I’ve always wanted to go to Chile. Since I started traveling, I’ve had a deep love for Spanish speaking countries, I want to visit them all. Although, other than language, they seem to have little in common. Other than maybe a shared love of food and family.
I spent some time in Spain, missing my flight home for an extra day in Madrid.
I took my husband with my to Costa Rica, and I didn’t want to leave. I just kept begging to head further south, even telling him I’d allow as much Van Halen signing as he wanted once we hit Panama (PAAAAAna-ma-ah!). But he wanted his own bed and some clean clothes. Weirdo.
And Chile has been there, long and lean, just sitting there on my list. I want to go and visit this place, so gorgeous, and with it’s incredible food.
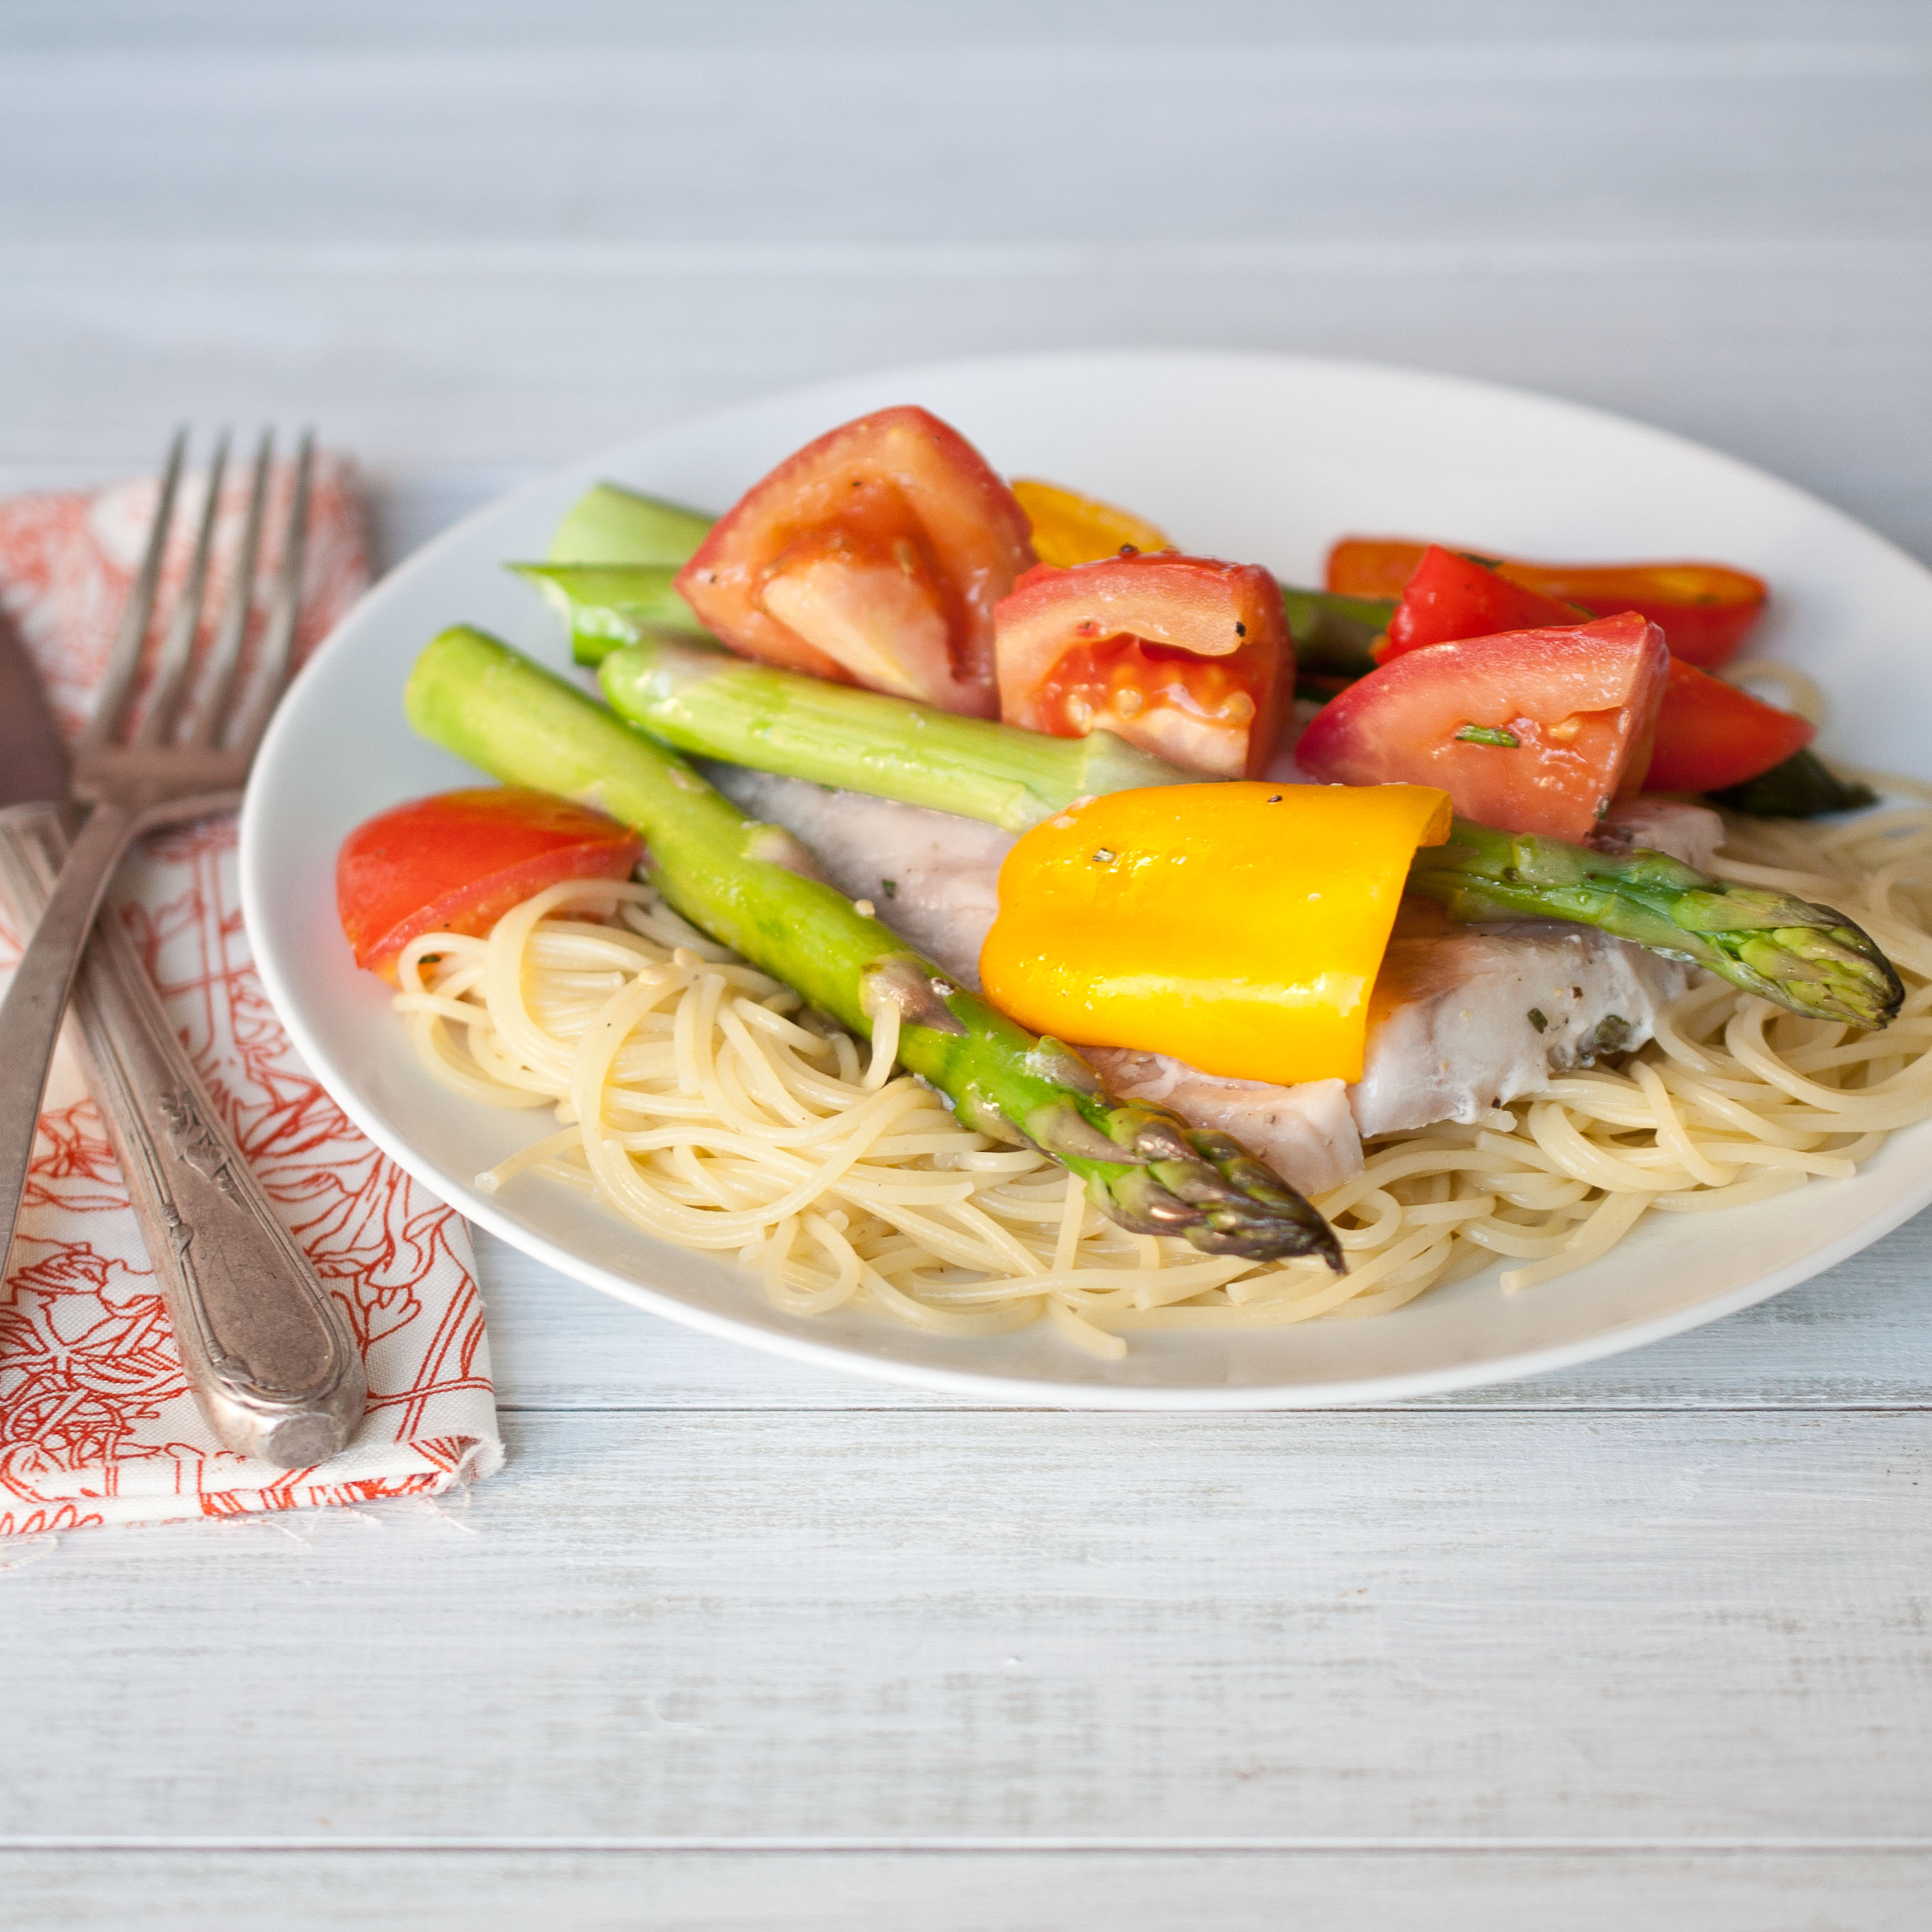
I was invited to a dinner party event put on by Foods From Chile a few weeks ago. It wasn’t a flight south along the Pacific, but I couldn’t pass up the opportunity to be part of an event that took place in five cities across the US. The food was amazing. Salmon, Avocado Soup, Endive Salad, and Blueberry Crisp, cooked up by the lovely Chef Cheryl.
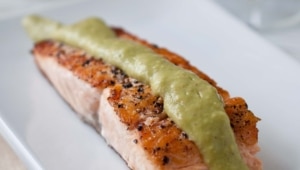
Maybe I’m not going to get on a plane and head south just yet, but I can eat some Chilean salmon, with some Chilean avocado cream sauce, and of course, the Chilean wine. And dream about the day I actually get my passport stamped in Santiago.
Chilean Salmon with Avocado Cream Sauce
Ingredients
For The Salmon
4, 3oz salmon fillets
1 lemon
1 to 2 tsp salt
1 to 2 tsp pepper
3 tbs olive oil
For The Avocado Cream Sauce
1 large avocado (about 2/3 cup)
2 tbs lemon juice
1 tbs chopped shallots
1/3 cup coconut water
pinch cayenne
pinch chili powder
pinch smoked paprika
¼ tsp cumin
2 tsp white wine vinegar
1 tbs olive oil
1 tbs chopped chives
Instructions
Place salmon fillets on a plate, squeeze lemon juice over salmon and allow to sit for five to ten minutes. Sprinkle filets with salt and pepper just prior to cooking.
In a good quality heavy sauce pan, heat the olive oil over high heat until hot but not smoking, swirling the olive oil to evenly distribute.
Add the salmon and allow to cook until golden brown before carefully flipping, about 4 minutes. Cook on the other side until cooked through.
In a food processor add the sauce ingredients and puree until smooth.
Every once in a while this happens. I made a recipe I love, and then it sort of slips away and never gets posted. This is one of those recipes. I can’t even remember why it didn’t get posted, maybe because I don’t really like the photos (sorry my ego got in the way of sharing a great dish with you .)
But I DO remember really loving it. Not just because it had a ton of flavor, and was really delicious, but because it’s low calories, naturally dairy and gluten-free AND it is packed with an insane amount of antioxidants, heart healthy foods, and that good stuff we need to shove into our bodies after the collective gluttony we all gleefully participated in over the past few days.
It’s like detox, but really, really delicious.
To be honest, the only reason I remember that it was buried in the recesses of my Dropbox, is an email I got from a PR person at the Blueberry Councill about a recipe contest. And although I have been drawn to a recipe contest or two in my day, I really don’t have the time for that right now. SO, it seemed to be fate that I had one. A really fabulous, healthy and delicious blueberry recipe all ready to go. So thank you, Blueberry Council, for the fabulous berries and the timely reminder.
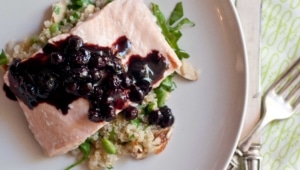
Oven Steamed Salmon with Blueberry Balsamic Reduction
Ingredients
For the Salmon:
4, 3 oz Salmon Filets, skinless
2-3 cups low sodium vegetable broth
For the Sauce:
1 medium shallot, minced (about 1 tbs)
1 tsp olive oil
1 cup fresh blueberries
¾ cup balsamic vinegar
½ tsp black pepper
For the Salad:
1 ½ cups cooked quinoa
1 cup chopped arugula
½ cup shelled Edamame beans
½ cup dry roasted almond slivers
½ tsp sea salt
(Makes 4 servings)
Instructions
Place a wire rack over a rimmed baking sheet , place the salmon fillets on the rack. Pour the vegetable broth in the bottom of the baking sheet, making sure that the broth does not submerge the wire rack. You want at least 1/2 inch between the liquid and the top of the wire rack.
Cover the baking sheet with aluminum foil, making sure to tent the foil over the salmon so that the foil does not touch the fish at all. Secure tightly, in order to trap the steam inside the foil.
Bake for 15-18 minutes or until the salmon flakes easily with a fork.
In a pan over medium high heat, add the oil and allow to get hot but not smoking. Add the shallots and sauté until opaque. Add the blueberries and balsamic, reducing heat to maintain a low simmer. Cook until reduce until about half, and thickened. Remove from heat and stir in the black pepper.
Combine all of the salad ingredients in a bowl and toss to combine. Divide the salad among four plates. Top the salad with a salmon fillet and top each salmon fillet with the blueberry balsamic reduction.
I think we know each other well enough by now that I don’t have to try and pretend. If a dish is easy, I’ll tell you. If it’s quick, I’ll tell you. If it’s healthy, I’ll tell you.
This is none of those things. It is, however, worth the effort. It’s a special occasion breakfast to keep in your back pocket, for, you know, if Bradley Cooper stops by for breakfast. It could happen.
It’s actually not that difficult. Although, I do hesitate to say that since my "not that difficult" is someone else’s "Oh my GOD, is she nuts??"
But really, you can do this. I even gave you a food processor version of a hollandaise, which is SUPER easy, you don’t even have to worry about turning your sauce into scrabbled eggs, which is what I did the first time I tried to make it the traditional way.
If you want to make this in stages, you can assemble the crab cakes ahead of time, put them on a plate, wrap tightly in plastic wrap and then cook the following day. You can also make the sauce ahead of time, and then reheat slowly in a double boiler. You can EVEN replace the poached eggs with fried eggs to make it even easier. But really, it’s not that difficult.
And I believe in you.
I think all food people have a small stash of items that we buy at Gourmet Food Stores that we save for special recipes. Spices, the good salt in those fancy containers, crab meat, things like that. This is a recipe I found worthy of breaking into my Gourmet Food Store stash. Rare for a breakfast recipe, but this one made the cut.
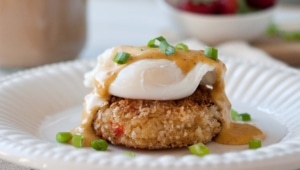
Crab Cake Eggs Benedict with Bacon Hollandaise
Ingredients
For The Crab Cakes:
1 egg
2 tbs green onions, chopped
1/4 cup roasted red pepper, chopped
1 tbs melted butter
8 oz lump crab meat
1 cup Panko bread crumbs, plus one cup divided
1/4 tsp salt
1/2 tsp pepper
pinch cayenne
1/4 tsp Old Bay seasoning
For the Hollandaise:
4 strips bacon
4 tbs butter
4 egg yolks
2 tbs lemon
pinch cayenne
4 eggs (for poaching)
Makes 4 servings
Instructions
Combine all the crab cake ingredients in a bowl (reserving one cup of Panko for the coating). Form into 4 patties, about 1 inch thick. Place remaining Panko in a bowl. One at a time, place the patties in the Panko and press until well coated on all sides with bread crumbs. Place on a plate and refrigerate until ready to use.
In a pan over medium high heat, cook the bacon, turing frequently, until crispy and cooked trough. Remove the bacon and set aside. Once the bacon is removed, add the crab cakes to the pan, cooking in the bacon grease until golden brown on the underside, flip carefully and cook on the other side until cooked through, about 3 minutes per side. Remove from heat.
In a food processor, add the bacon, process until only crumbs are left. Add the egg yolks and process for about 3 minutes. Melt the butter in a pot on the stove (or in the microwave) until hot and steaming. While the food processor is running, slowly, slowly add the butter until well combined with the yolks. Add the lemon and the cayenne, process until combined. If your sauce is too thick, add water to thin, about a teaspoon at a time.
Poach the eggs in simmering water.
Place one crab cake on each plate, top with poached egg, then sauce.
I’ve had a busy week, and my body has decided to request that I slow down.
On Friday, I was asked to do a cooking segment on CBS news in Los Angeles. I’ve spent the week preparing. My husband helped me run through the segment in the evenings, and for an entire week my drive home consisted of me practicing my talking points, out loud, looking like a crazy person, on an LA freeway. It all seemed to work, the segment went well:
As soon as I started my drive home from the studio, I started to crash. The next morning I lay in bed as my incredible husband got up with Tater, and I was able to sleep until the late, late hour of 8:45. In Mom Time, that’s pretty close to sleeping until noon. As I lay in bed, trying to pull myself together and trick myself into thinking I’m not actually sick, I watched this, this and this, and laughed so hard I think it worked. Maybe it’s true what they say about laughter and that whole "Best Medicine" thing.
And on Thursday I leave for the Foster Farms Cook-Off. I’ll be competing against 4 other cooks for $1,000 and a trip to Napa for the Cook Off Finals with a prize of $10,000.
Wish me luck! I’ll be posting on twitter and instagram as the contest goes along.
And now, the recipe. I bought a huge bag of Masa to make corn tortillas with, and if you have never made corn tortillas, you really, really need to . They’re so good, nothing like those cardboard disks they sell at the store, and they take about 5 minutes. The flavor is so good, I’ve been throwing the corn flour into everything, I’m totally in love with it. And the Jalapeno Peach Jam I also used on pork chops. So Good.
Coconut Cornmeal Shrimp With Jalapeno Peach Jam
Ingredients
For The Jam:
3 cups peaches, skin removed, chopped
2 tbs fresh lemon juice
1/4 cup sugar
1 jalapeno, stem and seeds removed, diced
1 tsp cornstarch
For The Shrimp:
1 can coconut milk
2 lbs raw shrimp, shell and tail removed
1 cup Masa Harina
1/2 cup shredded coconut
1/2 tsp salt
1/2 tsp pepper
pinch cayenne pepper
1/4 cup oil
Instructions
Add the raw shrimp and coconut milk to a bowl. Chill in the fridge for about 45 minutes while you make the jam.
In a pot over medium high heat, add all of the jam ingredients. Stirring occasionally, allow to simmer (not boil) until thick, and the peaches have broken down, about 45 minutes. Smash peached with a potato masher until a jam like consistency is reached. Remove from heat and set aside.
In a bowl, combine the masa, coconut, salt, pepper and pinch cayenne. One at a time, remove the shrimp from the coconut milk and allow to drain a bit before adding to the cornmeal mixture. Coat the shrimp well in the corn meal mixture.
Heat oil in a large skillet over medium high heat. Add the shrimp and cook until golden brown, about 3 minutes per side.
Remove from heat. You can either top the shrimp with the jam or serve the jam as a dipping sauce.
This is by far my favorite giveaway I’ve ever been a part of.
I’ve secretly always wanted a smoker. Such unique flavors and no real way to get that without very specific culinary equipment. But the smokers I have always come across are so large, bulky and intimidating. Including those that my Step Dad seemed to fashion on a regular basis out of abandoned aluminum items such as non-working refrigerators and ancient gym lockers.
I didn’t really want one of those eyesore monstrosities just hanging around my back yard. Clearly there was some adolescent trauma involved in my hesitation to purchase a smoker.
And then I get an email from those wonderful people over at Big Kitchen, with tales of a stovetop smoker that I can store in my pantry. They even wanted to give it to me, and give one to you. Of course, I said something along the lines of Hell Yes.
This is a fantastic option for those of you who want those great flavors of smoke without a gigantic metal object taking up residence in a remote corner of your yard.
And if you win, you can walk around your kitchen thinking, “I wonder if I can smoke that?” as you slowly realize what it must be like to live in Snoop Dogs head. Sort of.
As a girl who is constantly striving to fit into skinny jeans, I also feel compelled to point out that this little sucker crams an enormous amount of flavor into any food without adding a single calorie. And in most instances, it removes calories by rendering fat from meat. So much win.
It’s also simple to use.
Step 1: Place the base of the smoker on top of a stove burner, and add a few table spoons of woodchips in the middle of the base of the smoker
Step 2: add the drip try right on top of the pile of wood chips.
Step 3: Spray the wire rack with cooking spray and add to the top of the drip tray. Add the food to the wire rack.
Step 4: Slide the lid onto the smoker leaving a small vent. Turn the burner to medium heat (don’t turn it too high).
Step 5: once you start to see the first slight whips of smoke (about 2 minutes) use oven mitts to close the lid and start the cooking time.
A few things to remember while smoking food indoors:
Be realistic about the fact that you are using a smoker indoors, the smell will invade your house. But it seemed to dissipate in a few hours. Run your hood fan on high while smoking.
This gets blazing hot. Keep the hands of tiny humans far far away from this thing.
Although this stovetop smoker was a bit smaller than I had expected, the instructions show you how to easily modify the unit to accommodate larger items, like a turkey. You can smoke a TURKEY in this thing! (Get ready for a very smoky Thanksgiving)
You can even use this on your regular grill alongside your burgers and hot dogs.
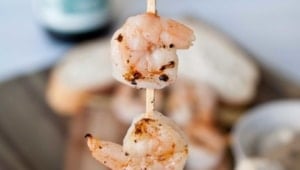
Smoked Olive Oil & Rosemary Shrimp
¼ cup olive oil
1 tsp chopped fresh rosemary
pinch of salt
½ tsp pepper
14 large raw shrimp, peeled
7, 6 inch wood skewers
2tbs Alder wood chips
In a bowl combine the olive oil, rosemary, salt and pepper. Add the shrimp and allow to marinate for 5 minutes Remove from marinade and add two shrimp to each skewer.
Smoke over alder wood chips using the above instructions for 15 minutes.
As summer nears it’s inevitable end, it’s not the weather that I’ll miss the most. In fact the leather boots and chunky sweaters of colder days are starting to beckon. The produce, back yard grills, the smell of life and food floating on a late afternoon breeze will be lost in the dawning of fall.
This isn’t a recipe about avoiding the oven, or grumbles of triple digit heat, it’s about enjoying August produce, paired with those Summer release beers and spending as much time as you can in the open air before we’re all forced to head inside, cook with squash, and drink stouts. Which I am already looking forward to.
Not just Went. I was asked to attend a VIP tour of Dodger Stadium for a Food Bloggers event that included hanging on the field, a tour of all of the exclusive restaurants, a buffet of all of the incredible hot dog creations the stadium chefs can dream up (macaroni and Fritos dog?!) and even a chat with Andre Ethier. Who told me he doesn’t drink beer (I’ll forgive him, kid can play some ball). And to top it all off, we got to sit in box seats right on the field.
If you follow me on instagram (@JackieJDodd), these pictures will look rather familiar.
Moments like these remind me to take a second to just sit and be grateful. Even when I feel like I am nowhere near the goals I have set for myself I always take time to appreciate what I have. The opportunities, people and experiences that give so much more to my life than I even deserve. I just finished Marcus Samuelson’s Yes, Chef and was incredibly inspire by his work ethic: "Always chase one shot of good luck with two shots of hard work" Great advice, Marcus. I’ll take it. Sitting side stage at America’s Favorite Past Time felt like a shot of good luck, so this week I’ll chase it with an even harder push towards my goals.
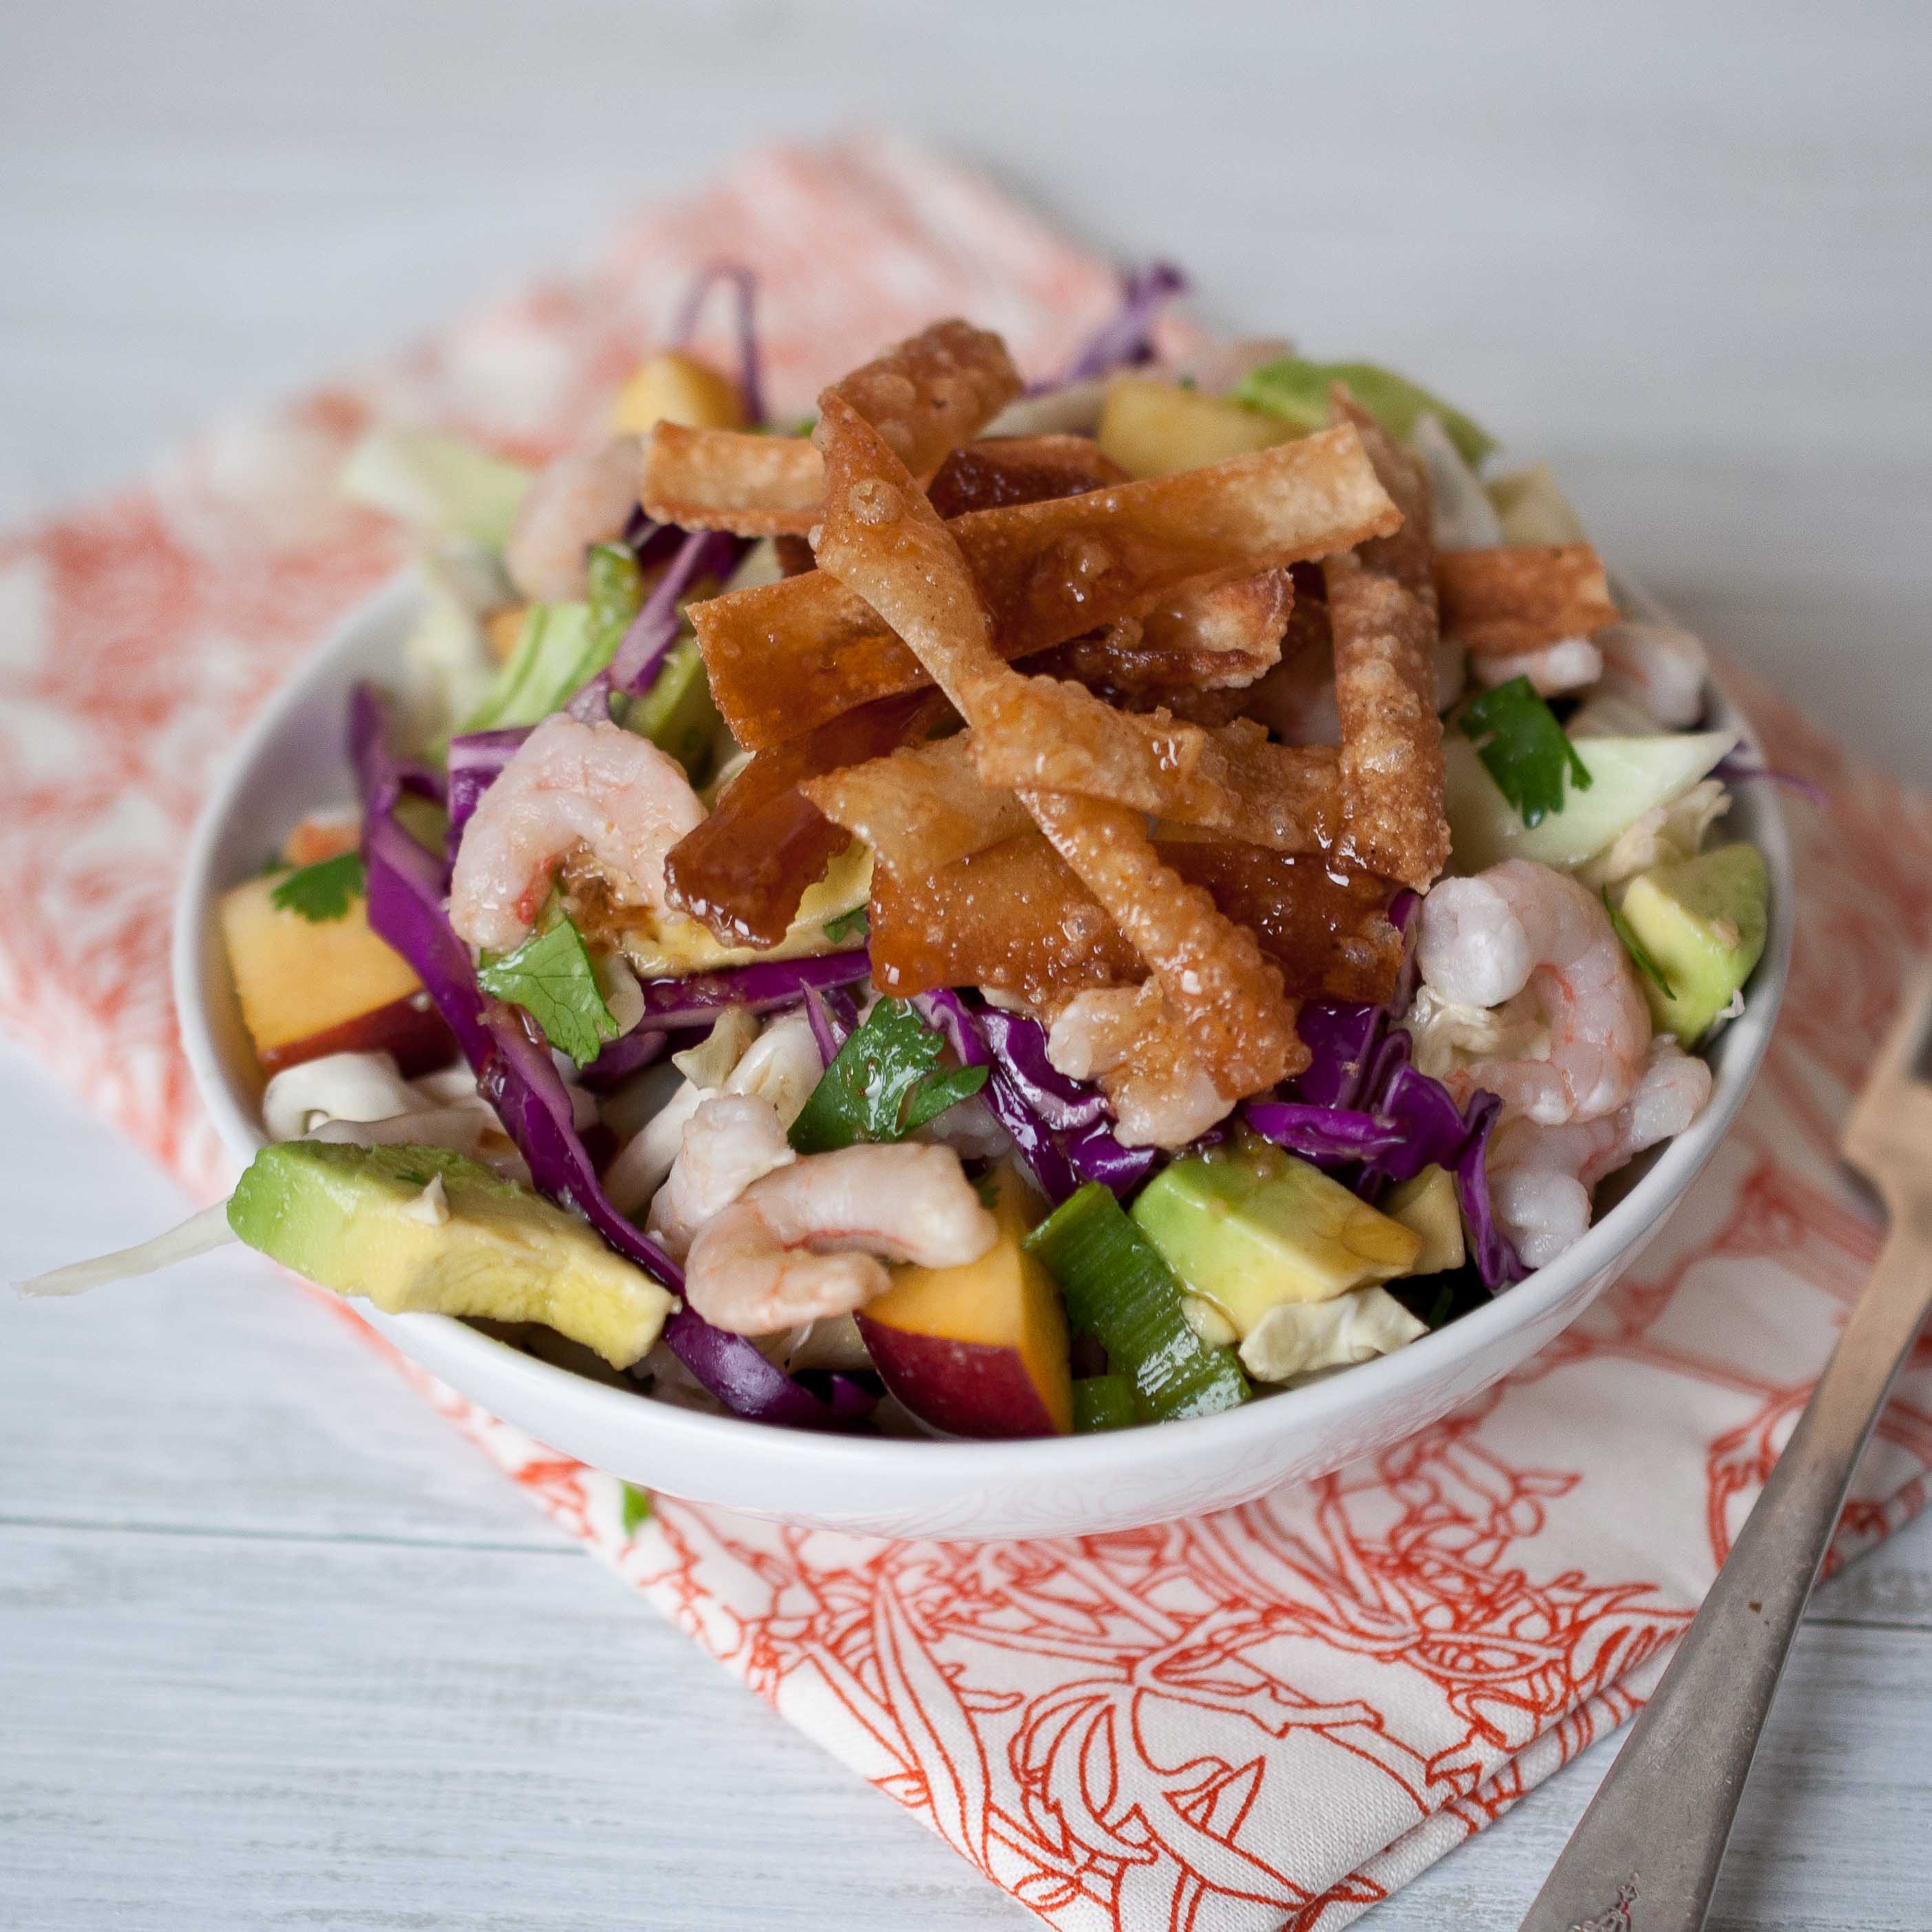
And after eating my body weight in hot dogs and chocolate cake at the Stadium, I needed a salad to balance it all.
And I know that I don’t have to tell you that Chinese Chicken Salad is much more about the dressing than it is about the chicken (which I replaced with shrimp).
This dressing, THIS dressing is so easy and so good you will never even be tempted to buy it pre made ever again.
And I also decided that I am also going to chase one negative though about myself with two positive ones. I like that formula, after all he is a Top Chef Master.
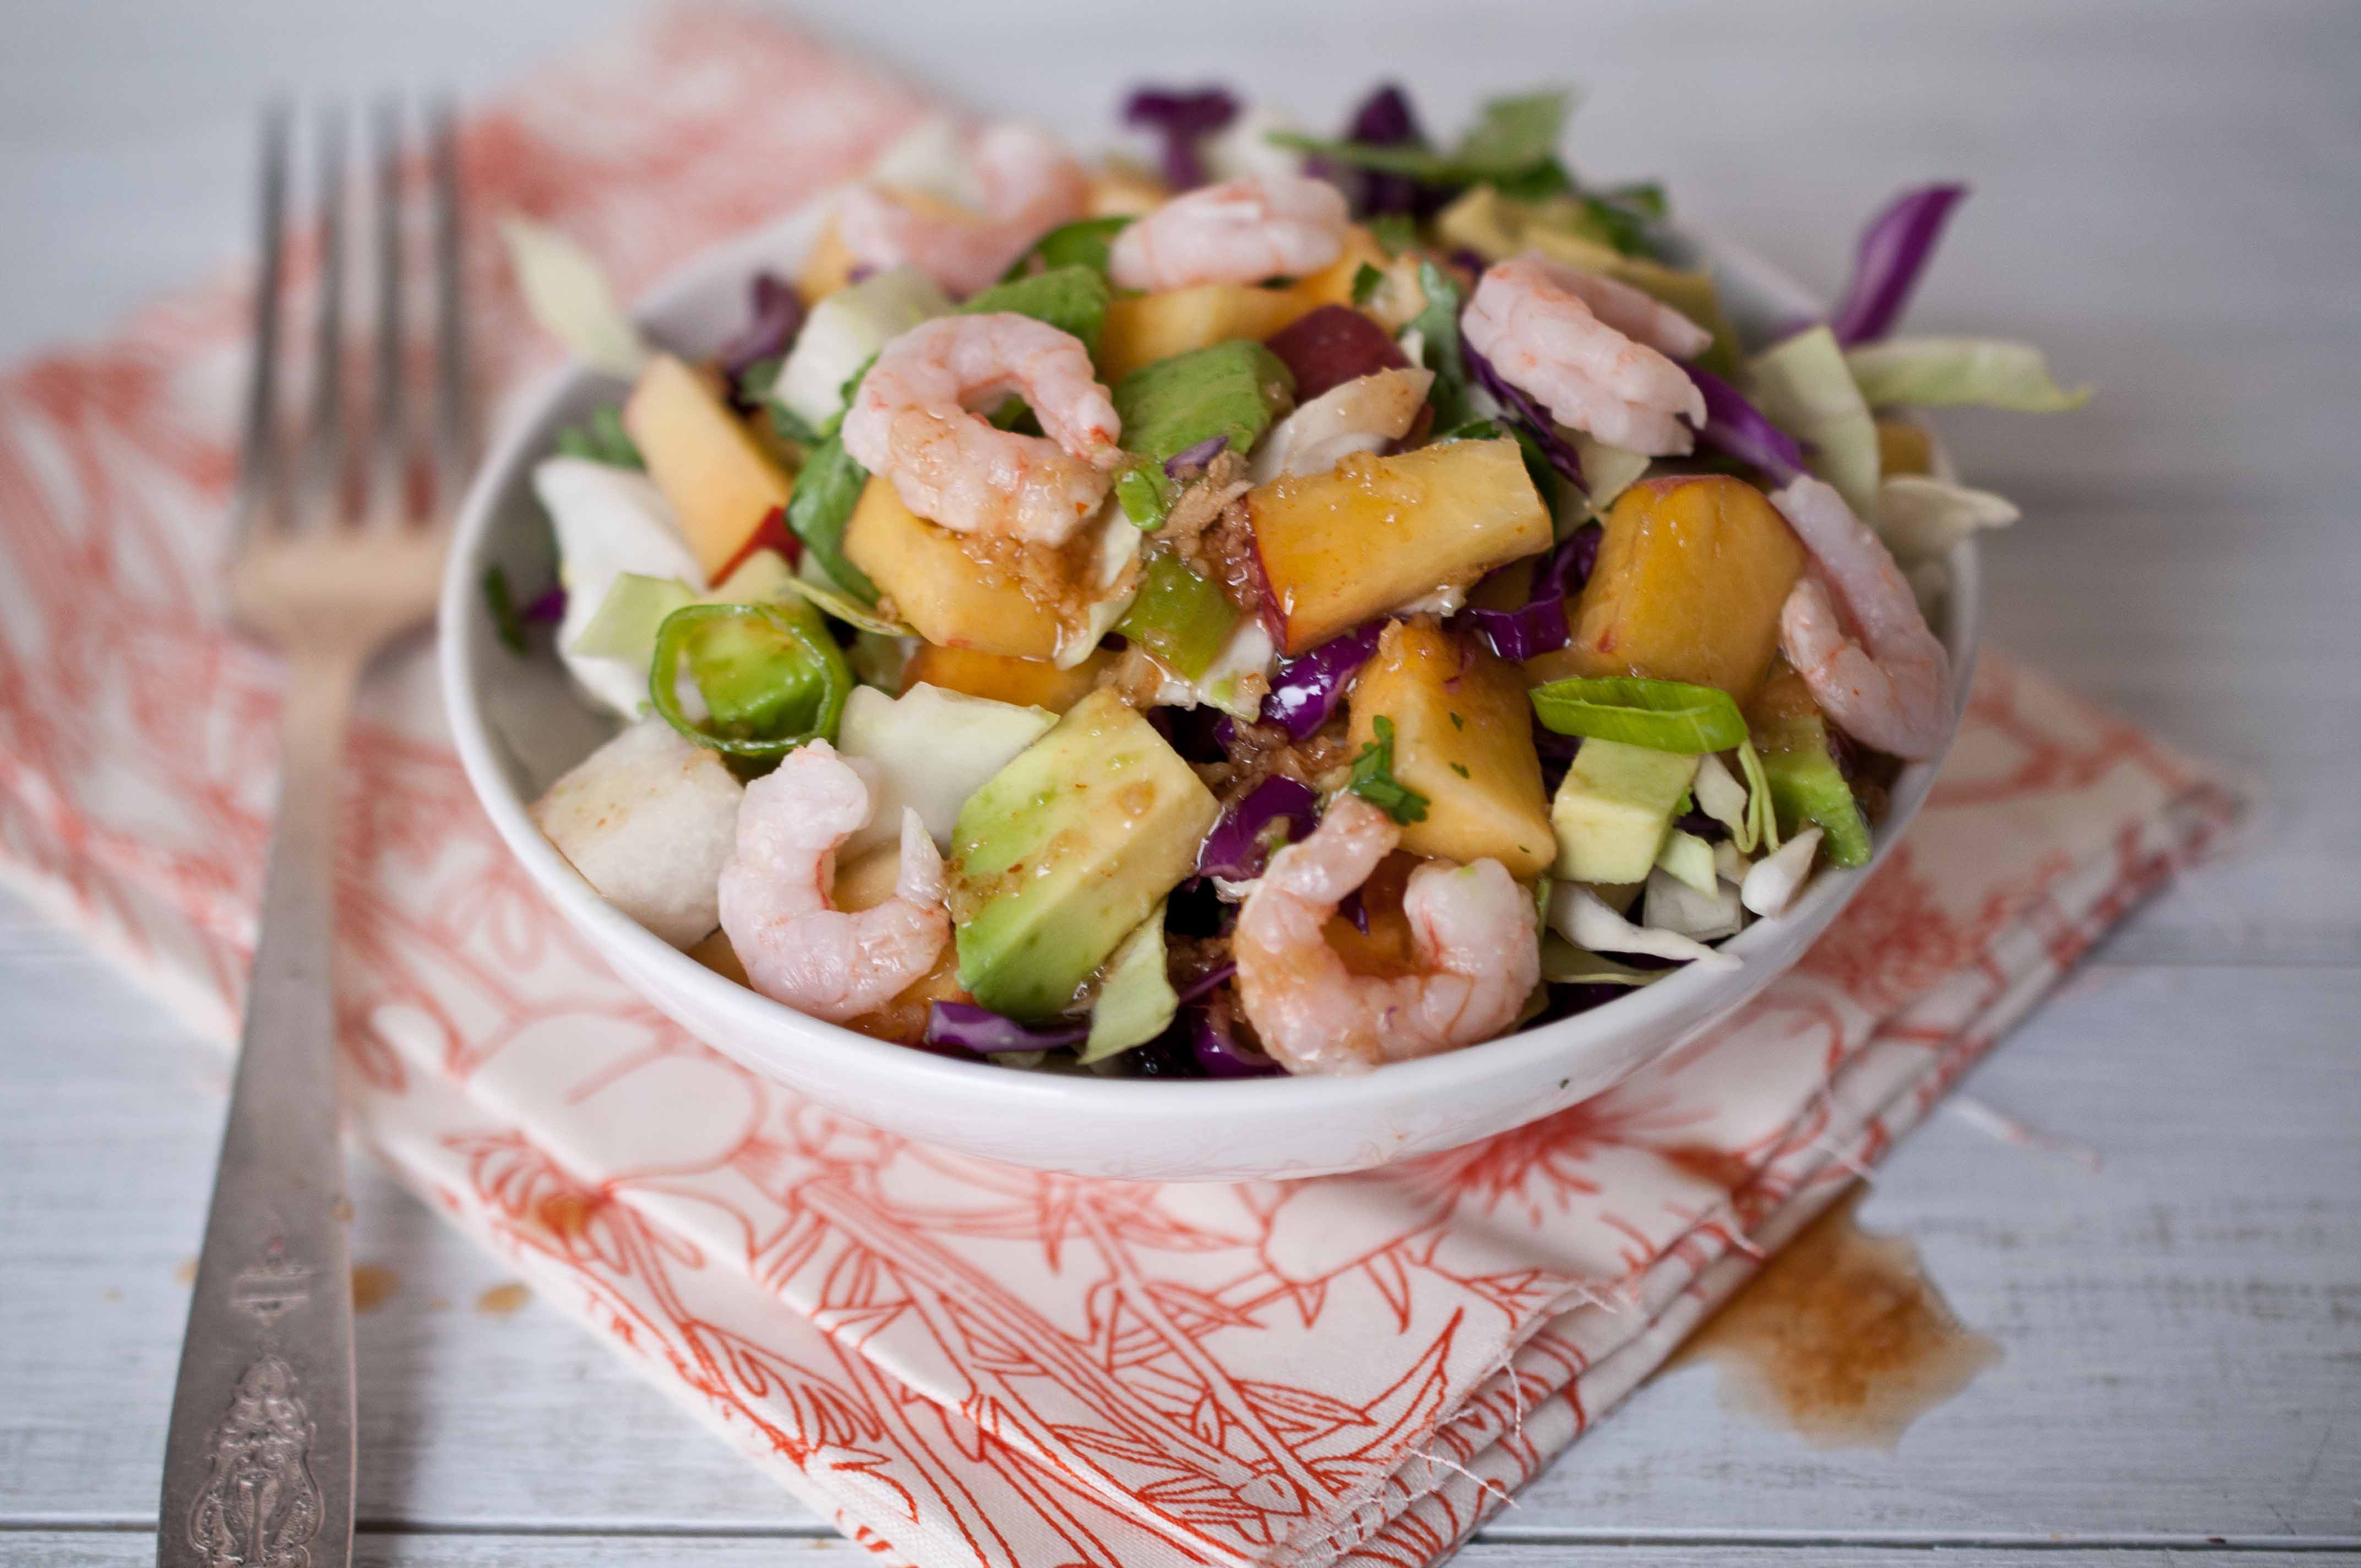
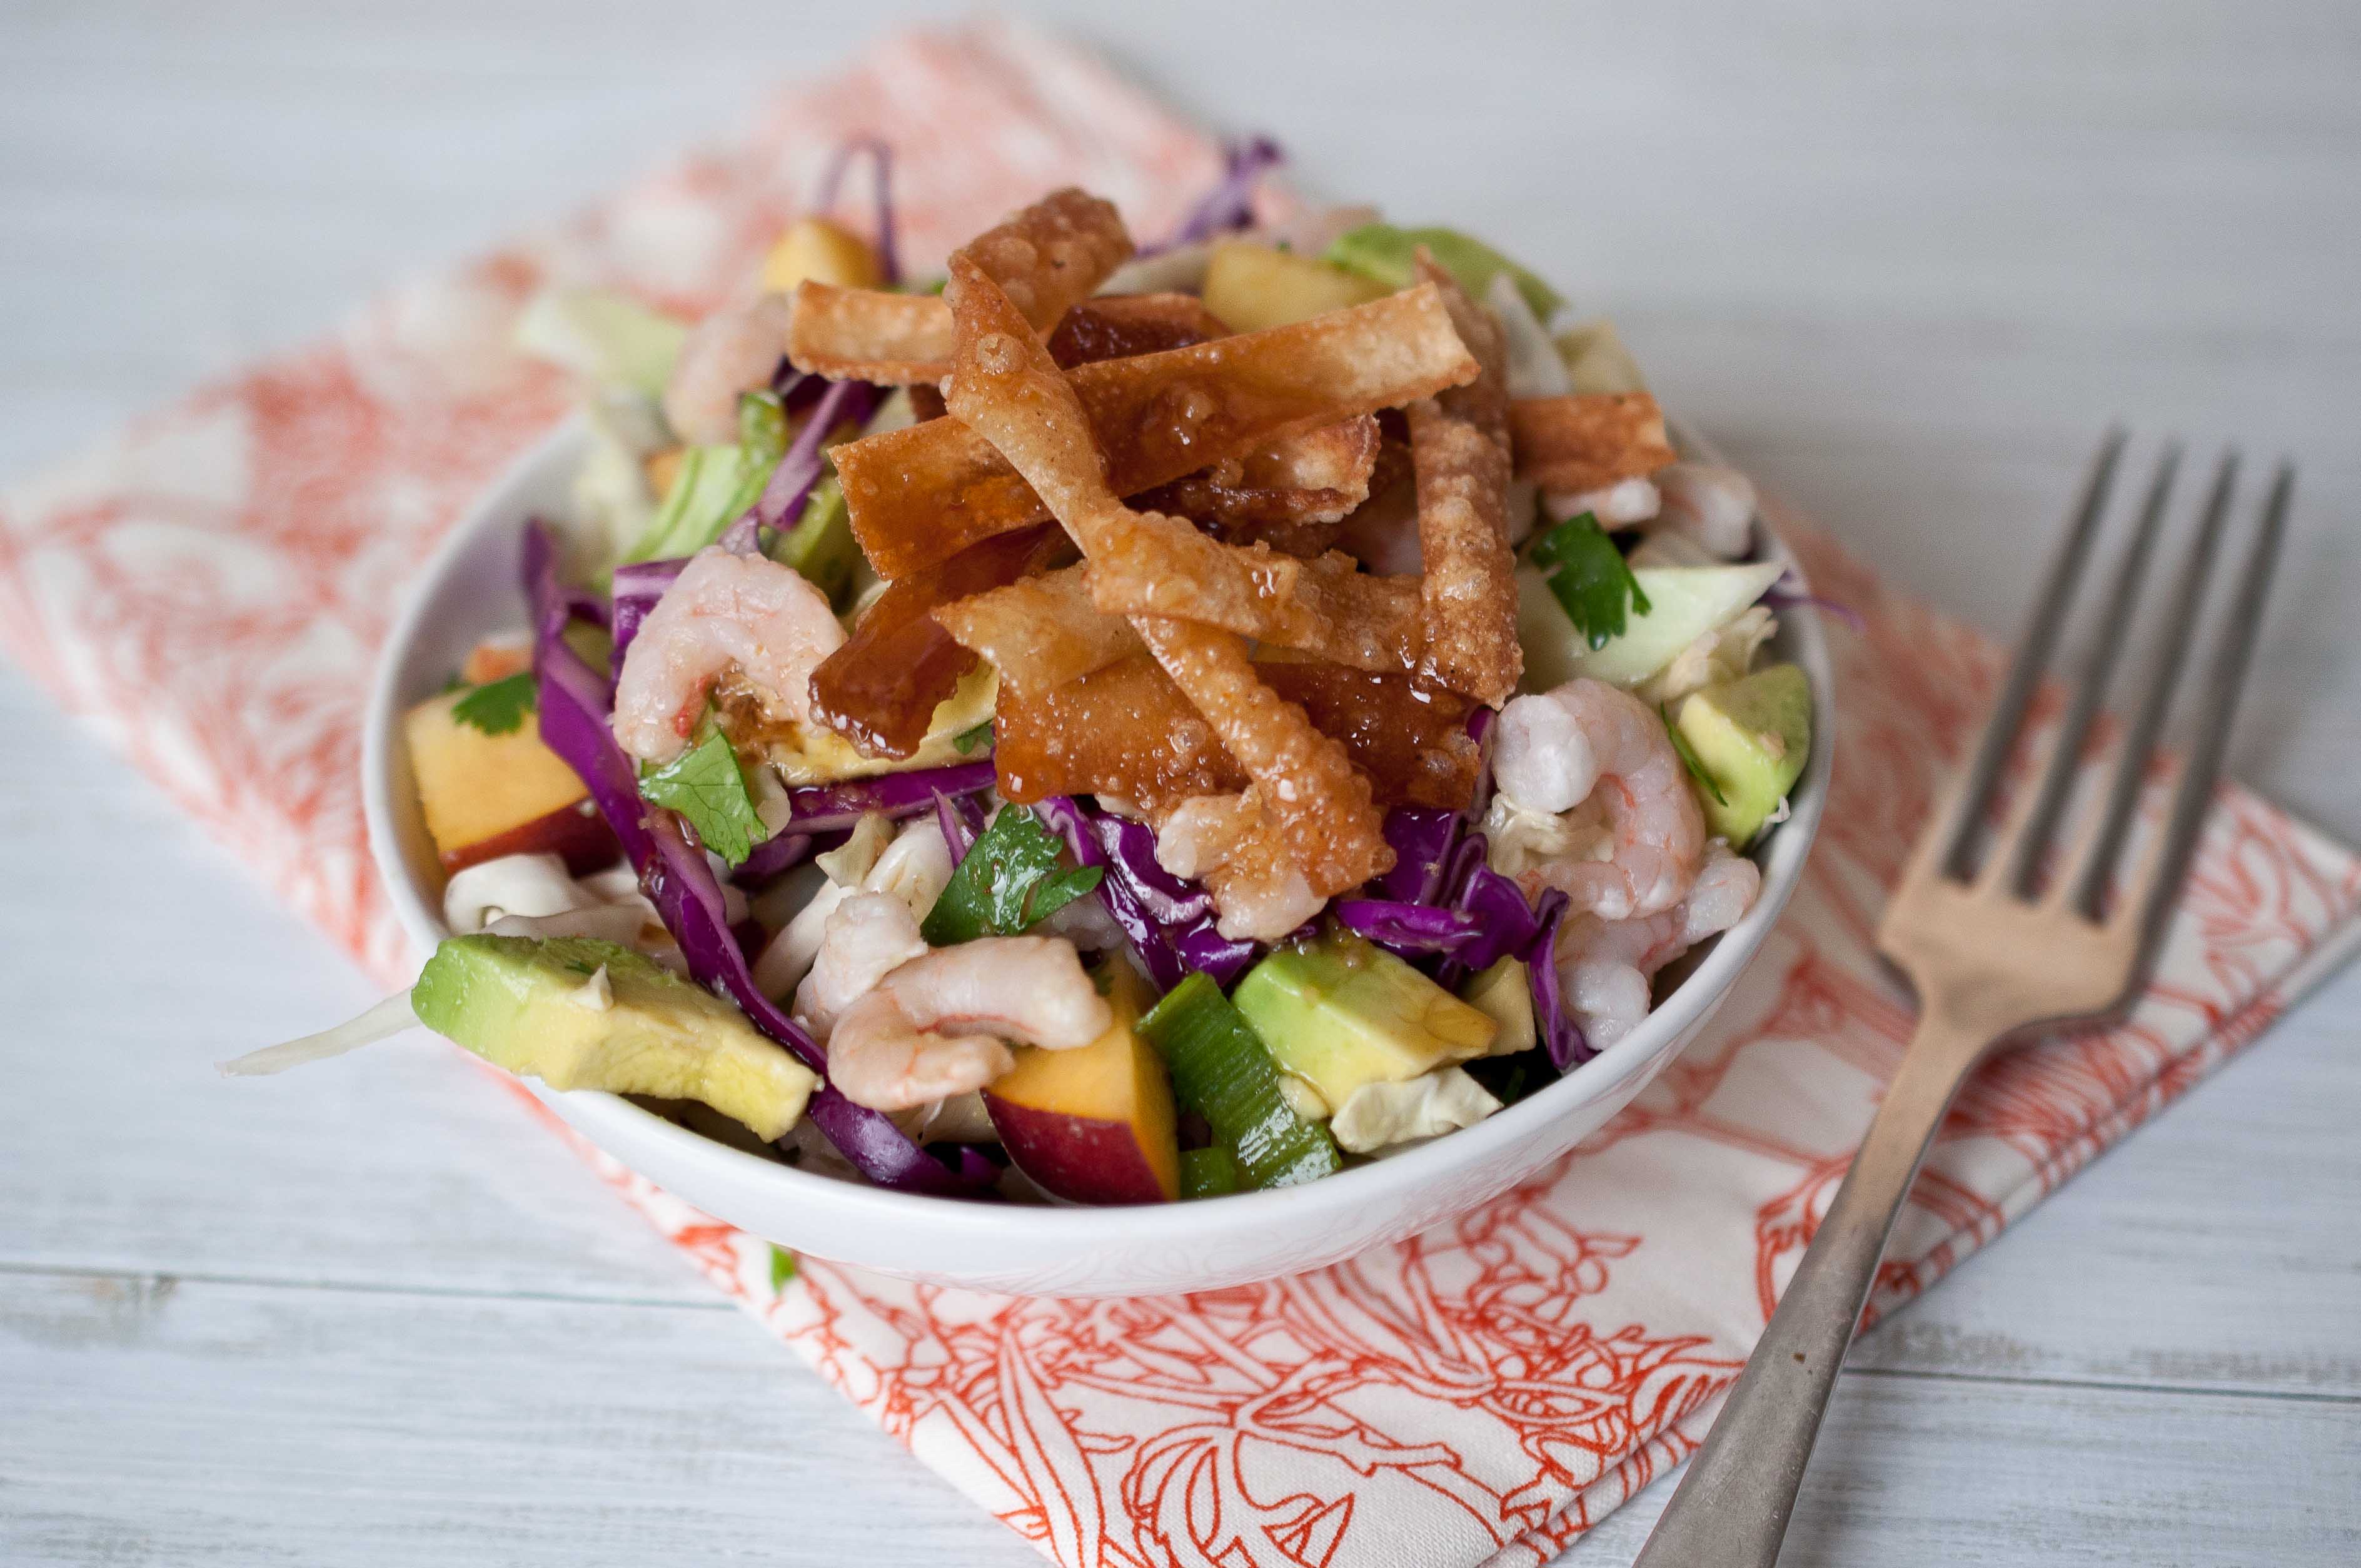
Chinese Shrimp Salad
3 cups green cabbage, chopped
3 cups red cabbage, chopped
1 cup jicama, peeled and diced
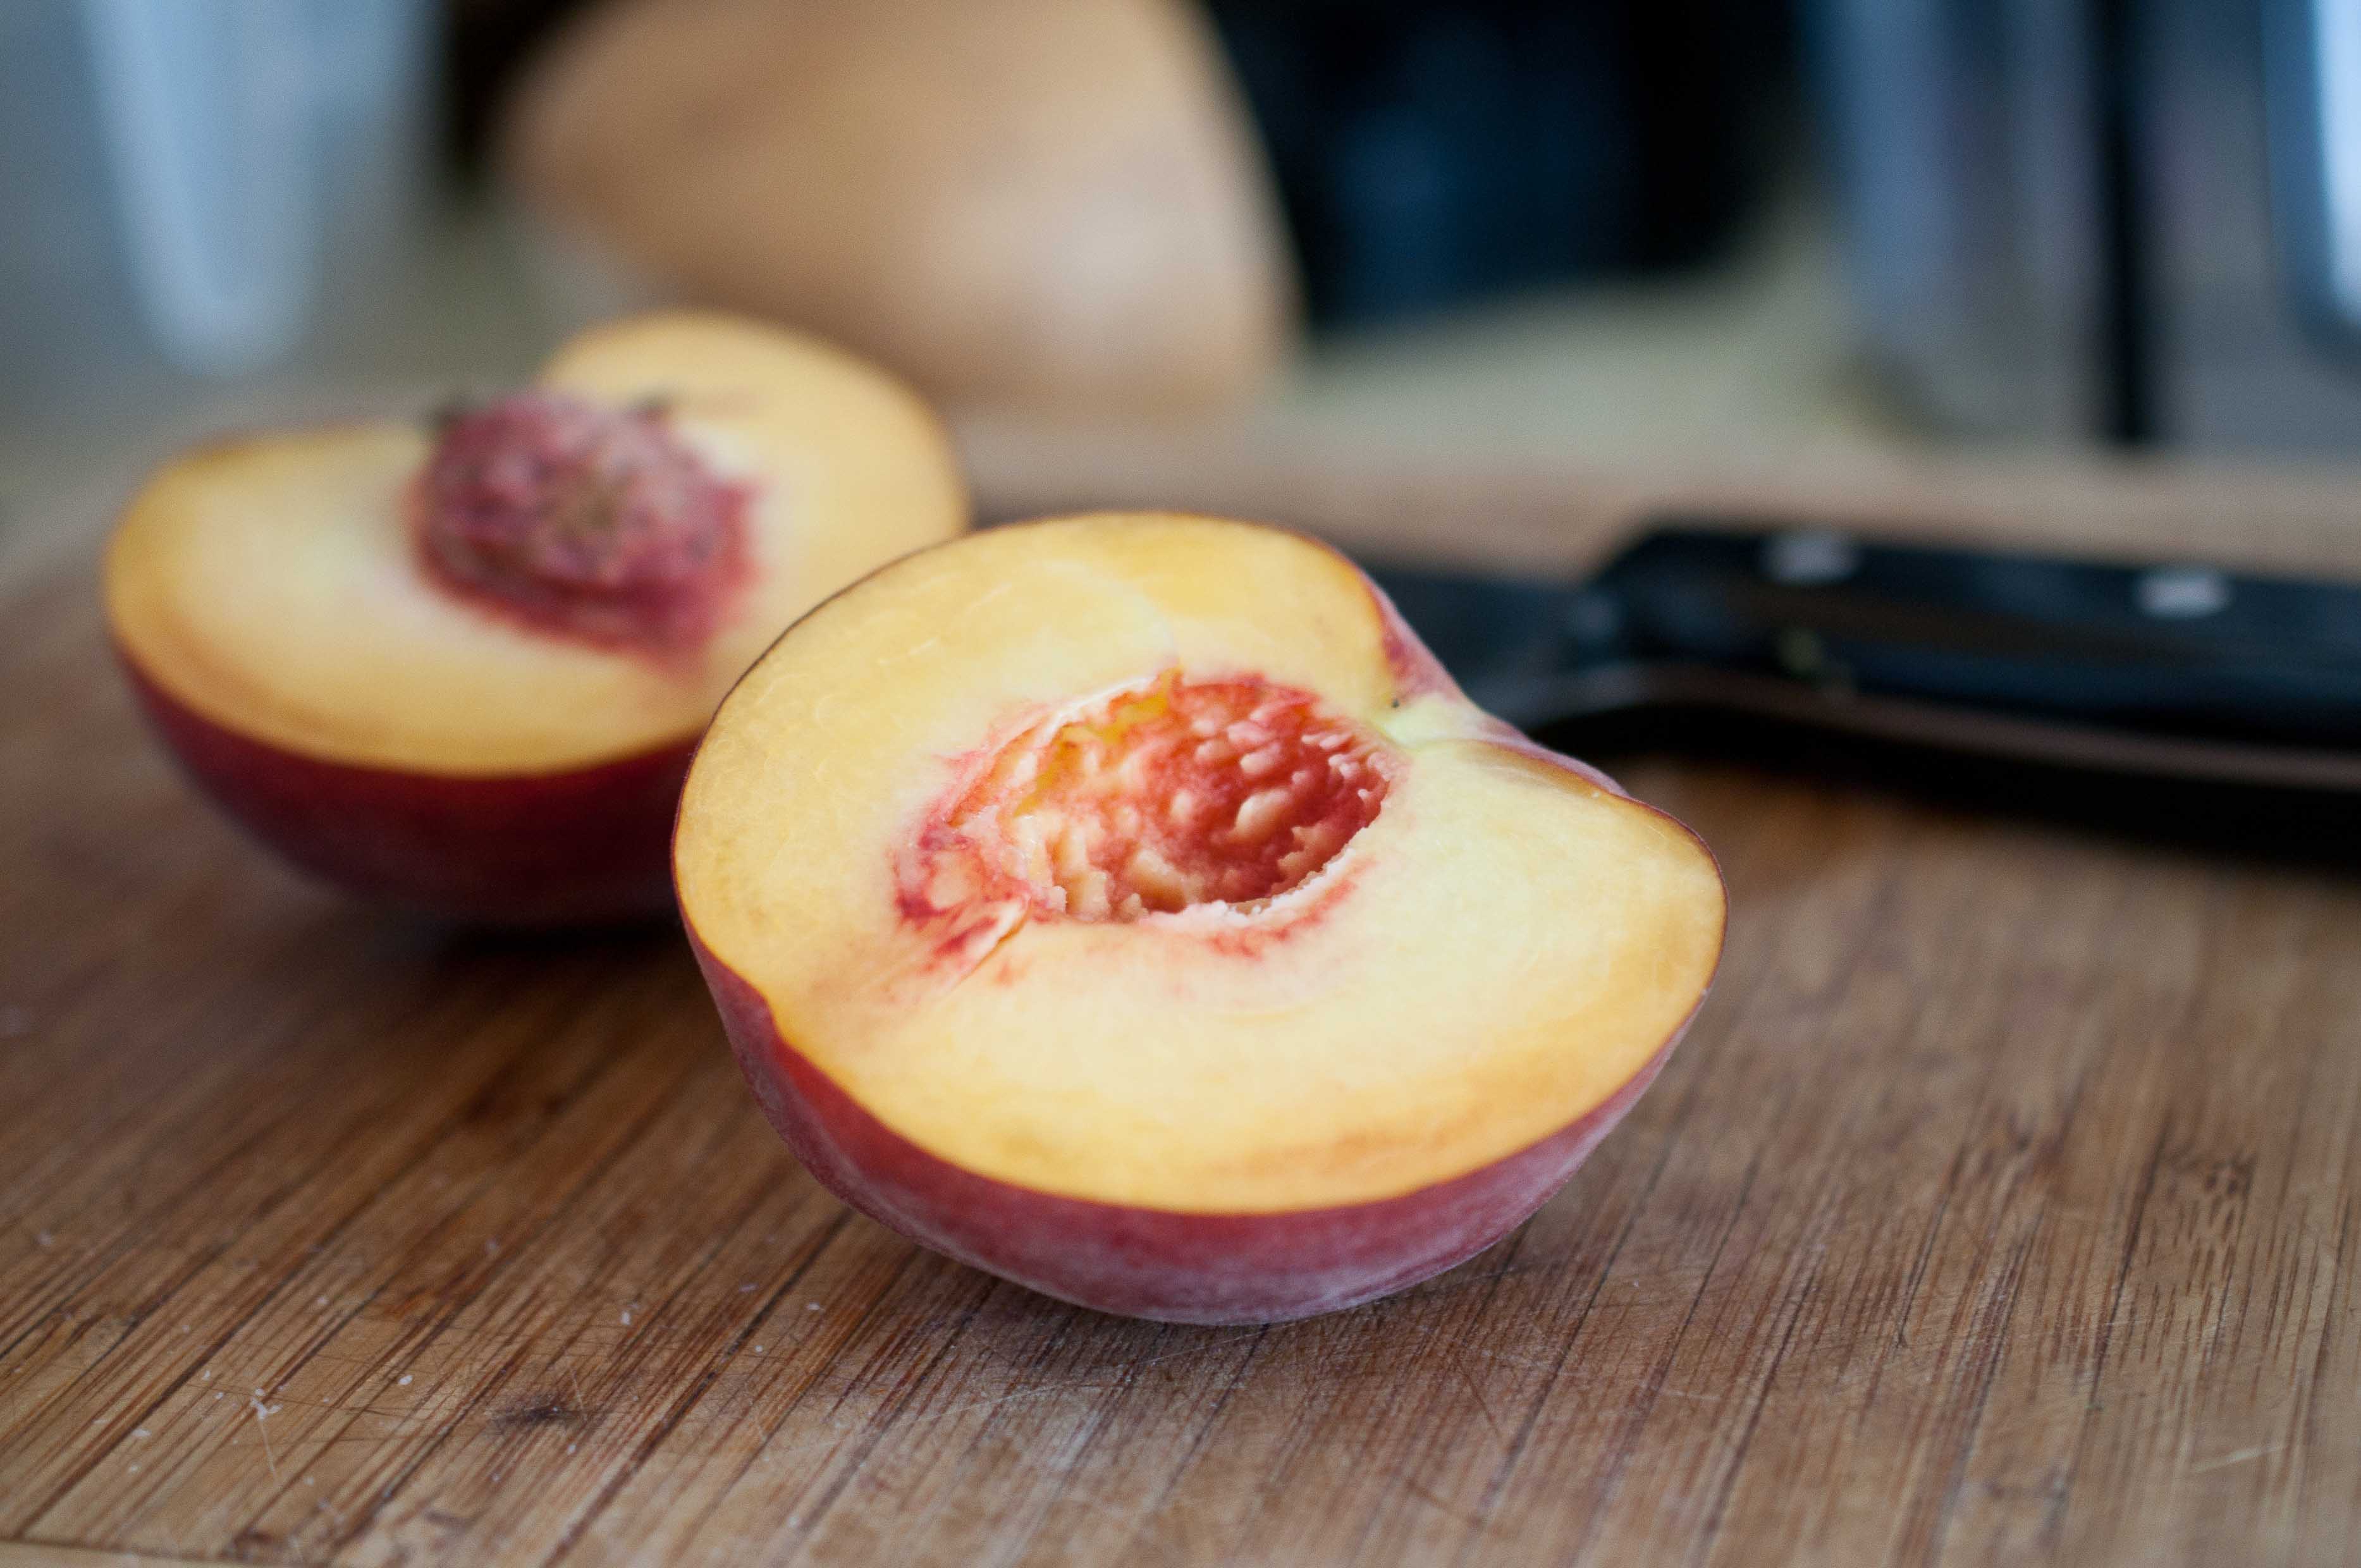
2 cups yellow peaches, chopped (about 2 large)
1 large avocado, chopped
1/3 cup green onion, chopped
1/3 cup cilantro, chopped
3/4 cup cooked bay shrimp
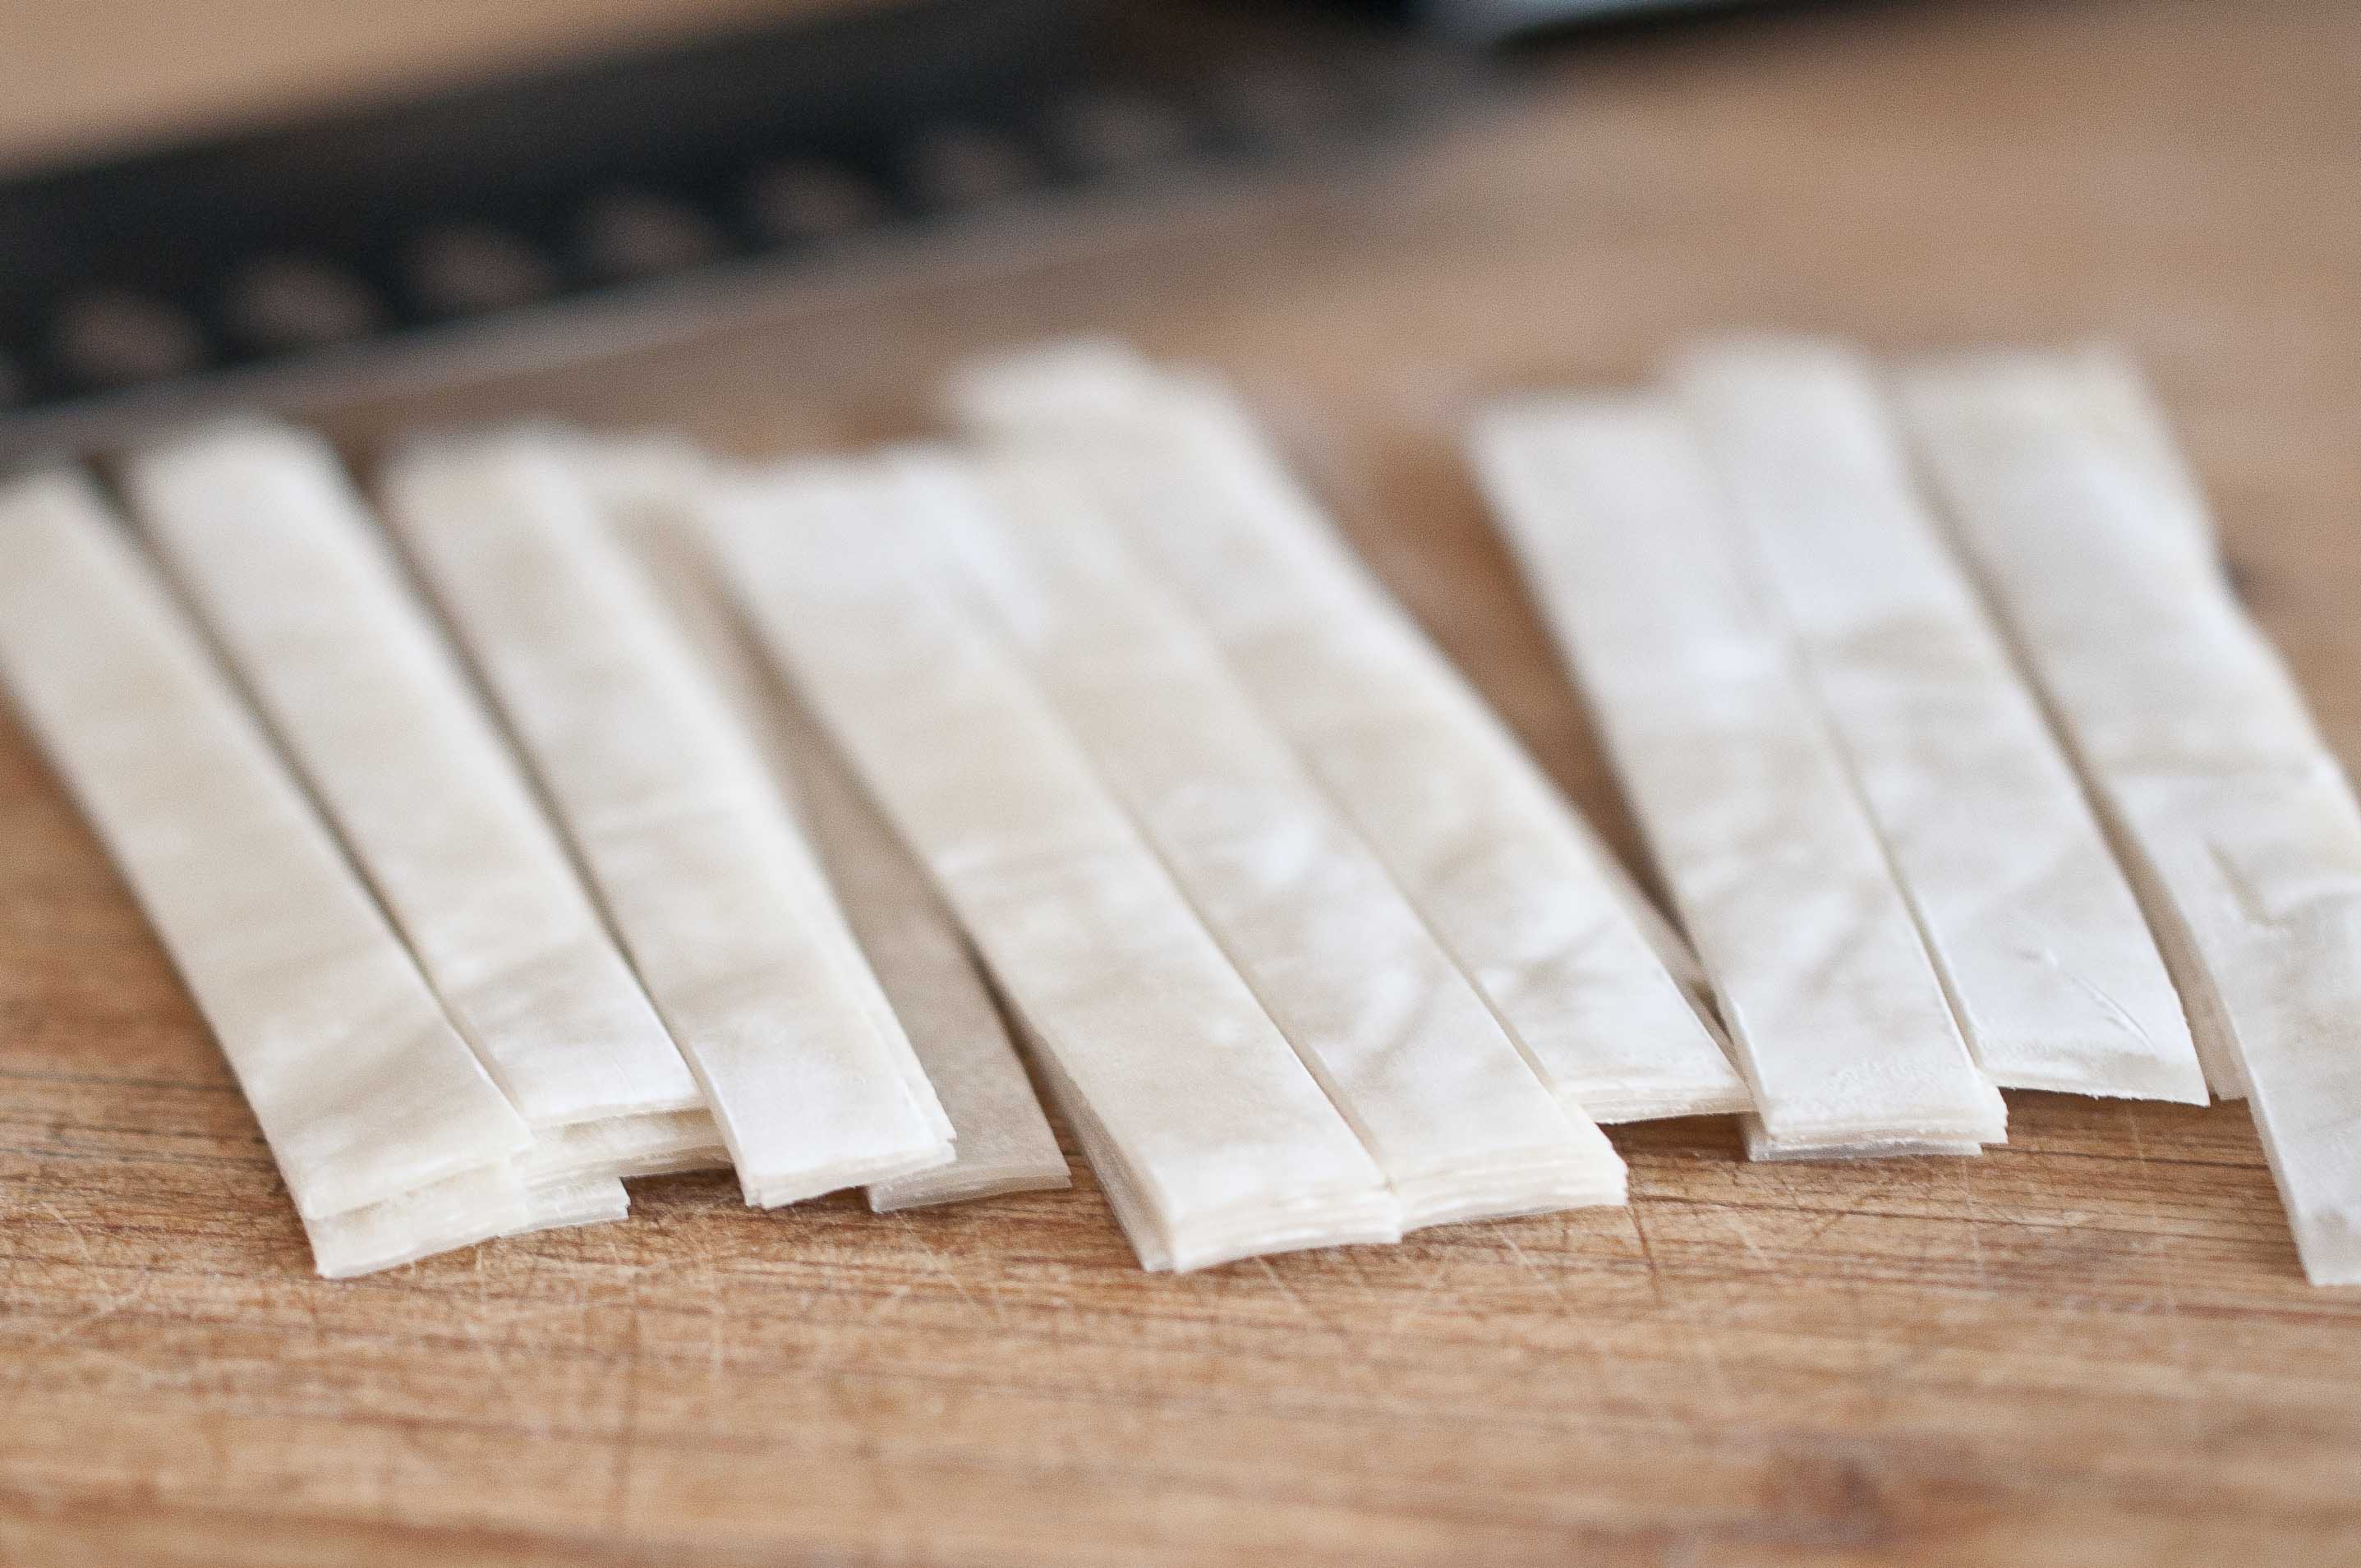
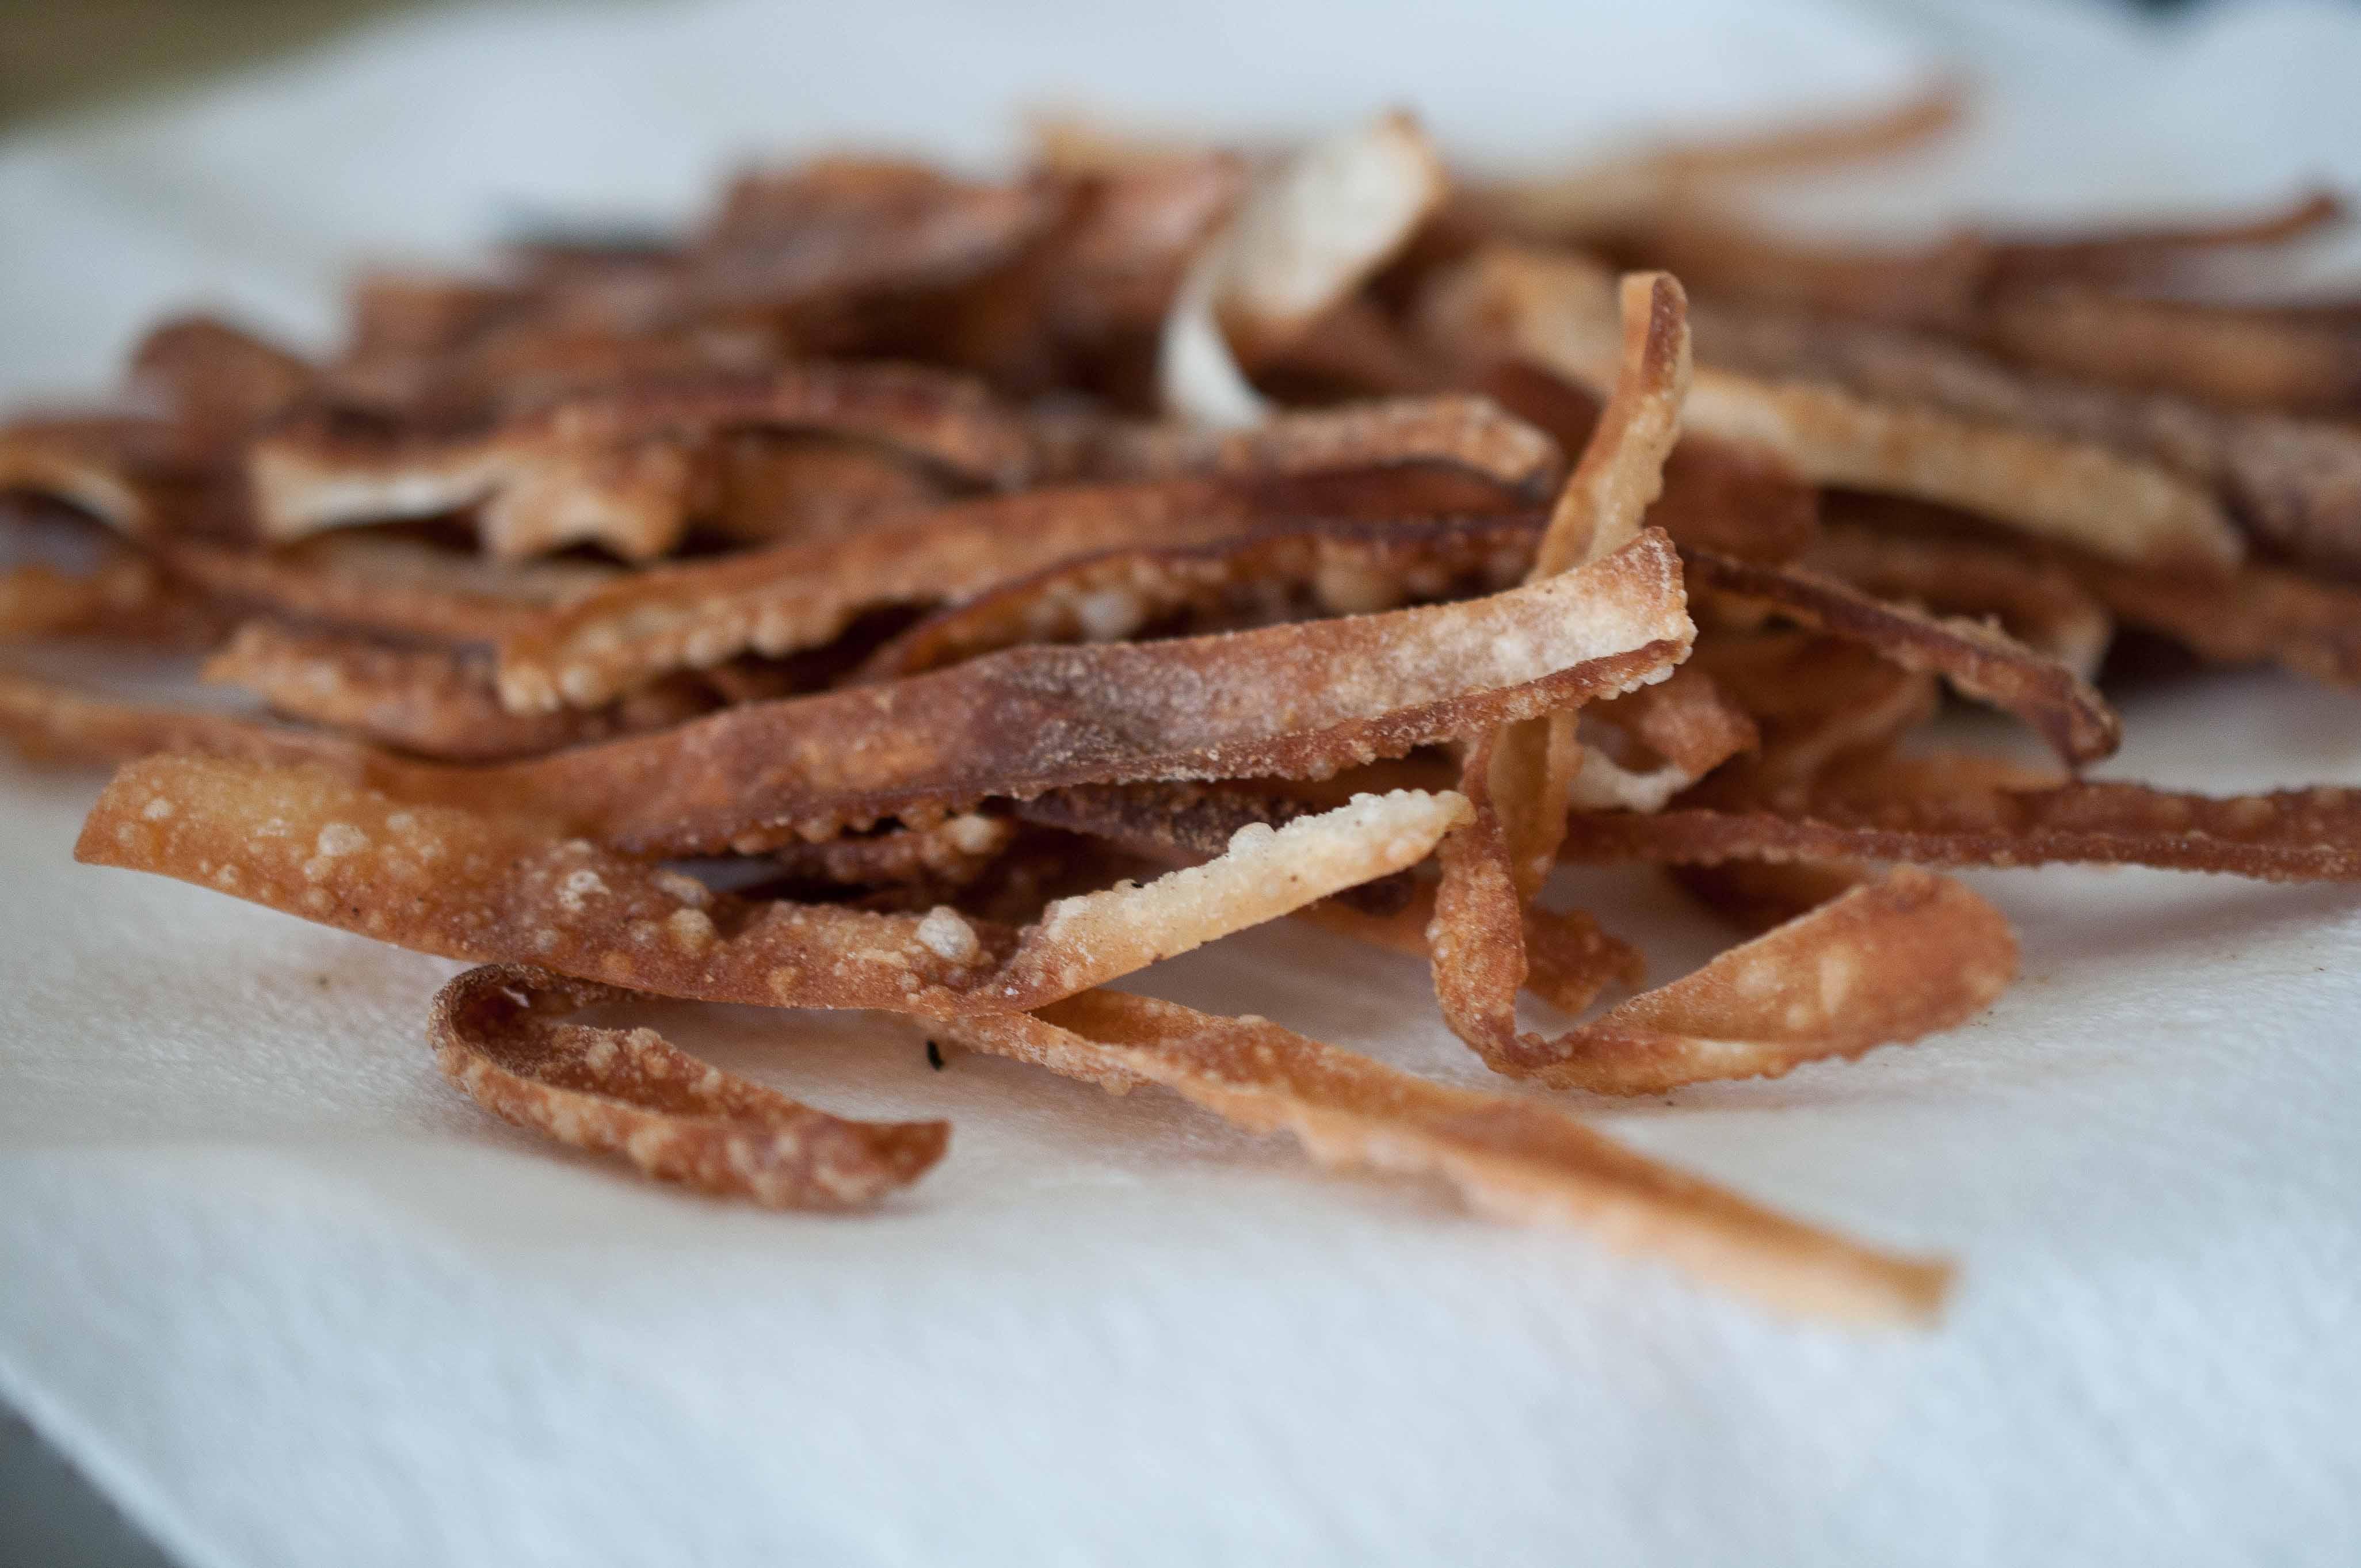
5 wonton wrappers, cut into 1/4 inch strips and lightly fried
For The Dressing:
3 tbs rice wine vinegar
2 tbs brown sugar
3 tbs ponzu sauce
1 tsp sriracha
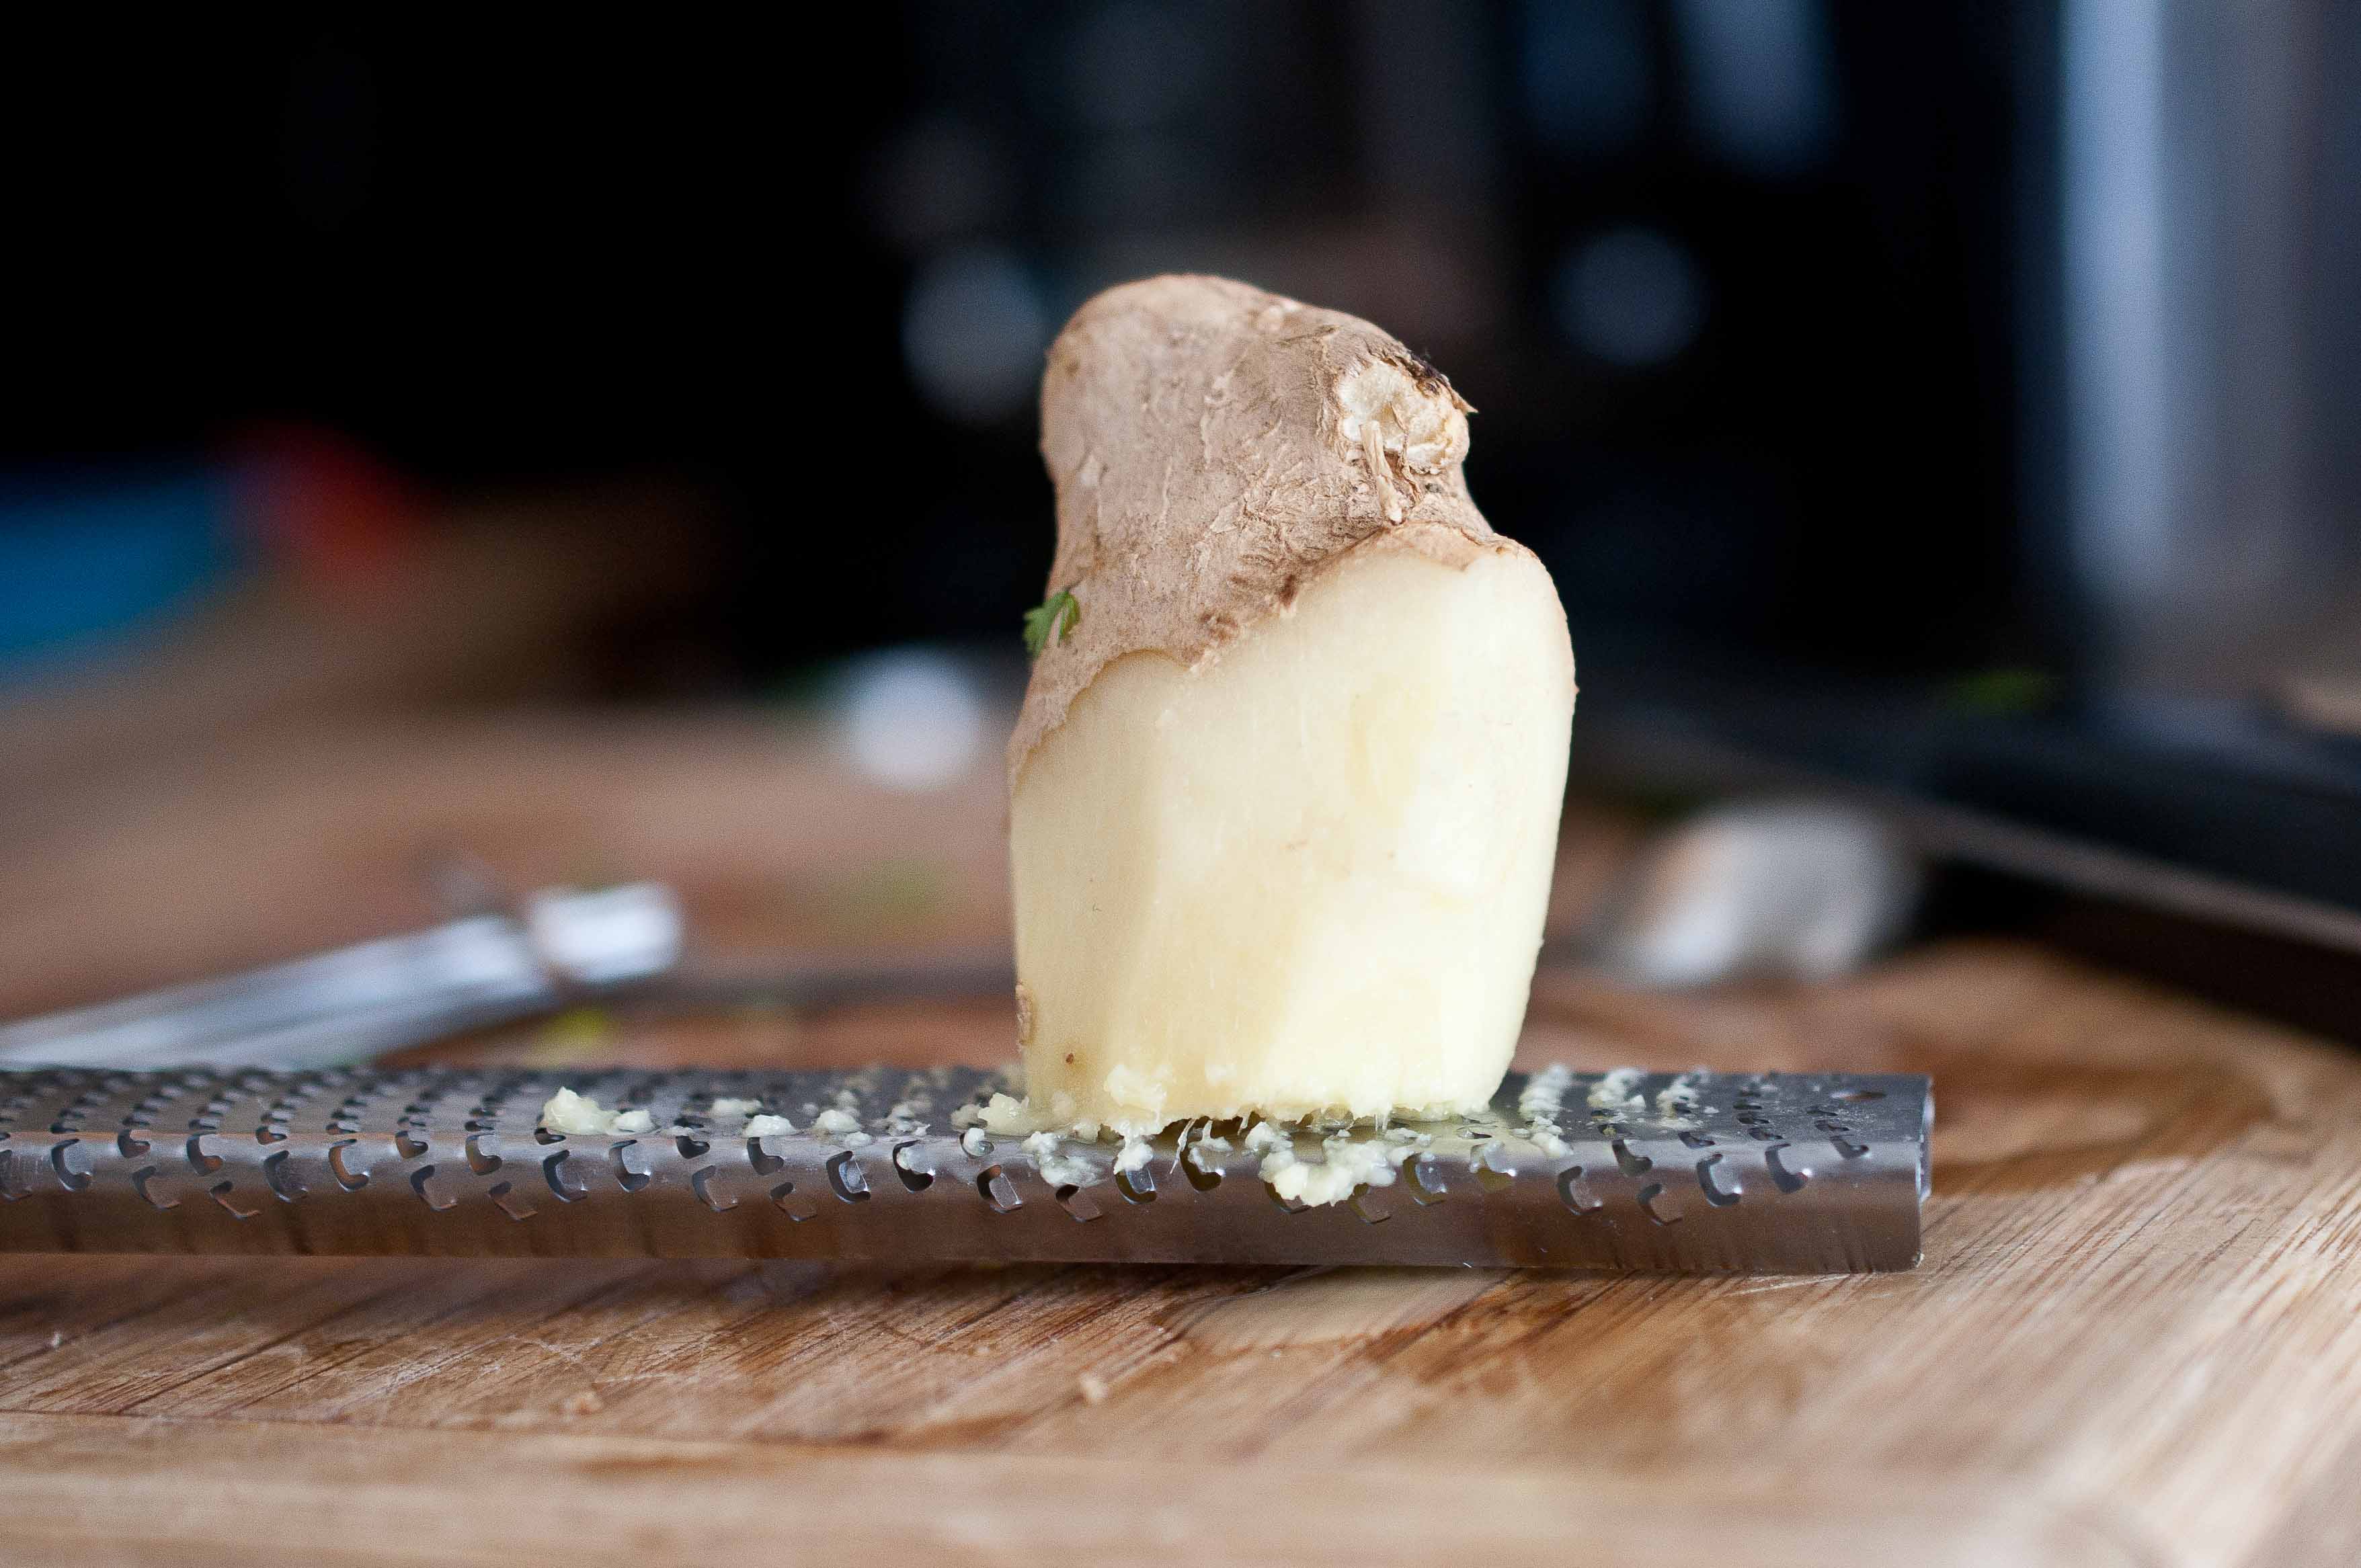
1 1/2 tsp grated ginger
2 tsp sesame oil
(you can also make a double recipe and save half in an air tight container in the fridge, should last about 1 month)
Add all of the salad ingredients (except the fried wontons) in a bowl, toss to combine. Top with wontons.
Add all of the dressing ingredients to a bowl, stir to combine. Drizzle over the salad. Serve cold.
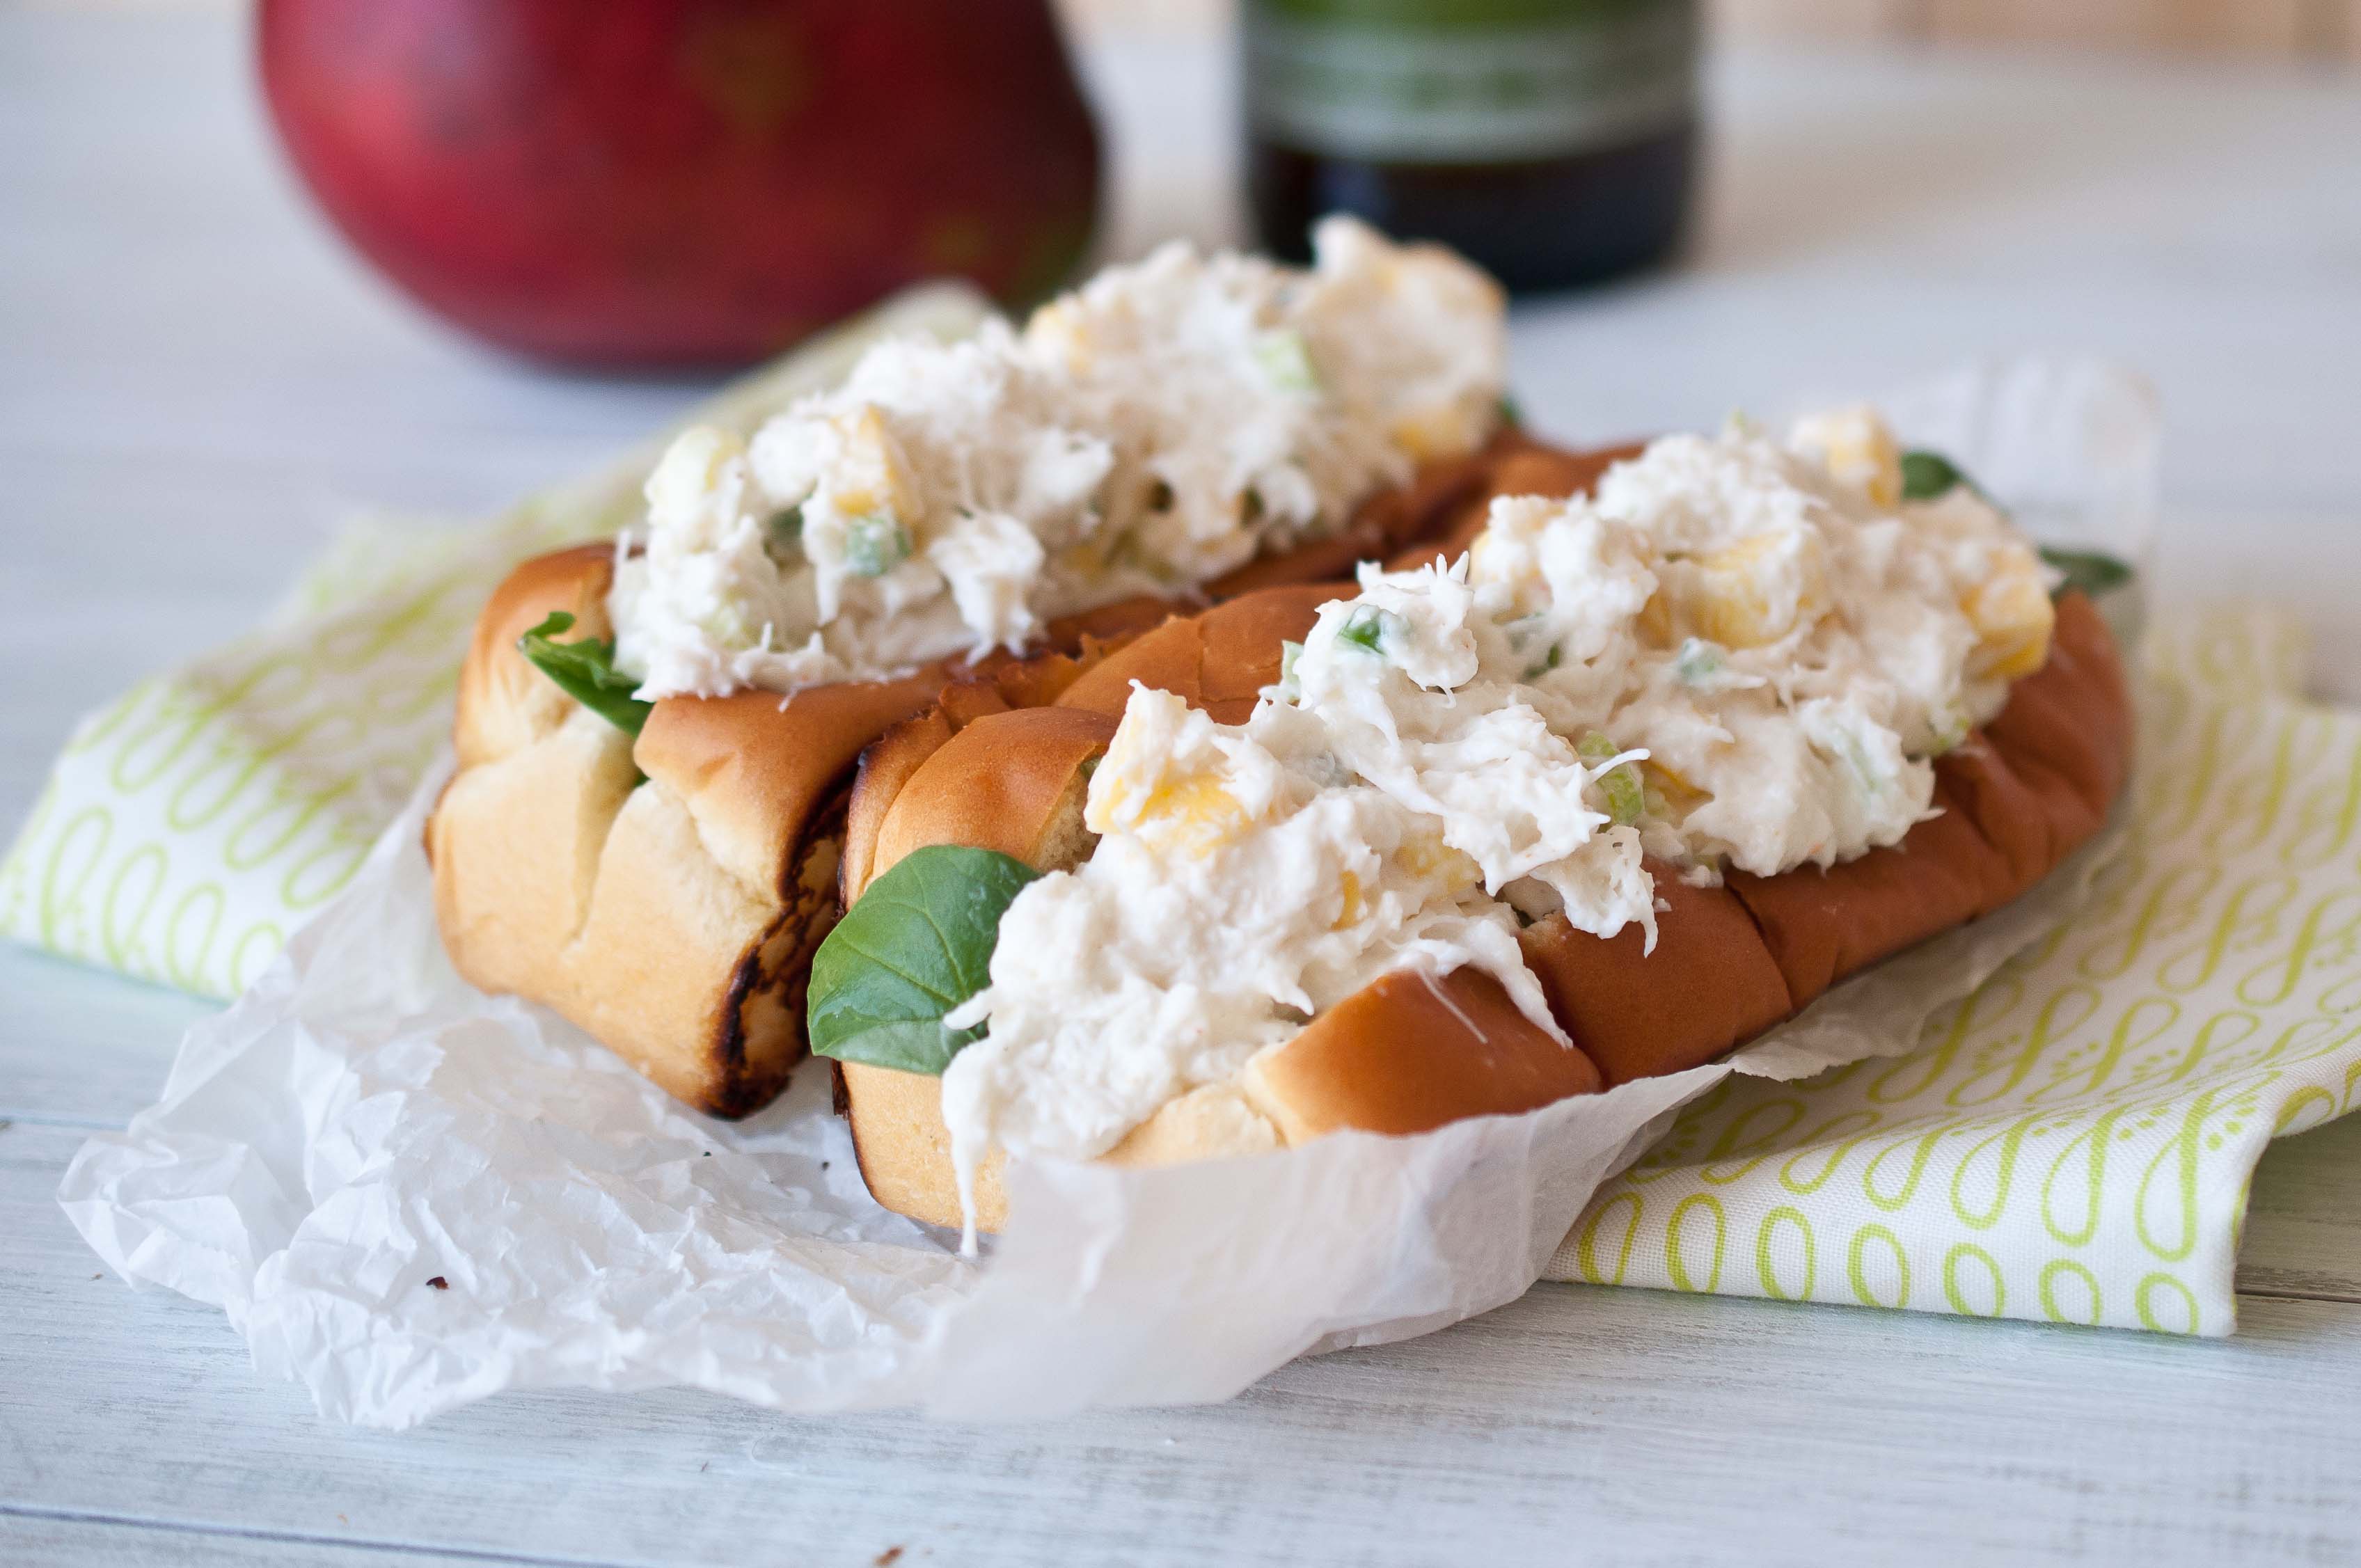
In my neck of the woods lobster is more expensive than a one hour massage, and doesn’t last as long. But crab I can pick up for $3 making my internal "Lobster vs. Crab" debate pretty short. If you can swing it, buy the Lump or Jumbo Lump, which has big pieces of crab, as opposed to the Special or Claw meat, which is just small shreds of crab.
I know that a traditional lobster roll has mayo, but to be honest with you mayo makes me gag. I always sub a combination of sour cream and cream cheese for the mayo that I refuse to use. With a flavor as delicate as crab, you don’t want to bulldoze the flavors with too much tang, more sour cream than cream cheese gave the perfect balance.
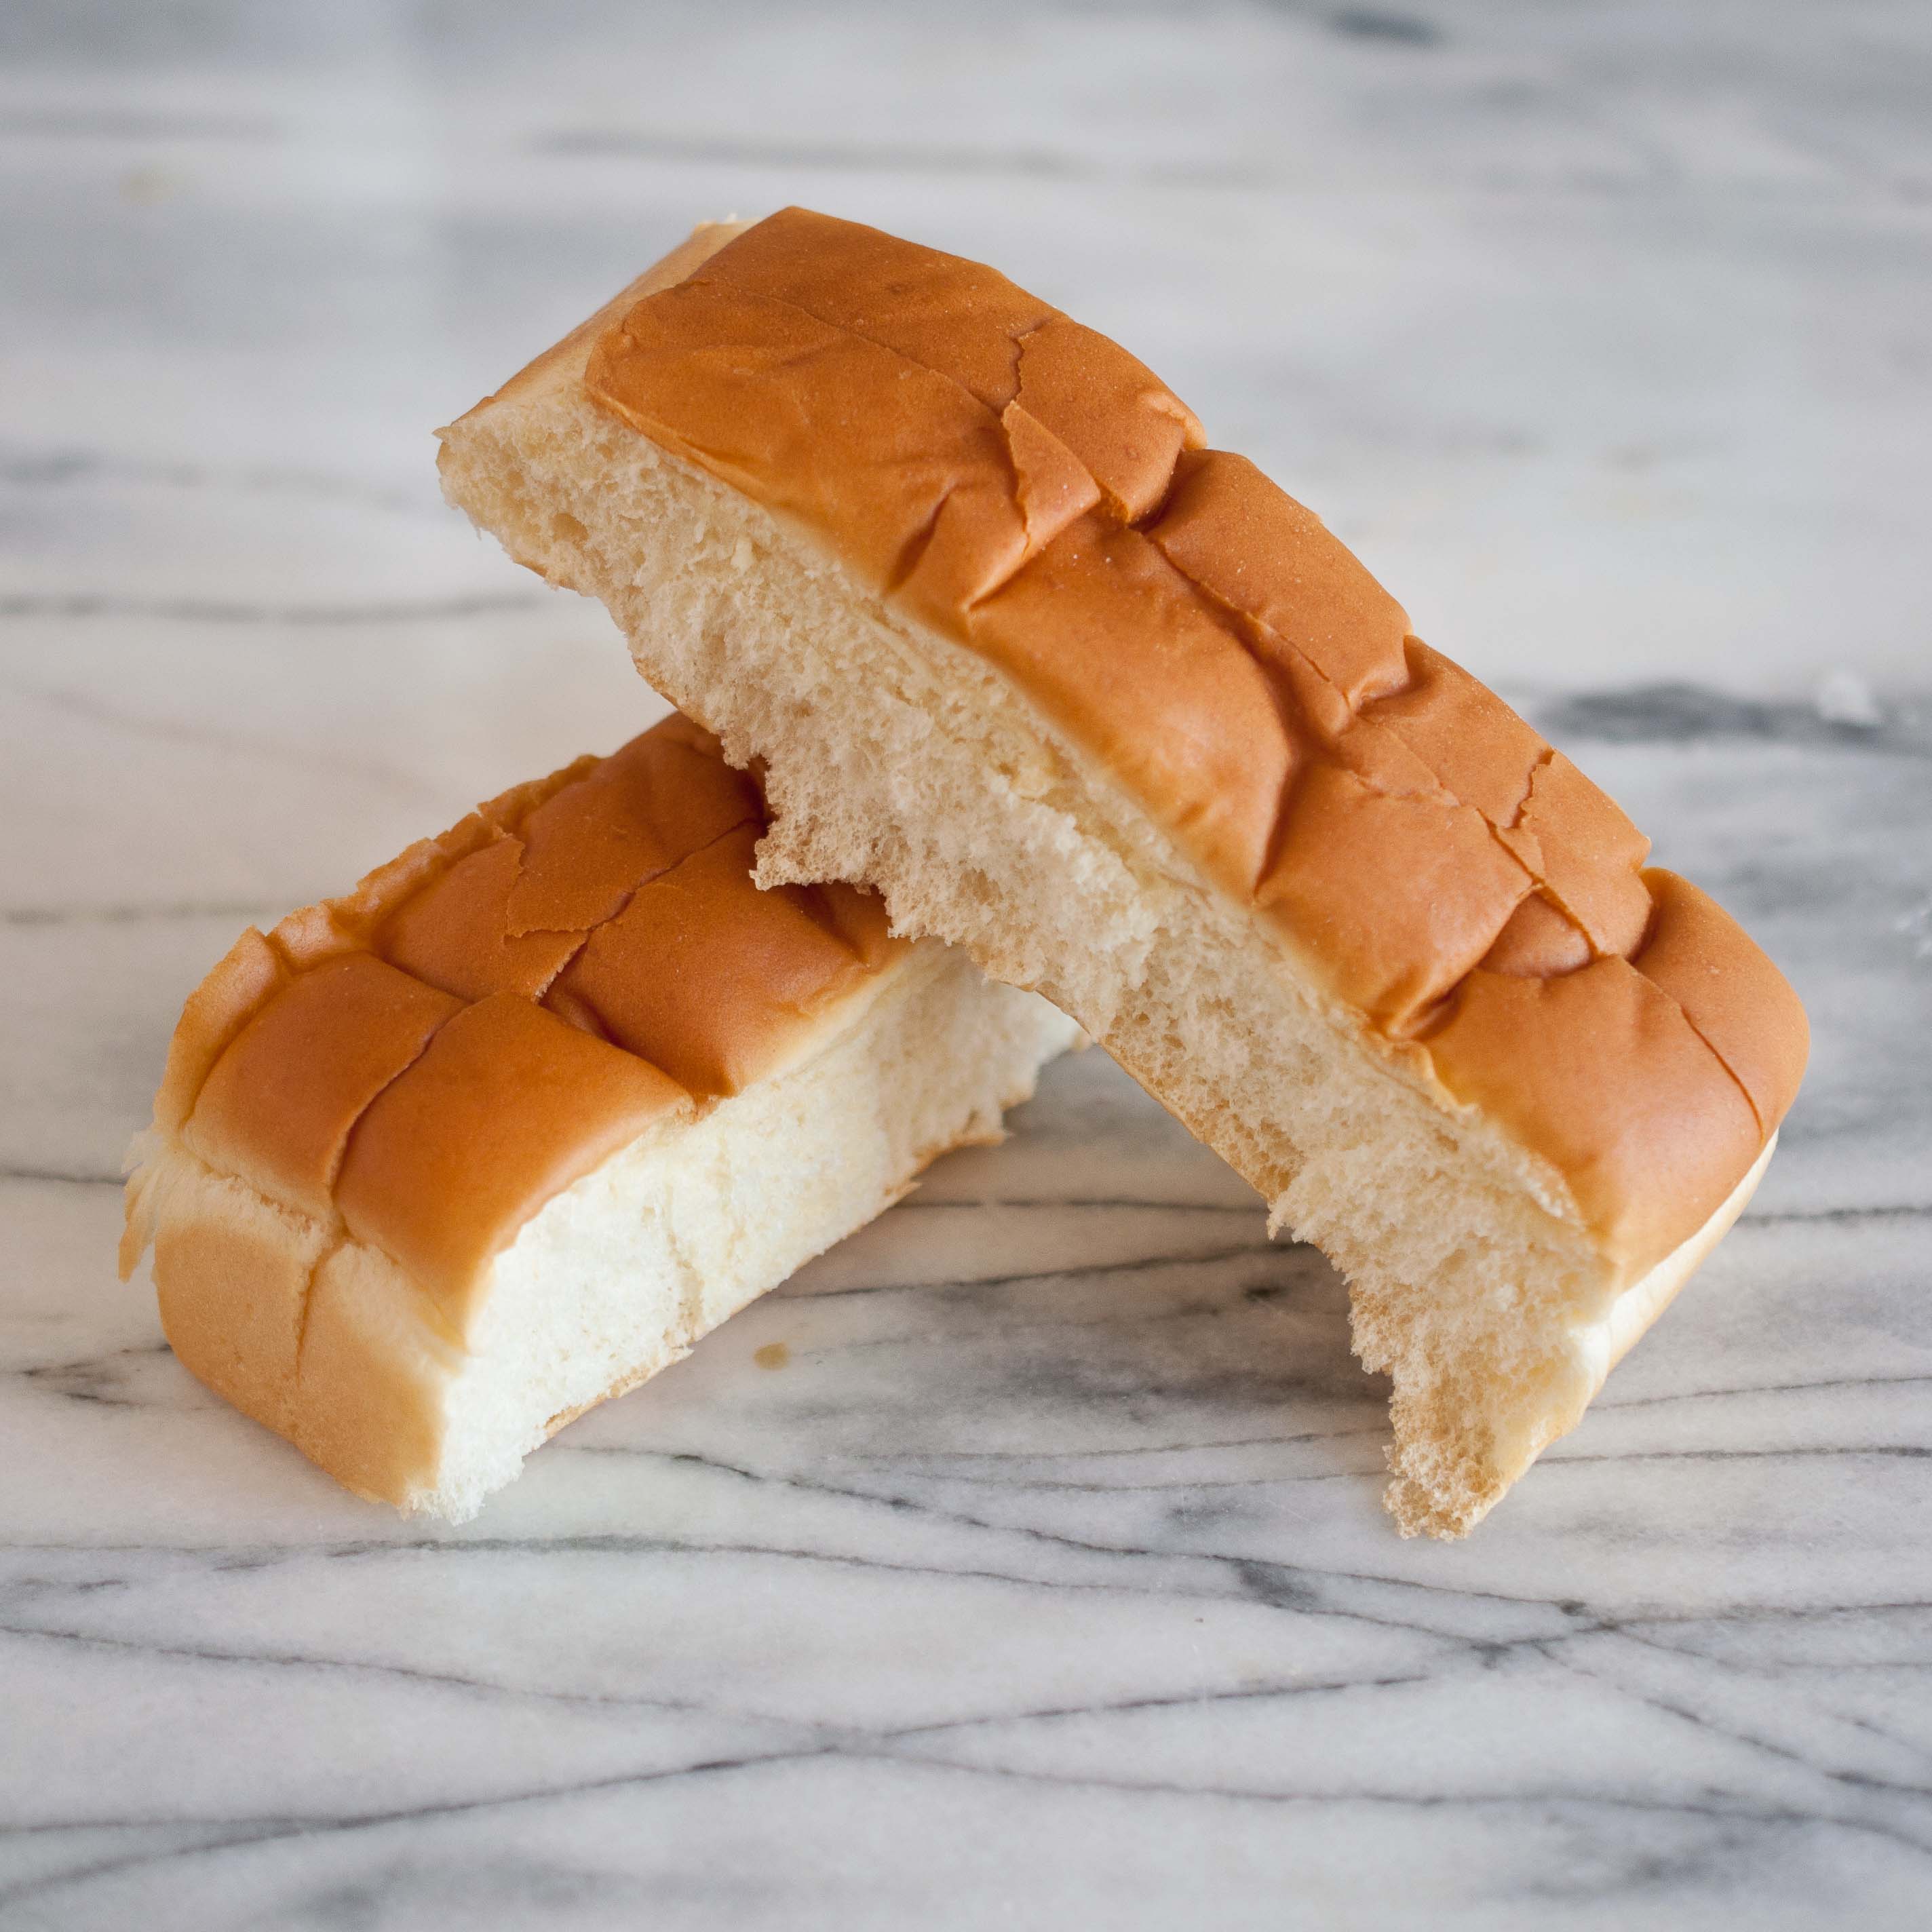
These Kings Hawaiian Hot Dog buns are incredible. The perfect softness with a touch of sweetness that really makes this recipe, a regular hot dog bun won’t work. Scour the town until you find them, they are so crucial to the amazing end result of this recipe. Here is their store locator.
Hawaiian Crab Rolls
3 oz cream cheese
1/2 cup diced mango
2 tbs chopped fresh jalapeno (stem and seeds removed)
In a bowl combine the cream cheese, mango, jalapeno, sour cream, salt, pepper, lemon juice and cayenne pepper, stir until well combined. Add the crab meat and stir until just combined, set aside.
Heat a skillet over medium high heat. Butter the sides of the Kings Hawaiian Hot Dog Buns, where they had presiously been attached to each other.
Add to the hot pan and cook on each buttered side until golden brown, about 2 minutes per side, remove from pan.
Line the inside of the toasted buns with arugula. Top with crab mixture.
There is something about the raw exposure that blogging brings that forces you to face and deal with emotional handicaps that you didn’t even know that you have.
It may be the contrast between complete strangers showering you with compliments and adorations, and other complete strangers raining down harsh criticism. When in reality, neither is wholly accurate. You are, to one degree or another, somewhere in the middle.
And as harsh and those nasty comments can be, the overly positive ones have always been more difficult for me to deal with. Those readers who send compliment saturated emails about how much they love my recipes, or how great my life must be, are with no doubt a highlight of blogging. But I am always left with the fear that the pedestal will crumble and I will be exposed as the ordinary person that I truly am.
Self worth is supposed to be an isolated container, unaffected by the thoughts of others. But I’m not sure anyone has really figure out how to do that, and if he does, I’m not sure I want to meet that guy.
The truth is, sometimes we need a mirror of honesty to see how great we are, and place that value in our container of worth. And to really start to believe it.
Take a second to think back on your life and write down all the best compliments that you have ever received.
And then take the rest of your life to truly believe them.
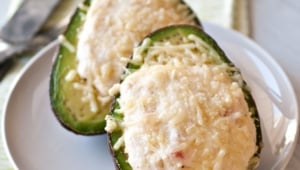
Crab Stuffed Baked Avocado
4 oz cream cheese, softened
6 oz crab meat (drain well if using canned meat)
1/4 cup tomatoes, chopped
1 tbs scallions
1/4 tsp salt
1/4 tsp pepper
pinch cayenne pepper
3 large ripe avocados,cut in half, pits removed
1/2 cup parmesan cheese
Preheat oven to 400.
In a bowl, combine all the ingredients except the avocados and the parmesan, mix until well combined.
Fit the hole in the avocado with crab mixture, top with generous amounts of cheese. Place avocados in the wells of a muffin tin, bake at 400 until the cheese has melted about 8-10 minutes.
I worked at a little cafe in college. It was a run by an odd man, who was largely absent, with questionable ethics and strange business practices. Which all ended up working to my benefit. I was young and slightly lazy, as long as I showed up for my shift and turned in the appropriate amount of money every day, I was lavishly ignored. There were no comment cards, focus on customer service, or unnecessary protocol, I did what I wanted. And what I wanted, other than giving out free muffins every time I forgot to ring in an order, was to spend time in the kitchen.
It was a small, poorly run brunch spot in Old Town Pasadena, right on the Rose Parade route. Our biggest draws were Granola French Toast with Vanilla Bean Sauce, Sour Dough Toads in A Hole With Chorizo Gravy, Pumpkin Pancakes year round and fantastic cappuccinos as well as a kitchen expertly managed by our overworked chefs Nacho & Sergio.
I take pride in the fact that I was one of the few waitresses that they liked. I brought them "water" when we were busy, made runs to our inappropriately far away walk-in and took the blame for spoiled food when the boss would eventually show his face. The cooks, after all, were the heart of the place. I could be replaced in a heartbeat, but the entire restaurant pulsed through Nacho & Sergio.
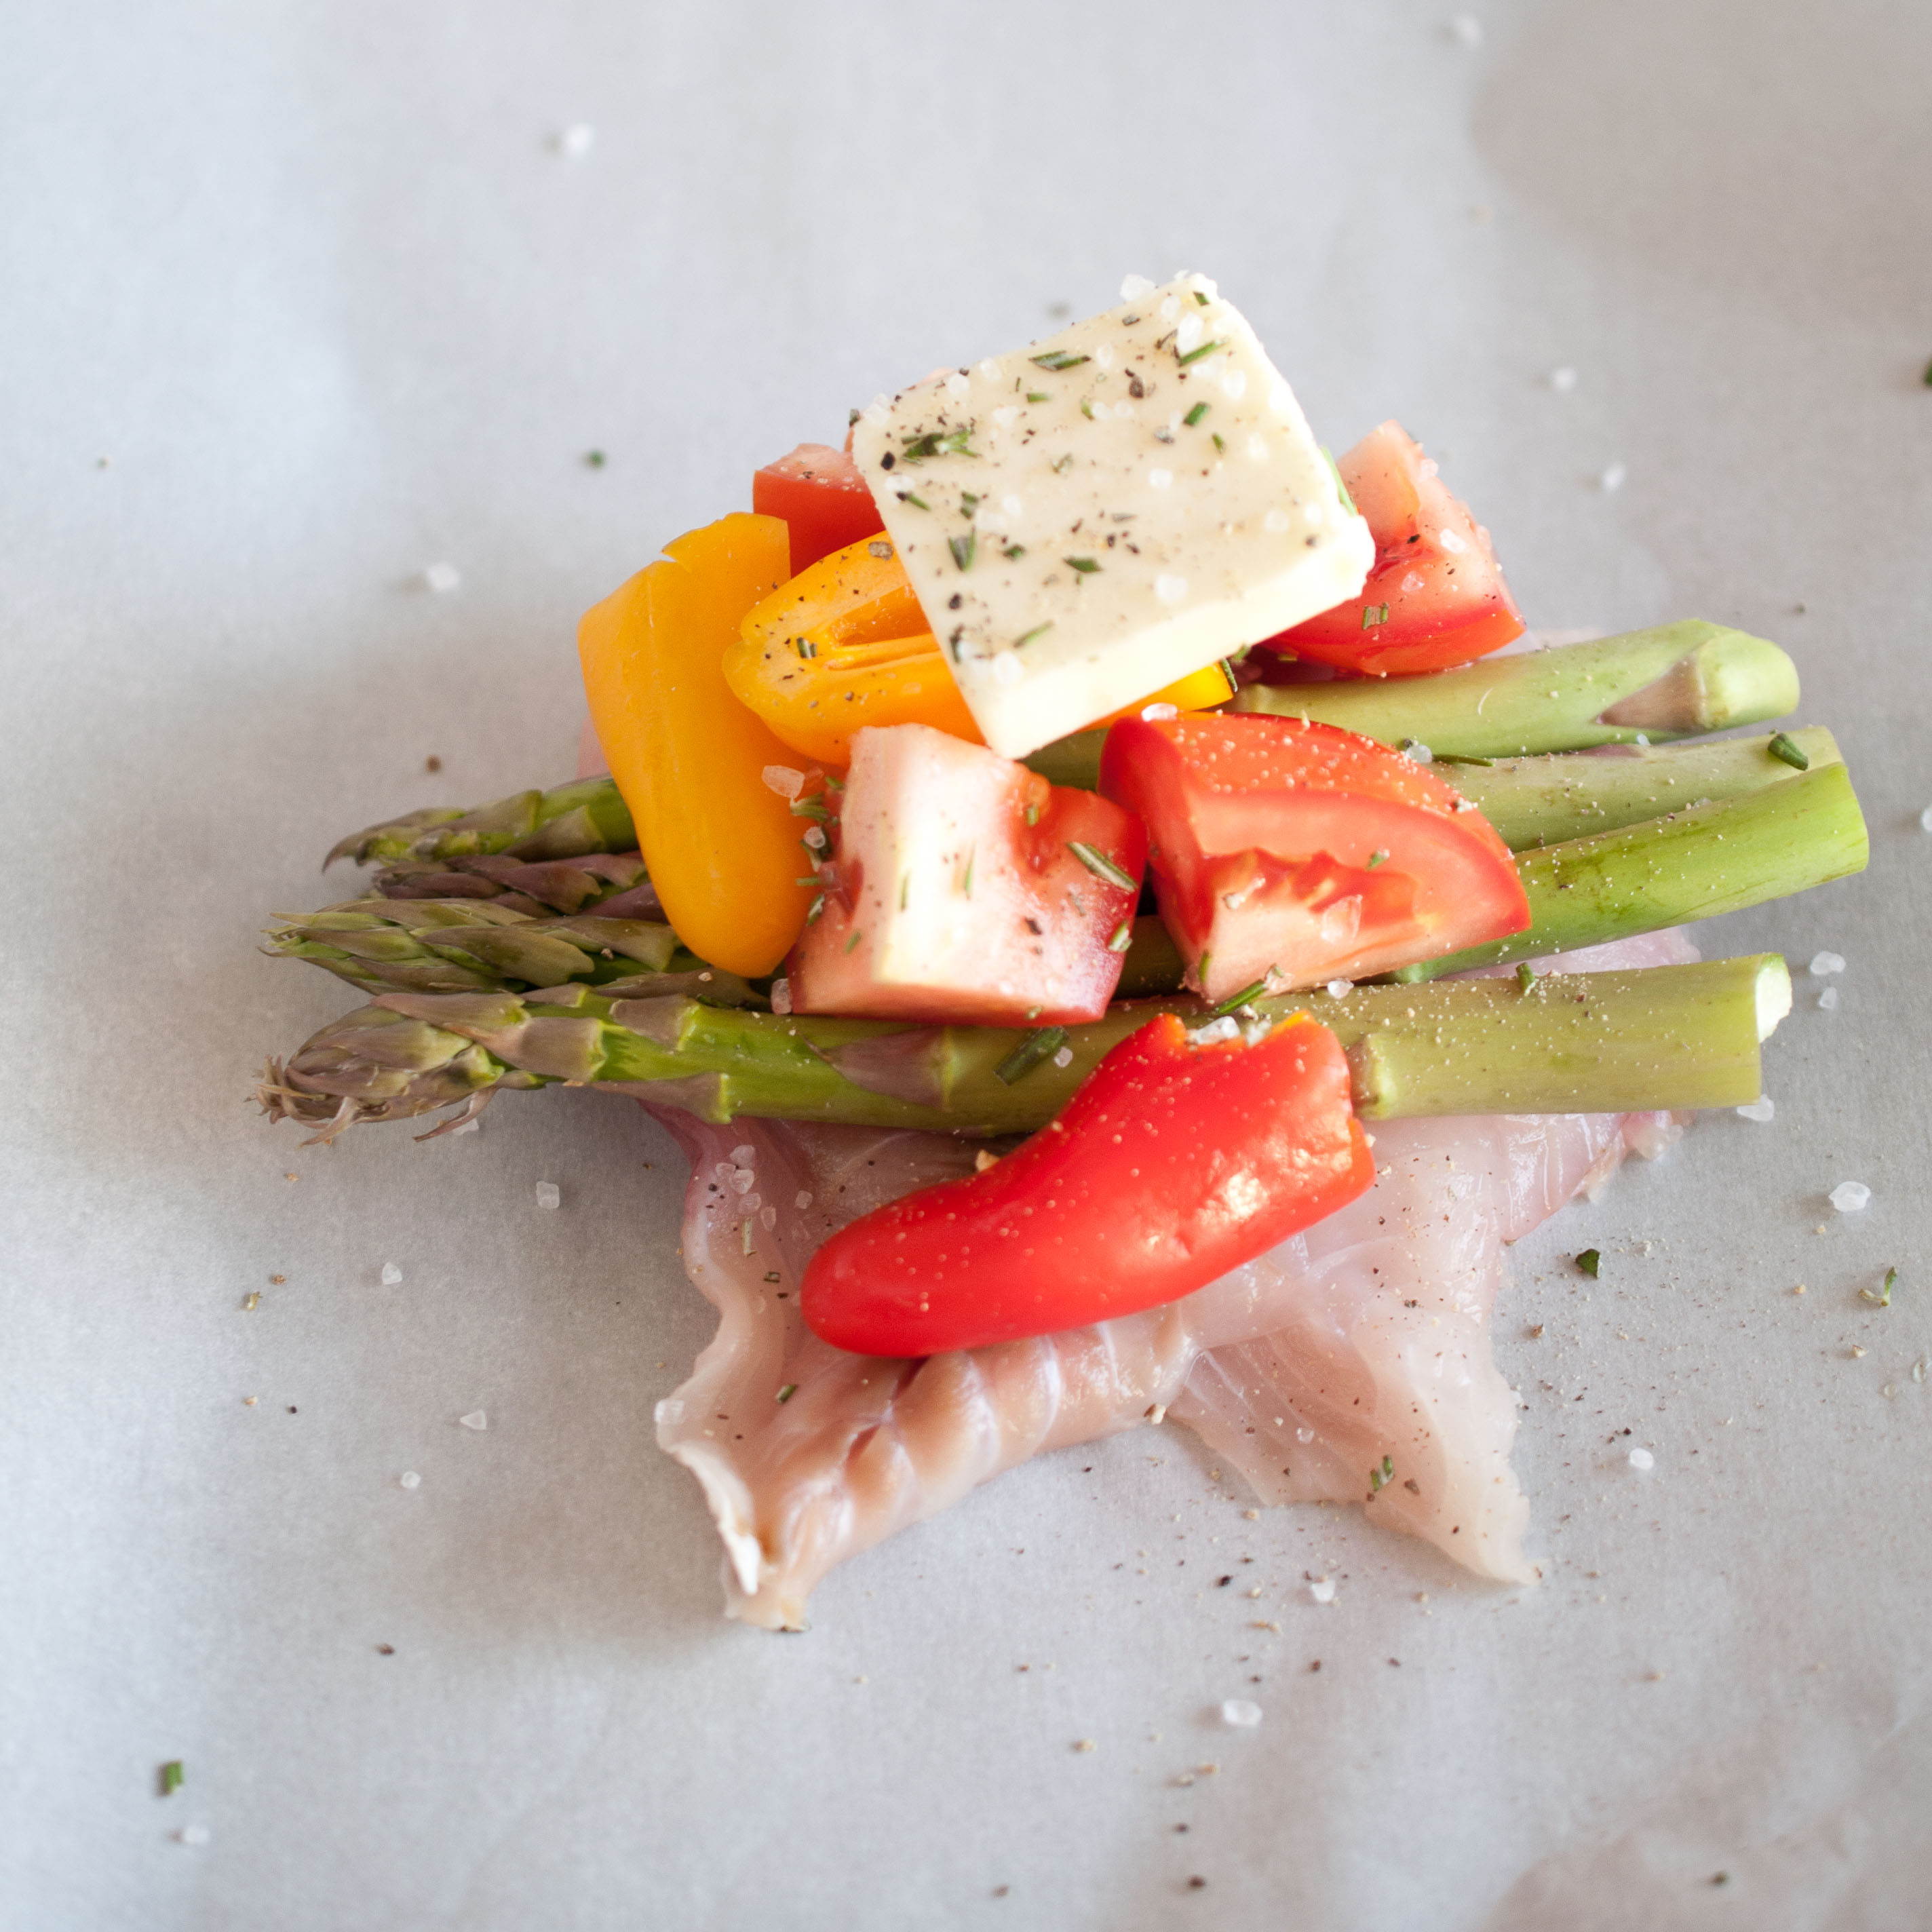
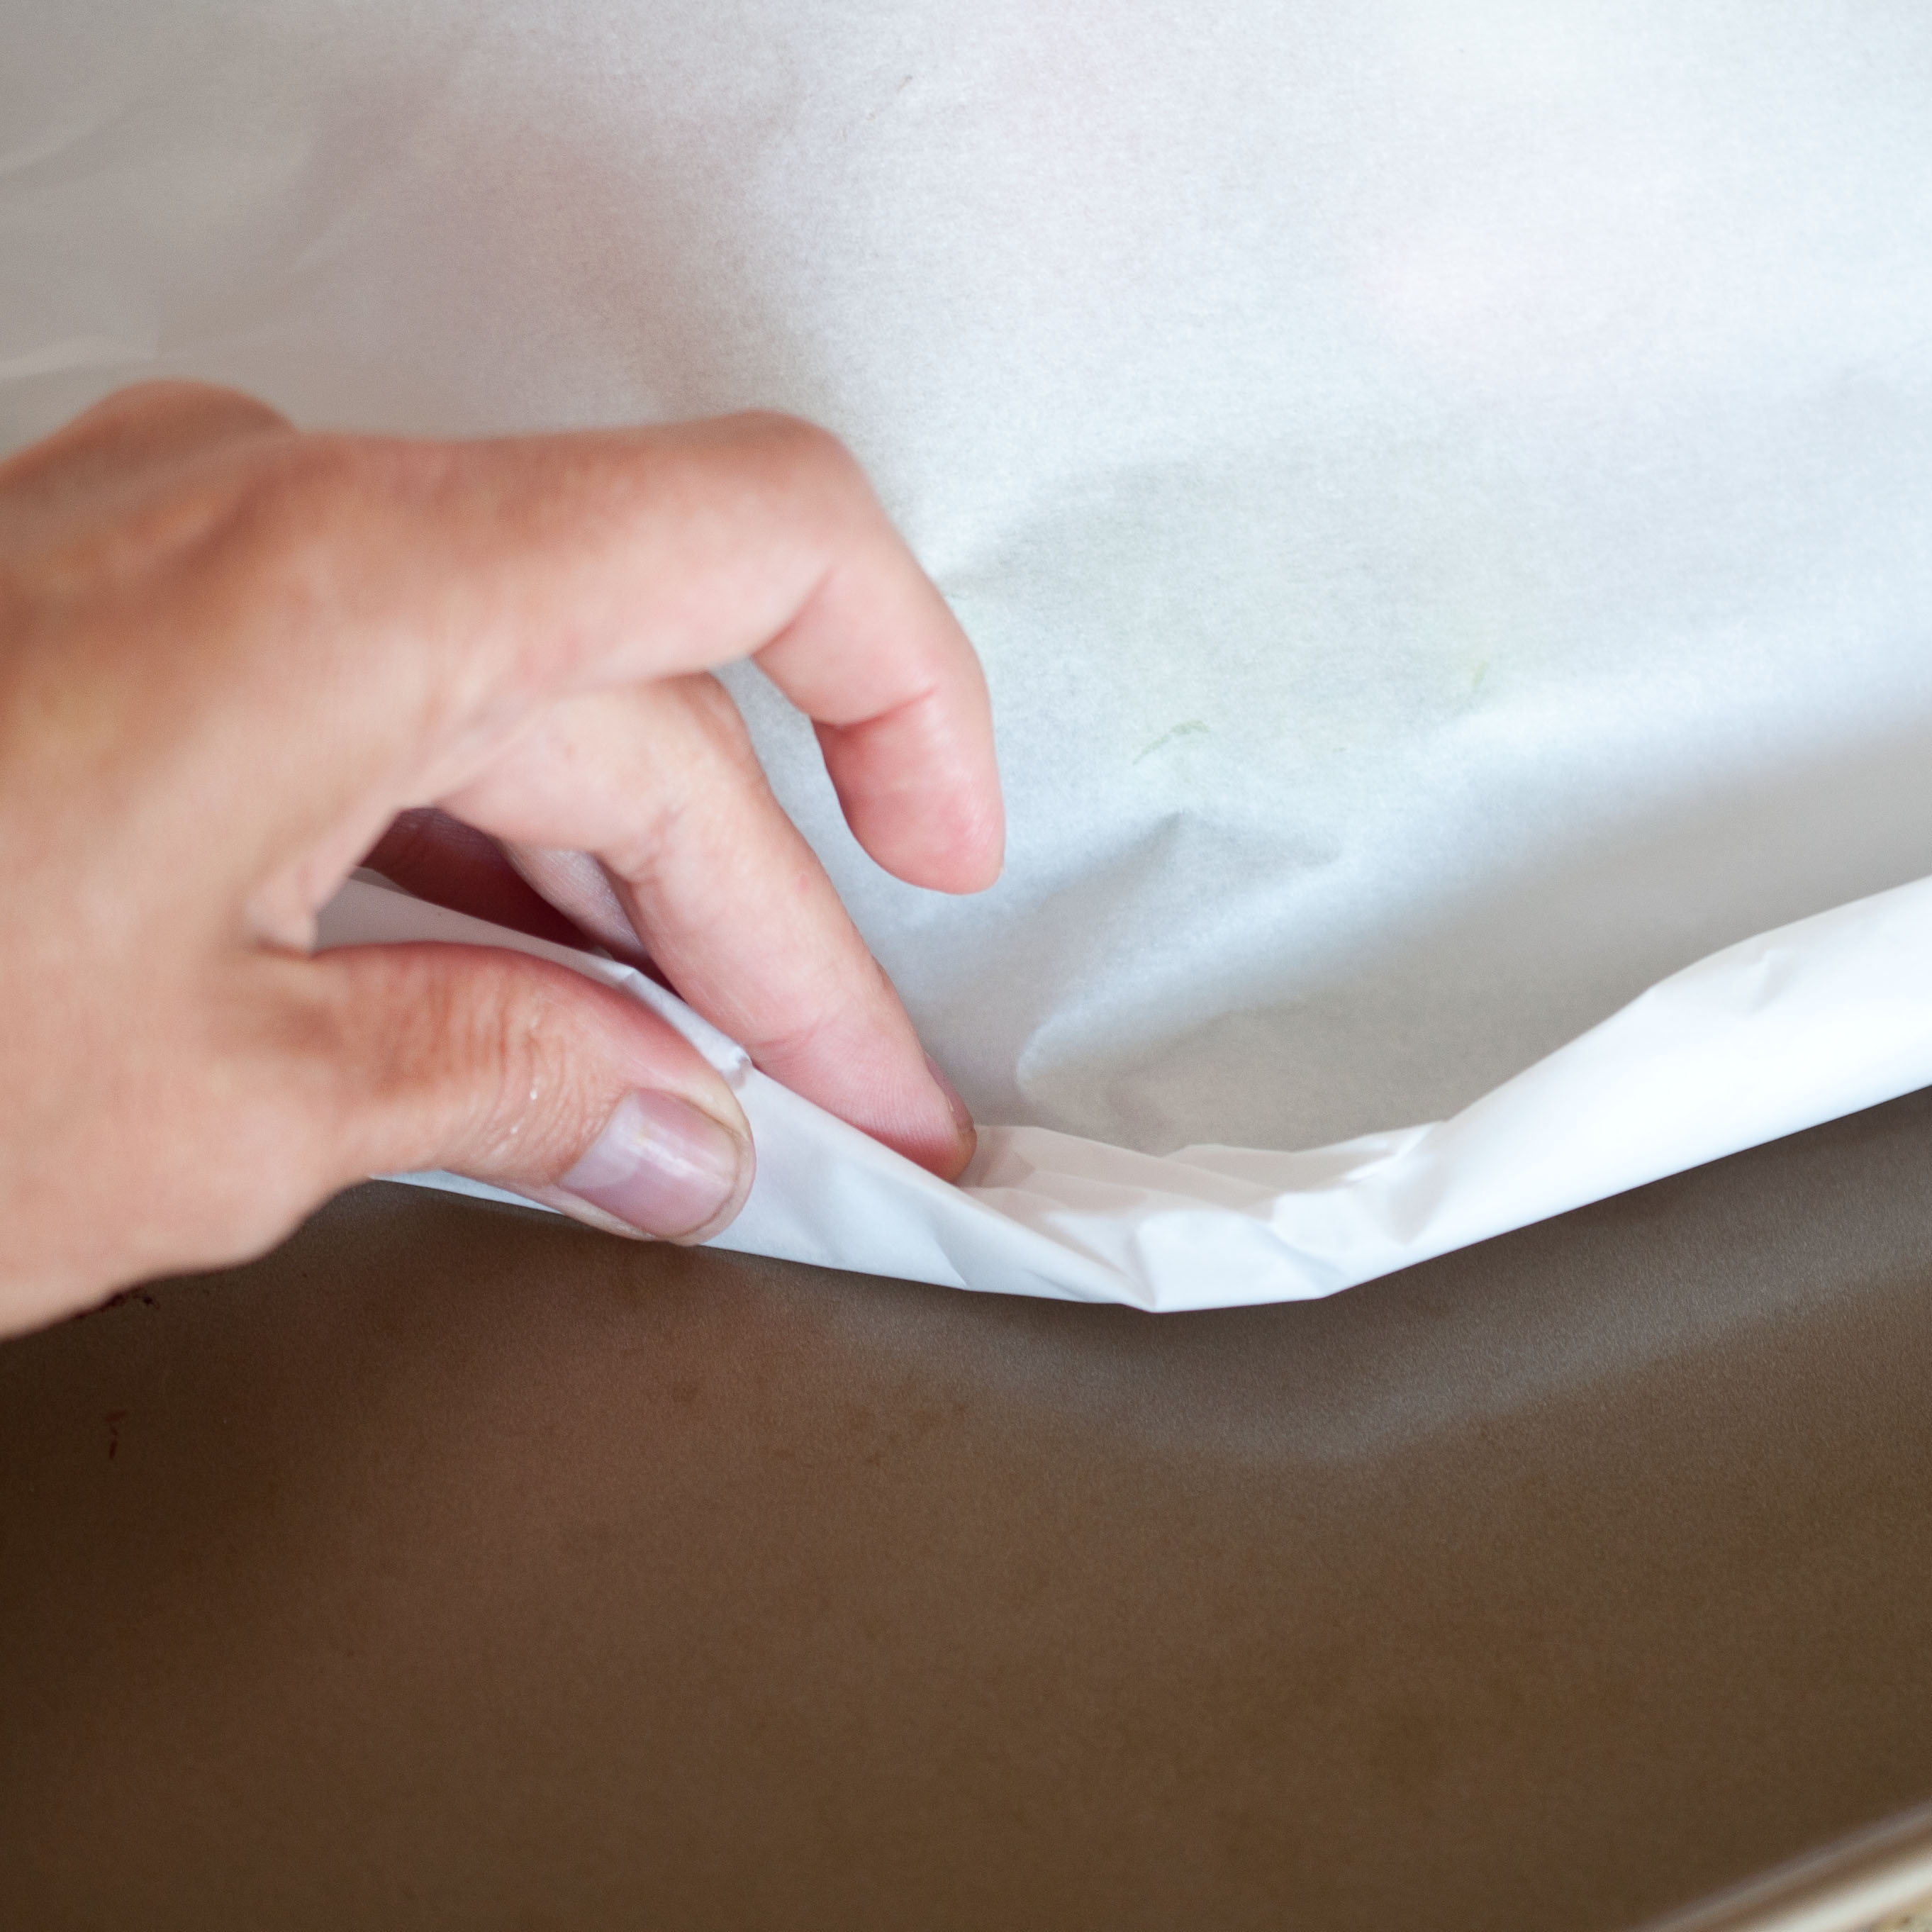
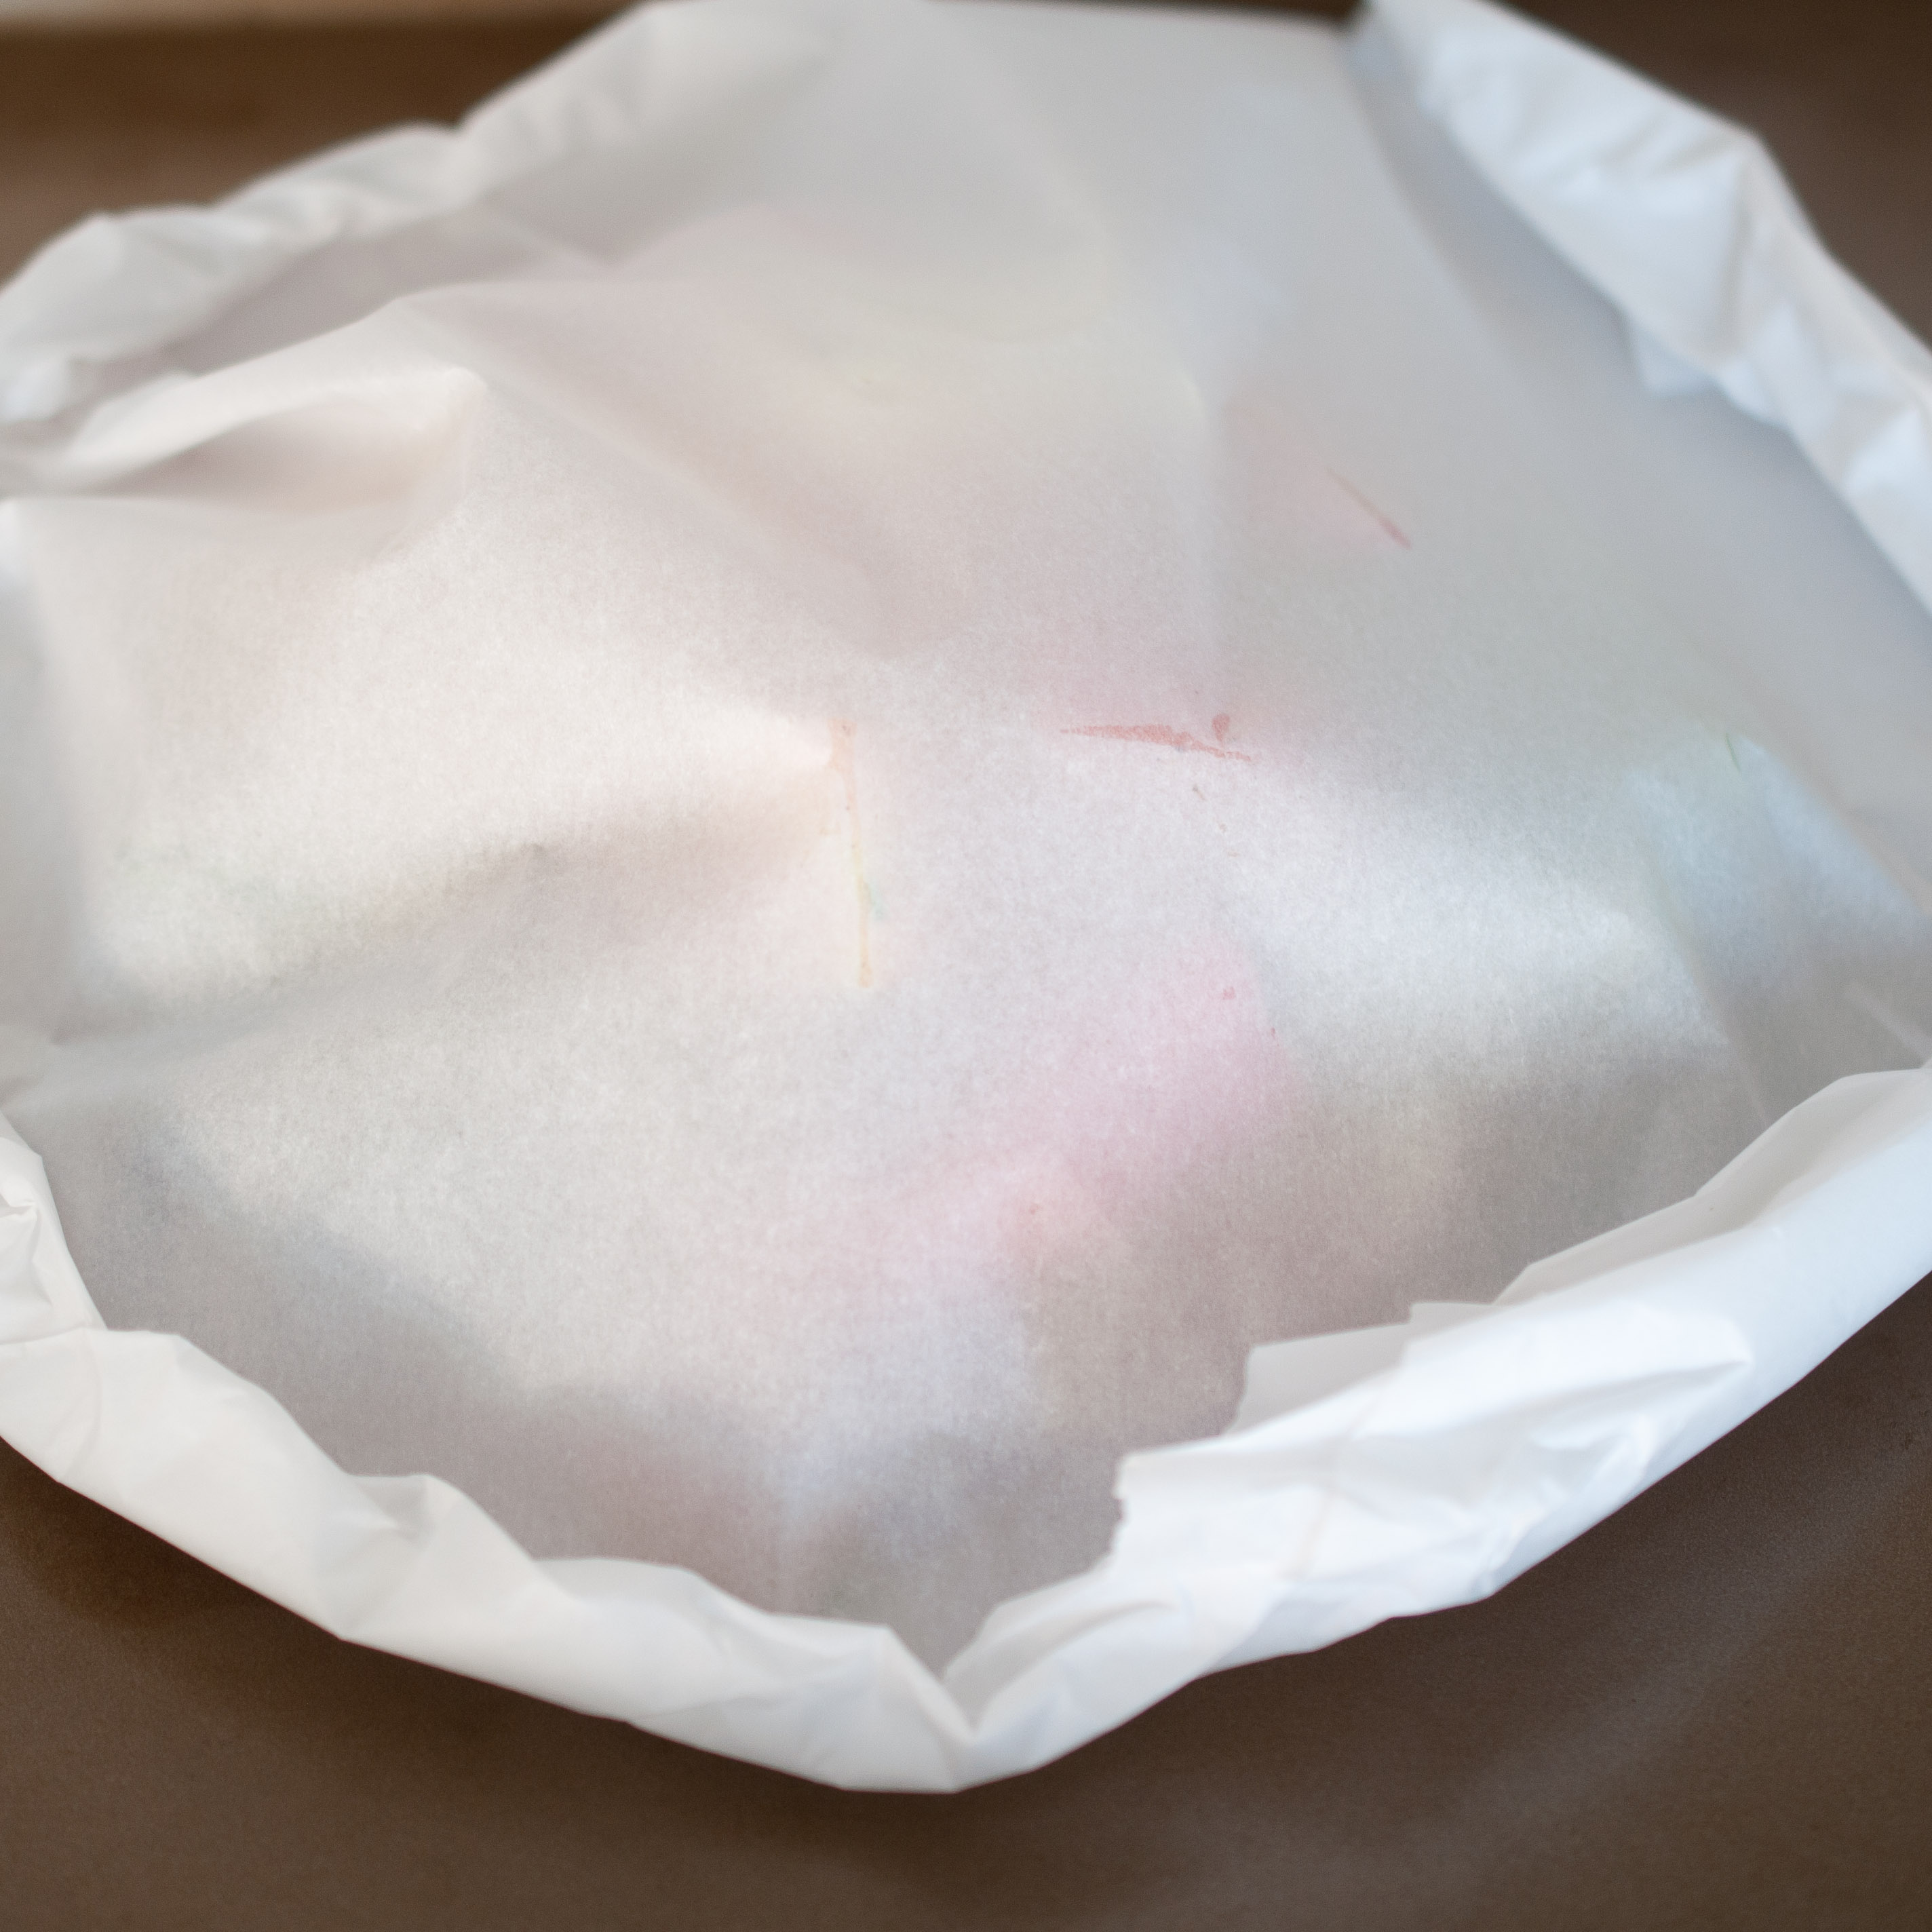
Late one afternoon, as our new and overly ambitious new manager-of-the-moment decided to dust off the chalkboard sign to institute a Daily Specials program, I begged Nacho to teach me something. He laughed. And then put me to work making Red Snapper packets with parchment paper, butter and some vegetables. To this day, I still make these. Easy, healthy and ready to adapt to in-season produce.
Remember the Beer Cooking Scale I told you about last month, the one I want to invent? The one that would let you know the approximate level of Beeryness the final product has? This recipe is at both ends of that yet-to-be-invented scale’s spectrum. The beer butter has a kick you in the mouth beer flavor that will be heartily enjoyed by beer enthusiast, and the shrimp has a subtle note of beer in it’s finish. If you are a Kick You In The Mouth kinda person, cooking for a Maybe Just A Touch kind of person, this will satisfy you both. You get a butter full of intense beer flavor to slather onto whatever you so choose, and your little friend gets a plate of shrimp with slight notes of beer. Harmony between the two of you once again.
For this recipe I used a Saison brewed with sage, giving really great herb notes to the finished product. This is a special release beer from Epic Brewing called Utah Saison Sage #2.
If you can’t find this beer, look for a Saison with herb or citrus notes.
Roasted Garlic Beer Butter
1 head of garlic
1 tbs olive oil
1/2 cup Saison beer
1 stick of butter, softened
Preheat oven to 425. Rub several layers of the white papery skin off the head of garlic, leaving a light layer still in tact to keep the bulb together. Cut off the top point of the head, exposing the cloves inside.
Place on a sheet of foil, drizzle with olive oil and fold the foil tightly around the garlic. Place in a baking dish and roast in a 425 degree oven until the cloves are soft, about 20 minutes. Remove from oven and allow to cool.
While the garlic is roasting, add the beer to a pot on the stove. Cook until reduced to 3 tbs, about 10 minutes. (To lower the level of beer flavor in the butter, reduce 1/4 cup of beer by half.)
In a food processor, add the softened butter and the beer. Squeeze the head of garlic until the cloves push out, adding just the cloves to the food processor and discarding the papery skin.
Process the butter until smooth. Add to an air tight container and store in the fridge.
Roasted Garlic Beer Butter Shrimp, two methods
3 tbs beer butter
10 shrimp
pinch of salt and pepper
Metohd one: Grilling
Preheat grill. Melt the beer butter in a microwave safe dish. Skewer the shrimp with a heat safe skewers(or water soaked wooden skewers). Sprinkle with salt and pepper, brush liberally with melted butter. Grill until pink and cooked through, about 2-3 minutes per side. Brush occasionally with butter while cooking.
Method two: Stove Top
In a pan over medium high heat, add the butter and stir until melted. Sprinkle the shrimp with salt and pepper, add to the pan and saute until cooked through about 5 minutes.
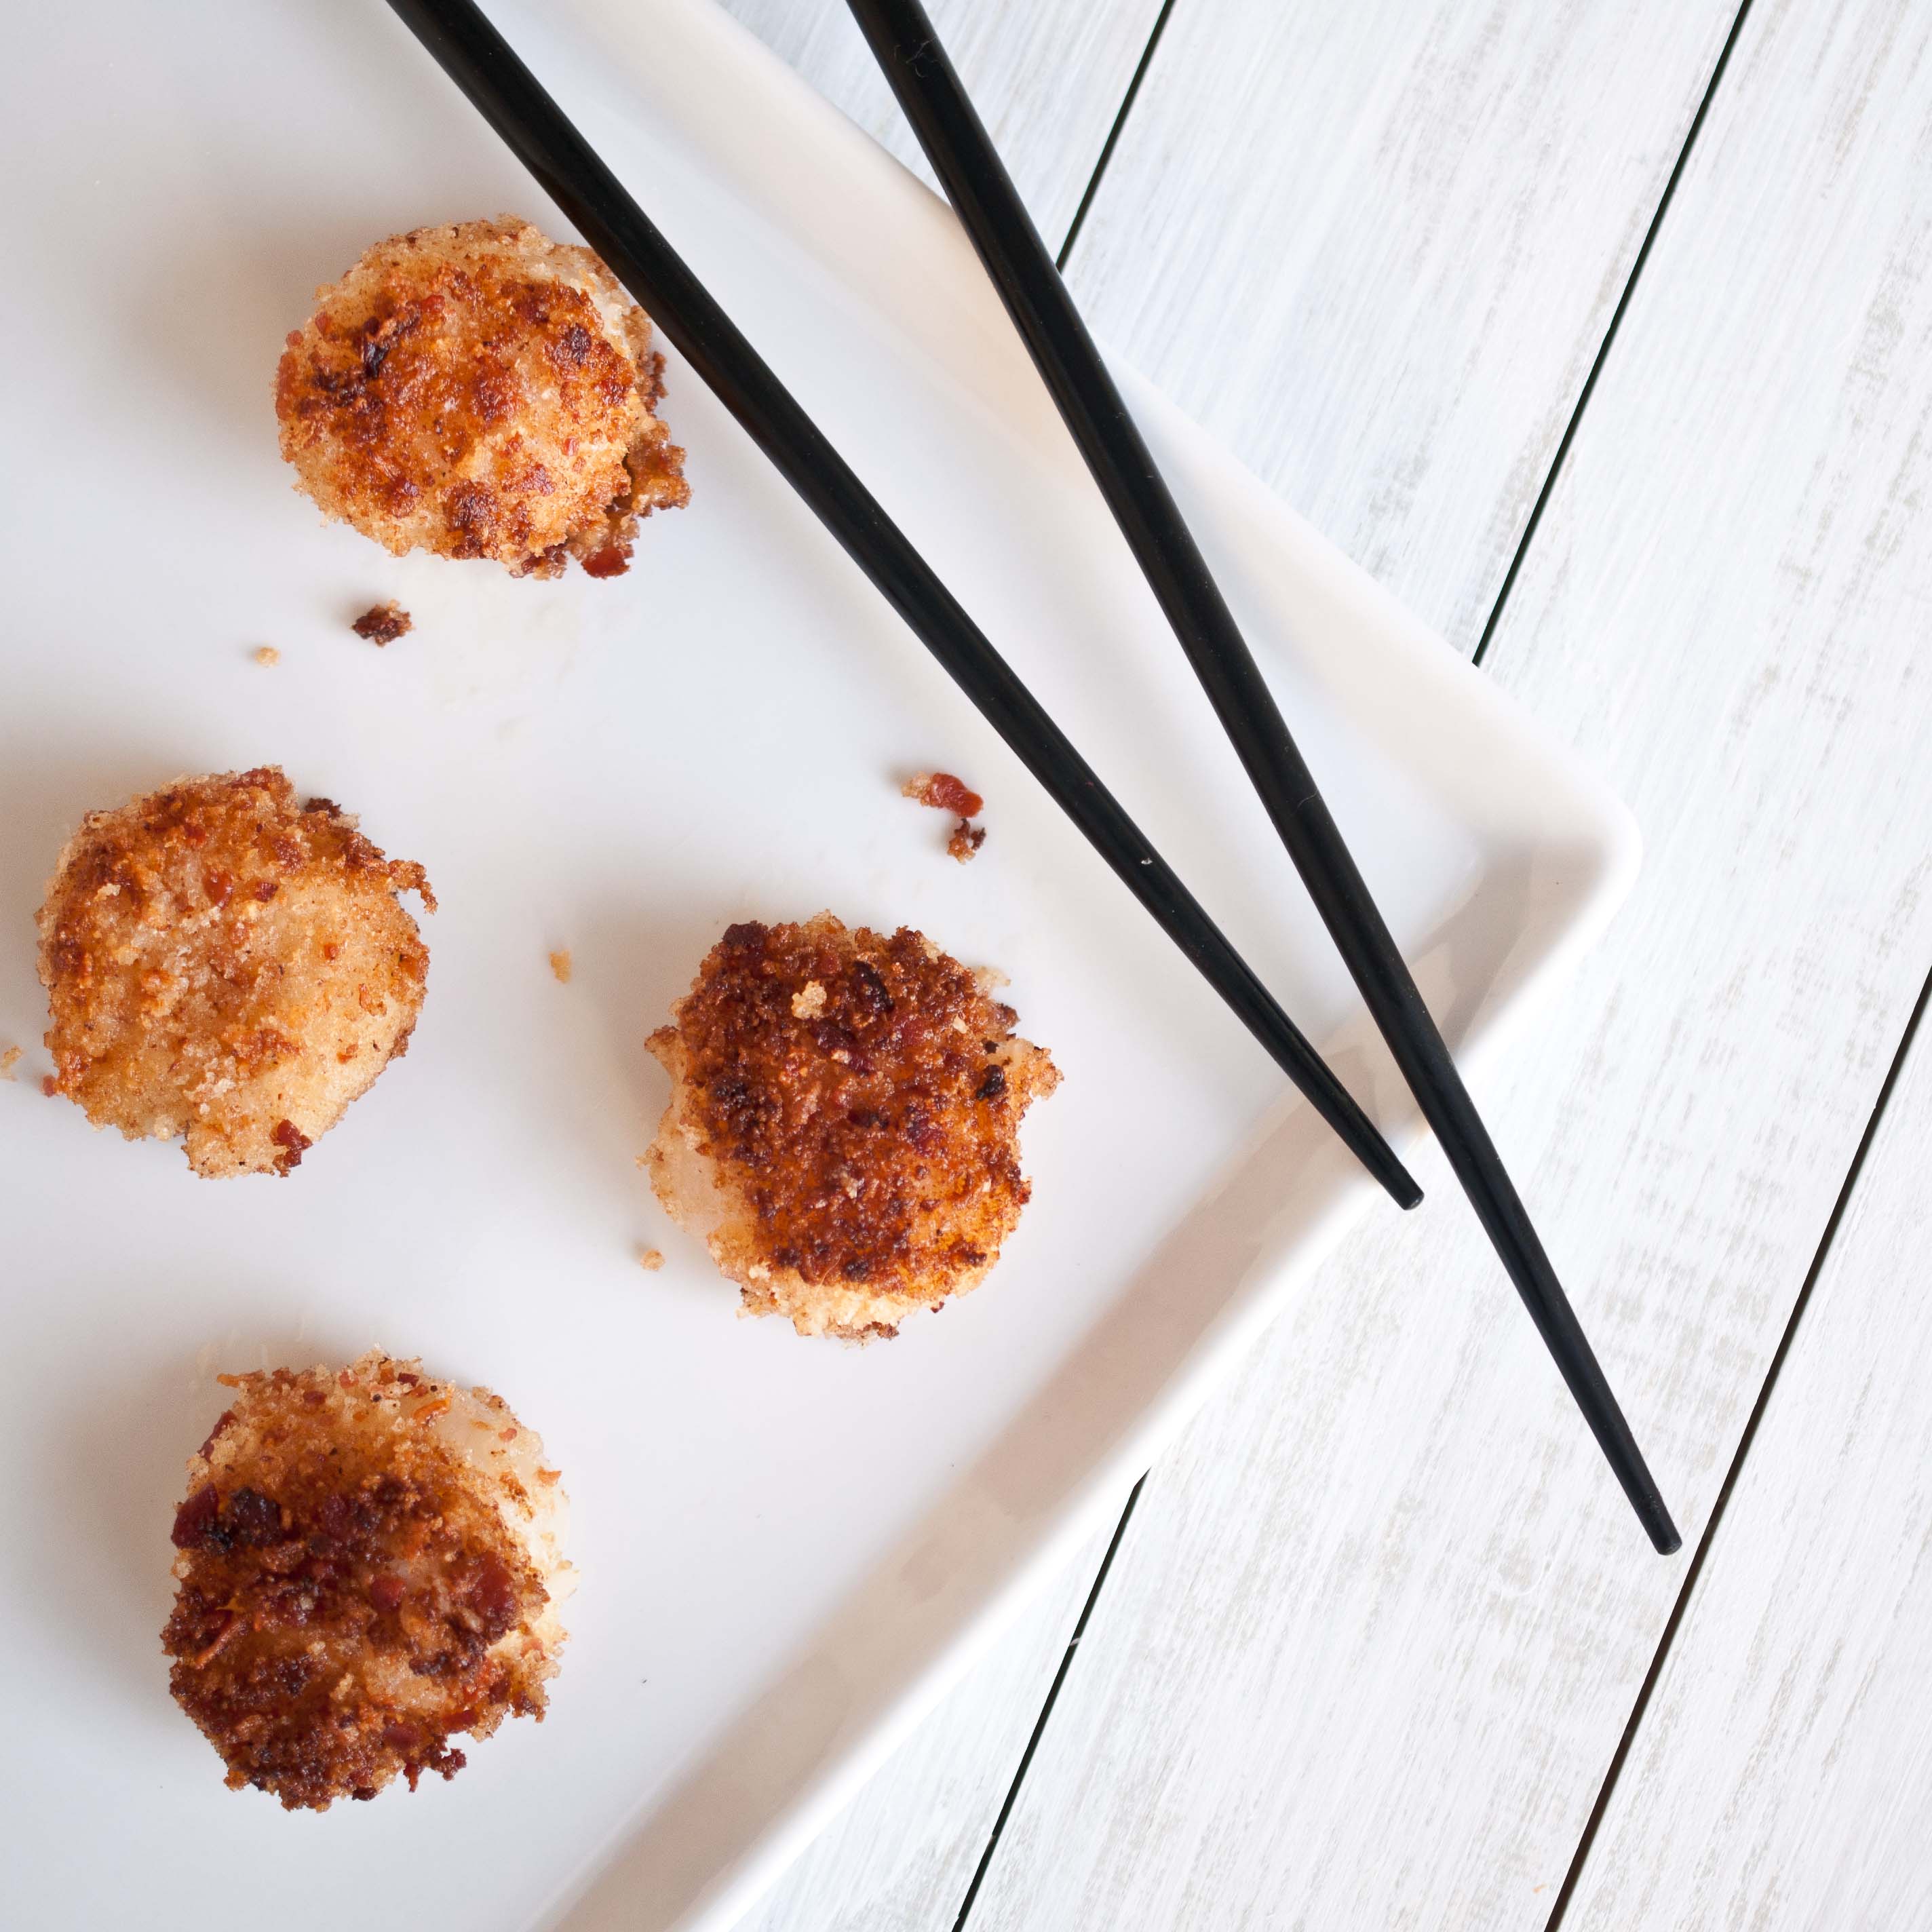
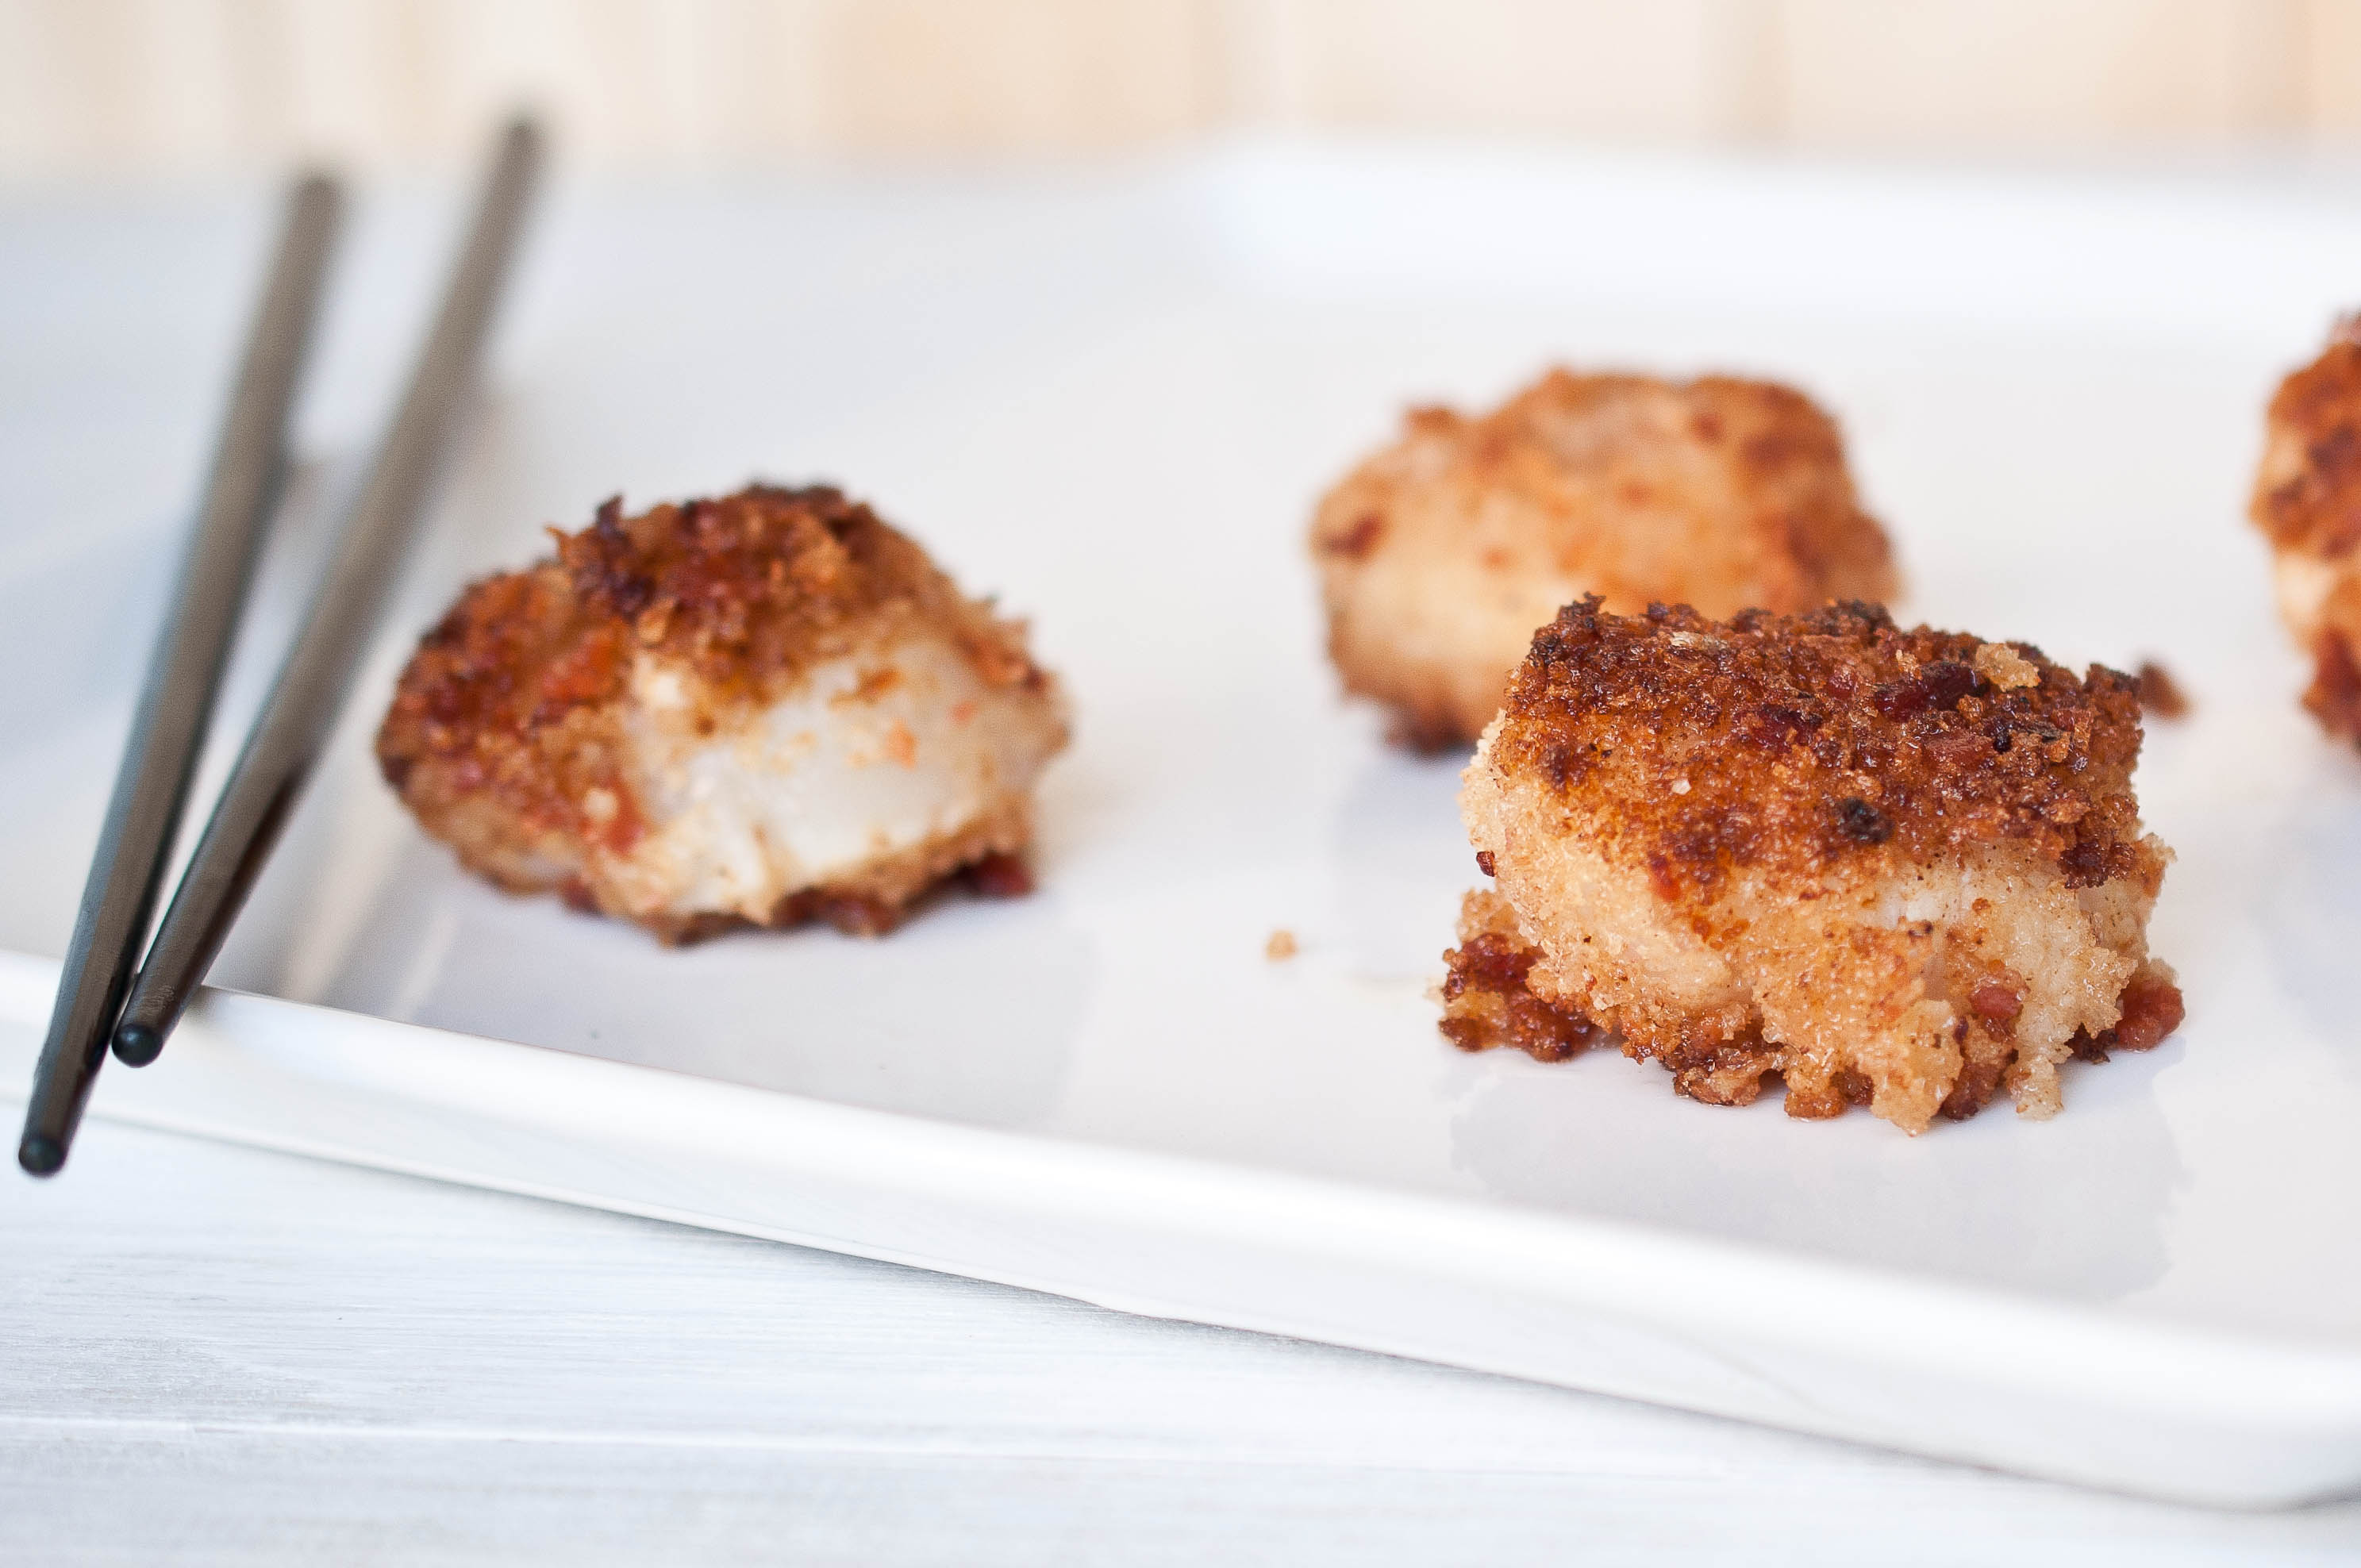
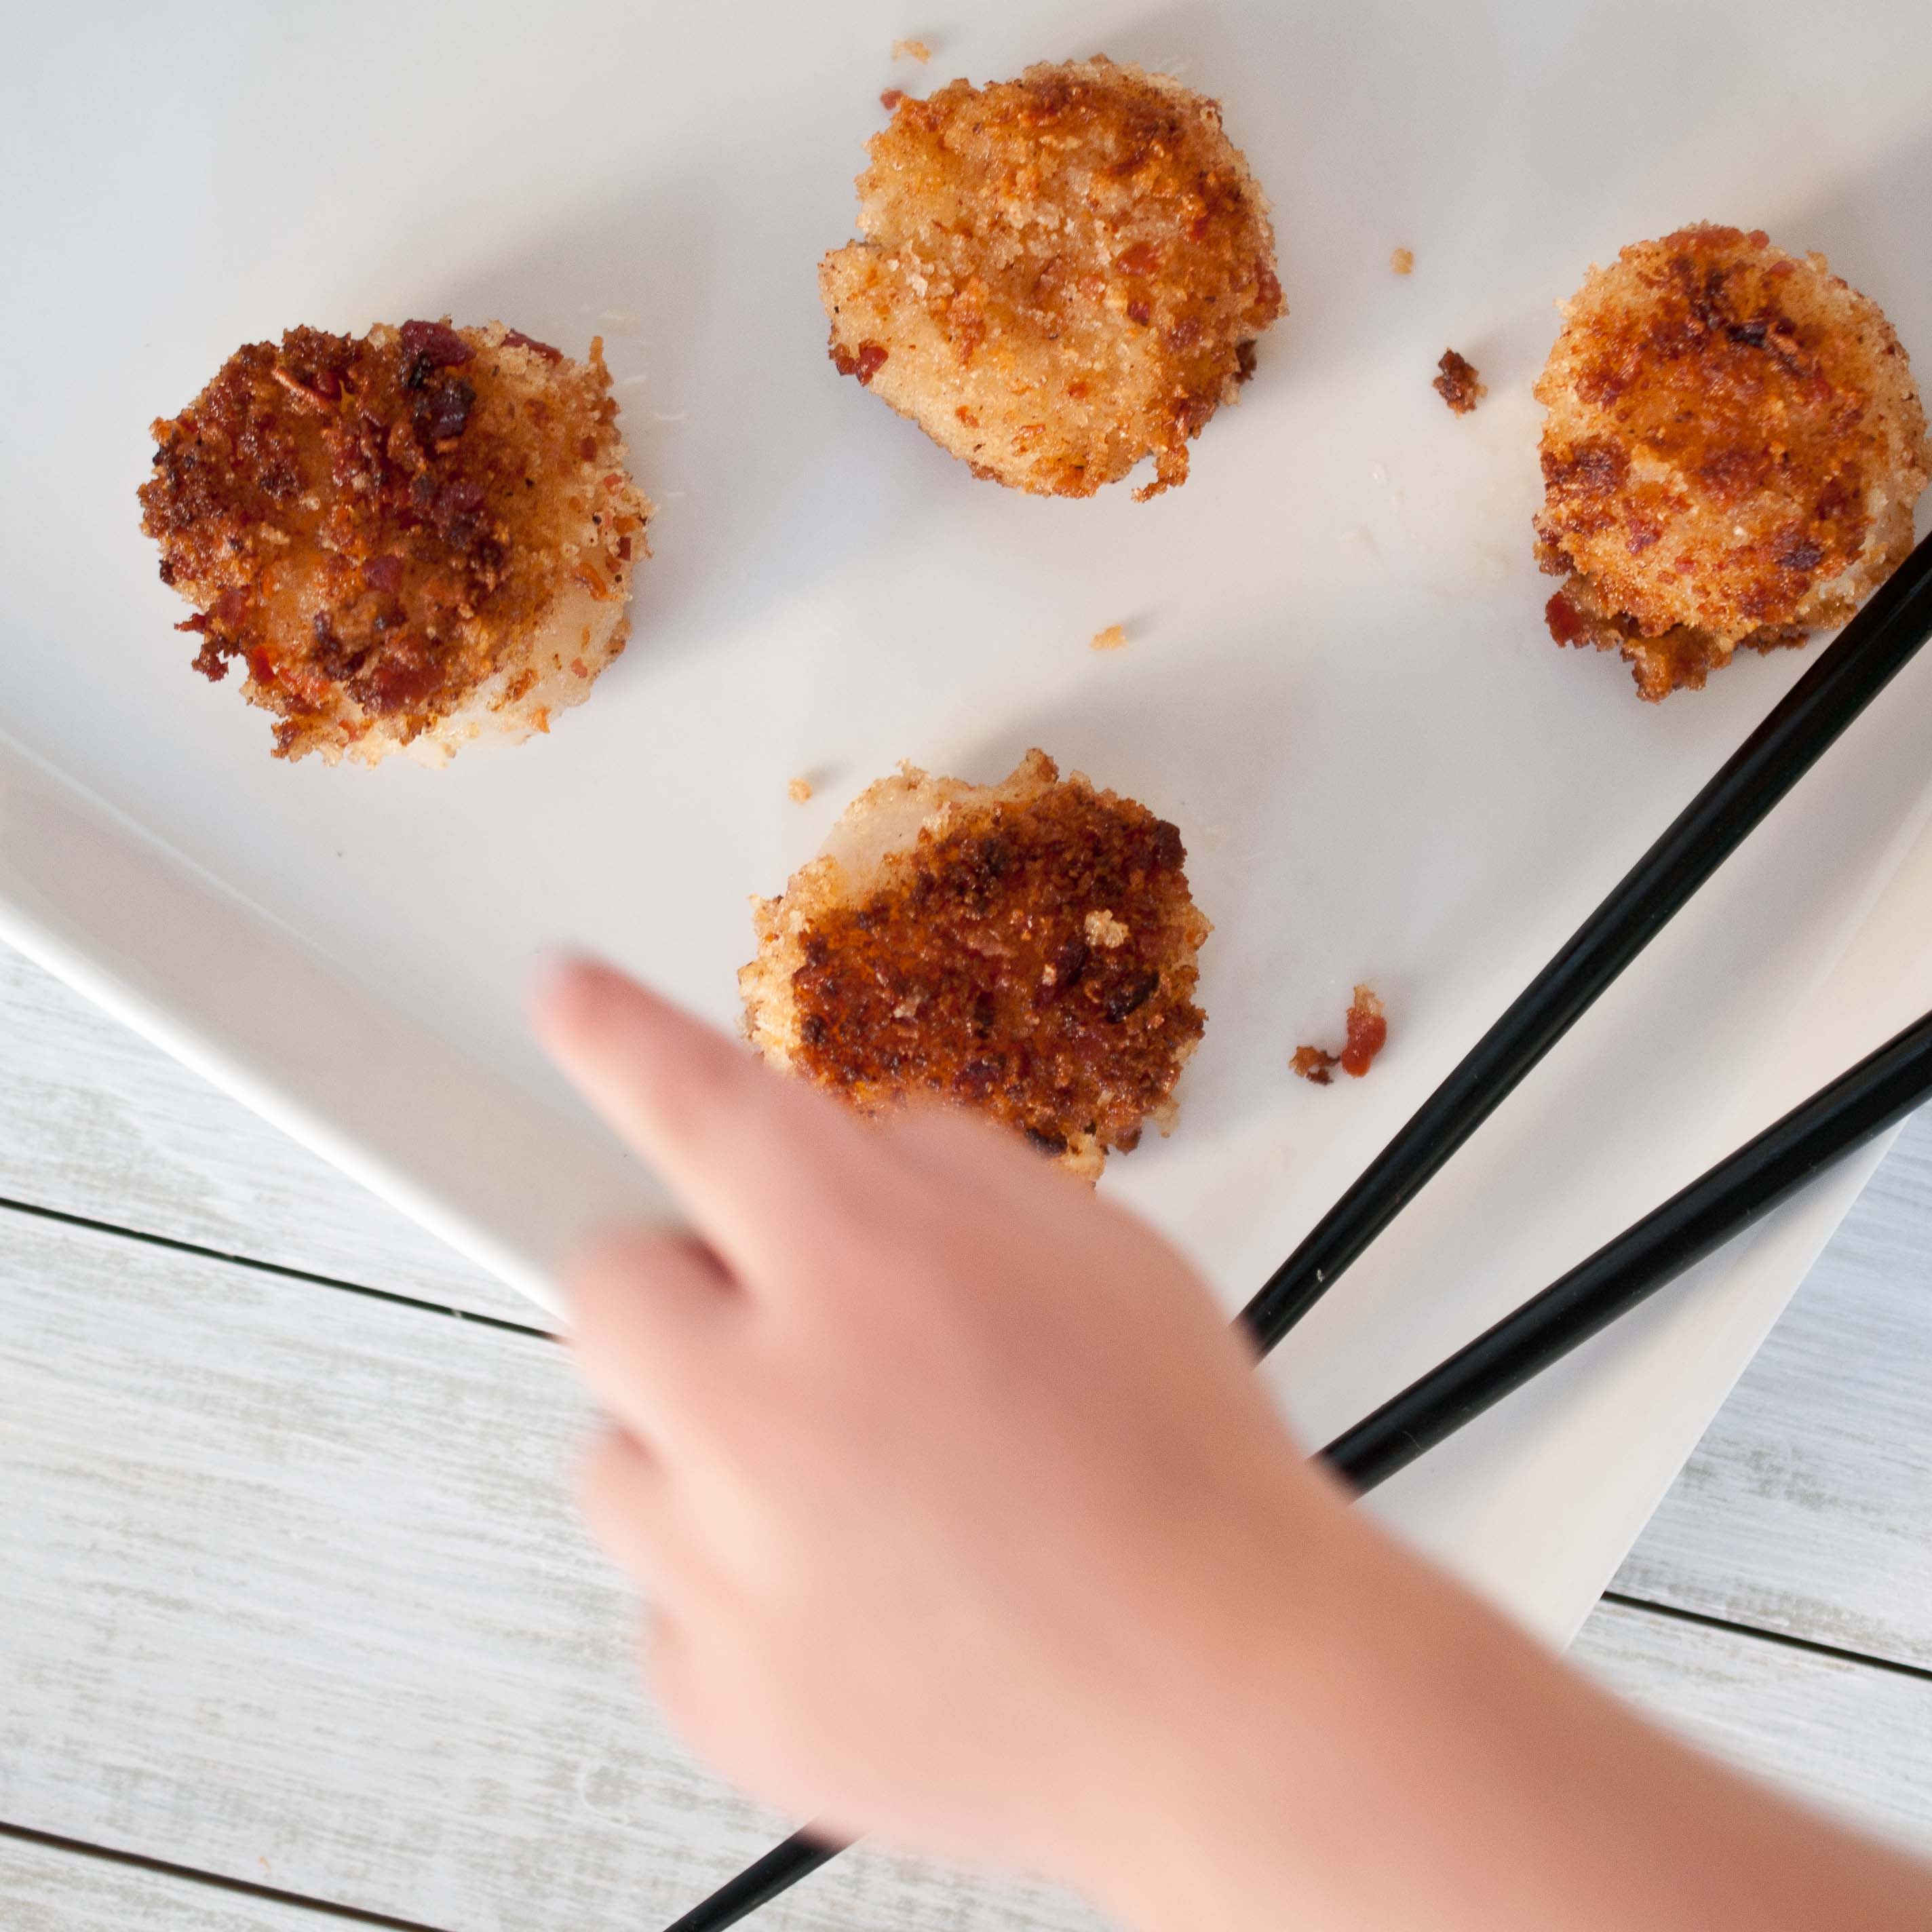
Bacon wrapped scallops sound like such a great idea, don’t they? Two fabulously delicious meats teaming up for one incredible bite. There’s an issue. A huge, unavoidable, technical glitch: the cooking times. Like most great loves lost, the deal breaking fundamental flaw is timing. Bacon takes somewhere around 3 times as long to cook as scallops, giving you two options: Hideously dry, overcooked scallops or semi-raw undercooked bacon. Yum, appetizing.
If you really want to fly in the face of Kosher and wrap your shellfish with pork, you have two really great options:
Wrap your scallops in prosciutto, like I do here, only needing attention on the scallops cooking time since proscuitto can be served any where from raw to cripsy,
or
Bread your scallops with crushed bacon and Panko, which I do below.
Either way, pork and scallops are harmoniously reunited. I knew those two crazy kids would work things out.
Bacon & Panko Crusted Scallops
4 strips of bacon, cooked
1/3 cup panko
8 large scallops
1/4 cup flour
1/4 cup milk
2 eggs
1/2 tsp salt
3 tbs canola oil
Roughly chop the bacon and add to a food processor along with the Panko, pulse until well combined and the bacon is reduced to crumbs, remove from food processor and add to a bowl.
Add the flour to a plate.
Add the milk, eggs and salt to a bowl and beat to combine.
Dry the scallops very well and dredge in the flour, knocking off any excess, dip in the milk/egg mixture and then into the Panko/bacon bowl, coating well. Place in the refridgerator for ten minutes to allow the coating to stick.
Heat oil in a skillet over medium-high heat. Cook scallops on both sides until golden brown, about 2 minutes per side, taking care not to over crowd the pan.
Forcing someone to say "I Love You" is about as meaningful as buying your own Grammy on eBay and pretending you actually won. The entitlement and expectation take all of the romance out of it. In just the same way that the show The Biggest Loser has had more successful marriages than The Bachelor series has, some things just cant be forced.
My husband and I did away with giving into the societal expectation years ago, much preferring to go out to dinner on nights that don’t include 2 hour waits and $65 pre fixe menus. He’s romantic in the little ways, negating my need for Valentines day pageantry. He will "borrow"my car in order to take it to get washed and the oil changed. He’ll get up with Tater on a Saturday and let me sleep in. When I’ve had a hard day he’ll do the dishes, giving me time to play blocks with Tater instead of spend what little time I have after work in the kitchen.
Now that I have a daughter, the focus of Valentines day is more fun and childish, more of the cartoon that it has become, and I like it that way. I buy Tater a bag of Valentines Day toys, and write her a card about how much I love her. I look forward to helping with her elementary school Valentines Days, the decorated shoe box receptacles, the paper cards, the drama of who wrote "XOXO" and who just signed their names. The sorting out of conversation hearts according to what is ok to give the boys and what is not. Because, everyone who has been a 3rd grader knows that slipping candy with messages on them into paper envelops is a big deal. And when you are required to give one to everyone in the class, even the boys you can’t stand and the boys you just pretend like you can’t stand, everyone know that you NEVER give a "Kiss Me" heart to a boy! Seriously, tragedy would in sue. Because you will also be reading every single heart that is the envelopes you got from the boys with the secret hopes that the boy who sits behind you didn’t just give you the "Nice Day" heart but intentionally slipped the "Be Mine" candy into the envelope with your name on it. In 3rd grade, risking possible social, school yard torture via teasing to let the little girl who sits in front of you know you like her is so romantic.
When you grow up, and have kids and a house and a job, romance is different. It’s the consideration that tends to wain as we grow comfortable with each other. Romance is that person who has woken up next to you for years actually seeing you. As special and important and desireable. It’s someone feeling lucky to be the one who wakes up in your bed, and eat the food you make and parent along side you.
Romance isn’t feeling required to bring home red flowers on the second week February, it’s running to the store late at night for flour because we’re out your wife is behind on blog posts.
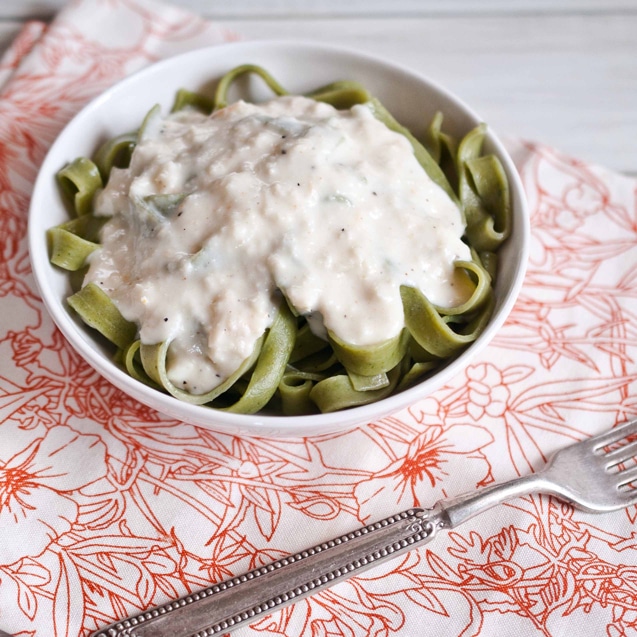
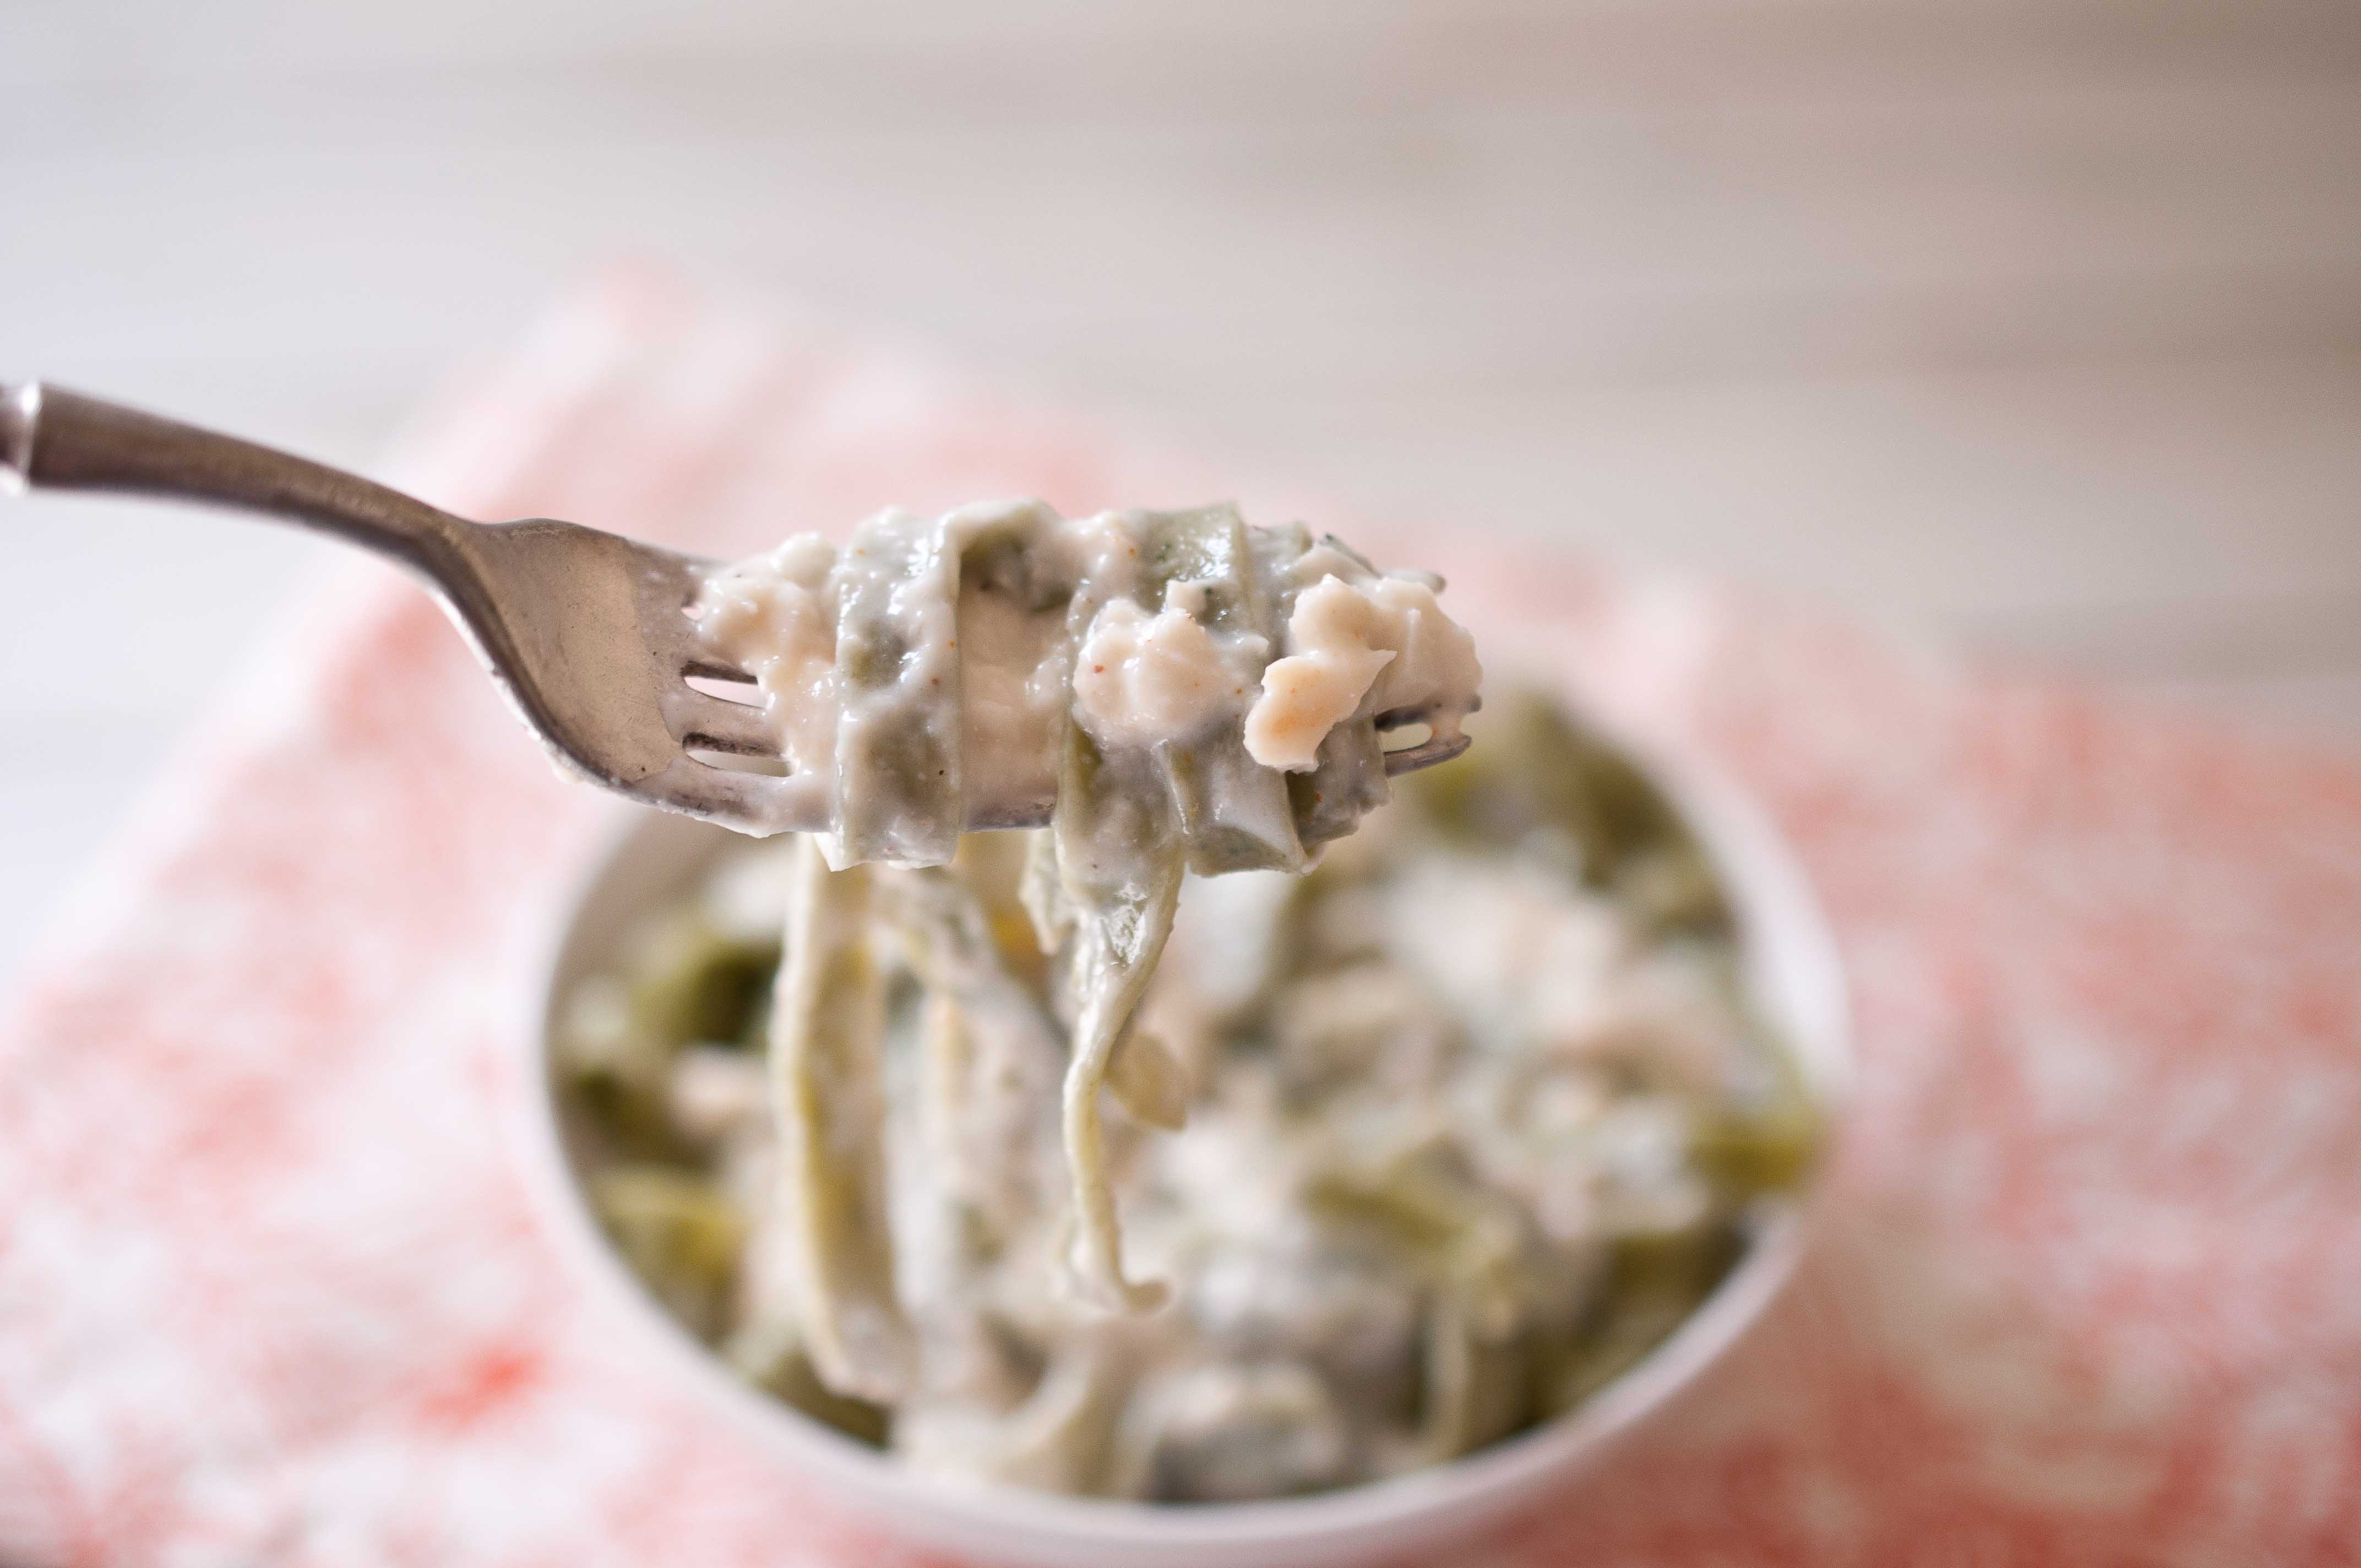
Even though Valentines day is in the middle of the week this year, and like me, you may have about 20 minutes between the time you get home from work and the time your family is expecting to be fed, this dish takes about that much time. But it feels special. Crab Alfredo in 15 minutes.
Crab Alfredo
3 tbs butter
3 large cloves of garlic, minced
1 tbs, plus 2 tsp flour
1/2 cup whole milk
1/2 cup heavy cream
1/2 cup parmesan cheese
1/2 tsp lemon juice
Pinch Cayenne pepper
6 oz crab meat, drained well
salt and pepper to taste
Pasta for serving
(makes two large or four small servings)
Cook pasta according to package directions.
In a skillet over medium/high heat, melt the butter. Add the garlic and stir, allowing to cook for about 30 seconds. Add the flour and whisk until well combined with the butter, don’t allow to brown. Add the milk and cream and stir to combine. Add the lemon juice, cayenne and cheese, cooking until the cheese has melted. Add the crab meat, stir until the crab is warmed up and remove from heat. Salt and pepper to taste. If sauce is too thick, add milk about 1 tbs at a time to thin.
Do you remember when you were a kid and staying home sick had sort of a romantic, charming allure? Your friends at school would wonder where you were. Maybe there would be rumors of your overall declining health and that you passed out in 31 Flavors the night before.
You would stay home, indulge in as much sleep as you wanted. Watch TV in your jammies, eat ice cream.
You had no idea that when you grew up, that would be called "Vacation."
When you have a baby, there are no such thing as sick days. Your kids pay absolutely no attention to that note your doctor gave you saying you need to rest. Those little Tyrants want sippy cups filled at full capacity, grapes cut into quarters, constant supervision of their destructive tendencies…*Sigh* It’s a good thing we are genetically inclined to adore them or they would be the worst boss ever.
BUT, if you do get sick, make sure and give your immune system the boost it needs. First, and I hate to break it to you after all that Ice Cream talk: Sugar lowers your natural immunities. Stay away it for the first few days.
Garlic, ginger and lemongrass are all known fighters of the everyday cold and flu. I ate disgusting amounts of them the winter I was pregnant with Tater, and I avoided getting sick for the first winter in about 6 years.
Plus, the kick of thai chili in this soup will remind you that you are alive and strong, empty sippy cups and whole grapes beware.
Thai Coconut Shrimp Soup
2 tbs Smart Balance Light, butter or margarine
2 tsp chopped thai red chili, seeds removed
6 cloves of garlic, minced
2 tbs fresh Lemongrass, chopped
1 tbs thai Galangal ginger, peeled, minced
5 cups, fat free, low sodium chicken broth
2 cans light coconut milk
3 tbs fish sauce
2 tsp black pepper
1 tsp salt
1 tbs lemon juice
8 large basil leaves, chopped into ribbons
16 large shrimp, raw, peeled and deveined, tails off (can substitute 1 cup, chopped raw chicken)
(Makes 4 Servings)
In a large pot over medium-high heat, melt the margarine. Add the chili and the lemon grass and cook until soft, about 3 minutes. Add the garlic and the ginger. Stir frequently until you can smell the garlic, about 30 seconds. Add the chicken broth and coconut milk and allow to simmer for 10 minutes.
Add the remaining ingredients and cook until the shrimp is cooked through, about 5 minutes. Taste and adjust seasoning to your personal preference.
My very first giveaway is over. I wanna do it again. It was so fun to read all the comments and have brand new visitors to my blog. I just wish I had 141 more of those beautiful cheese domes to give away! But congratulations to Dee!
Now I am going to expect fancy cheese if I ever stop by your house.
And a big huge smooch and a Thank You to Ile De France for the fabulous prize.
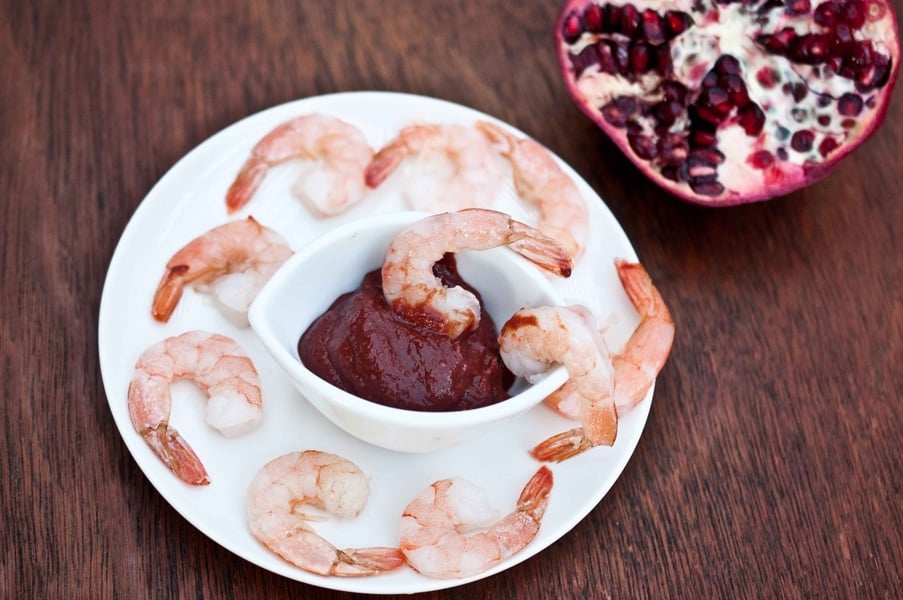
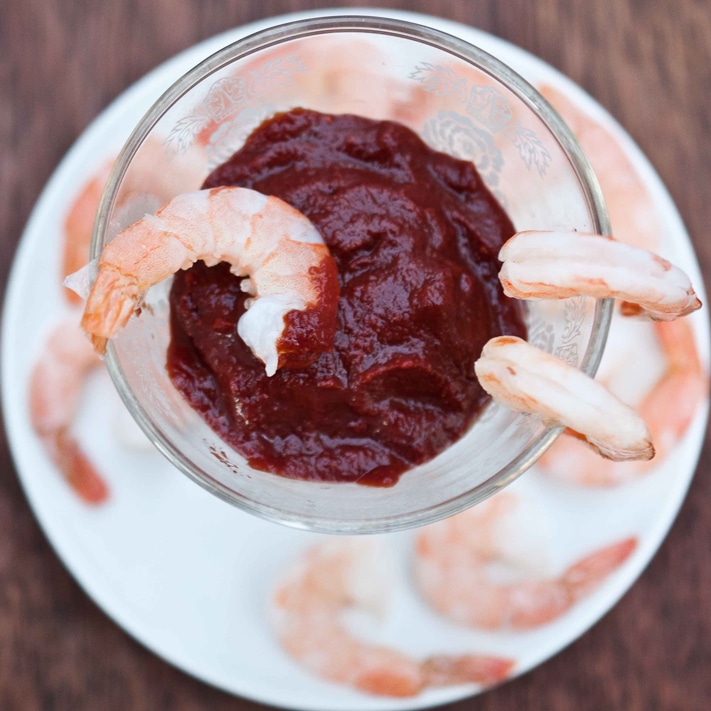
Here is another recipe for all that Holiday entertaining that you all will be doing. PACKED with good stuff like anti-oxidants and almost no fat. One of those treats that is actually fairly low in calories, gives you a dose of fruit and veggies AND makes you feel like you are spoiling yourself by eating a special treat. A way to indulge without added pounds.
Shrimp With Pomegranate Sriracha Cocktail Sauce
2/3 cup pomegranate seeds
2/3 cup tomato paste
1 tsp Sriracha
2 tsp cream style horseradish
1 tbs worcestershire sauce
2 large cloves of garlic, minces (about 1 tbs)
1 tsp lemon juice
24 large shrimp, shelled & deveined, cooked & cooled, tails on
in a food processor, combine the first 7 ingredients. Process utill completely combined and smooth. Push sauce through a fine mesh strainer to remove the pomegranate seeds.
You always have fun when you’re eating crab cakes. Actual fact. But, here is the thing about crab cakes: Lots of work.
I made Wolfgang Pucks recipe once and it took me about an hour. They were really incredible, so if you ever get your hands on some really amazing, fresh, never touched a can, right out of the sea- kinda crabs, that would be a worthy recipe to slave over.
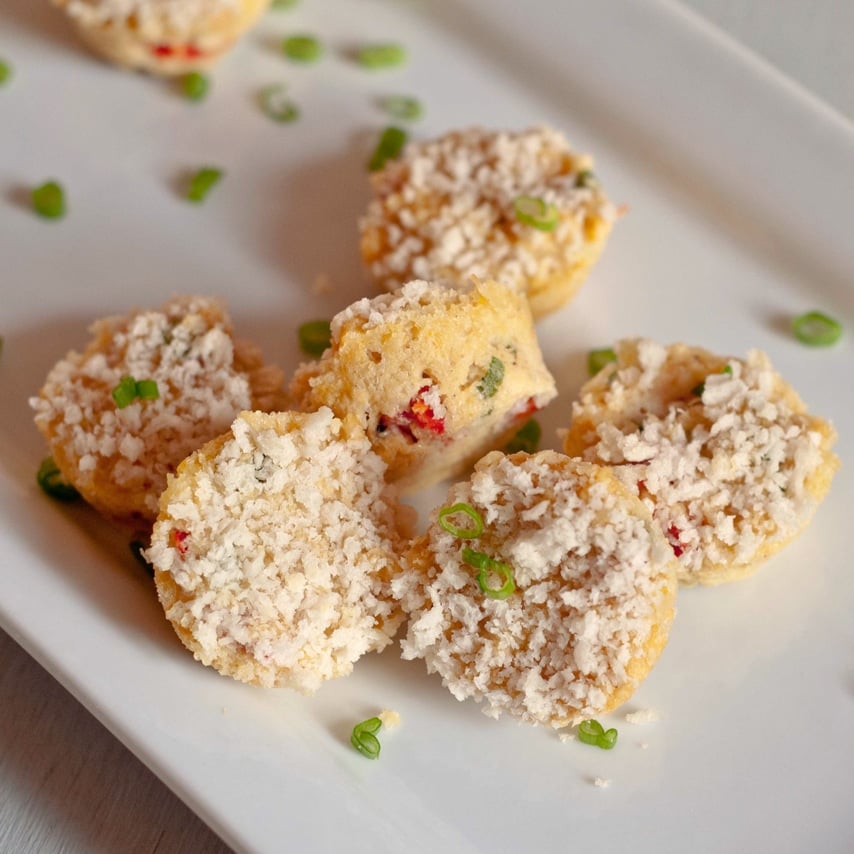
This time of the year, food is more about the biggest shine for your time. You have about a zillion things to cook for right now: the holidays, your office party, your kids school gathering-that-we-legally-can’t-call-a-party party, AND family type people. Here you go: 15 minute crab cakes. Looks super fancy, like you spent that hour I spent with those other crab cakes, craveably addictive, AND 15 active minutes, then bake.
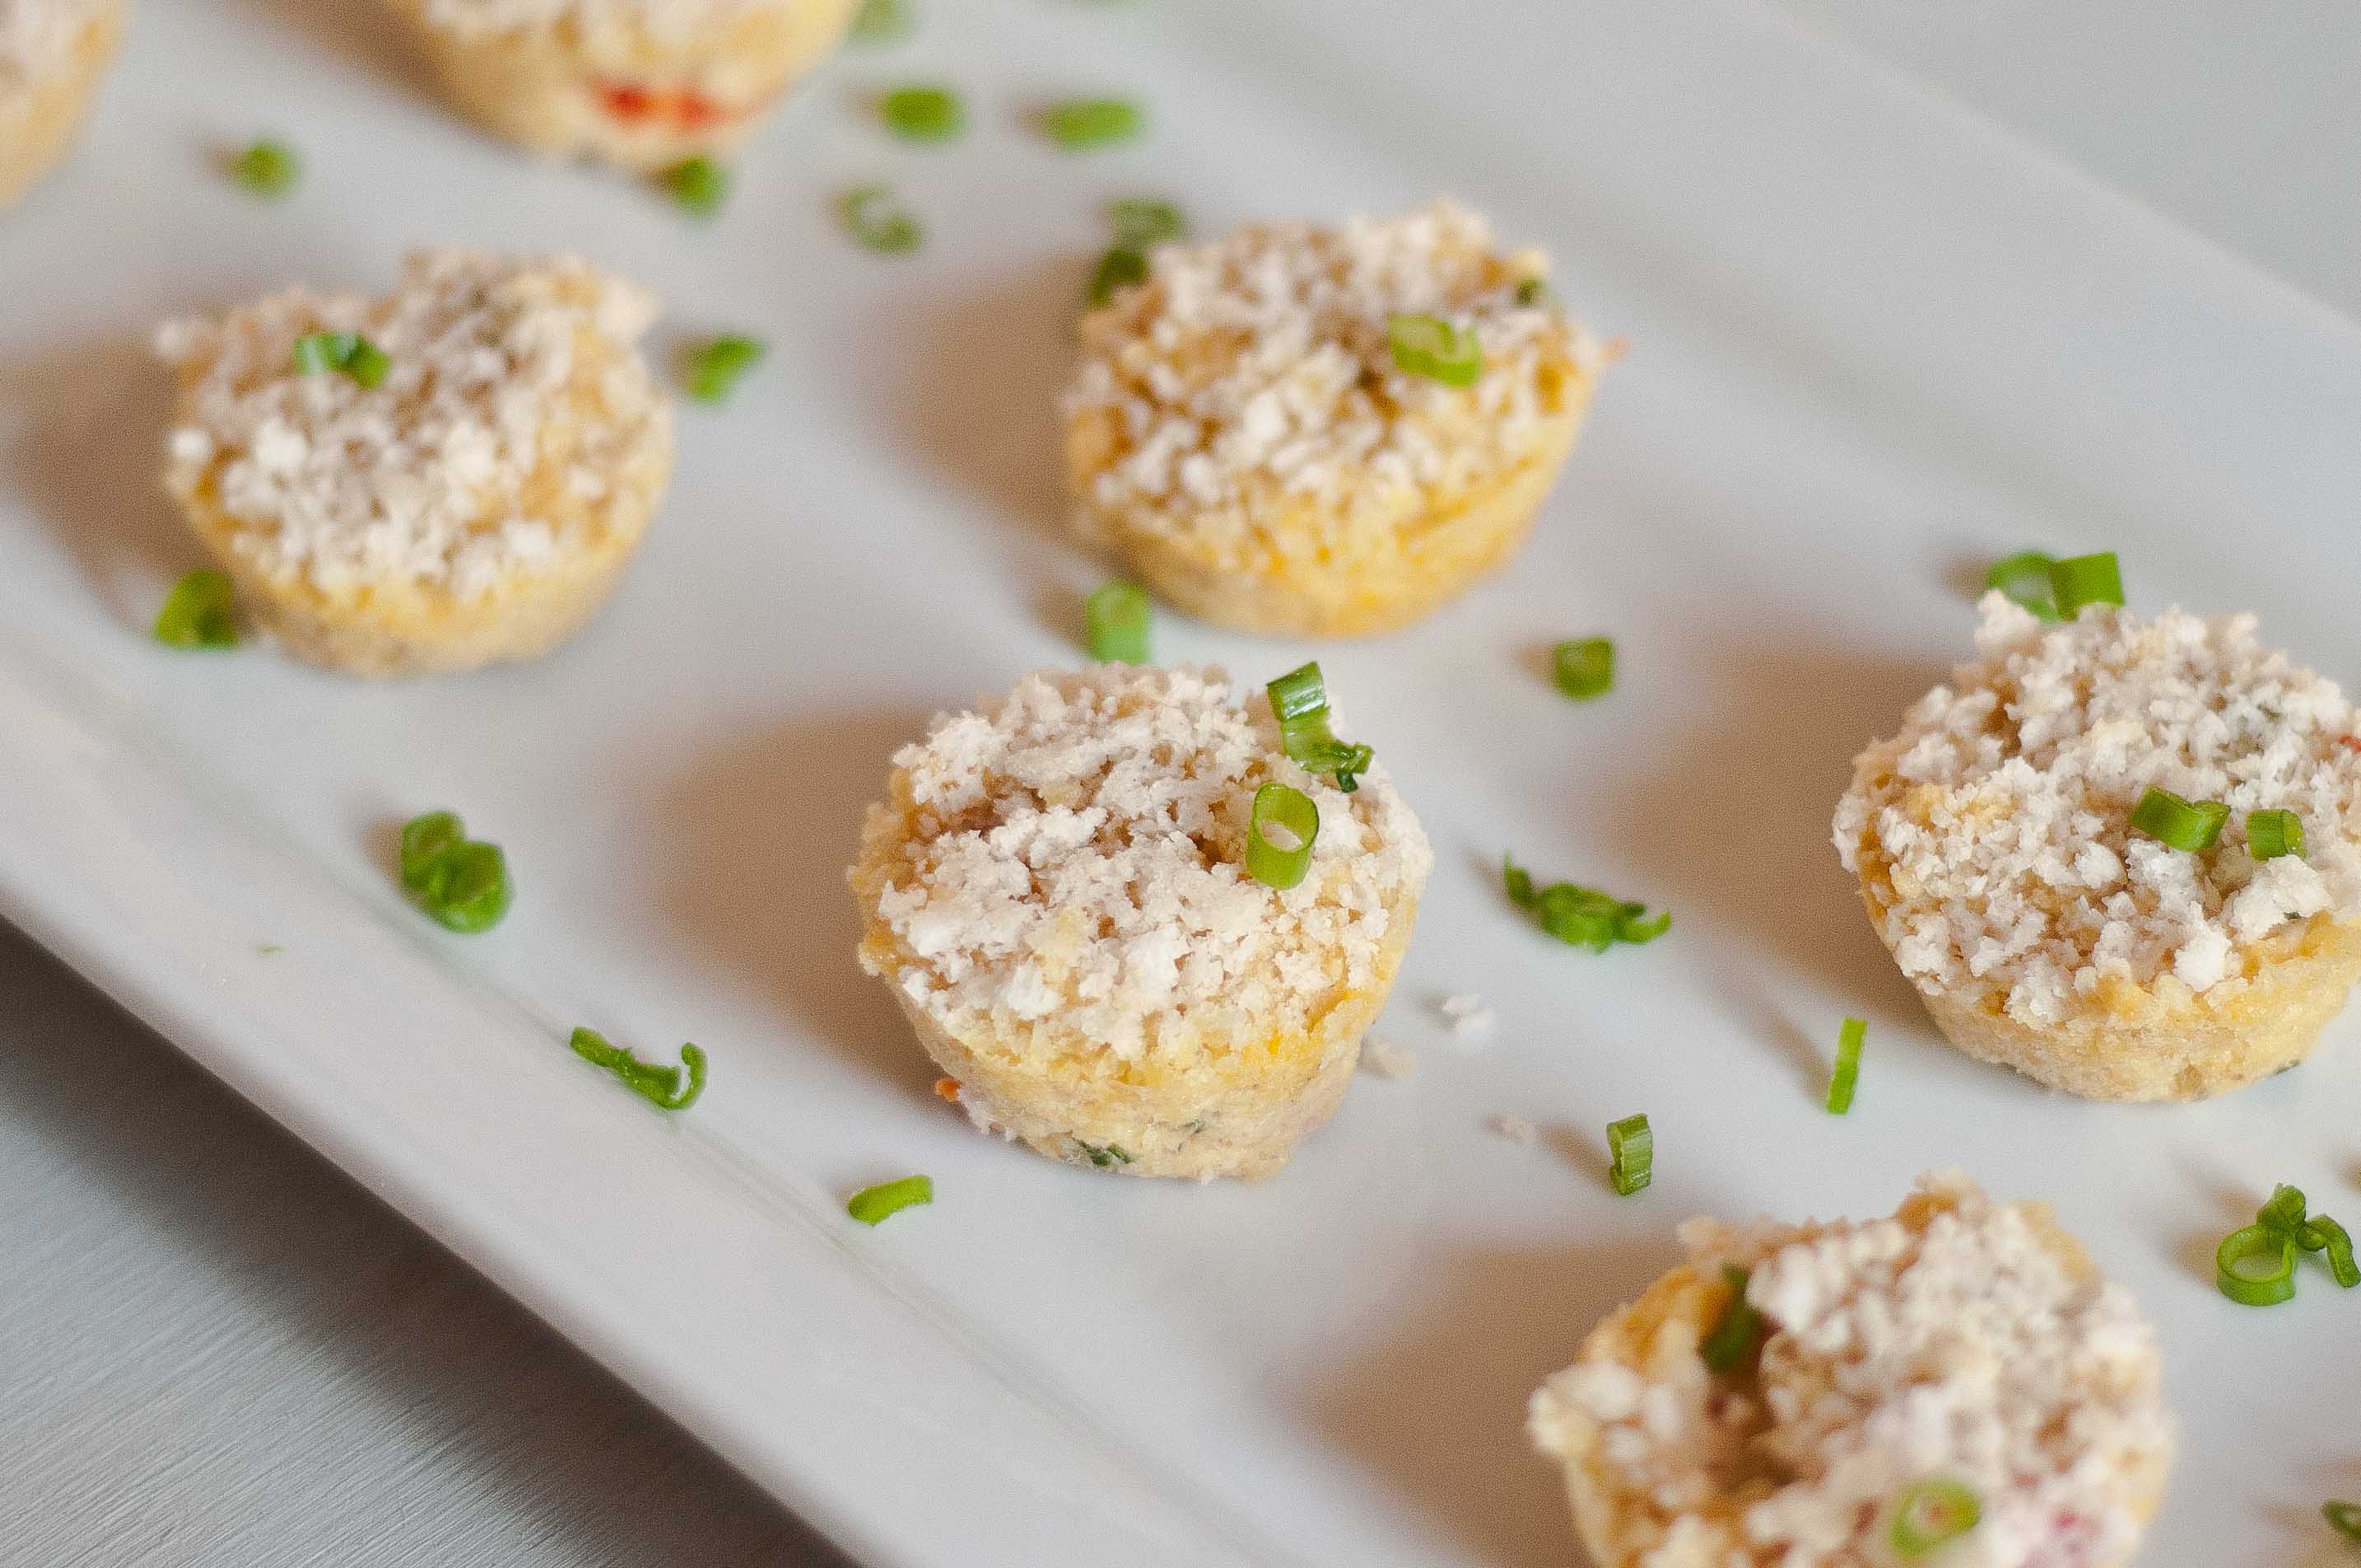
Crab Cake Mini Muffins
3 tbs cream cheese
2 eggs
1 tbs lemon juice
1 tsp Dijon mustard
1/2 tsp hot pepper sauce (Tabasco, Tapatillo)
1/4 cup roasted red bell peppers, chopped
1/2 tsp Old Bay seasoning
½ tsp salt
1 tsp black pepper
½ tsp onion powder
1/2 tsp garlic powder
2 tbs green onions, chopped (more for garnish if desired)
1/2 cup Panko bread crumbs (plus ¼ cup for topping, divided)
¼ cup flour
6 oz lump crab meat, drained
Makes 16-18
Preheat oven to 350.
In the bowl of a stand mixer, beat the cream cheese until softened. While the mixer is on high, add the eggs, one at a time until well combined.
Reduce speed to medium and lemon juice, mustard, and hot pepper sauce, mix until combined.
Add the Old Bay, salt, pepper, onion powder, garlic powder, green onions and mix until combined.
Add ½ cup Panko and flour and mix until combined. Remove the bowl from the stand mixer and stir in the crabmeat with a wood spoon or spatula.
Very generously grease enough mini muffin tins to hold about 18 mini crab cakes.
Add the crab mixture to the wells of the mini muffin tins until just below the top. Sprinkle the top of each mini muffin with the remaining ¼ cup of Panko.
Bake at 350 for about 18-20 minutes
Questions that I think you might have:
If I don’t own a mini muffin pan, can I make this in a regular muffin pan?
I don’t recommend it. My guess is that by the time you get the inside cooked (about 30 minutes) the outside will be burnt and dry. But my other guess is that if you buy a mini muffin pan, you will use it all the time.
I like to dip things, What about a dipping sauce?
I like to dip things too. Easy dippin’ sauce, since I know you have a ton of other things to do: 1 cup sour cream, 1 tsp garlic powder, ¼ tsp smoked paprika, ¼ tsp hot pepper sauce. Adjust depending on taste, oh and throw some of those green onions on top.
I don’t like hot stuff, can I leave on out the pepper sauce?
They will be bland. But the small amount that is called for isn’t enough to make it spicy. They sell Tabasco in supper tiny bottles, and it lasts for about a million years in the fridge.
Take a second to like my Facebook Page to receive info about new post in your feed.
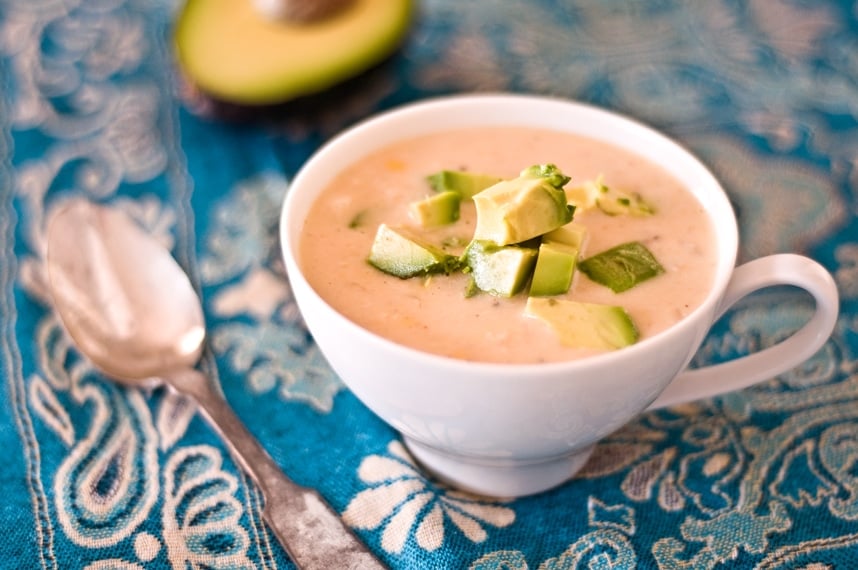
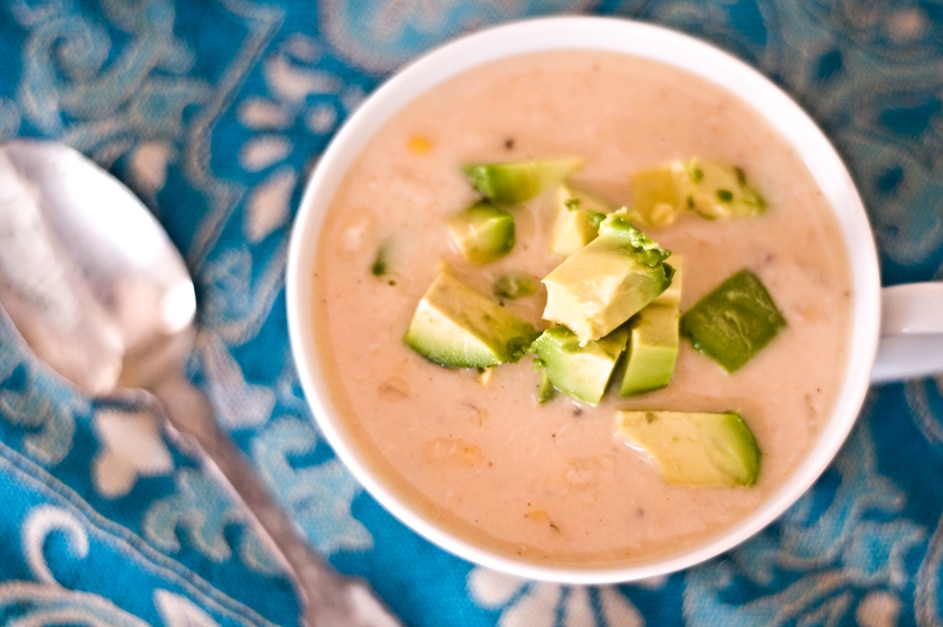
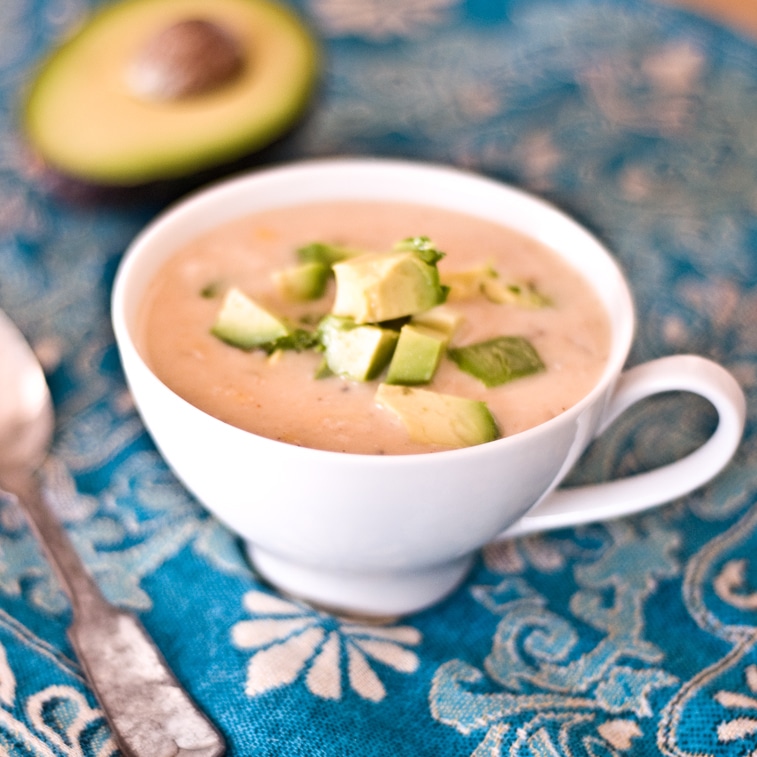
My favorite thing about fall is homemade soup. I love a soup that takes all day, it’s like an art. But, since I am a very busy working mom, as I assume quite a few of you are too, I also need a really delicious soup that I can make after work. I invented this soup because I adore clam chowder, but I’m not a huge fan of the clams that you buy at the grocery store. Crab, in all it’s delicious splendor, was a fine substitution. I added the avocados because I live Southern California, a very avocado heavy place. If you ever make it out west, make it a mission of yours to stop by a farmers market (we get to have them year round in these parts) and have one for yourself.
Avocado Crab Chowder
2 tbs butter
1/2 cup chopped onions
3 large cloves of garlic, minced
4 cups chicken broth
2 cups potatoes, peeled, chopped
1 cup corn kernels (I used Trader Joe’s Fire Roasted Corn Kernels)
1 tsp salt
1/2 tsp pepper
1 tsp Old Bay seasoning
1/2 tsp chili powder
3/4 cup heavy cream
1/2 tsp chili pepper sauce (Such as Tapatillo or Tabasco)
2 6oz cans crab meat (lump or claw meat if you can find it), drained
1/4 cup lemon juice
3 large avocados, chopped
In a large pot, melt the better over medium/high heat. Saute the onions until soft and translucent. Add the garlic and stir. Add the broth and bring to a boil. Add the potatoes and allow to boil until the potatoes are soft, about 20 minutes. Add the salt, pepper, Old Bay, and chili powder, stir to combine. Remove the soup from the heat. Using an immersion blender, puree until smooth, and then pour in the cream, stir to combine. Return to heat, add the corn, and allow to boil until thickened, stirring frequently,about 5 minutes. Add the chili pepper sauce, crab meat, and lemon juice and stir to combine. Adjust the seasonings to taste. Pour into serving bowls, garnish with avocado.
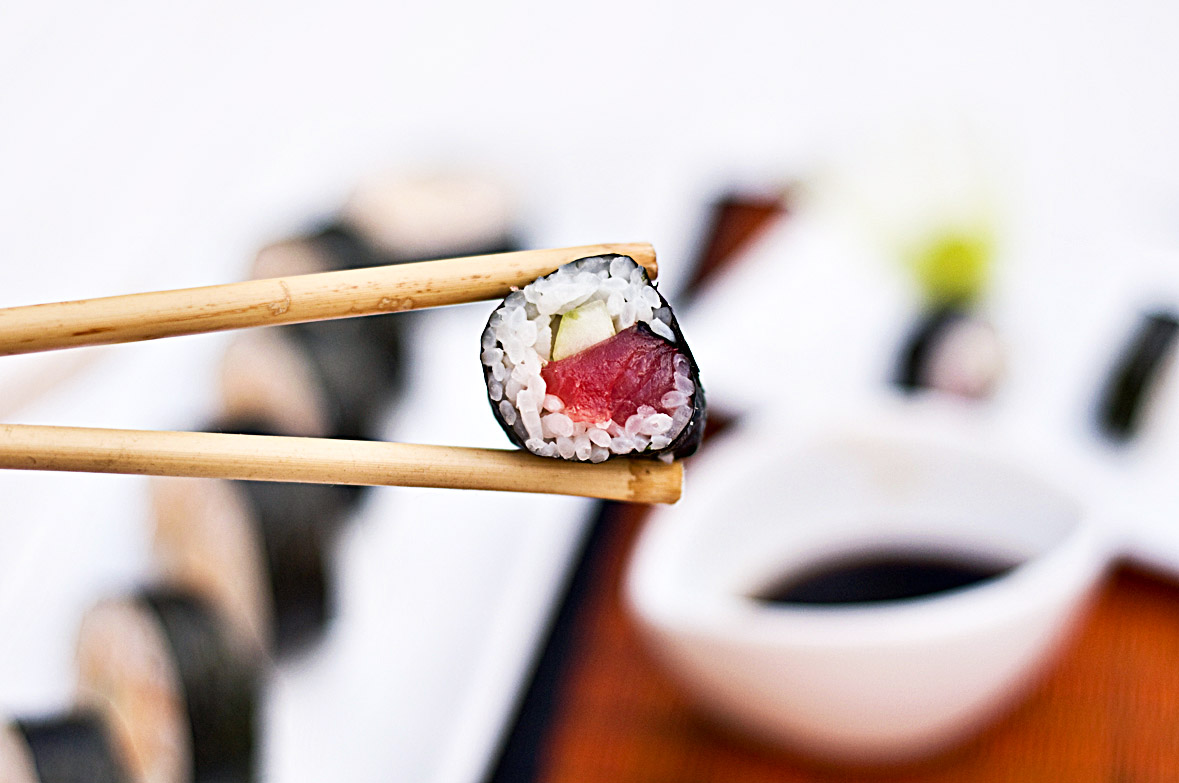
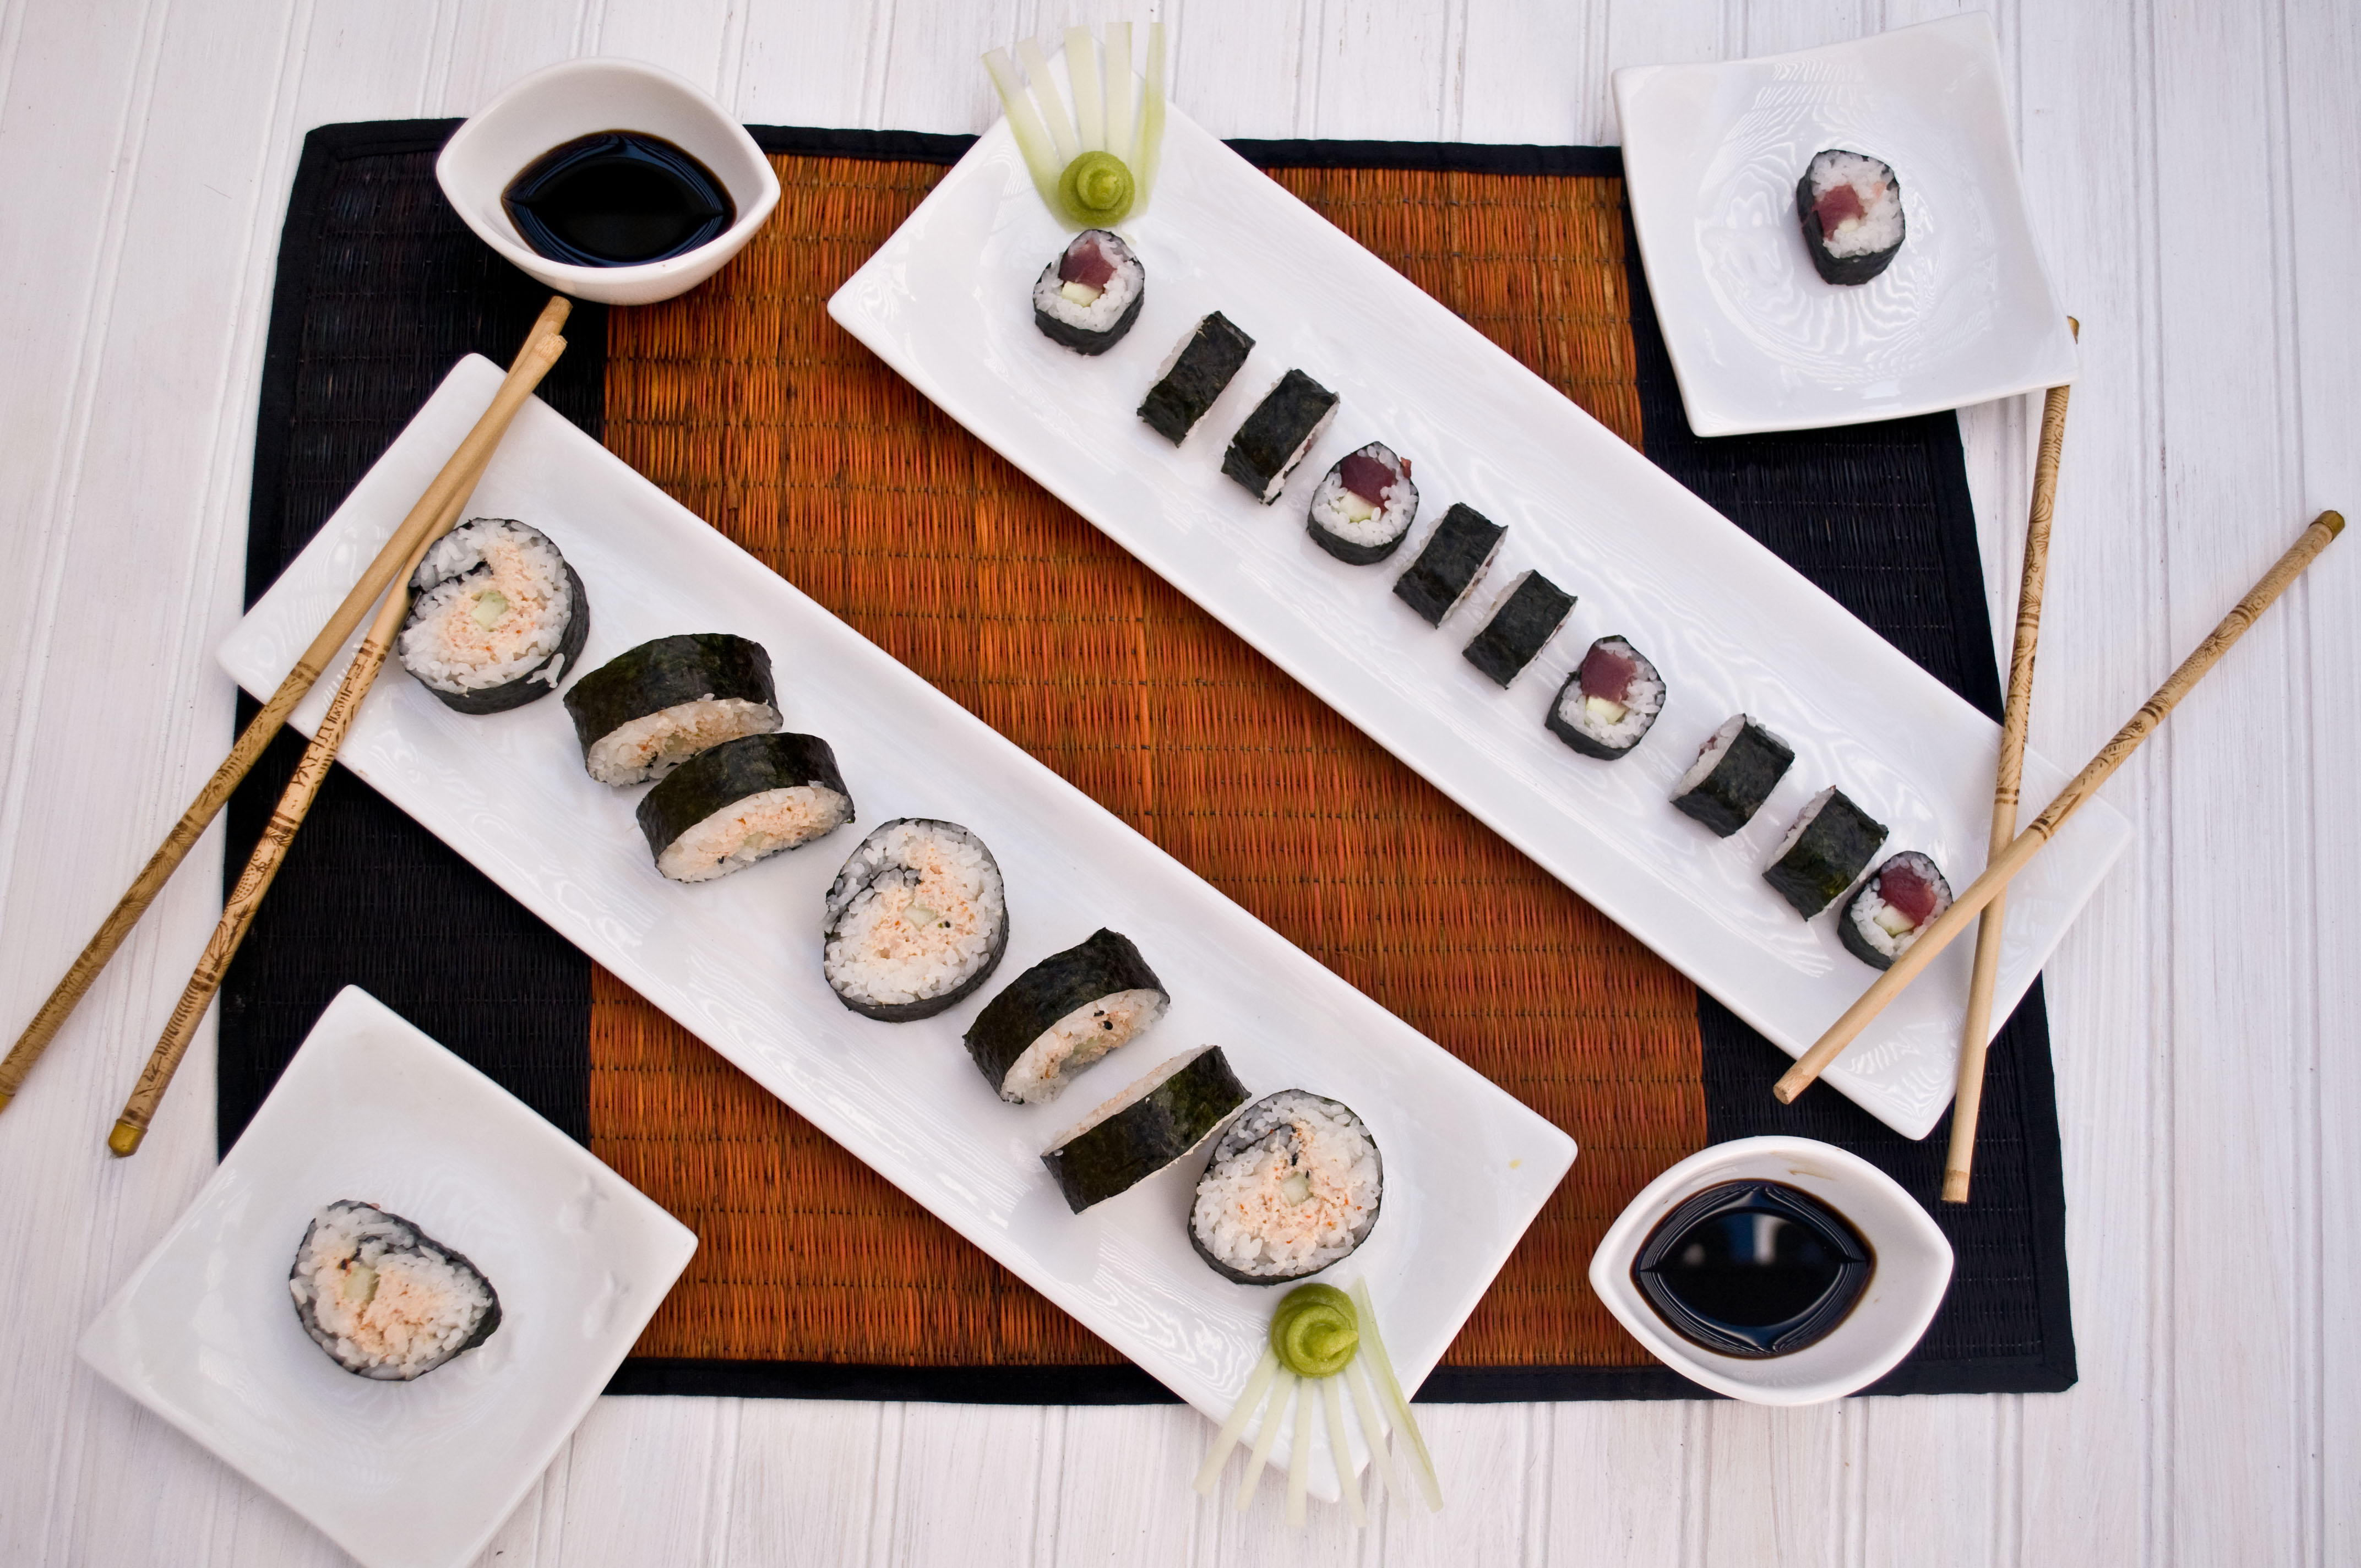
Sushi making is an art. A beautiful, delicious art. I’m not going to sit here and pretend that one little post will ever get anyone near the magic that happens behind a real sushi counter, but I WILL tell you that making a simple roll is easy enough to do at home. If you dare.
Make The Rice
Sushi rice isn’t like your every day rice and isn’t cooked the same way. The cooking method is different, and it is finished with a shot of sake (optional) and a vinegar dressing.
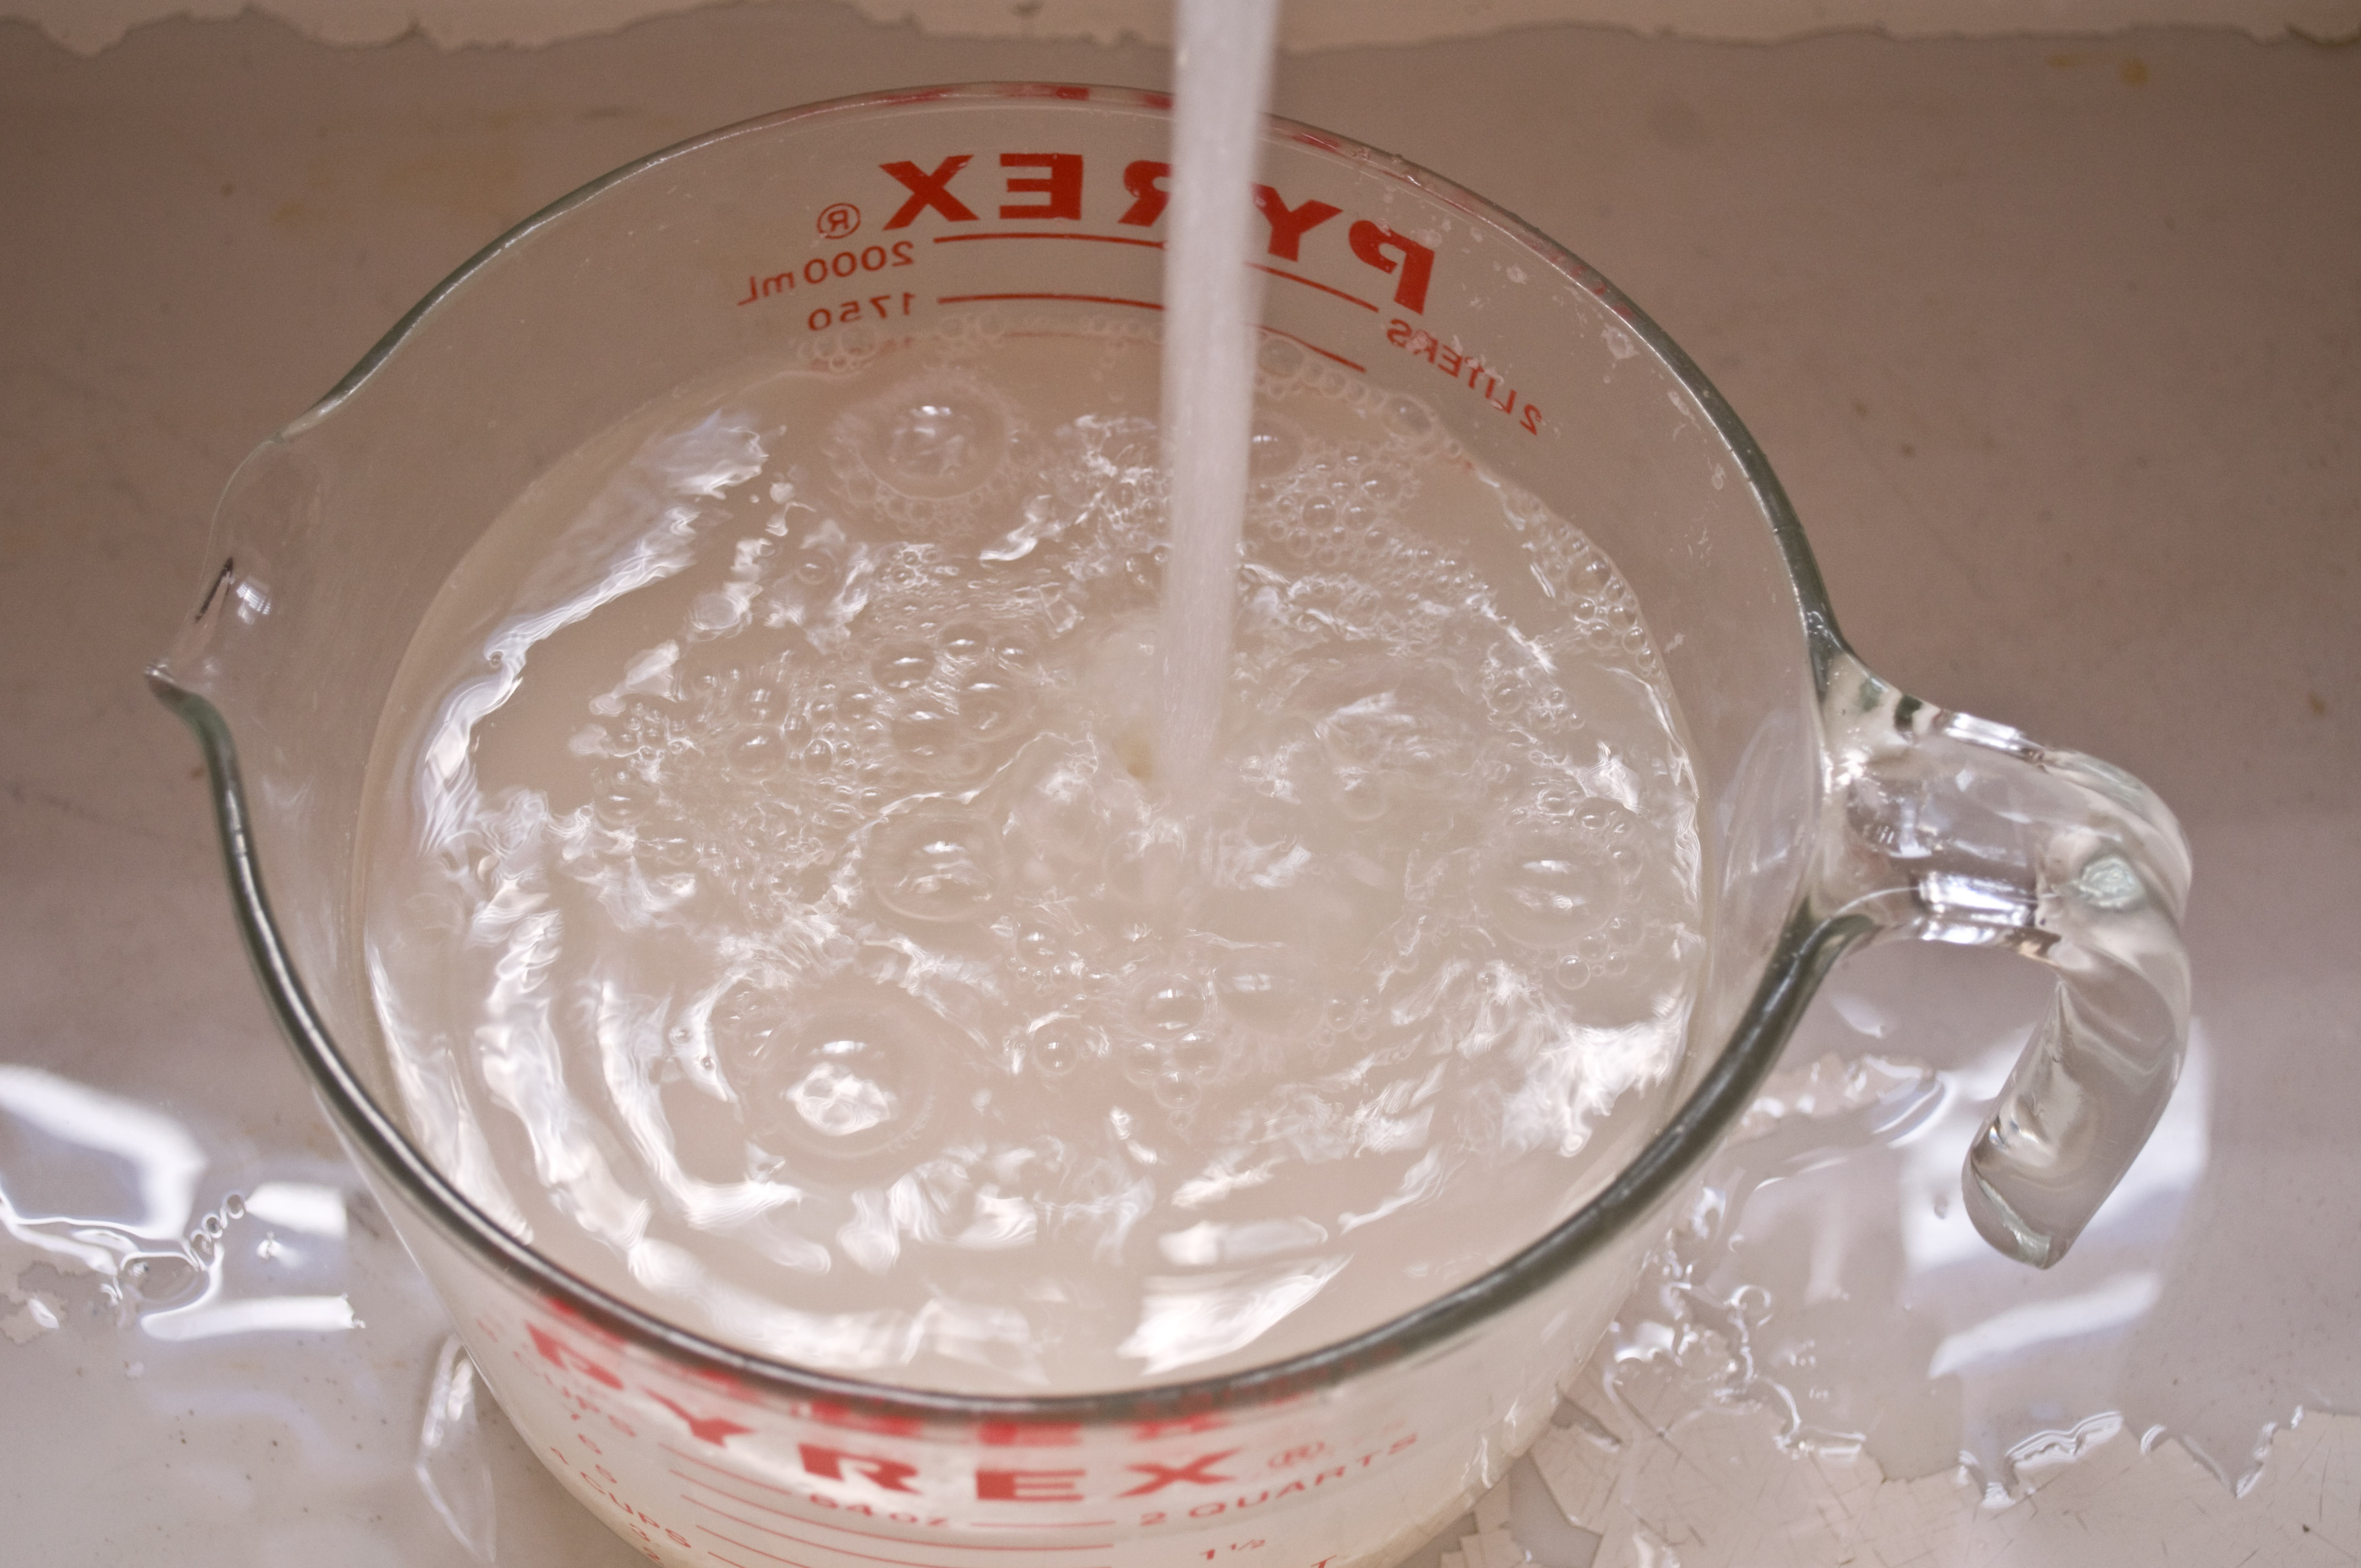
Put the rice in a large bowl and cover with cold tap water.
Swirl with your hands to remove any debris.
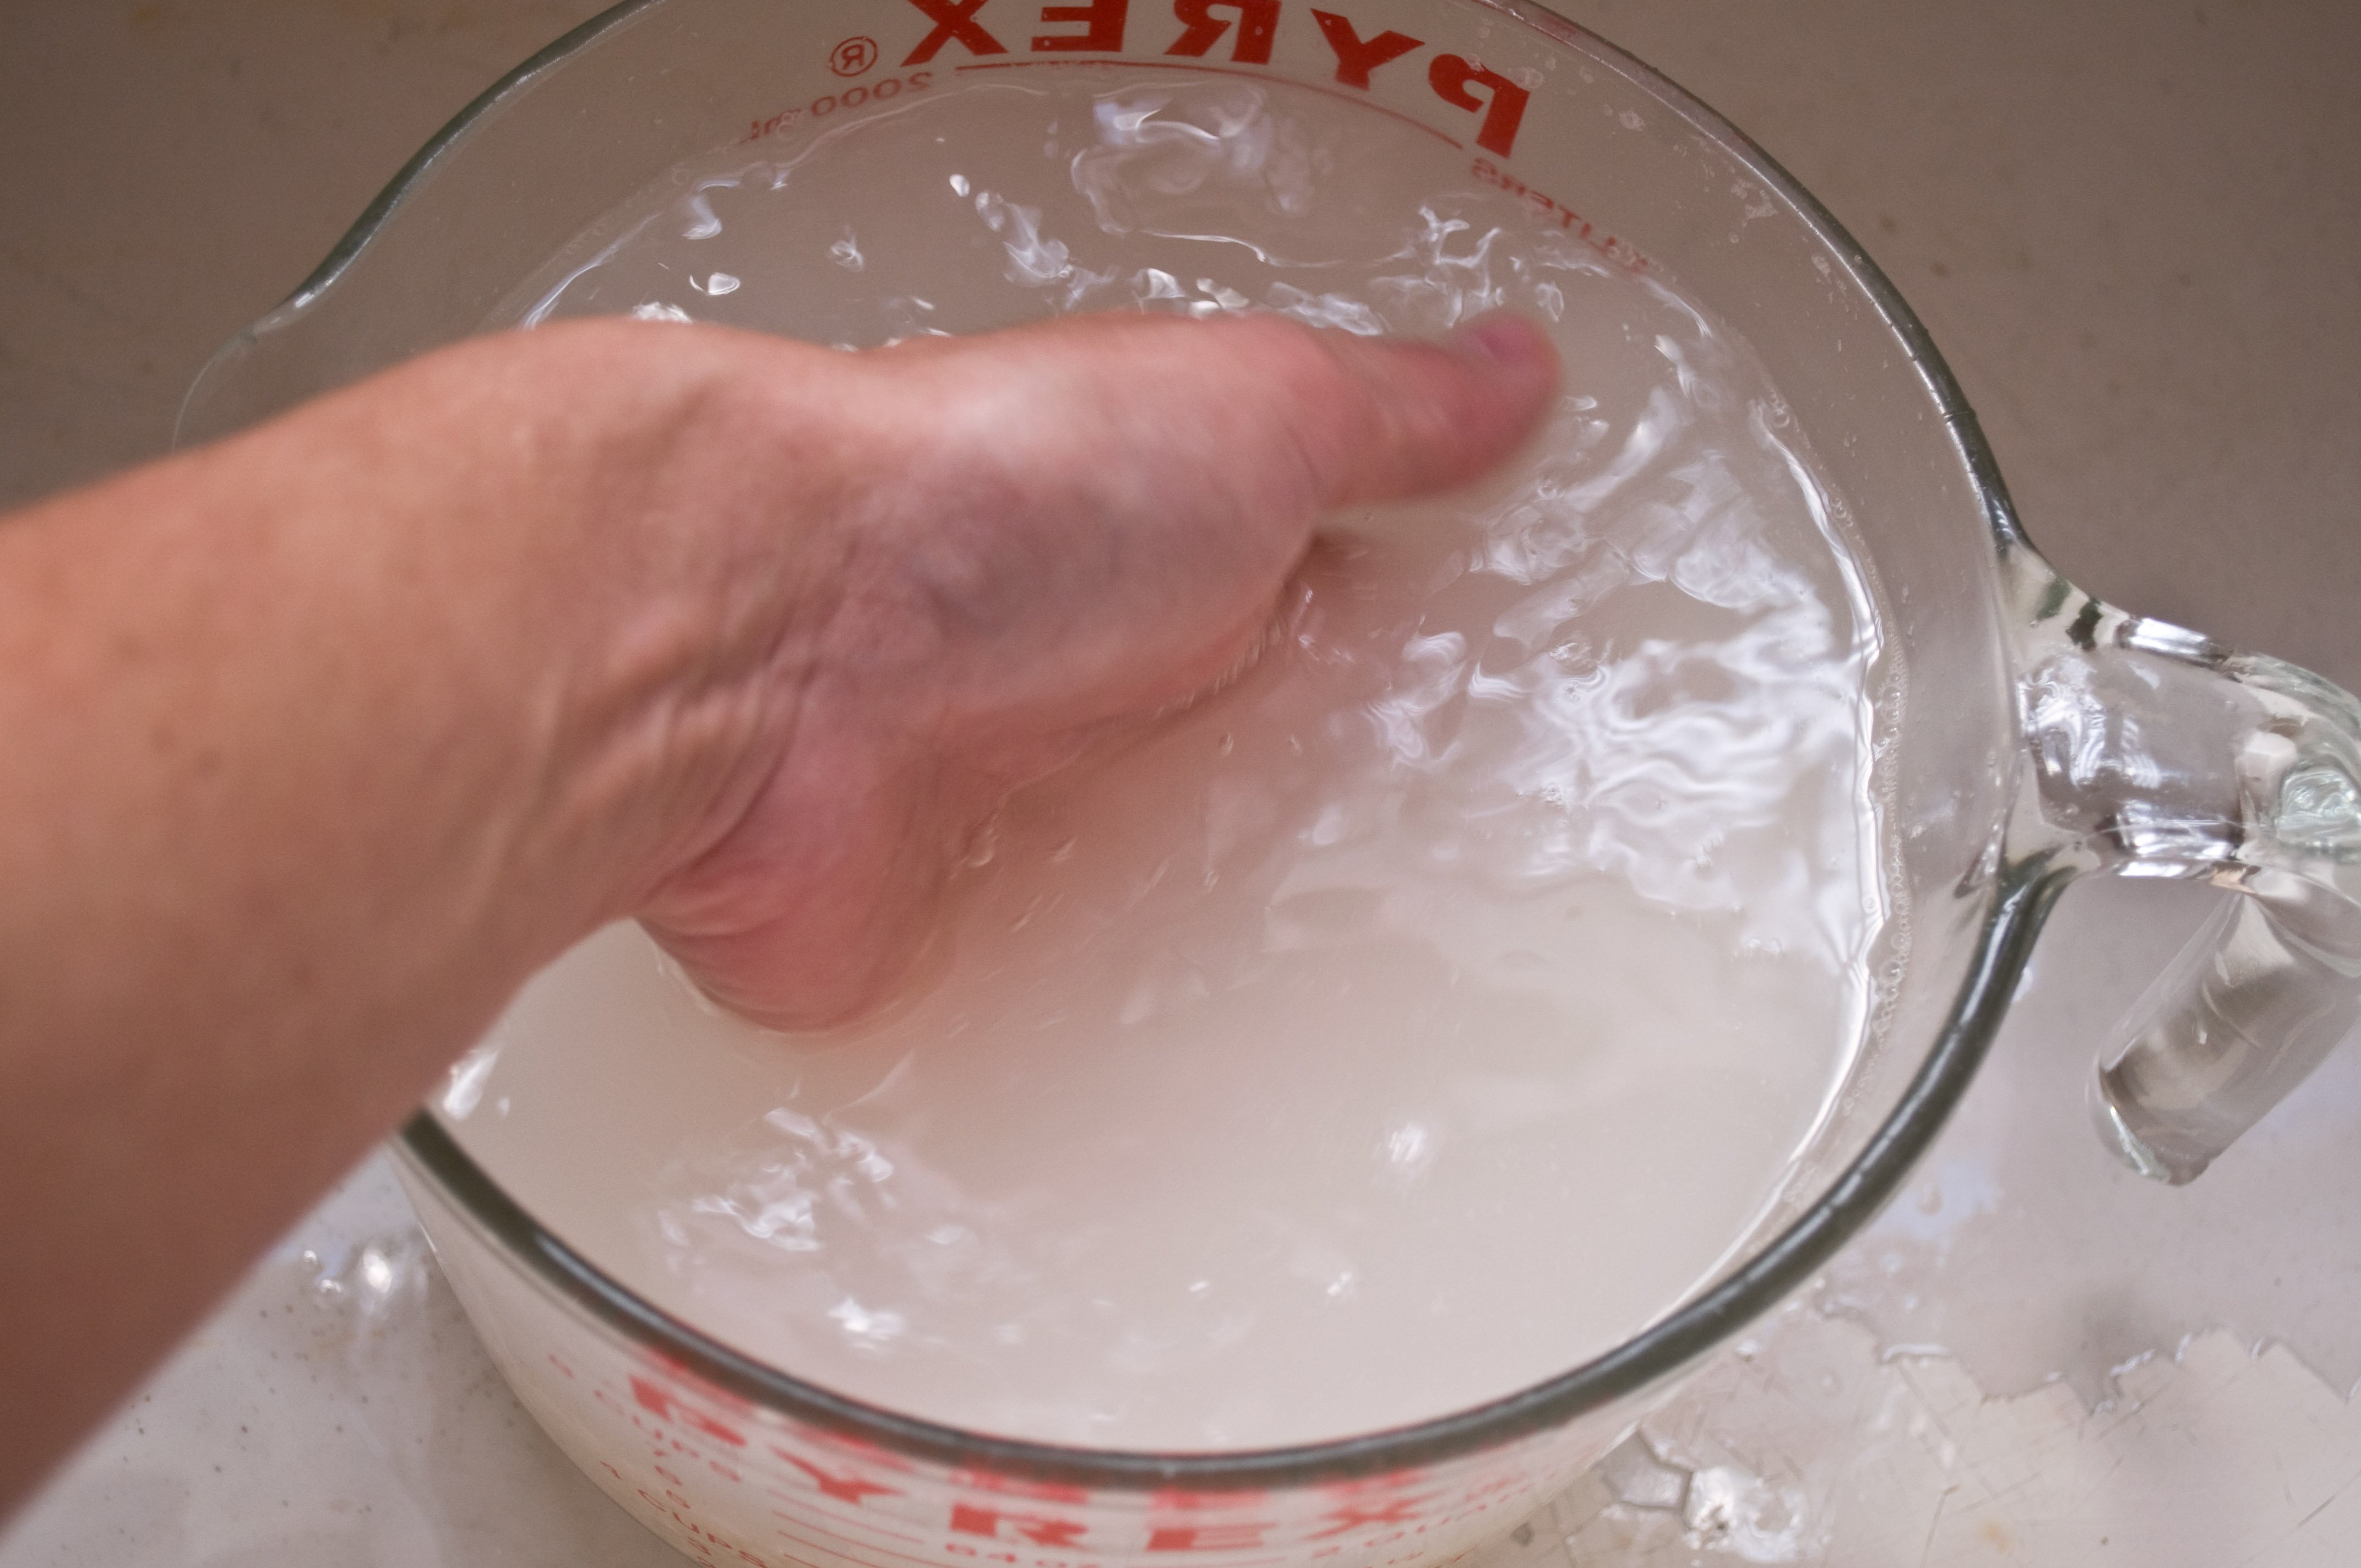
Drain the water off, using your hand to keep the rice in the bowl
Repeat two more times. By the third time, the water should be much less cloudy.
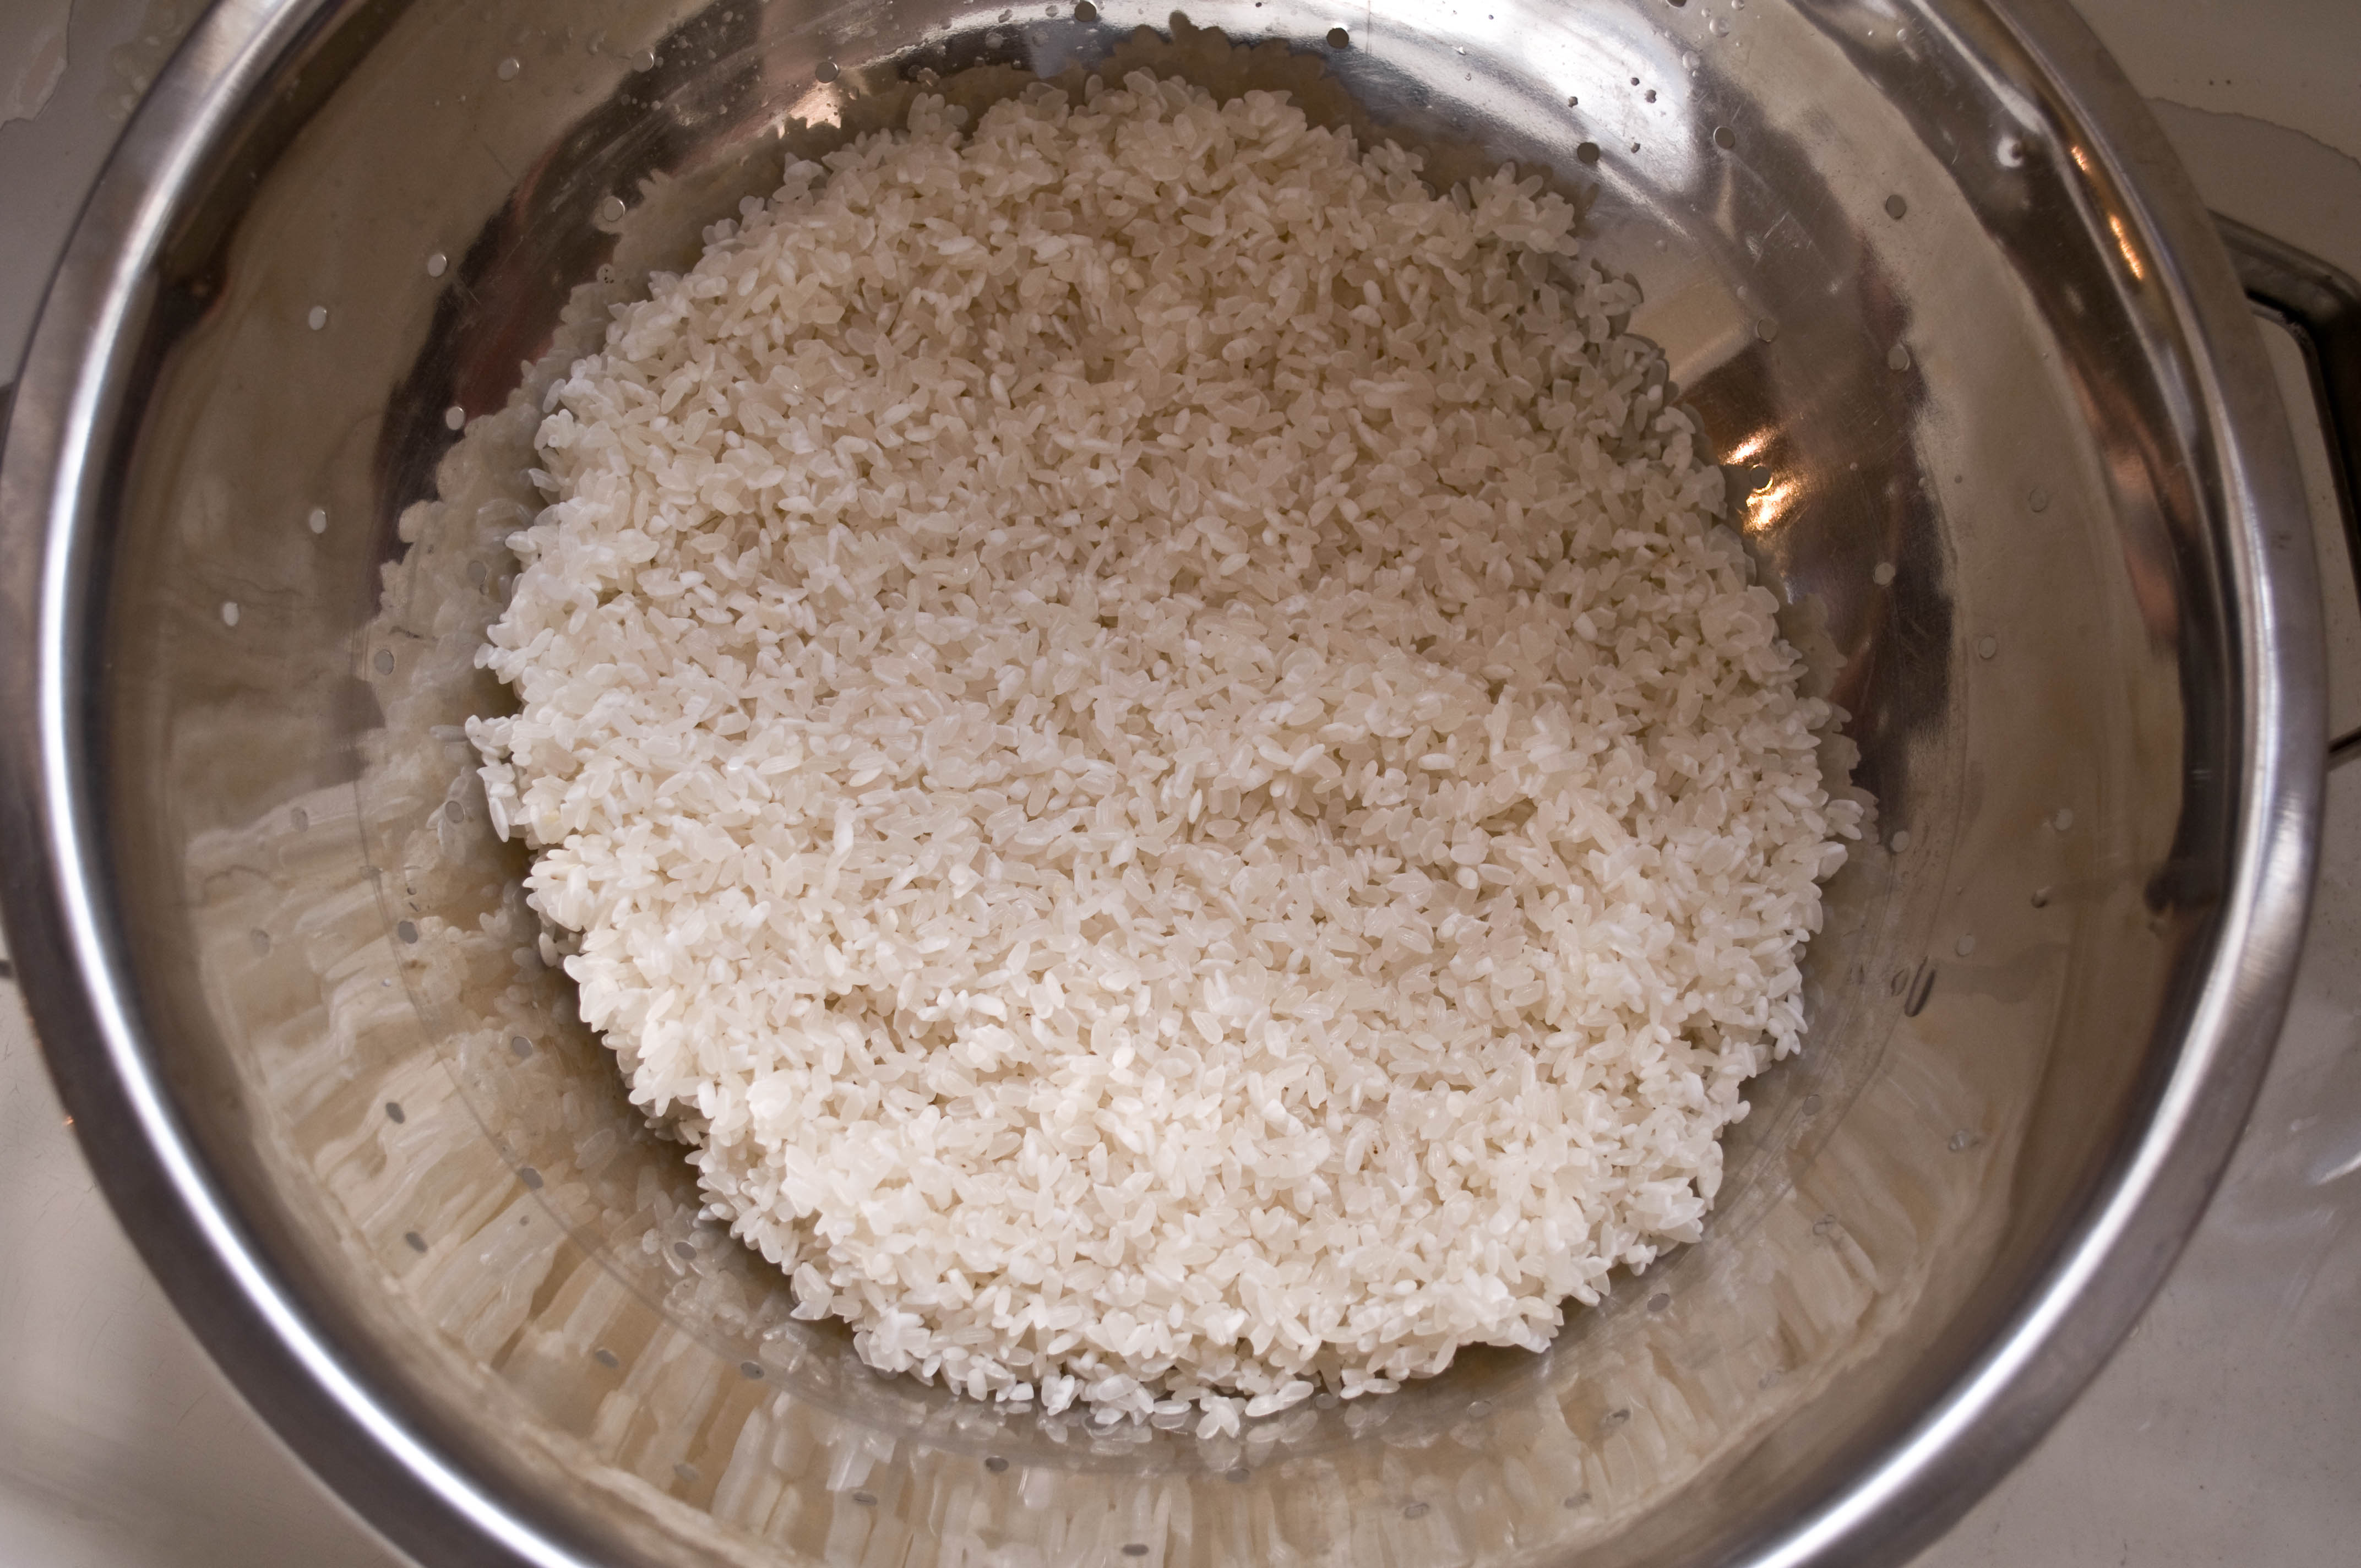
Put rice in a colander and allow to drain and dry, about 30 minutes.
Now here is where things get a little wierd. By all accounts, in my previous rice-cookin past, the ratio is 1 part rice to 2 parts water, right? Well, not in sushi land. Put your 3 cups of rice in a large sauce pan and cover with 3 cups of water. Yep, thats 1 part to 1 part. Don’t worry, it all works out.
Bring to a boil over high heat.
Cover and allow to boil over high heat (resist the urge to turn the heat down) for three minutes.
Then turn the heat to medium and cook for an an additional 5 minutes (I sure hope you have a kitchen timer).
Then turn the heat to low and cook for another 8 minutes.
There should be no visible water left. If you have a shot of Sake, drizzle it over the rice at this point. If you don’t have any Sake, don’t worry about. Remove from heat.
Cover with a towel or a cheese cloth, put the lid back on and allow to rest for ten minutes.
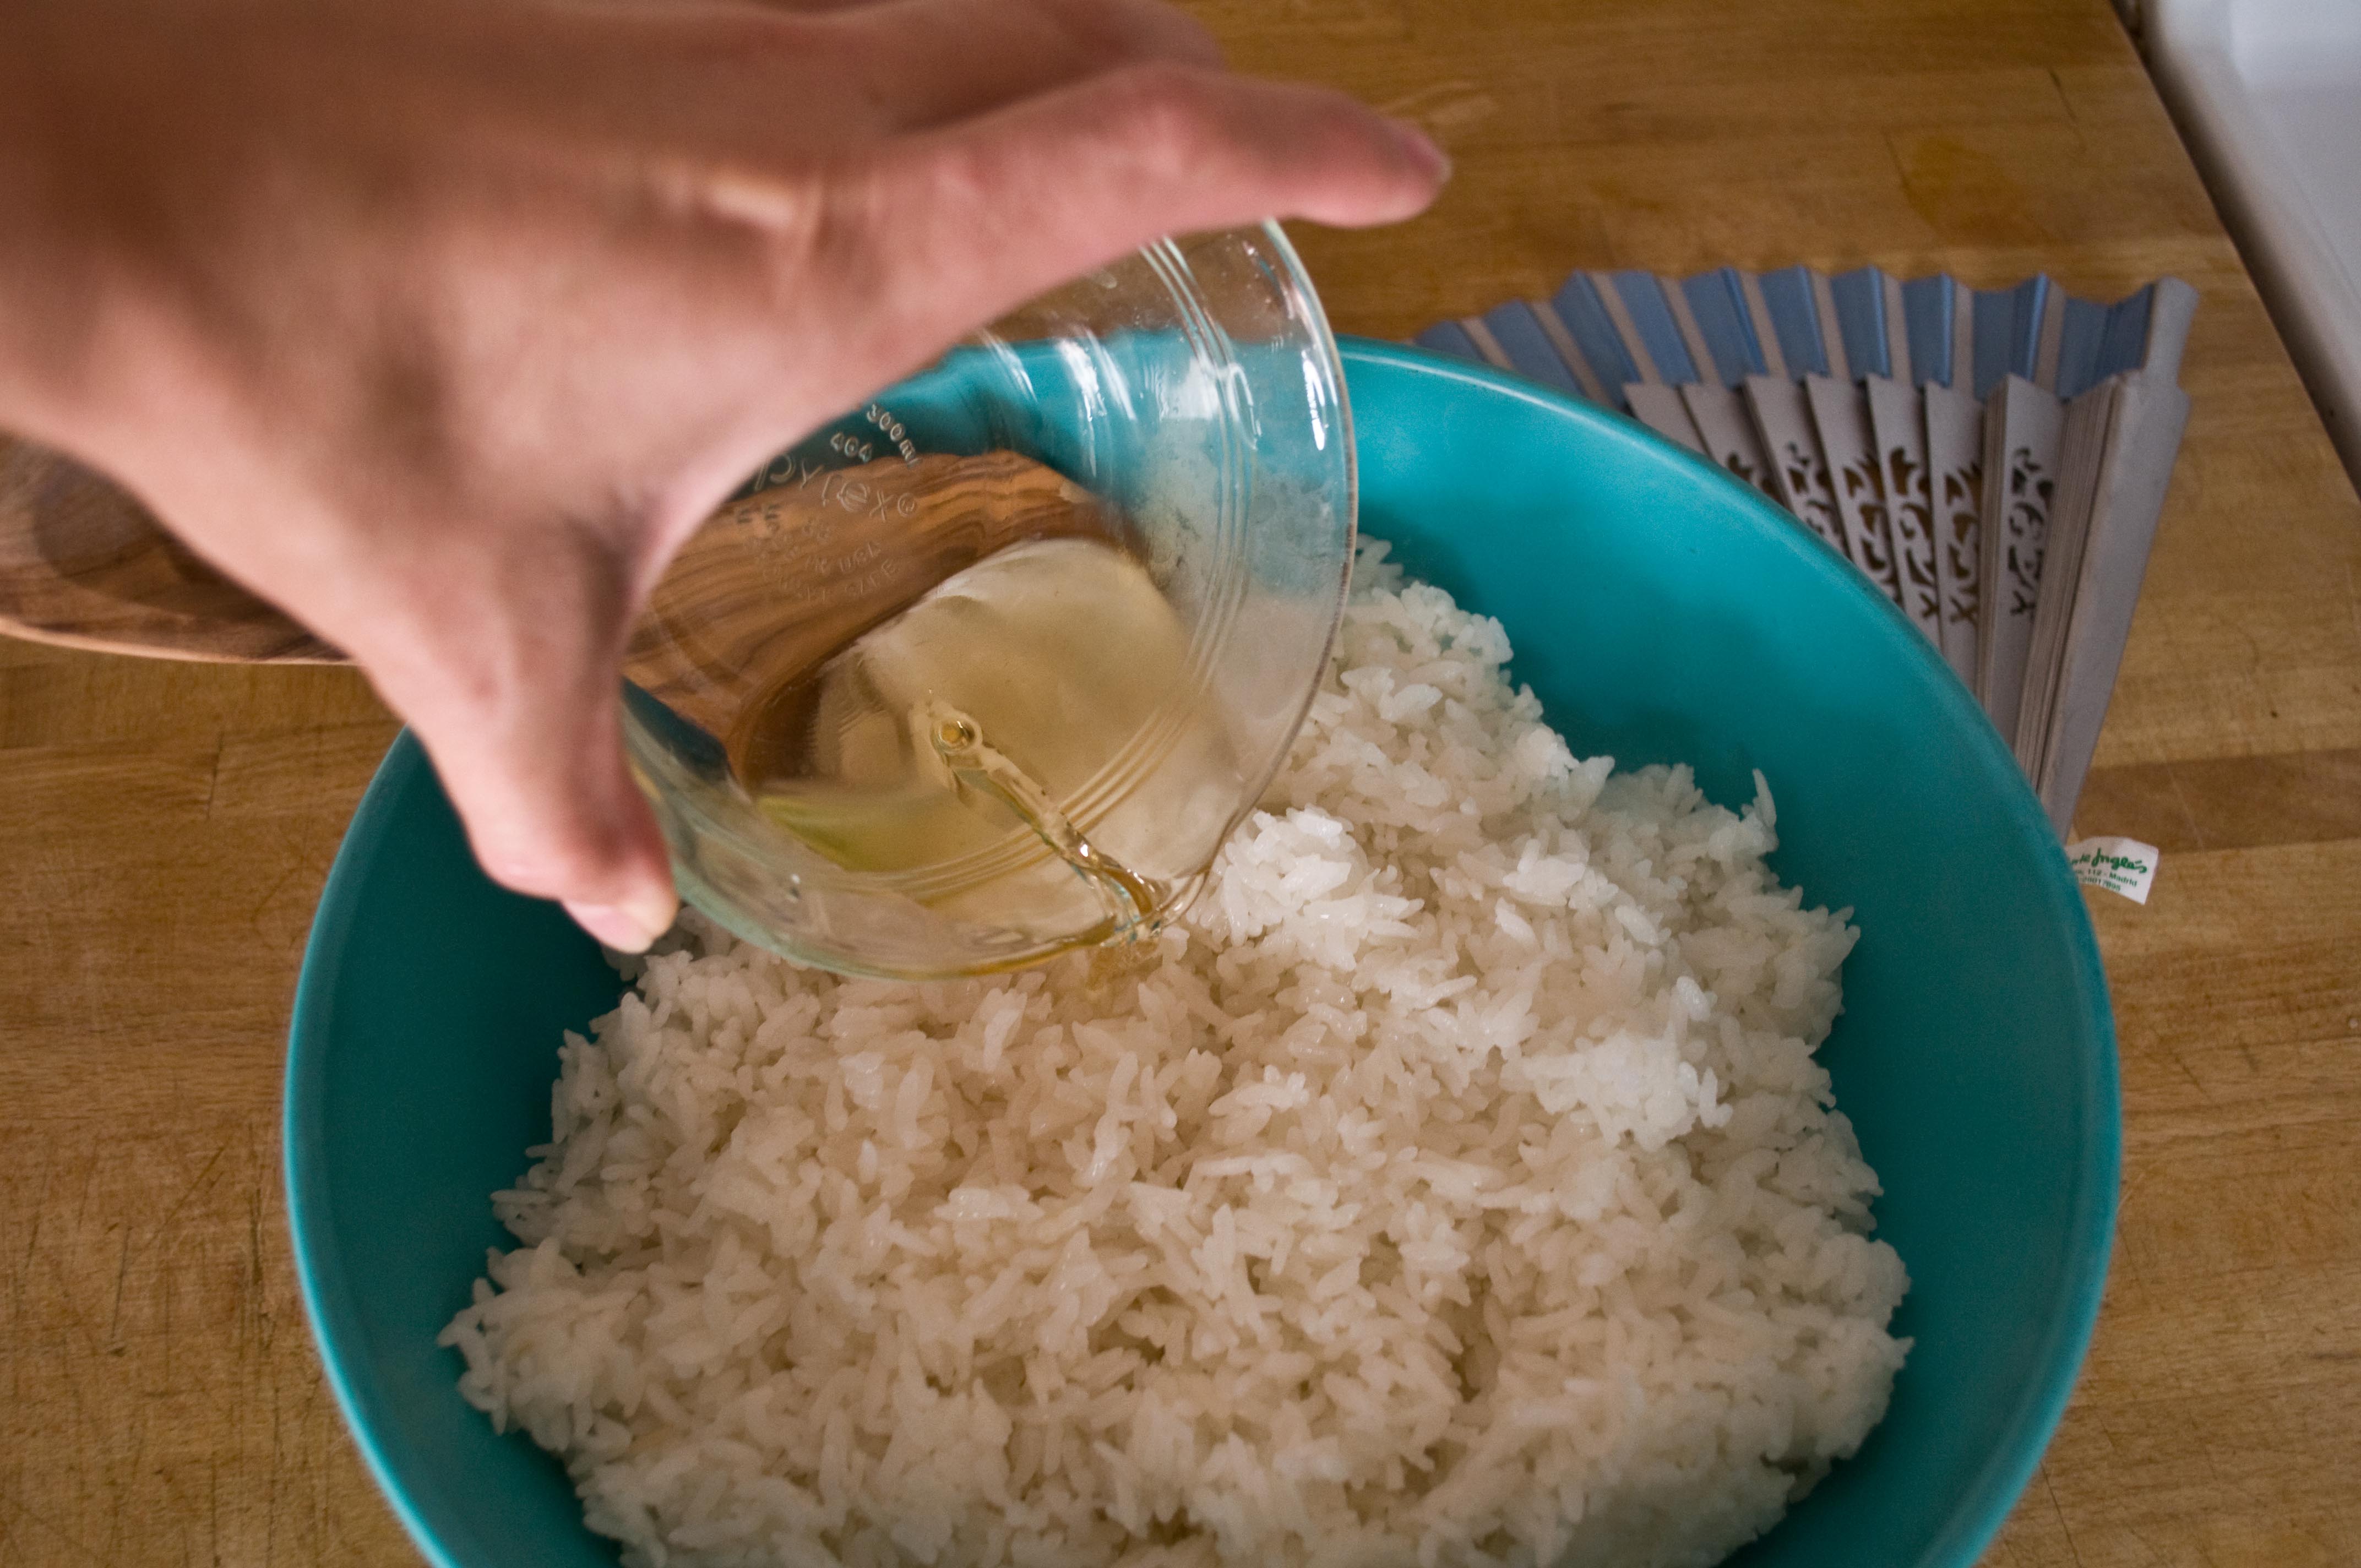
While your rice is cooking, make the dressing. Combine the vinegar, salt and sugar in a small bowl and microwave on high for 30 seconds. Stir until dissolved and allow to cool.
Once the rice has rested, transfer to a large, flat bottom bowl.
Pour the dressing over the rice.
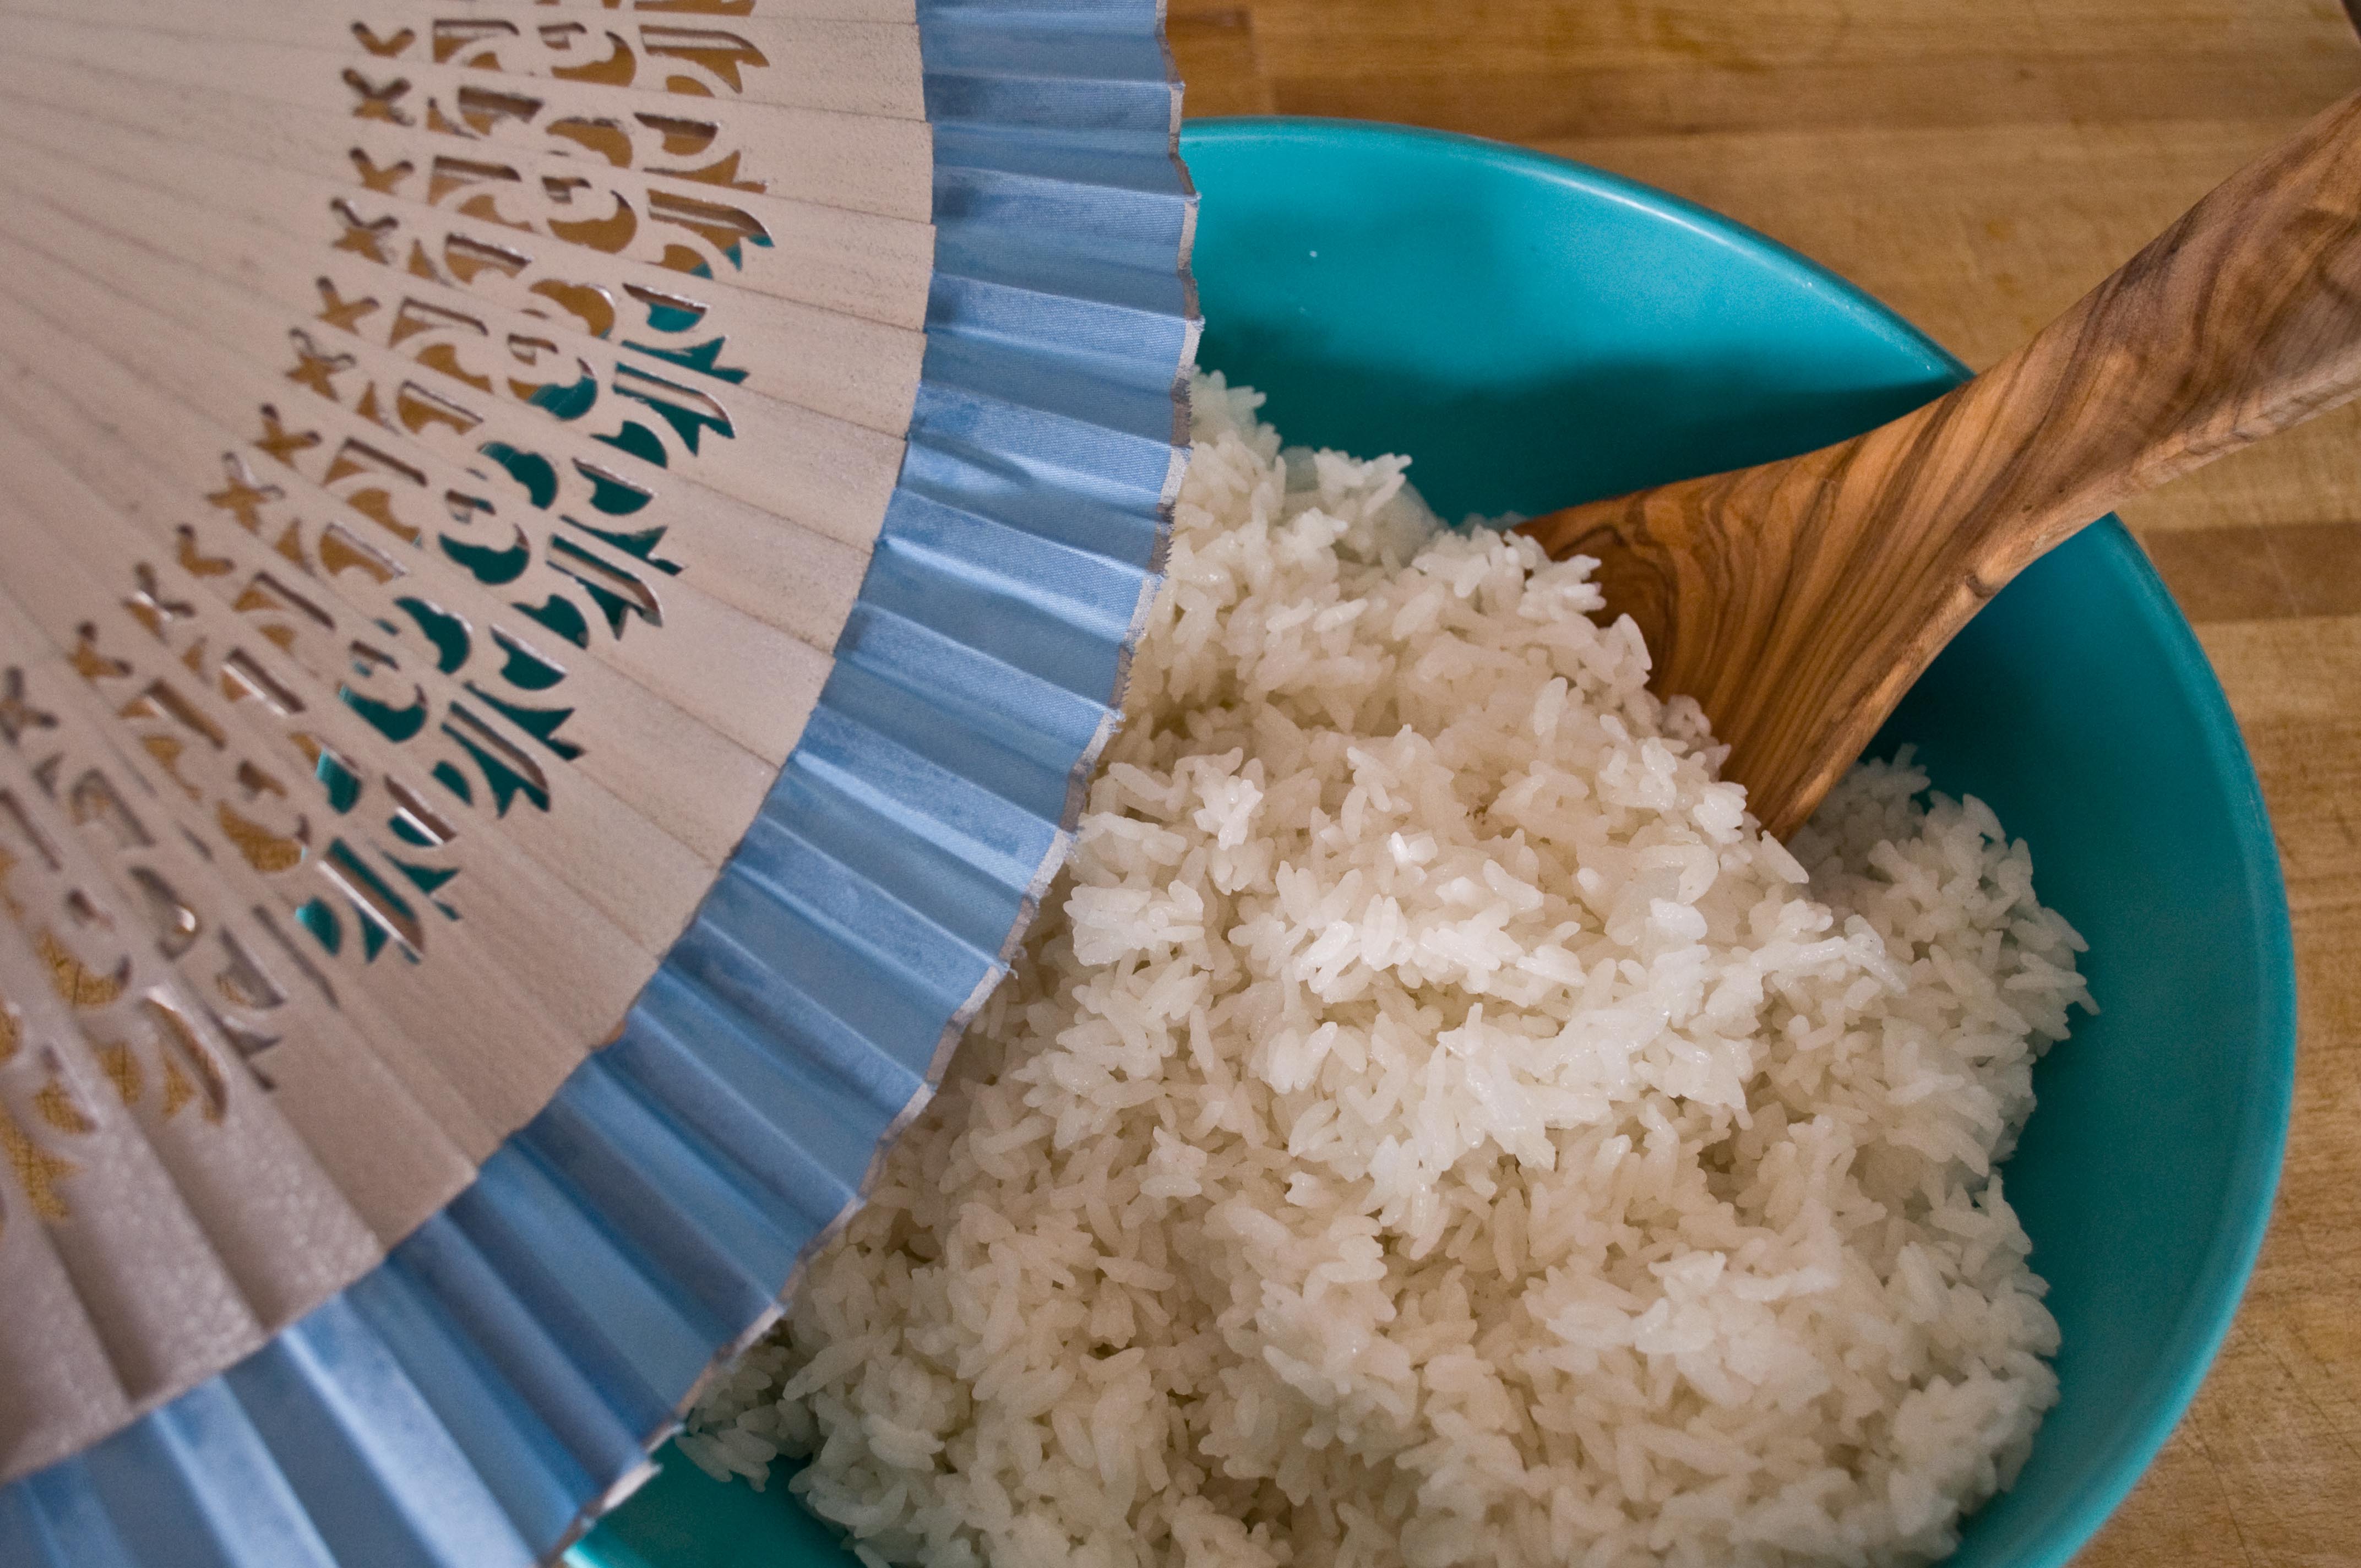
Stir the rice with a wooden spoon to distribute the dressing evenly, while fanning with a fan to cool. If you don’t have a fan a piece of cardboard will work just fine.
Repeat until rice is at body temperature.
Make The Roll
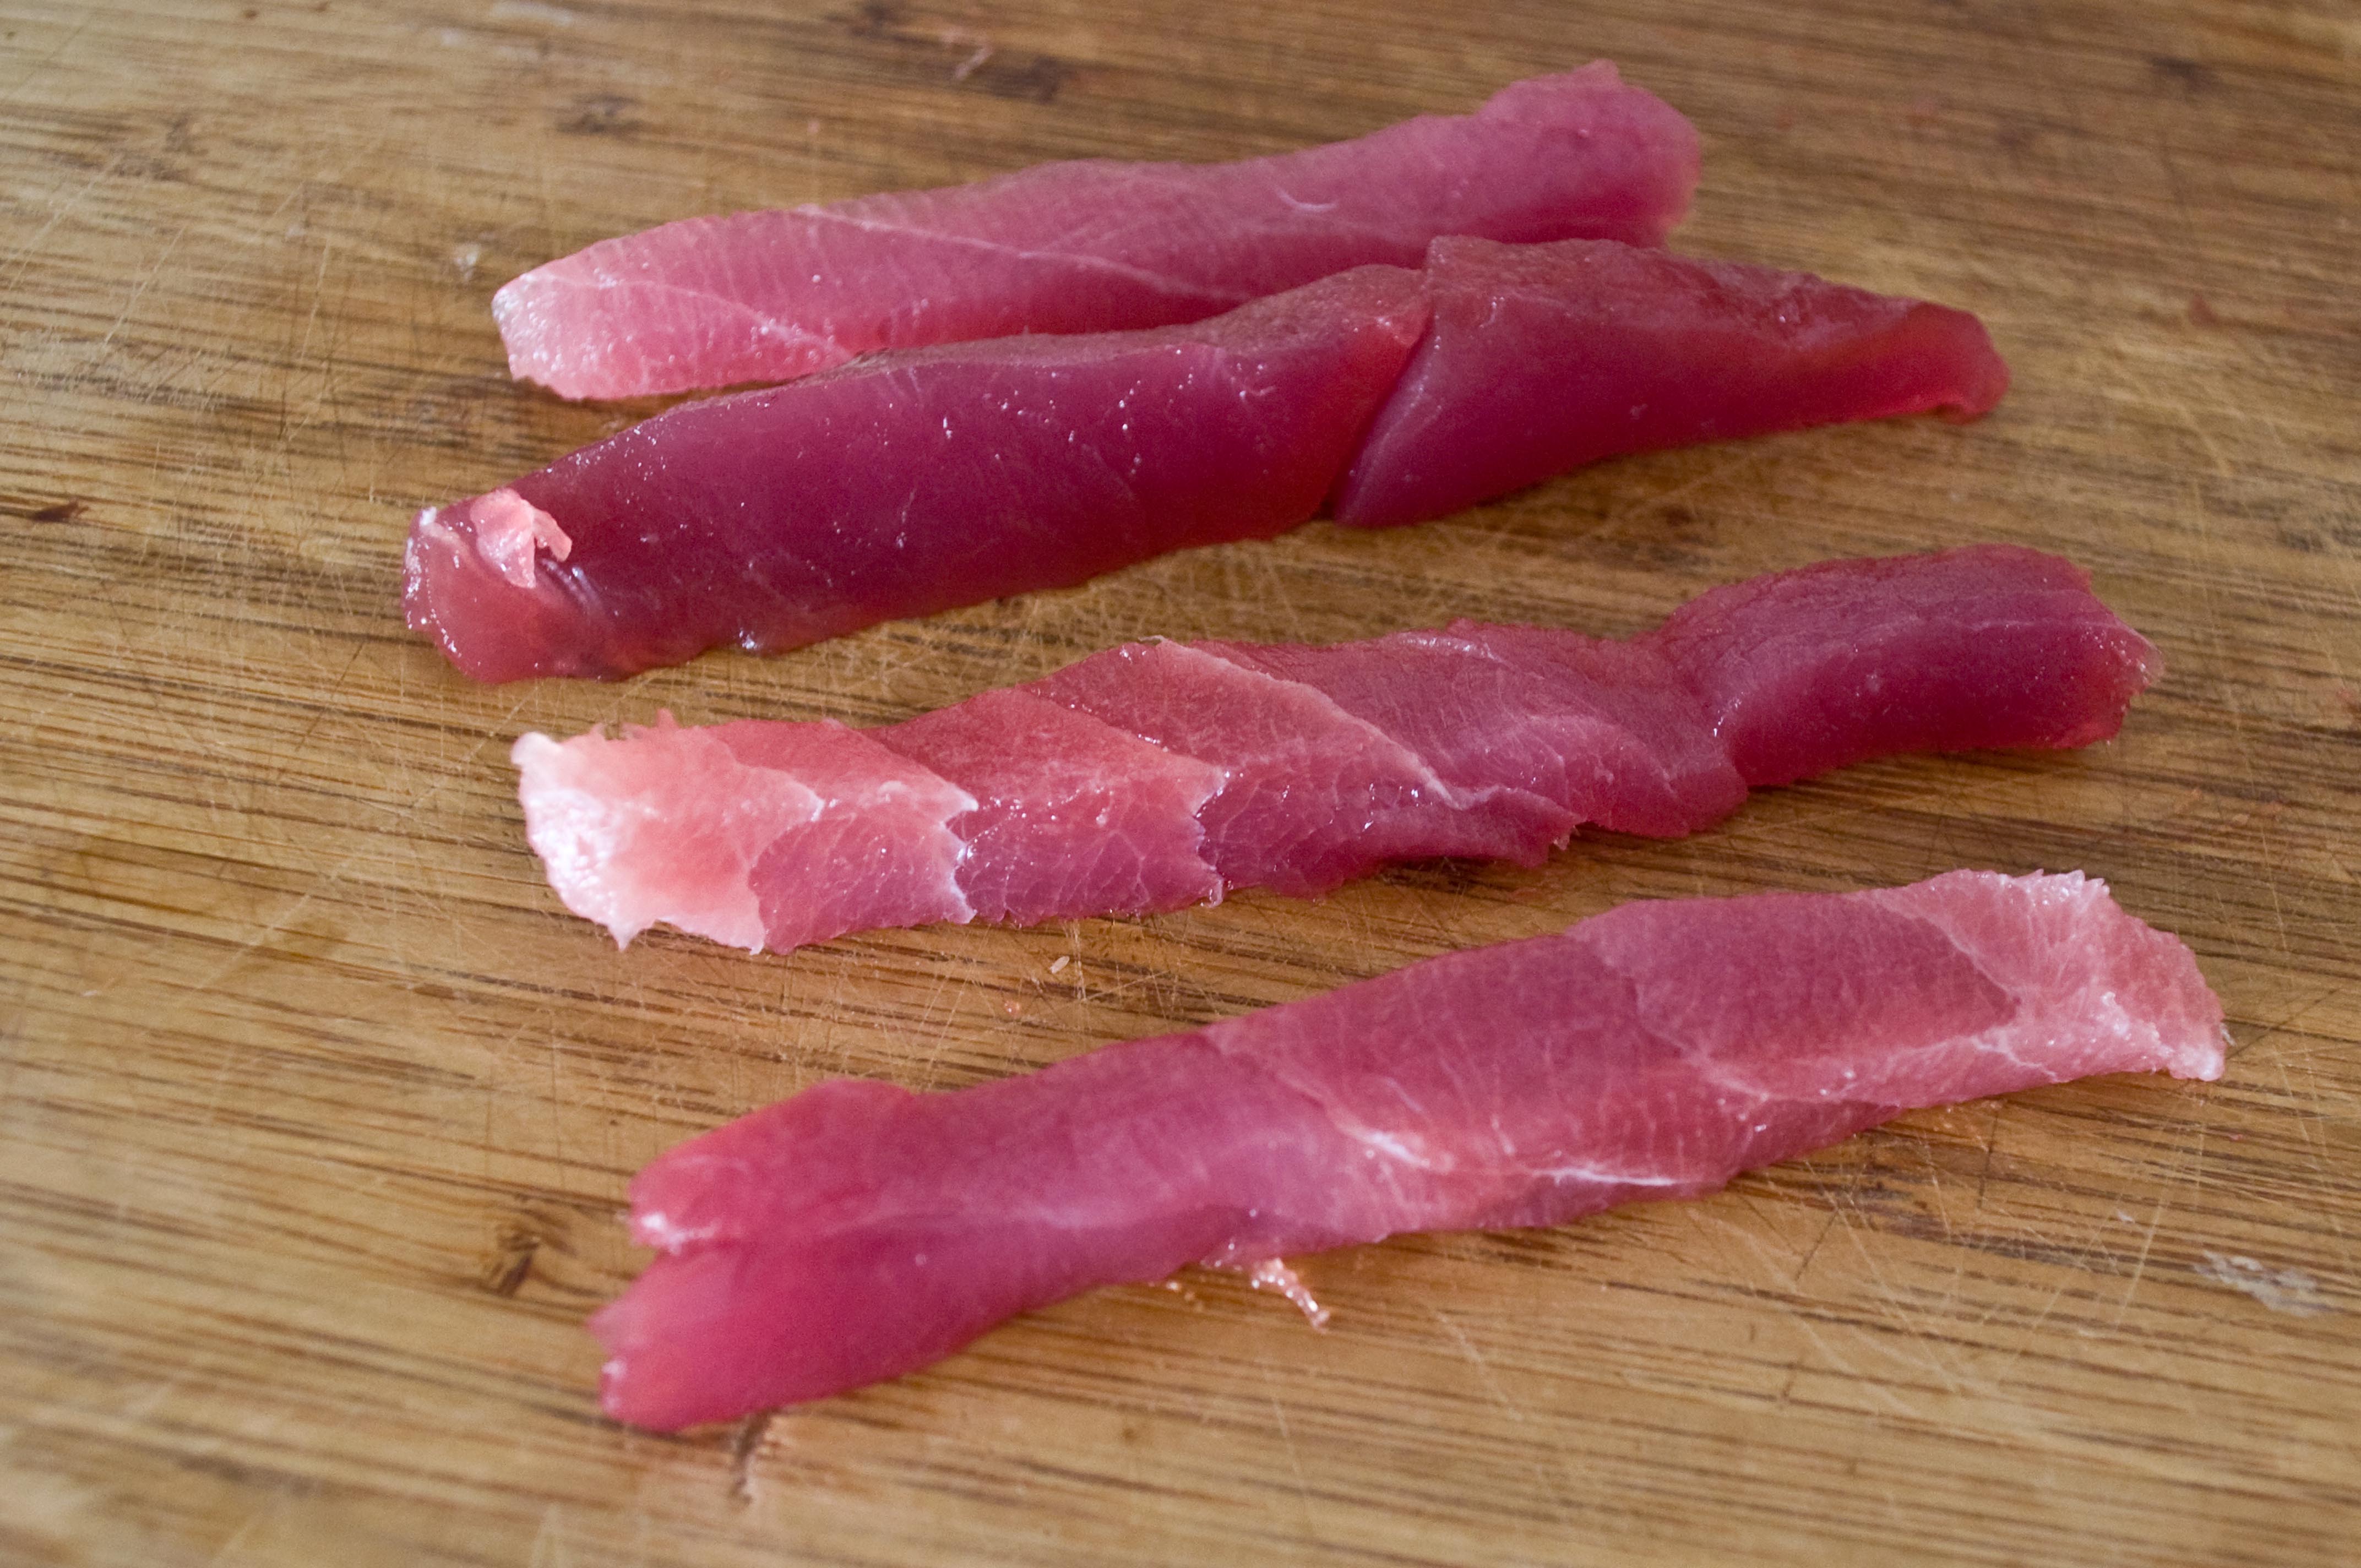
First, lets talk about fish. For this post I made two kinds of sushi, a basic Ahi Tuna Roll and a Spicy Crab roll. You can fill your sushi with just about anything you want, including other types of meat and vegetables. If you want to use raw fish, buy the best stuff you can find, really, this is no place to bargain shop. Go to the best fish market in your town and asked what they have that is Sashimi grade and of that, what is the freshest and highest quality. Don’t go in with your heart set on a certain kind of fish, you may not get the best quality. If you really want Ahi, but they just had a beautiful Yellow Tail come in, get that. You don’t need a lot, I was able to make 5 rolls from less than a half a pound of Ahi.
Cut your fish into long thin strips, the width of about your pinky. If you don’t have a long enough piece of fish to cover the entire length of the roll, you can use segments.
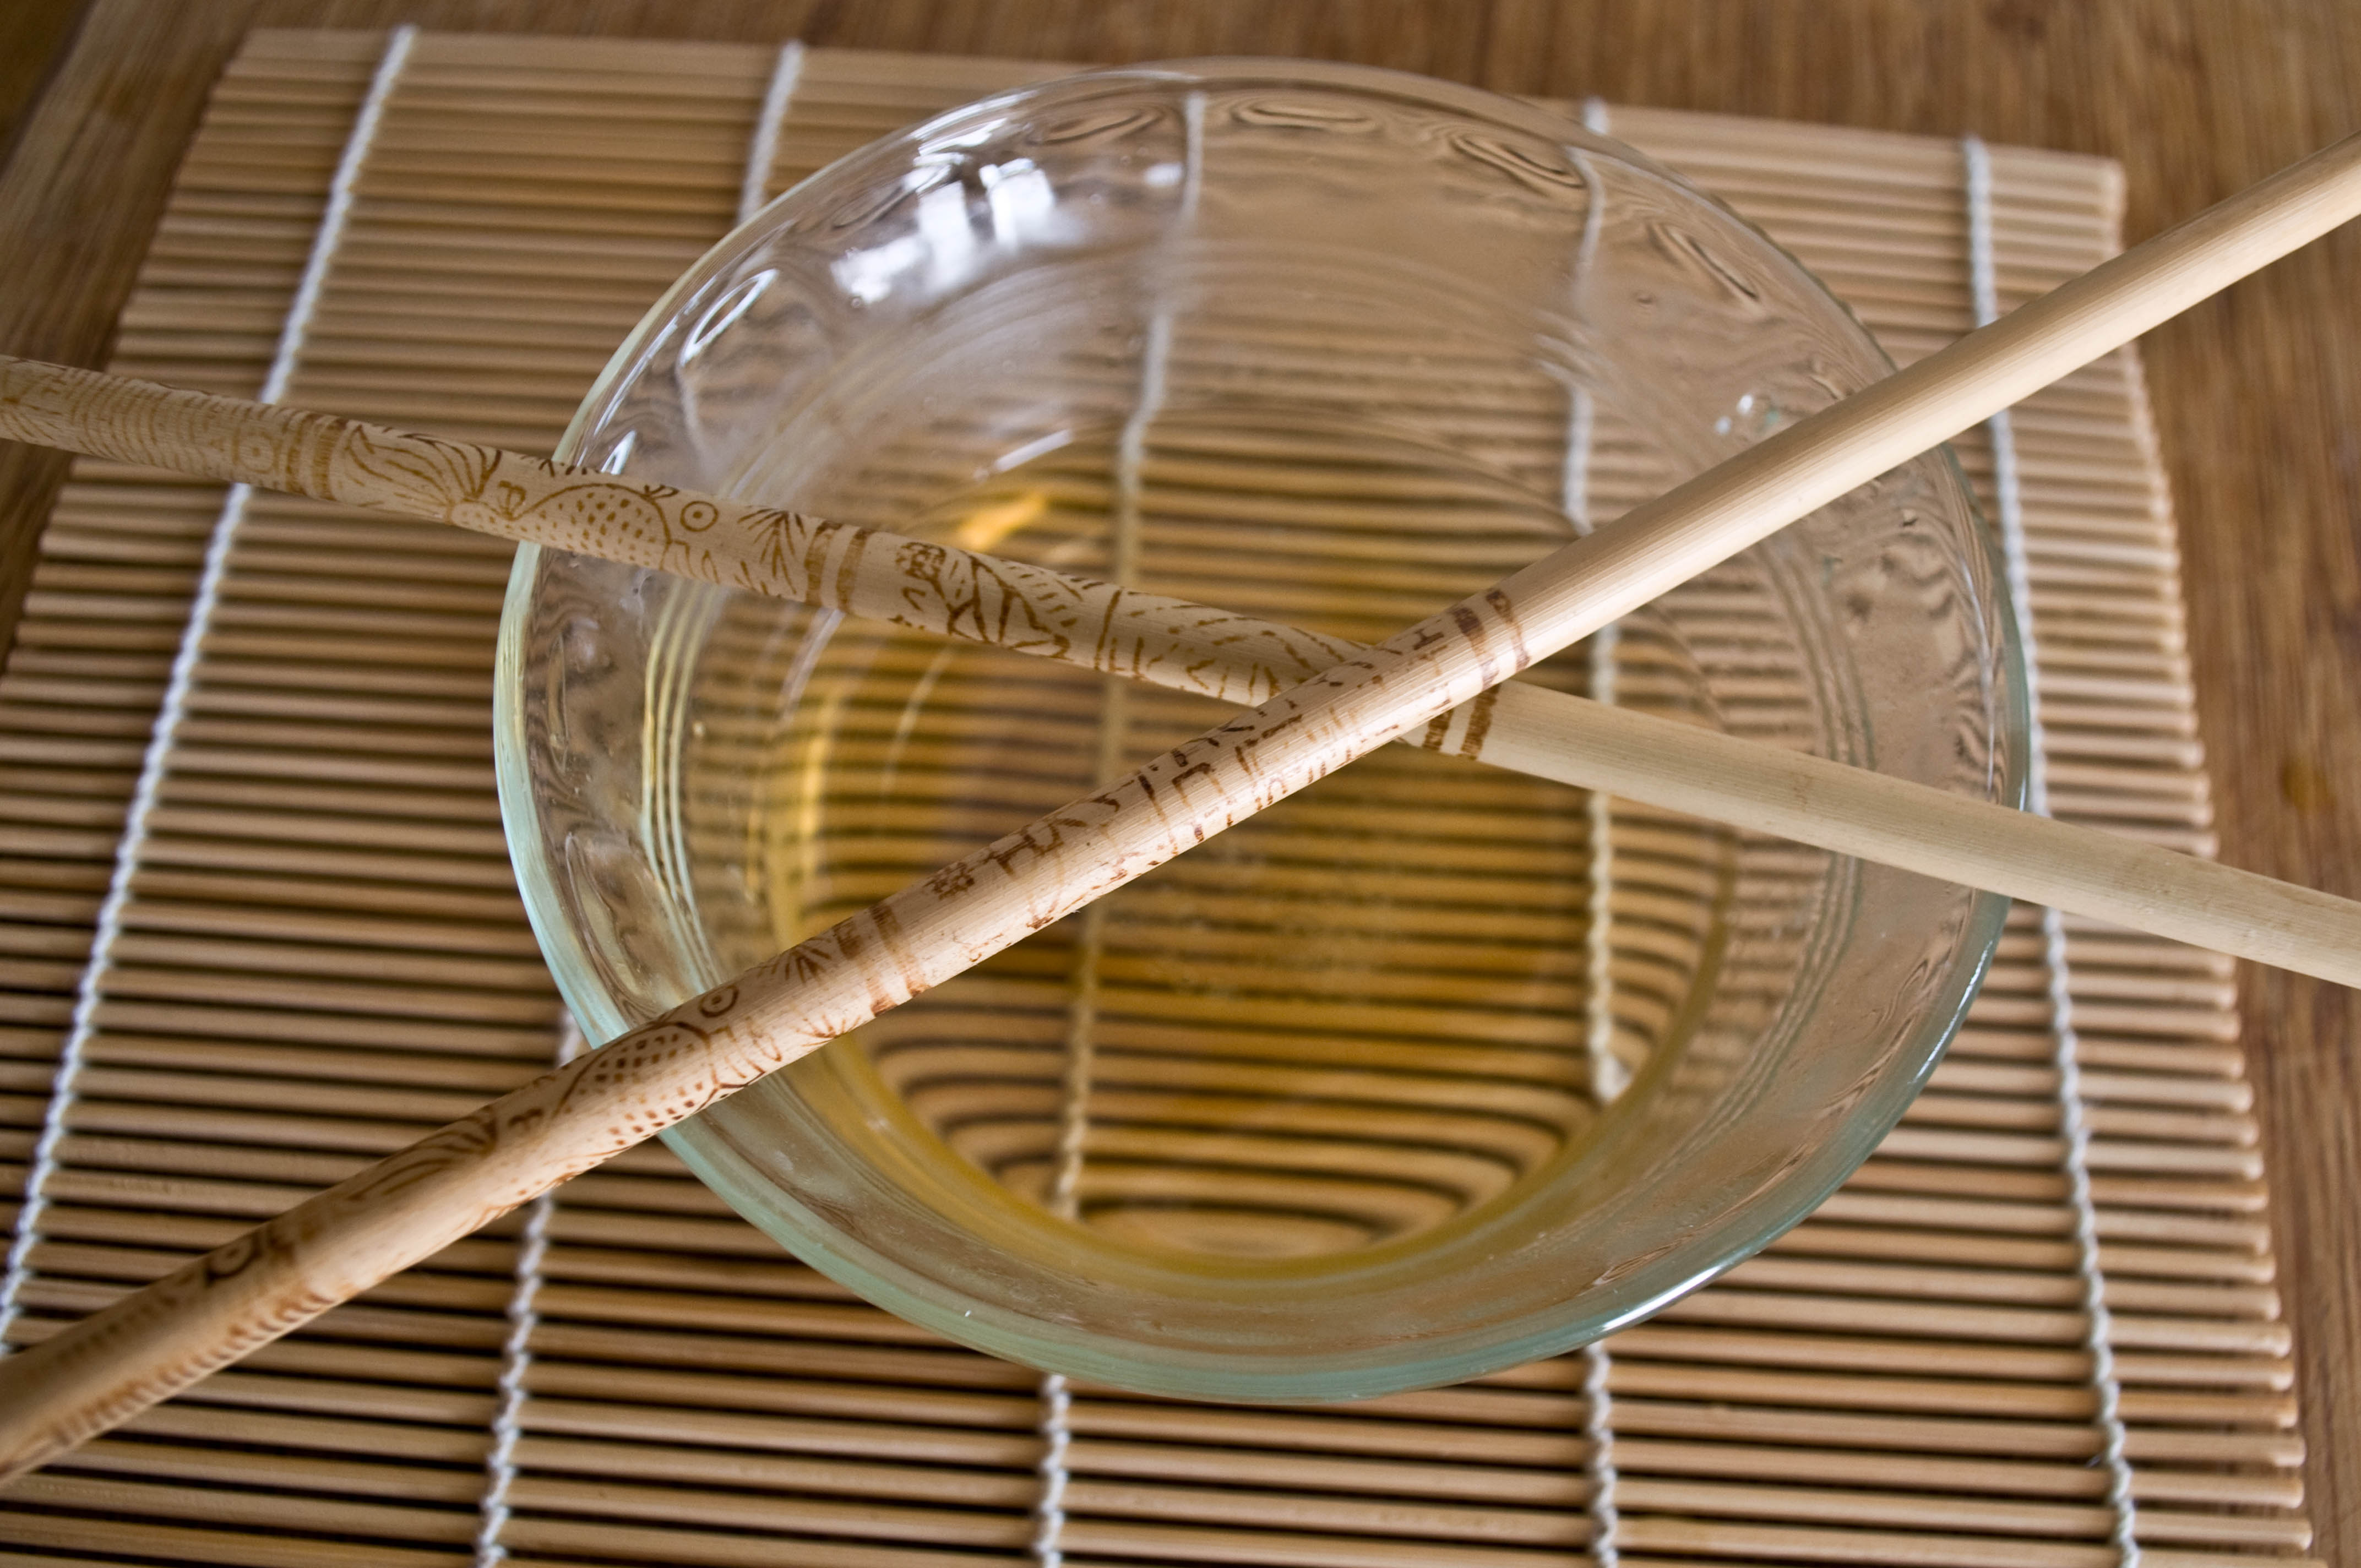
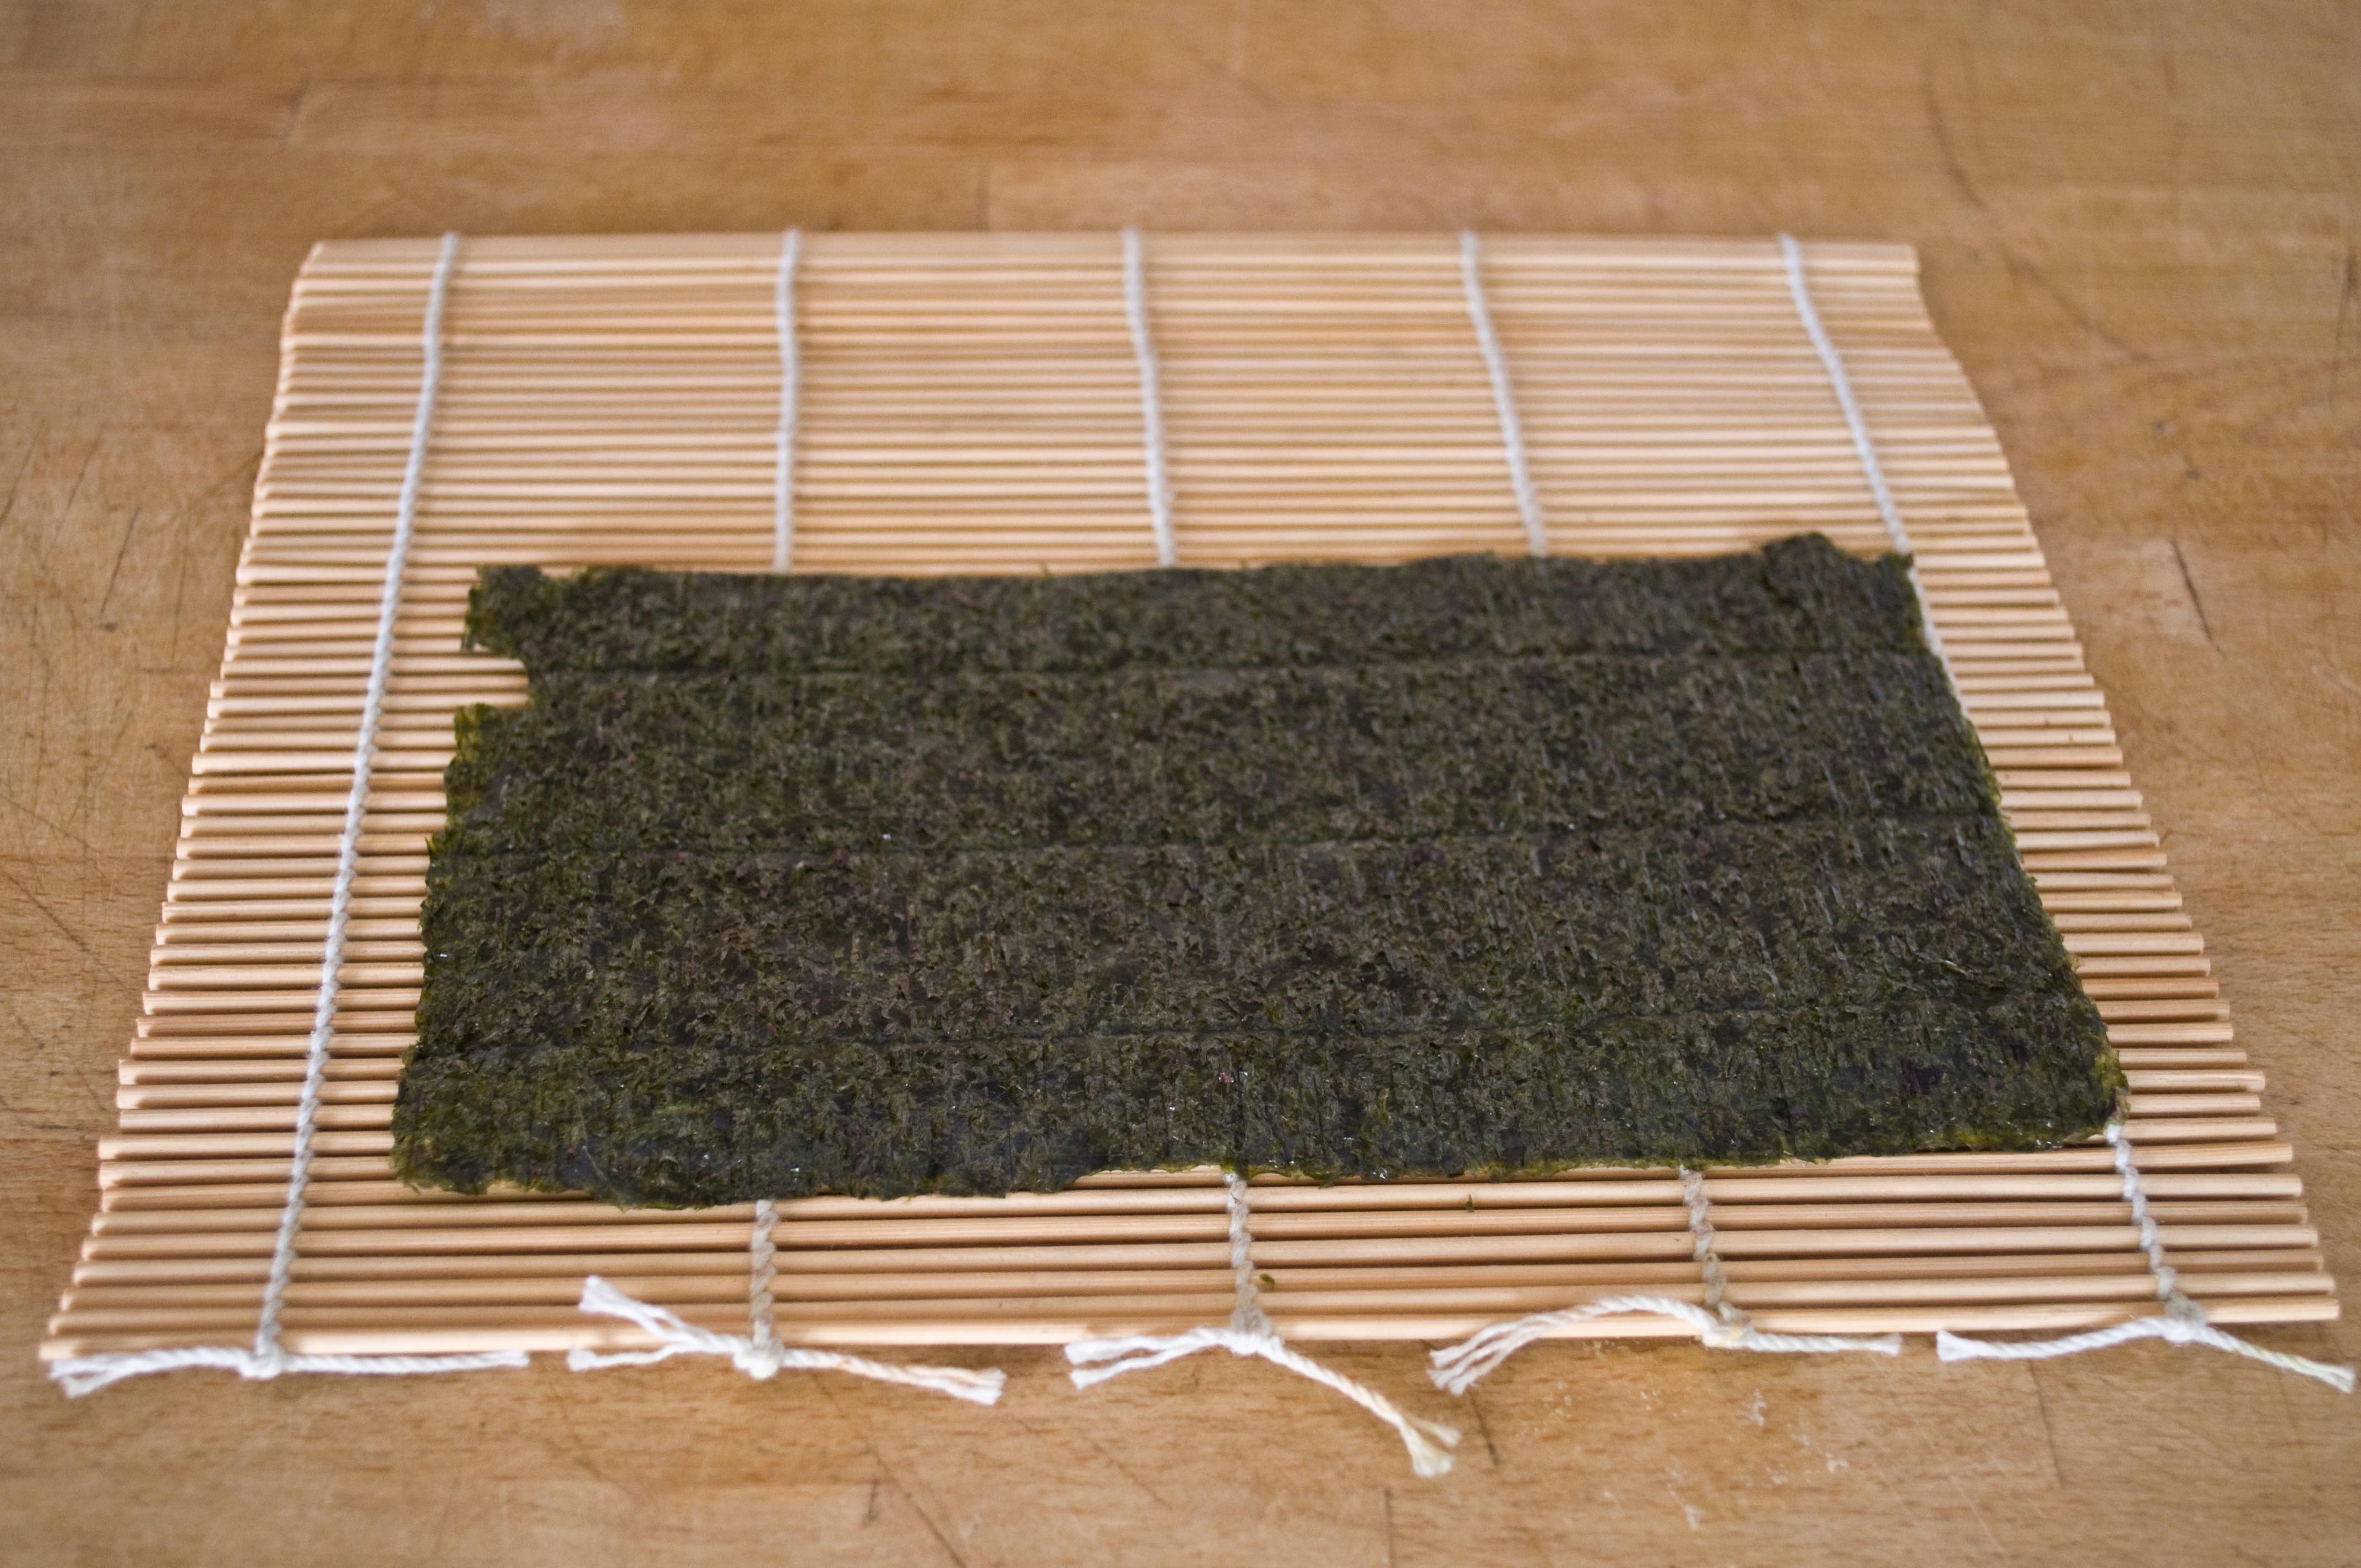
You’ll will need sheets of Nori and a bamboo rolling mat. Most large chain grocery stores carry both of those in their Asian sections. You can also try your local Japanese markets.
For the smaller, basic Ahi roll, use one sheet of Nori, cut in half width-wise.
Place this on your bamboo rolling mat.
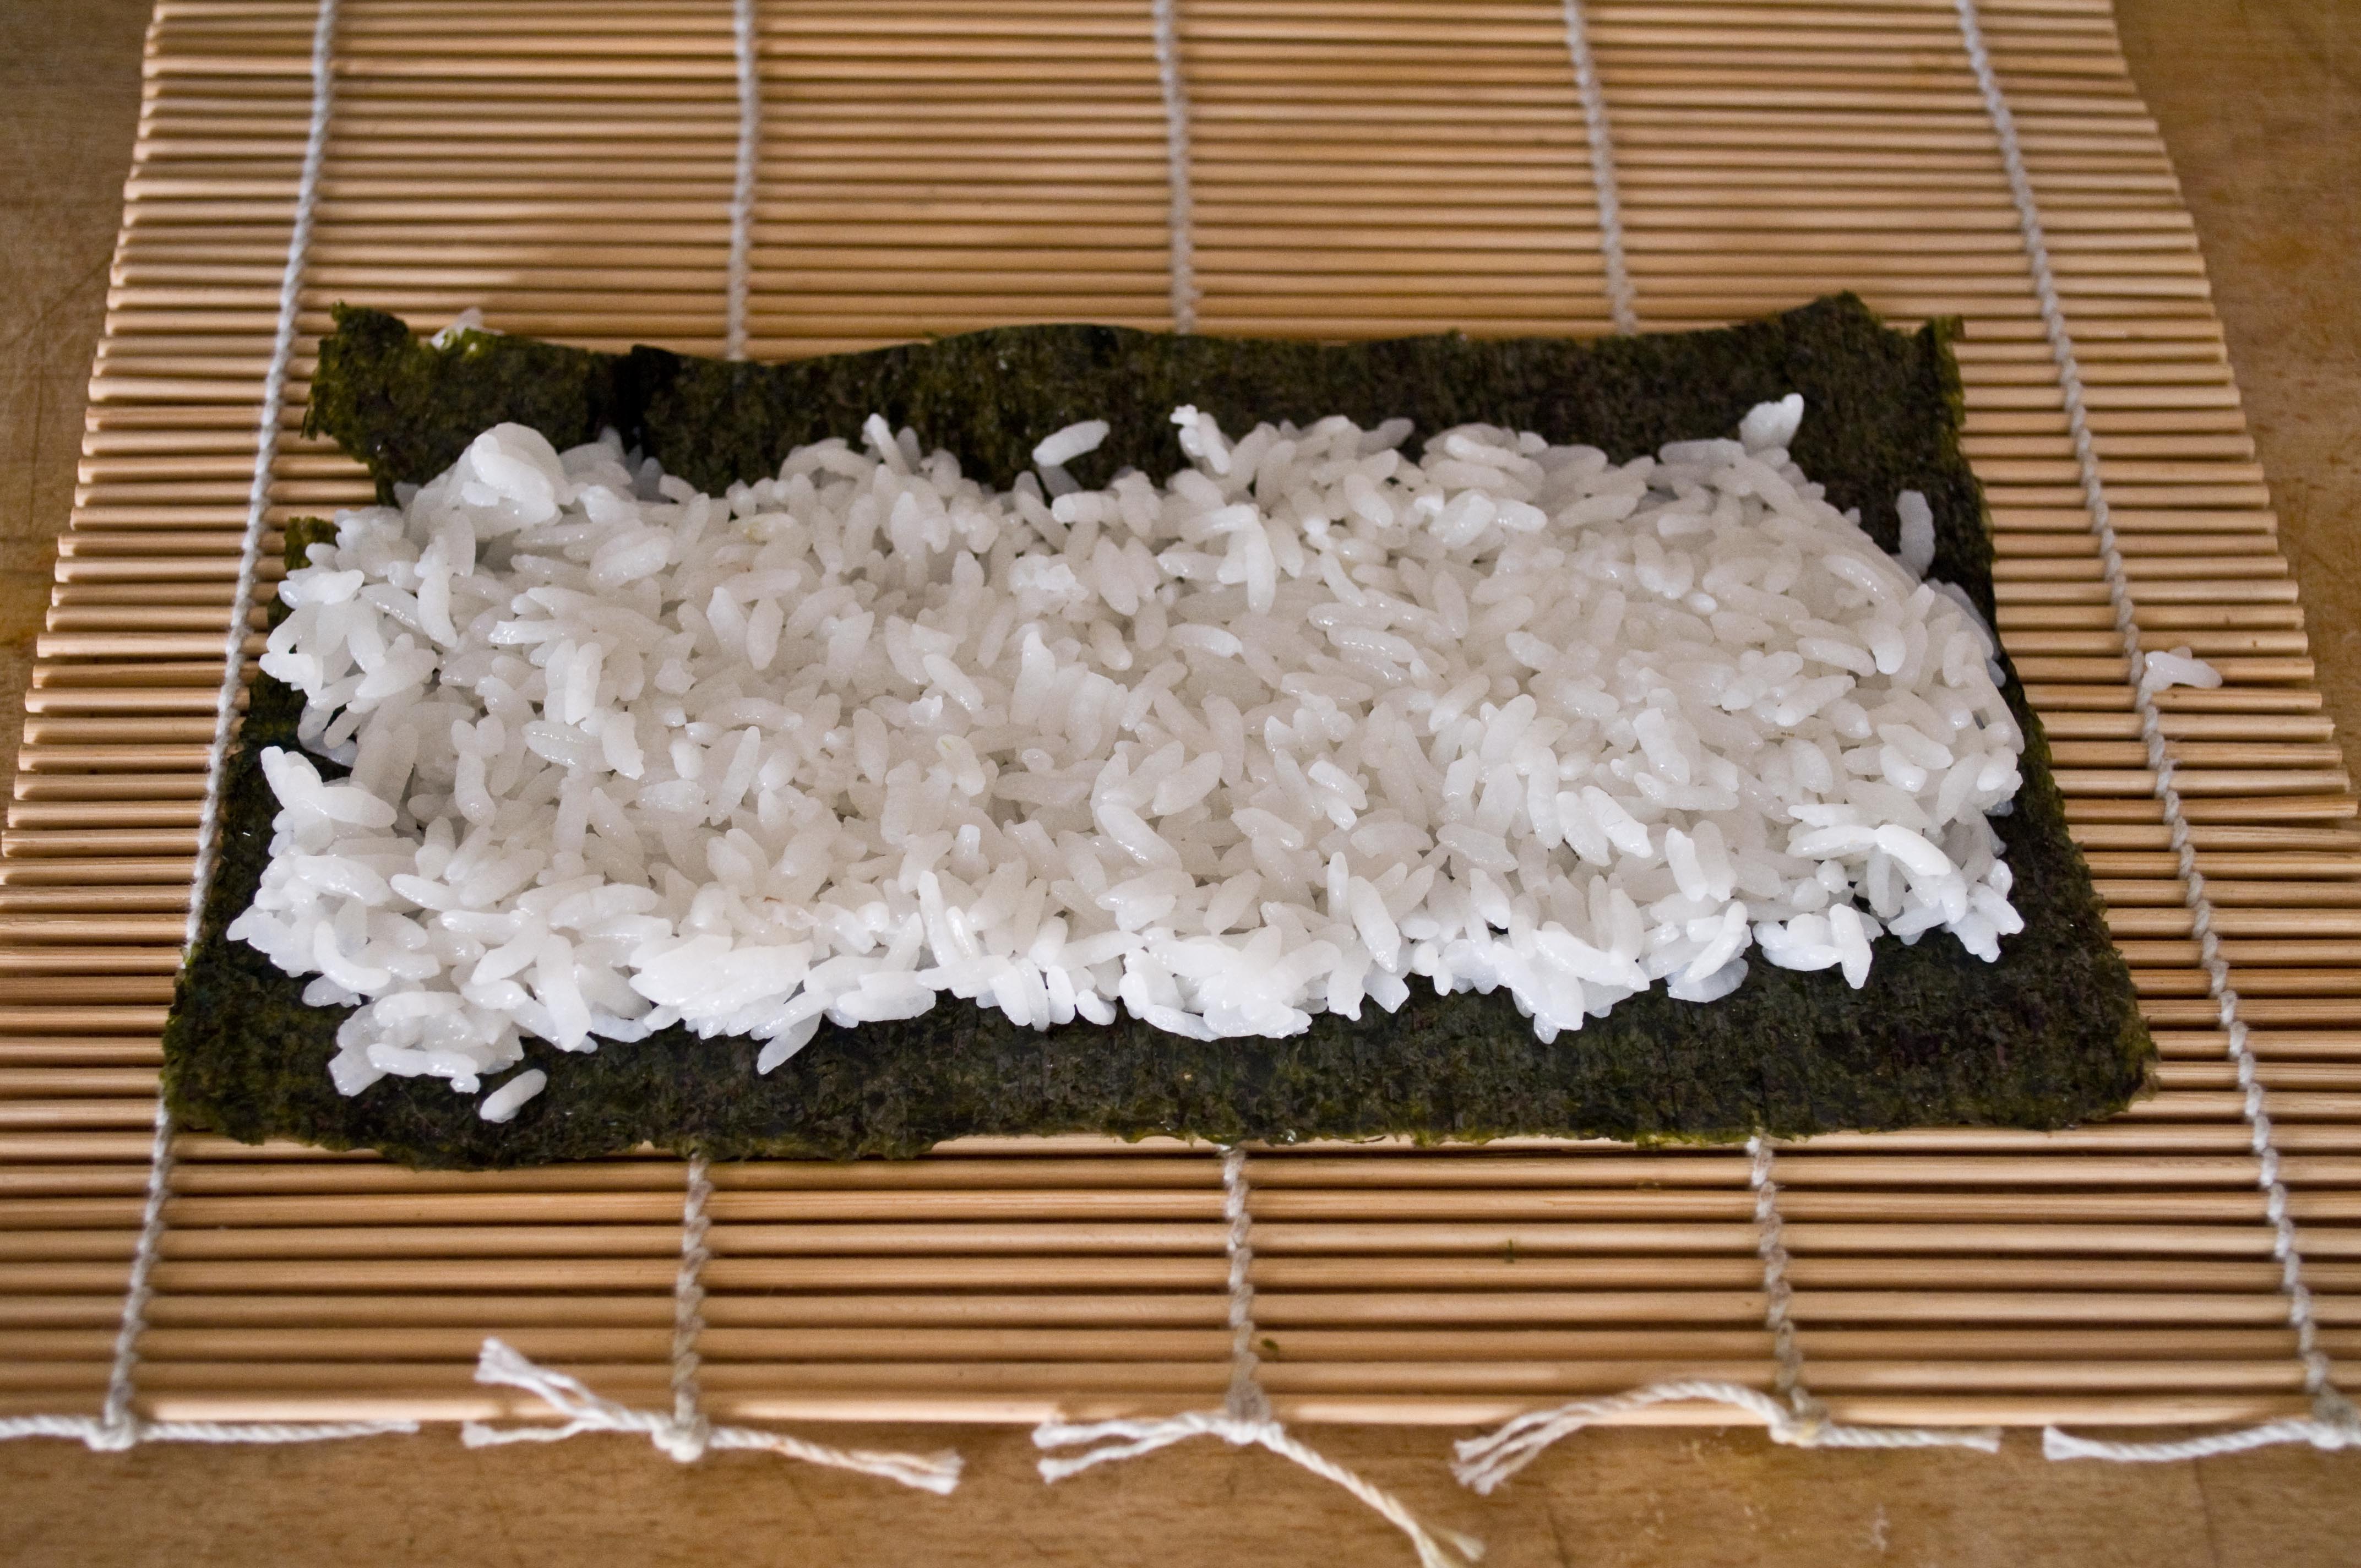
You will NEED a small bowl of cold water. This is so that the very sticky rice doesn’t stick to your fingers. Dip your fingers, as needed, into the water and transfer enough rice to make a thin layer of rice over the sheet of Nori while leaving a small blank margin along all sides.
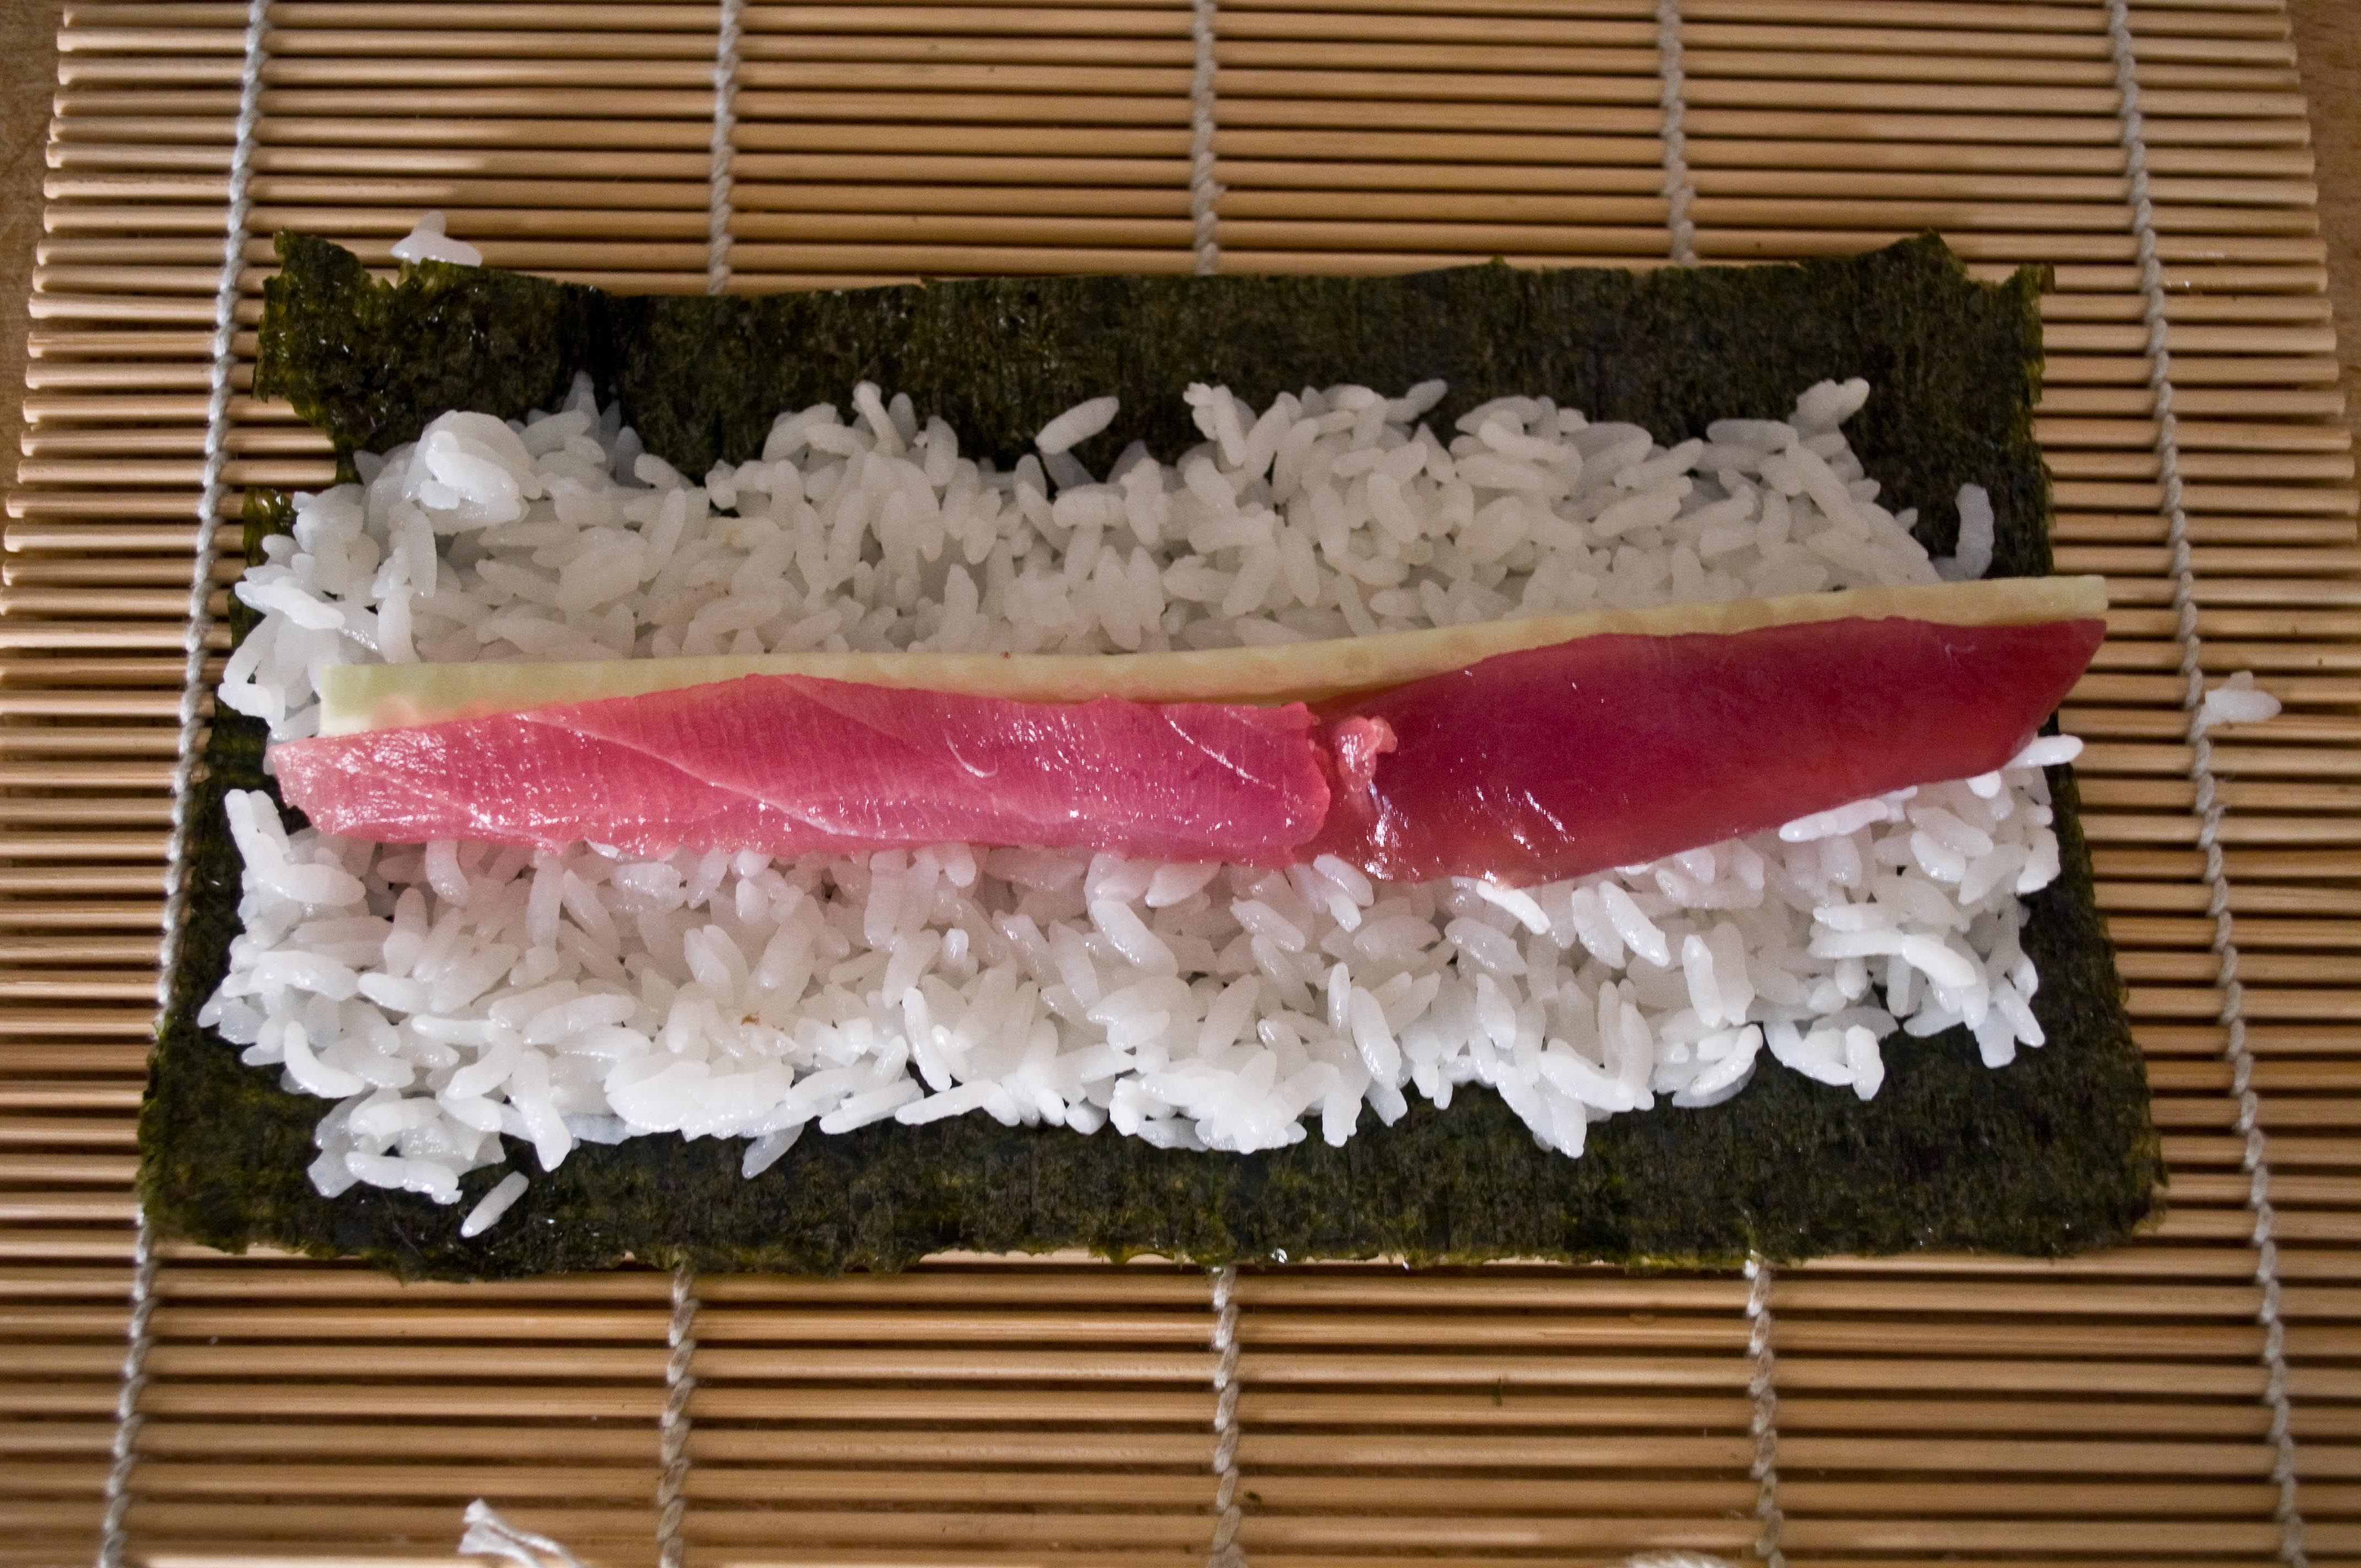
Place your thin strips of fish in the center. I also placed a long thin strip of cucumber for a little crunch.
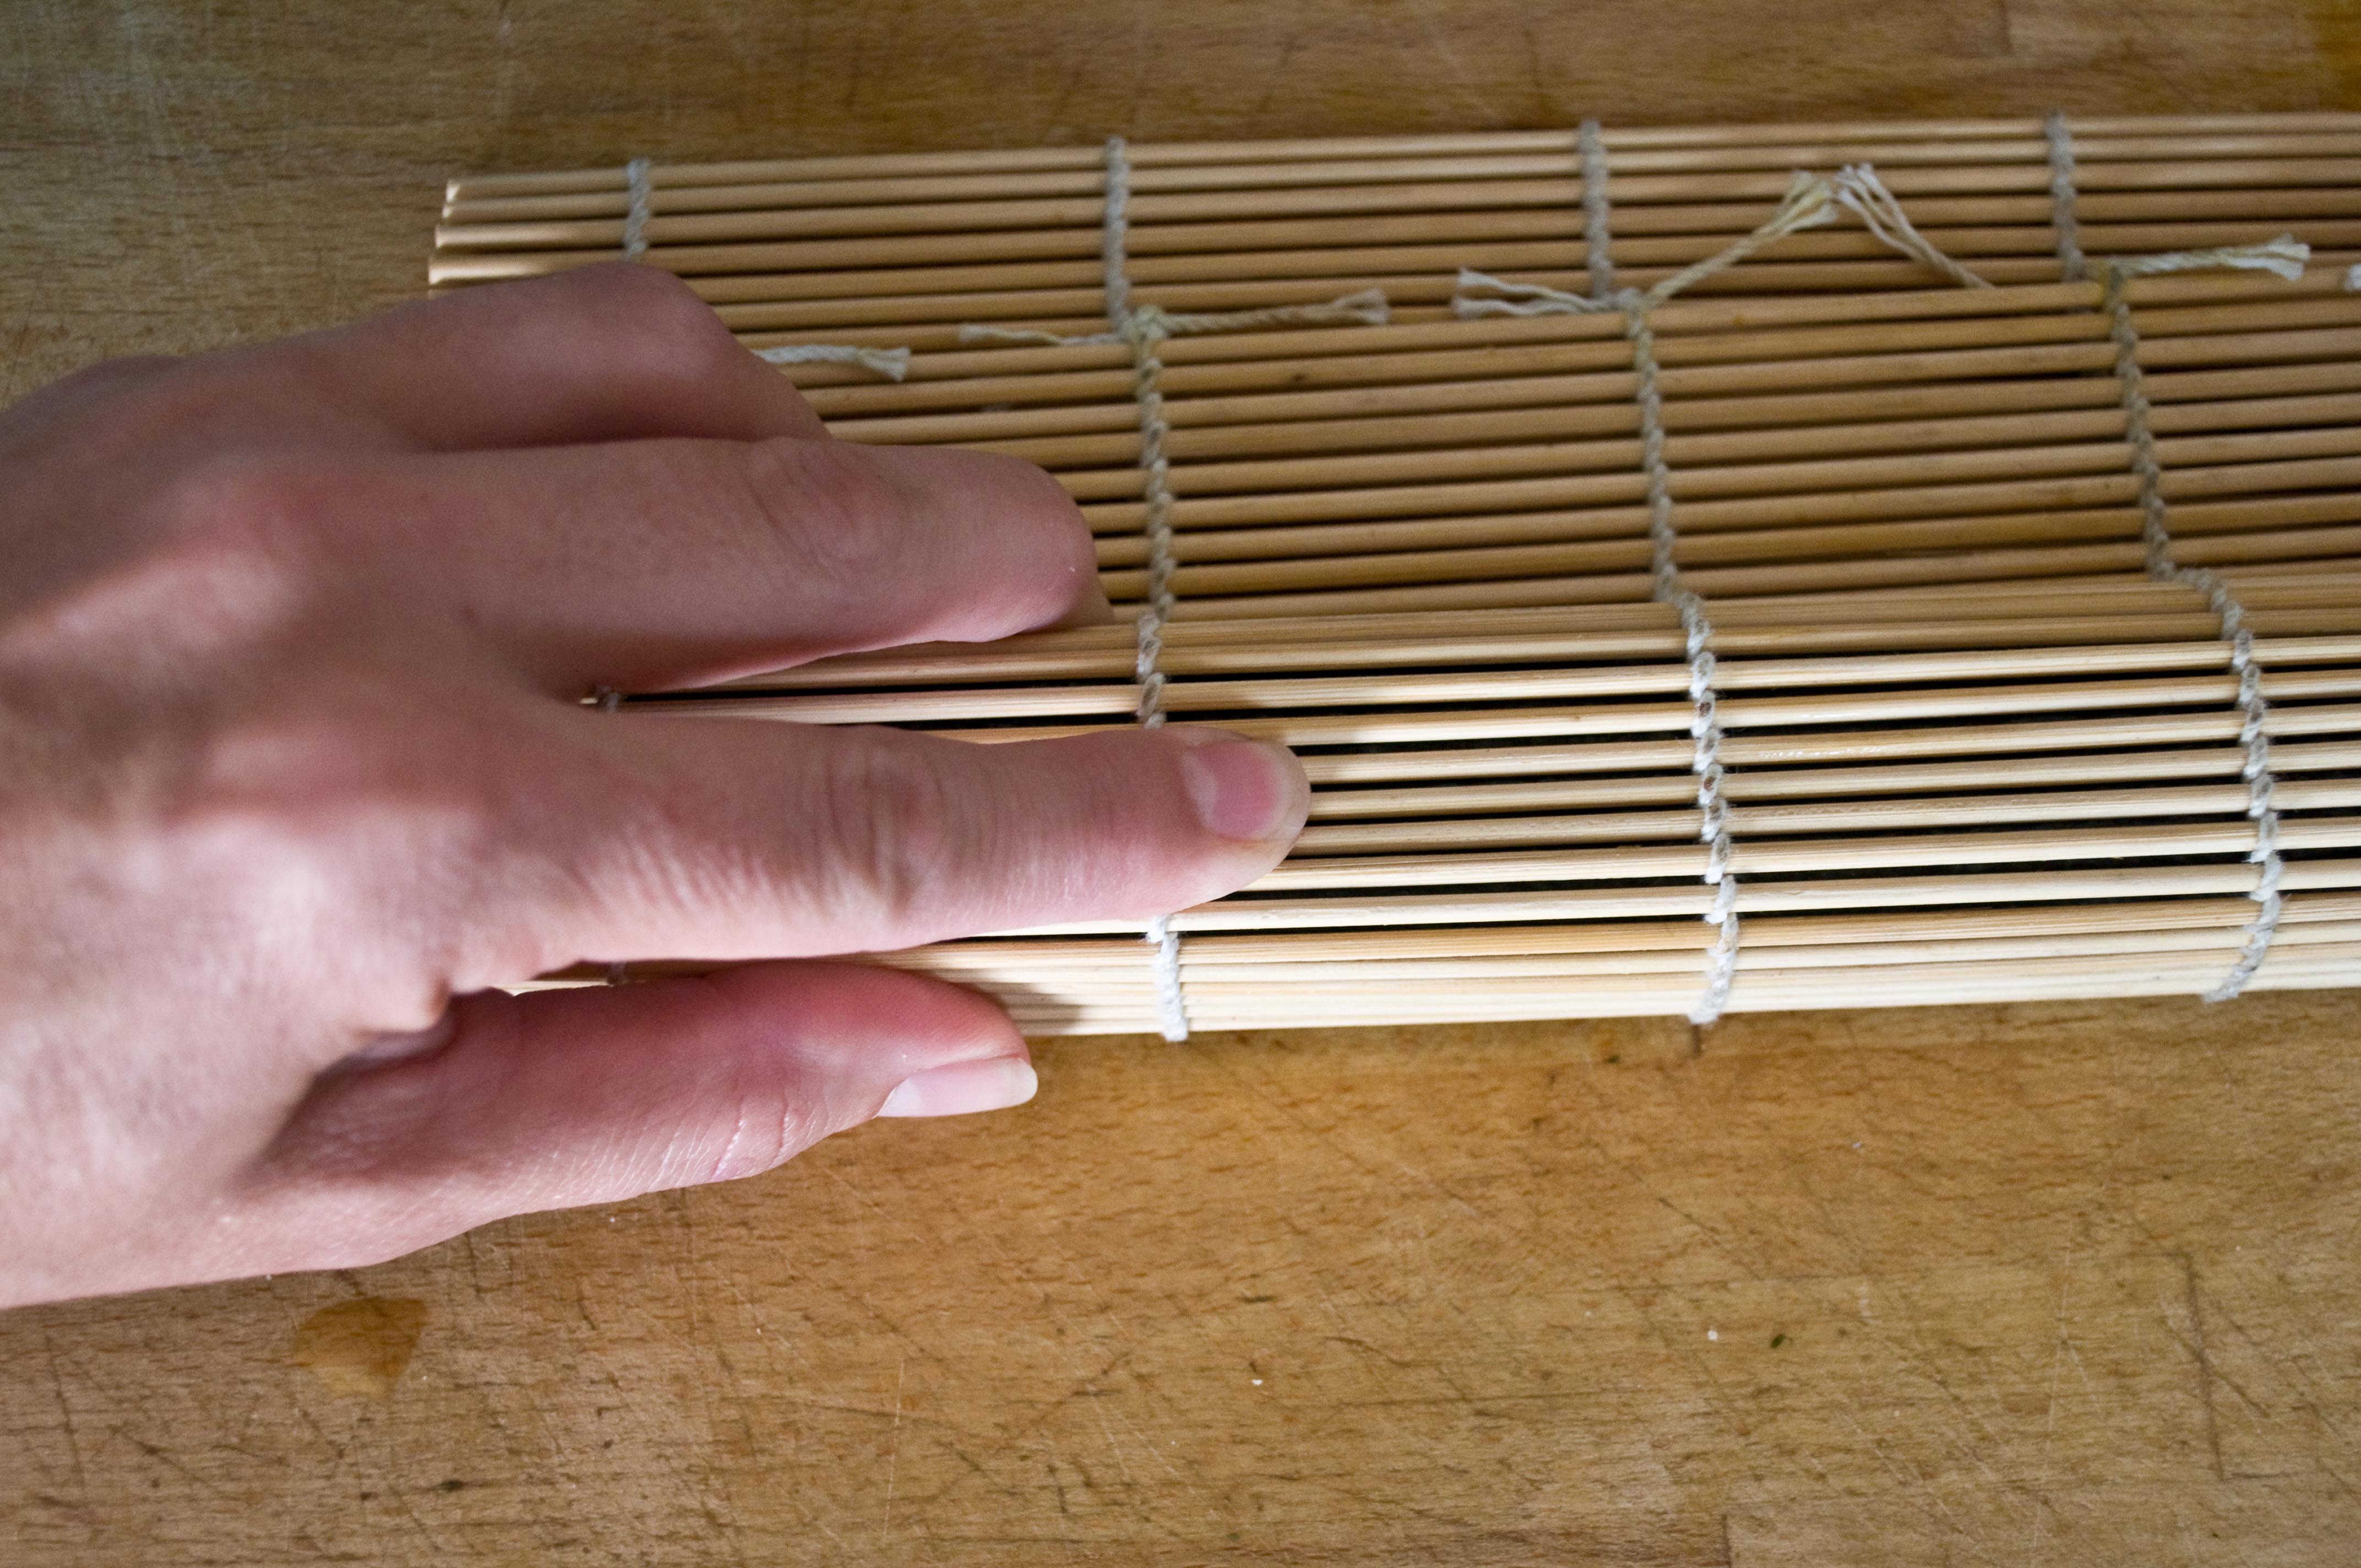
Roll away from you, using the mat as a guide. Apply firm pressure to shape the roll.
While the roll is still in the bamboo mat, form into a square with firm pressure.
For the Spicy Crab FIlling:
This is much more accessible and easier to find in most of the United States, regardless of how far you are from the ocean.
This is a basic spicy crab recipe, with sour cream as a substitute for the more commonly used mayonaise. If you want to use mayo, it will work just fine as well. I just have a very strong aversion to mayo in general, store bough being at the top of my hit list.
1 six ounce can of lump crab meat, or claw meat (please don’t use the fake stuff Krab just doesn’t taste the same)
2 tbs of sour cream
1 tsp Nanami Togarashi (Don’t be scared, most grocery stores have it in the Asian section)
Pinch of salt
Squeeze the crab meat to remove as much water as you can. This will help your filling to stay together and not become a soupy mess.
Add the sour cream, nanami and salt and stir to combine.
Use a full sheet of Nori for this roll, but use the same steps as with the Ahi roll.
I used a thin strip of cucumber for this roll as well. Just because I had it already cut and I wanted to add a little crunch.
Roll the same as before, but there is no need to make the larger rolls square.
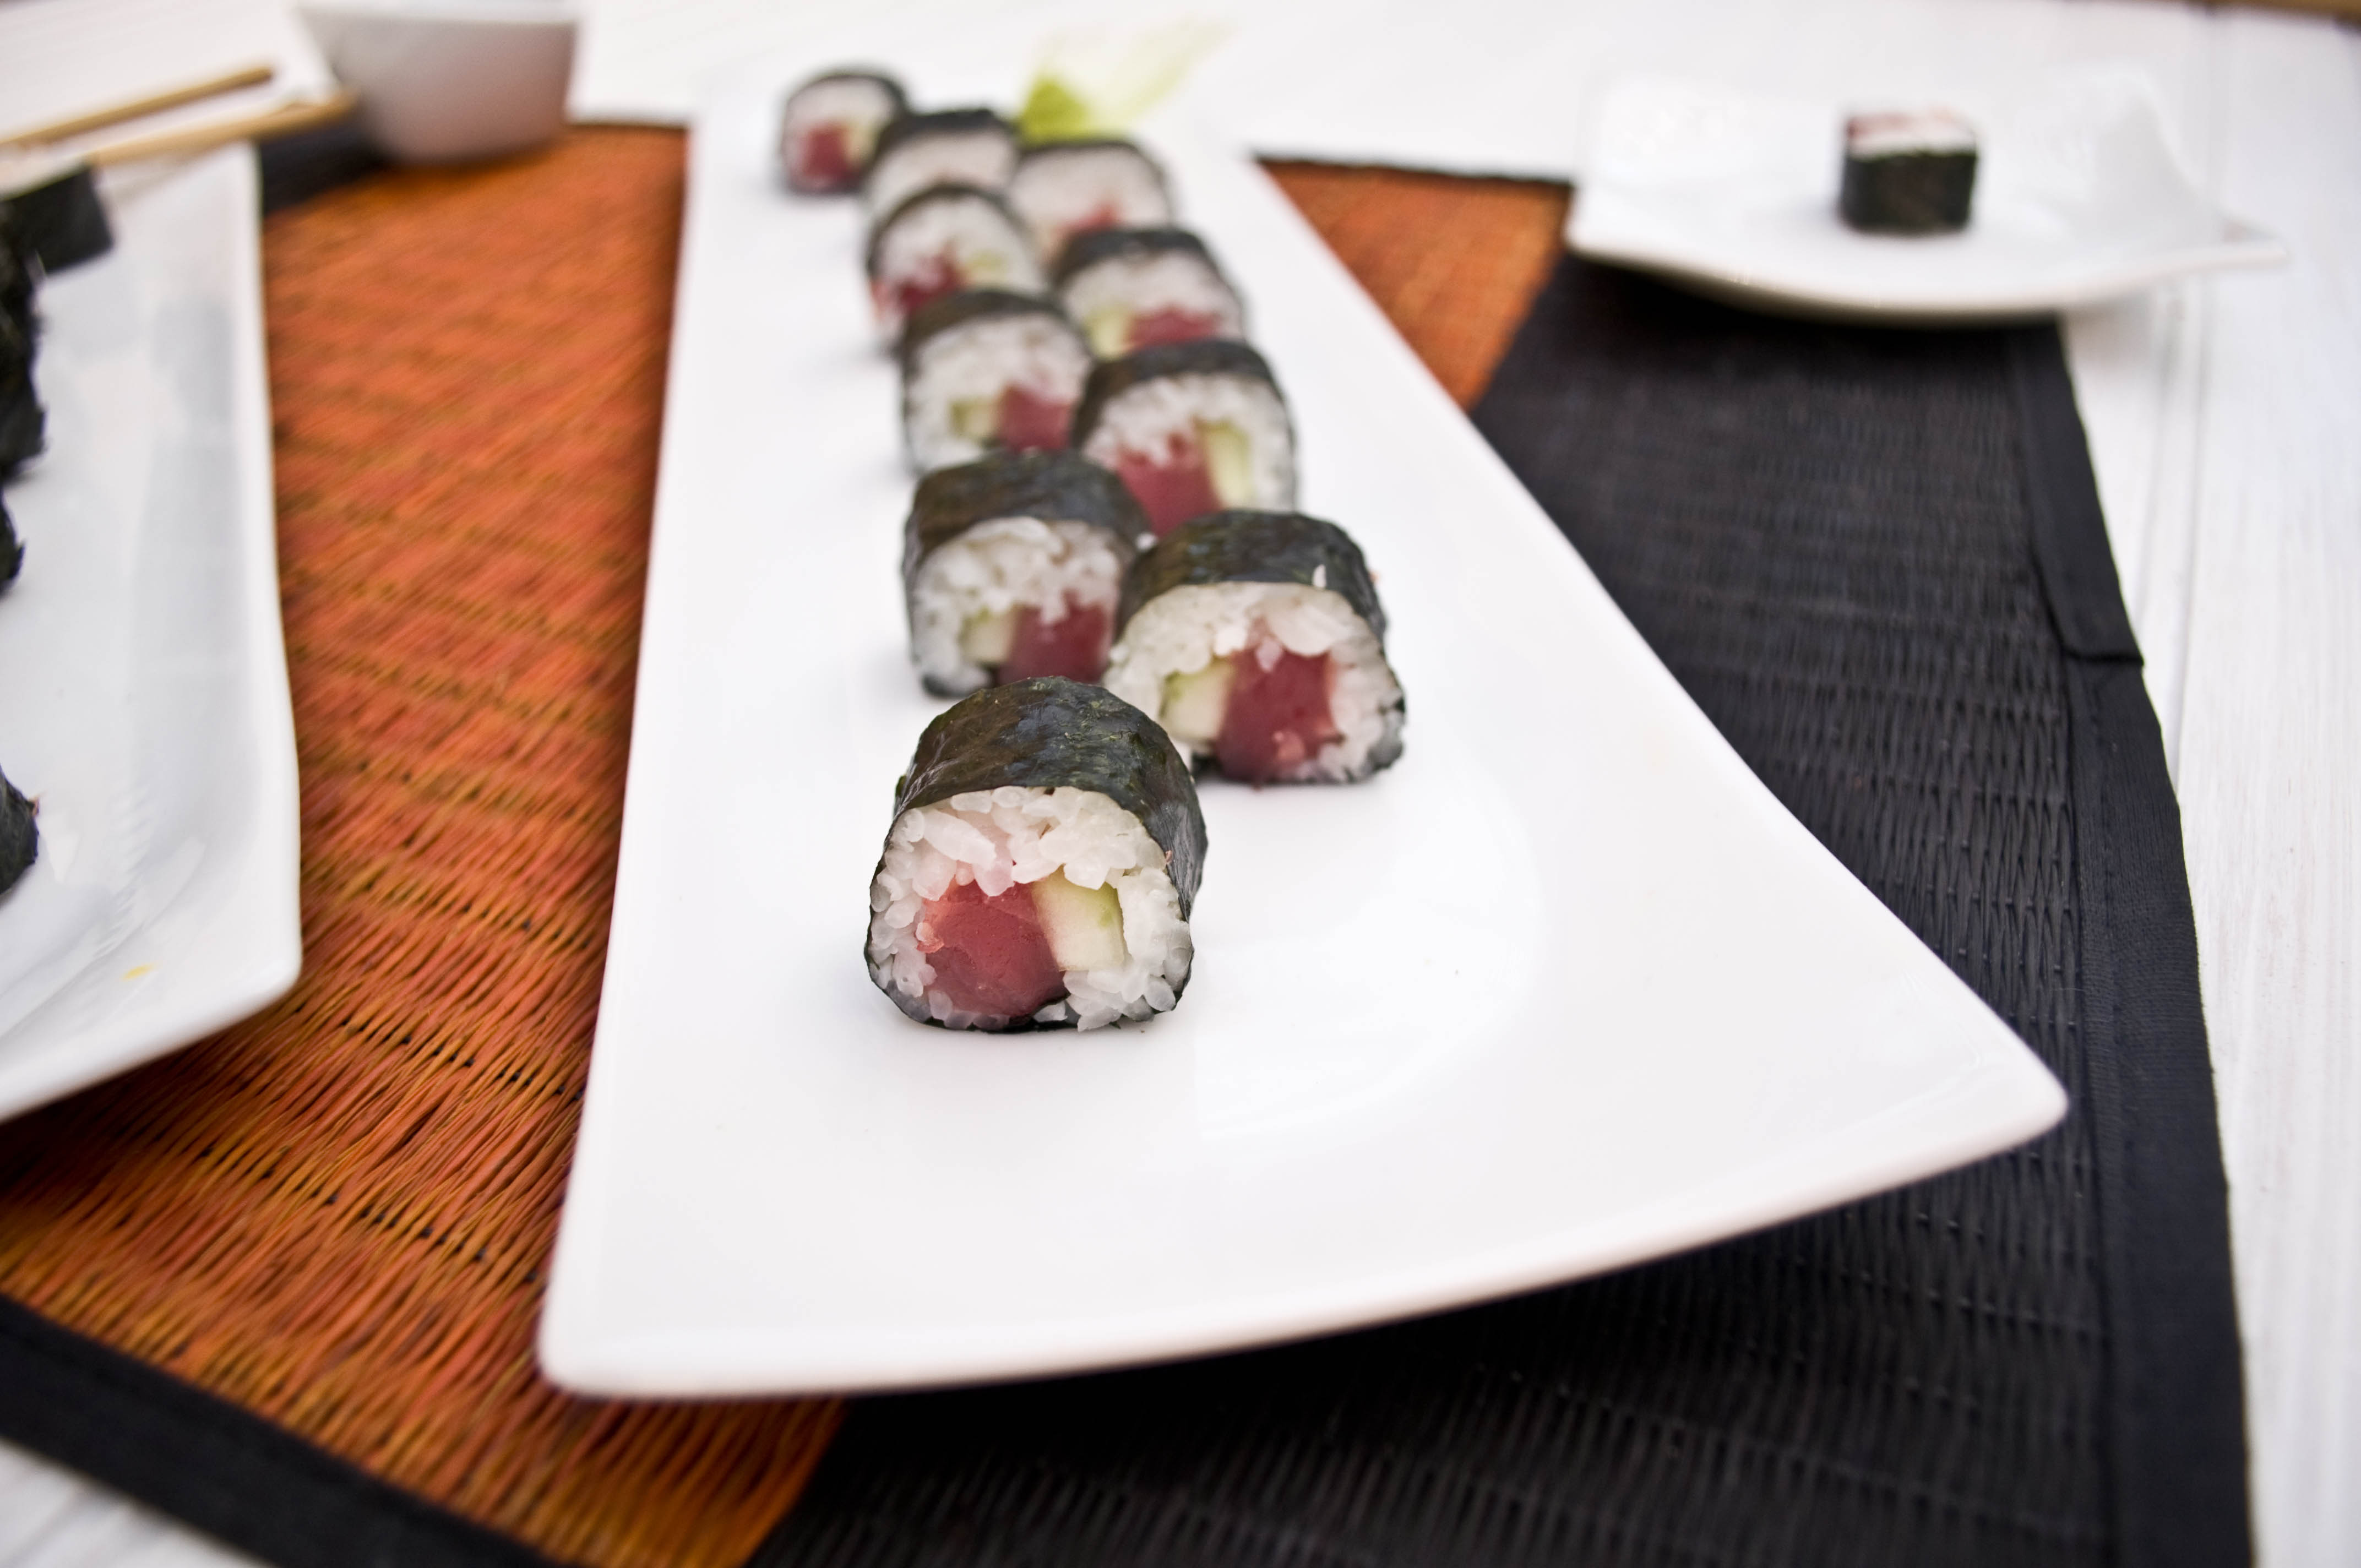
Use a very sharp knife to cut the rolls, you may need to run the knife under hot water in between cuts.
Whats up with Wasabi?? There are two kinds that are pretty readily available at most grocery stores. The squeeze tube kind and the powder kind that you mix with water. I find the squeeze tube kind to have an odd, over powering taste. I very much prefer the powder kind.
You now know how to make sushi. Go impress your friends.
Do you have a How To that you want to see? Email it to [email protected] or leave it on my Facebook wall at:


