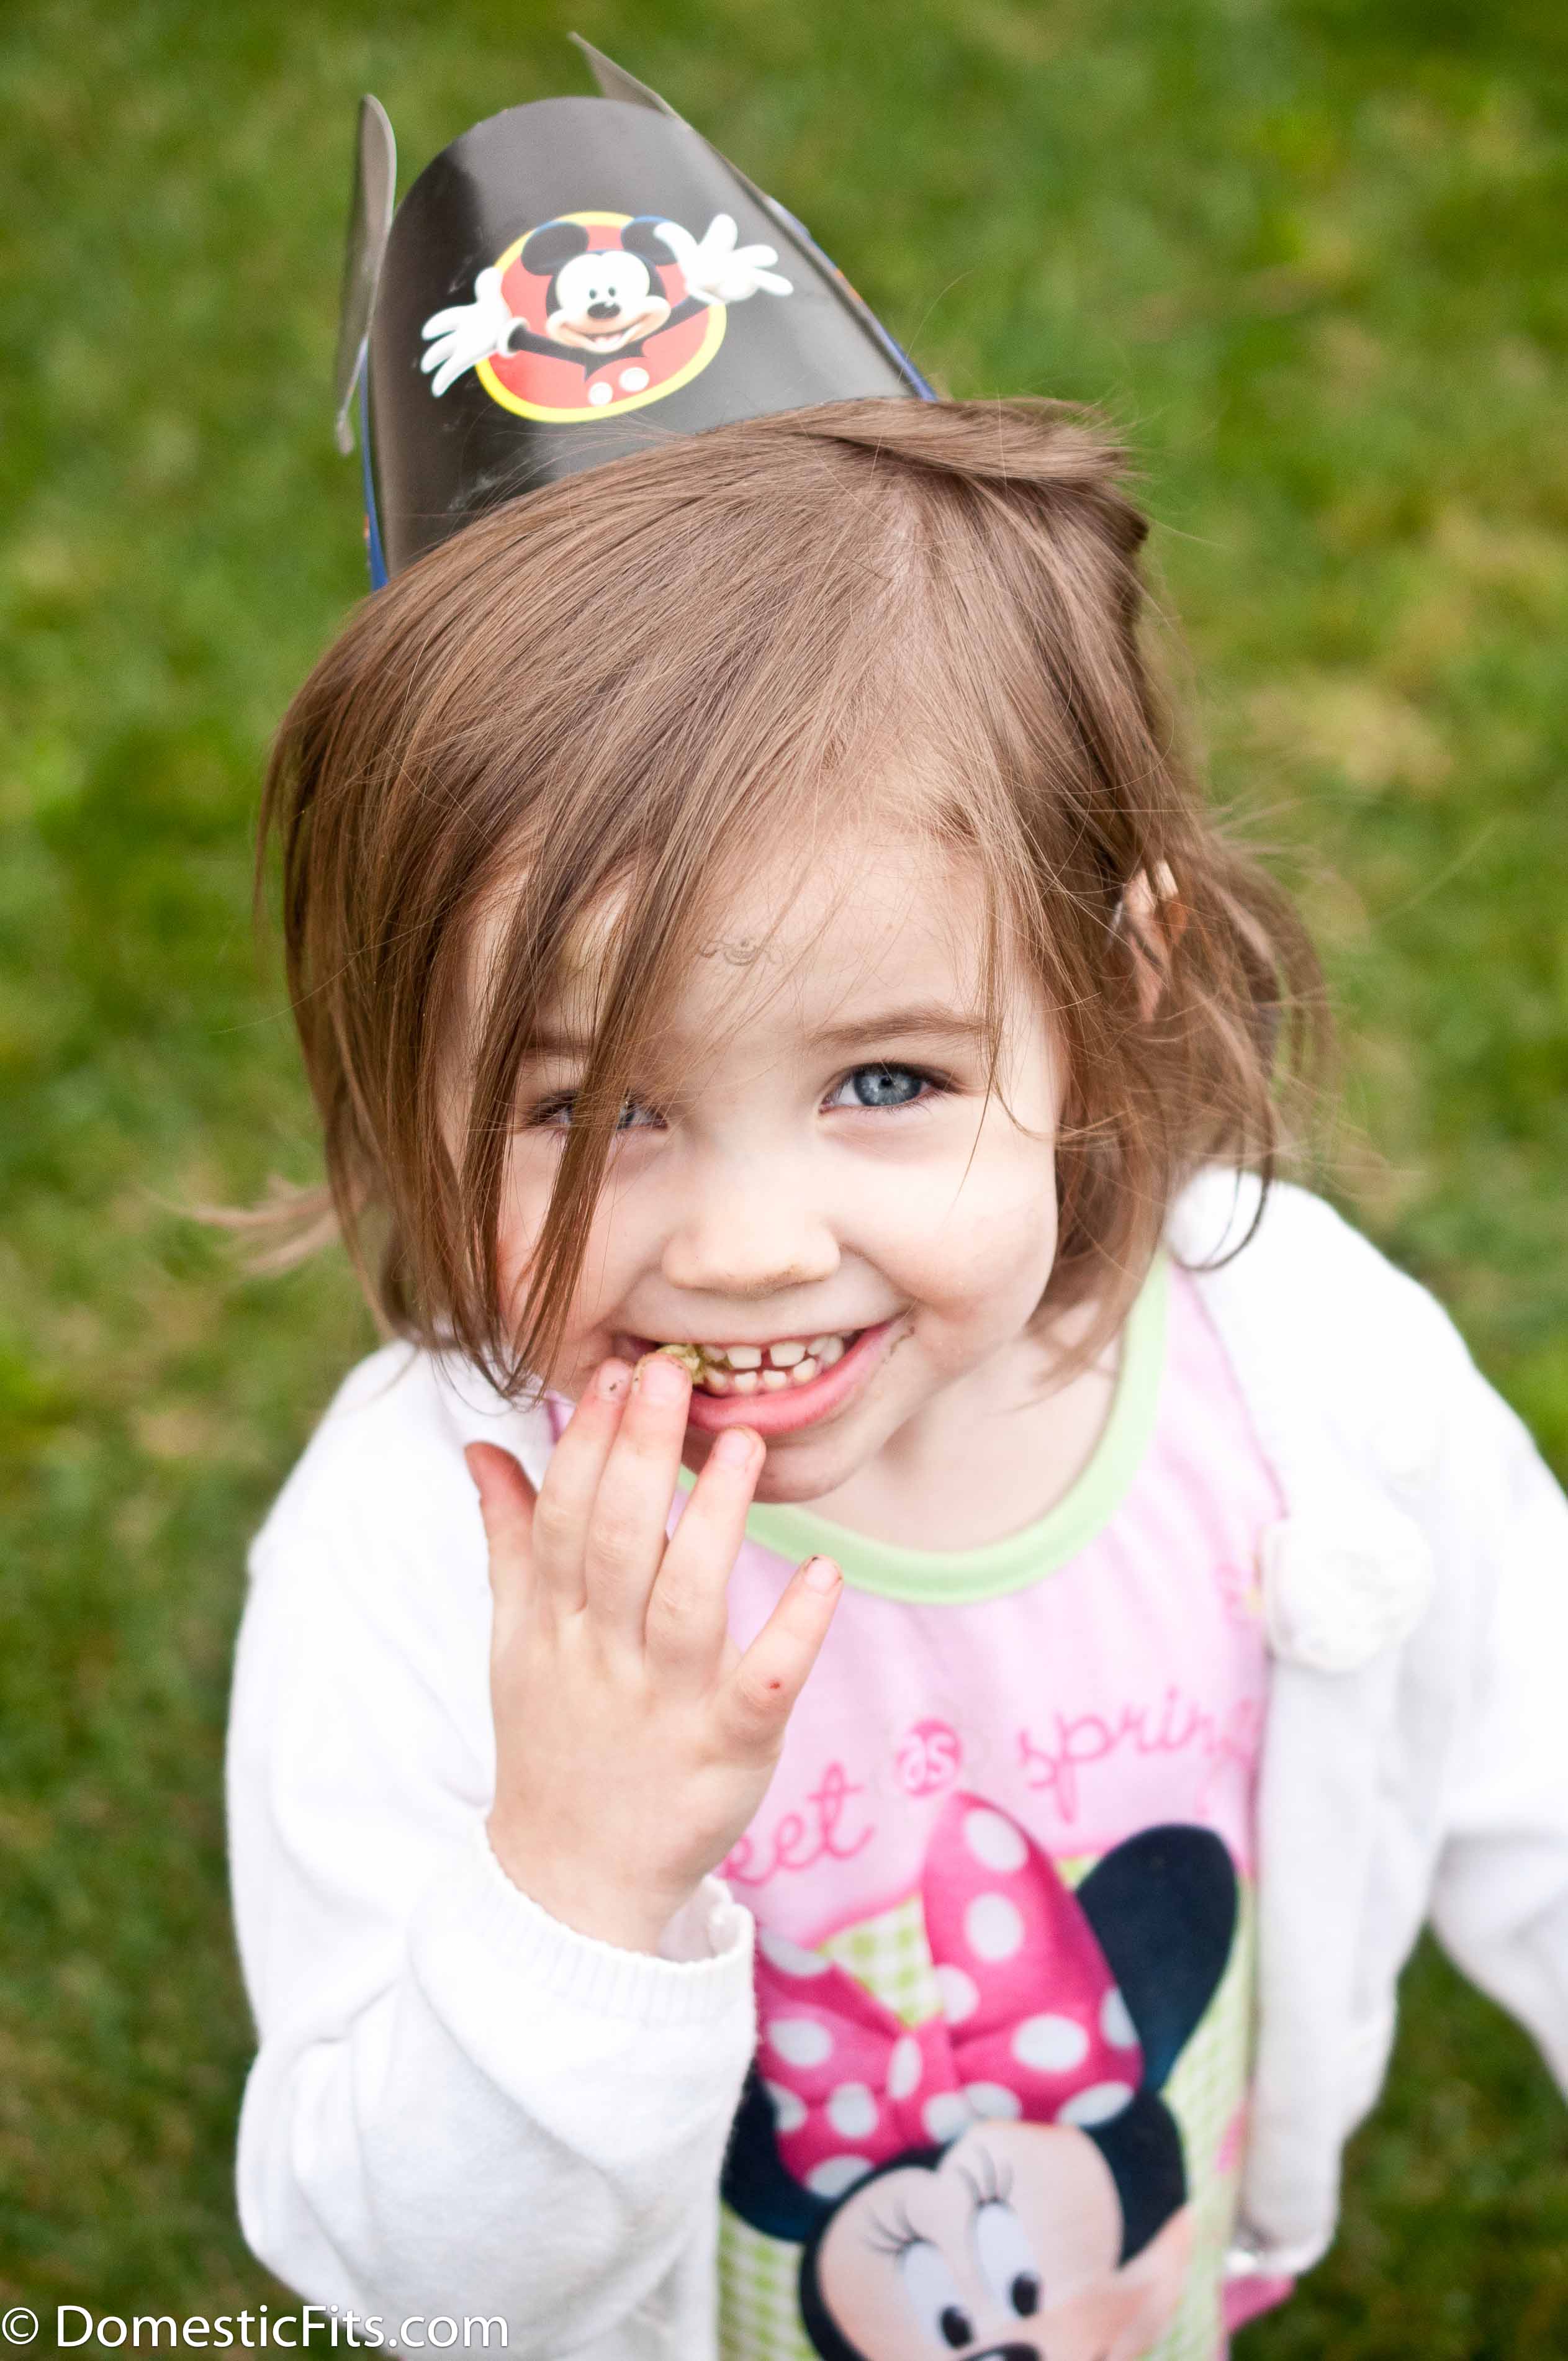
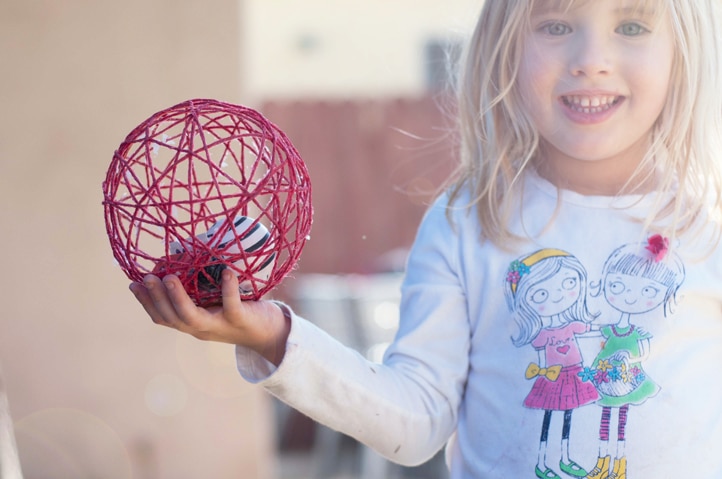
Crafts/Parties

Mickey Mouse Kids Party Favor Bar

Mickey Mouse Kids Party Favor Bar: cheaper, easier, and better than a candy buffet!


Tater turned 3.

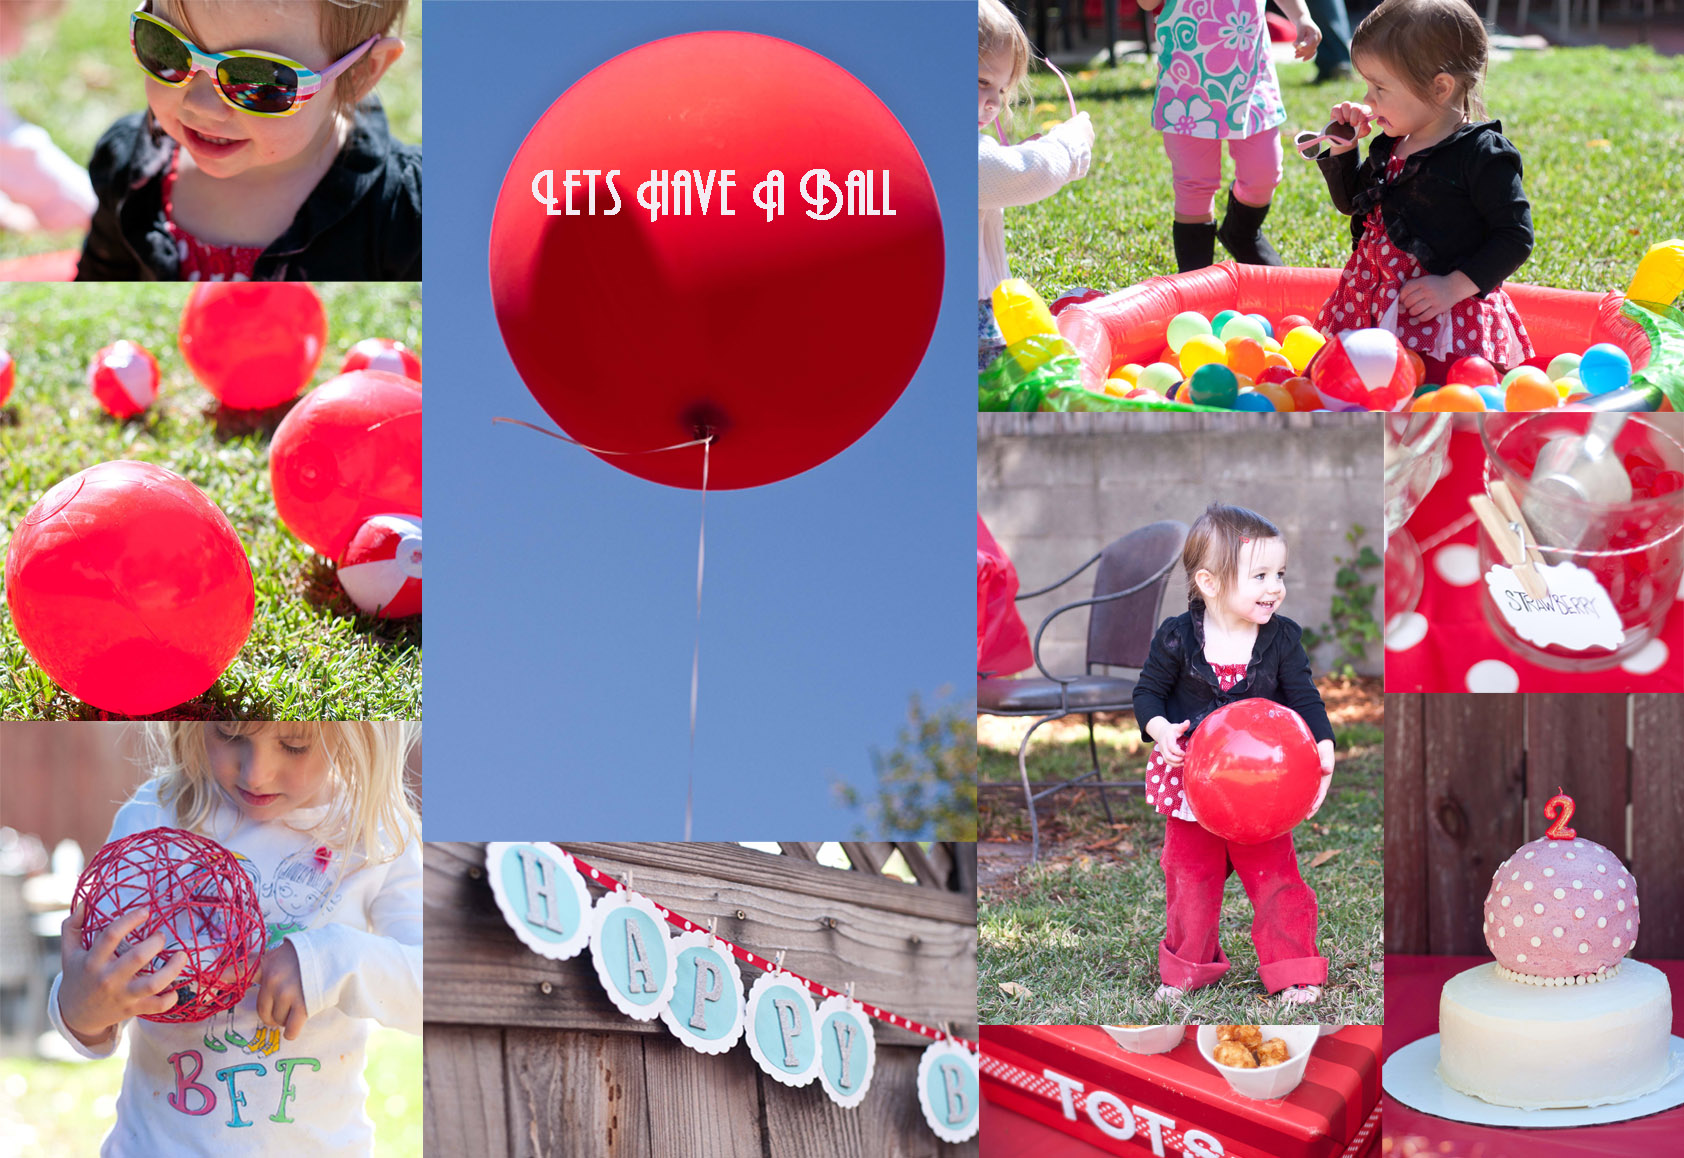
I feel like I just typed up her Lets Have A Ball 2nd birthday party post, and now she’s three. To say that "It Goes By So Fast" is like saying a ghost chili is "kind of spicy." I want her to stop growing up so fast, but I love this amazing tiny person she’s turning into.

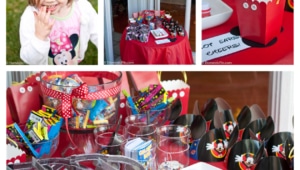
All she wanted for her birthday was a Mickey Mouse party, save the Princesses for someone else, it’s all about the Mouse for this kid. For the past two years I’ve been making Candy Buffets, which are adorable, but let’s be honest, there are some issues. First: there is always leftover candy and that is no bueno when it comes to my lack of self-control. Second, they are always more expensive than I think. To buy enough candy to fill the cute jars, not to mention getting the coordinating colors you want, it can be up $100 (p.s. that’s too much to spend on candy for a kids party).

Also, most parents don’t get super excited about their kids leaving a party with a gigantic bag of kiddie crack. The favor bar worked out much better, it was cheaper, parents where happier and the leftovers haven’t cause me to gain even an ounce.

Here’s a list of what I bought:

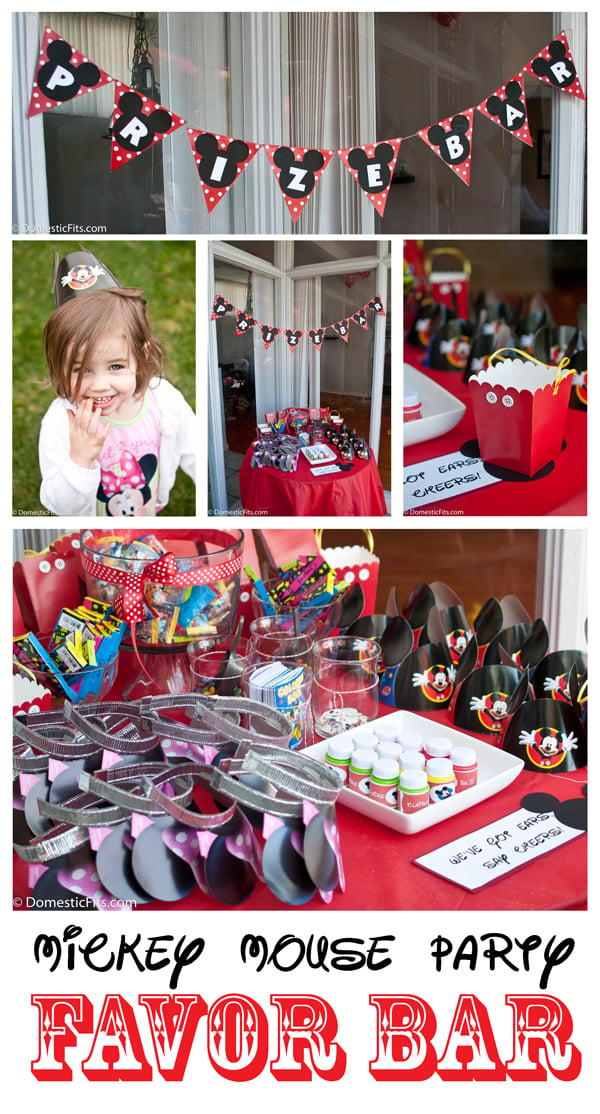
For the banner I used this Red Polka Dot Banner from Oriental Trading for $3, then printed PRIZE BAR (using the free Mickey Ears font) on a regular printer, just glued the letters on using a glue stick. I downloaded FREE Mickey Mouse fonts to use for all the signs and the invitations. Mickey Mouse Kids Party Favor Bar: cheaper, easier, and better than a candy buffet! 
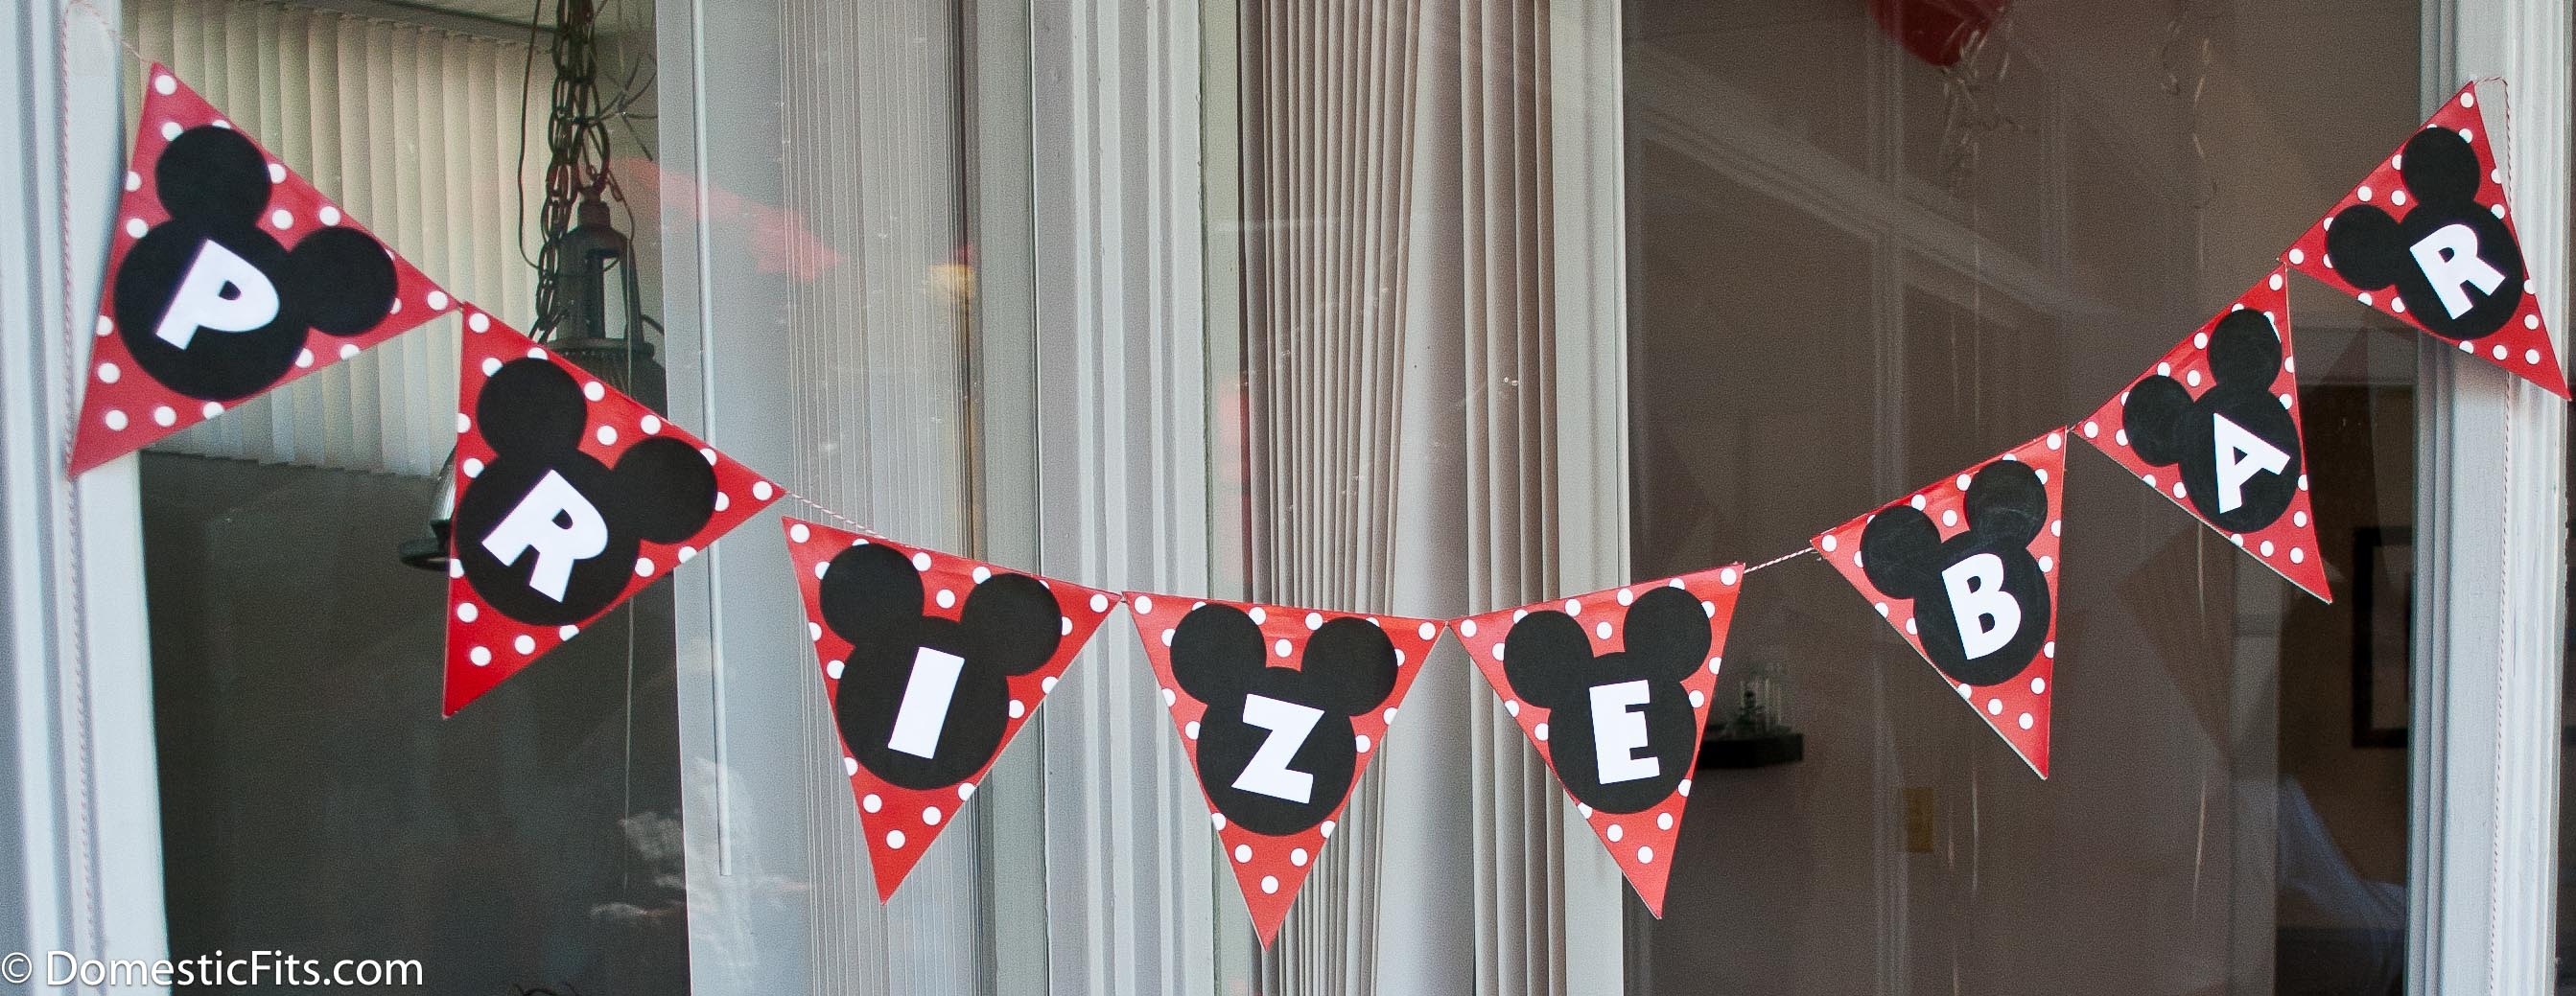
I also bought Mickey Party Hats and Minnie Ears (both of these are also available at Party City).

Mickey Prize Bar Tater

I bought small 1 ounce bubbles (about this size) really cheap. Because I was going to pull the labels off I bought the Class of 2012 bubbles on sale at a local party store.

Mickey Mouse Prize Bar Bubbles with free printable labels

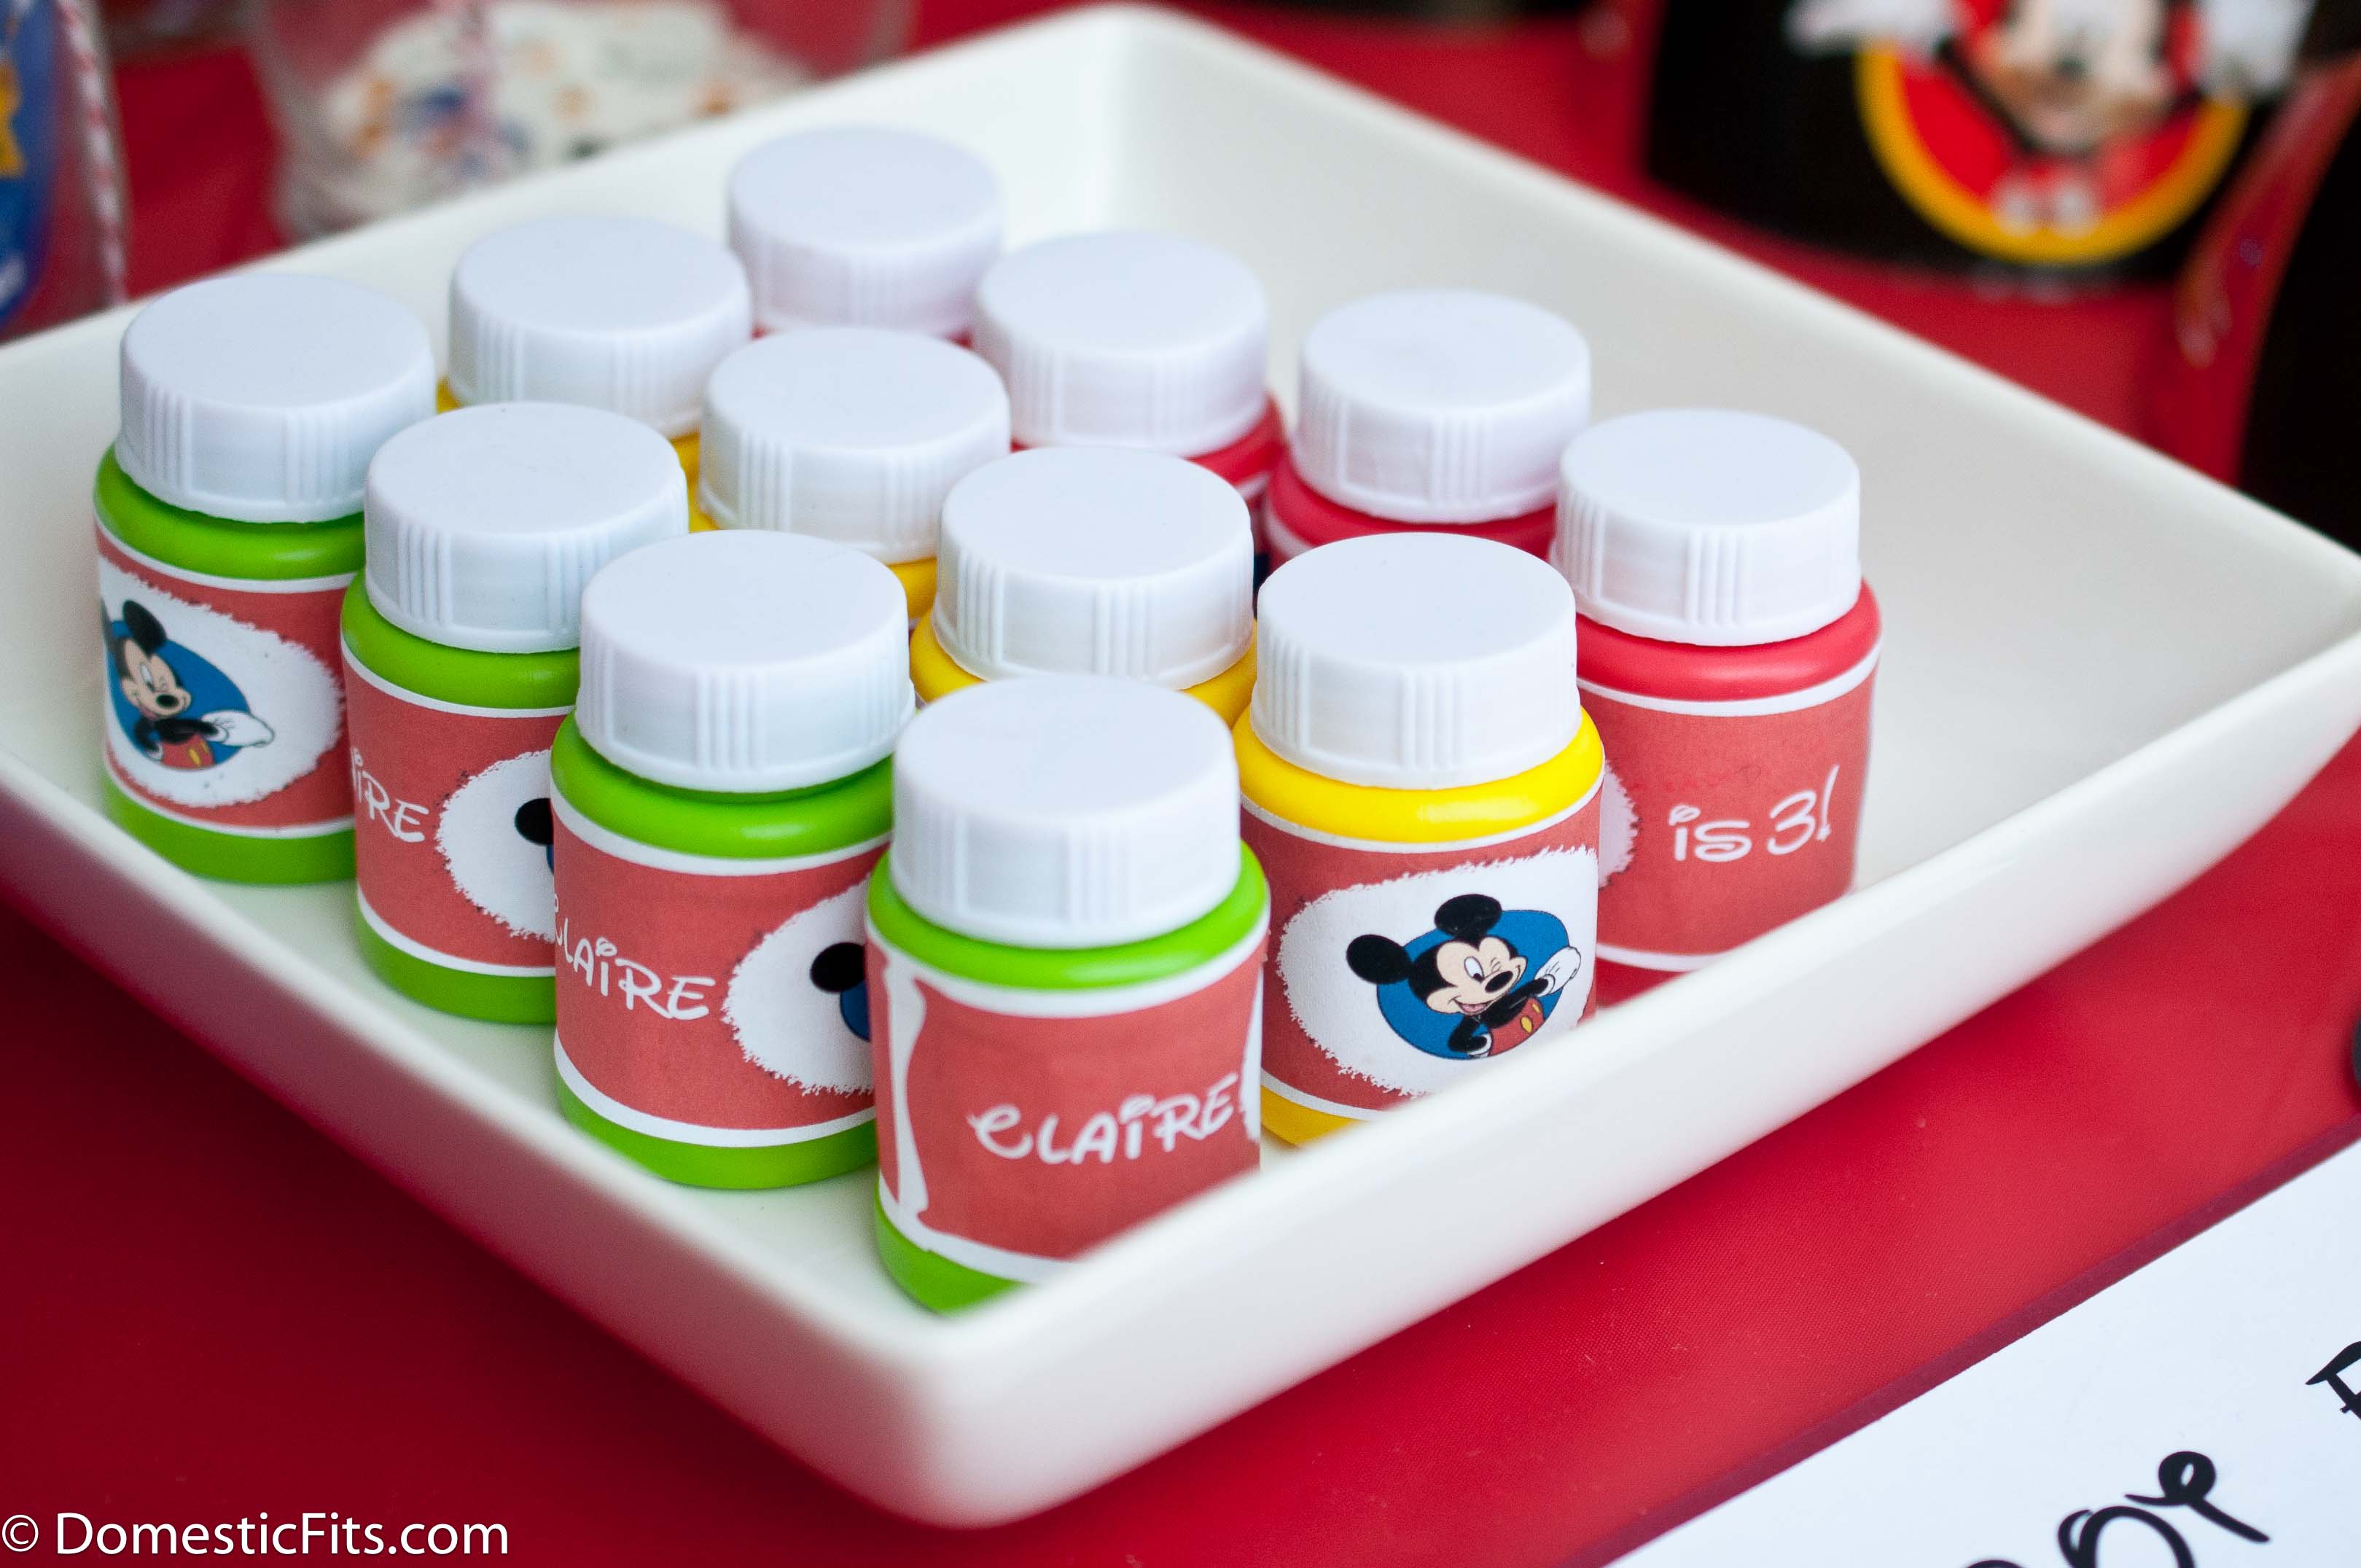
I made these labels and glued them on with glue stick (I’ve posted the label below without my kids name, but I put her name on one side of the Mickey and is 3! on the other using the free Walter font.

bubbles

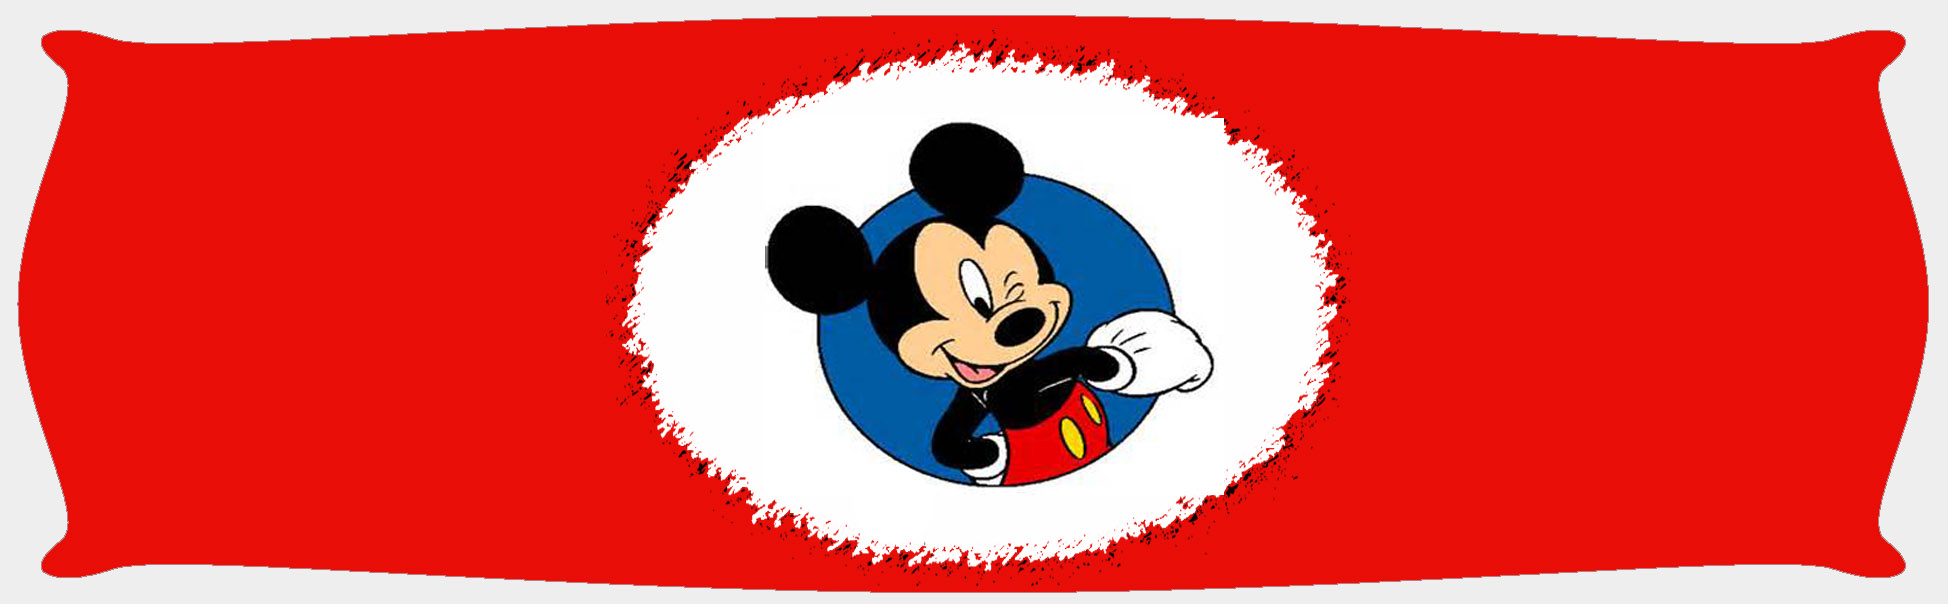
For a printable PDF file, click here: bubbles printable

  I also bought 24 small crayon packs for $5.25, because every mom can use some purse crayons. I also bought small Mickey coloring books at Party City for 30 cents each, Tater loves those so the leftovers are great for road trips and hanging at restaurants. I had Mickey Mouse temporary tattoos as well as stickers, that the kids seemed to love. I had some candy, but not a lot. I like the fake M&M’s from Simple Truth (sold at Ralph’s, QFC, Pay Less) because they don’t have any artificial food dyes.

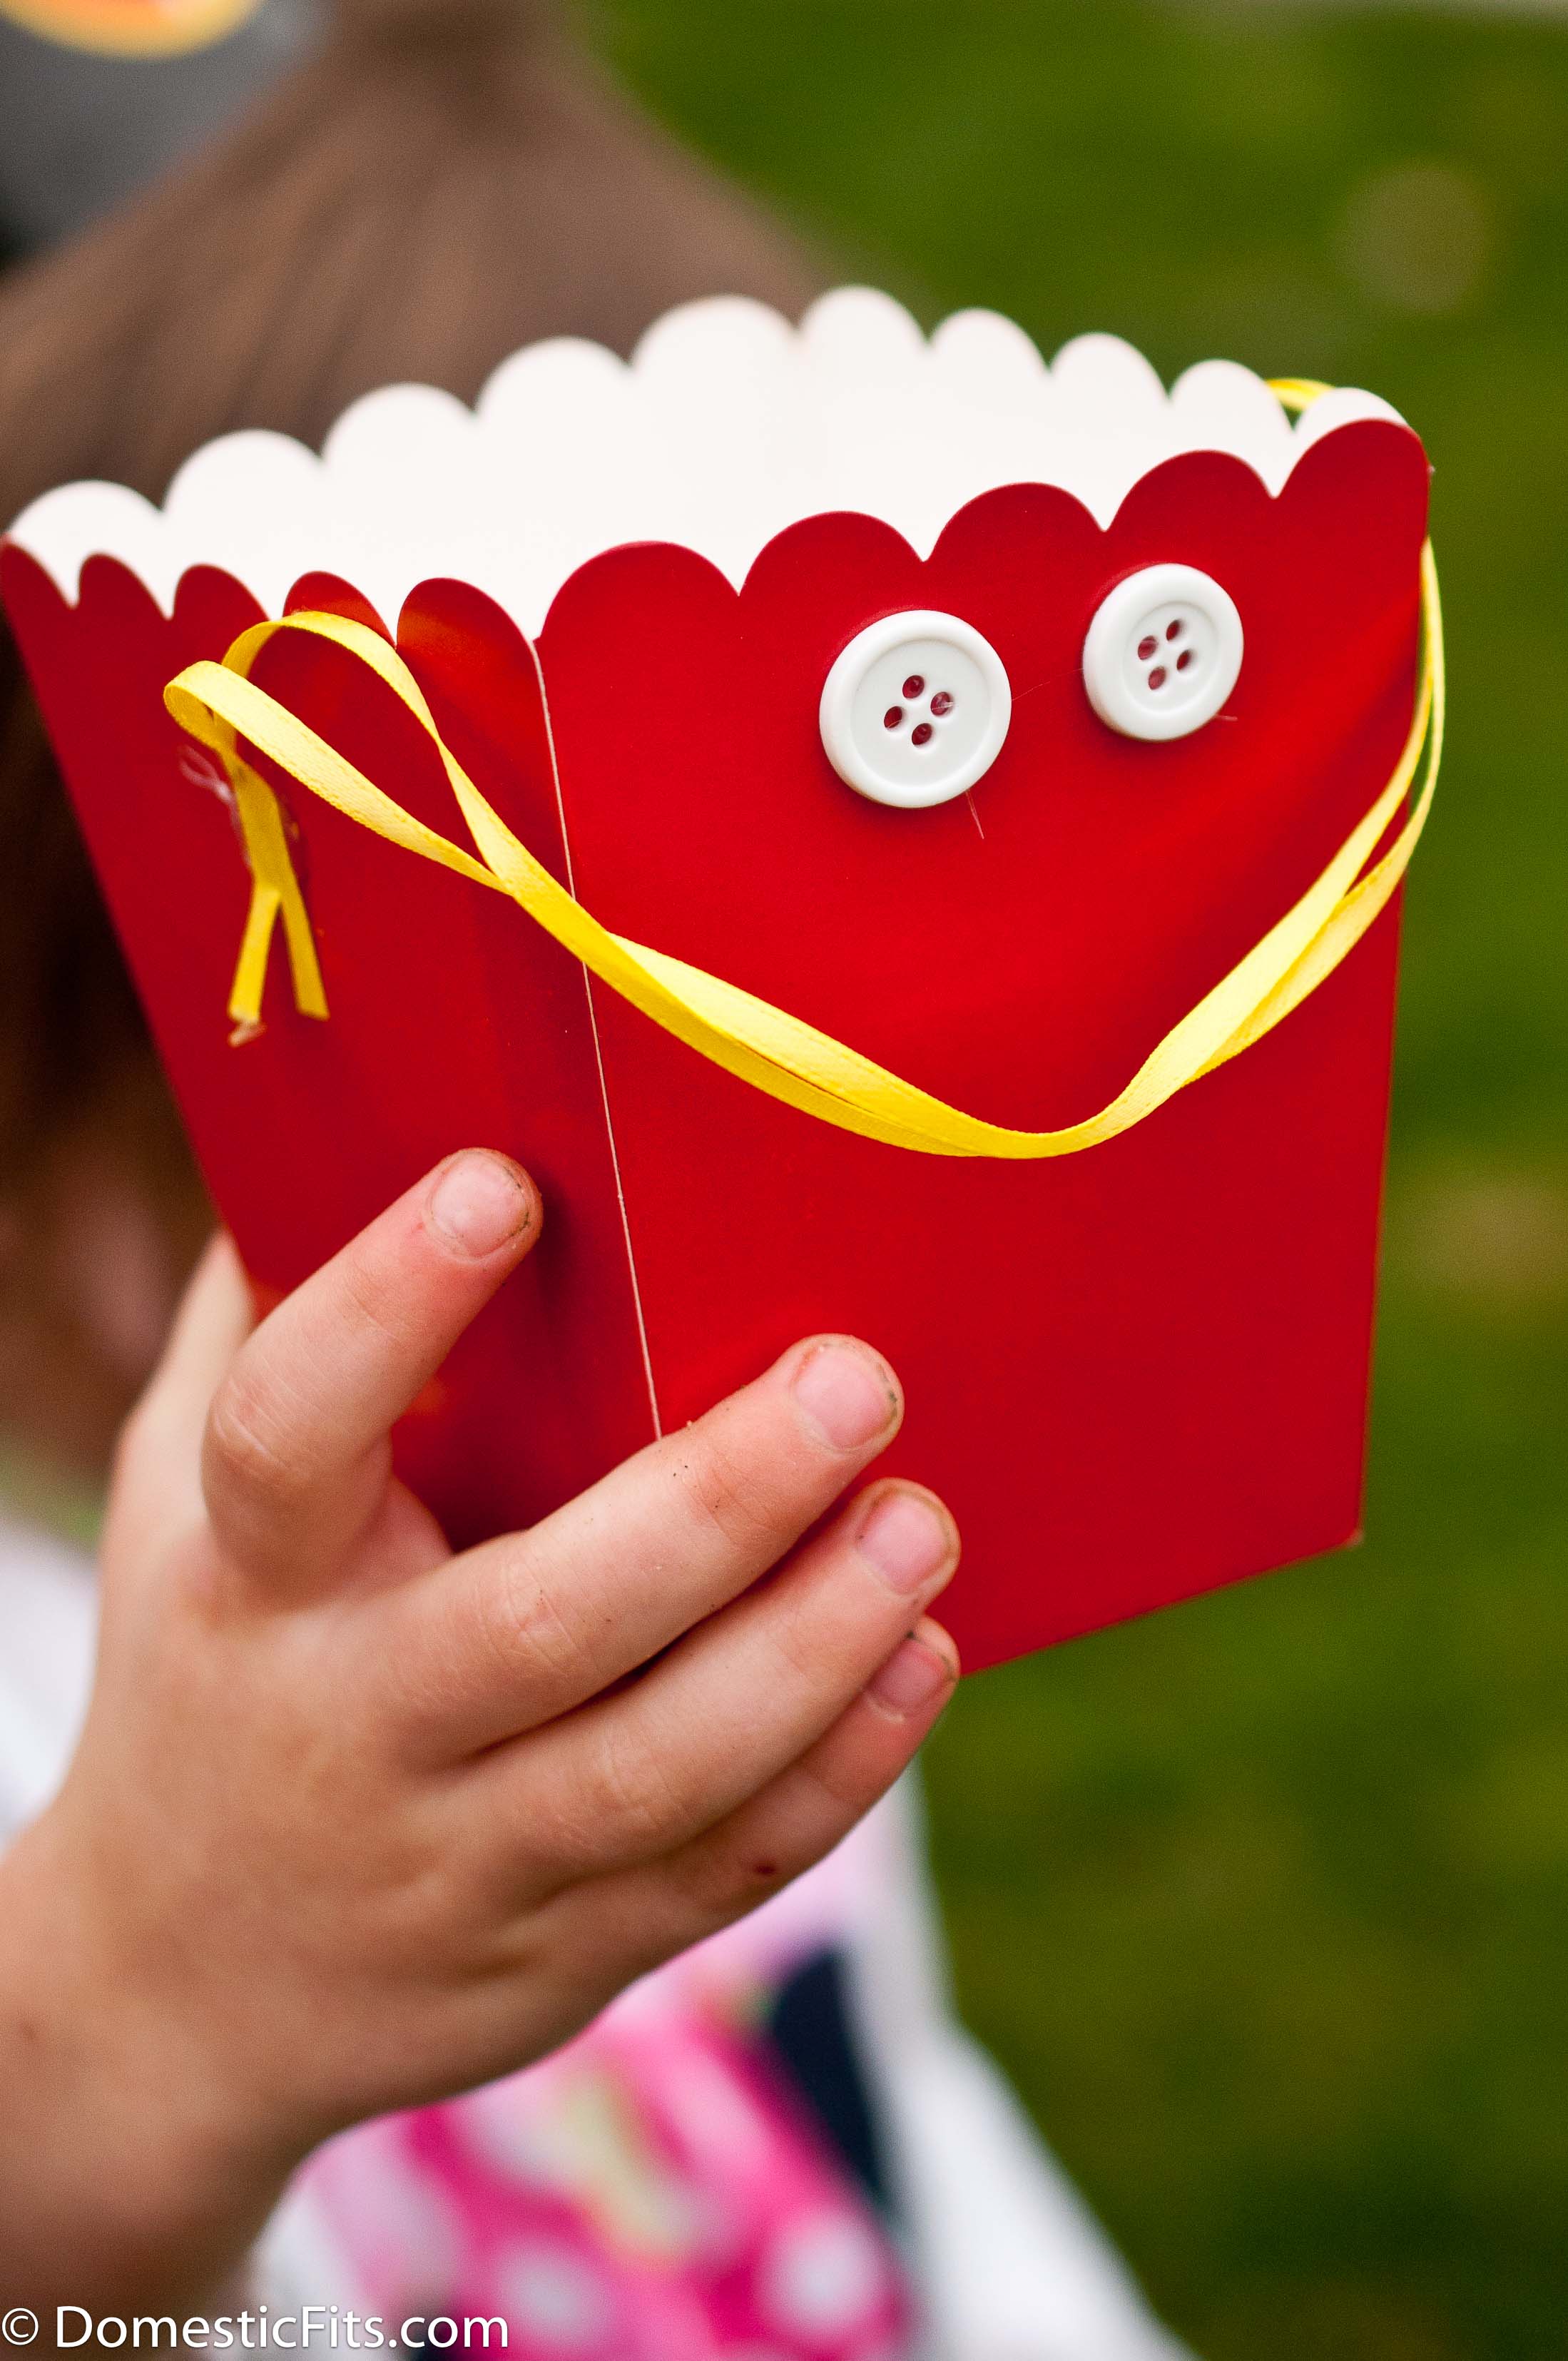
For the bags I used these mini popcorn boxes ($6), hot glued on some yellow ribbon and buttons I had on hand to make really cute Mickey Britches Boxes.

Mickey Prize Bar Mickey Mouse Briches Favor Boxes

All together, the favor bar cost about $32 for 22  kids (about $1.45 per kid) and the kids were able to pick out what they wanted. I had leftovers, but nothing that won’t get used at some point!

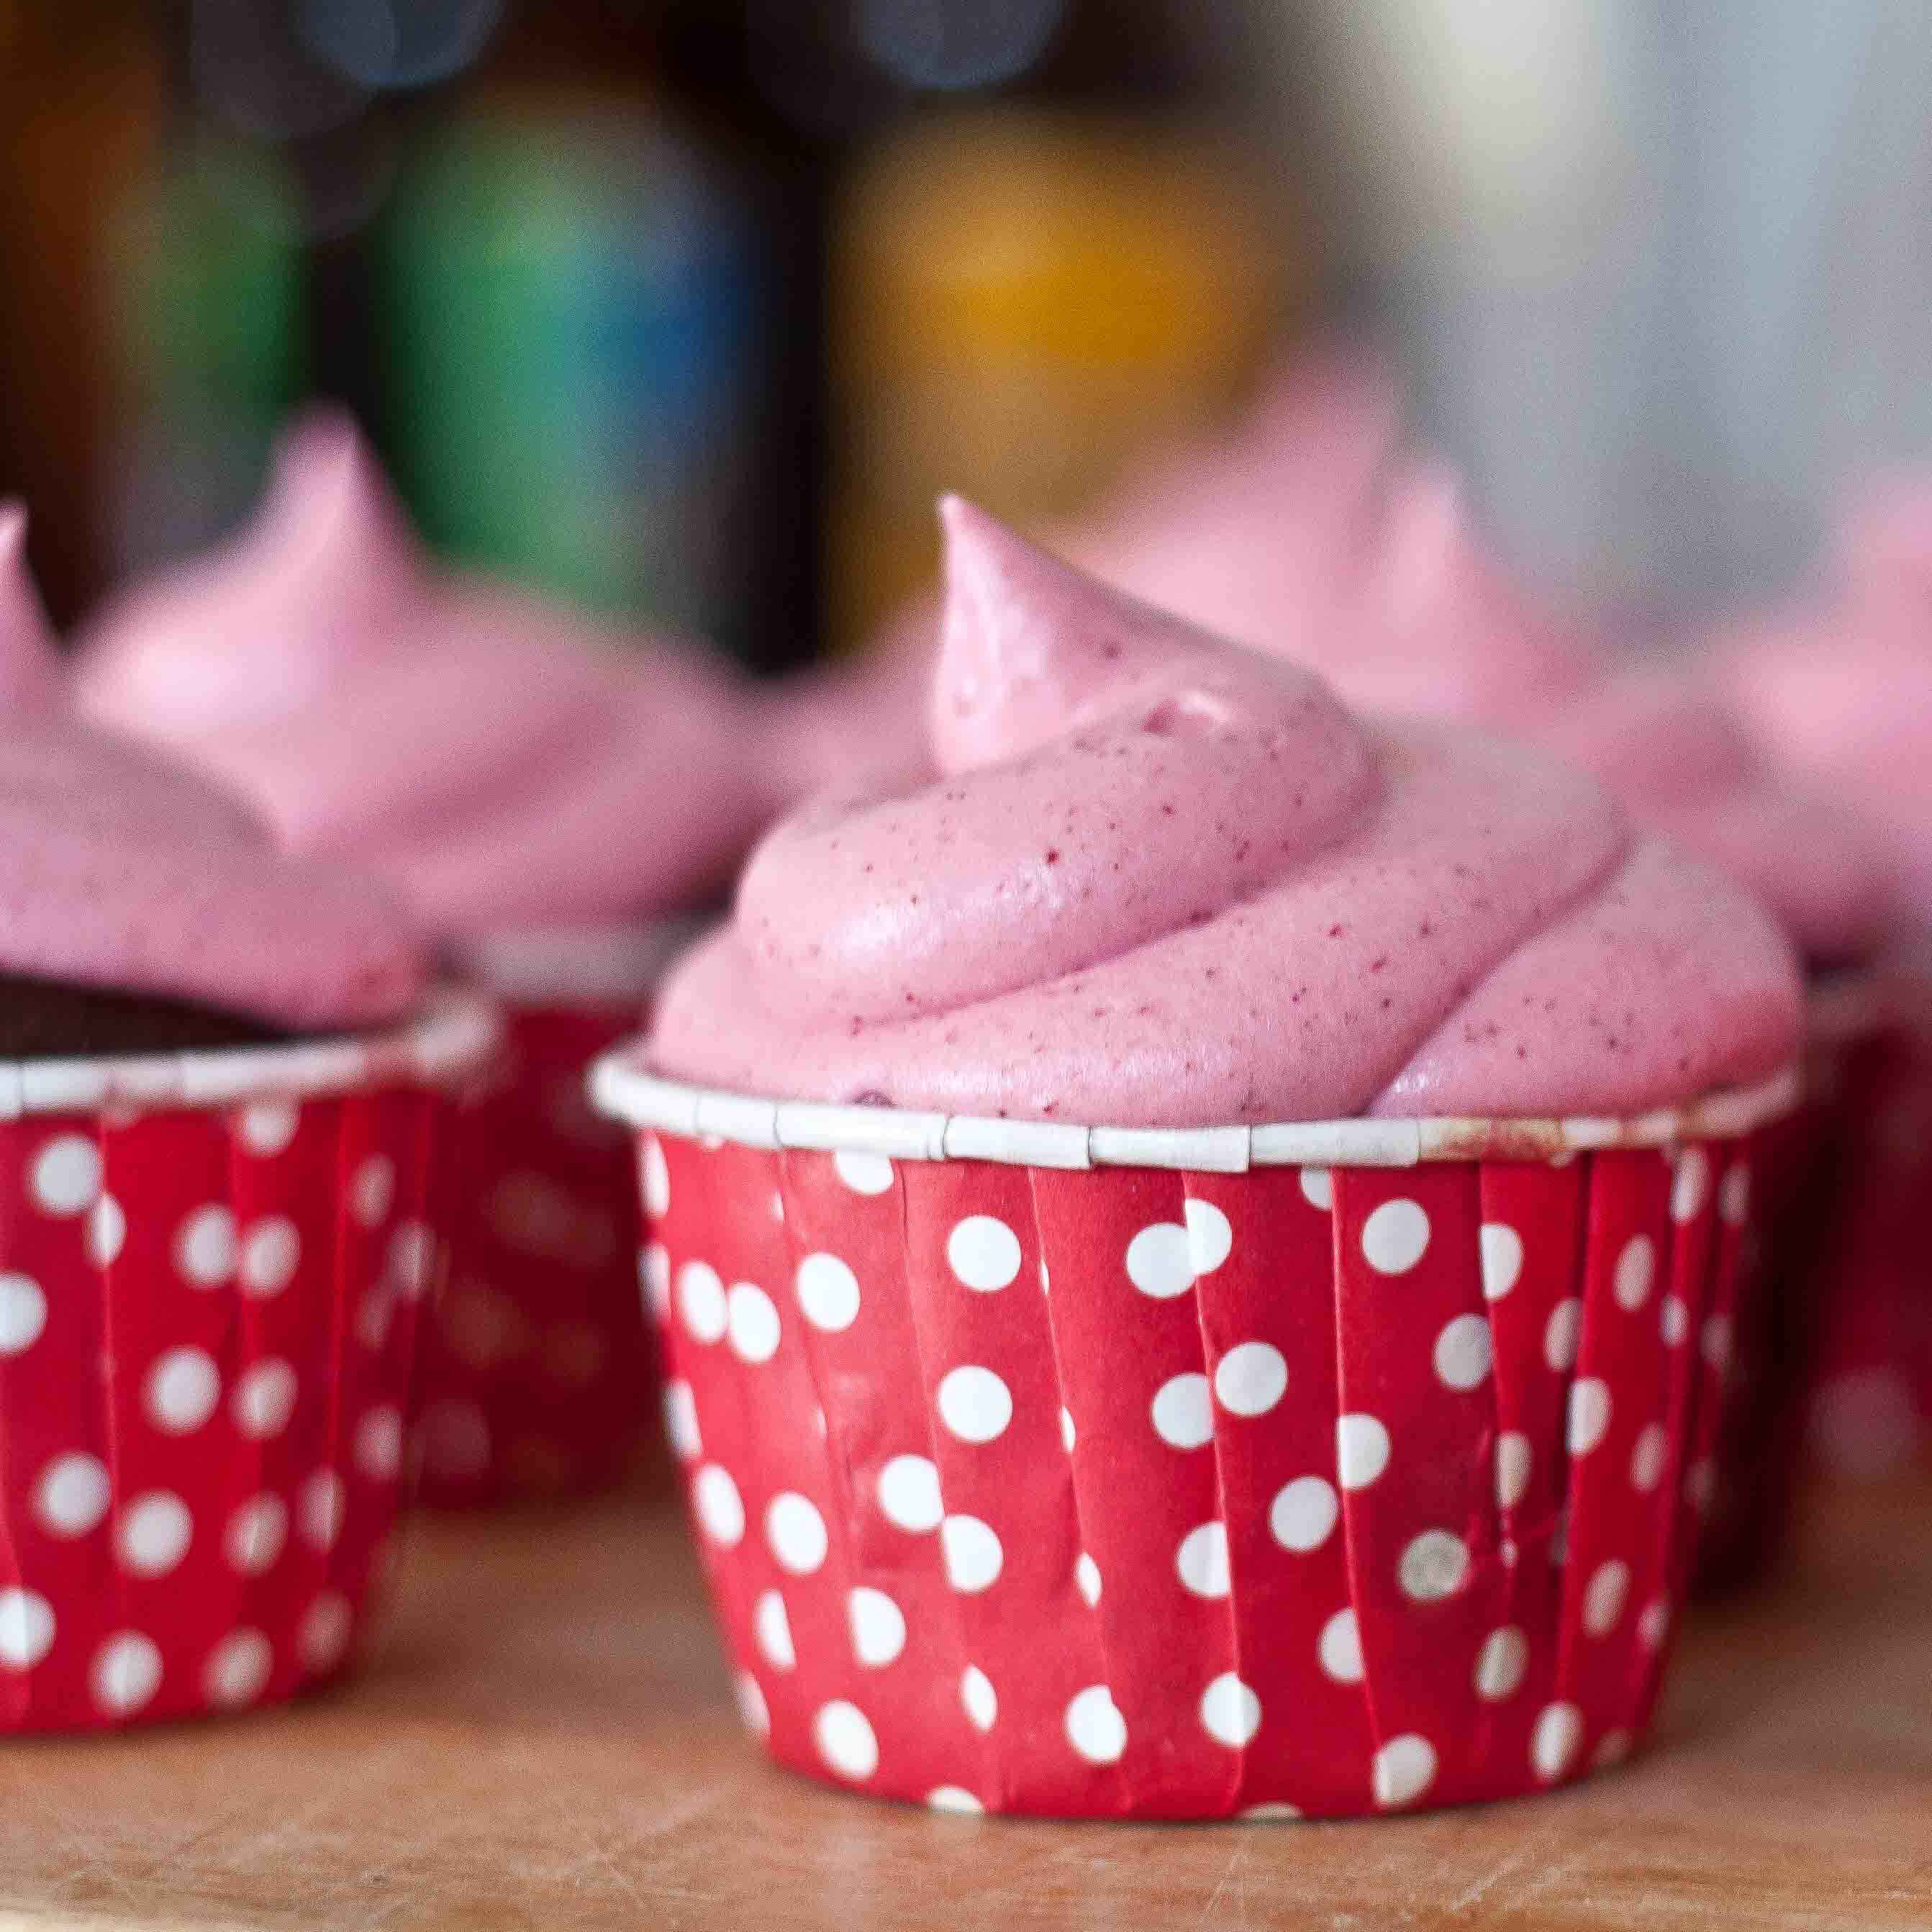
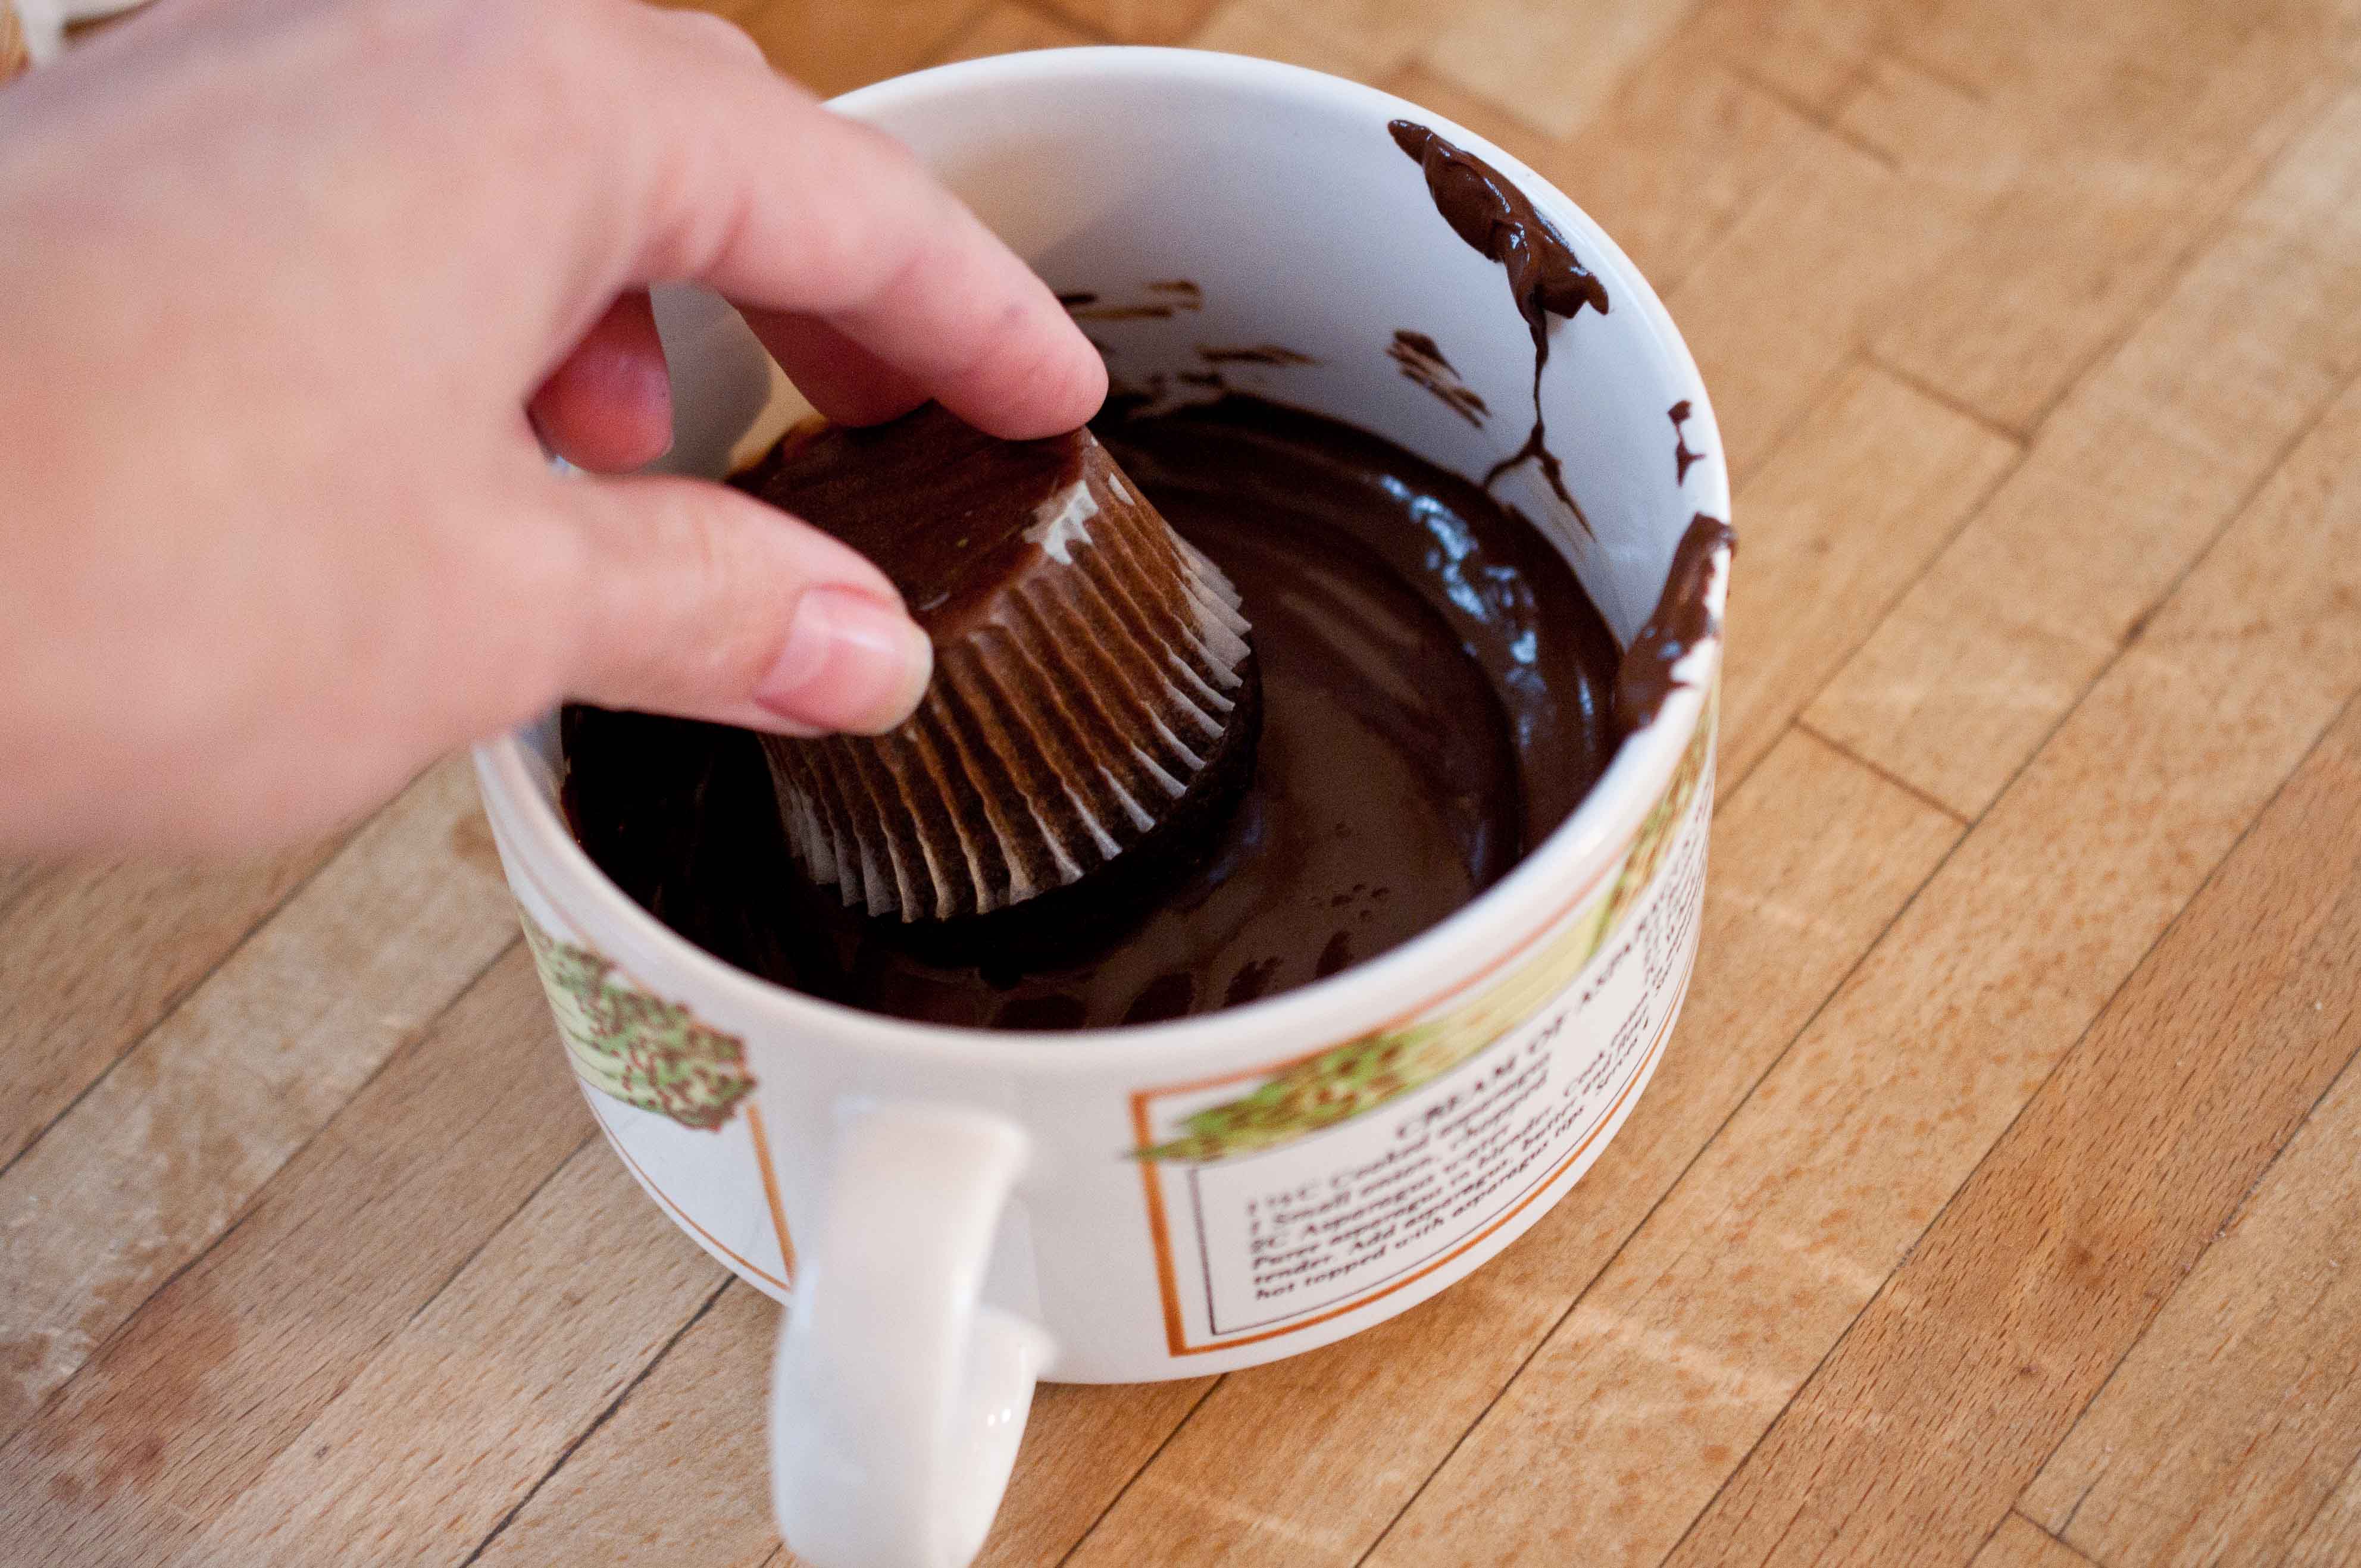
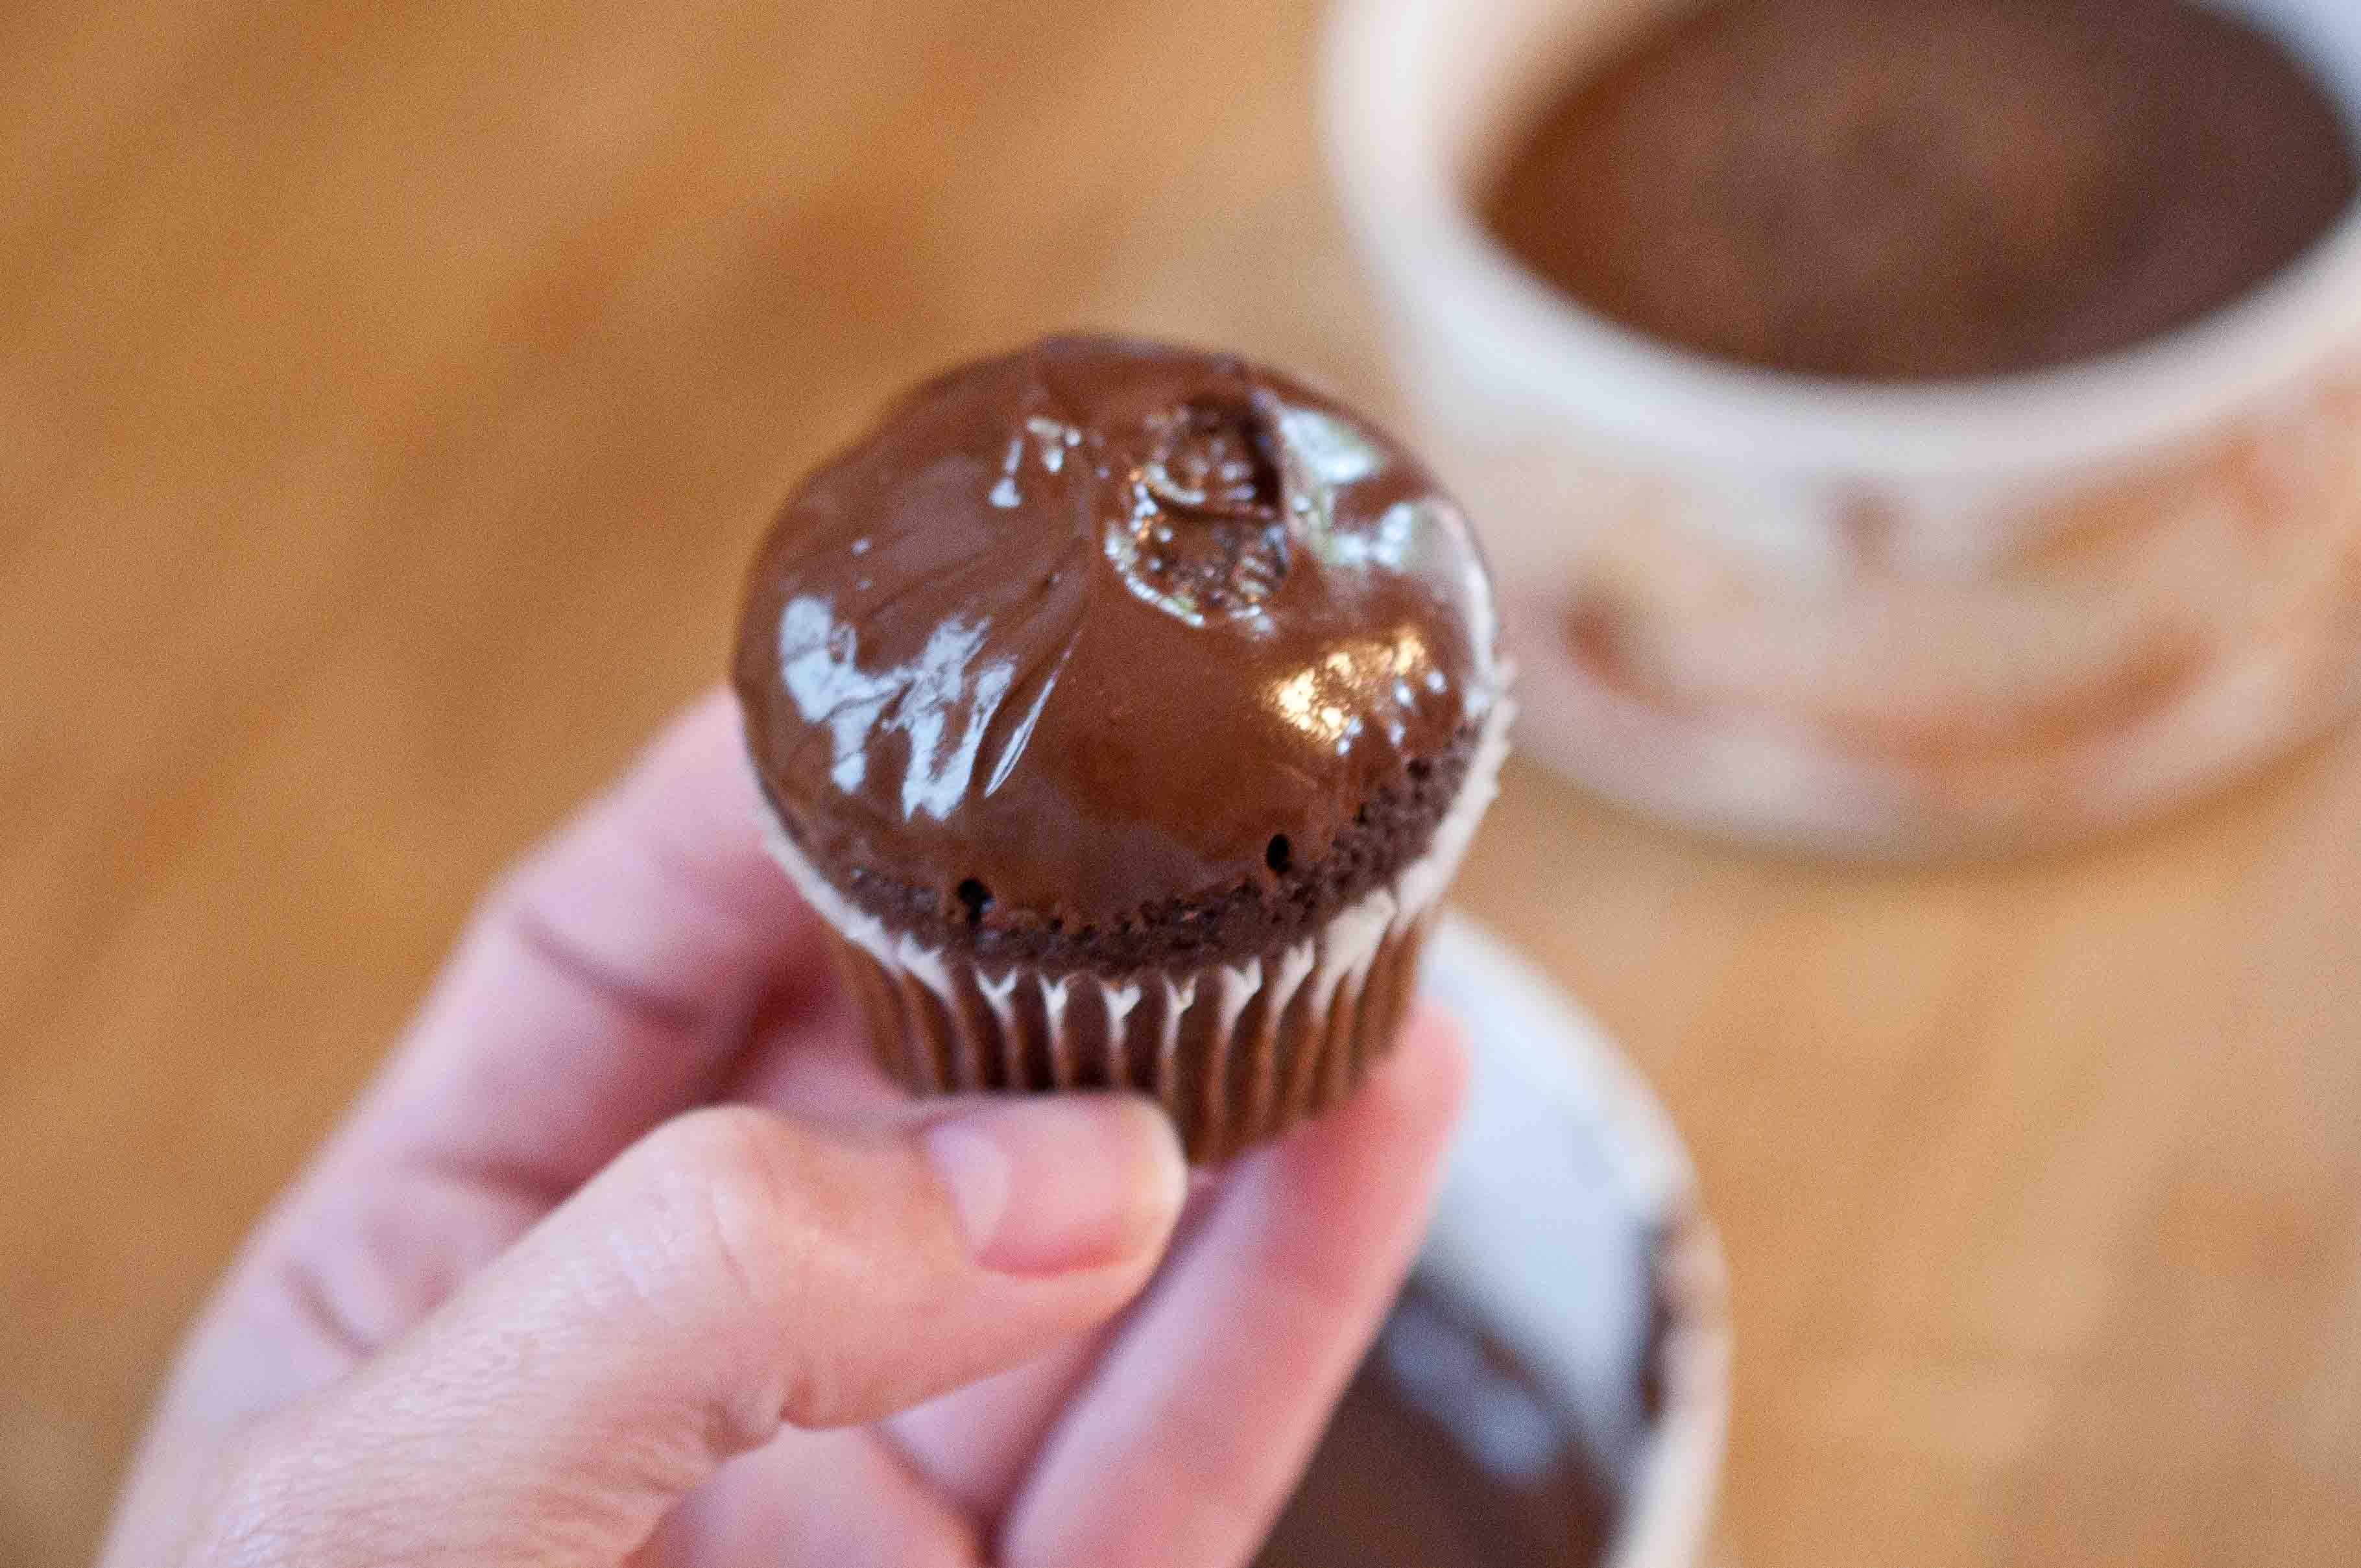
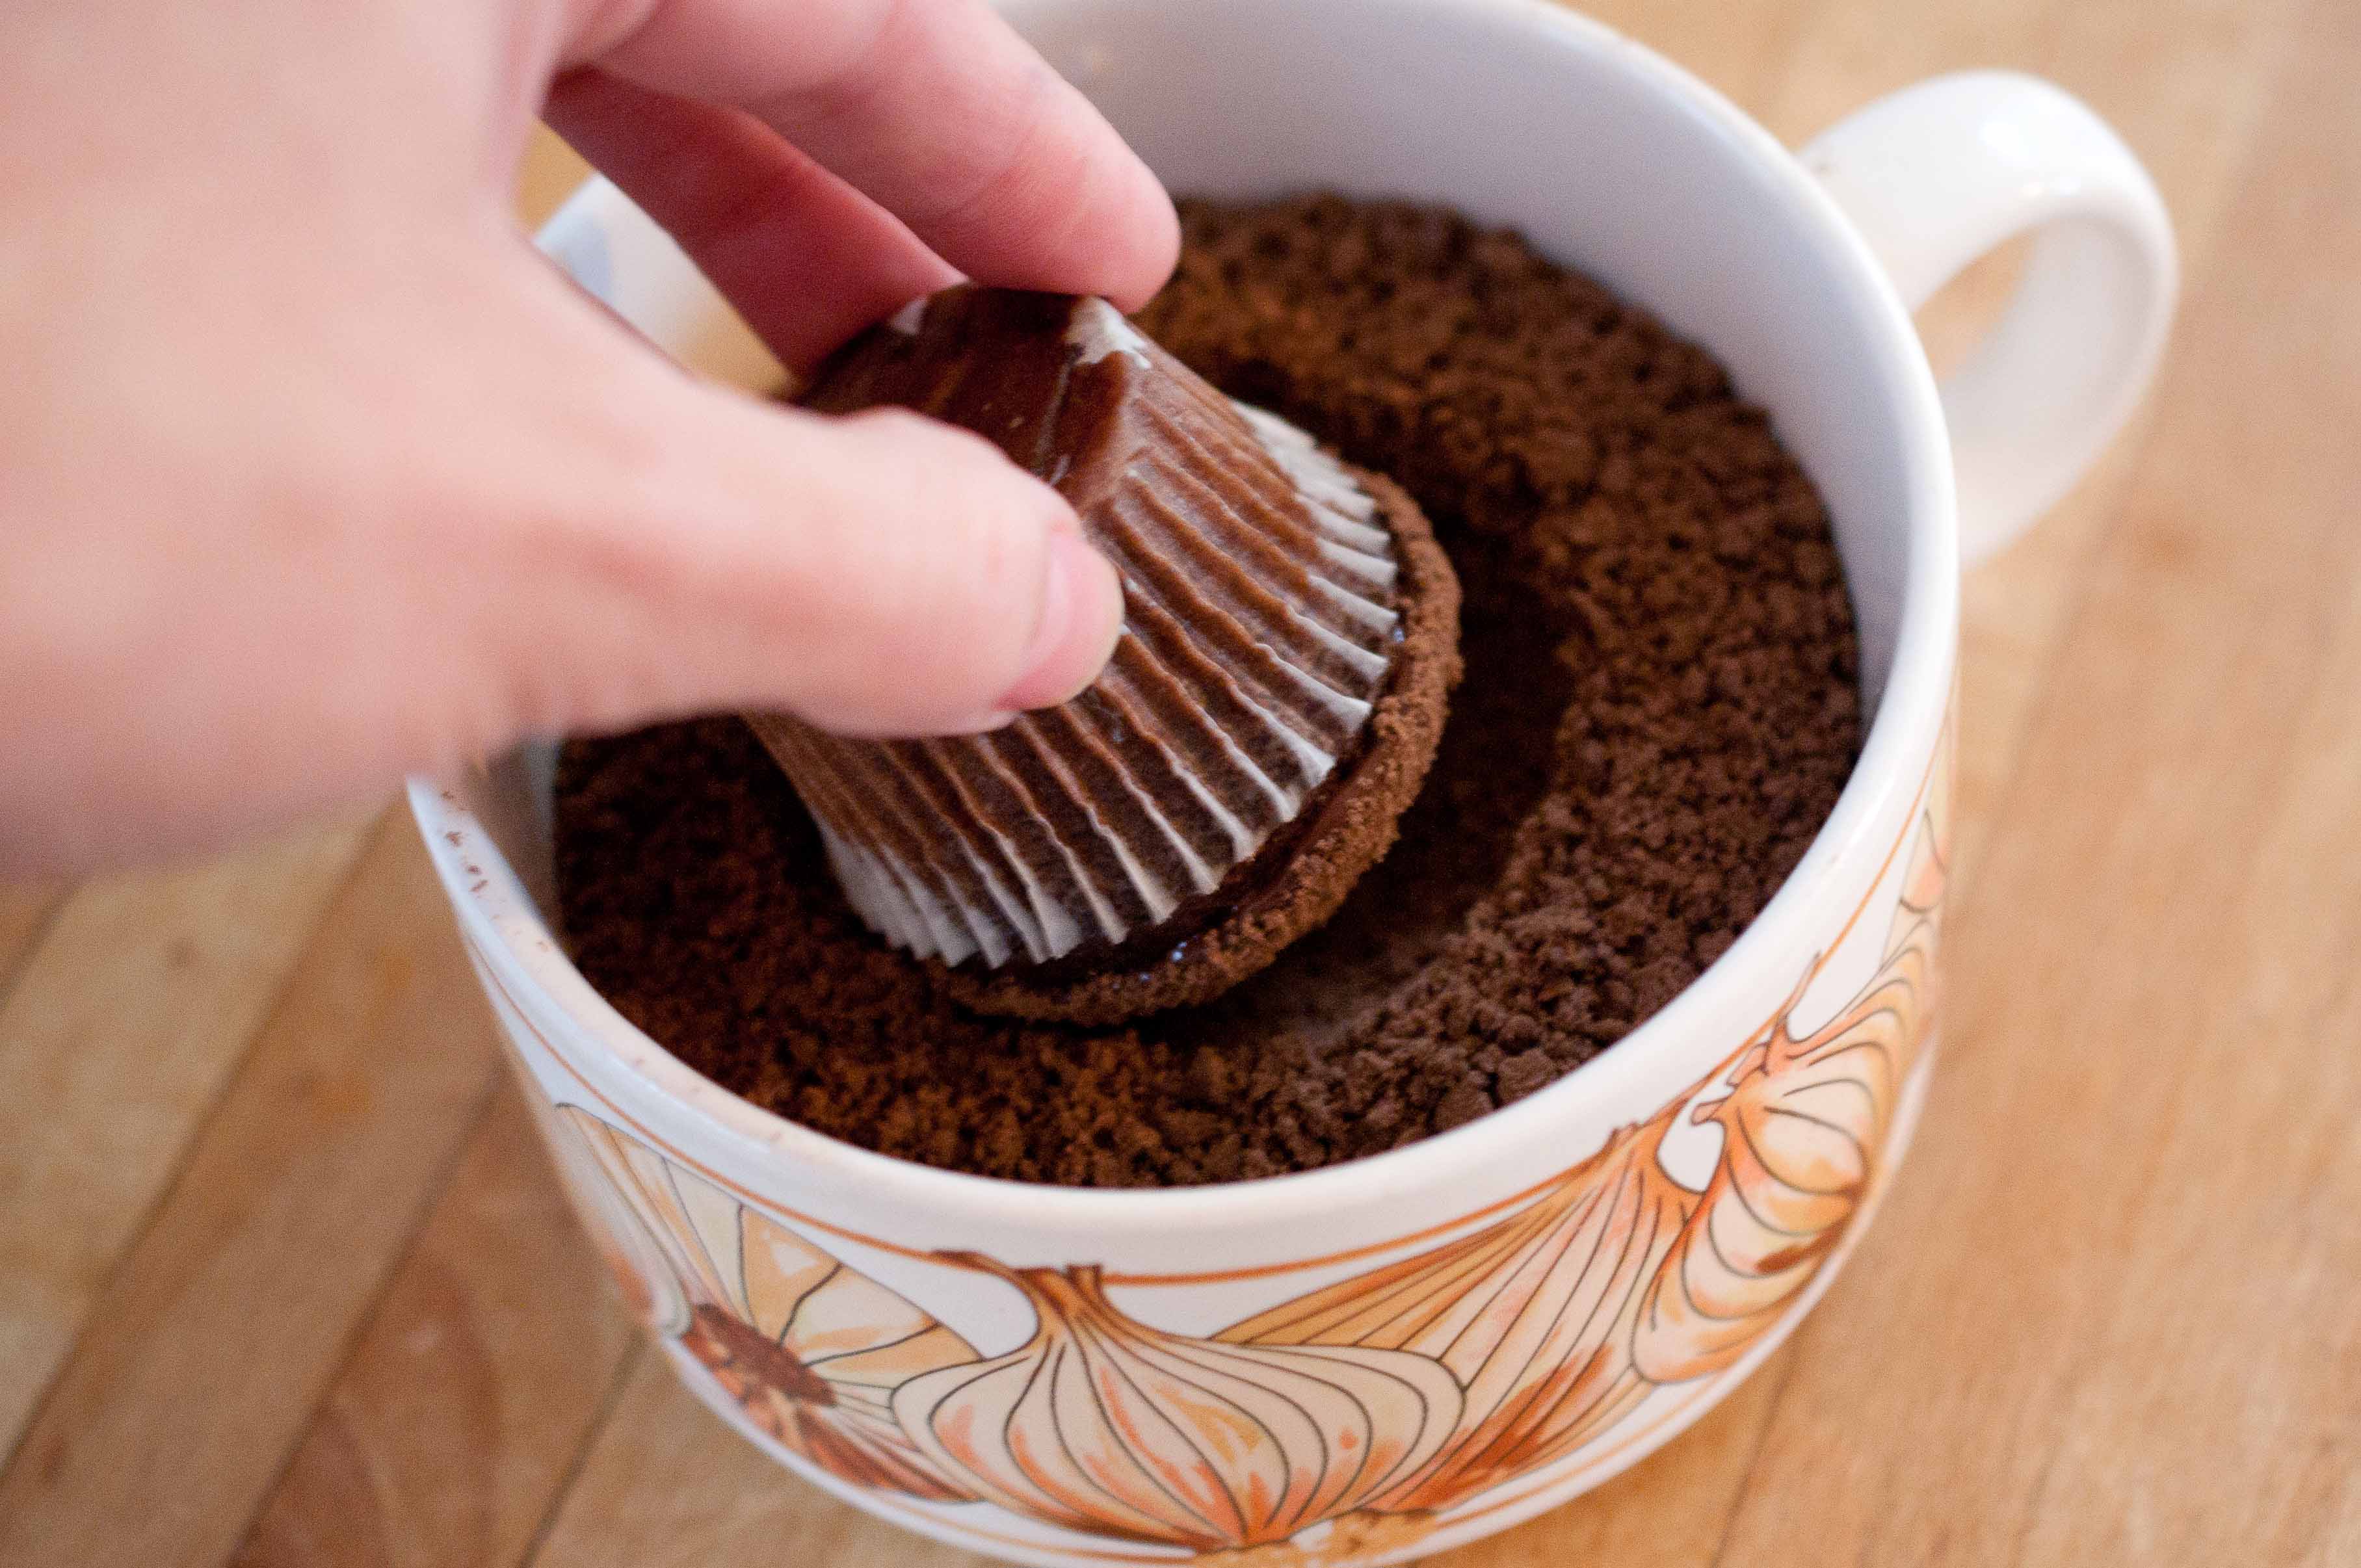
I also made the Easiest Mickey Cupcakes Ever, which require zero decorating skills. Not part of the favor bar, but part of the Mickey Party Extravaganza.

The Easiest Mickey Cupcakes Ever zero decorating skills needed!

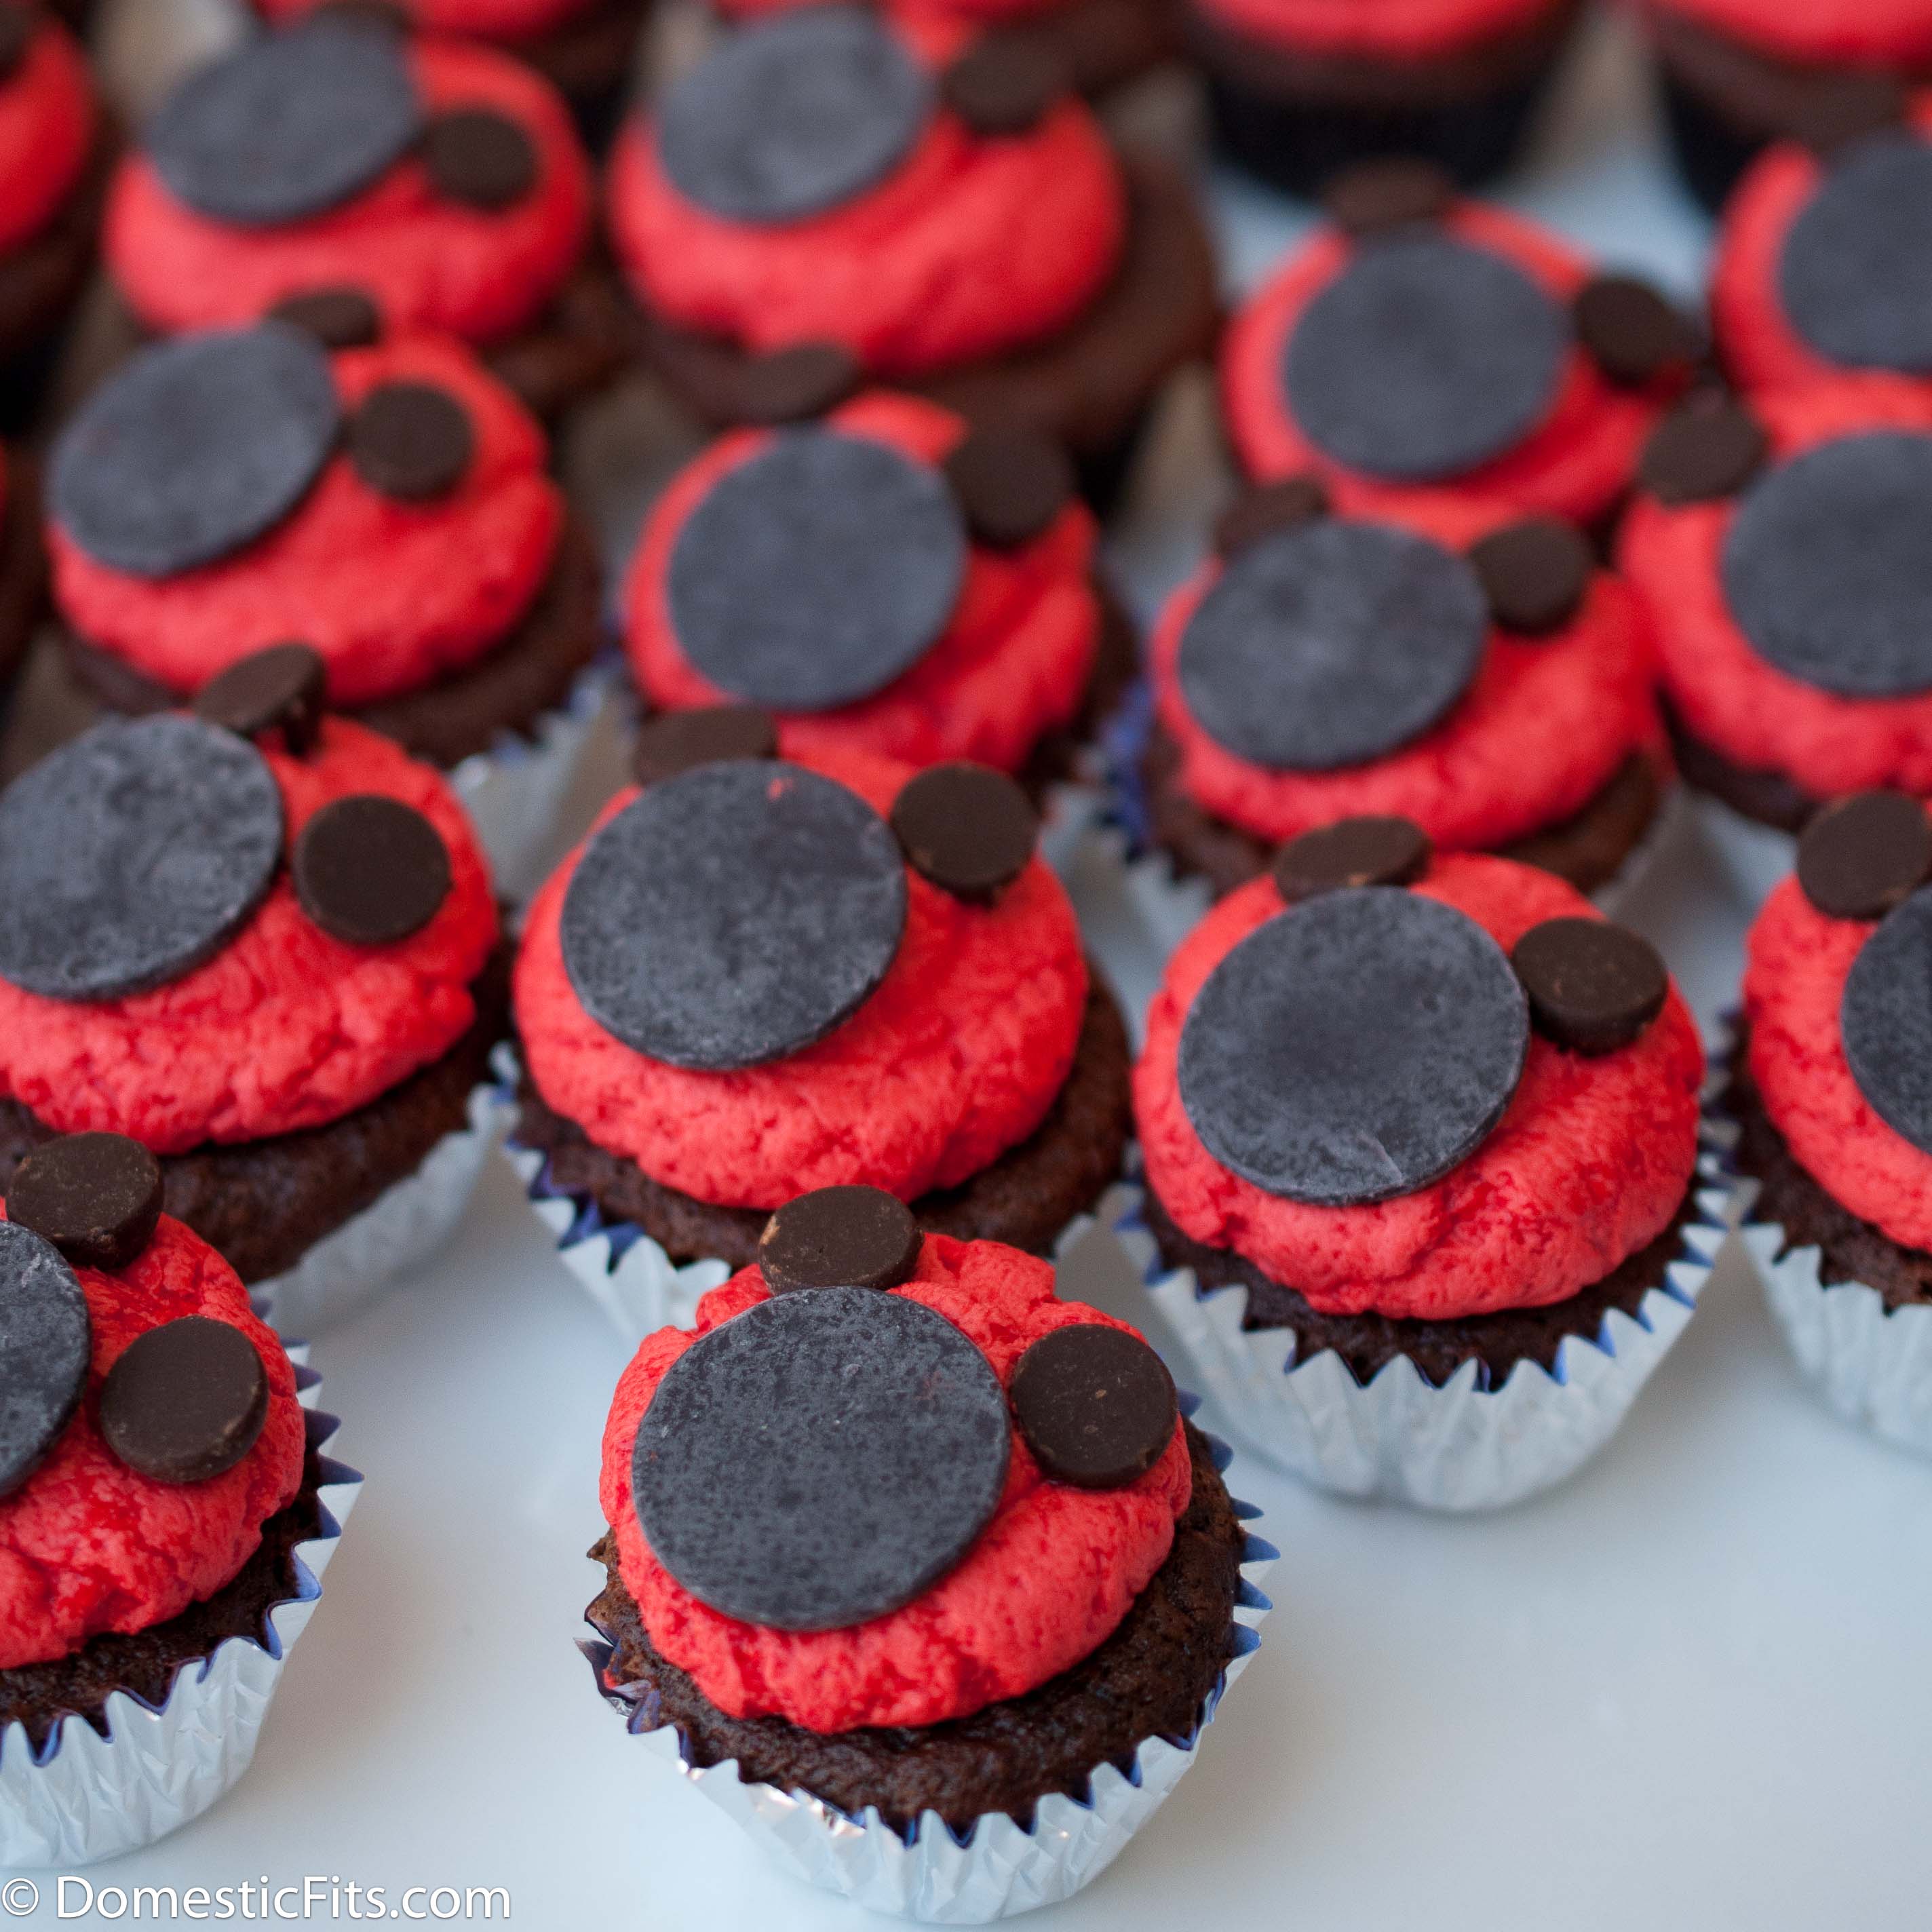
All you need is chocolate mini muffins (mini cupcakes), red frosting, plus 1 large dark chocolate candy melt, and two chocolate chips (per mini cupcake). Just make sure to press the pointed side down, and you are set. Cute and super simple.

DIY Glow In The Dark Halloween Ghost Craft

DIY Glow In The Dark Halloween Ghost Craft


Maybe you don’t know this, but the first post I ever did for this blog was a craft post on how to make Homemade Paper Lanterns. It wasn’t too much longer that I was sucked into the food blog scene and haven’t really looked back.

I do still love to get my crafting hands dirty, and this little DIY is so easy, I hope you forgive me for my break from those food posts I love so much.

Make a dozen or so to hang from your trees on Halloween, they turned out a little creepy in the best way.

Materials (for 1 ghost):

1 large clear plastic christmas ornament (I found this at Michael’s Arts & Crafts for $1)

1 to 3 glow sticks (or glow necklaces) that are small enough to fit inside the ornament

Round black felt stickers, or black felt cut into cricles

6 feet of cheese cloth (most grocery stores sell this in the baking section)


Remove the metal top from the ornament. Place the glow sticks inside (but wait until dark to break the glow stick). I found that two or three work better once its dark.

Replace the metal top.

Add the black felt stickers (or cut out circles and glue them) to the ornament to resemble eyes.

Cut the cheese cloth into 2 foot strips. You can also cut it into various lengths to add a bit of dimension.

Layer the cloth over the ornament and push the metal ring through the cloth.

DONE!

That’s it, takes about 5 minutes.

Here is day time creepy ghost:

And night time creepy ghost.


Yarn Ball Party Favors

When you have a blog, and you post instructions about how to make or cook something that you have dreamed up, you want all of the mistakes to happen to you. You want to be the one to discover the holes in the theories, the lapses in the instructions or the possible interpretations that will end up in failure.

Lucky for me, and for any who attempt to make these, those failures bestowed themselves upon me during this craft project.

These yarns balls have been popping up in craft books since the 70’s but made a resurgence a few years ago when Martha Stewart posted a rough DIY on how to make these as christmas ornaments.

Craft bloggers began posting these as decorative balls for baskets, ornamental garland and even colorful Easter eggs. (Other tutorials: Happy Hour Projects, Ruffled Blog, Make and Takes, On Shore)

Reading the comments on the post it seem as if half the people who attempted this had glowing success and the other half had epic failures. I fell into the latter half. Which ended up being a good thing because I was forced to seek out the answers to the most common failure:

WHY didn’t the yarn harden??

Most of the bloggers who did respond didn’t seem to know the answer: Too much glue? Wrong type of glue?  Too humid in your part of the Country?

None of those answers really seemed to fit the issues I was having, but I could tell by the next morning with string that was soft and not stiff, that I had to fix the problem or there would be no party favors for Taters "Lets Have A Ball" Party.

I consulted my sister, from whom I stole the idea to put toys inside these decorative balls in the first place. She’s completely brilliant and epically creative Polaroid photographer.

Her advice: "More glue, it won’t have a choice but to harden."

True. I traced the lines of the yarn with my Elmer’s glue bottle, blotted it in with a sponge brush and in three hours, I had Yarn Ball Party Favors ready to go.

Another common factor that I saw in success was glitter. It seems to act as a binder of sorts. Add it to the glue and it helps to hold shape.

Other than the threat of failure looming over my head, I loved the way these turned out.


Materials:

8 ballons, about 6 inch round

Toys, I used squishy balls, temporary tattoos and Lady Bug Bubbles (Small enough to smash into a balloon and large enough not to fall through the yarn holes)

2 bottle of Elmer’s glue

1/4 cup warm water

2 tbs glitter

Step one:

Squish the toys into the balloons. You might want to have extra incase you break some trying to get the toys in. Also, it helps to have an extra set of hands to help. I used my husbands:

Step Two:

Blow up the balloons and securely tie the end.

Step Three:

Mix the glue, water and glitter in a large bowl.

Step Four:

Place a few feet of yarn into the glue and press down, try not to stir or you’ll end up with a tangled yarn mess.

Step five:

Wind the yarn around the balloons, cutting of the end and tucking it into an inconspicuous spot and then place on sheets of wax paper to dry.

Step Six:

Allow to dry completely until the yarn has become very stiff and there is no give to it. Then pop the balloon in the middle.

Step Seven:

Wrestle the toys out of the popped ballon and remove the deflated balloon from the ball.

Tips:

If your yarn never hardens, don’t remove the balloon. Trace the yarn with the glue bottle tip and then pat the glue into the yarn with a sponge brush.

Yarn must be hard and stiff for this craft to work.

Pin this post!

Follow me on twitter

Follow me on Pinterest

Like Domestic Fits on Facebook


Let’s Have A Ball Themed Kids Party & Apple Slice Party Balls

I am now the mother of a two year old. 

Of course I’ve been warned about the Terrible Two’s and the nightmare that I am now  a party to. 

And no offense to those who have gone before me, but I rather enjoy this age. Every age, every situation and every person is not without drawbacks. There is no such thing as a perfect situation. Quality of life is built on figuring out what is great about the situation that you are in and enjoying the crap out of it. 

So, what is great about 2 year old?

You get to have all the answers. You are able to solve all of their problems. These tiny little humans see you, their moms, as the Fair Princess Goddess of The Universe. You have control over everywhere they go and who they play with. And all of that will end way too soon. As much as I long to have more freedom and independence, sleep past 6:30am, set my schedule on a whim, travel to exotic places and be able to pee in private again, I know without a single tiny doubt that I will miss the hell out of my 2 year old once she is all grown up. 

For Tater’s second birthday, my little tomboy wanted to run around the back yard and play with balls, her favorite thing in the entire world. So that’s what we did. 


I had huge gigantic balloons from Sweet Lulu


I made Yarn Ball Party Favors, You can see the DIY here:

Dozens of red and white beach balls covering the lawn, that I bought from Oriental Trading

Tater was in love with this. 


I filled a red baby pool up with a bag of ball pit balls. 

And as I shared with you a few weeks ago, I’m tring to rid my life of food dye. Quite a challenge for someone who is used to spending hours concocting the perfect frosting color for cakes. I let go and accepted the fact that the frosting I made with beet powder was just going to be purple and that was OK. More on that in a later post. 


A least I was able to sneak some antioxidants and vegetables into her cupcakes, at fine compromise in my opinion. 

And the food went largely unphotographed. A pretty shocking thing in my world, given the frequency with which I snap food pictures. 

We did, however, reserect the Tater Tot Bar from last year.

I used white cone cups and made the cone holder out of a cardboard box and wrapping paper. 

I also made the Hanging Paper Lanterns, one of my very first post was how to make them.

And I remade the paper Happy Birthday banner. 

I did get a few shots of my Apple Balls, cored and sliced apples held together with rubber band and bakers twine. I replaced the core with string cheese. This will keep them fresh, un-browned and party ready for hours. 

First, core and slice the apples using an apple slicer. 

Remove the core and replace it with string cheese. Reassemble the apple and secure with a rubber band, then tie a ribbon or bakers twine around the rubberband. This will help your apple slices to stay fresh longer, without turning brown. 

If you can, try to find string cheese that is the same size, or just a bit larger than your apple corer. 

Pin This Post! 

Follow me on twitter

Follow me on Pinterest

Like Domestic Fits on Facebook


Food Craft: Spring Flower Pot Mini Muffins

I like to play with my food. For some reason, it makes me less hungry.

When I got these little suckers from a vendor at work, I had no interest in eating them. But I did want to play with them. Maybe it’s a commentary on how much food we waste in America, or maybe it’s just because candy is pretty, Food Crafts are huge source of entertainment in my world. Although there are many cupcake toppers featured on websites across the land, I’m not a fan of inedible garnishes. Even if I don’t plan to eat it, it seems like you just didn’t try hard enough.

Sure you can print out a pretty flower decal from your home computer, or make a rose out of paper, or a fancy embelishment with ribbons and buttons, but if you can’t eat it what the heck is it doing on my plate?

No one glues plastic googly eyes to a pot roast. Or puts a wizzard hat on a chicken sandwich. Why are completely random acts of craftiness allowed on baked goods?

And paper flag banners on a cake? weird. Why not put a pile of mail on there, or decorative globe? What’s next, filling my plate with bedazzled paper mache vegetables?

Here is my entry for completely edible cupcake garnish, other than the stick, of course.


Spring Flower Pot Mini Muffins

Supplies:

12 chocolate mini muffins

12 small suckers (dum dum sized)

18 standard size marshmallows

3 microwave save bowls

1/4 cup white chocolate

1 pair scissors

1/2 cup chocolate chops

1/2 cup chocolate graham crackers (or chocolate Teddy Grahams)

Cut the marshmallows into four to five slices. There are going to be a few that just don’t look right, so cut more than you need. They will curl up a bit, but just push them flat.

There will most likely be one end that is a bit more rounded and one that is a bit pointier.

Cut off a very small amount of the pointed end, about 1/8 of an inch.

Place the white chocolate in a microwave safe bowl. Heat in the microwave on high for 20 seconds, stir and repeat until melted. Don’t over heat or it will seize. Using a butter knife or a spoon, smear a small on the marshmallow petal where you just made the cut.

Press the chocolate side against the sucker, at the base, nearest the stick. 

Repeat for all pedals. You’ll want to put about 5 petals on each flower which will require a bit of overlapping of the pedals. 

Lay flat until the chocolate glue dries. 

Put the chocolate chips in a microwave safe bowl and heat on high for 30 seconds, stir and repeat until melted. 

In a food processor, process the graham crackers until nothing is left but crumbs. Transfer crumbs to a bowl. 

One at a time, take the mini muffin and submerge the top in the melted chocolate until completely coated. 

Before the chocolate cools and dries, roll the melted chocolate muffin top around in the graham cracker crumbs. 

Once all the chocolate has dried, plant your candy marshmallow flower in your little mini muffin pot. 

Pin This Post!

Follow me on twitter

Follow me on Pinterest

Like Domestic Fits on Facebook 


Santa Hat Cookies & Why I Hate Santa

I guess HATE is too strong, but I don’t like Santa.

Except maybe this Santa. He’s awesome:

(Photo taken by my brother-in-law, and Hawks fan, Austin Metz)

It all started years ago when I was working at a group home with teenage foster and probation kids in South Central Los Angeles. I know, the white girl from the farm, in South Central.

I loved it.

I was able to see these kids as more than just Gang Members with horrible parents, but human children with potential, talent, hearts and brains. Being raised by grown-up damaged children.

It changed me.

I was teased, laughed at, listen to, and trusted.

I’ve posted so many serious posts lately, I’m no going to go into great detail about that first year, the first christmas. The kids who, at 16 years old, received their first Christmas presents of their lives, or how none of the parents came to our "Holiday Party."

But I will tell you this: Nearly every kid had a story about thinking he was bad because Santa didn’t bring him presents. After all, that’s the story, right? "Santa brings presents to good boys and girls. Bad kids don’t get any."

Or knowing that Santa wasn’t real because the Christmas after he turned 5 he sat in the living room, all alone on Christmas morning with no presents because Mom was on a bender and never came home.

This probably doesn’t apply to you. You will probably never have a Christmas when your kids don’t have presents. Hopefully.

But this year, more kids than ever won’t have presents. And the last thing I would want is for my daughter to carry that message with her to the kids at school who didn’t get presents, for her to think the reason those less fortunate kids didn’t get any gifts during the holidays was because they were bad. 

And I would never want ANY kid to think that the reason he didn’t get presents was because he’s bad.

We don’t need this.

Even though I don’t like the message that comes along with Santa (and I won’t even go into my fear of Mall Santas and their inherent creepiness) Santa is still an iconic symbol of Christmas. He is a great decoration. Which is why I made these Santa Hat Cookies.

I even have one Santa decoration at my house. Just one. I bought it in Paris a few years ago because I really wanted a Christmas Ornament from France and this was all I could find in September.

Links to donate to those in need, if you want:

Toys For Tots

Salvation Army

Angle Tree

Donation Town

These Cookies are pretty adorable, and really easy to make.

Santa Hat Cookies

Sugar Cookie Base:

1 cup (2 sticks) of Butter

3/4 cup sugar

1 egg

1 tsp vanilla extract

1 tsp baking powder

2 cups of flour

1 tsp salt

Cream Cheese Frosting:

1 package of cream cheese (8 oz) softened

1 stick of butter, 1/2 cup, room temperature (very important)

1 tsp vanilla

1/8 tsp salt

1 cup powdered sugar

Hat:

24 large strawberries, stem and leaves cut off


In the bowl of a stand mixer, cream the butter and sugar. Add the egg and the vanilla and beat until well combined. In another bowl, add the flour, baking powder and salt, mix with a fork until combined. Add the flour to the stand mixer and mix until the flour is just incorporated into the butter mixture.

Form into a disk and wrap with plastic wrap. Refrigerate until cold, about 1 hour. It is important that the sugar cookie dough is cold or the cookies will spread too much during making.

Preheat oven to 350.

Once the dough is chilled, roll out and cut into 2 inch circles (or just larger than the base of your strawberries).

Bake at 350 for 8-10 minutes or until the edges just barely start to brown. It will probably look as if they need another minute or too, but cookies continue to bake once they are out of the oven and you don’t want these to be too crispy.

Allow to cool.

In the bowl of a stand mixer, beat the cream cheese on high for about 2 minutes. Add your room temperature butter and mix until combined. Add the vanilla and beat again until combined. Turn the mixer off and add the powdered sugar, return mixer to a low speed and mix until the sugar is incorporated into the cream cheese.  Add the frosting to a piping bag. If you don’t have a piping bag, add to a large, heavy duty, zip lock bag and cut about 1cm off the bottom corner of the zip lock bag, this can be used as a make-shift piping bag.

Pipe a dime sized amount onto the cut end of the strawberry and place in the middle of your sugar cookie.

Pipe the frosting around the base of the strawberry, as well as a pea sized amount on the tip of the berry to resemble Santa’s Hat.


Thanksgiving Craft: Chocolate Turkeys Made From Halloween Candy

Edible Thanksgiving crafts! Tater really isn’t old enough yet for this (but that kid will be tortured with many holiday crafts in her life, once she is old enough) but this is perfect for kids who are a little older. And an excellent way to use up that left over Halloween candy. They only take a few minutes each, and would make an adorable name card holder for your Thanksgiving feast.

For each Candy Turkey you will need:

2 miniature Reeses Cups

1 Hersheys Kiss

1 Yellow Starburst Candy (one can be used for up to 4 turnkeys)

1 Red Starburst Candy (1 can be used for 8-10 Turkeys)

1 Orange Starburst Candy (1 can be used for 2 Turkeys)

6 Almond Slices

Candy Melts to be used as "glue" (you may also be able to use Hersey’s kisses for this job)

1 Squeeze Bottle (can be found at most craft stores)

1 toothpick

Start by putting about about 1/2 cup of Candy Melts (Hershey’s kisses should work fine as well) in your squeeze bottle. I’ve only had one of these squeeze bottles for about a year and I use it all the time, so handy. After I’m done with it I just store it, with the candy melts still inside, in a large ziplock back and reheat it when I need it. Place in the microwave for 30 seconds, remove and shake to check consistency, heat for another 30 seconds and repeat until the chocolate is melted.

Then squeeze a small amount of melted chocolate on the top of a Reese’s cup (removed from all wrappers) and place the narrow end of the almond slices in the chocolate.

Use all six almond slices to make the Turkey tail, about halfway around the Reese’s cup.

Set aside and allow to dry.

Unwrap the red Starburst candy and cut off a small sliver (if this is a craft that kids are helping with, make sure to make all cuts yourself, or have the kids use a butter knife)

Cut the slice in half the long way to make a long skinny strip.

Take your long skinny "gobbler" and wrap it half way around the point of your unwrapped Hershey’s Kiss

Pressing the candy into place should be enough to hold it.

Cut the corner off your unwrapped yellow Starburst Candy.

Smash it and pinch it, to soften it and mold it into the shape of a beak then gently press into the point of the Hershey’s Kiss until secure.

(Man, I wish I’d gotten a manicure before I made this post)

Then cut off a small amount of the orange Starburst Candy and roll into a ball, flatten and press onto the kiss above the beak to make an eye.

Make another one, the same size to make the other eye.

Dip one end a toothpick into your melted chocolate and place a small dot in the middle of the orange eye.

Retrieve your Reese’s cup and turn it to the smaller side, opposite end from the one with the almond feathers. Place a dot of chocolate in the center.

Then place your Hershey’s Kiss head on top of that.

Slice off a small piece of your orange Starburst Candy.

Squeeze two thirds of it, making it narrow while leaving one end flat.

Make two cuts in the flat end to resemble Turkey toes (there is probably a more scientific name than "toes").

Make another Turkey leg, using the same method. Then place both over your second Reese’s cup, hanging down just slightly to the side of the middle. Place a dot of melted chocolate on the top (this is be used to fuse the Turkey to the base)

Retrieve your Turkey, and shave a small amount of the bottom Reese’s cup, below the Turkey face, between the almond feathers.

Place the Turkey, cut side down, on the base, over the legs.

Cute, right?

You can use this with your name card holders for your Thanksgiving place settings, or just put them on each plate. So cute.

Two Peas In A Pod: Twin Girl Baby Shower

(The above invitation was made by Kim Nelson)

My friend Lindsay is pretty amazing. I mean, how many people can say they got pregnant twice in the same week? Thats pretty efficient if you ask me. She is due with her twin girls pretty soon and I was one of the lucky ladies (along with my friend Emily, who is gorgeous, and her house is so beautiful it made any type of decorations borderline unnecessary) who got to throw this amazing Mom a baby shower.

Two Peas in a Pod was a fun theme, however, it was pretty hard to find adorable embellishments to go along with the party so I had to rely on Etsy and my own craft prowess to get me through.

I ordered stickers from Autumnleah On Etsy that said, "Two Peas In A Pod, Lefler Twin Girls." Adorable. I used them on mini takeout boxes for the candy buffet,

I also used the stickers to make take away cupcake bags using mini pink lunch bags and ribbon.

Of course, the candy buffet was pink and green and a big hit.

I made a sign for the candy buffet that said:

Two Peas in A Pod

Life is good, the Leflers  are blessed

With two little ladies, there will be no rest

Twice the dresses, twice the curls

Two beautiful, lovely, little girls

As we celebrate a gift so sweet,

Please enjoy a box of treats!

I made cupcake toppers with supplies from Paper Dozen on Etsy.

We also had people write down wishes and prayers for the Lefler family, easily my favorite activity of the day. I made the wish sign from chipboard letters, ribbon, brads, and scalloped circles from JCSkyline on Etsy. I heart Etsy and those crafting geniuses who sell their wares.


I also made my very first diaper cake. Tater picked out the frogs for the top, although I’m pretty sure she had no idea I would ask her to part with them. I did distract her with fresh strawberries and a juice box.

Now, no one really tells you this, but it turns out that photographing a 15 foot banner is actually harder than making a 15 foot banner. Here is my best attept. Although it’s hard to see, I was pretty dang proud of that banner. I use scrapbook paper, pink paper circle coaster from the Martha Stewart Crafts collection, sparkly chipboard letters, grosgrain ribbon and tiny little clothespins.

It says, "Welcome Sweet Peas." Anytime you have to actually explain what’s in a photo, it’s not a good photo. Sorry, Nikon, it wasn’t your fault.

I also made hanging paper lanterns, the green ones not the pink one. My crafting skills aren’t quite that good yet. I used the same techniques that I used in this hanging paper lantern tutorial. If you want to make super duper cheap lanterns for your own party, it is super duper easy.


We also had food. I know, we’re pretty crazy.

Mini quiches

Berry platter that was as much of a decoration as it was a food item, so beautiful.

I made two kinds of Salad Skewers, Goat cheese, Roasted Beet & Arugula as well as the ever popular Caprese Skewers.

We also had delicious mimosas, some made with real life champagne and others with pregnancy friendly sparkling cider.

And I made a cake! Shocking, I know. It was a white cake with a vanilla pastry cream filling and a brown sugar buttercream frosting. I used the same cake batter recipe I used for these cupcakes, the same  frosting as with these cupcakes (the NON-beer version) and I decided to post a How To on making pastry cream because that dang cream was so good it was the true star of the cake. I made the peas in a pod out of fondant and doughnut holes, and brushed them with luster dust.

Oh yeah, there were people there too, and some super cute babies.

For the Lefler Family, My wish to you:

I Wish You Well, By Bill Withers

I wish you flowers sunshine and smiles
I wish your children that grow to make you proud
I wish you pretty things to wear
Sweet things to smell

I wish you well (oh I wish you well)
I wish you well (well)

I wish you good friends that always treat you fair
Wanna wish you ribbons to tie around your hair
I wish you, truckloads of cheer
and many happy years

I wish you well (oh I wish you well)
I wish you well (well)

I wish you freedom to do the things you love
Wanna wish you blessings and kindness from above
Wanna wish you sunlight through the clouds
I hope you laugh out loud

I wish you well (oh I wish you well)
I wish you well (well)

Fondant Basics

I am not usually a baker for hire. Especially cakes. They take so long and frustrate me. I can never get them as perfect as I want and I end up feeling (in a very overly dramatic fashion) that they are a complete disaster. A friend of Mr. Fits asked me to make a Monkey Cake for the baby shower she was throwing for her sister and her sisters wife to welcome their baby boy. Maybe it was the mushy soft spot that I now have for babies since Tater was born (this did not really exist prior to birth of my adorable little lady) or maybe it’s how easy it is to guilt me into baking by merely asking, but I said yes. *sigh*

Fondant 101

If you’re not sure what the stuff is that covers those cakes, it’s fondant. It’s a sugar dough that is rolled out like cookie dough to cover a cake and can even be sculpted, like clay, for decorations. If you have an interest in giving it a try, you should. It takes a little practice but general gives a very impressive look to your cakes.

I have been working with fondant for about 5 years and I have learned a thing or two about this sugar dough that I’ll share with you all.

First, it’s not very tasty. Really, even the good kinds don’t really add to the taste of a great cake. I have never, ever heard anyone say, "This cake tastes really good, but you know what it needs? A nice layer of fondant." It’ll never happen. It’s use is purely aesthetic. If you can perfect the technique of buttercream your cake can look just as good and taste somewhere around a million times better, but that’s for a different post.

Fondat can be difficult to work with, but if you really want to make a cake that  has a professional look to it, this is a great option.

There are three brands of fondant that I have worked with, and as far as my experience goes, these are the three main brands:

Wilton

Satin Ice

 Fondx

The basic rule, when it comes to yummy vs easy, is that the better it tastes the more difficult it is to work with.

Wilton is at the bottom of the yumminess food chain. It tasted like sugary play-dough. I would however, suggest you start here if you have never given fondant a try. Wilton fondant is a tank compared to the other two. It’s forgiving and tough. Use it your first time to get a feel for how to use fondant then move on when you think you’re ready.  Just let your guests know that, although it is edible, you would recommend peeling it off before eating the cake.

Satin Ice is far superior to Wilton in the taste department, but, it’s a bitch to work with. I’ve renamed it Satan Ice and probably won’t use it for cake covering ever again. It has a great flavor and tends to blend well with the frosting but it is extremely fragile, cracking and tearing easily. It is a great option for molding decorations or adorable little monkey mommas and babies.

Fondx, and Elite by Fondx are my favorite. Not as yummy as Satin Ice (although some would disagree), but much easier to work with. It isn’t as hearty as Wiltons, but it is much tastier.

Fondant comes in nearly every color you can imagine and is much easier if you buy it pre-colored. The draw back to this is cost. If you look at the monkey cake picture, you can see there are 9 different colors. If I was to buy 9 different colors of fondant it would cost me about $150. Since I’m pretty sure no one wants to pay that much for a cake that only serves a few dozen, coloring fondant is the way to go. I buy white and then use gel food coloring to achieve the color I want. The use of gel is important in order to keep a solid consistency to your fondant, instead of turning your fondant to a sticky mess with too much liquid. Just add a bit of the gel to your white fondant and knead until the color is consistent. If it starts to turn mushy, add some powdered sugar.

You need to ice your cake at least two separate times. Some call the first icing a crumb coat, because the cake crumbs will invade this first layer, and others (including myself) call it dirty ice, because it sounds more fun. Allow first layer of icing to set completely, about an hour.

The next coat is your final coat and it helps to smooth everything out and cover any bumps or holes in your cake. Think of fondant as that super shiny, thin bridesmaid dress that makes you look awful and shows every flaw, and you would never be caught dead it in it, let alone PHOTOGRAPHED in it over and over, if you didn’t really love your friend–and the final ice is the Spanx that allowed you to keep your sanity and hit on the cute bartender. The final ice is the compression garment of the cake world, makes everything look smooth and pretty.

Fondant will show every imperfection so make sure your final ice is as smooth as you can make it. If you need to go for round 3 on icing, then do that.

Roll out your dough, on a flat surface covered with powdered sugar, the way you would roll out pie dough. Make sure that you roll out a circle large enough to cover your cake with at least a two inch overhang on all sides.  To transfer your dough to your cake, you can either use an extra set of hands, or you can try and slide a large cardboard sheet (like a cake board) underneath.

Once its over your cake use your hands to smooth it down the cake. Start at the top and work your way down.

Using a sharp paring knife or a pizza cutter, remove the excess fondant.

The bottom will probably look a bit rough. Making a perfectly even cut around the bottom is very difficult so don’t beat yourself up about it, just cover it up. To do this, I have used the following:

Long strip of fondant

Small balls made of fondant

Candy gumballs

Marshmallows

Mini cupcakes

If you look at novelty cakes, most of them have some type of bottom boarder.

To get that powdered sugar off the cake, I use a clean make-up blush brush that I bought specifically for the job.

To make the cake shine, spray the fondant with vodka. The alcohol will evaporate so you don’t have to worry about getting the pregnant lady drunk at her own baby shower. I use a small travel sized spray bottle that was probably intended for transporting hairspray across TSA lines.

If you have ever used clay, fondant reacts in similar ways when sculpted. There is an adorable British girl who has several You Tube posts about making fondant animals.

Good luck in your caking adventures. Remember that every cake is a learning process and your first cake won’t be perfect, it’ll be a starting point.

4th of July Treat: Patriotic Mini Pies on Sticks

Clearly, from my recent posts, I have a soft spot in my heart for childhood treats. When these babies were finished, they tasted like Pop-tarts. Strawberry Pop-tarts, which were always the best ones. I loved these so much that I am even going to give you all the cheater notes. And by this I mean the shortcuts to make them in about 15 minutes. While I am a strong advocate for making everything from scratch, I also realize that most people don’t love to spend all day in the kitchen (whaaaat???). So, you can follow my long direction (highly recommended route) or you can go out on your own with pre-made pie dough, strawberry jam (at least buy the good kind) and a cookie cutter.

Mini Pies on Sticks

Pie Dough:

(adapted from Fool Proof Pie Dough, Cooks illustrated 2007)

3 cups of all purpose flour

1/2 tsp salt

3 tbs sugar

10 tbs butter (1 stick plus 2 tbs), cut into cubes

1/2 cup shortening

1/4 cup vodka

1/4 cup cold water

Strawberry Filling:

1 cup of sugar

1 tbs corn starch

3 tbs unsalted butter

2 cups of diced strawberries

Egg Wash:

1 egg white

1 tsp water

plus 2 tbs sugar for sprinkling

Royal Icing:

1 egg white

1 tbs lemon juice

1.5 cups powdered sugar

PLUS:

16, 6 inch wooden skewers

Really, if you have the time, homemade pie dough is the jam. It is so far superior to that store bough nonsense that it could stand on it’s own. You could even make cookies out of it and eat it plain. I have been over this before but there are a few pie dough rules that one must never deviate from:

1. Cold dough will always cook better than warm.

2. The less it is worked with, the more tender it is. Don’t overwork your dough.

3.  Using vodka creates a flakier crust because it cooks off completely, unlike water.

First, food processors are great at getting the job done as quickly as possible, and as previously mentioned, the more you mess with dough the tougher it becomes. So break out that food processor and add 2 cups of the flour, salt and sugar and give it a quick pulse until it’s combined.

Add the cubes of butter and the shortening and pulse until combined, about 1 1/2 minutes. A mix of shortening and butter gives a good flavor and texture.

Now, if you have a larger food processor that mine, then add the remaining flour and pulse until it gathers around the blade. MINE is tiny and I need a new one. So if you are in the same boat as I am, just transfer it to a bowl and add the remaining flour by hand. (if you have a nice big guy food processor, transfer to a bowl after you add the remaining flour)

Then add the water and the vodka and squish it into the dough until its all combined. Your dough will be very moist, but you can add a bit of flour if it is too moist to hold together. Then split into two evenly sized disks and wrap in plastic wrap, and chill for at least 2 hours.

To make the filling, add the sugar and cornstarch to a pot and stir quickly to combine. Add the butter and strawberries and stir over medium heat until the berries are broken down and the sauce is thick and dark. Allow to cool

Once the dough has chilled, roll it out on a floured surface. If it breaks up, which it may since it is a pretty flakey recipe, just smoosh it back together with your fingers. Cut out your desired shape, 3-4 inches seems to be ideal. I used stars because of our upcoming I Heart America holiday, as well as 3 inch circles. Place the bottom circle on a baking sheet covered with parchment paper.

Place the stick more at least halfway up into your shape and top with a spoonful of the sauce.

Now, quickness is key at this point. Place a matching shape on top and smoosh the edges together.

I had some red and white straws left over from Taters party that I bought from Sweet Lulu’s that I used for sticks on a few of the pies. I wasn’t sure it they would bake well so I only did a few. I just pinched the  top shut and placed it on the star cutouts. I liked them so much that the ones that had boring ol' 6 inch wooden skewers were covered with those cute striped straws to match. Refrigerate your pies for at least 30 minutes.

In a small bowl, beat the egg white and the water until combined. Brush the tops with the egg wash and sprinkle with sugar.

Bake for 20-25 minutes or until the tops are goldeny brown.

Allow to cool. If the filling leaks out, its OK. Just try and cut around the shapes with a sharp knife before trying to remove from the pan.

In a small bowl, combine the royal icing ingredients and stir until well combined. Top the pies with the icing and then with the sprinkles of your choice.


O


Aqua + Black + White Bridal Shower

My Adorable little sister is getting hiched next month. My eqauly as adorable older sister and I planned a bridal shower using Little Sisters wedding colors.

We had the candy buffet:

ts-candy-strawsts-candy-2ts-candy2ts-candy4ts-candy5

I made lables for the take away boxes that we gave to all the guests

ts-candy-container-favor

And of course, there were cupcakes

ts-cupcakests-cupcakes2

The food was lovely,

ts-food-labels

we had

Goat Cheese and Flank Steak Crustinis

crustini-with-label_0-2ts-crustini

Roasted Chicken Salad on Crosants

ts-chicken-salad

Caprese Skewers

labelts-caprese-skewers

Fruit Skewers

ts-fruit-skewers

Meatball Sliders with Pesto Sauce

label_1ts-meatball-sliders

For the drinks we had a lovely Peach Sangria as well as Jones Soda’s that matched her colors

ts-sangria2ts-jones-3ts-jones-sodats-jones-soda2

My favorite of all was the photo banner that I made using a Chipboard Book Kit (http://www.stuff4scrapbooking.com/6-x8-with-8-pages-2-rings-chip-art-chipboard-bracket-book-kit-466594.html) I covered each page with paper that matched her wedding colors by tracing the shape, cutting it out, and then using spray adhesive to attach the paper to the book page. I then used pictures of the couple and photo corners on each page. I strung the pages up with a ribbon and put a color coordinating pinwheel at each end

ts-banner-book-haning-closets-banner-book-hanging-2book-hanging

When the party was over, I used binder rings to make it into a book that she can put on the guest book table at her wedding

book-done-openbook-done2book-done

I love you little sister and I wish you a long and happy marriage.

Spring Flower Garland and Hanging Decorations

flower-garland-and-hanging-done-tableMy favorite part about these decorations are the brads. I haven’t used brads since I was in 4th grade and I think I’ve been missing out. I love the birds, and the bunnies add a subtle Easter touch without having to write “HOPPY EASTER” on a pastel banner.  The process and materials are similar to my Paper Lantern post, so if you’ve attempted those you’ll be ahead of the game. Change the colors and they aren’t just for Easter. I would also love these for a baby shower or with patriotic colors for a 4th of July party.

Materials (per four hanging flowers and one 12 foot garland strand)

4 pieces of 12×12 scrapbook paper (I used yellow)

12 pieces of 6X6 paper (also yellow)

4 bunny brads (the ones I used)

12 Bird Brads (the bird ones)

12 to 14 Feet of jute or twine, Plus 2 feet for each hanging flower (the stuff I used)

Hole punch

Paper cutter

Start by cutting your 12X12 inch sheets into about 1.5 inch strips. I just pushed them flush with the edge of my paper cutter and the strips turned out great.

haning-flower-paper-cutterhanging-flower-stripsThen punched a hole in each end of the strip

hanging-flower-strips-with-holesThen stack up all the strips, then put a brad through the holes in one end and bend the stack around to also put the brad through the holes in the other end, making a teardrop shape. Then pull the strips out the make the flower shape

flower-garland-hoops-with-bradhanging-flower-doneUse about 2 feet of string to hang the flower decoration

hanging-flower-done-outsideI made the garland the same way, using the 6×6 sheets

flower-garland-paper-cutterflower-garland-done-singleand strung them on the 14 feet of twine

flower-garland-done-tableflower-garland-done-fenceflower-garland-done-fence-closeflower-garland-done-fence-2

Girly Pink Skull Cake

Somehow, over the past half a decade, the iconic symbol of rebellion, mayhem and destruction has morph itself into an adorable emblem of girly fun. I’m not sure who does PR for the Skull, but BRAVO! This cultural make-over surpasses even Mark Wahlbergs move from the Funky Bunch to Oscar Nominee. My current cake creation was in celebration of my wonderful friend, (who is a symbol of Girly Fun times in my life) and her most recent birthday.

To start, I made a four layer lemon cake. I decided to make Mango Cream Cheese frosting because that is a favorite of the birthday girl. It was good, but the mango bits made the frosting a bit chunky and it wasn’t mango-y enough. If you like  mild mango flavor, here is the recipe. To mango it up a notch, you can add Mango Extract: http://www.amazon.com/Natural-Mango-Extract-29-Fl/dp/B002BX351A

In a sauce pan over low heat, add 2 cups of sugar, 1/4 cup of butter and one large mango, diced, skin removed. Stir infrequently until the mango chunks are super soft and falling apart, about 30 minutes. I left this on the stove, semi-forgotten, while I gave Tater a bath, so you really don’t need to babysit it as long as the heat is on low and you stir it occasionally. Let it cool to room temperature, then puree in a food processor until as smooth as you can make it. The biggest rule for making cream cheese frosting is that your ingredients NEED to be at room temperature. You can’t cheat and try and trick your frosting, you’ll end up with a big mess the consistency of ground beef.  In a stand mixer, put 32 ounces of room temp cream cheese 2 sticks of room temp butter and mix well. Then add the room temp mango mixture and blend well. Everyone likes a different sweetness level on their frosting, I like mine closer to savory than overly sweet. I added about 1 cup of powdered sugar to this, taste and add more depending on your preference. I also added quite a bit of pink food coloring

pink-frostingStarting with a white 14 inch cake board circle (you can buy at cake supply stores or Michaels Arts and Crafts) I stacked up the layers with a hefty amount of frosting in between each layer. After that,  I iced the cake completely, this will be the first coat. Some call it crumb coat, because the cake crumbs will invade this first layer, and others (including myself) call it dirty ice, because it sounds more fun. Allow that to set completely, about an hour.

dirty-iceThe next coat is your final coat and it helps to sooth everything out and cover any bumps or holes in your cake. Think of fondant as that super shiny, thin bridesmaid dress that makes you look awful and shows every flaw, and you would never be caught dead it in it, let alone PHOTOGRAPHED in it over and over, if you didn’t really love your friend–and the final ice is the Spanx that allowed you to keep your sanity and hit on the cute bartender. The final ice is the compression garment of the cake world, makes everything look smooth and pretty.

cake-final-iceFondant is tricky and unforgiving. There are several different kinds of fondant, including homemade. The easiest to work with, although the yuckiest to eat, is Wilton’s. It would probably be the most accessible for you because it is the most widely carried. I do recommend using it for beginners because it is the most forgiving and will allow you to get a feel for fondant work before moving on the bitchier fondants. Just tell your guest that it is edible, but that you recommend they peel it off and don’t eat it. I used Fondx, actually pretty tasty but very soft and unforgiving. You can buy it in all different colors but I would recommend white and then color it yourself. Just use gel food coloring instead of liquid and if it gets too goopy, add powdered sugar. Then grab an unspecified amount (just gonna have to guess based on your cake size) and put on a clean surface dusted with powdered sugar. I used a softball size, colored hot pink

fondant-ballThen roll it as close to a circle as you can. I would highly recommend the use of a marble rolling pin.

pink-rolled-fondantSlowly  and carefully pick it up (you can use your rolling pin for assistance) and move to the cake. Here is a good picture tutorial from Satin ice: http://www.satinfinefoods.com/how.htm

Starting at the top, gently smooth the fondant. This will cause the bottom of your fondant to have bit of a ruffle effect

cake-fondant-precutTo cut the ruffle off, I use a sharp paring knife that I push the fondant a bit under the cake. A lot of people use a pizza cutter. Just use what works for you.

bottom-fondant-cutYou will notice quite a bit of powdered sugar left on your pretty cake. You can buy a brush at cake supply stores, I used a clean make-up blush brush. Just brush the cake until all the sugar is gone. You will still have a light layer. The next step is vodka! Not a shot for the weary baker, but a spray for the cake. Vodka is used in nearly every bakery to clean up cakes and give them a pretty shine. I use a small travel size spray bottle, probably intended to transport hairspray across FAA lines, but works really well in my kitchen. Just spray a light layer over your cake for a pretty, powder sugar free shine

cake-fondant-coveredI rolled a small hunk of white fondant on my cuttin’ surface and used a skull cookie cutter to cut out some decorations for the cake.

fondant-skulls-cut-outI used food coloring and a small artist brush to make a boy skull and a girl skull as well as left over fondant to make little bows

fondant-skulls-just-madeI decided that the boy and girl skulls made for a Hot Topic Wedding Cake look that I wasn’t diggin’ so I just used the girl skulls

fondant-skulls-no-mini-cupcakesAt some point in this decorating furry, I managed to make about 18 mini cupcakes and 3 regular sized cupcakes in black cupcake papers. I also ran out of pink frosting, as well as cream cheese, so I made Vermouth Whipped Cream. Sounds super hard and fancy, right? Not really. In a stand mixer, combine 2 cups heavy cream (or whipping cream, both will work just fine), 1 cup of sugar, 1 shot of vermouth and I added the pink food coloring. beat on high for about 4 minutes or until stiff peaks form. Opposite of the cream cheese, the cream has to be chilled or you’ll be churning butter. Then spoon it into a large Ziplock bag for the cheater piping bag. Cut the corner off, about the size of your pinky nail. Then pipe the whipped cream on in a swirl pattern. Looks SO fancy and it’s easier and faster than any other frosting method.

cheater-piping-bagThen I sprinkled the cupcakes with small pink sugar pearls. I placed them on the cake board at the base of the cake, securing them the the Wilton’s Candy melts that I use so often for my pastry glue. Just put a small amount of candy melts in a glass bowl, microwave for 30 seconds, stir and repeat until melted. Smear a bit on the bottom of each cupcake and place on the cake board.

fondant-skulls-on-cakeThe top cupcakes I used a wooden skewer to secure in place, I didn’t want those babies going anywhere

cupcake-skewerI used those same Wilton’s candy melts in a Pirate Skull Pick Mold

http://www.wilton.com/store/site/product.cfm?id=1E26F64B-1E0B-C910-EA95C108A7B263D0&killnav=1

and stuck two of them in each of the cupcakes to make a two sided skull topper

cupcake-topIt didn’t look quite done so I made some black fondant and cut out three hearts to add balance. DONE!! Happy Birthday Kelly!!

cake-done-6cake-donecake-done2cake-done3
cake-done4

Easter Table Center Peeps


Peeps, love ‘em or hate ‘em, will always conjure up spring time memories of pastel plastic baskets and egg hunts on the back lawn. Even as a kid I was never a huge fan of sugar coated sugar in the shape of farm animals, but I would have been disappointed had I not seen a row of co-joined marshmallow quadruplets on top of my green plastic Easter Grass. This center piece (oh, excuse me, Center Peep) was made to bring those lovely memories into my current day celebration, a way to reminisce without the calories.


Materials (per one center peep)


One empty ribbon spool, about a half inch wide


9 Bunny Peeps (I used Yellow)


1 green chick Peep


Wilton’s Candy Melts (can be used in the color of your bunnies, or in white)


1 plastic squeeze bottle, like a mustard bottle (can be found most craft stores, restaurant supply stores and sometimes grocery stores)


1 wooden skewer


Hot glue gun, with glue


Sprinkles in the color of your bunny


Floral Foam


1 Terra Cotta pot (or any color that you choose)


1 sheet of tissue paper


Start by ripping the ribbon spool apart so that you just have the middle cardboard hoop


centerpeep-ribbon-ring


The hot glue the flat end of the wooden skewer to the hoop and don’t be shy with the hot glue, really slather it on for a strong hold.


ring-stick-glue


The pull your bunnies apart and castrate them (yikes!) so that their bottom is flat


centerpeep-bunny-cut


Then put about 3/4 cup of candy melts in the squeeze bottle. Put in the microwave for thirty seconds, remove and shake a bit. Repeat until candy is melty and squeezes out of the bottle easily.


Squirt a bit of the candy melts on the freshly exposed bunny undercarriage


centerpeep-bunny-chocolate


Push against the cardboard ring. I made two of these and the easiest way to do it is to start close to the stick and crowd the bunnies close together so that all nine will fit on the ring.


The rim the exposed carboard ring with the candy melts. This makes it look prettier as well as provides a stronger hold for the rouge bunny. Before the candy melts dry, cover it with the sprinkles.


centerpeep-sprinkles


The take your green chick peep and cut a bit of an angle where his shoulder would be


centerpeep-chick-leaf-cut


Fill his cut with the candy melt and place him on the stick, a bit higher up that you might want so that the bottom half of the stick can go into the pot without a problem.


You can also add more candy melts when he is on the stick to make the hold better.


The cut a wedge of floral foam to fit snugly inside your pot


centerpeep-floral-foam


Put your foam into your pot and cover with the tissue paper, tucking the ends into the pot. Allow your Center Peep to cool completely before moving. It will take about 20 minutes. When you lift it up, support the head so that all the weight isn’t on the hot glue joint. Then skewer it all the way into your pot


centerpeep-stick-in-pot


Cover the tissue paper with your favorite Easter candy (jelly beans, mini candy eggs, pastel M&M’s) I just used candy left over from the Candy Buffet at Tater’s first birthday party.


All done!!

The Very Hungry Caterpillar Cake


The adorable Miss Emmi turned 1 just a few days after Tater. Emmi loves the Very Hungry Caterpillar more that I have ever seen a kid love a book, it’s quite adorable. She’s that bugs #1 fan. So of course, her party had to follow suit. Tater and I spent Saturday afternoon hagnin’ out with Emmi and her fabulous mother and we made a cake.

First, I made a 20 inch 2 layer strawberry cake

hc-cake-base-cake

The we covered it in cream cheese frosting and then a layer of white fondant and put brightly colored gumballs at the bottom

hc-cake-gumballs

We then cut out three inch circles from another sheet cake, cutting off the rounded top and cut those circles in half

hc-cake-circles

We frosted those half circles and then covered them in different shades of green fondant

hc-cake

We covered one of the cake circles in red fondant to use as the head

hc-cake-just-head

On went the body

hc-cake-body-part-way-on

Although Miss Emmi’s house is filled with every baby toy imaginable, the ladies spent most of the day playing on the stairs

claire-emmi-stairs

Emmi’s mom was a quick study with the fondant and was able to make her name, Caterpillar legs, antennae and eyes as well as an adorable sun

emmis-party-9

And check out that mini smash cake, made by Emmi’s aunt. Very adorable!

Happy first year Emmi!

No-Sew Headbands With Interchangeable Decals


I love these. Not only are they so so so cute, they cost less than $10 in materials and took me less than 30 minutes. Plus, look adorable on Taters little head.

Materials, all can be found at a craft store:

Elastic stretch lace, large fancy buttons, less than a foot or marabou(I found this in the ribbon section), about 2.5 feet of ribbon, large snaps, felt circles (about 1 inch in diameter)

buttons-feathersbands-startsnaps

First, I cut the lace to the size I needed and hot glued the ends together. Although I was skeptical of this method, it worked great

black-band-glue

I cut a small piece of the marabou, just enough to wind around the back of the pretty button. I lined the back of the button with hot glue and attached the feathers

black-parts

Then glued the felt circle to the back of the feathered button and then one side of the snap to the felt. Make sure that the felt is glued to the button, not just the feathers

black-front-felt-glueblack-back

I glued the other side of the snap over the hot glued seam of the elastic. The decal will completely cover the seam.

black-wth-snap

I also had an idea for a button in the middle of a ribbon flower. I started with 4 strips of ribbon, 7 inches long each. Then hot glued the strips into loops

blue-stripsblue-loops

I hot glued the middles of the loops to make smashed loops

blue-smashed-loops

hot glued two smashed loops into an X shape

blue-decal-x

Glued loops behind the X, one in each direction

blue-decal-front-pre-button

Then glued the button in the middle

blue-decal-with-button

then glued the felt on the back and half the snap on that

blue-decal-back-snap

I glued half of a snap onto each headband. It really doesn’t matter which side you use for the decal and which side you use for the headband as long as you are consistent, so that each decal has the exact same side and each headband has the other.

I also made another decal, the same way as I did with the first black and silver decal. I love this one, red flower and black marabou, so pretty

3-headband-parts3-headbands-donered-black-cream-handband-done

Tater Turns One!


Our little lady, with a nickname of Tater Tot, is an entire year old! We had a bash at our place to celebrate her, as well as to commemorate our first year as parents. I obsessed over the every detail, my poor husband had to put up with a house covered in red and aqua crafting supplies for months! I was happy with how things turned out and  although there is a list of things I wanted to do but didn’t have enough time for, it was a great day. Of all the party offerings, my two favorite were the Tater tot/French Fry Bar and the Candy Buffet.  Both were huge hits.

Tater Tot bar!! Of course our Tater needed Tater Tots at her birthday party, it was an obvious paring. I made a cone holder for those deep fried nuggets of goodness

tater-holderI bought 30 treat cones  at Shop Sweet Lulu (http://shopsweetlulu.bigcartel.com/product/12-polka-dot-party-cones)

and they went much quicker than I had expected (we needed double that amount) and ended up using plastic cups as portable potato vessels. I made 3 sauces, Chipotle Ketchup, Blue Cheese Sour Cream and Garlic Aioli. Although the Blue Cheese Sour Cream was my fave, the Chipotle Ketchup was the runaway hit.

tater-tot-barI also had a selection of mini sandwiches, Pulled Pork Sliders on mini Hawaiian Buns, Caprese BLT Sandwiches & Pork Free Caprese Sandwiches (both on sour dough), and a childhood favorite of most Americans: Mini PBJ on white bread (crust-less, of course). I Also made fruit skewers and served them stuck into a half of a watermelon, in a way the reminded me of a 1950′s Luau.

food-tabletater-tot-bar-signThe Candy Buffet turned out exactly how I wanted (rare, isn’t it!). I spent weeks searching for red or aqua candy, used clear glass pedestal bowls that I already had, and bought a yard of Micheal Miller fabric to match the scheme.

candy-buffetI also borrowed the wording for the sign from a wedding blog and changed it a bit to fit a birthday party. I can’t remember the exact blog to offer credit.

candy-signI baked a two tiered cake that did not go as planned (my one “mini disaster” of the day) as well as two dozen cupcakes with edible pinwheel cupcake toppers. I posted a DIY for the edible pinwheels last week. The cake looked “OK” from a distance, but was mess up close. Tater seemed to enjoy it and that’s what’s important.

cupcakesdesserts birthday-girl-cake3-2   birthday-girl-cake2-2_0Over the dessert tables I had a Happy Birthday banner that I made out of paper circles and chipboard letters, as well as a Month by Month banner that I made with photos that I took each month of Tater in a corresponding onesie. My sister is a party throwin’ genius and made those adorable onesies, using them as decorations at my baby shower. One for each month all the way up to one year. I used the One Year picture on a separate banner over the food table with a picture of myself and one of my husband at one year of age. It was a great contrast for my guests to be able to see which features she gets from each of us.

birthdat-banner_0happy-birthday-banner-1month-onsie-banner-2month-onsie-banner-2-2_0claire-1-monthI made 15 paper lanterns, and posted a detailed DIY a few weeks ago. They looked great hanging over the food and dessert tables

paper-lanters2paper-lanterns1I also made a dozen tissue paper Poms, enlisting the help of my good friend Kelly, who did a lovely job. I found a great DIY on the Martha Stewart site: http://www.marthastewart.com/how-to/tissue-paper-pom-poms-how-to

I used 10 sheets of tissue each and was able to find 40 sheets for a dollar at the 99 Cent’s Only store, a very affordable, although time consuming, decoration project.

pomsI found some really great aqua and white polka dot table covers at Marshall’s for only $4 each

tablesI had two centerpieces on each table, one with a homemade pinwheel and red and aqua suckers, and one with chocolate covered strawberries and marshmallows. I found some really cute sugar ladybugs at www.orientaltrading.com that I loved and used on the strawberries.

pinwheel-center-piece choc-strawI half way attempted a photo booth but didn’t have enough time to really bring it together.

photobooth-2The favors that I made were one of my favorite touches! I used standard clothes pins, 1.5 inch wood circles, scrapbook paper and round magnets to make personalized favor bag holders that also doubled as a fridge magnet for the “photo of the moment” for all those parents who still love a printed photo on their fridge. In the bags, that I also found at www.shopsweetlulu.com, I put age appropriate toys.

favorsI am hoping to post a DIY on those soon, very easy and super cute. I love a personalized touch! I did the math and I believe that each favor clip cost me about 35 cents each.

Some of Taters adorable little friends who partied with us

emmi-2daniel-2london-1All in all, I had a great time and so did my little lady. She is an amazing little human and I am so lucky to be her mom, I hope that she will always know that. There are not enough parties to be able to express the celebration I feel in having her in my life.

Edible pinwheels


Over the course my event planning, my Daughters first birthday morphed into a pinwheel theme. Maybe because they are easy to make or just so darn cute, its hard to say, but the idea of making edible pinwheels just wouldn’t get out of my head. Edible pinwheel cupcake toppers!! Could it be possible? Oh, I made it possible. It was quite a crafting adventure from start to finish and if you plan to attempt these, I hope that you can learn from my mistakes.

First, although I know that printed and colored rice paper exists, I wasn’t able to locate any in the short time I had allotted for the task, so I started with plain white sheets of rice paper that I cut with a standard paper cutter:

pinwheels11

To get the pinwheel in the right shape, you need a square piece of paper. I tried 4×4, 3×3 and 2.5×2.5. My favorites were the 2.5 squares, big enough to be put on an edible stick or to be used on its own. Because I wanted the pinwheels to match the red and aqua color scheme that I had going, I tried to paint the rice paper. Really, I wouldn’t advise this but if you want to attempt, it didn’t go horribly awry. I used a clean standard paint brush and put a small amount of gel food coloring in a small bowl. I put a small amount of vodka in another bowl. With all the squares on a sheet of wax paper, I dipped my brush just a tiny bit in the vodka and then mixed it into the gel just enough to make it spreadable. I then painted each side of the rice paper squares.

pinwheels9

Then I painted the other side and covered the painted squares with wax paper and flattened them so that they wouldn’t curl

pinwheels8

I let them dry overnight. To be honest, some didn’t survive. the ones that had too much food coloring stuck to the wax paper and tore when I tried to remove them. Not a pretty sight. I was able to save about 2 thirds of them, dried and ready for the next step. I have made so many pinwheels in the past few weeks that I just took out my scissors and eyeballed the cuts. But if you want to be a touch more accurate, you can draw a line from corner to corner, cut towards the middle leaving about 2cm between each corner cut. I just started at one corner and aimed for the opposite corner making sure to stop short of the middle

pinwheels6

Then I attempted to glue to corners into the center, one at a time, using some store bought icing in a tube that I had on hand

pinwheels5

It worked OK. I also made some royal icing and tried that as well. I was marginally more successful with that. I then placed sugar pearls in the center to cover up the ugliness left behind by the icing “glue”. Still, I wasn’t happy. The food coloring left inconsistent color variations and although technically edible, the excessive amounts of gel coloring left a flavor that I describe as “kinda yucky.” Next, I went back to the plain white squares of rice paper. I cut them the same way I did the red dyed ones but decided to “glue” the flaps to the center with melted white Wilton’s Candy Melts. MUCH BETTER!

pinwheels2

I added the sugar pearls again to cover the mess. Although this process was much easier and faster than the painting fiasco, they looked too plain. I had some Disco Dust on hand, as well as a mini spray bottle. I found the mini spray bottle at the trial size section of Target, but you can also over pay for them at cake supply stores. I filled the bottle with vodka. A little side note about the vodka: my double mention of liquor as well as its residence in travel size containers isn’t because motherhood has driven me to alcoholic tendencies, it’s a common practice among cake bakers. Vodka will evaporate completely (not a trace of alcohol left behind so it’s safe for the little one) so it won’t water down color or dissolve sugars the same way water will. OK, back to the pinwheels! I just sprayed one spray of vodka on the pinwheels and then sprinkled them with the aqua colored disco dust. I tried two sprays and that made the pinwheel curl up and there wasn’t anymore dust that adhered then with one spray.

pinwheels

I loved them! I then decided to go on a mission to find some sort of edible stick to put them on. After wandering around the grocery store, I happened upon Pocky in the Japanese section of the market. YAY!! SO perfect, other than the fact that this is the one thing that deviated from my aqua and red color scheme, I was happy. Perfect size and actually yummy.

pocky

I glued these on the back with the candy melts as well and they looked perfect.

cupcakesSo my lessons learned are:

If you want colored rice paper, buy it that way.

2.5 inch squares are the perfect size for cupcake toppers

Candy Melts make better glue than icing