Hefeweizen

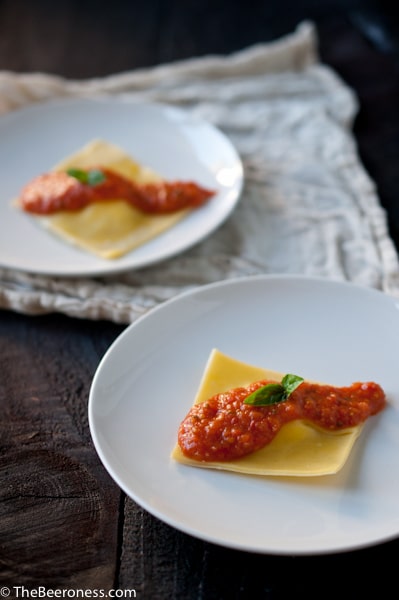
Goat Cheese Raviolis with Blistered Sugar Plum Tomatoes and Hefeweizen Marinara & How to Make Homemade Raviolis

Beer Raviolis

Homemade raviolis are a food lovers endeavor. It’s time consuming, physically trying, and a bit tedious. There are plenty of places that can sell you beautiful hand made raviolis, but you do it because you want to be there. In the kitchen, shoulders aching from kneading, hands covered with yolk and flour, feeling a connection to the Sicilian grandmothers who stood barefoot on unfinished wooden floors teaching the art to their eager but bored grandchildren.

It’s as much about the journey as it is about the cheese filled destination. I love homemade pasta, there is something meditative about the repetition of the process. I’m always glad for the time I spent, pushing myself closer to mastering the craft of pasta making. And the end product is a handsome reward for the labor.

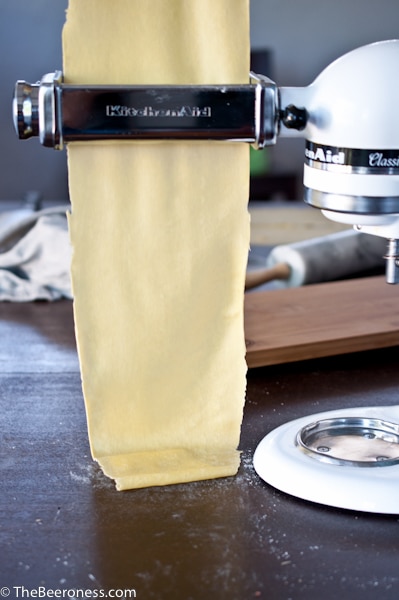
I used the KitchenAid pasta rollers. I love these, and even though they are more than most people want to spend on what will probably be an occasional use item, it’s a worth while investment. I don’t use these often, but when I do, I’m so glad I have them. The set comes with three rollers: a pasta dough roller (to make sheets), a  fettuccine cutter and a spaghetti cutter. Because they’re automatic (meaning you don’t have to use one hand to crank the roller) it makes feeding the pasta into the roller fantastically easy. The KitchenAid pasta roller and cutters are also very well made and should last a life time, long enough for you to pass down to your future eager but bored grandchildren.

How To Make Raviolis

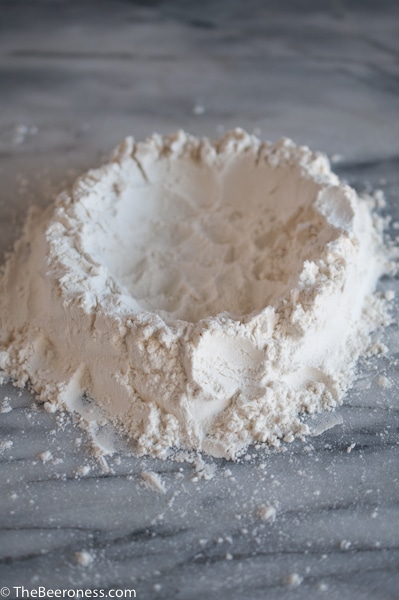
On a flat surface add the flour. Make a well with walls that are about 1 inch thick, make sure the well is large enough to hold the eggs, milk and oil.

How to make Raviolis 1

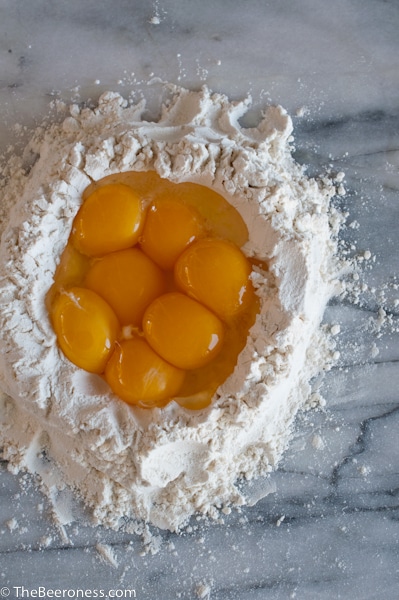
Add the yolks, egg, milk and oil. Break the yolks.

How to make Raviolis 2

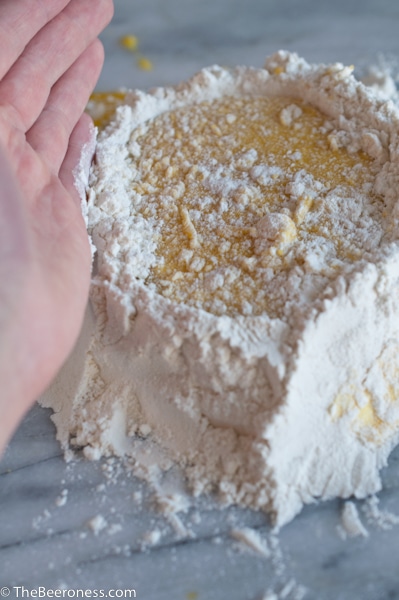
Using your fingers, or a fork, stir quickly. The motion will allow the liquid to pick up flour from the walls and will gradually become thicker. This will take about 10 minutes.

How to make Raviolis 3

As the liquid becomes thicker, close to a paste consistency, start to push the flour walls up over and into the liquid pool. Continue to stir until the flour and liquid is mostly incorporated.

How to make Raviolis 4

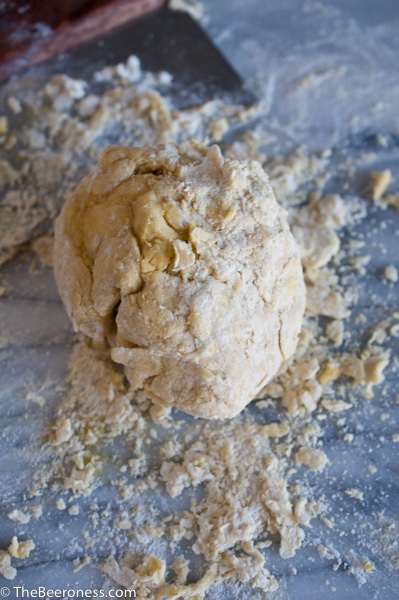
Pull the dough into a ball, it will be shaggy and seem a bit dry.

How to make Raviolis 5

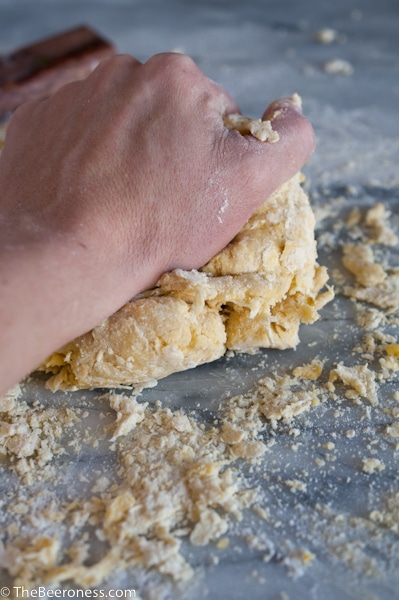
Knead on a flat surface with the heel of your hand, this will take a ten to fifteen minutes. Knead until the dough is smooth and slightly elastic. If you aren’t sure if the dough is done, keep kneading. This isn’t a dough that can be over worked, but too little kneading is a problem.

How to make Raviolis 6

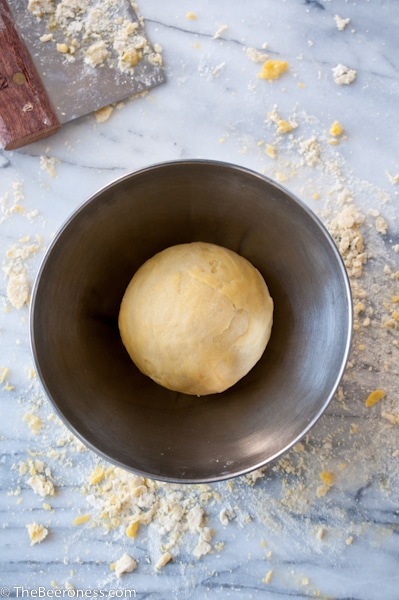
Put dough into a small bowl and cover tightly and allow to rest for 30 minutes at room temperature.
How to make Raviolis 7

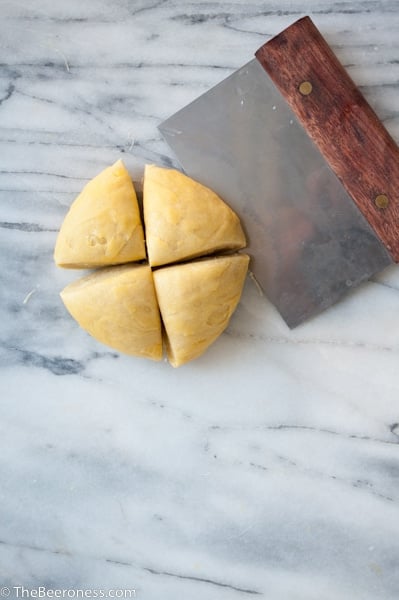
Cut into 4 sections. Place any dough sections you are not working with back in the bowl and cover.

How to make Raviolis 8

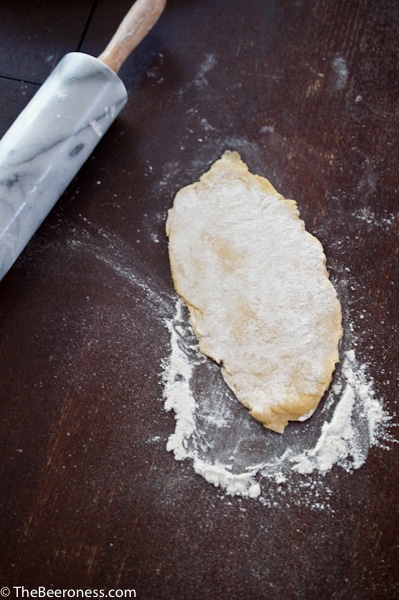
One at a time, roll out the dough sections to about ¼ to ½ inch rectangle.

How to make Raviolis 10

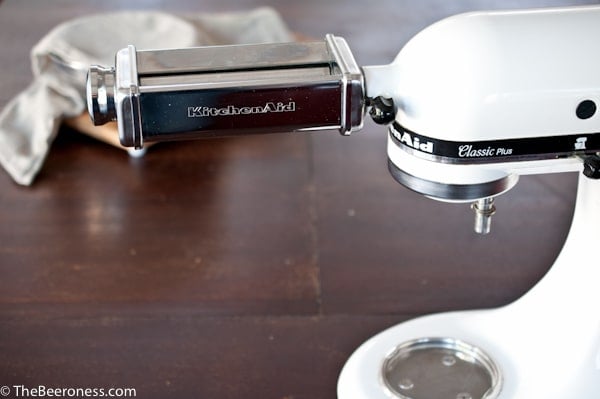
Attach the KitchenAid Pasta Roller attachment to your stand mixer.

How to make Raviolis 9

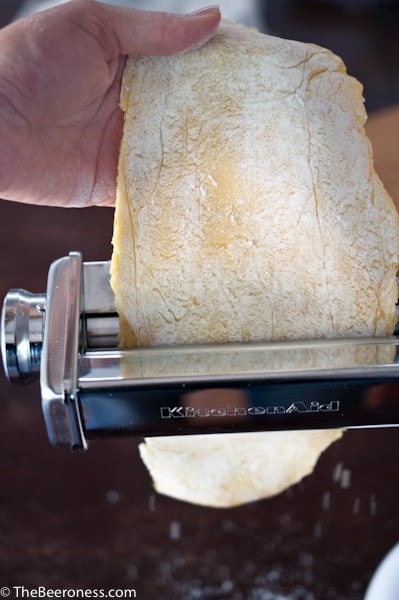
Set the thickness to 1 (the thickest setting). Turn the KitchenAid stand mixer to a speed of 2.Feed the dough rectangle into the pasta roller narrowest side first.

How to make Raviolis 11

Pass through two or three times. Narrow the thickness to a 3. Pass the dough sheet through two or three times, this should get easier and easier with each pass.

How to make Raviolis 12

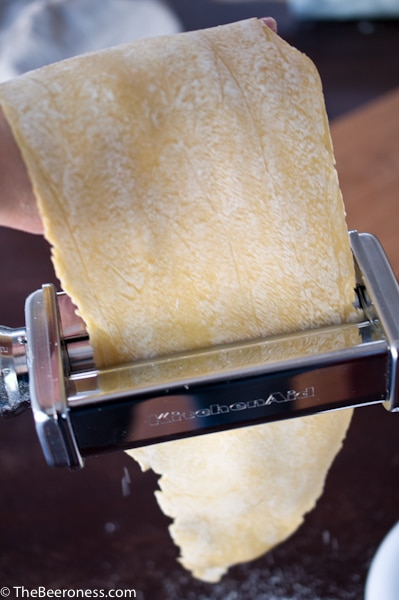
Narrow the thickness to a 5. Pass the dough sheet through two or three times, this should get easier and easier with each pass. You want the dough sheets to be so thin you can see through them.

How to make Raviolis 15


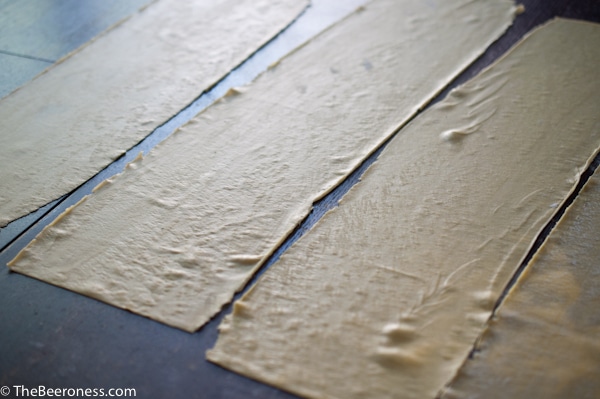
Lay the sheets on a flat surface. It’s best to do this one at a time, moving through the steps as not to let the dough dry out, but for the purposes of photography and natural light, I broke that rule.

How to make Raviolis 16

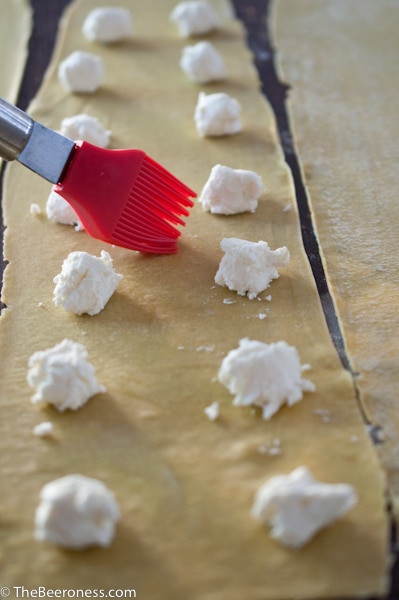
Place about 2-3 tsp of filling on the dough sheets about 1 ½ inches apart, in to rows.

How to make Raviolis 17

Brush the dough with water around the balls of filling. Top with second sheet of pasta.

How to make Raviolis 18

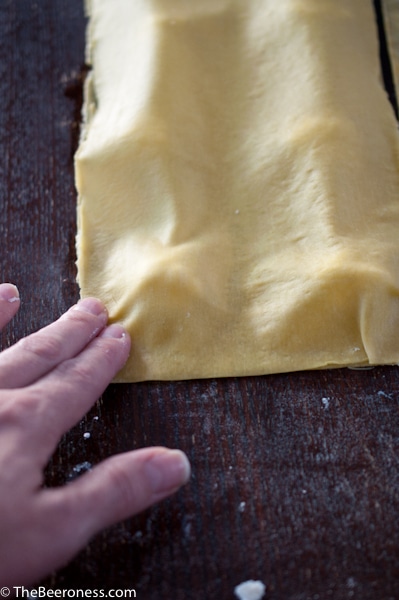
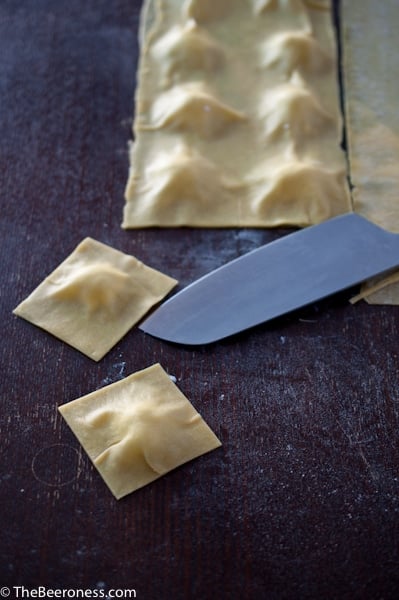
Press the pasta around the filling, sealing well.

How to make Raviolis 19

Use a sharp knife or a pastry wheel to cut into squares.

How to make Raviolis 20

Place on a plate, allow to sit for about 10 minutes.

How to make Raviolis 21

Cook in a pot of lightly salted boiling water until raviolis float and are cooked through.

Drain, plate and top with sauce.

Goat Cheese Raviolis with Blistered Sugar Plum Tomatoes and Hefeweizen Marinara

Ingredients
  

  • 1 ¾ cups sifted all-purpose flour
  • 3 large egg yolks room temperature
  • 1 large egg room temperature
  • 1 ½ teaspoons olive oil
  • 1 tablespoon milk
  • 3 ounces goat cheese
  • 2 tbs chop fresh herbs, if desired

For The Marinara

  • 1 lb sugar plum tomatoes or grape tomatoes
  • 1 tbs olive oil
  • ½ white onion chopped
  • 3 cloves garlic minced
  • 1 cup beer
  • 5 large basil leaves chopped
  • 1 tsp chopped fresh oregano
  • ½ tsp salt
  • ½ tsp pepper
  • 2 tbs tomato paste

Instructions
 

  • On a flat surface add the flour. Make a well with walls that are about 1 inch thick, make sure the well is large enough to hold the eggs, milk and oil.
  • Add the yolks, egg, milk and oil. Break the yolks.
  • Using your fingers, stir quickly. The motion will allow the liquid to pick up flour from the walls and will gradually become thicker. This will take about 10 minutes.
  • As the liquid becomes thicker, close to a paste consistency, start to push the flour walls up over and into the liquid pool. Continue to stir until the flour and liquid is mostly incorporated.
  • Pull the dough into a ball, it will be shaggy and seem a bit dry.
  • Knead on a flat surface with the heel of your hand, this will take a ten to fifteen minutes. Knead until the dough is smooth and slightly elastic. If you aren’t sure if the dough is done, keep kneading. This isn’t a dough that can be over worked, but too little kneading is a problem.
  • Put dough into a small bowl and cover tightly and allow to rest for 30 minutes at room temperature.
  • Cut into 4 sections. Place any dough sections you are not working with back in the bowl and cover.
  • One at a time, roll out the dough sections to about ¼ to ½ inch rectangle.
  • Attach the KitchenAid Pasta Roller attachment to your stand mixer.
  • Set the thickness to 1 (the thickest setting).
  • Turn the KitchenAid stand mixer to a speed of 2.
  • Feed the dough rectangle into the pasta roller narrowest side first.
  • Pass through two or three times.
  • Narrow the thickness to a 3. Pass the dough sheet through two or three times, this should get easier and easier with each pass.
  • Narrow the thickness to a 5. Pass the dough sheet through two or three times, this should get easier and easier with each pass. You want the dough sheets to be so thin you can see through them.
  • Lay the sheets on a flat surface.
  • Place about 2-3 tsp of goat cheese on the dough sheets about 1 ½ inches apart, in to rows.
  • Brush the dough with water around the balls of goat cheese (sprinkle with fresh herbs, if desired). Top with second sheet of pasta.
  • Press the pasta around the filling, sealing well. Use a sharp knife or a pastry wheel to cut into squares.
  • Place on a plate, allow to sit for about 10 minutes.
  • Cook in a pot of lightly salted boiling water until raviolis float and are cooked through.
  • Drain, plate and top with sauce.

Make the sauce:

  • Heat the oil in a cast iron skillet over medium high heat, cook the onions until soft about five minutes.
  • Add the tomatoes, cook until soft and the skin has blistered. Add the garlic, cook for about 30 seconds.
  • Add the beer and cook until the beer has mostly evaporated, about ten minutes.
  • Add the remaining basil, oregano, salt and pepper, stir, remove from heat.
  • Add to a food processor along with the tomato paste, process until smooth.
Beer Raviolis

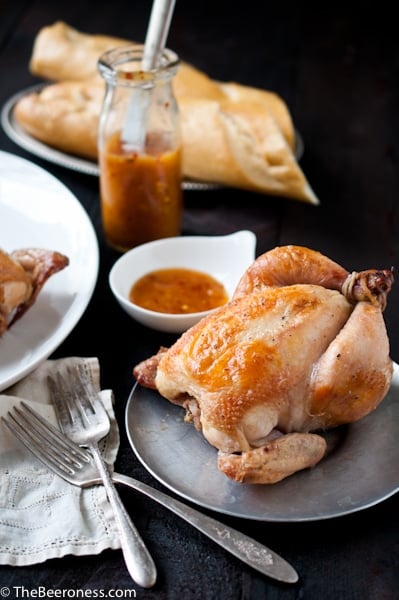
Beer Brined Roasted Cornish Game Hens with Orange Chili Sauce

Beer Brined Roasted Cornish Game Hens with Orange Chili Sauce 3

I’ve started to think about dishes that have made an impact on me over the years, a salt roasted whole fish I ate in italy, curried soup I had in New York, even pancakes from my Grandfather. I didn’t grow up in a culinary family, I grew up in a defrost-and-feed family and decided I wanted to figure out this cooking thing when I was in High School. I met a guy who was older than me, SO old, in fact, that he had his own apartment. I wanted to impress him, so I offered to cook him dinner. Newly licensed, I drove to the grocery store all by myself for the first time. I had planned to buy steak and try to figure that out, but a combination of seeing these tiny chickens and realizing how expensive good steak was made the decision easy. Two "tiny chickens" were only $4, and I peeled the price tag off so that he wouldn’t know how cheap I was.

I just rubbed them with butter (probably margarine, to be honest) and salt and pepper, and cooked them until I thought they were done. They turned out amazing, I think I was more impressed than he was. It was my first official Kitchen Win, Roasted Cornish Game Hens at 16 years old, in the kitchen of a crappy post war era apartment off George Washington Way.

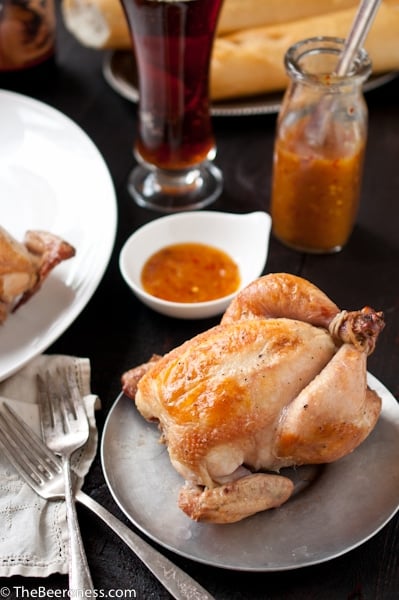
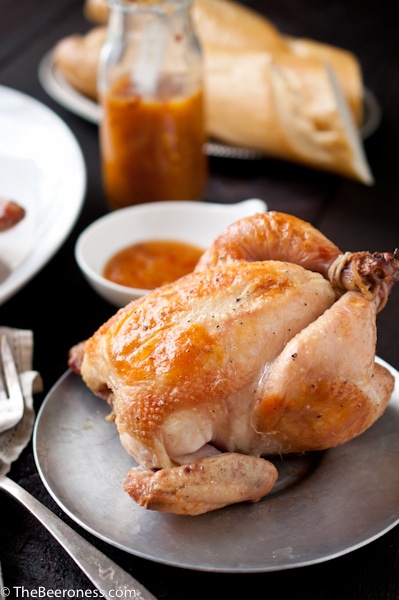
I haven’t made them since (until now), and I can’t even tell you why. I make roast chicken all the time, and this is just as easy, and if you are having a dinner party, it’s really impressive, everyone gets their own tiny chicken. You don’t even have to tell them how cheap they are.

Beer Brined Roasted Cornish Game Hens with Orange Chili Sauce 2

A beer brine is incredible, the combination of the subtle flavors and the meat tenderizing properties of beer give you a fantastic final product. I usually use brown ale, I love the notes of molasses and nuts that are easy to find in brown ales. I remembered Brother Thelonious from North Coast, a strong, dark, Belgian Style Abbey Ale . The notes of nuts, fruit, malt, brown sugar and cherries, along with a relatively high ABV of 9.3%, it was exactly what I was looking for. North Coast is a stellar brewery out of Northern California, that has brought us such hits as Old Rasputin and PranQster. North Coast has been preaching the craft beer gospel for 25 years, producing beer that is diverse and on point, you’ll never hear anything but praise out of me for North Coast.

Another reason to enjoy the Brother Thelonious is that a portion of the proceeds go to support the Thelonious Monk Institute of Jazz, It’s a beer with a mission.

The sauce can be made with what you have "leftover" from the beer brine, but let’s be honest, it probably won’t last that long. You can also use a lighter wheat beer, or a pale ale. Just a warning, alcohol intensifies heat so the higher ABV you use, the higher the heat level will be. Removing the seeds from the pepper gives you a greater control over the sauces final heat level. Most of the heat of a pepper is found in the seeds, with almost no flavor.The flesh of the pepper still has significant heat, but also contains the flavor of the pepper. If you are worried about the heat not being high enough, reserve some of the seeds and add them into the sauce as needed.


Beer Brined Roasted Cornish Game Hens with Orange Chili Sauce 4

Beer Brined Roasted Cornish Game Hens with Orange Chili Sauce

Ingredients
  

For the chicken:

  • 12 ounces Belgian ale wheat beer, or brown ale
  • ¼ cup kosher salt
  • 2 tbs white sugar
  • 1 tbs whole cloves
  • 2 cups ice
  • 2 Cornish game hens 1.75 to 2 lbs each
  • 1 large lemon
  • 2 tbs melted butter
  • ½ tsp salt
  • ½ tsp pepper

For the sauce:

  • 1 habanero chili
  • 2 cara cara oranges juiced (about 1 cup)
  • 1 tbs corn starch
  • 1 tbs white sugar
  • ¼ cup wheat beer
  • 1 tbs white vinegar
  • 1 tbs red chili flakes

Instructions
 

  • In a pot over medium high heat, add the wheat beer, salt, sugar and cloves. Cook, stirring frequently, until the sugar and salt have dissolved, remove from heat. Add the ice, stir until dissolved.
  • Rinse the game hens inside and out, place together in a large bowl. Pour the brine over the hens, refrigerate for 6 to 12 hours.
  • Preheat oven to 425.
  • Remove hens from brine, rinse thoroughly and pat dry.
  • Place in a roasting rack of a roasting pan or on a wire rack on a rimmed baking sheet. Cut lemon into quarters. Place one quarter into each hen, place the remaining two in the roasting pan beneath the hens.
  • In a small bowl combine melted butter, salt and pepper.
  • Brush the hens liberally with the butter mixture.
  • Roast at 425 for 45 minutes or until the internal temperature reaches 165.
  • While the hens are roasting, make the sauce. Using gloves remove the seeds from the habanero, discard seeds and stem, chop remaining pepper.
  • Add habanero, orange juice, cornstarch and white sugar to a saucepan over high heat, whisk frequently until mixture has thickened. Remove from heat, add beer and vinegar, bring to a boil just until re-thickened, stir in about half (1-2 tsp) of the 1 tbs chili flakes. Taste sauce, add additional red chili flakes for a higher level of heat.
  • Serve the orange chili sauce in small sauce dishes along side the hens for dipping.

Notes

This recipe makes an abundance of sauce, enough for 4 to 6 servings. If you make more Game Hens, you won't need to double the sauce unless you make 8 or more servings. If you are worried about the heat not being high enough, reserve some of the seeds and add them into the sauce as needed.

Beer Brined Roasted Cornish Game Hens with Orange Chili Sauce

Homemade Garlic Beer Pita Bread

 Homemade Garlic Beer Pita Bread4

Do you remember when I told you that once I discovered that homemade corn tortillas where so good it made me realize that I didn’t actually hate corn tortillas, I just hated those sad cardboard disks they sell at the store?

Homemade Garlic Beer Pita Bread2

Pita bread is an even bigger revelation. It’s not as quick as those 10-minute homemade tortillas, but it’s so soft and addictingly amazing, it’s worth the time. It’s about 15 minutes of active time and another 45 to 60 minutes of rising time.  About an hour all in.  An hour well spent. Pita bread was the first yeast bread I ever made which helped me to conquer my fear of yeast and made me wonder what I was so scared of.

Homemade Garlic Beer Pita Bread

For this, and for most bread recipes, I like a wheat beer, especially an unfiltered wheat beer. The bready notes and the yeast in the beer give a great texture with a hint of beer on the back end.

So, what do you do with this beautiful bread once you’ve decided to make it? If you can resist eating it right out of the pan, it makes amazing wraps and sandwiches, but don’t be afraid to make mini pizzas or even large chicken tacos with this too. Or just eat it right out of the pan with some melted butter. And a cold beer.

Homemade Garlic Beer Pita Bread3

Homemade Garlic Beer Pita Bread

Ingredients
  

  • 2 ½ cups all purpose flour
  • 1 envelope rapid rise yeast
  • 1/2 tsp garlic powder
  • 1 cup beer
  • 1 tsp salt

Instructions
 

  • In the bowl of a stand mixer fitted with a dough hook attachment, add the flour, yeast and garlic powder. Mix until combined.
  • In a microwave safe bowl add the beer. Microwave on high for 20 seconds, test temperature with a cooking thermometer and repeat until temperature reaches between 120 and 125 degrees Fahrenheit.
  • Add the beer to the stand mixer and mix on medium speed. Once most of the dough has been moistened, sprinkle with the salt while the mixer is still running.
  • Turn speed to high and beat until dough is smooth and elastic, about 8 minutes.
  • Transfer dough to a lightly oiled bowl, tightly wrap with plastic wrap. Allow to sit in a warm room until doubled in size, about 45 to 60 minutes.
  • Remove from bowl and add to a lightly floured surface. Knead several times, cut into 8 equal sized pieces.
  • One at a time roll the dough into 6 inch circles.
  • Lightly oil a cast iron skillet and heat over high heat until very hot. Add one dough circle to the pan, cook until the underside has browned and the top starts to bubble, about 2 minutes, flip and cook for an additional 1-2 minutes or until the pita bread is cooked through. Adjust the heat if the pan becomes too hot and the bread burns too quickly.


Hefeweizen Honey Rolls

 I have wandered into a complete obsession with making bread. It started slowly, and really, rather timidly. When I first started, I was afraid of yeast, and a wee bit convinced that it hated me.

I threw several mounds of fail dough in the trash after it refused to rise. I learned a few things long the way that I am more than happy to share with you and save you from the "What the EFF is wrong with this damn bread!" frustrations that I suffered.

First, check the expiration date.  Yeast expires in a biblical sense, it actually dies. Yeast is a bit of a living beast, and once it reaches it’s expiration date, don’t even think about it. It’s not like that bottle of Ibuprofen in your  cabinet that expired last year but is probably still going to cure your headache. If the yeast has been in your cabinet a while, throw it out.

Salt kills yeast too. Don’t let inactive yeast come in contact with salt. I learned this the hard way when adding salt to the cream before microwaving it.

Yeast will rise between 40 and 120 degrees. Any higher than 120 and it will be killed by the heat (unless you use rapid-rise which will work until about 130), stay away from the high end of the scale in case your thermometer is a bit off. If the yeast is colder than around 90, it will take a long time to rise. At 40 degrees, it will still rise, but it will take days. 110 seems to be a bit of a sweet spot, but I live in LA, and even when the East Coast is being ravaged by Frankenstrom, it was still 85 degrees yesterday. Bread rises faster when it’s warm, slower when it’s cold. Yeast types are not interchangeable without major recipe modifications. Use the yeast the recipe calls for.

Dry milk powder is a bit of a secret weapon when it comes to bread making. I discovered this in the Secret Ingredient section of King Arthur Flour, it may be to blame for my bread making fixation.  Your bread will be softer, taller and more tender. Buy a bag just to keep on hand for Thanksgiving and Christmas rolls, because if you are going to all of the trouble to make homemade rolls, you should really pull out all the tricks in your bag.

Beer. Of course, the beer. Bread is my favorite thing to make with beer. Even if you aren’t a beer kind of girl, it gives your bread a lighter, slightly more leavened quality that makes it a perfect baking liquid. And because it’s bread, a wheat beer is a natural choice.


Hefeweizen Honey Rolls

Ingredients
  

  • 1/2 cup heavy cream
  • 1 envelope dry active yeast
  • 5 cups bread flour
  • 1/4 cup dry milk powder
  • 1/4 tsp salt
  • 2/3 cup wheat beer room temperature
  • 3 eggs
  • 1/4 cup honey
  • 4 tbs unsalted butter softened to room temp

To Brush On Top:

  • 4 tbs melted butter
  • 1 tsp honey
  • 1/2 tsp coarse salt

Makes 16 rolls

    Instructions
     

    • Add the cream to a microwave safe dish. Heat for 20 seconds, test temperature and repeat until cream is about 110 degrees. Add the yeast, set aside until foamy, about 5 minutes. If the yeast does not foam, it isn't good. Discard it and try again.
    • In the bowl of a stand mixer add the flour, salt and dry milk powder, mix until well combined.
    • Add the cream and the beer, mix until combined. It will look dry and shaggy.
    • Add the eggs, one at a time, mixing between additions.
    • Add the honey and butter and allow to mix until the dough forms a smooth and shiny ball that isn't sticky, about 8-10 minutes.
    • Coat the inside of large bowl with oil. Form the dough into a ball and add to prepared bowl. Cover the bowl tightly with plastic wrap and allow to rise in a warm room until doubled in size. This will take between 1 and 2 hours depending on the temperature of the room.
    • Punch the dough down, and knead lightly for about 1 minute.
    • Cut the dough in half, then cut each half in half. You will now have 4 equal size pieces. Cut each piece in half to create 8 equal sized pieces. Cut each of those in half to give you 16.
    • Roll each piece of dough into balls, place into a baking dish with a bit of space between each roll (you might need two baking pans to accommodate 16 rolls).
    • Cover and allow to rise until about doubled in size.
    • Heat oven to 400 degrees.
    • Combine the melted butter and honey. Brush the top of the rolls with honey butter mixture, sprinkle with salt.
    • Bake at 400 for 12-15 minutes until golden brown.


    Mac And Beer Cheese Soup


    I have a confession to make. Before starting this blog, I tried to make beer cheese soup and failed. I was baffled, at first, but figured out that a combination of my lack of patience (manifesting itself in my cheese dumping rather than slow adding) and a furious boil, resulted in a sloppy mess.

    Second confession of the day (just call yourself a priest, and I’ll say a few Hail Mary’s on my way out) is that even though I love this recipe, I think I may love the photos more. Because right after I took them I was reminded via ping of my first post and how on their best day, those photos are hideously below average. I’ve worked really hard to bring my photography up to an acceptable standard and these photos reminded me of how my work is paying off.

    Third confession, I won a state-wide Cook-Off on Friday. Ok, not really a confession, but I’m excited, so I thought I would share.

    Fourth confession, I still have  a crush on Luke Perry. And Val Kilmer’s character in Real Genius. Looks like I went one confession too far.

    Mac And Beer Cheese Soup

    Note: Cheese sauce separates easily if the mixture is brought to a boil, or if pre shredded cheese is used. If the mixture does separates, try to puree the cheese sauce with a hand blender before you add the noodles.

    Ingredients
      

    • 3 tbs olive oil
    • 1 onion chopped
    • 1 fresh jalapeno stemmed, seeded and chopped
    • 3 cloves garlic chopped
    • 4 tbs butter
    • 1/4 cup flour
    • 1 tbs corn starch
    • 12 ounces Hefeweizen
    • 2 cups chicken broth
    • 1/4 cup heavy cream
    • 2 cups cheddar cheese thinly grated, don't use pre shredded
    • 1/2 tsp salt
    • 1/2 tsp pepper
    • 1 tsp smoked paprika
    • 1 1/2 cups elbow macaroni noodles

    Instructions
     

    • In a large pot heat the olive oil. Add the onions and jalapenos, cook until softened, stirring frequently, about 5 minutes. Add the garlic and cook for about 30 seconds.
    • Add the butter stir until melted.
    • Sprinkle the flour and corn starch on top of the melted butter and whisk until combined.
    • Add the beer, broth and cream bring to a low simmer.
    • 1/4 a cup at at time, add the cheese and stir until completely melted before adding more (do not boil or cheese will separate). Repeat until all the cheese is incorporated into the soup.
    • Add the salt, pepper, smoked paprika and stir to combine.
    • Add the macaroni noodles and cook until noodles are al dente.
    • Add additional beer or broth to thin to desired consistency.

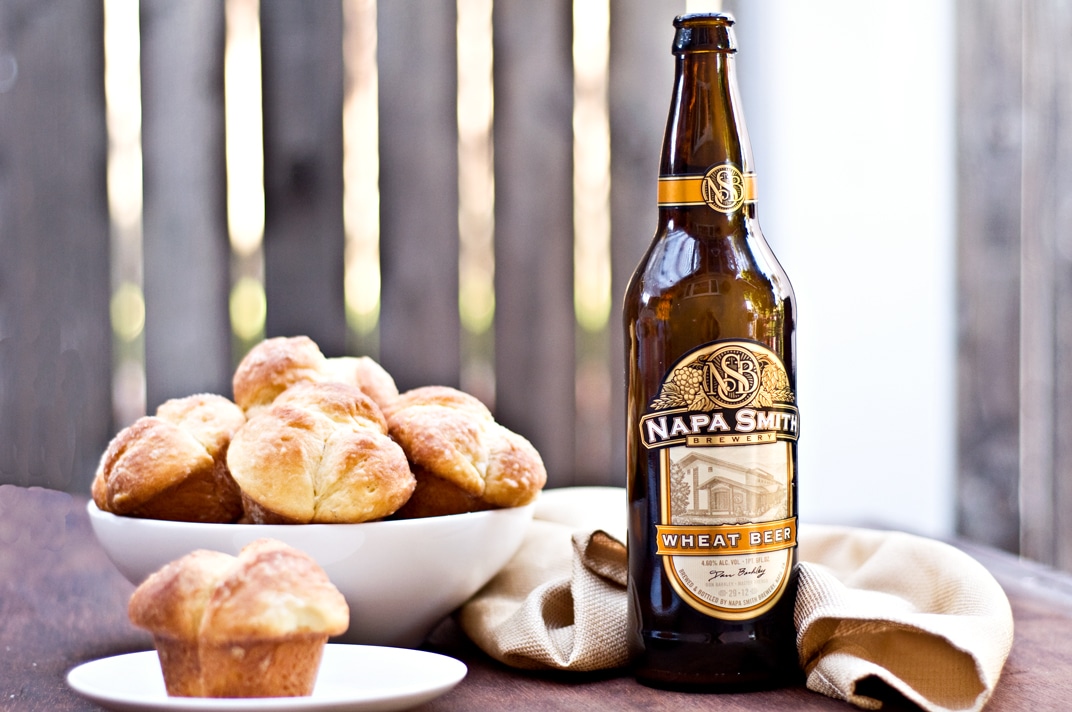
    Salted Hefeweizen Brioche Rolls

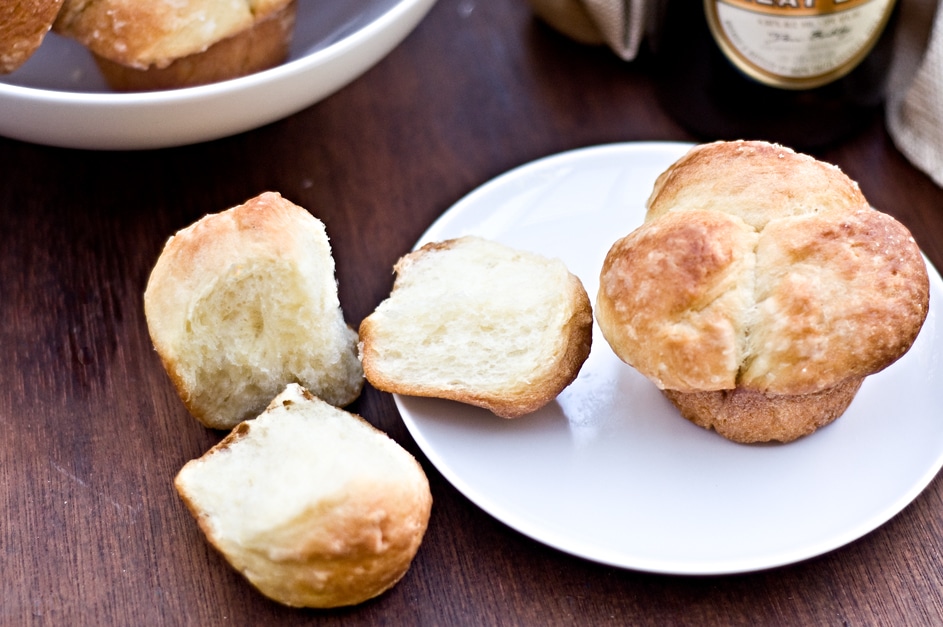
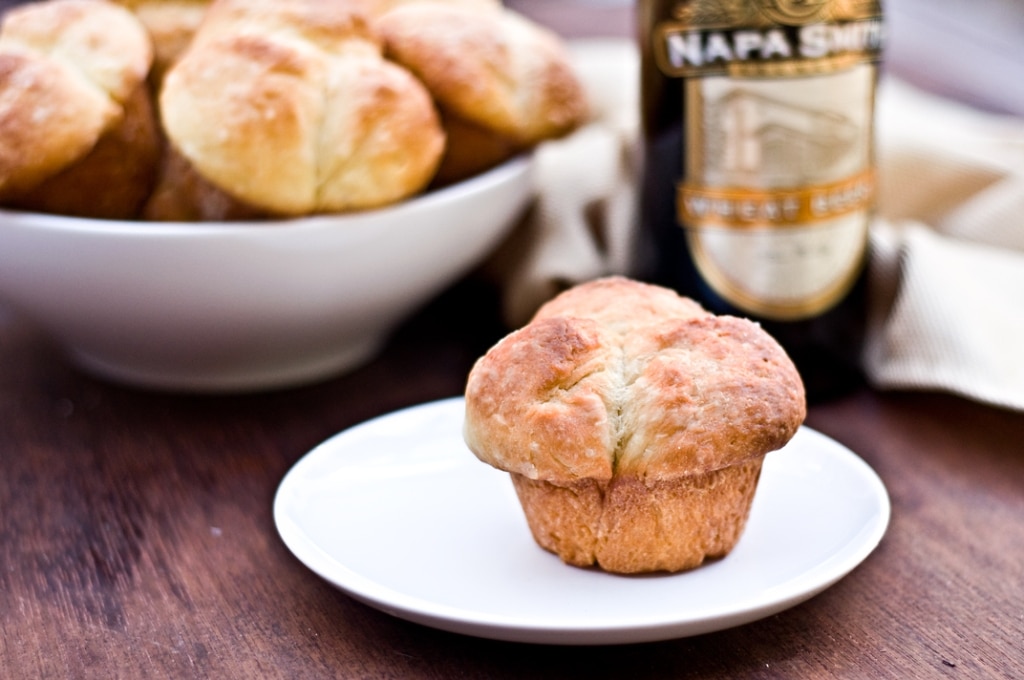
    Napa SmithWheat is a perfect baking beer. It has crisp, clean flavors, sweetness and bold tones that hold up to the oven. A smooth wheat beer with citrus and peach notes.

    I enjoyed this beer, the baking, the drinking, the flavors. It was an easy beer to enjoy and gave me a sense of the brewery. Relaxed, comfortable and welcoming. I’ve lived in California most of my life, and traveled all over the world and I have a firm believe that Napa is a place that needs to be experienced, a beautiful escape from the rest of reality. Winding along the back roads of  Napa county, meeting locals, sampling the local food, drinks, produce…You’ll feel like you are living in a distant land far away from the life you know. In Napa, people love to eat, drink and cook with only local ingredients. It’s charming, as if Napa could exist all on it’s own. A little bubble, a snow globe of a world, swirling around itself filled with fresh-baked bread, handmade pies and locally sourced beer.

     Salted Hefeweizen Brioche Rolls

    1/2 cup room temperature Hefeweizen Beer (Napa Smith Wheat Preferred)

    1 envelope of dry active yeast (1/4 oz)

    2 2/3 cups all-purpose flour

    2 tablespoons sugar

    1 teaspoons sea salt,

    3 large eggs

    1 1/2 sticks unsalted butter, softened

    Topping:

    1 tbs melted butter

    1 tbs sea salt

    1. Add the beer to a microwave safe container heat in the microwave for 10 seconds, test the temperature (you want it between 105 and 110) and repeat until the desired temperature is reached. Put the beer in the bowl of a stand mixer.
    2. Sprinkle the yeast on top and allow it to get foamy, about 5 minutes.
    3. Add the flour, salt and sugar and mix on low with the dough hook attachment until shaggy, flaky lumps form (about 1 1/2 minutes).
    4. Add the eggs, one at a time, mixing until combined.
    5. Add the softened butter (softened is important), beat until the dough gathers around the hook and is smooth and shiny.
    6. Coat the inside of a bowl with olive oil and place the dough ball in inside.
    7. Wrap with plastic wrap leave in a warm place until it’s double in size, about 1 1/2 hours.
    8. Grab the dough at the sides until it has deflated.
    9. Allow to rise a second time at room temperature, until it has doubled in size, deflating every 15 minutes by grabbing the sides, about 45 minutes.
    10. Remove from the bowl and place on a floured surface, shape into a long log, about 4 inches wide and 1 foot long.
    11. Using a sharp knife, cut in 3 equal sized pieces.
    12. Then cut each of those pieces in half (you will now have 6 pieces.)
    13. Now cut each of those pieces in half and you will have 12 equal sized pieces.
    14. Each of these pieces will be a roll, but you have to make some more cuts first.
    15. Cut each slice into 3 equal sized pieces, rolling each into a ball and placing all three into the same well of a greased muffin tin. Repeat for each slice.
    16. Cover with plastic wrap, place in the fridge and allow to double in size, about 1 1/2 hours.
    17. Brush the top with melted butter and sprinkle generously with sea salt. This is when you break out the fanciest salt you have. Or buy some just for the occasion.
    18. Preheat the oven to 400. Bake for 16-18 minutes or until golden brown.
    Join me: FacebookTwitter