craft beer

Beer Battered Mini Corn Dogs with Chipotle Ketchup


This my friends, is how you do Football Food.

It meets all of the requirements to earn a spot on the Football Food Table.

These vague and unenforceable requirements include qualities like: fun, as high calorie as possible, no utensils or plates needed, ability to sit at room temperature for hours, AND there are always bonus points for including beer.

 I also want to tell you a little bit about Chipotle Ketchup. Corn dogs need to be dipped, and if we are all willing to adhere to the good 'ole American tradition of dunking fried stuff in ketchup, I want to doctor it up a bit. Although you can make ketchup from scratch, and don’t think I haven’t filed that idea away in my mental recipe stockpile, I just used store bought. Chipotle is a lovely flavor, one of my favorites.

The smokiness is beautiful. If you just want smoke and no heat, just add 1 tsp of smoked paprika to 1 cup of ketchup and stir to make yourself a little smokey ketchup to go along with your fancied up deep-fried treats.

Beer Battered Mini Corn Dogs with Chipotle Ketchup

Servings 24 mini corndogs

Ingredients
  

  • canola or peanut oil for frying
  • 1 cup flour plus 1/4 cup, divided
  • 2/3 cup corn meal
  • 1 tbs brown sugar
  • 1 tsp baking powder
  • 1 tsp baking soda
  • 1 egg
  • 3/4 cup plus 2 tbs beer I used an IPA
  • 24 mini hot dogs
  • 24, 4 inch wooden skewers or toothpicks

For the Ketchup

  • 1 cup ketchup
  • 1 chipotle peper in adobo sauce
  • 1 tsp adobo sauce

Instructions
 

  • Pour oil into a pot, about 3-4 inches deep. Clip a cooking thermometer onto the side. Heat over medium high heat until the oil reaches between 350 and 375, adjust heat to stay in this temperature range.
  • In a bowl, combine 1 cup flour, corn meal, sugar, baking powder, baking soda, stir to combine. Add the egg and the beer, stir until combined.
  • Pour the batter into a tall coffee mug, this will make dipping the corn dogs easier.
  • Skewer all of the mini corn dogs with wooden skewers. Put remaining 1/4 cup flour in a bowl. Roll the hot dogs in the flour, then brush off any excess flour.
  • Holding the skewer, dip the hot dog into the batter until submerged and coated. Slowly place the battered hot dog into the oil. Allow to fry in the oil until a dark brown, about 4 minutes. Remove with a slotted spoon and place on a stack of paper towels to drain.
  • To make the ketchup, place all ketchup ingredients in a small food processor or blender and process until smooth.

I used these bamboo skewers.

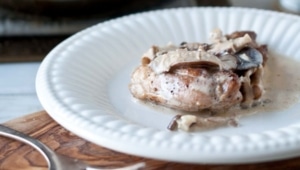
Chicken in Creamy Mushroom Beer Sauce


Today is November 6th, Election Day.

As Americans spend the day thinking of little else, wedged firmly between Barack and a hard place, I wanted to give you a little motivation to get through this day.

We will soon find ourselves at the end of this exhausting Election Season, our feelings of separatism from those who disagree with us will fade. We will find Facebook to be a friendlier place, and those Someecards of a political nature will ebb.

Regardless of the outcome, you have a reason to grab your favorite beer. Either in celebration of your guy winning the mad race to 1600 Pennsylvania Avenue, or as a way to console yourself over the fact that the other guy came out ahead.

Given that you may be too distracted to spend all that much time in the kitchen tonight, this meal only takes about 20 minutes.

And, I’m pretty certain it has bipartisan support.

For this recipes, I like a brown ale, a blonde, a pale or a wheat beer. Be aware that using an IPA will kick up the beer flavor considerably and may be too bitter in the end.

Chicken in Creamy Mushroom Beer Sauce

Ingredients
  

  • 4 boneless skinless chicken thigh fillets
  • 1 tsp salt
  • 1 tsp pepper
  • 3 tbs butter
  • 1/4 cup onions chopped
  • 3 cloves garlic minced
  • 5 oz wild mushrooms such as Shiitake (not dried)
  • 1/2 cup beer
  • 1/2 cup heavy cream
  • 1/3 cup shredded parmesan
  • salt and pepper to taste

Instructions
 

  • In a pan over medium high heat, melt the butter. Sprinkle chicken thighs on all sides with salt and pepper. Add chicken to the pan and cook on both sides until browned, about 4 minutes per side. Remove chicken from pan.
  • Add onions and saute until soft and translucent, about 3 minutes.
  • Add garlic and mushrooms, cook until mushrooms are soft and have darkened, about 5 minutes.
  • Add the beer, scraping the bottom to deglaze the pan.
  • Reduce heat to medium, add the cream and stir.
  • Add half of the cheese, stir until melted. Add the remaining half, stir until combined.
  • Add the chicken and allow to cook until sauce has thickened, about 5 minutes. Salt and pepper to taste, serve over rice or pasta.


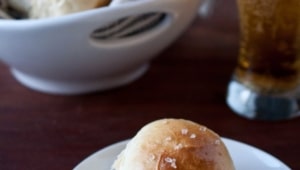
Hefeweizen Honey Rolls

 I have wandered into a complete obsession with making bread. It started slowly, and really, rather timidly. When I first started, I was afraid of yeast, and a wee bit convinced that it hated me.

I threw several mounds of fail dough in the trash after it refused to rise. I learned a few things long the way that I am more than happy to share with you and save you from the "What the EFF is wrong with this damn bread!" frustrations that I suffered.

First, check the expiration date.  Yeast expires in a biblical sense, it actually dies. Yeast is a bit of a living beast, and once it reaches it’s expiration date, don’t even think about it. It’s not like that bottle of Ibuprofen in your  cabinet that expired last year but is probably still going to cure your headache. If the yeast has been in your cabinet a while, throw it out.

Salt kills yeast too. Don’t let inactive yeast come in contact with salt. I learned this the hard way when adding salt to the cream before microwaving it.

Yeast will rise between 40 and 120 degrees. Any higher than 120 and it will be killed by the heat (unless you use rapid-rise which will work until about 130), stay away from the high end of the scale in case your thermometer is a bit off. If the yeast is colder than around 90, it will take a long time to rise. At 40 degrees, it will still rise, but it will take days. 110 seems to be a bit of a sweet spot, but I live in LA, and even when the East Coast is being ravaged by Frankenstrom, it was still 85 degrees yesterday. Bread rises faster when it’s warm, slower when it’s cold. Yeast types are not interchangeable without major recipe modifications. Use the yeast the recipe calls for.

Dry milk powder is a bit of a secret weapon when it comes to bread making. I discovered this in the Secret Ingredient section of King Arthur Flour, it may be to blame for my bread making fixation.  Your bread will be softer, taller and more tender. Buy a bag just to keep on hand for Thanksgiving and Christmas rolls, because if you are going to all of the trouble to make homemade rolls, you should really pull out all the tricks in your bag.

Beer. Of course, the beer. Bread is my favorite thing to make with beer. Even if you aren’t a beer kind of girl, it gives your bread a lighter, slightly more leavened quality that makes it a perfect baking liquid. And because it’s bread, a wheat beer is a natural choice.


Hefeweizen Honey Rolls

Ingredients
  

  • 1/2 cup heavy cream
  • 1 envelope dry active yeast
  • 5 cups bread flour
  • 1/4 cup dry milk powder
  • 1/4 tsp salt
  • 2/3 cup wheat beer room temperature
  • 3 eggs
  • 1/4 cup honey
  • 4 tbs unsalted butter softened to room temp

To Brush On Top:

  • 4 tbs melted butter
  • 1 tsp honey
  • 1/2 tsp coarse salt

Makes 16 rolls

    Instructions
     

    • Add the cream to a microwave safe dish. Heat for 20 seconds, test temperature and repeat until cream is about 110 degrees. Add the yeast, set aside until foamy, about 5 minutes. If the yeast does not foam, it isn't good. Discard it and try again.
    • In the bowl of a stand mixer add the flour, salt and dry milk powder, mix until well combined.
    • Add the cream and the beer, mix until combined. It will look dry and shaggy.
    • Add the eggs, one at a time, mixing between additions.
    • Add the honey and butter and allow to mix until the dough forms a smooth and shiny ball that isn't sticky, about 8-10 minutes.
    • Coat the inside of large bowl with oil. Form the dough into a ball and add to prepared bowl. Cover the bowl tightly with plastic wrap and allow to rise in a warm room until doubled in size. This will take between 1 and 2 hours depending on the temperature of the room.
    • Punch the dough down, and knead lightly for about 1 minute.
    • Cut the dough in half, then cut each half in half. You will now have 4 equal size pieces. Cut each piece in half to create 8 equal sized pieces. Cut each of those in half to give you 16.
    • Roll each piece of dough into balls, place into a baking dish with a bit of space between each roll (you might need two baking pans to accommodate 16 rolls).
    • Cover and allow to rise until about doubled in size.
    • Heat oven to 400 degrees.
    • Combine the melted butter and honey. Brush the top of the rolls with honey butter mixture, sprinkle with salt.
    • Bake at 400 for 12-15 minutes until golden brown.


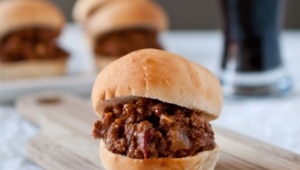
    Chipotle Stout Sloppy Joe’s Sliders


    I spent a few days up in Napa last month. While I was hanging out at Bear Republic those guys were nice enough to show me around and even let me jump behind the bar. While I was behind the bar, most likely annoyingly in his way, the bar manager asked me what my favorite style of beer was. To be honest, I didn’t have an answer. I wanted to try his special release stuff, those beer that never make it into bottles. And the Peter Brown Tribute that I had heard about but hadn’t been able to taste yet, but I still am not sure if I could pick one all-time favorite.

    It depends on what I’m eating.

    I do tend to favor lower alcohol beers, because I live in LA and we like to drive here.

    I like a dry hopped IPA.

    Or a circusy White.

    And I will always stand in line for a spicy beer.

    But, if I had to choose only one style of beer to cook with, that would be easy. Stouts are by far my favorite beer to cook with. They work well with beef and fabulously with chocolate. Spicy stouts are always intriguing, and although the go-to recipes for those seems to be a meat product, I  also want to figure out a really great chili chocolate cake recipe made with a spiced stout.

    Lucky for us, more and more breweries are making beer with spices so check out your local beer store and ask around. Here are some of my favorites:

    Stone Smoked Porter W/ Chipotle Peppers

    Mikkeller Texas Ranger 

    Bootlegger Black Phoneix Chipotle Coffee Stout

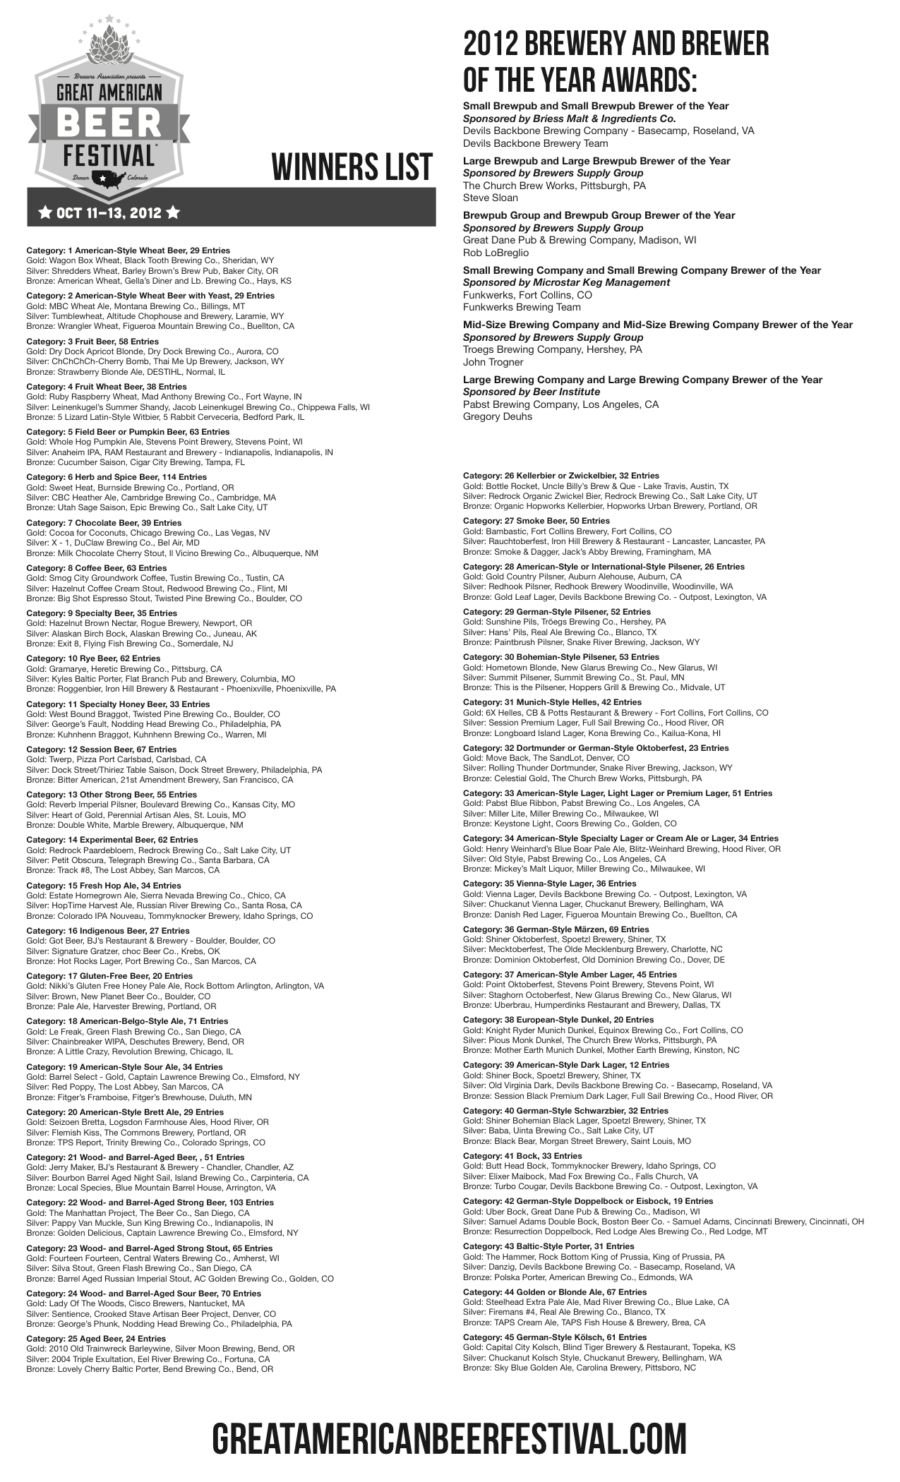
    I really encourage you to find a great beer for a brewery close to home. Stop in some day and see what they suggest. Maybe there is even a brewery close to you that won at last weeks Great American Beer Festival. Take look, make  some notes on what you want to try, but don’t forget to drink what you love, because you love it, regardless of how many or how few prizes it has under it’s belt.


    Chipotle Stout Sloppy Joe’s Sliders

    Ingredients
      

    • 1 tbs oil
    • 1 lb 80%/20% premium ground beef
    • 1/2 white onion chopped
    • 3 cloves of garlic
    • 1 1/4 cup Chipotle Stout or Porter
    • 1 small chipotle pepper from can in adobo sauce
    • 1 tsp adobo sauce from can
    • 4 oz tomato paste
    • 1 tbs mollasas
    • 2 tbs Worcestershire sauce
    • 1/2 tsp dijon mustard
    • 1/4 tsp cumin
    • 1/4 tsp smoked paprika
    • 1/4 tsp salt
    • 14-16 slider buns warmed

    Instructions
     

    • In a pan over medium high heat, add the oil and ground beef, cook until browned, stirring and breaking up meat. Using a slotted spoon, remove meat from pan.
    • In pan with residual oils, cook the onions until soft, about 5 minutes. Add the garlic and stir.
    • Add the beer, stir to combine.
    • Remove a small chipotle pepper from the can. Using a sharp knife and fork, chop very well until nearly reduced to a paste like substance. Add chipotle to the pan along with tomato paste, adobo sauce, molasses, cumin, paprika, salt, Worcestershire sauce and mustard. Allow to cook until well combined and slightly thickened.
    • Add meat to the sauce pan, stir until well combined.
    • Fill slider buns with meat, serve warm.


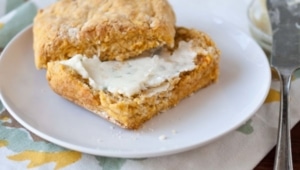
    Sweet Potato Beer Biscuits With Maple Sage Butter


    I didn’t grow up eating Sweet potatoes.

    I never saw them on my Thanksgiving table or at Sunday dinner. They just didn’t exist in my world. Until one chilly afternoon in College when I stopped by the dorm room of a Souther friend of mine who had just pulled a Sweet potato, covered in butter and brown sugar out of the microwave. She was nuts. A Vegetable with sugar on it? I couldn’t get over how strange it was to enjoy a vegetable as if it was some kind of dessert. She offered me a bite, and my instinct to recoil was overtaken by my overwhelming curiosity. I was hooked.

    I shocked at how much I love it. It was a comfort food, and it was a vegetable. Biscuits, made from scratch, are a bit the same. Although I didn’t grow up with anything other than a biscuit from a tube with a fear inducing opening method, those always seemed amazing to me. Another incredible comfort food.

    And the beer isn’t just here for the novelty of it. Beer is a mild leavening agent, giving this biscuits a lighter, more tender texture. For this recipe, I like a Hefeweizen or a Pumpkin Ale.

    Sweet Potato Beer Biscuits With Maple Sage Butter

    Ingredients
      

    For the Biscuits:

    • 1 large sweet potato
    • 2/3 cup beer
    • 2 cups flour
    • 2 tsp baking powder
    • 1 tsp baking soda
    • pinch salt
    • 1 tbs sugar
    • 1 stick butter cold, cut into small cubes
    • 1 tbs melted butter

    For the Butter:

    • 3 tbs butter room temperature
    • 1 sage leaf minced
    • 1 tsp pure maple syrup

    Instructions
     

    • Preheat oven to 425.
    • Pierce the sweet potato all over. Microwave on high until soft, about 3 to 5 minutes. Remove from oven and allow to cool enough to work with. Remove and discard skin, add sweet potato to a bowl (should be about 3/4 cup of sweet potato mash).
    • Add the beer to the sweet potatoes and using a potato masher, stir and mash until completely combined.
    • In a bowl, add the flour, baking powder, baking soda, salt and sugar. Mix to combine.
    • Add the butter cubes and using your fingers or a pastry blender, rub the butter into the flour until completely combined.
    • Add the sweet potato beer mixture and mix until just combined.
    • Form dough into a ball and place on a lightly floured surface. Form into a square, about 1 1/2 inches high, and about 1 foot long. Cut into square biscuits. Place on a baking sheet covered with a Silpat or parchment paper. Brush with melted butter.
    • Bake at 425 for 15-18 minutes.
    • In a small bowl, add the maple syrup ingredients and stir until combined.
    • Serve biscuits warm, with maple sage butter.


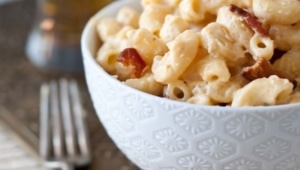
    Stove Top Beer And Bacon Mac And Cheese

    I’m not a beer snob. To be honest, the term has always rubbed against the grain.

    I’m a beer fan, a beer lover, a girl fascinated by beer, but I’m not a snob.

    I spent years on the fringes of the music industry in LA, and the beer snobs I meet now echo those same phrases I heard then. And so do my responses.

    If you loved The Killers when we saw them play free shows at The Spaceland, you should still love them when they win Grammys.

    Good music, is good music. Regardless of how many, or how few, other people like it.

    If you loved Rogue Dead Guy Ale when no one carried it, you should still love it when it has mass distribution.

    Good beer, is good beer. Regardless of how many, or how few, other people like it.

    At a beer event a few months ago I asked the rep from North Coast Brewing why he hadn’t brought any Scrimshaw, "The Beer Snobs would eat me alive if I poured that!" And then whispered to me that it was what he drank more than anything else.

    Stop doing that.

    Good beer is good beer. Don’t be afraid to drink what you like, even if everyone else likes it too.

    In celebration of good beer, I give you my favorite one pot, quick and easy, make this for Thanksgiving, you will never make it from a box again, Mac & Cheese. Hope you still love it even when everyone else does too.

    Stove Top Beer And Bacon Mac And Cheese

    Servings 4 servings

    Ingredients
      

    • 2 cups elbow macaroni
    • 4 strips of bacon cut in half
    • 1/2 cup sour cream
    • 1 egg
    • 2/3 cup beer pale ale, blonde, bock, and Hef work well, an IPA will give you a very strong beer flavor
    • 1 1/2 cups cheddar cheese fresh grated, pre-shreaded has additives that prevents it from melting properly
    • 2 tbs butter
    • 1/2 tsp black pepper
    • 1/4 tsp smoked paprika
    • pinch cayenne pepper
    • salt to taste

    Instructions
     

    • In a large pot of boiling water, add the noodles and cook until just before done. Don't over-cook the noodles or this will end up mushy.
    • Drain the pasta, return the pot to the stove and cook the bacon until crispy, remove from pot and allow to cool.
    • Drain off bacon grease and return drained noodles to the pot.
    • In a separate bowl, add the beer, egg and sour cream, beat until well combined.
    • Add the butter and the beer mixture to the noodles and return to medium heat. Stir until the butter has melted.
    • About 1/4 a cup at a time, add the cheese. Stir until cheese has melted before adding more.
    • Add the spices and chopped bacon, stir.


    Join me: Facebook, Twitter

    Triple Berry Blueberry Beer Cobbler

    You inspire me. You really do. One of my favorite moments of my day is reading emails from you, those of you who read my blog and like what I’m doing.

    And sometimes,the emails have a common theme. A thread that runs through out the world, across the internet, and remind me of how we are all connected, in one way or another, and more similar than we all think.

    In the past month I’ve received four emails from all over the world about blueberry beer. Not so much along the avenue of, "I love this, you MUST try it!" but more in the vein of, "This is interesting, but not totally drinkable, what do I do with it?"

    And to be honest, I feel the same way. At a beer event six months ago, an overly zealous beer server shoved a glass of Shipyards Smashed Blueberry into my hand. And, as one who will never let a beer go untasted, I began to drink. It was interesting. The presence of blueberry with bready, toasty notes that where really well balanced. It wanted to love it, but it just wasn’t for me. It’s a great example of a blueberry beer, one that you should go out and drink, if fruit beers are your thing, but just not for me. Even still, it stayed with me, because in my world there is a different place for cooking beers. And this was a great cooking beer. One that I believe in, in theory, a well crafted beer with great flavors, but one that I wasn’t eager to run home and drink.

    So here we are, me and you, with blueberry beers that we find interesting but not necessarily ones we want to fill our glasses with.

    So here is what I propose: an easy berry cobbler made with this intriguing beer. And here are some great ones to go out and try:

    SLO Brewing Blueberry

    Dark Horse Tres Blueberry Beer

    Bluepoint Blueberry Ale

    Shipyard Smashed Blueberry

    Triple Berry Blueberry Beer Cobbler

    Ingredients
      

    • Six cups of berries I used 2 cups each blackberries, strawberrries, and blueberries Frozen is fine
    • 1/2 cup brown sugar plus 2 tbs divided
    • 1/2 cup powdered sugar
    • 2 tbs corn starch
    • 1 1/2 cups blueberry beer
    • 2 cups cake flour
    • 2 tsp baking powder
    • 1/4 tsp salt
    • 12 tbs butter 1 1/2 sticks cut into small cubes
    • 1/2 cup beer
    • 1/4 cup milk
    • 1 cup heavy cream
    • 1/2 cup powdered sugar
    • 2 tbs beer

    Instructions
     

    • Preheat oven to 450.
    • In a pot over medium high heat, add 4 cups berries (reserve 2 cups mixed berries for the end), 1/2 cup brown sugar, 1/2 cup powdered sugar, corn starch and beer. Allow to simmer until reduced and thickened, stirring occasionally, about 15 minutes.
    • Remove from heat, add reserved 2 cups of berries, stir to combine. Add to a deep dish pie pan.
    • In a bowl, add 2 tbs brown sugar, flour, baking powder, salt and stir to combine.
    • Add the butter, rub into the flour until well combined and resembles course meal.
    • Add the milk and 1/2 cup beer, stir until combined.
    • Gently add the flour topping, a bit at a time, to the pie pan until the berries are covered.
    • Bake at 450 until the topping has turned a light golden brown, about 18 minutes.
    • In the bowl of a stand mixer, add the cream, 1/2 cup powdered sugar and 2 tbs beer. Whip on high until soft peaks form, about 3 minutes.
    • Serve the cobbler topped with whipped cream.


    Beer Braised Chicken and Hefeweizen Cornmeal Dumpling Soup

    Although most of you are starting to pull out those wool sweaters you neatly packed away a few months ago, here in Los Angeles we are in the throws of a record heat wave that drug us into 108 degree heat yesterday. While most of the sane people of LA stayed indoors and avoided the oven, I spent the morning interviewing ex-cons turn foodies, and then came home and made soup.

    Like i’ve mentioned before, my inherent rebellion pushes me to buck tradition and even reason. I drink stouts in the summer, eat ice cream in the winter and make soup in triple digit heat.

    Beer Braised Chicken and Hefeweizen Cornmeal Dumpling Soup

    Ingredients
      

    For The Soup

    • 4 tbs butter
    • 4 boneless skinless chicken thigh fillets cup into bite sized peices
    • 3 cloves garlic minced
    • 1/4 cup white onions chopped
    • 1/2 cup celery chopped
    • 1/2 cup carrots chopped
    • 1 cup sweet white corn kernels fresh is best, frozen is acceptable, canned is disgusting
    • 2 cups Hefeweizen Beer
    • 2 cups chicken broth
    • 2 tbs flour
    • 1/4 cup cream

    For The Dumplings

    • 1/2 cup Masa Harina corn flour used to make corn tortillas
    • 1/2 cup fine ground corn meal
    • 1/2 cup all purpose flour
    • 1/4 tsp salt
    • 2 tsp baking powder
    • 1/2 tsp chopped fresh rosemary
    • 2 tbs butter cut into small cubes
    • 1/4 cup milk
    • 1/2 cup Hefeweizen beer

    Instructions
     

    • In a large pot with a lid, like a dutch oven or enamel cast iron pot, melt the butter over medium high heat. Add the chicken and cook until seared on all sides, about 3 minutes. Add the garlic, onions, celery, carrots and corn, stir. Add the beer and broth, stir. Allow to simmer until chicken is cooked through, about 15 minutes. Sprinkle the flour over the pot and whisk until combined. Remove from heat and slowly add the cream while stiring. Return to medium/low heat.
    • In a large bowl, add the masa, cornmeal, flour, baking powder, salt and rosemary, stir to combine. Add the butter and rub into the flour with your fingers until completely combined.
    • Add the milk and hefeweizen and stir until combined. You don't want the dough too thin or it will fall apart during cooking, you want a biscuit like consistency.
    • Drop mounds of dough, about 3 tbs in size, equally spaced on top of the pot until all dough has been used. Cover the pot and cook on low heat until the tops of the dumplings are dry, about 15 to 20 minutes.


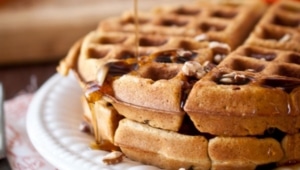
    Pumpkin Ale Waffles & How To Roast A Pumpkin

     Although most of you are in the giddy early stages of fall, here in Los Angeles it’s still over 90 degrees. So what the rest of the country is referring to as "Fall," I am calling Pumpkin Season. And to curb my near constant urge to shove as much pumpkin into everything I consume, I have elected to only make pumpkin from scratch, no cans.

    It’s only really helped a little. It’s pretty easy to roast a pumpkin and turn it into massive quantities of pumpkin treats.

    If you haven’t roasted your own, don’t be intimidated, its pretty simple.

    Start with a pie pumpkin. They go by various other names, but they are not Jack-o-Lantern pumpkins used for carving. They are small, about the size of a cantaloupe.

    Preheat oven to 375.

    Remove the stem by running a butter knife around the edges and then prying it off. The most stubborn one I removed by whacking it on the edge of the counter. Popped right off.

    Cut the pumpkin in half, right through the hole left by the stem.

    Scoop the seeds out with a spoon.

    Line a baking sheet with aluminum foil. Place pumpkins on baking sheets, cover tightly with aluminum foil. Roast at 375 for 1 to 1 1/2 hours or until a fork can easily slide into the skin.

     Allow to cool and sccop the flesh out.

    For a smoother texture, process in a food processor for about 3 minutes.

    See, that’s not so hard. You can totally do that.

    Pumpkin Ale Waffles

    Ingredients
      

    • 2 1/2 cups flour
    • 1/2 cup brown sugar
    • 2 tsp baking powder
    • 1 tsp baking soda
    • 1/2 tsp salt
    • 1/2 tsp ginger
    • 1/2 tsp nutmeg
    • 1 tsp cinnamon
    • 4 eggs divided
    • 1/2 cup milk
    • 2/3 cup pumpkin puree
    • 1 stick melted butter
    • 1 cup Pumpkin Ale

    (Makes 6 to 8)

      Instructions
       

      • Preheat waffle iron.
      • Get out three bowls.
      • In the largest bowl, add the flour, sugar, baking power, baking soda, salt, ginger, nutmeg, and cinnamon, stir until well combined.
      • Divide the eggs between the last two bowls, egg whites in one, yolks in the other.
      • In the yolks bowl, add the milk and pumpkin puree, stir until well combined. Add the melted butter and stir.
      • Using a hand mixer, beat the egg whites until stiff peaks form, about 4 minutes.
      • Add the pumpkin mixture to the dry mixture and stir until just combined, don't over mix. Add the beer and stir until combined. Gently fold in the egg whites.
      • Spray waffle iron with butter flavored cooking spray. Cook waffles according to manufactures directions.


      Chocolate Mint Stout Ice Cream

      There are two ways to look at this.

      It’s either the summer death rattle manifesting itself in an ice cream during the first week of fall, or it’s the nexus of the best of summer treats and the best of fall beers joining forces at the perfect moment.

      For this, I used Bison Chocolate Stout. Rich, dark and beautiful. Although I did try and hold out for the Stone Chocolate Mint Stout that I’ve been teased with for months now, I may have to give this recipe another try when the red tape is lifted and the world is able to indulge in that.

      I also used Green & Blacks Mint Dark Chocolate, adding a smooth peppermint flavor.

      Resulting in a rich, smooth ice cream that’s like a Girl Scout Thin Mint, but with beer. And, that’s really what those cookies need: beer.


      Chocolate Mint Stout Ice Cream

      Ingredients
        

      • 2 cups whole milk
      • 3 fresh mint leaves
      • 1 cup heavy cream
      • 1 cup chocolate stout or chocolate mint stout
      • 7 ounces of 60% dark chocolate with peppermint oil such as Dark Chocolate Mint from Green & Blacks, broken into chunks
      • 4 egg yolks
      • 1 1/4 cup white sugar

      Instructions
       

      • In a pot over medium high heat, add the cream, milk, mint leaves cream and stout. Bring to a gentle simmer. Remove from heat, remove and discard mint leaves, and stir in the chocolate until melted.
      • In a separate bowl, add the egg yolks and the sugar, whisk until well combined. Slowly add the chocolate milk, whisking continually, until about 1/2 the mixture has been added to the egg yolks. Add the egg yolk mixture back into pot, whisk until well combined. Return pot to heat and bring to a mild simmer.
      • Refrigerator until chilled, about 3 hours.
      • Churn in ice cream maker according to manufactures directions. Chill until firm.


      Green & Blacks provided me with a sample of chocolates used in this post. I was not monetarily compensated for this recipe. All thoughts, opinions and ideas are my own. 

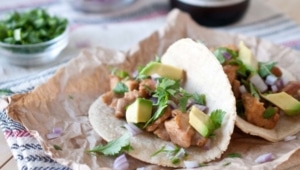
      Beer Braised Chicken Tacos with Beer Corn Tortillas


      When it seems like your entire life revolves around a food blog, small things make you really excited.

      Like making homemade tortillas with beer and realizing how much better they are than any other tortilla you’ve ever had.

      Or getting a shout out from The Cooking Channel as if they knew just how to fuel your obsession with them.

      Or realizing that because Foster Farms is willing to fly you into Napa a few days early for the National Cook-Off Finals, you get to visit the following breweries: Laguanitas, Russian River, and Bear Republic.

      And then your Aunt tells you that your Grandma and Guy Fieri’s Grandma where roommates in college, which sounds like a Mad Lib, but turns out to be true.

      Small wins that make me so excited, you’d think I won a Beer Cooking Oscar. This is what keeps us playing the Man Behind the Curtain on these little blogs we are so dedicated to. Bloggers are easily excitable, which maybe why we spend so much time on the other side of these computer. Sometimes our excitement isn’t fit for public consumption.

      Back to these tortillas. Homemade tortillas are a completely different animal from those cardboard disks they sell in supermarkets. Soft, slightly sweet, and they only take 5 minutes to make. To use a beer analogy fit for an SAT exam:

      Coors Light is to Pliny as Store Bought Tortillas are to Homemade Tortillas

      I’m not kidding, that much different. If you don’t believe me, and really, why should you, I’m just the overly excited girl behind the screen, try it and report back. I really think you’ll be amazed.

      For this recipe, I used Lagunaitas IPA. And like I’ve mentioned before, IPA’s give you a huge punch of beer flavor. If you want a milder beer flavor, grab a traditional Pale Ale, a Blonde or a Wheat Beer.


      Beer Braised Chicken Tacos with Beer Corn Tortillas

      Ingredients
        

      For the Tortillas

      • 2 cup Masa
      • ½ tsp salt
      • 1 1/4 cup room temperature beer
      • 2 Tbs melted butter or olive oil

      For the Chicken

      • 4 boneless skinless chicken thigh fillets
      • 1 tsp garlic powder
      • 1 tsp black pepper
      • 1/2 tsp salt
      • 1/2 tsp chili powder
      • 1/2 tsp smoked paprika
      • 2 tbs olive oil
      • 1 cup beer

      Recommended Garnishes

      • 1/4 cup chopped onion
      • 1/4 cup chopped cilantro
      • 1 avocado chopped

      Instructions
       

      • Chop Chicken thighs into small, bite sized pieces. In a bowl, place all spices and mix well. Add the chicken pieces and toss to coat.
      • Heat olive oil in a dutch oven. Add the pieces and sear quickly. Reduce heat, add beer, cover and cook until cooked through, about 10 to 15 minutes.
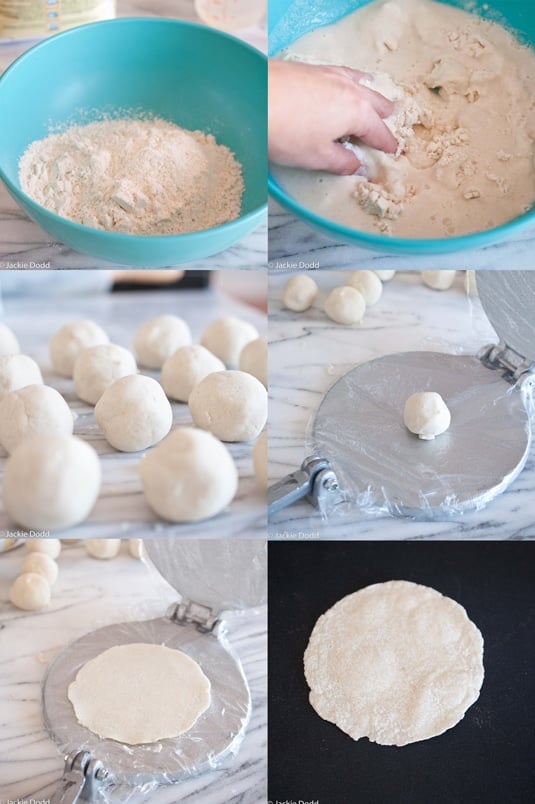
      • In a large bowl, add the Masa and the salt, stir to combine.
      • Add the beer and butter, stir to combine. If the dough is too dry to hold together, add additional beer or water. If it is too wet, add more Masa.
      • Form into balls a bit larger than golf balls.
      • Prepare a tortillas press by wrapping in plastic wrap or covering with parchment paper (you can place tortilla ball between two sheets of parchment and use a rolling pin). Place one ball in the center.
      • Press, rotate and press again until thin.
      • Heat a griddle (or cast iron skillet) to a medium high heat (about 350 for electric griddles).
      • Cook until slightly brown on the bottom (about 30 seconds to a minute) flip and cook on the other side. Don’t overcook.
      • Fill tortillas with chicken, garnish and serve.


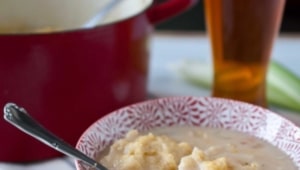
      Mac And Beer Cheese Soup


      I have a confession to make. Before starting this blog, I tried to make beer cheese soup and failed. I was baffled, at first, but figured out that a combination of my lack of patience (manifesting itself in my cheese dumping rather than slow adding) and a furious boil, resulted in a sloppy mess.

      Second confession of the day (just call yourself a priest, and I’ll say a few Hail Mary’s on my way out) is that even though I love this recipe, I think I may love the photos more. Because right after I took them I was reminded via ping of my first post and how on their best day, those photos are hideously below average. I’ve worked really hard to bring my photography up to an acceptable standard and these photos reminded me of how my work is paying off.

      Third confession, I won a state-wide Cook-Off on Friday. Ok, not really a confession, but I’m excited, so I thought I would share.

      Fourth confession, I still have  a crush on Luke Perry. And Val Kilmer’s character in Real Genius. Looks like I went one confession too far.

      Mac And Beer Cheese Soup

      Note: Cheese sauce separates easily if the mixture is brought to a boil, or if pre shredded cheese is used. If the mixture does separates, try to puree the cheese sauce with a hand blender before you add the noodles.

      Ingredients
        

      • 3 tbs olive oil
      • 1 onion chopped
      • 1 fresh jalapeno stemmed, seeded and chopped
      • 3 cloves garlic chopped
      • 4 tbs butter
      • 1/4 cup flour
      • 1 tbs corn starch
      • 12 ounces Hefeweizen
      • 2 cups chicken broth
      • 1/4 cup heavy cream
      • 2 cups cheddar cheese thinly grated, don't use pre shredded
      • 1/2 tsp salt
      • 1/2 tsp pepper
      • 1 tsp smoked paprika
      • 1 1/2 cups elbow macaroni noodles

      Instructions
       

      • In a large pot heat the olive oil. Add the onions and jalapenos, cook until softened, stirring frequently, about 5 minutes. Add the garlic and cook for about 30 seconds.
      • Add the butter stir until melted.
      • Sprinkle the flour and corn starch on top of the melted butter and whisk until combined.
      • Add the beer, broth and cream bring to a low simmer.
      • 1/4 a cup at at time, add the cheese and stir until completely melted before adding more (do not boil or cheese will separate). Repeat until all the cheese is incorporated into the soup.
      • Add the salt, pepper, smoked paprika and stir to combine.
      • Add the macaroni noodles and cook until noodles are al dente.
      • Add additional beer or broth to thin to desired consistency.

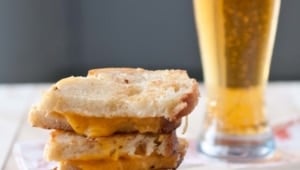
      Brown Butter Grilled Beer Cheese Sandwich

      There are some great elements in this world we live in that we beg the universe to some how bring together.

      Like a Yankees vs. Dodgers World Series

      Or an episode of The Office directed by Christopher Guest

      Or Trey Parker have complete creative control over The White House Holiday Card

      Or a reality show hybrid of The Bachelor and Fear Factor

      Even though I have to come to terms with the fact that those things will sadly never exist, I can meld brown butter and beer cheese into the greatest of all grilled cheese sandwiches. It won’t have the cultural repercussions of any of the above unions, but it is the best sandwich I’ve had in a long time. Too bad I didn’t have the forethought, or the consumptive restraint, to create a beer tomato soup to go along for the journey.

      Brown Butter Grilled Beer Cheese Sandwich

      Ingredients
        

      • 6 oz cream cheese
      • 1/2 cup mozzarella cheese
      • 1 tsp cornstarch
      • 1/4 cup Pale Ale
      • 4 oz cheddar
      • 8 slices bread
      • 4 tbs butter

      Instructions
       

      • In a blender or food processor add the cream cheese, mozzarella, cornstarch and beer. Blend until smooth, about 3 minutes. Spread the beer cheese generously onto 4 slices of bread. Top with about 2 tbs of cheddar and then top with a clean slice of bread.
      • In a skillet with a lid melt the butter over medium heat (don't allow the butter to get too hot or it will burn) until just starting to turn a golden brown. Carefully add the sandwiches, and replace the lid allowing the sandwiches to steam in the pan until the underside is golden brown, about 3 minutes. Flip the sandwiches, replace the lid and allow to cook until the other side is a light golden brown and the cheese is melted, about 3 additional minutes.

       You can also use the pre-oven beer cheese from my Roasted Garlic & Parmesan Beer Cheese Dip.


      IPA Ceviche


      As summer nears it’s inevitable end, it’s not the weather that I’ll miss the most. In fact the leather boots and chunky sweaters of colder days are starting to beckon. The produce, back yard grills, the smell of life and food floating on a late afternoon breeze will be lost in the dawning of fall.

      This isn’t a recipe about avoiding the oven, or  grumbles of triple digit heat, it’s about enjoying August produce, paired with those Summer release beers and spending as much time as you can in the open air before we’re all forced to head inside, cook with squash, and drink stouts. Which I am already looking forward to.

      IPA Ceviche

      Ingredients
        

      • 1/4 cup fresh squeezed lemon
      • 1/4 cup fresh squeezed lime juice
      • 1 1/2 lb raw shrimp shell & tail removed, chopped
      • 1/2 cup IPA Beer
      • 1 yellow onion diced
      • 3 cups tomatoes diced
      • 1 large jalapeno diced, stem and seeds removed
      • 1/2 cup cilantro
      • 1/4 tsp salt
      • 1 tsp red pepper sauce such as Sriracha

      Instructions
       

      • Add the lemon/lime juice and raw shrimp to a small bowl. (Shrimp will "cook" in the juice as it marinates.)
      • Mix beer, onion, tomato, and jalapeño in a large bowl, allow to marinate in the fridge for at least one hour.
      • Drain the vegetables and return to large bowl.
      • Once the shrimp have "cooked," drain and add them to the large bowl along with the salt and pepper sauce, toss to combine.
      • Serve cold with corn chips.


      Beer Chicken Piccata

      Here it is, just like I promised. Beer Chicken Piccata, to go with those beer noodles I made.

      The first time I ever had Piccata I was a completely broke college student traveling through Italy. And it was cheap. It turned out to be one of the most memorable dishes I had on that trip, moving it to the top of my list of Italian Favorites. If I see it on a menu, especially those family run strip mall joints that I love so much, I can’t resist ordering it.

      If you are familiar with this dish, you can see that this is a pretty standard Piccata with the white wine replaced with beer. You need to choose a low hop beer with notes of citrus, an IPA will overwhelm this sauce.


      Beer Chicken Piccata

      Ingredients
        

      • 2 chicken breasts
      • about 1/4 cup flour for coating
      • 1 tsp salt
      • 1 tsp pepper
      • 3 tbs butter Plus an additional 3 tbs, divided
      • 1 1/2 tbs flour
      • 1/3 cup pale ale
      • 1/4 cup fresh squeezed lemon juice
      • 1/3 cup chicken broth
      • 1/4 cup capers

      Instructions
       

      • Filet each chicken breast in half horizontally, making each chicken breast thinner, not smaller. Place a piece of plastic wrap over the chicken and pound with a meat mallet or a rolling pin until about 1/4 to 1/2 inch thick.
      • Sprinkle on all sides of the chicken with salt and pepper. Dredge chicken in flour until well coated.
      • In a pan over medium high heat, melt the butter. Once the butter is melted, add the chicken and cook on each side until browned, about 3 minutes per side. Remove from pan.
      • In a clean pan melt the remaining butter. Sprinkle with 1 1/2 tbs flour and whisk until combined. Add the beer, broth and lemon juice and cook until warmed and thickened, about 3 minutes. Add the capers and stir.
      • Add the chicken to a plate on top of a bed of rice or pasta. Top with sauce, serve immediately.


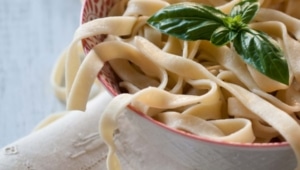
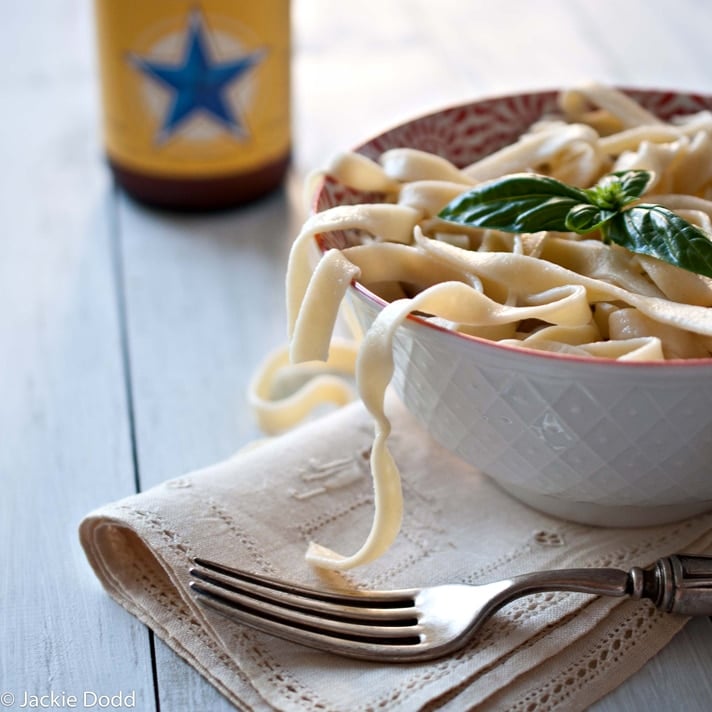
      Homemade Beer Pasta


       This is something everyone should do in their lives.

      Like cliff jumping in Greece, restaurant week in New York City, and watching the sun rise over the Mediterranean. Although making pasta from scratch doesn’t require a passport.

      Pasta isn’t as hard to make as you think and I have complete faith in your ability to pull this off. And impress your friends.

      Plus this leaves you open to a wide variety of sauces. Not just my Beer Marianna, but can someone please make me a beer Alfredo sauce?

      I’ll have a Beer Chicken Piccata for you later.  But in the meantime, someone needs to make me this stout bolognese. I’ll bring the noodles.

      Homemade Beer Pasta

      Ingredients
        

      • 2 cups all purpose flour
      • 1/2 tsp salt
      • 2 large eggs
      • 1/4 cup wheat beer
      • 1 tbs olive oil

      Instructions
       

      • In the bowl of a stand mixer fitted with a hook attachment, add the flour and the salt and mix well. Form a well in the center, add the eggs and the beer. Mix on a low speed until the dough, eggs and beer are incorporated, about 6 minutes. Remove from the mixer and kneed on a well floured surface until smooth and elastic, at least 10 minutes to remove all air pockets. Form a ball and brush with olive oil. Cover and allow to rest at room temperature for about 30 minutes.
      • Cut the dough into two equal halves. Cut each half into equal thirds to give you 6 equal sized pieces. Keep all dough covered that you are not working with.
      • Flatten each dough section into a long oval. Pass through the pasta roller at the widest setting. Close the pasta roller one notch and pass through again. Close the pasta roller again pass the pasta through again. Add flour to the pasta with each each pass through the pasta roller. Continue to do this until the pasta is thin. I used the Kitchen Aid Pasta Roller Attachment with the narrowest setting at 4.
      • Switch to the fettuccinie cutter pasta roller and cut each flattened pasta section into fettuccinie ribbons.
      • Allow to dry on a pasta drying rack or laid flat on a baking sheet for about 15 minutes.
      • Add pasta to a pot of lightly salted boiling water until cooked through, about 5-8 minutes.


      Beer Steamed Stuffed Artichokes & How to Stuff an Artichoke


      Here’s my artichoke. We’re going to gut him and stuff him with bacon.

      And then cook him in beer.


      The first step is to trim. Start with peeling off a few layers of the outside leaves They’re tough and not very good, don’t feel bad about getting rid of them.

      And if your artichoke has a long stem, trim it so that it can stand upright, with its leaves pointed at the sky. That will come in handy later.

      Then you are going to cut off the pointed tip of the artichoke.


      Then use a pair a kitchen sheers, (or, lets be honest regular scissors will be fine) to trim the pointed tips off of all of the leaves.


      Starting at the outside and working towards the inside, pull the leaves outward.


      Once you get to the inside leaves that are yellow and purple, you are going to want to remove these. There is a lot of waste with stuffed artichokes, just accept it and move on.

      This part isn’t easy. If you are having a hard time, that’s normal. The best way to do it is to dig at it with a melon baller. And swear at it a few times to put it in it’s place.

      Feel the inside to make sure it’s smooth and none of that hairy choke is left behind. If it still feels fuzzy, keep digging. And swearing, if it helps.

      Squeeze half a lemon into the cavity of the artichoke.

       Next you want to make the filling (recipe below).

      Stuff the filling inside the middle of the artichoke. Starting at the outside, spread the leaves out and press the filling inside the leaves, work your way in until all the leaves are full.

      Place in an oven safe pot, standing upright. Pour 1 1/2 cup citrusy wheat beer into the bottom of the pot.

      Cover with a lid or tin foil and bake at 375 for 40-60 minutes or until the outer leaves come away easily.

      Beer Steamed Stuffed Artichokes

      Ingredients
        

      • 4 large artichokes prepared as above
      • 1 large lemon
      • 4 strips of bacon
      • 1/3 cup chopped shallots
      • 4 cloves garlic minced
      • 1 cup mushrooms chopped
      • 1 cups bread crumbs
      • 1/2 cup parmesan cheese
      • 1/2 cup mozzarella
      • 2 tbs olive oil
      • 1 1/2 cups citrusy wheat beer

      Instructions
       

      • Preheat oven to 375
      • Prepare artichokes as instructed above, squeeze 1/4 lemon into the cavity of each artichoke.
      • In a pan over medium high heat, cook the bacon until browned. Remove from pan, and chop. Drain off most of the bacon grease, leaving about 2 tbs in the pan. Add the shallots and cook until soft. Add the garlic and stir. Add the mushrooms and cook until dark brown. Remove from heat and add the remaining ingredients as well as the chopped bacon (other than the beer), stir until well combined.
      • Stuff the artichokes as instructed above.
      • Place artichokes upright in the pot, fill with 1 cup beer.
      • Cover and cook until outer leaves come away easily, about 40-60 minutes.


      Maple and Bourbon Beer Glazed Salmon

      Let’s talk.

      If you are new to the Beer Scene you might not know about bourbon barrel aged beer. It’s exactly what it sounds like. Beer that has been aged in bourbon barrels giving it flavors of that remnant bourbon that once took up residence in that same barrel. Because bourbon is aged for years, and sometimes several decades, the flavors soak into the wood leaving their distinct flavor signature behind. When you use that same barrel to age beer, those beautiful hand-me-down flavors give an incredible depth to it’s new alcoholic vessel.

      If you haven’t had a bourbon barrel aged beer, add it to your list of beers to try. You may love it. You may loath it. Either way, it’s an experience that needs to be added to your beer exploits.

      Bourbon barrel aged beers aren’t the type you reach for after a long hot day of yard work. These are beers for chilly nights and dark chocolate desserts. Fireside chats and long conversations.

      Among my favortites is the Barrel Aged Old Rasputin form North Coast. 


      For this recipe I used Angels Share by Lost Abby. An intense bourbon flavor that goes very well with this recipe.


      Maple & Bourbon Beer Glazed Salmon

      Ingredients
        

      • 1/4 cup ponzu sauce
      • 3/4 cup bourbon barrel aged beer
      • 3 cloves garlic minced
      • 1 tbs brown sugar
      • 1 tbs maple syrup
      • 1 tsp sesame oil
      • 1/4 tsp chili powder
      • 1 tbs lime juice about 1 large lime, juiced
      • 4 salmon fillets about 4 to 6 oz each

      Instructions
       

      • In a bowl, add all ingredients (other than the salmon) stir until well combined. Add to a large zip top freezer bag. Add the salmon and remove as much air as possible before sealing. Place in the fridge, allowing to marinate for one to two hours, rotating at least once.
      • Preheat broiler.
      • Remove the salmon from the bag and place on a baking sheet sprayed with cooking spray.
      • Place the marinade in a pot over medium high heat. Boil until reduced and thickened, stirring frequently, about 8 to 10 minutes.
      • Brush the salmon with the marinade glaze.
      • Place under broiler and cook until salmon flakes easily, about 6 minutes. Brush salmon with glaze several times during cooking.
      • Serve over rice or pasta.