I have a message for that guy who decides what day holidays are on. It’s awesome when he picks a day of the week, rather than a date of the month. He did a great job deciding on Thanksgiving and Easter, but a spectacularly awful job for Halloween and the 4th of July.
So I have some changes to propose to…that guy. Whoever he is.
The 4th of July should be celebrated on the first Friday in July, so that the 5th of July never has me sitting in an office trying to participated in work related functions with the remnants of my "casual get together turned late night party" still hanging onto me like a overly tired toddler. I do realize that if you name a holiday after a date, then it really messes people up if it doesn’t occur on that date, as in, "Are you coming over for The 4th of July on the 6th of July?" But, Holiday Naming Guy is to blame for that.
So my suggestion is that Independence Friday is now to replace (or rather move) Mid Week 4th of July celebrations. All the same patriotic fun with out the comprehensive country wide lack of productivity the following day. I might have to start lobbying for this as soon as I can beat the crap out of who ever invented Day Light Saving time, that Guy is a real A-Hole.
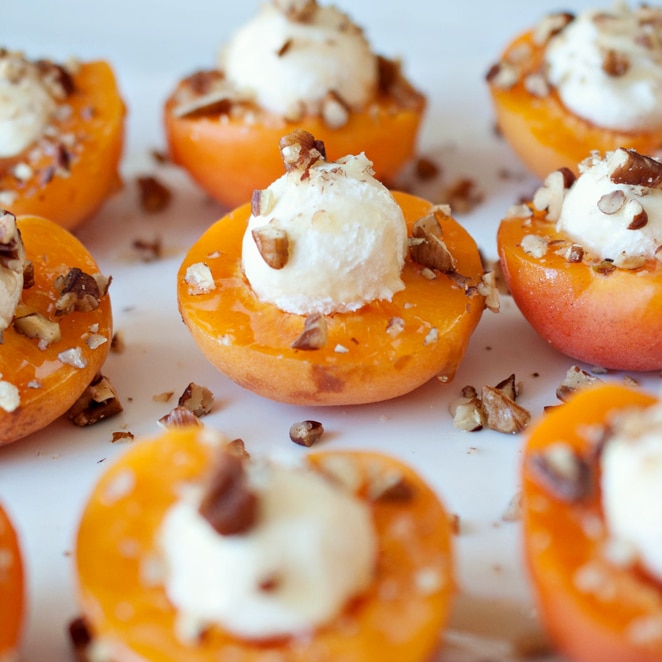
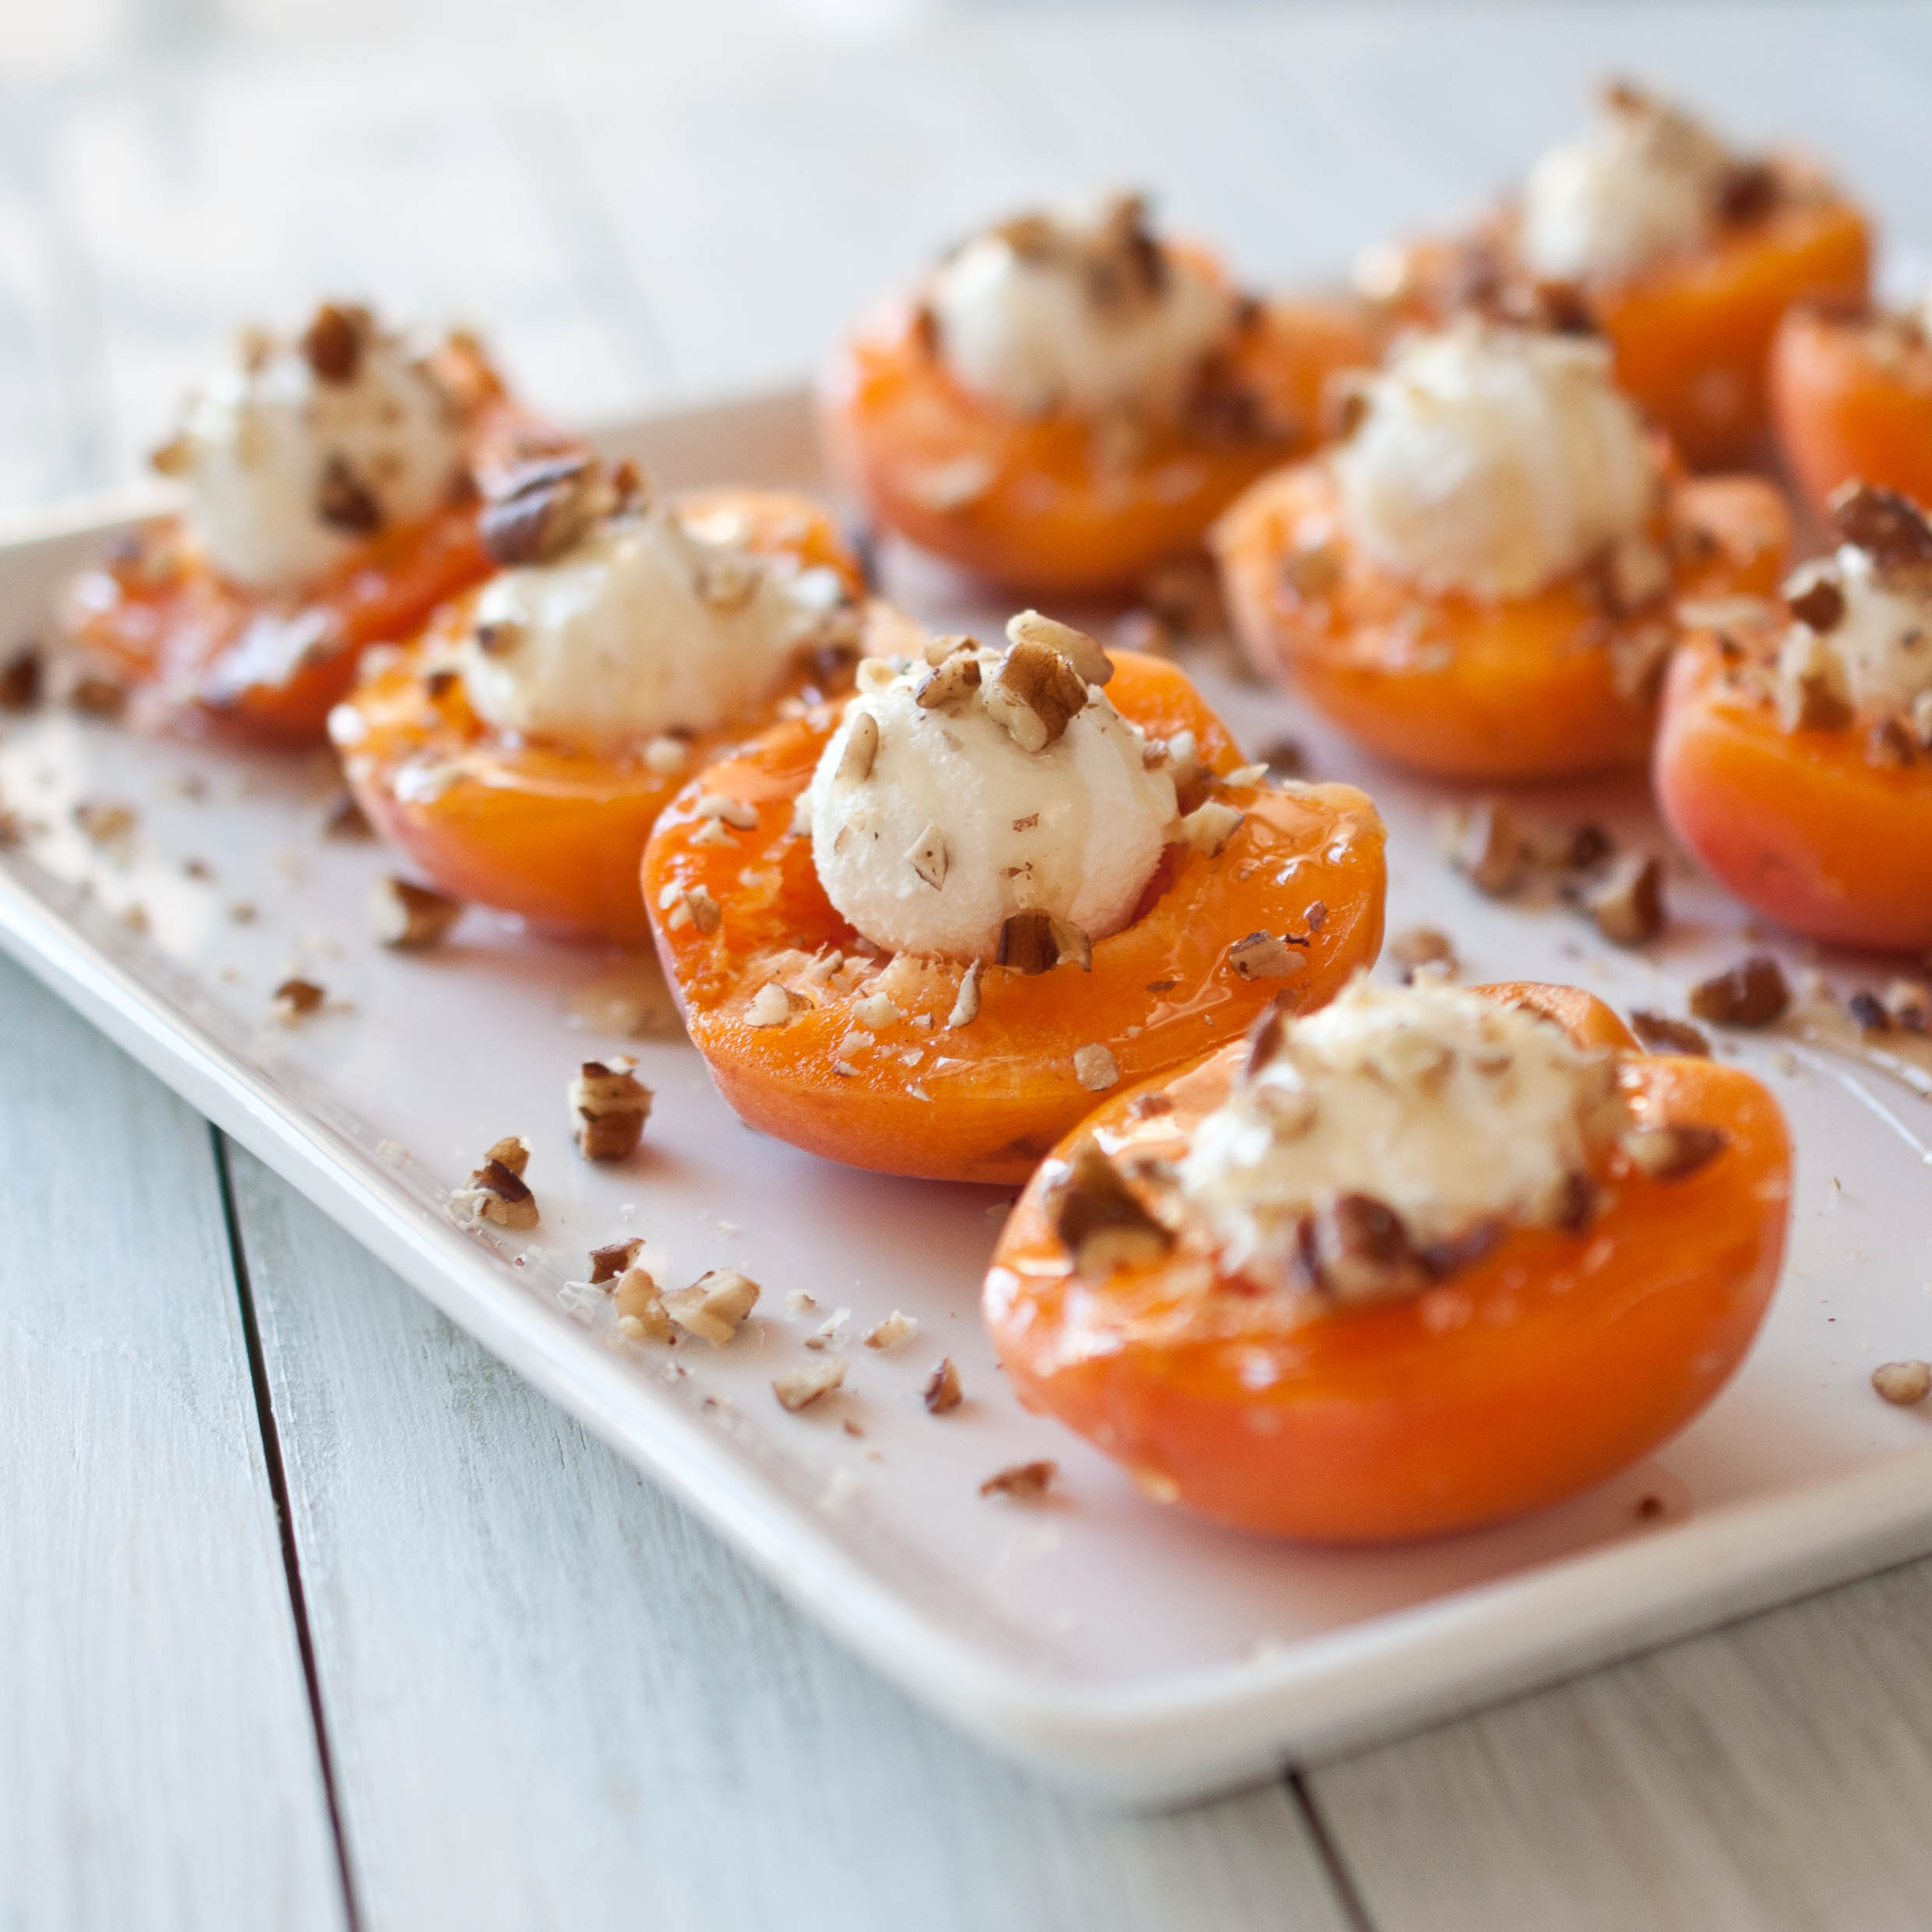
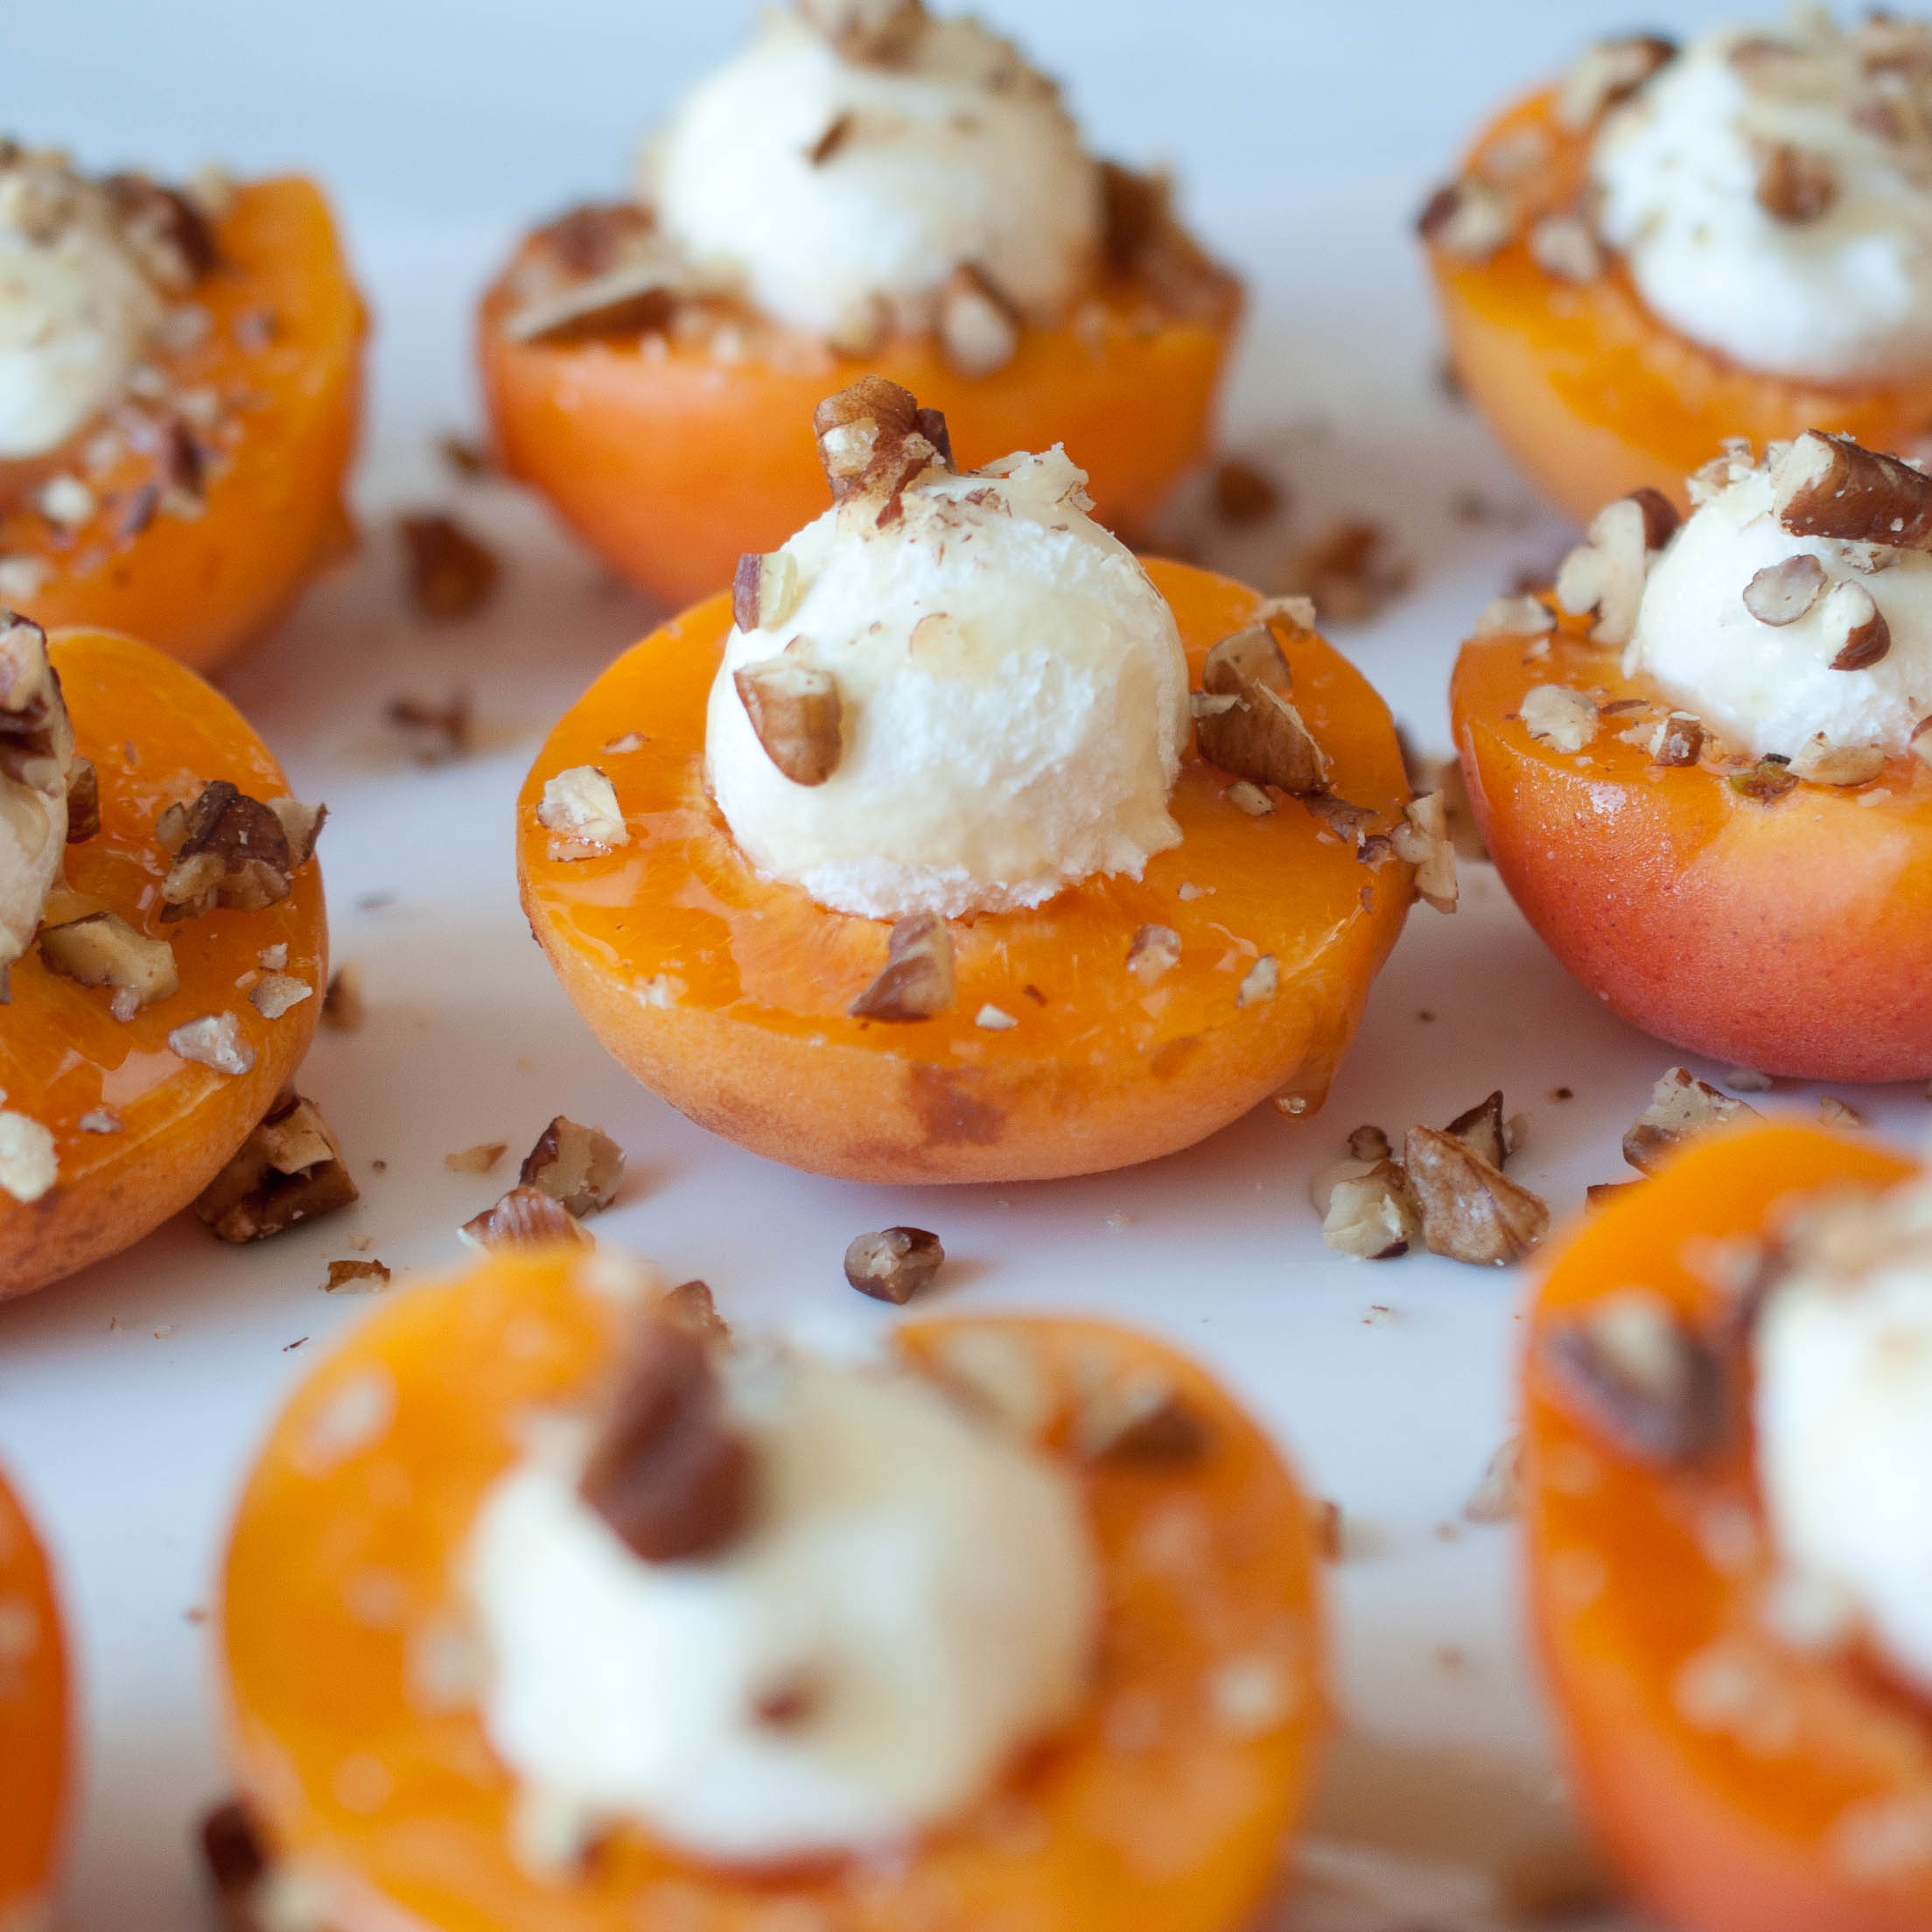
Goat Cheese Stuffed Apricots
12 apricots
6 to 8 ounces goat cheese
3 tbs raw honey
1/4 cup chopped pecans
Cut the apricots in half and remove the pits. Grab a small piece of goat cheese, about the size of the pit you just removed and roll it into a ball. Place it in the center of the apricot. Drizzle with honey, sprinkle with pecans.
I also cut these in half again before serving, but that’s your call.
I told you all about my plan to try and limit my dairy intake. There are, however, some things that I will never part with, like goat cheese. I might crawl across broken glass for goat cheese. And homemade whipped cream, especially Candy Cane Whipped Cream, is a joy I will indulge in for the rest of my life.
But milk, I could take it or leave it. In fact, most of the time I would rather leave it. Not just because the idea of drinking a tall glass of un-manipulated milk makes me want to gag, but because I have found so many alternatives that I enjoy so much more.
Coconut milk is an amazing substitute for milk, and the flavor is beautiful. Almond milk adds a new dimension to dishes that I adore.
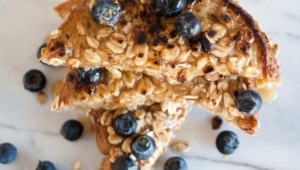
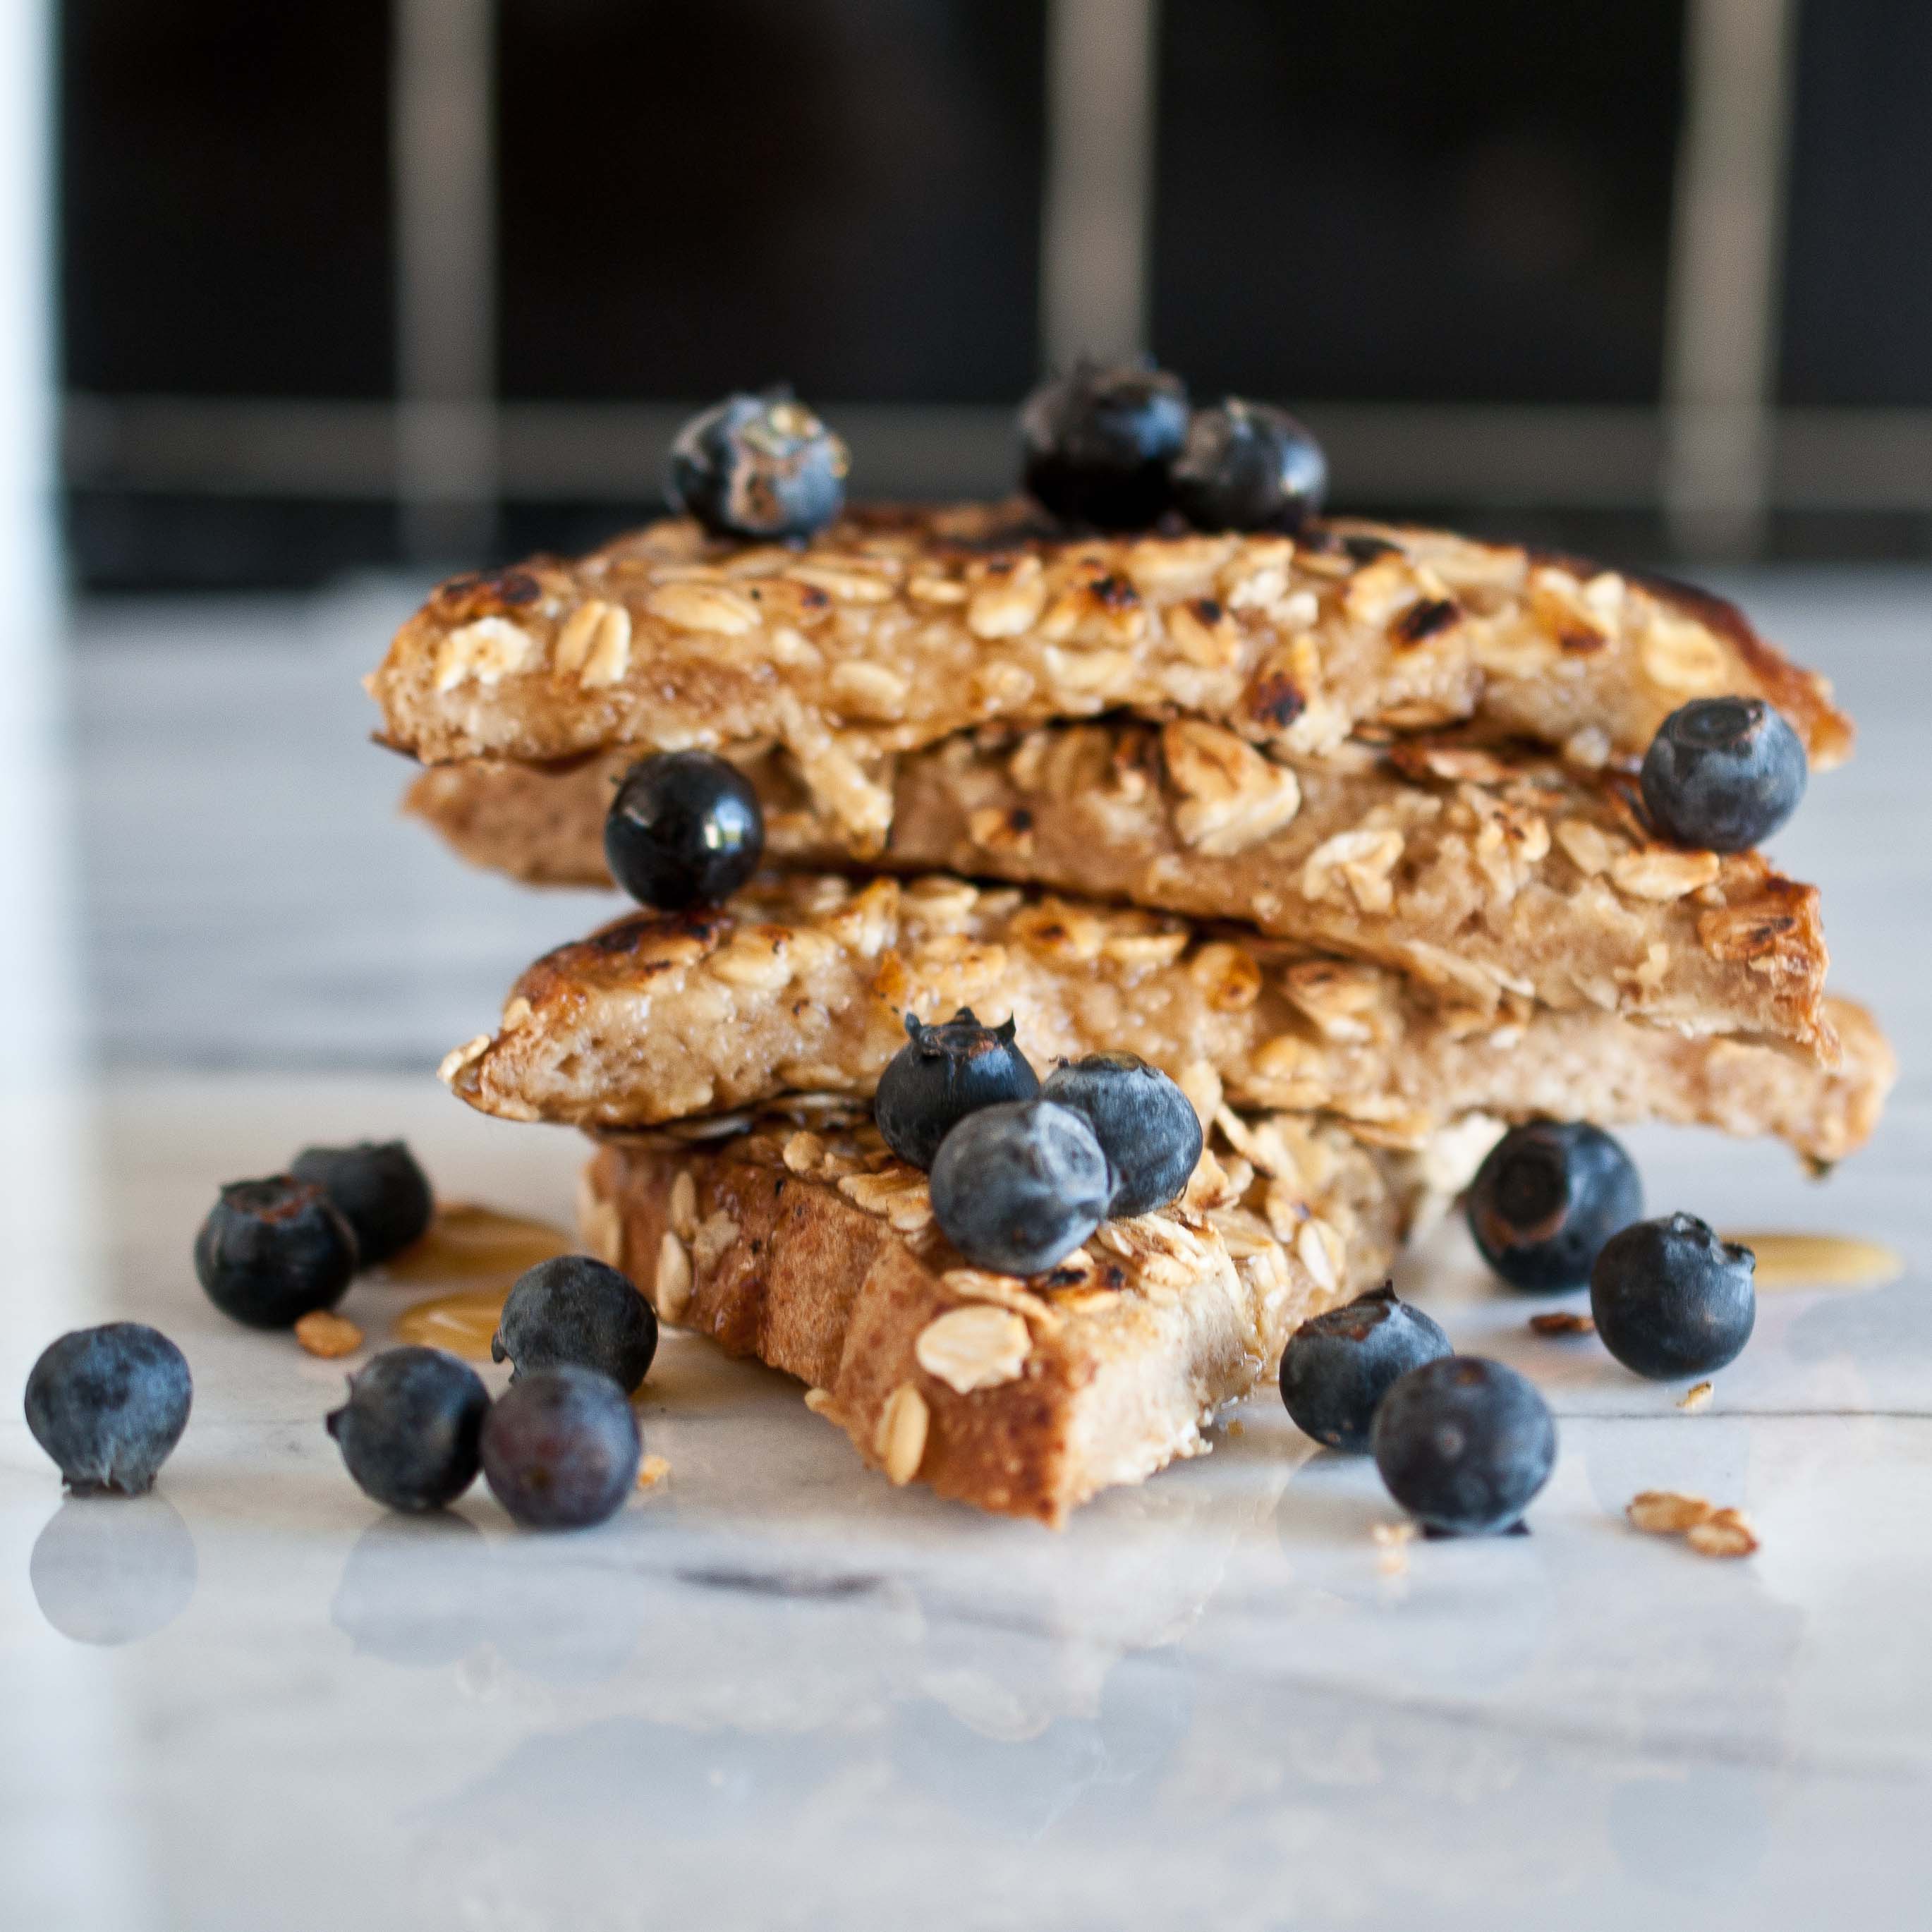
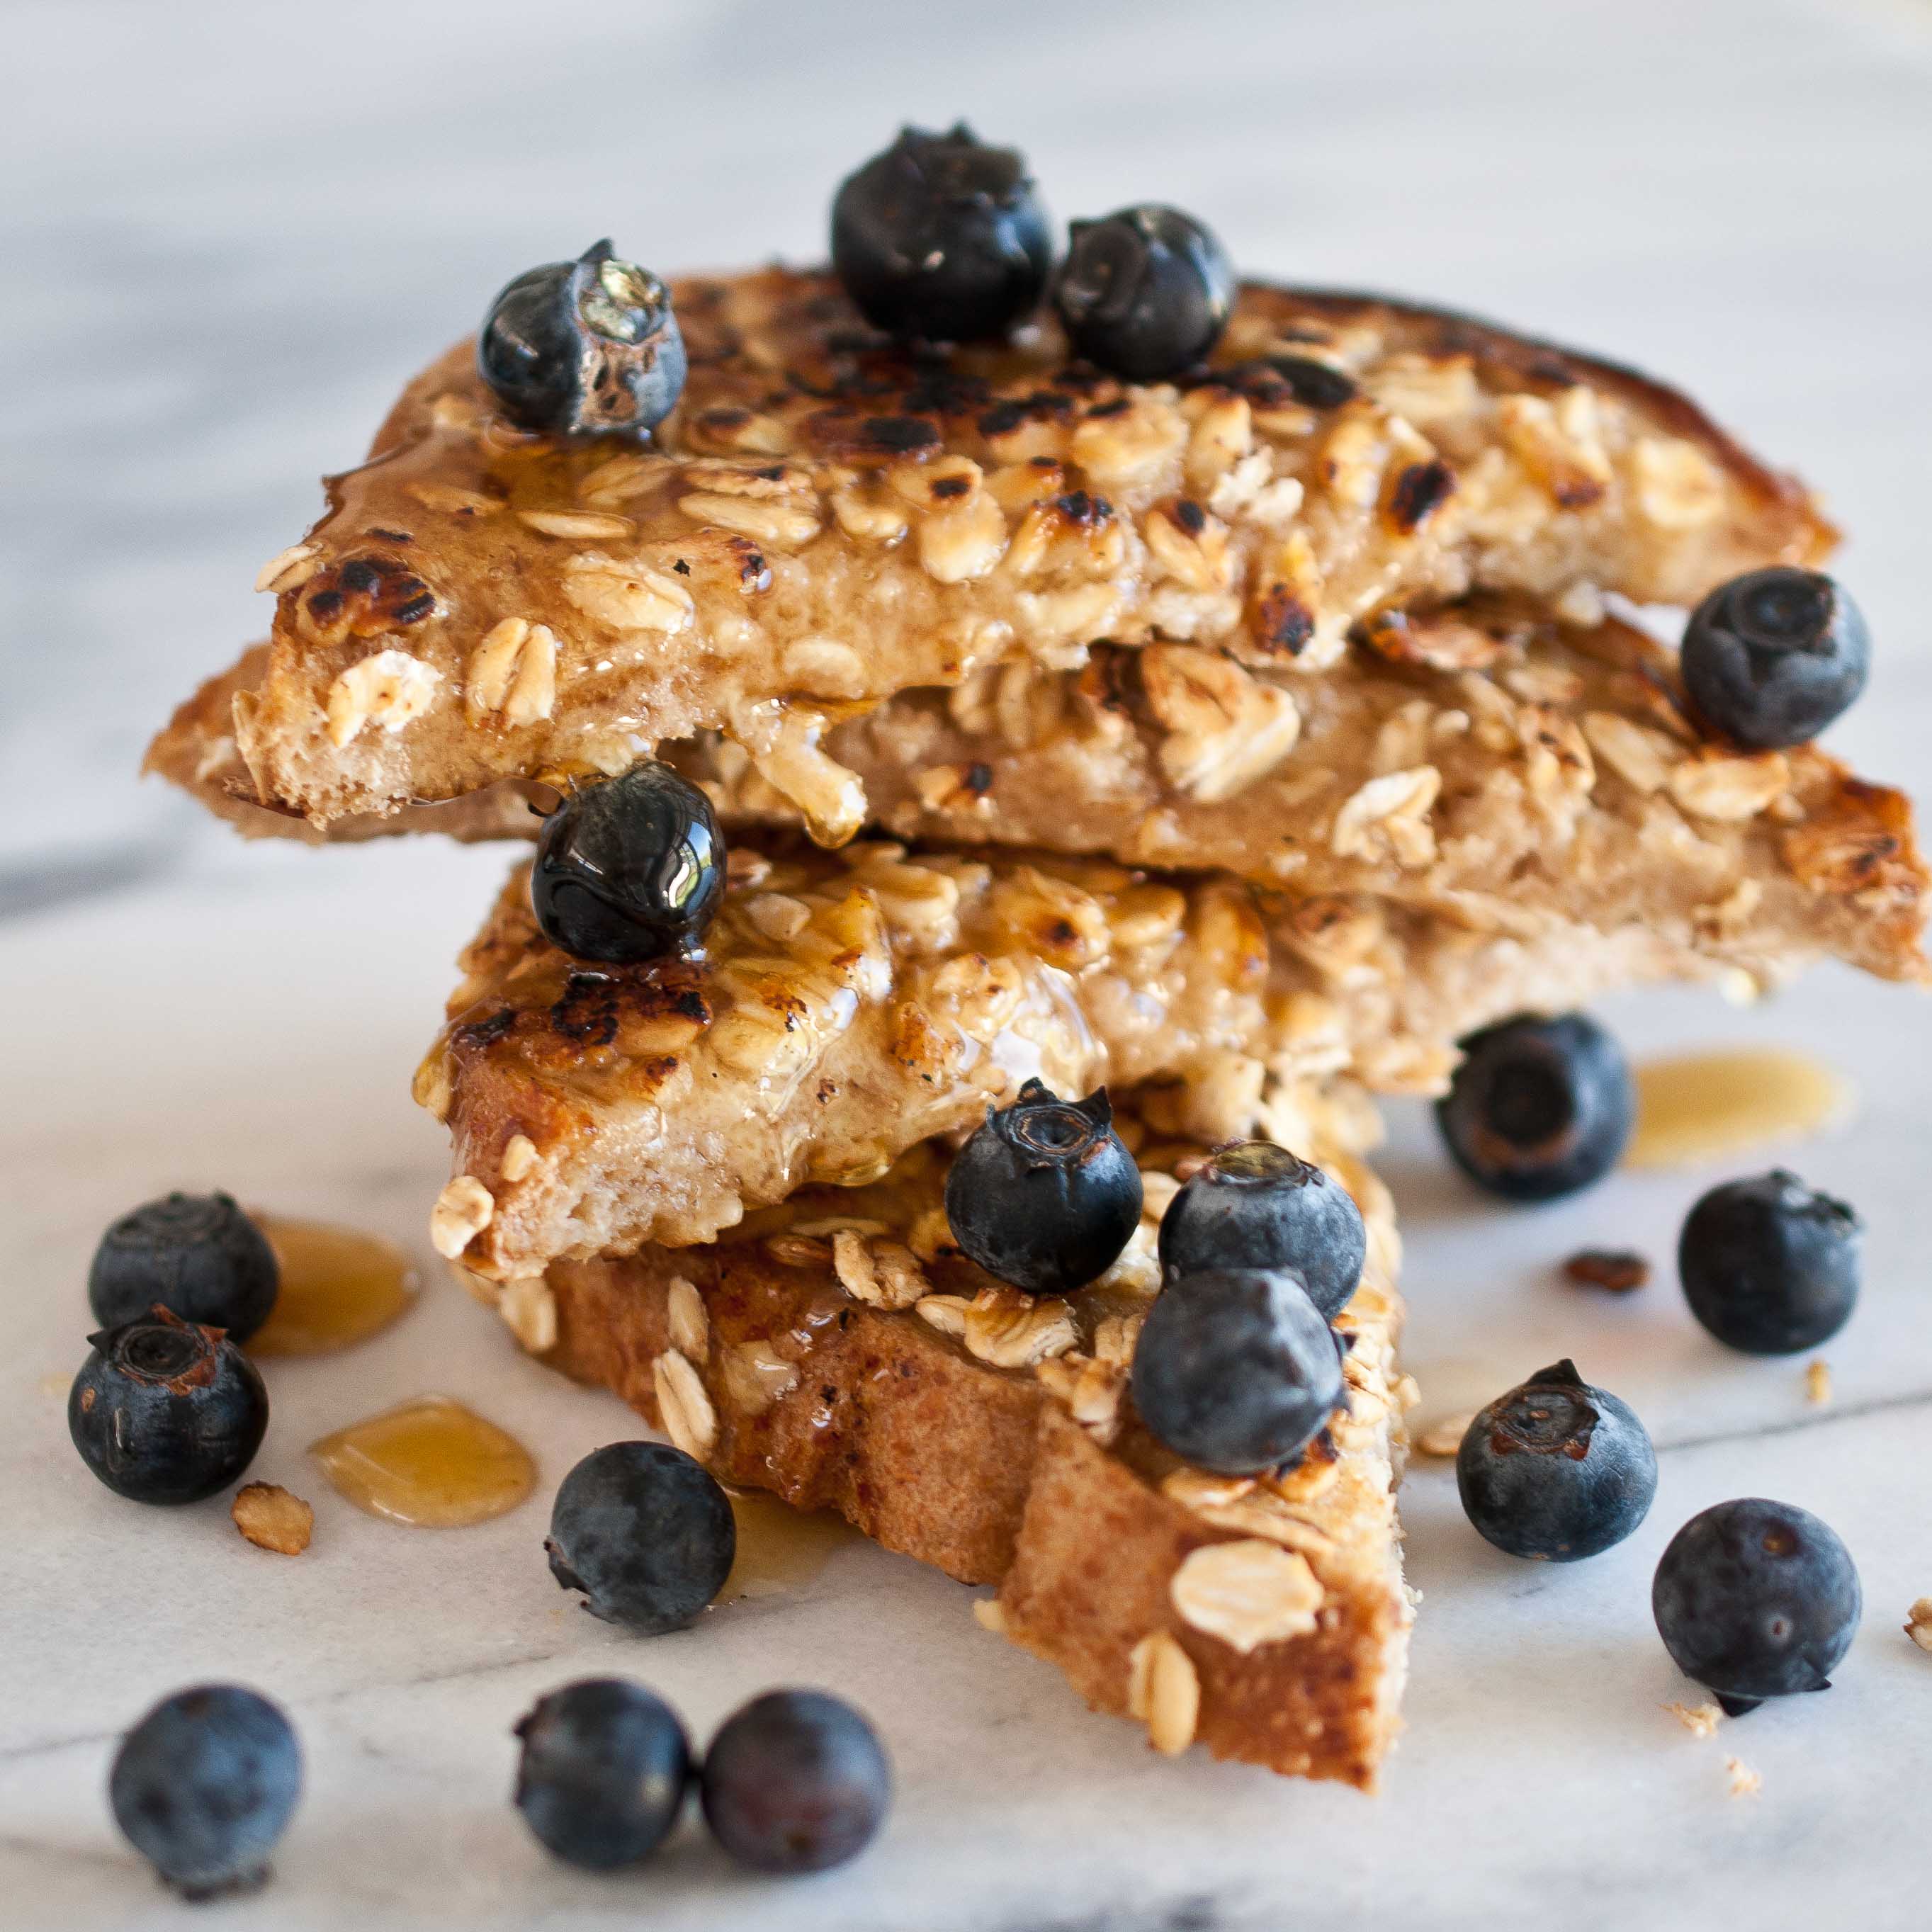
For now, I will be making my french toast with coconut milk, I loved the way it tasted.
Coconut Oat French Toast
1 can light coconut milk
1/4 cup brown sugar, plus additional 1/4 cup divided
1 tsp vanilla
2 eggs
12 slices of bread
1 cup quick oats
Add the coconut milk, 1/4 cup brown sugar, vanilla and eggs to a bowl, whisk until well combined.
Place the oats and remaining brown sugar on a plate or in a shallow dish, stir until well combined.
Heat a skillet (with a lid), sprayed with butter flavored cooking spry, over medium high heat until hot but not smoking.
Two at a time, soak the bread in the coconut milk mixture for about a minute. Remove from the milk and allow excess to drain off, place on the oat plate, turn to coat.
Add the french toast to the hot pan, replace the lid and cook for two minutes. Turn the french toast, replace the lid and cook for an additional two minutes, or until cooked through. Turn the heat down on the pan if the oats start to brown too quickly.
To see my Coconut Oat French Toast, click on the picture:
Why would a meat eating cheese monger such as myself want to make something vegan? Several reason, not the least of which are my friends and family who can’t or wont eat dairy. As meat eaters, it is even more important for us to experiment with vegan and vegetarian food and not hang on the crutch of animal products with the exclusion of other foods. We need to have all types of recipes in our arsenals, not just to accommodate those who might be guest at our tables, but in order to discover foods that we didn’t know we loved, because we didn’t think food with "vegan" labels applied to us. In exploring vegan cooking I have discovered what an amazing texture vegetable shorting lends to frosting, how rich and beautiful coconut milk tastes, and how fruit purees can be a flavorful stand in for butter.
Dairy free baking is something I want to lean towards more. Only using milk products when other substitutions would compromise the overall product, but in many cases vegan substitutions make the end result just as good or even better. Plant based foods just feel better in my body and if the taste of the food isn’t harmed then why would I make any other choice?
I started exploring dairy free cooking when three friends where coming over for dinner. One was kosher (meat and dairy can not be served together) one was allergic to cow’s milk and the other was breast-feeding a baby who couldn’t have dairy. All three needed a dairy free meal. I realized how much dairy I use. Why? I love plants, produce, vegetables, fruit…why all the milk?
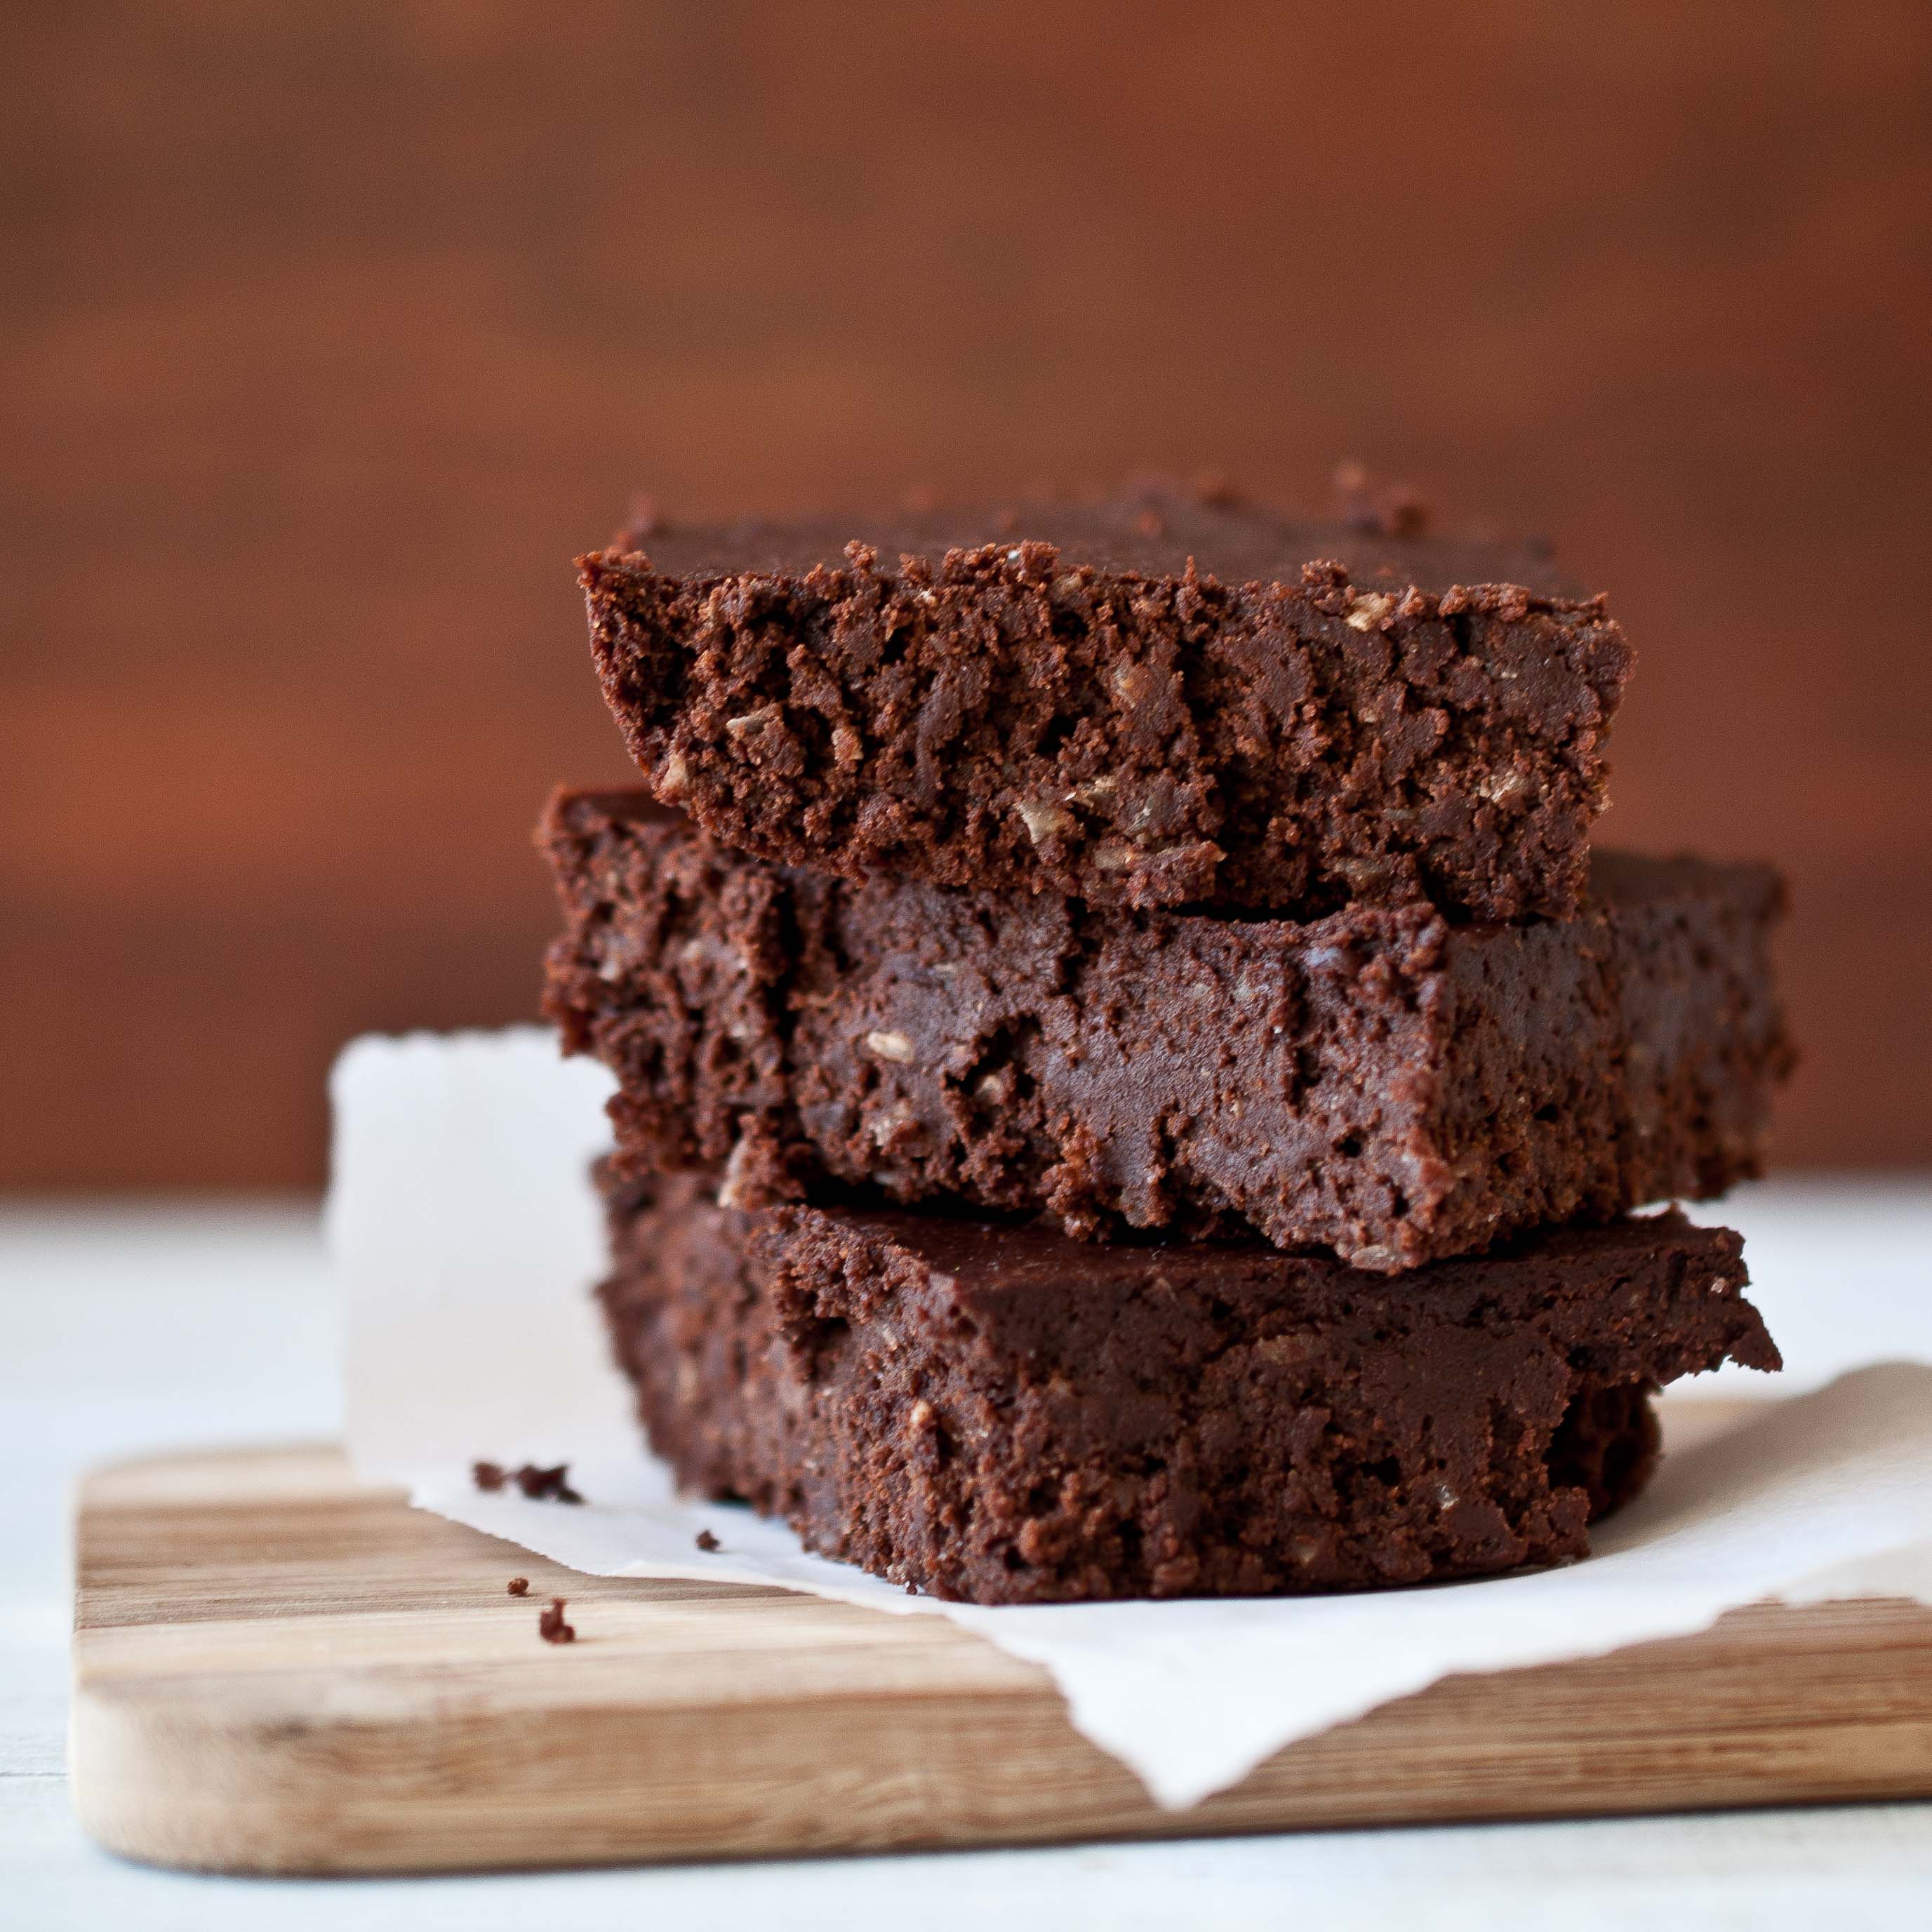
These brownies where really good. Not just "good for vegan" but just really good. So fudgy and intensely chocolatey, even Tater couldn’t keep her little fingers off them.
She took a bite and then carefully put it right back where I had place it. So cute, I love that kid.
Chocolate Coconut Vegan Brownies
1/3 cup coconut oil
1 cup agave nectar
1/2 cup unsweetened soy milk (can sub coconut milk)
1/3 cup strong coffee*
1 cup cocoa powder
3/4 cup whole wheat flour
1/2 cup unsweetened shredded coconut (I used Bob’s Red Mill)
1/2 tsp salt
In a bowl, beat together the coconut oil and the agave nectar until well combined. Add the soy milk and coffee and beat again. in a separate bowl, add the cocoa powder, flour, shredded coconut and salt and stir to combine. Add the dry ingredients to the wet ingredients and stir until just combined, don’t over mix.
Spray a 8×8 inch baking dish with cooking spray (or line with parchment paper) and pour bater into prepared pan.
Bake at 350 for 16-18 minutes. You don’t want to overcook these or they will be too dry. Allow to cool before cutting into.
For an extra treat, serve warm topped with coconut milk ice cream.
*Note: Coffee intensifies the flavor of chocolate, with no trace of a coffee taste. If you don’t like coffee, or don’t have a coffee maker, stop by a Starbucks and order a black coffee, use 1/3 of a cup and freeze the rest in ice cube trays for use in future chocolate baking.
When I was a kid "Pasta Salad" was just a requisite side dish at family gatherings that was hastily bought at the grocery store and remained in it’s plastic tub beside other more appetizing offerings while slowly making it’s way to room temperature. I never really understood how macaroni noodles, eggs and mustard where always such an important part of every barbecue I went to. And while these little gatherings were being planned, there was always a mention of it, "Who is going to bring the pasta salad?" Pasta salads have so much variety and take so little time, you don’t ever have to resort to grocery store tub again.
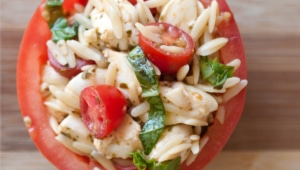
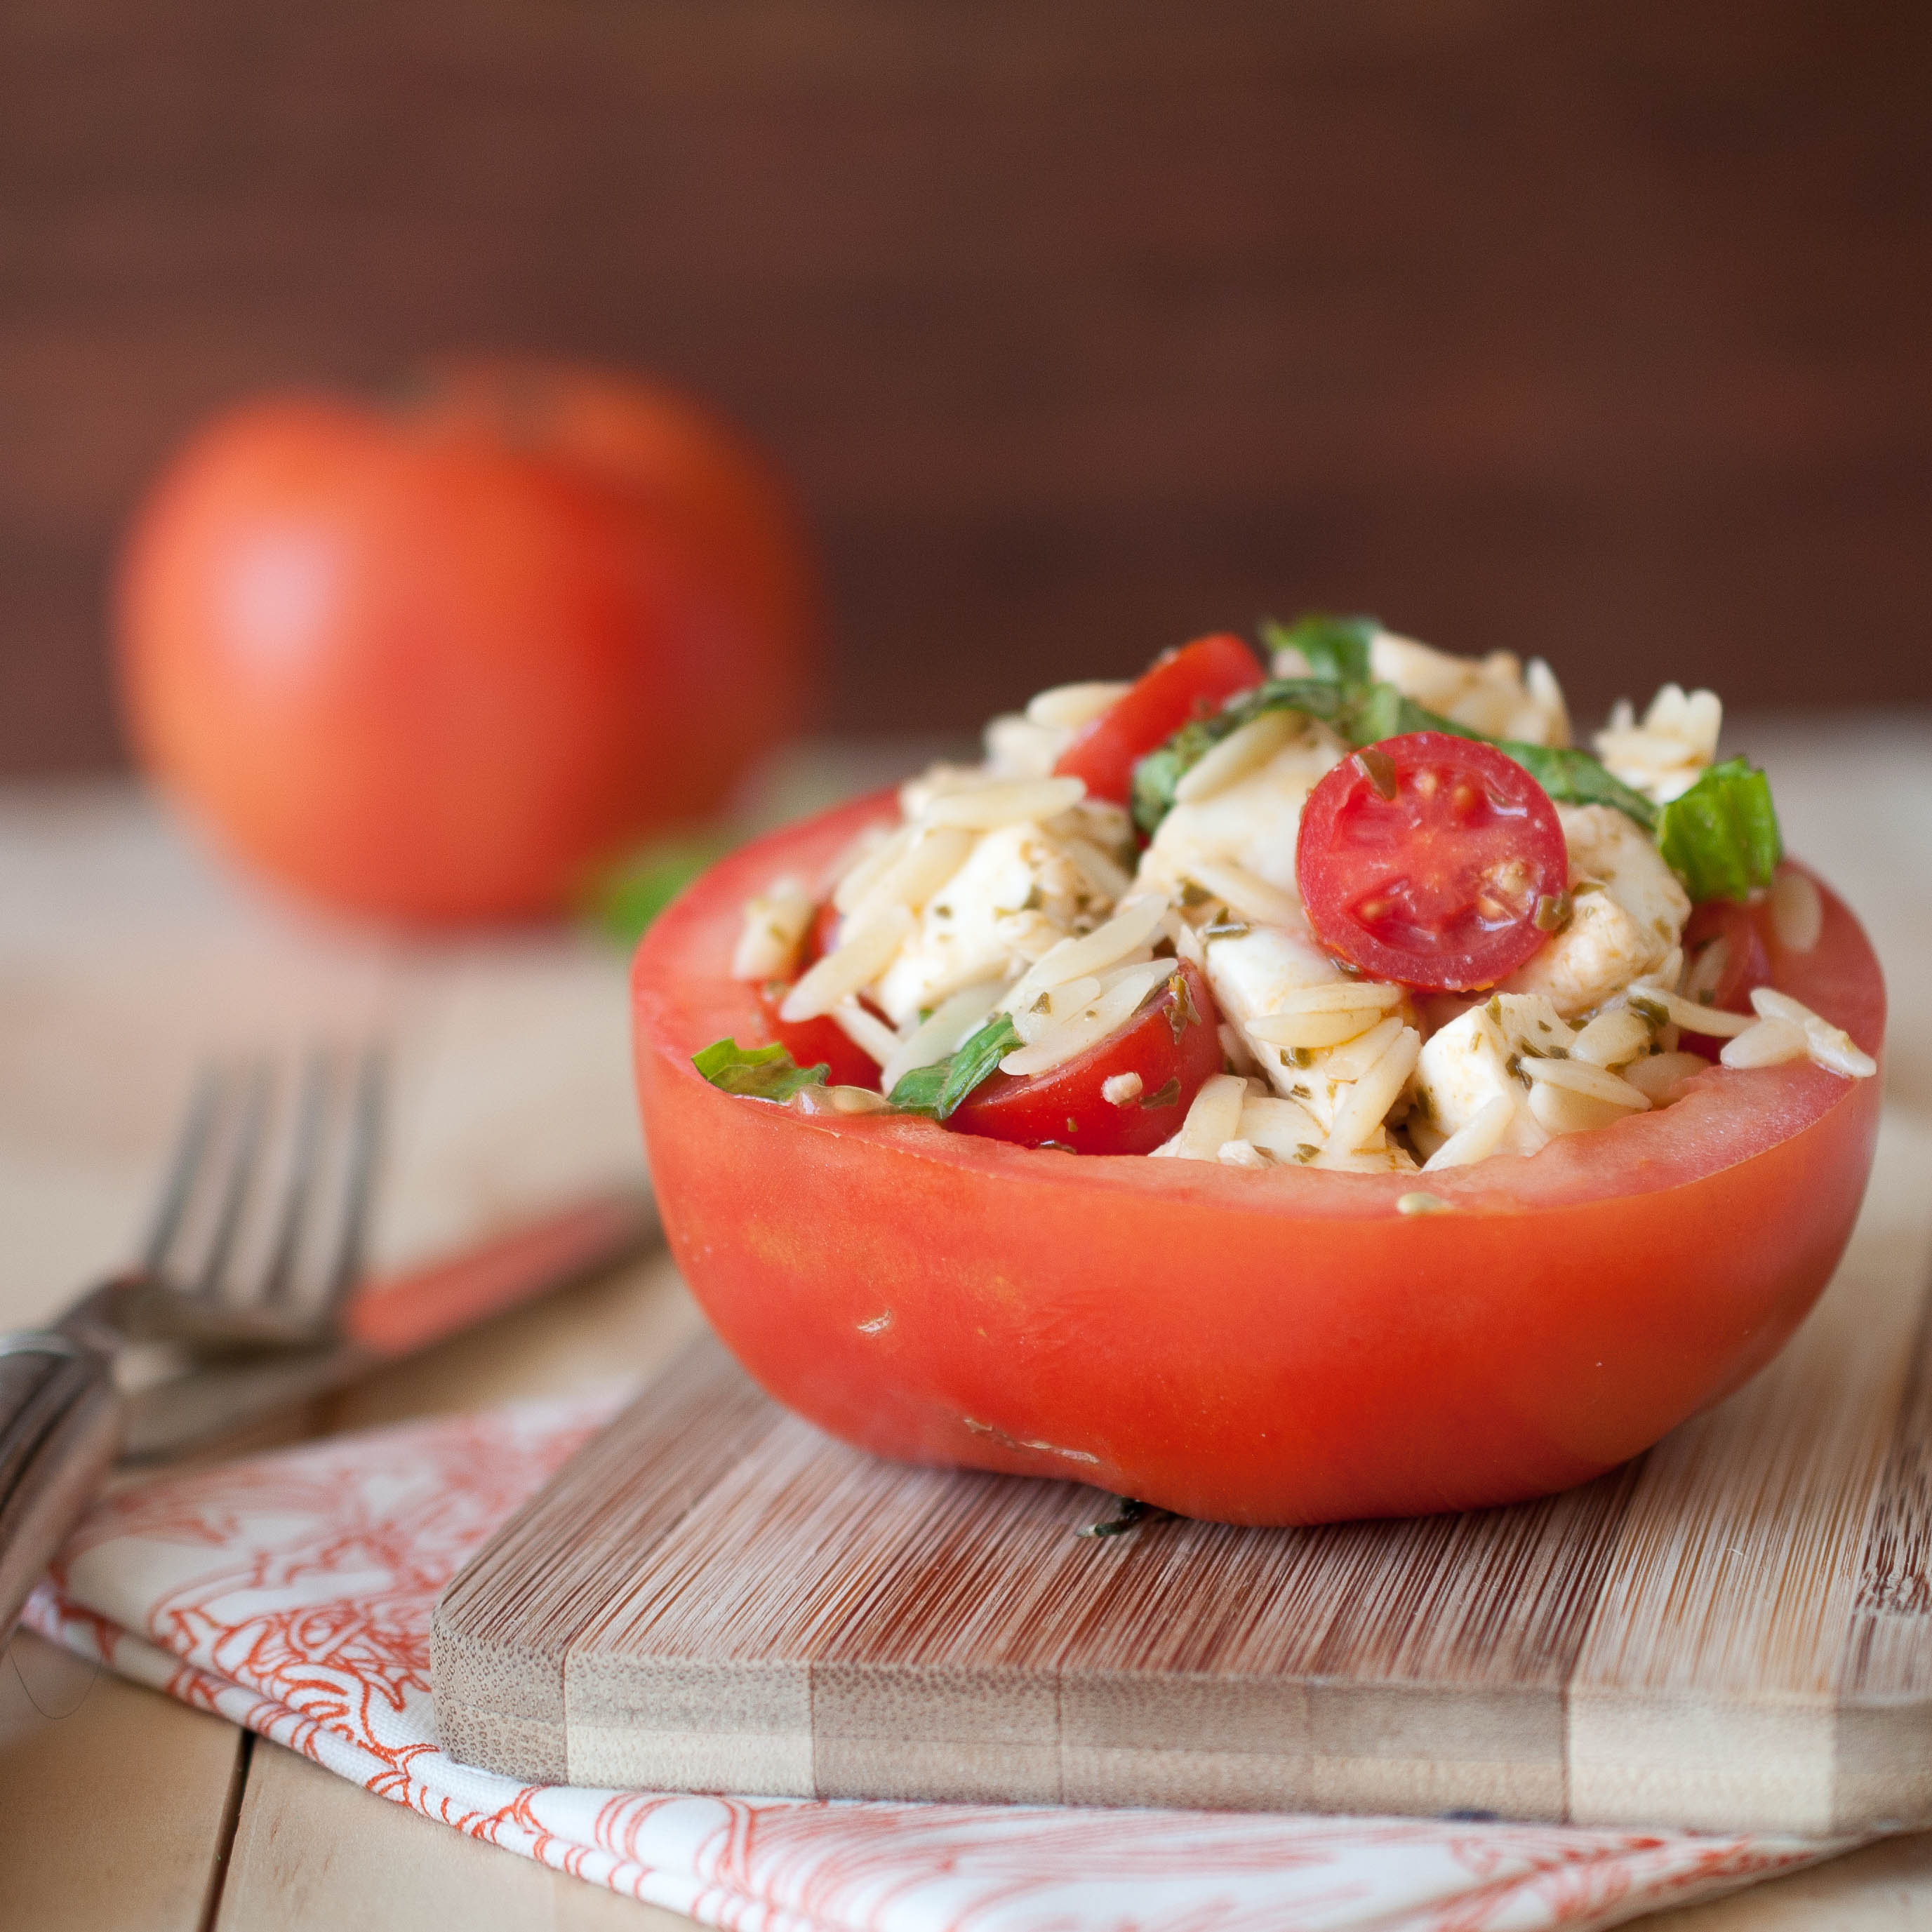
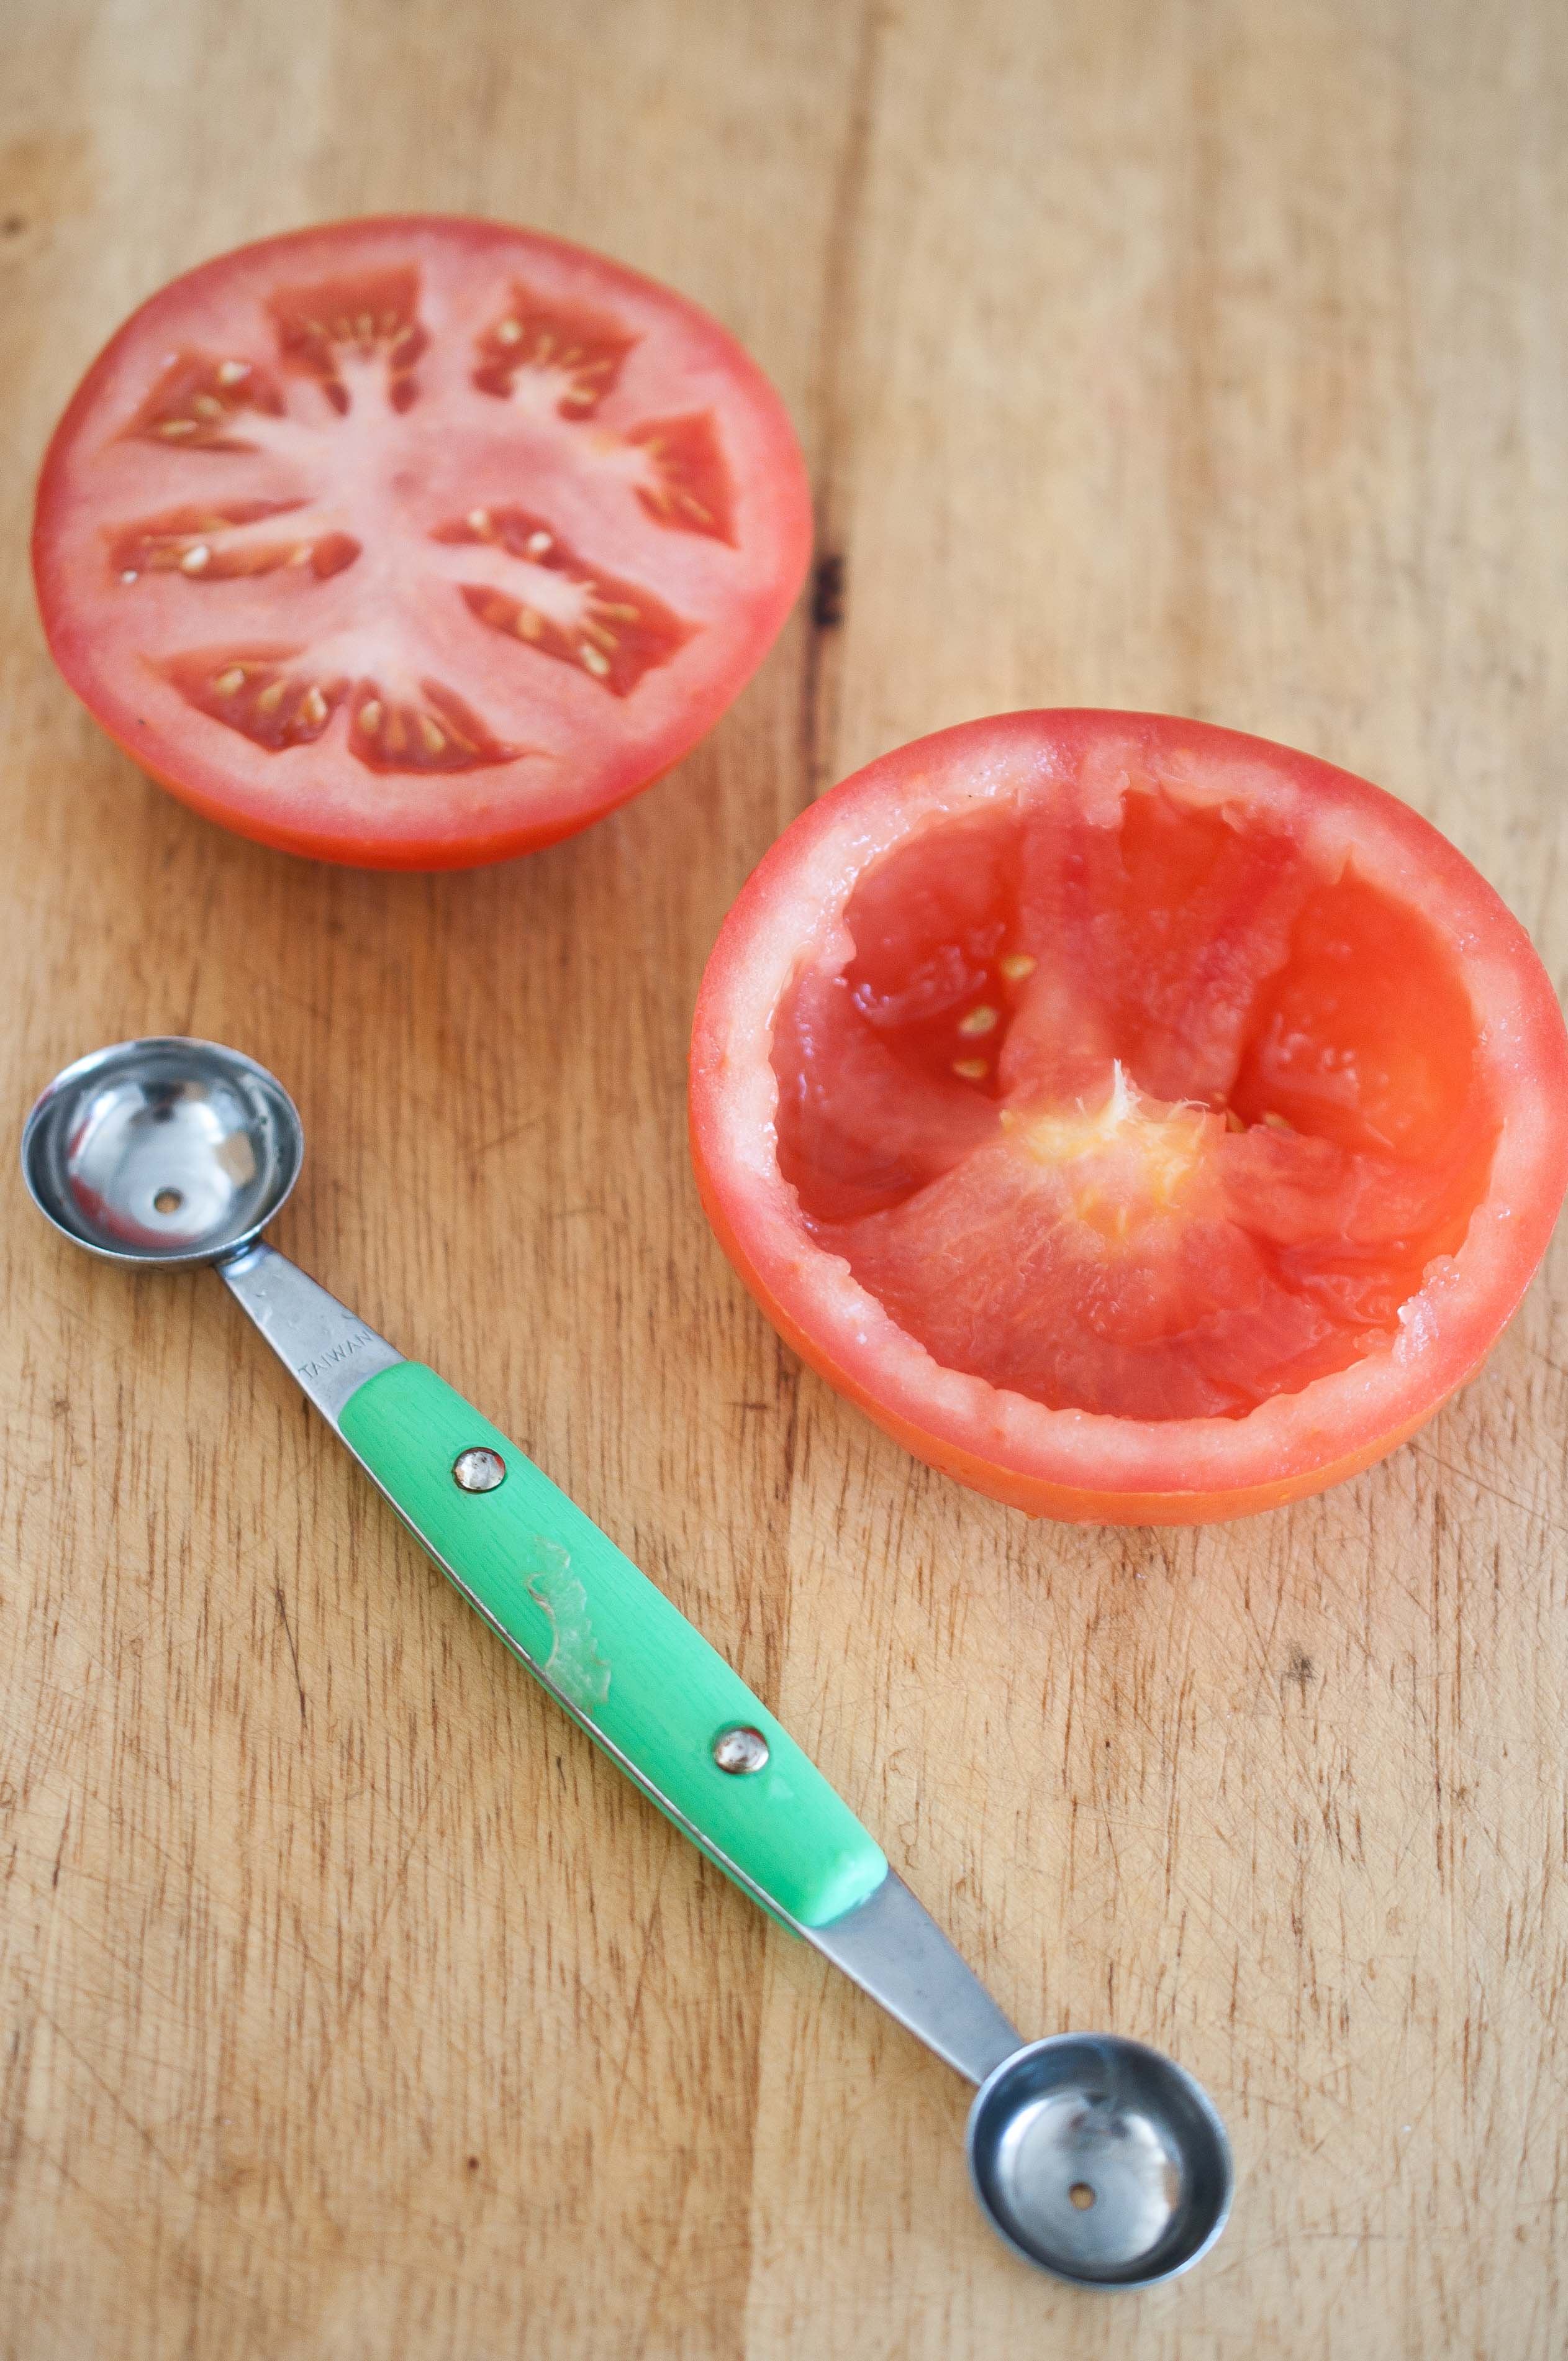
Instead of that I offer you this. Orzo pasta and a fairly traditional Caprese salad, mixed together and served in a hallowed out tomato (feel free to bypass the individual serving size vegetable dish for larger gatherings.)
2 cups small mozzareall balls (ciliegine sized) cut in half or quarters
5 basil leaves, chopped
3 tbs pesto sauce
1 tsp balsamic
Salt & Pepper
4 beefsteak tomatoes
Cook Orzo according to package directions until al dente, put in a bowl with the grape tomatoes, mozzarella balls, basil leaves, pesto and balsamic. Toss to combine, salt and pepper to taste.
To serve in tomato cups, cut the beefsteak tomatoes in half widthwise and use a melon baller to scoop out the insides.
Every foodie mom wants to raise an eater. A kid with a profound appreciation for food who can tell you the difference between a Béarnaise and a Hollandaise.
I love that my two year old’s favorite food is bacon, that she’ll pick the carcass of roast chicken clean if I let her, that she prefers to snack on roasted Nori sheets over Oreos if given the option, but it’s not my biggest focus. I want her to respect food, but I want her to respect people more.
I’m grateful that I have the ability to buy organic whole produce, spend the extra five bucks for the organic free range eggs, that I always make cakes, frosting, ricotta cheese, bread and pasta from scratch, and I’m thrilled that I get to be that type of mom. But I wasn’t that type of kid.
I was the kid who’s family lived pay check to paycheck, who once sorted through boxes of canned food sent over from the local Mission when the funds ran really low, who waited in the 12 passenger van while mom ran into the bakery to buy twenty-cent day old bread so our family of ten could make it through the month. And I never had a friend who made me feel bad about it.
When my seven sisters and I would have friends over on a friday night, and mom would make Bisquick pancakes for dinner, it was seen as charming, not as a cheap way to feed the fifteen mouths that were now at the table.
That’s what I want for Tater. To be able to sit at anyones table and see the food as what it is, a gesture of care and affection. I don’t want her to ask for aged Reggiano to add to the Rice-A-Roni that her friends mom served. I don’t want to raise a kid who wants to add a honey balsamic reduction to ice berg salad mix she is given by the next door neighbor.
I want her to eat what she is served, and feel grateful that someone took the time to offer her food from their home.
I want to raise a kid who would eat boxed macaroni and cheese if that what she is served, and clean her plate, without ever pointing out that her mom makes it from scratch.
And if she is at summer camp and a group of weary, under paid cooks serve her chicken nuggets and tater tots that only made a brief stop in the kitchen after a long ride on a Sysco truck, I hope she is able to see warm food that people took time away from their families to make for her.
And if someday her mother in law serves her a burnt lasagna that is still frozen in the middle, with Kool-Aid out of plastic tumblers, I hope she say thank you. And I hope she means it.
Food is more than just an experience of taste and the pleasures that it brings, it’s about a respect for those who serve it. Everyone has different abilities, concerns and limitations but we all bring food to those we love with the same motivation, and no amount of foodie intolerance should ever diminish that.
I have the privilege of spending time and money on the food that I want to serve, but the love I bring to my table is no different than the busy, over worked mother or 5 who serves spaghetti from a jar and a box twice a week.
I want her to be gracious and appreciative, no matter what is put in front of her, thanking her hosts, because others did that for me.
That’s what food is about.
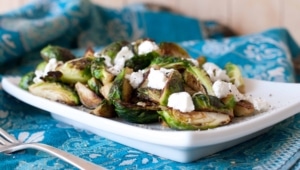
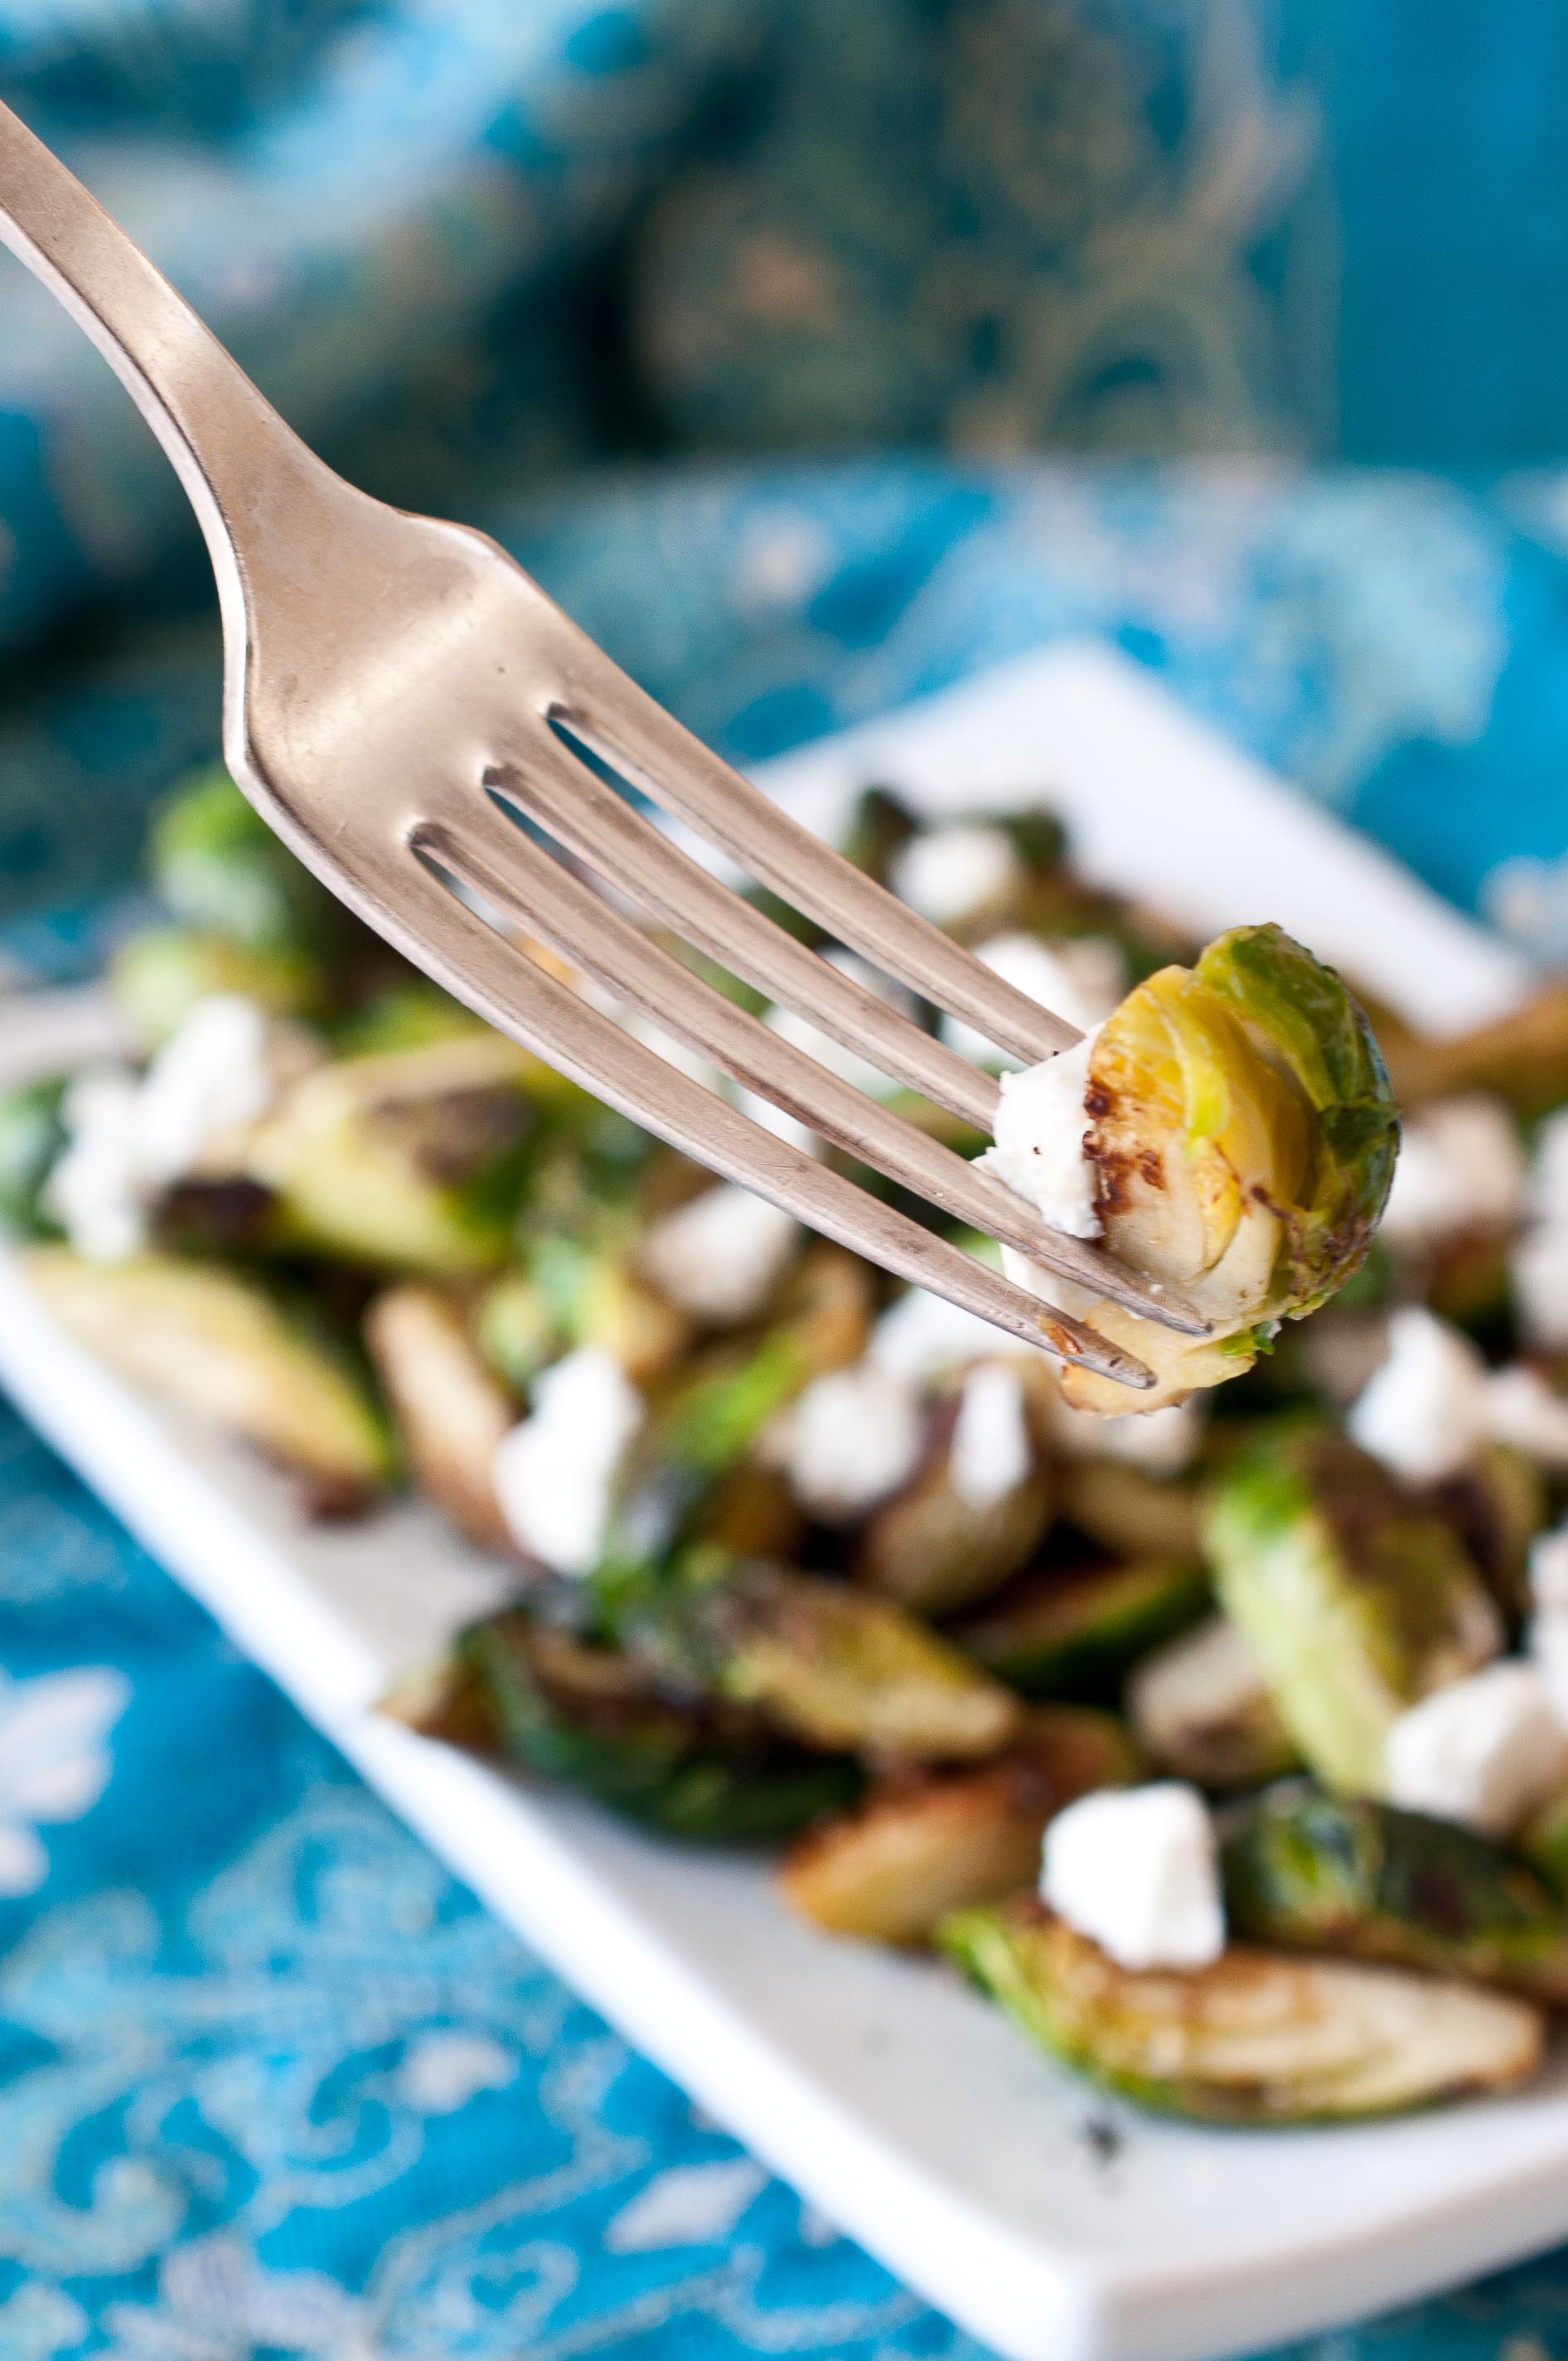
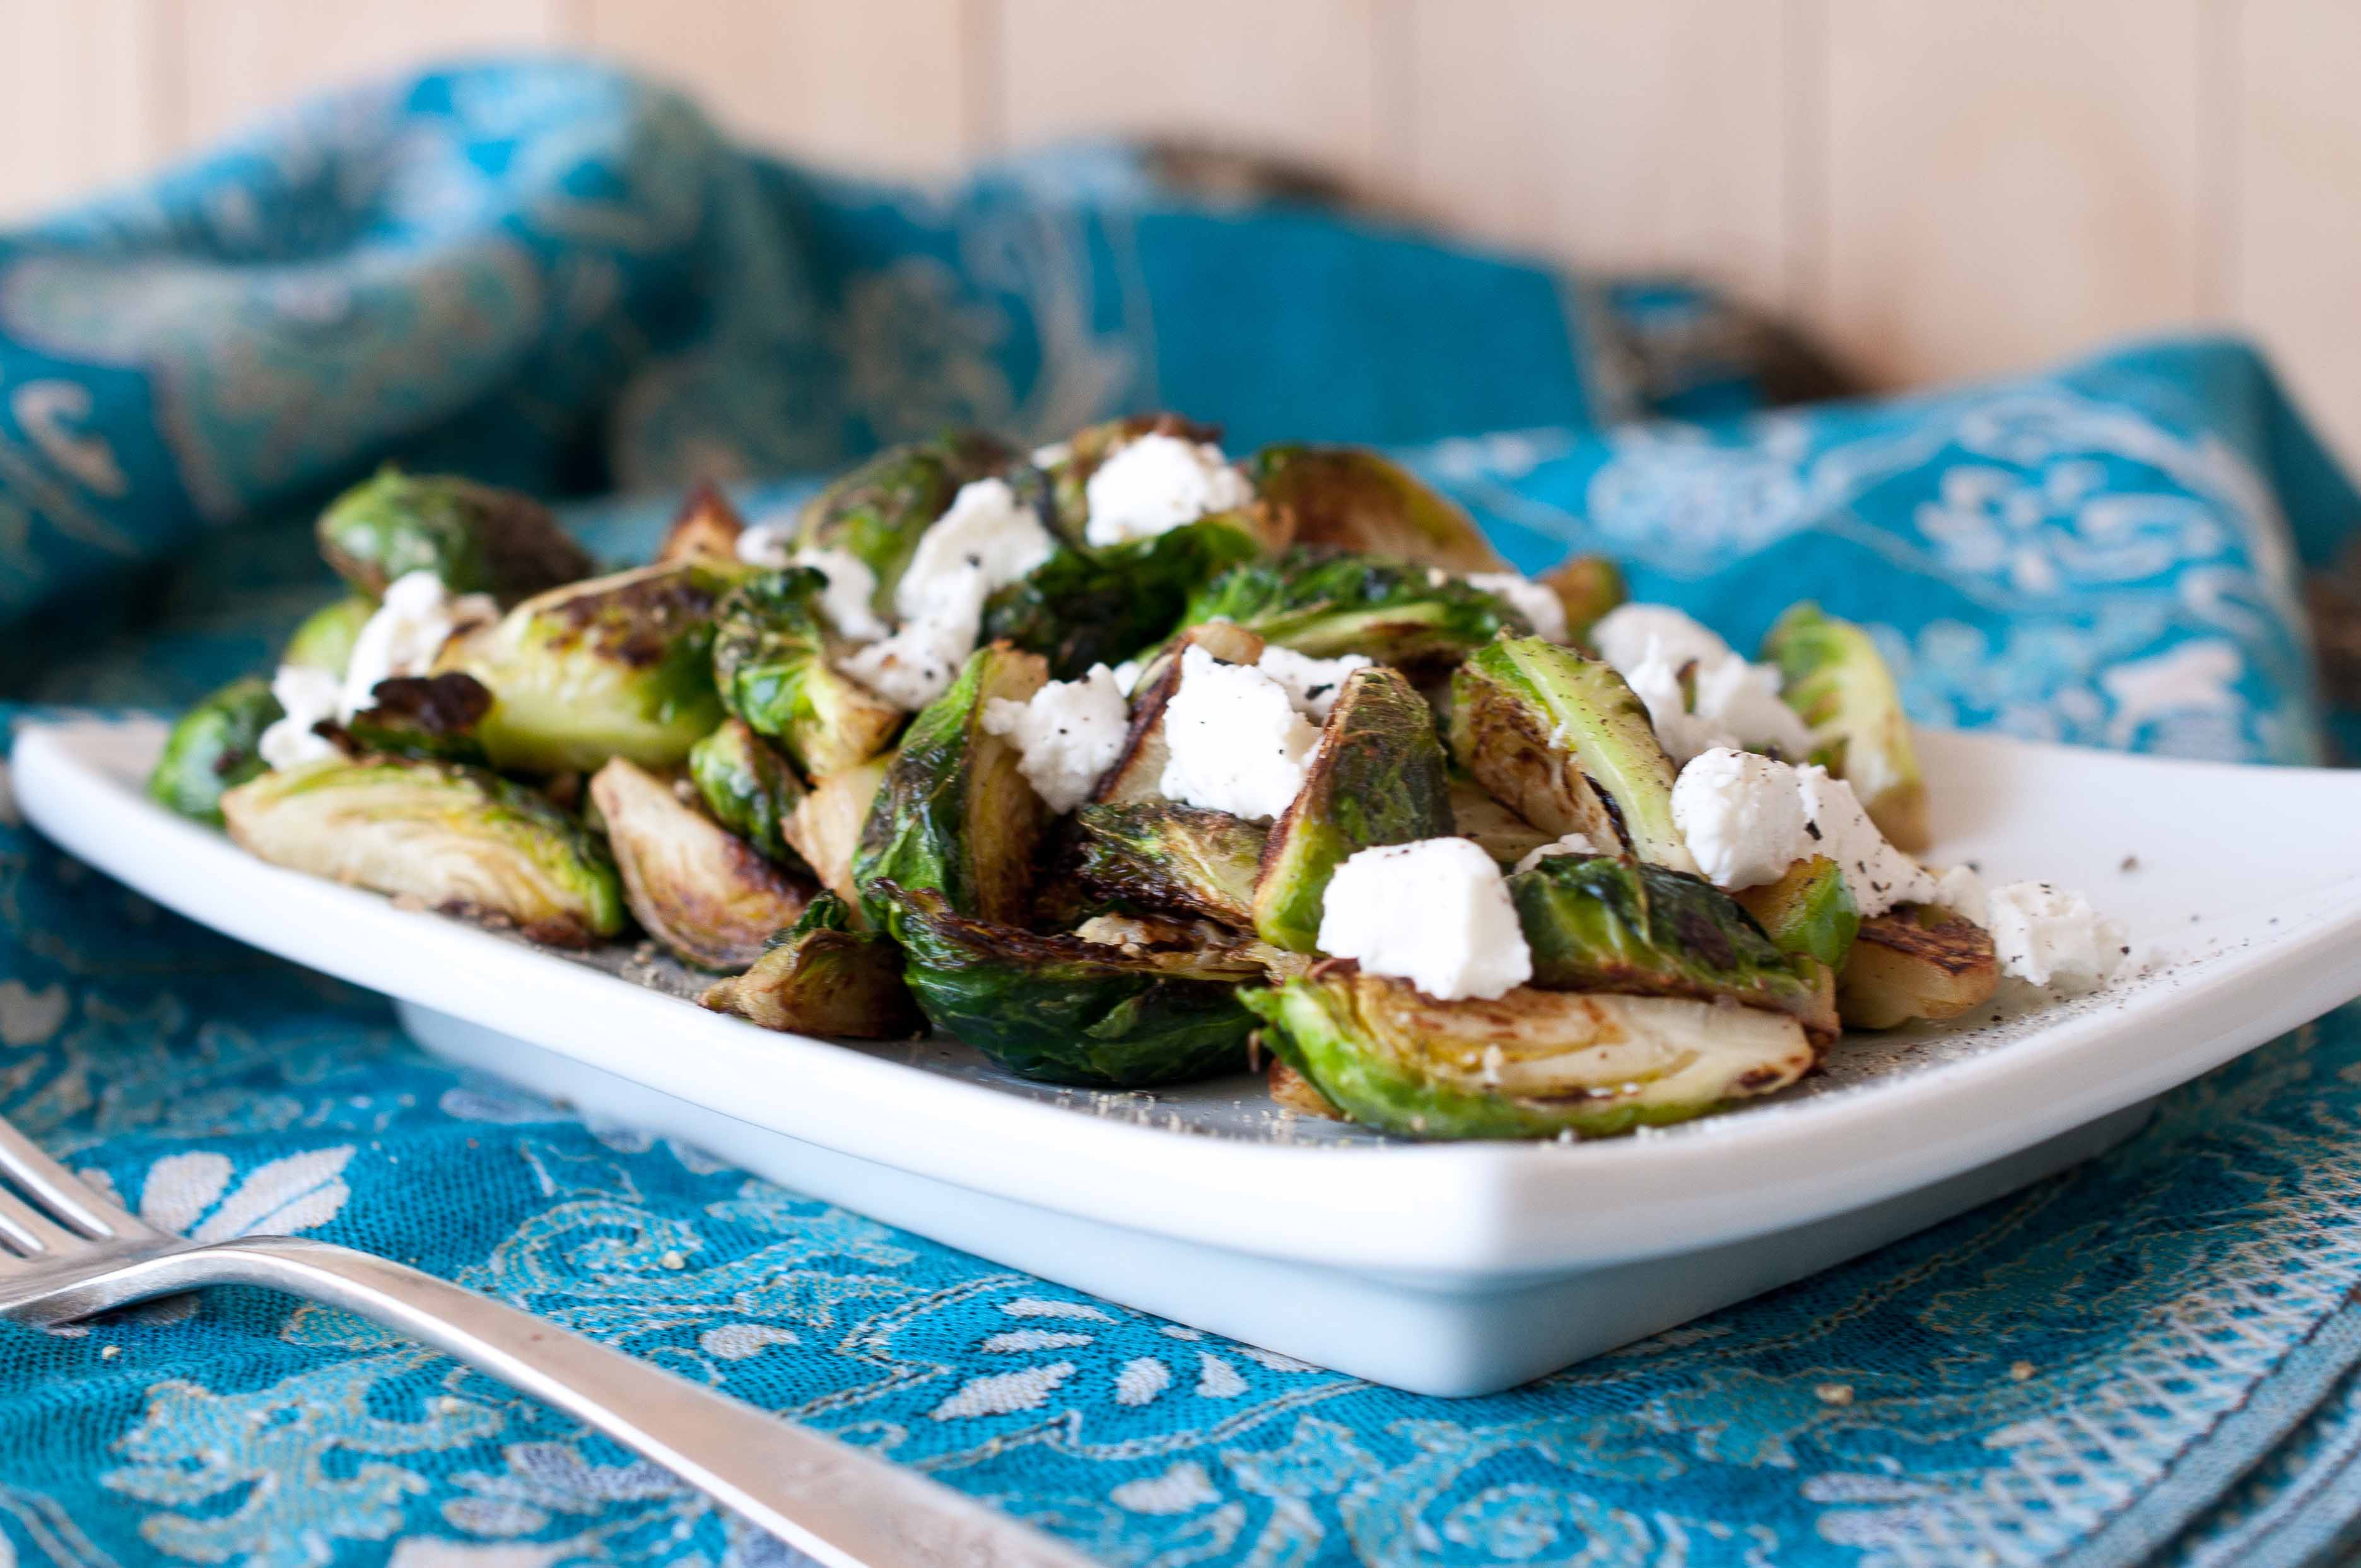
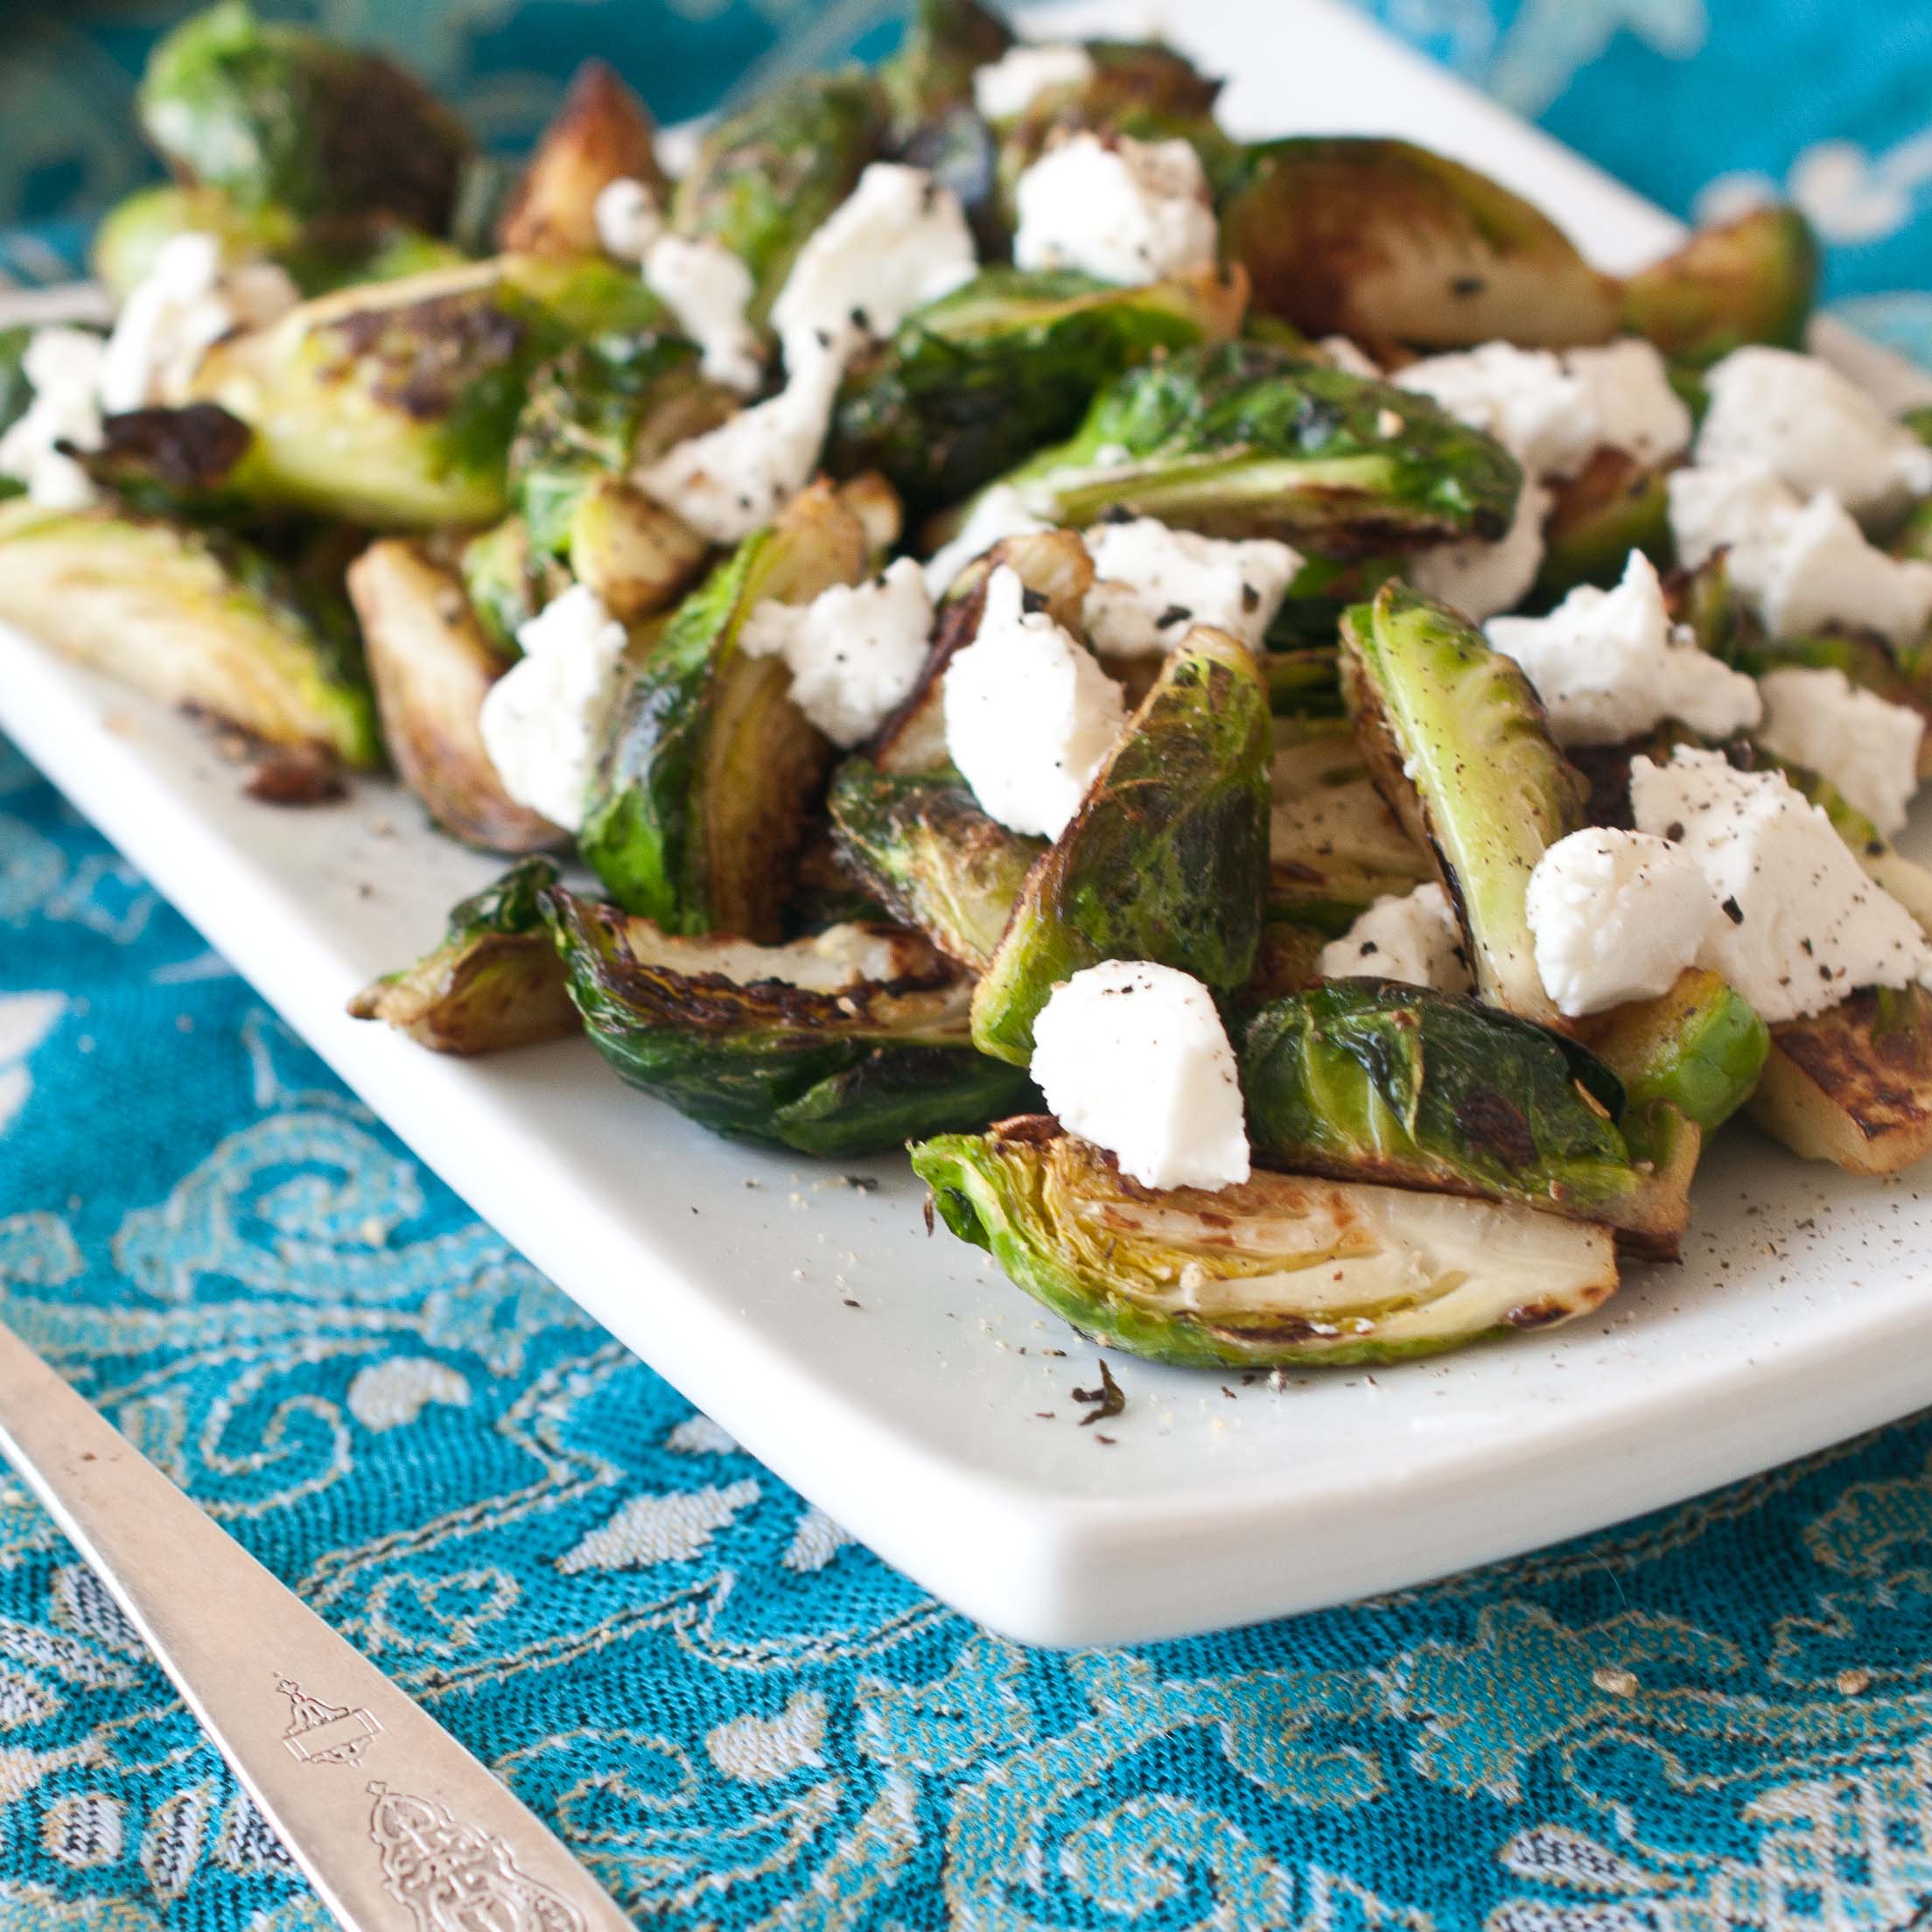
Sauteed Brussels Sprouts With Goat Cheese
3 tbs olive oil
3 cups Brussels sprouts, cut into quarters
1/2 tsp course salt
1/2 tsp fresh cracked pepper
small pinch of cayenne pepper
2 oz goat cheese, crumbled
(makes 4 side dish portions)
In a large sauté pan, heat the olive oil over medium high heat until hot and shimmery. Add the Brussels sprouts, tossing frequently until browned and fork tender. Turn off heat, add the salt pepper and cayenne, toss to coat. Add to a plate and top with goat cheese.
I stole this idea from my friend Tori. She is the genius behind The Shiksa In The Kitchen. And if you watch the morning news, anywhere in America, there is a chance she cooked up something special on your TV. She is a big hit in New York and San Francisco especially, but can you blame them? She’s gorgeous, smart and nicer than you could ever expect.
Even when the inevitable day comes when she gets her own cooking or travel show, she will be the girl who sits in the airport terminals between flights and answers your cooking question via twitter, because she’s that nice.
We met over crayons and wide ruled paper in Mrs. Newets 4th grade class room. We lost touch when I moved to Eastern Washington, because we are both older than the internet, but met up again through blogging. Which is one of the reasons I love blogging. And why I love when my friends in the computer, become real life humans who call me on the phone and invite me to have lunch with Mario Batali.
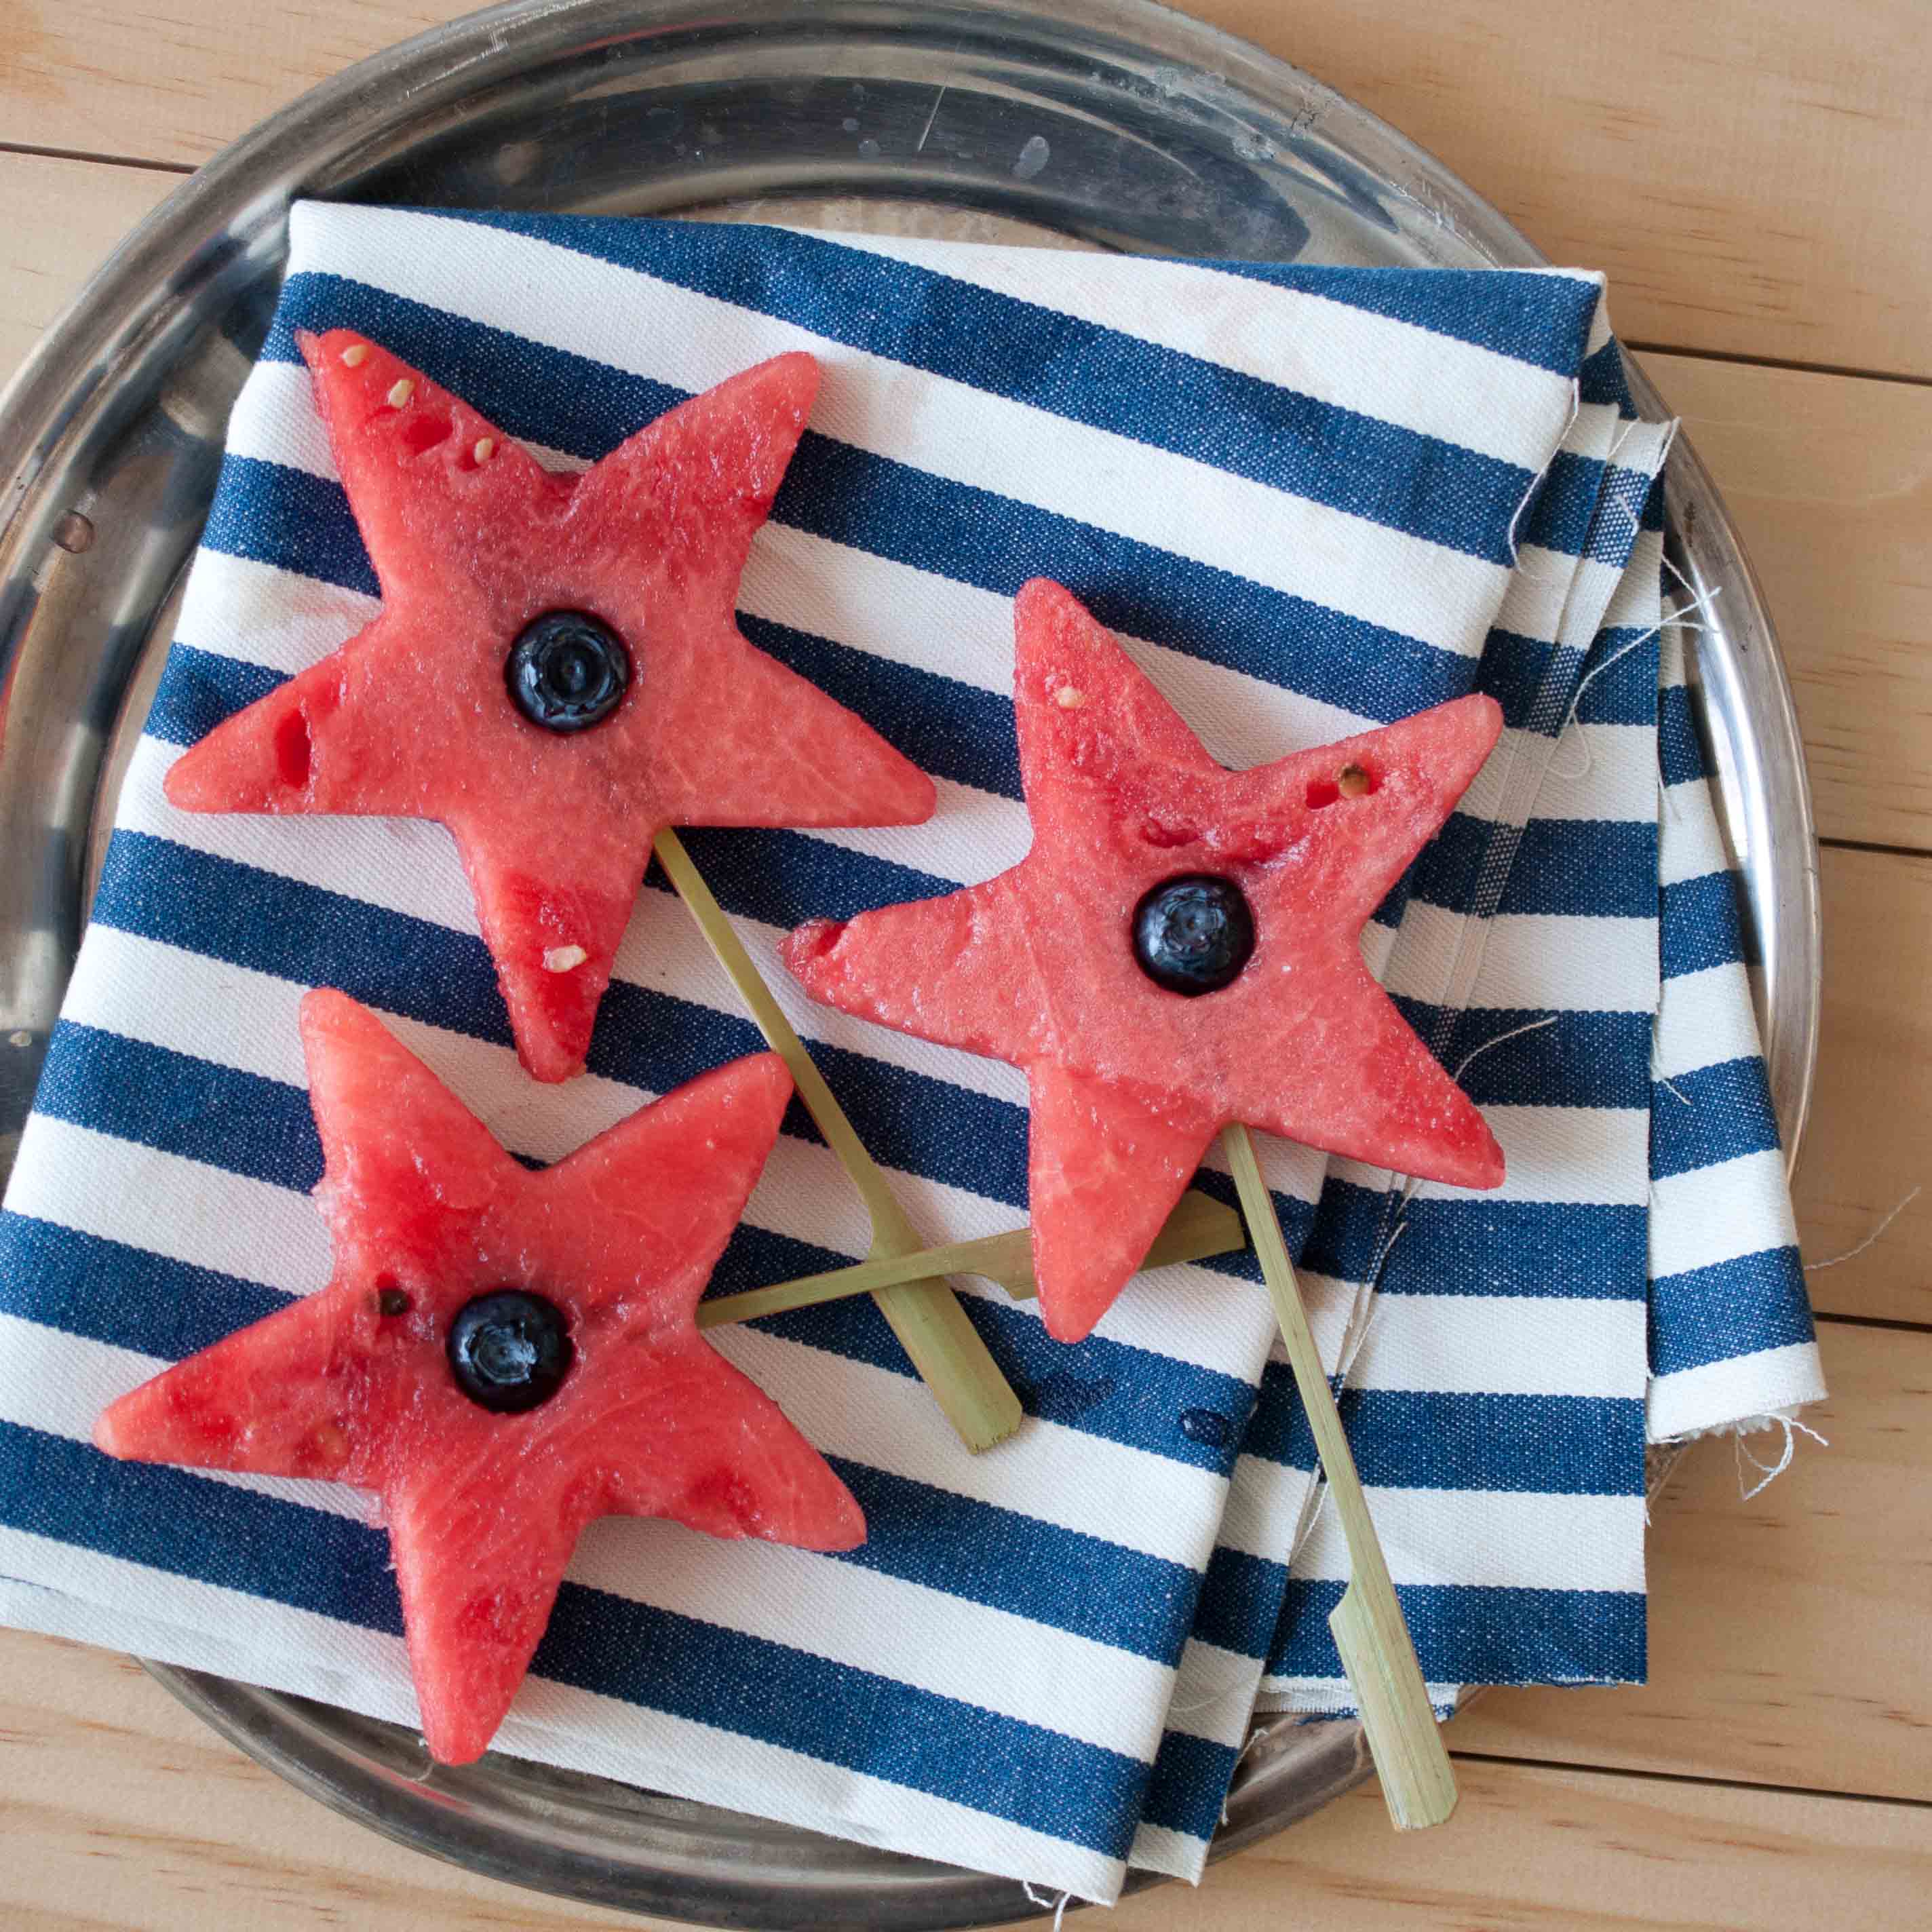
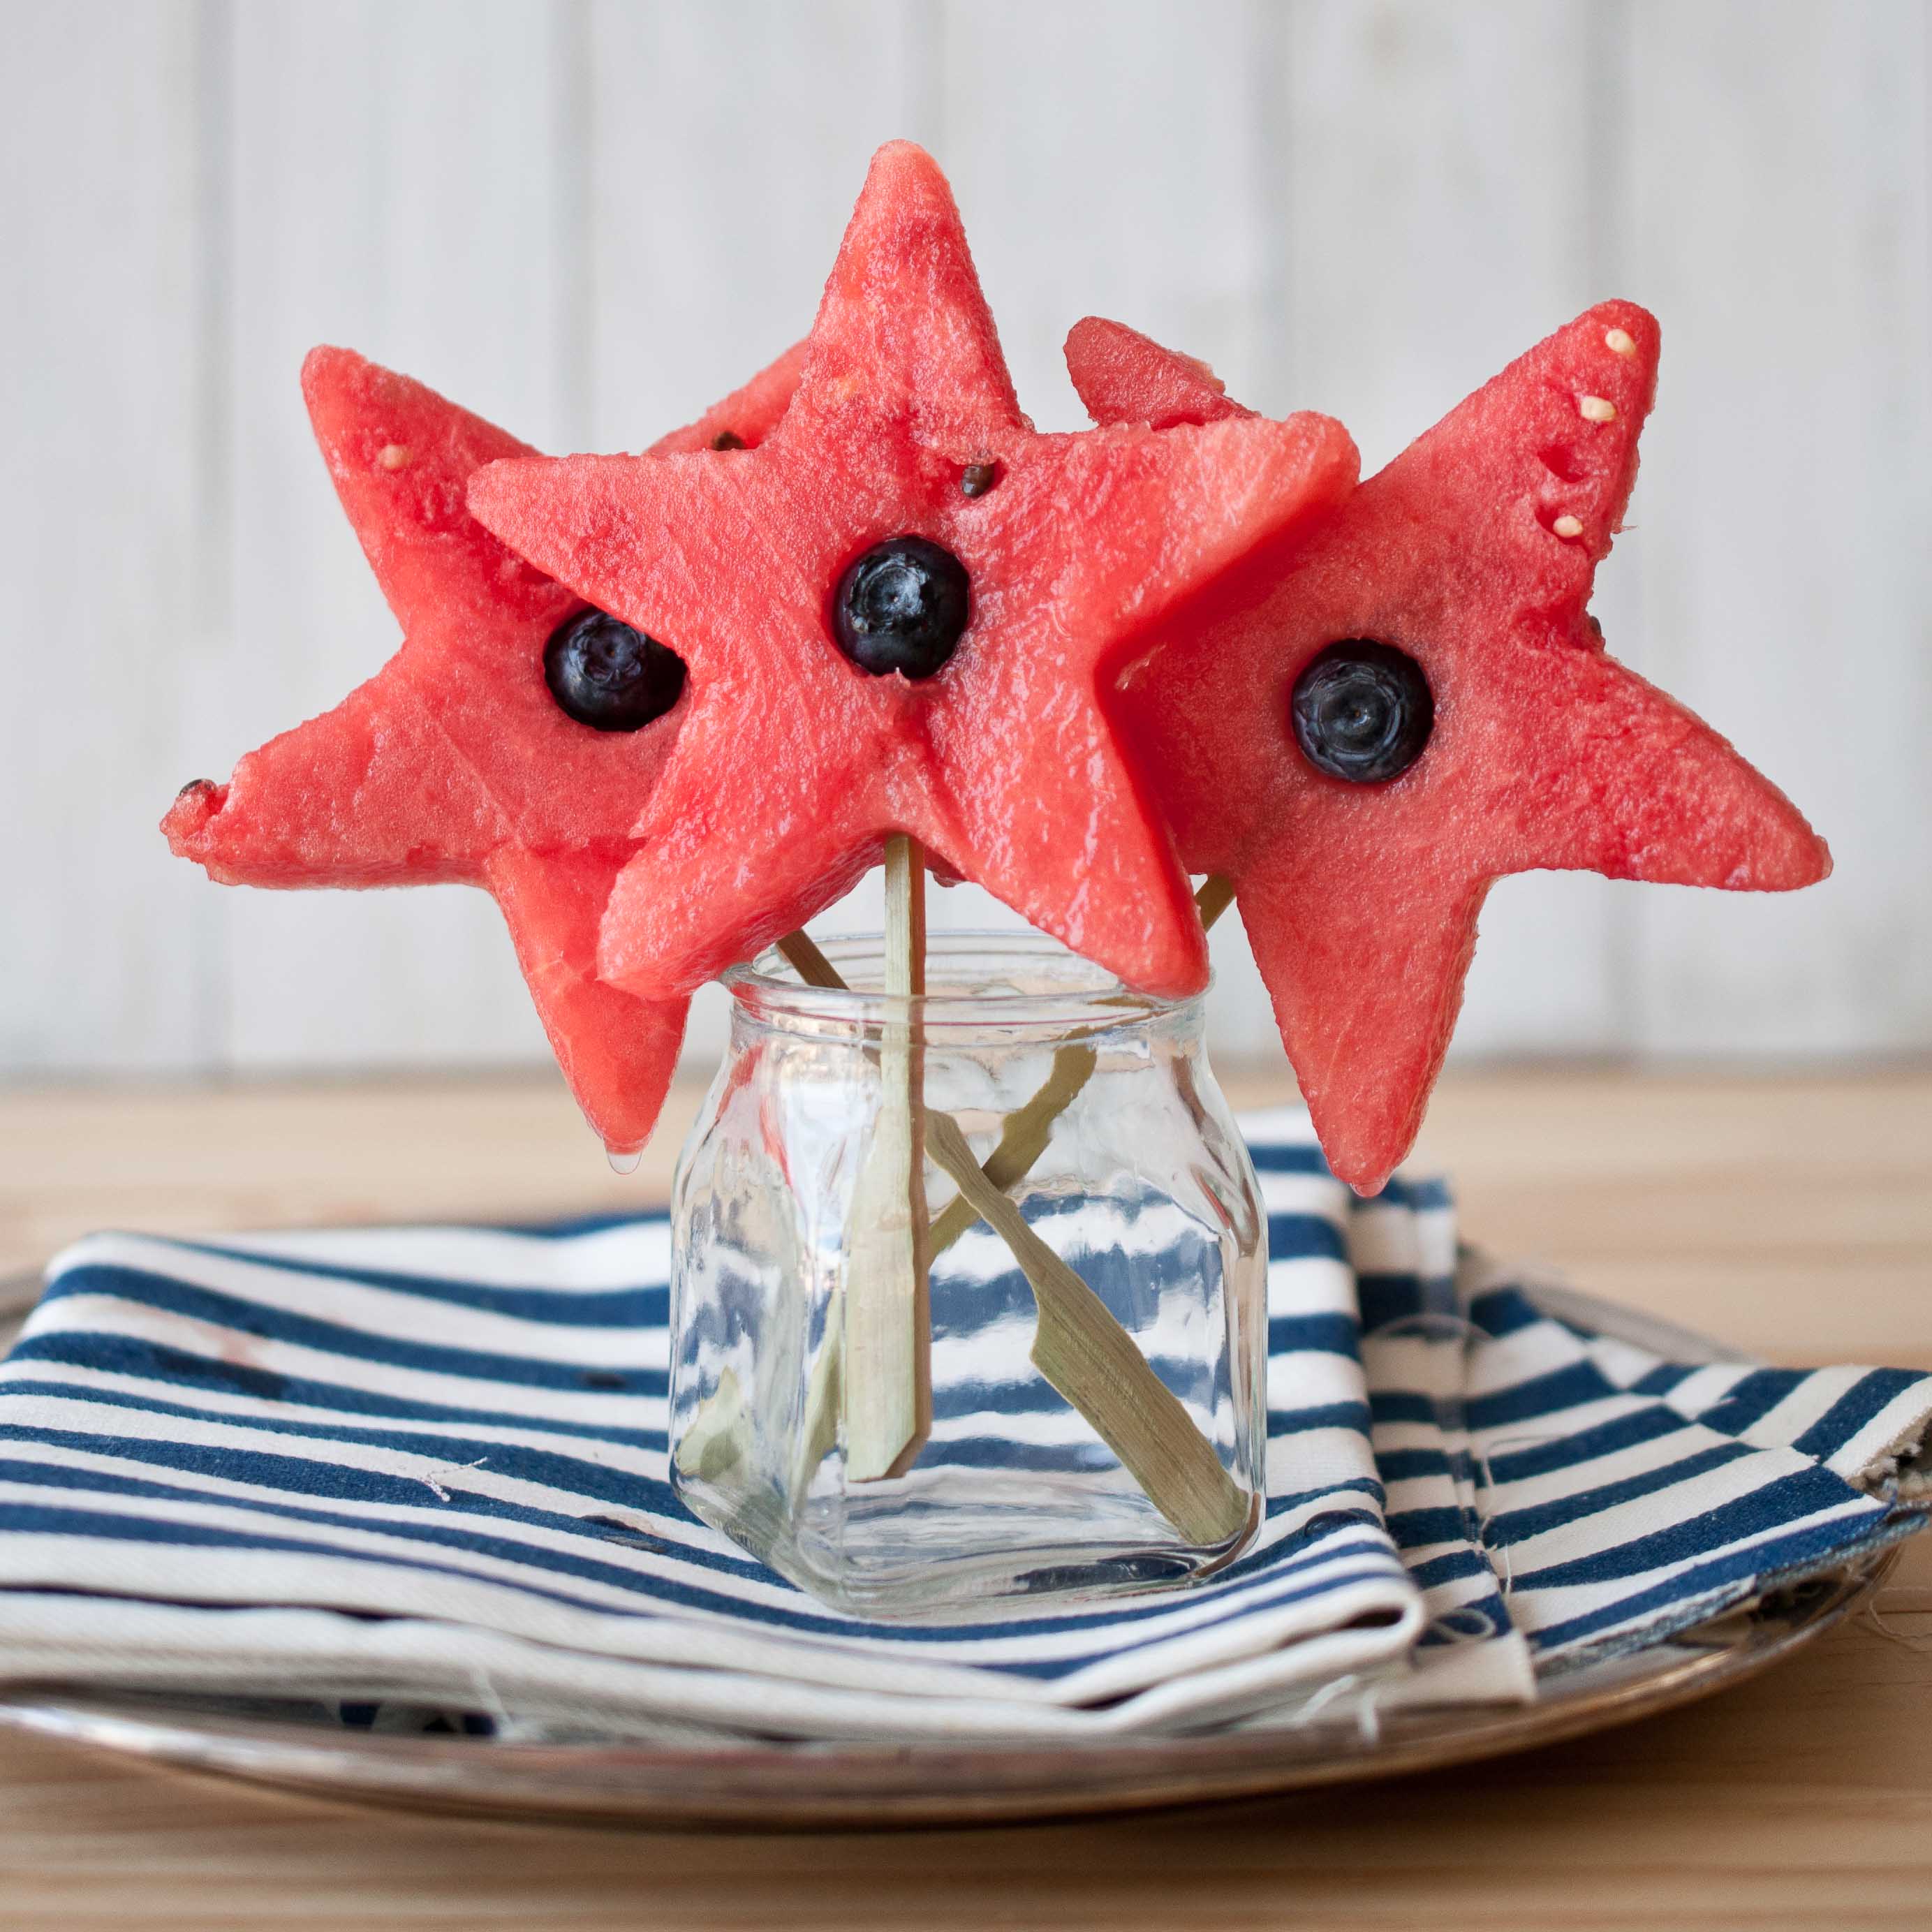
I’m going to show you how to make these watermelons into stars for that I Heart America holiday that is rapidly approaching, but you’ll have to go over to her blog to find out how to put booze in them
Make sure you do, because whats more American than produce and booze? Good Bless the USA.
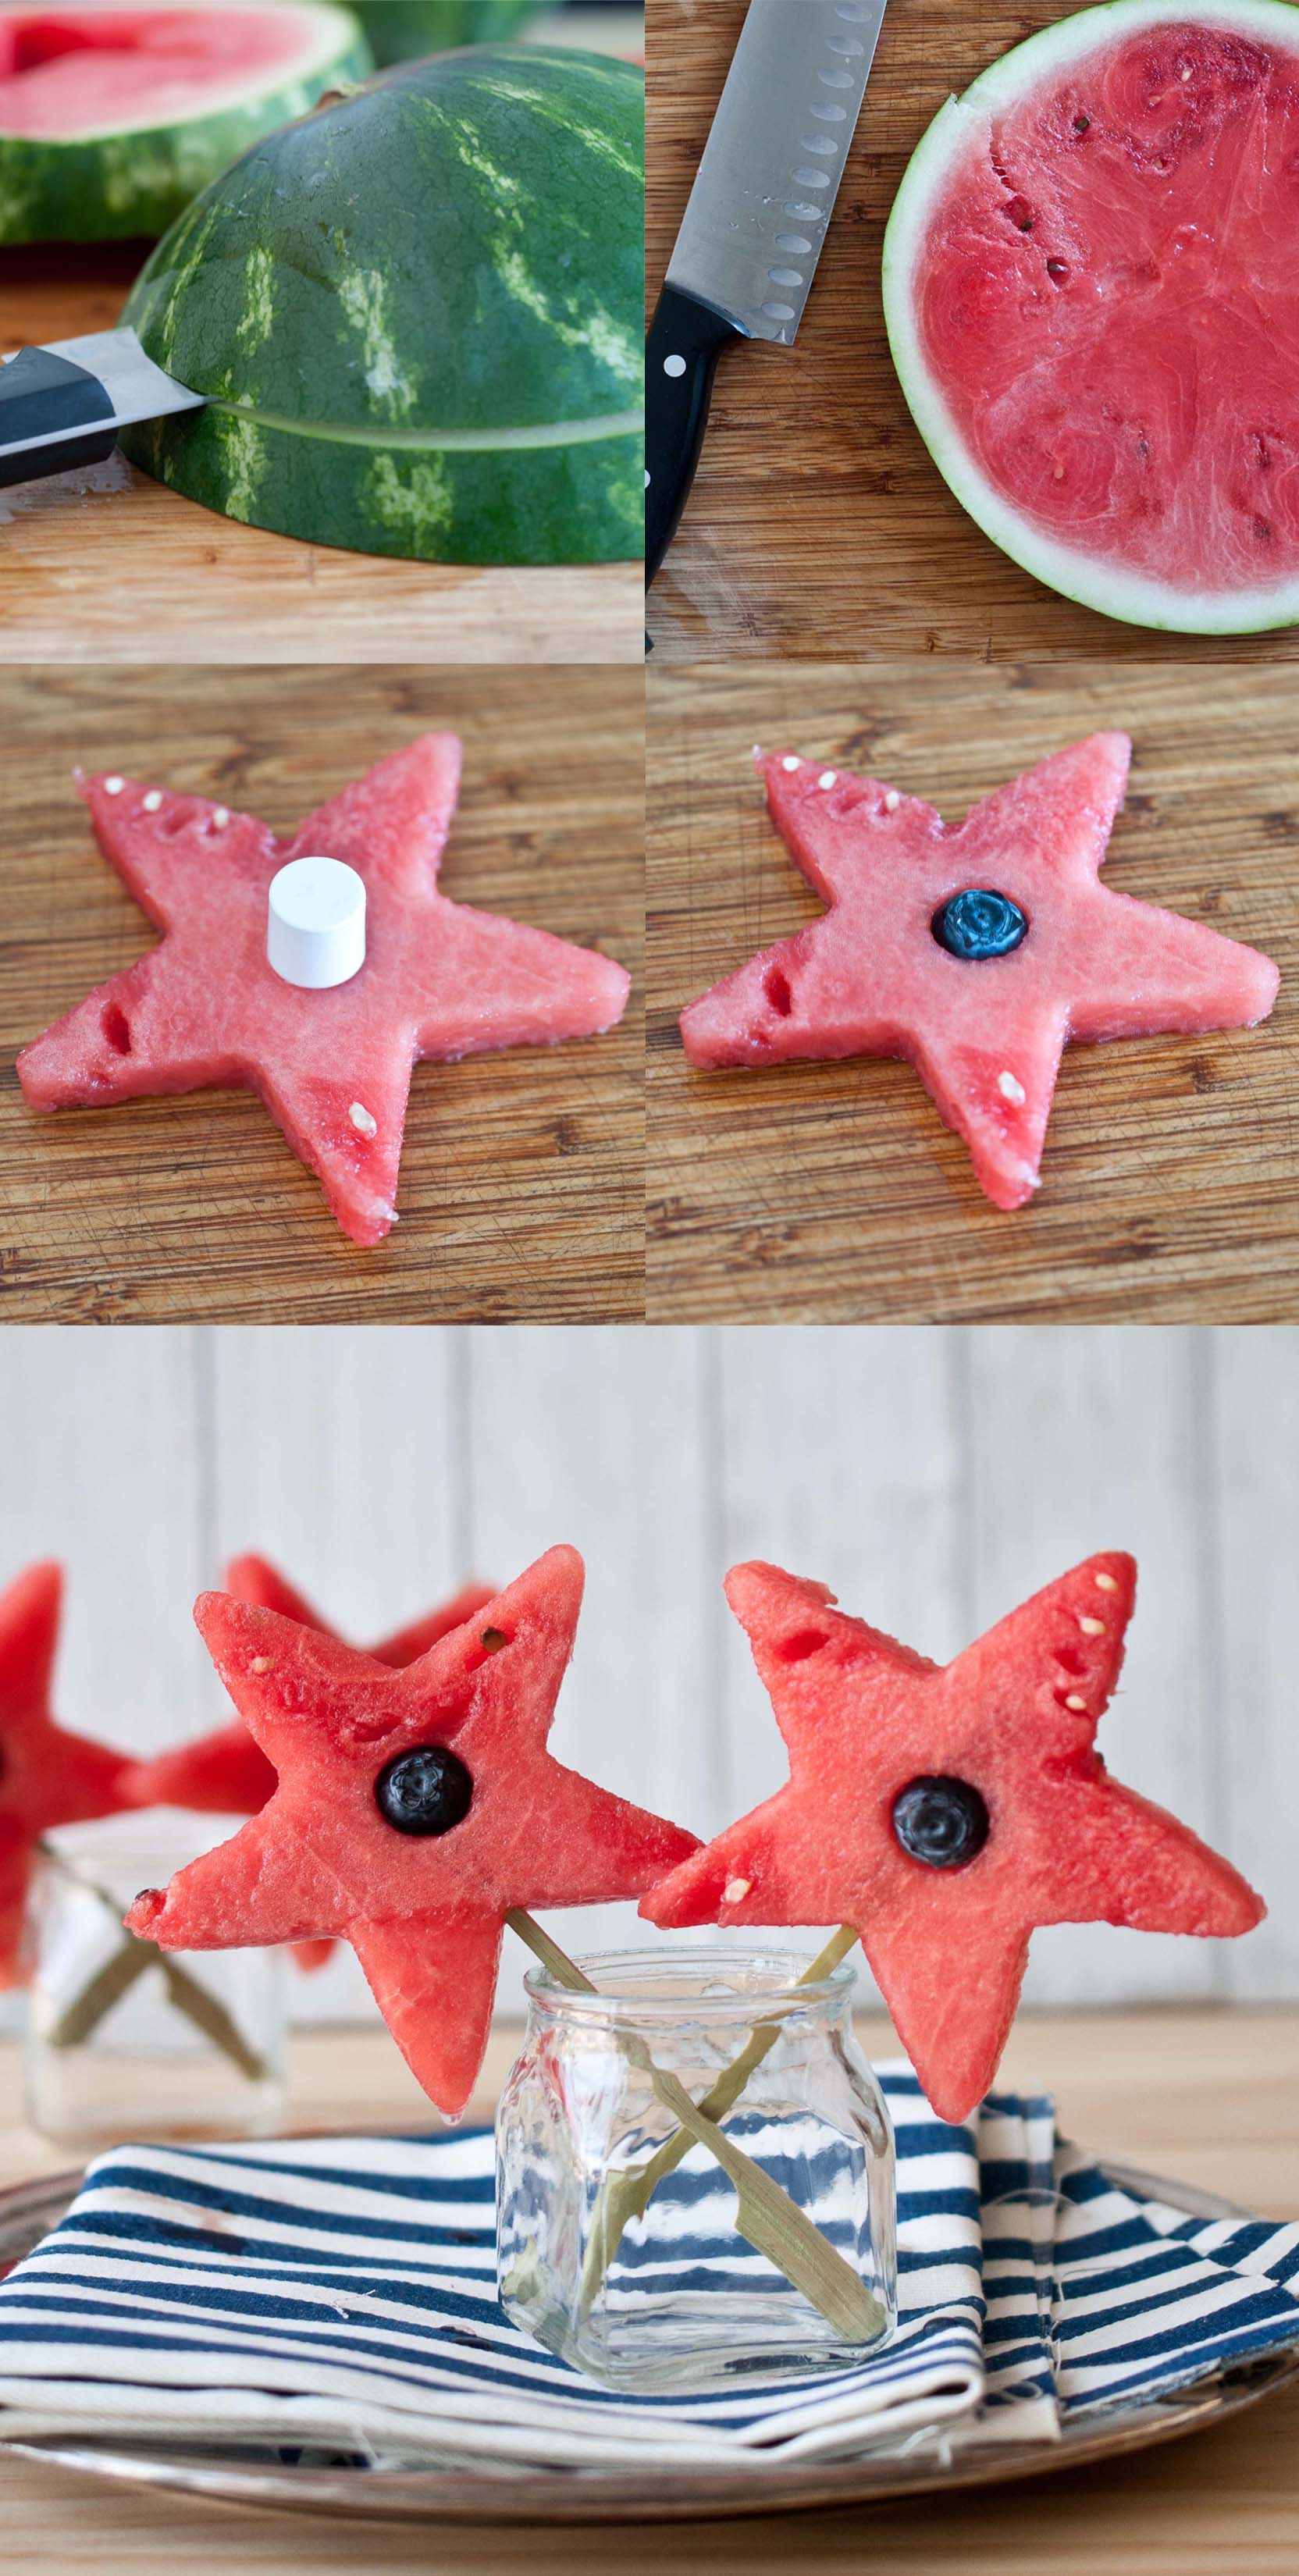
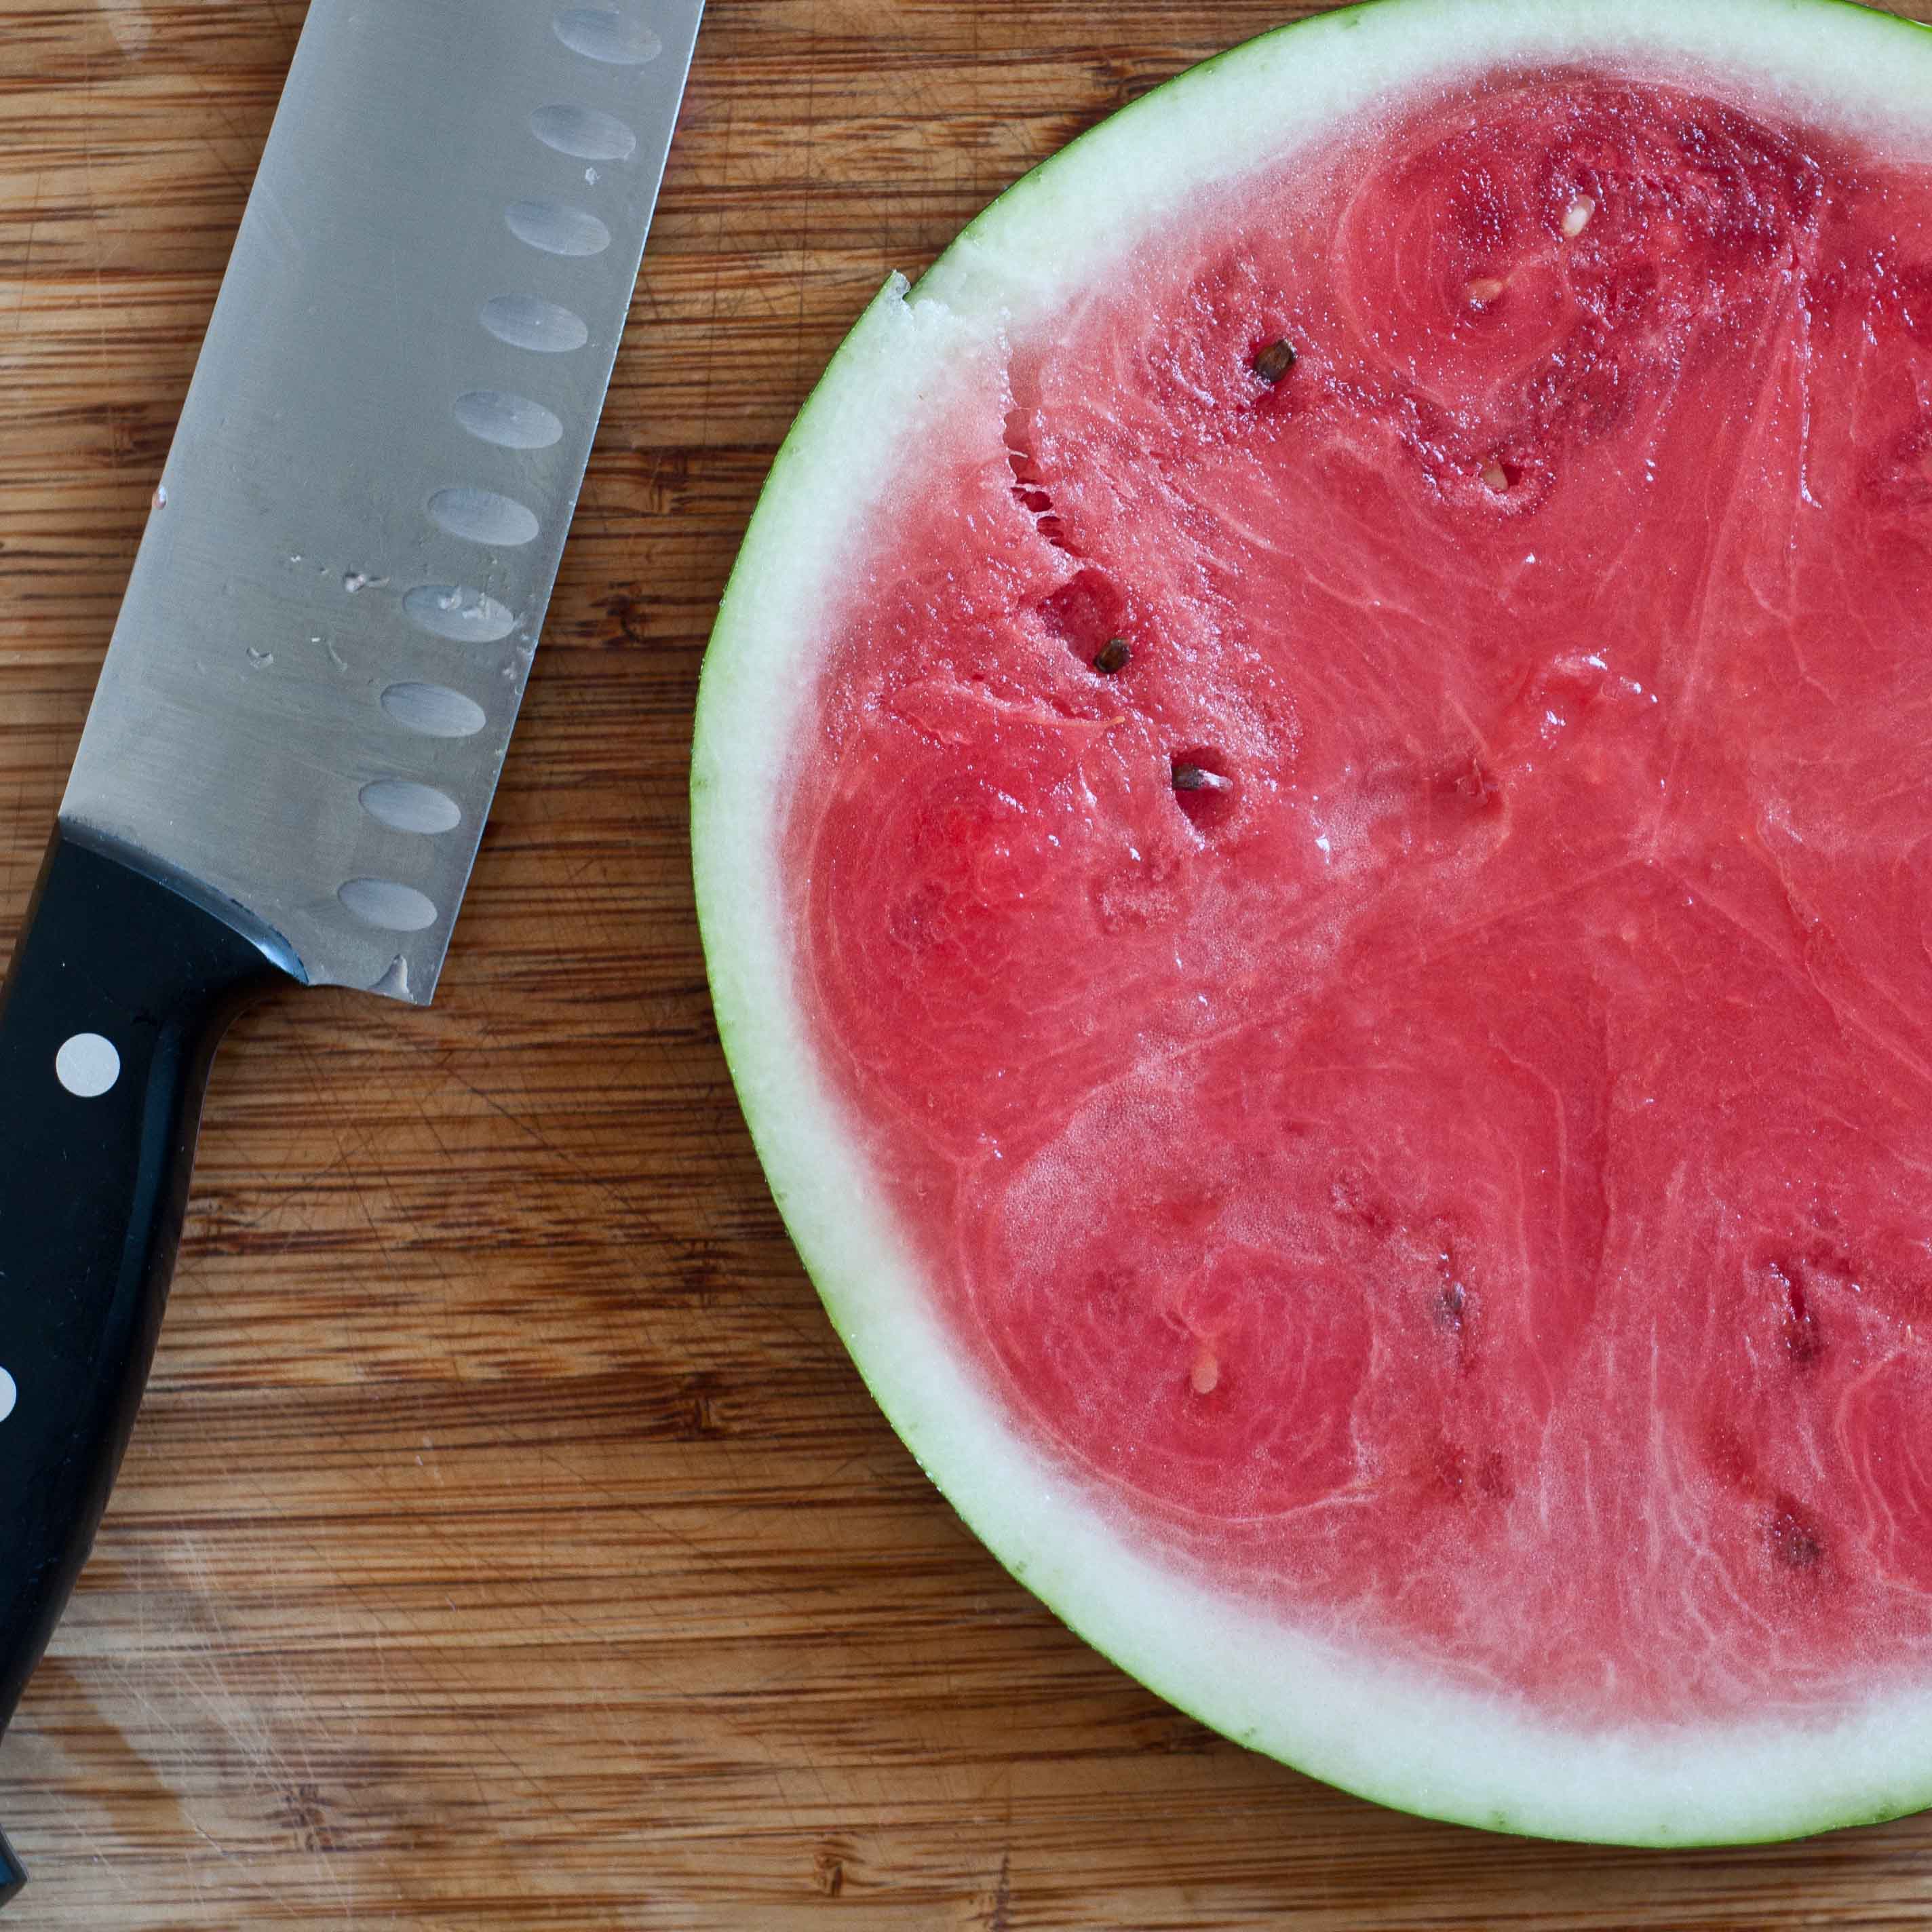
Lay the rings on a flat surface and cut out as many stars as you can with a Star shaped cookie cutter. You should be able to get two or three stars out of each ring. If the stars are too fat, cut them in half width wise to make two thinner stars. Be sure to reserve the watermelon "scraps."
Step Three:
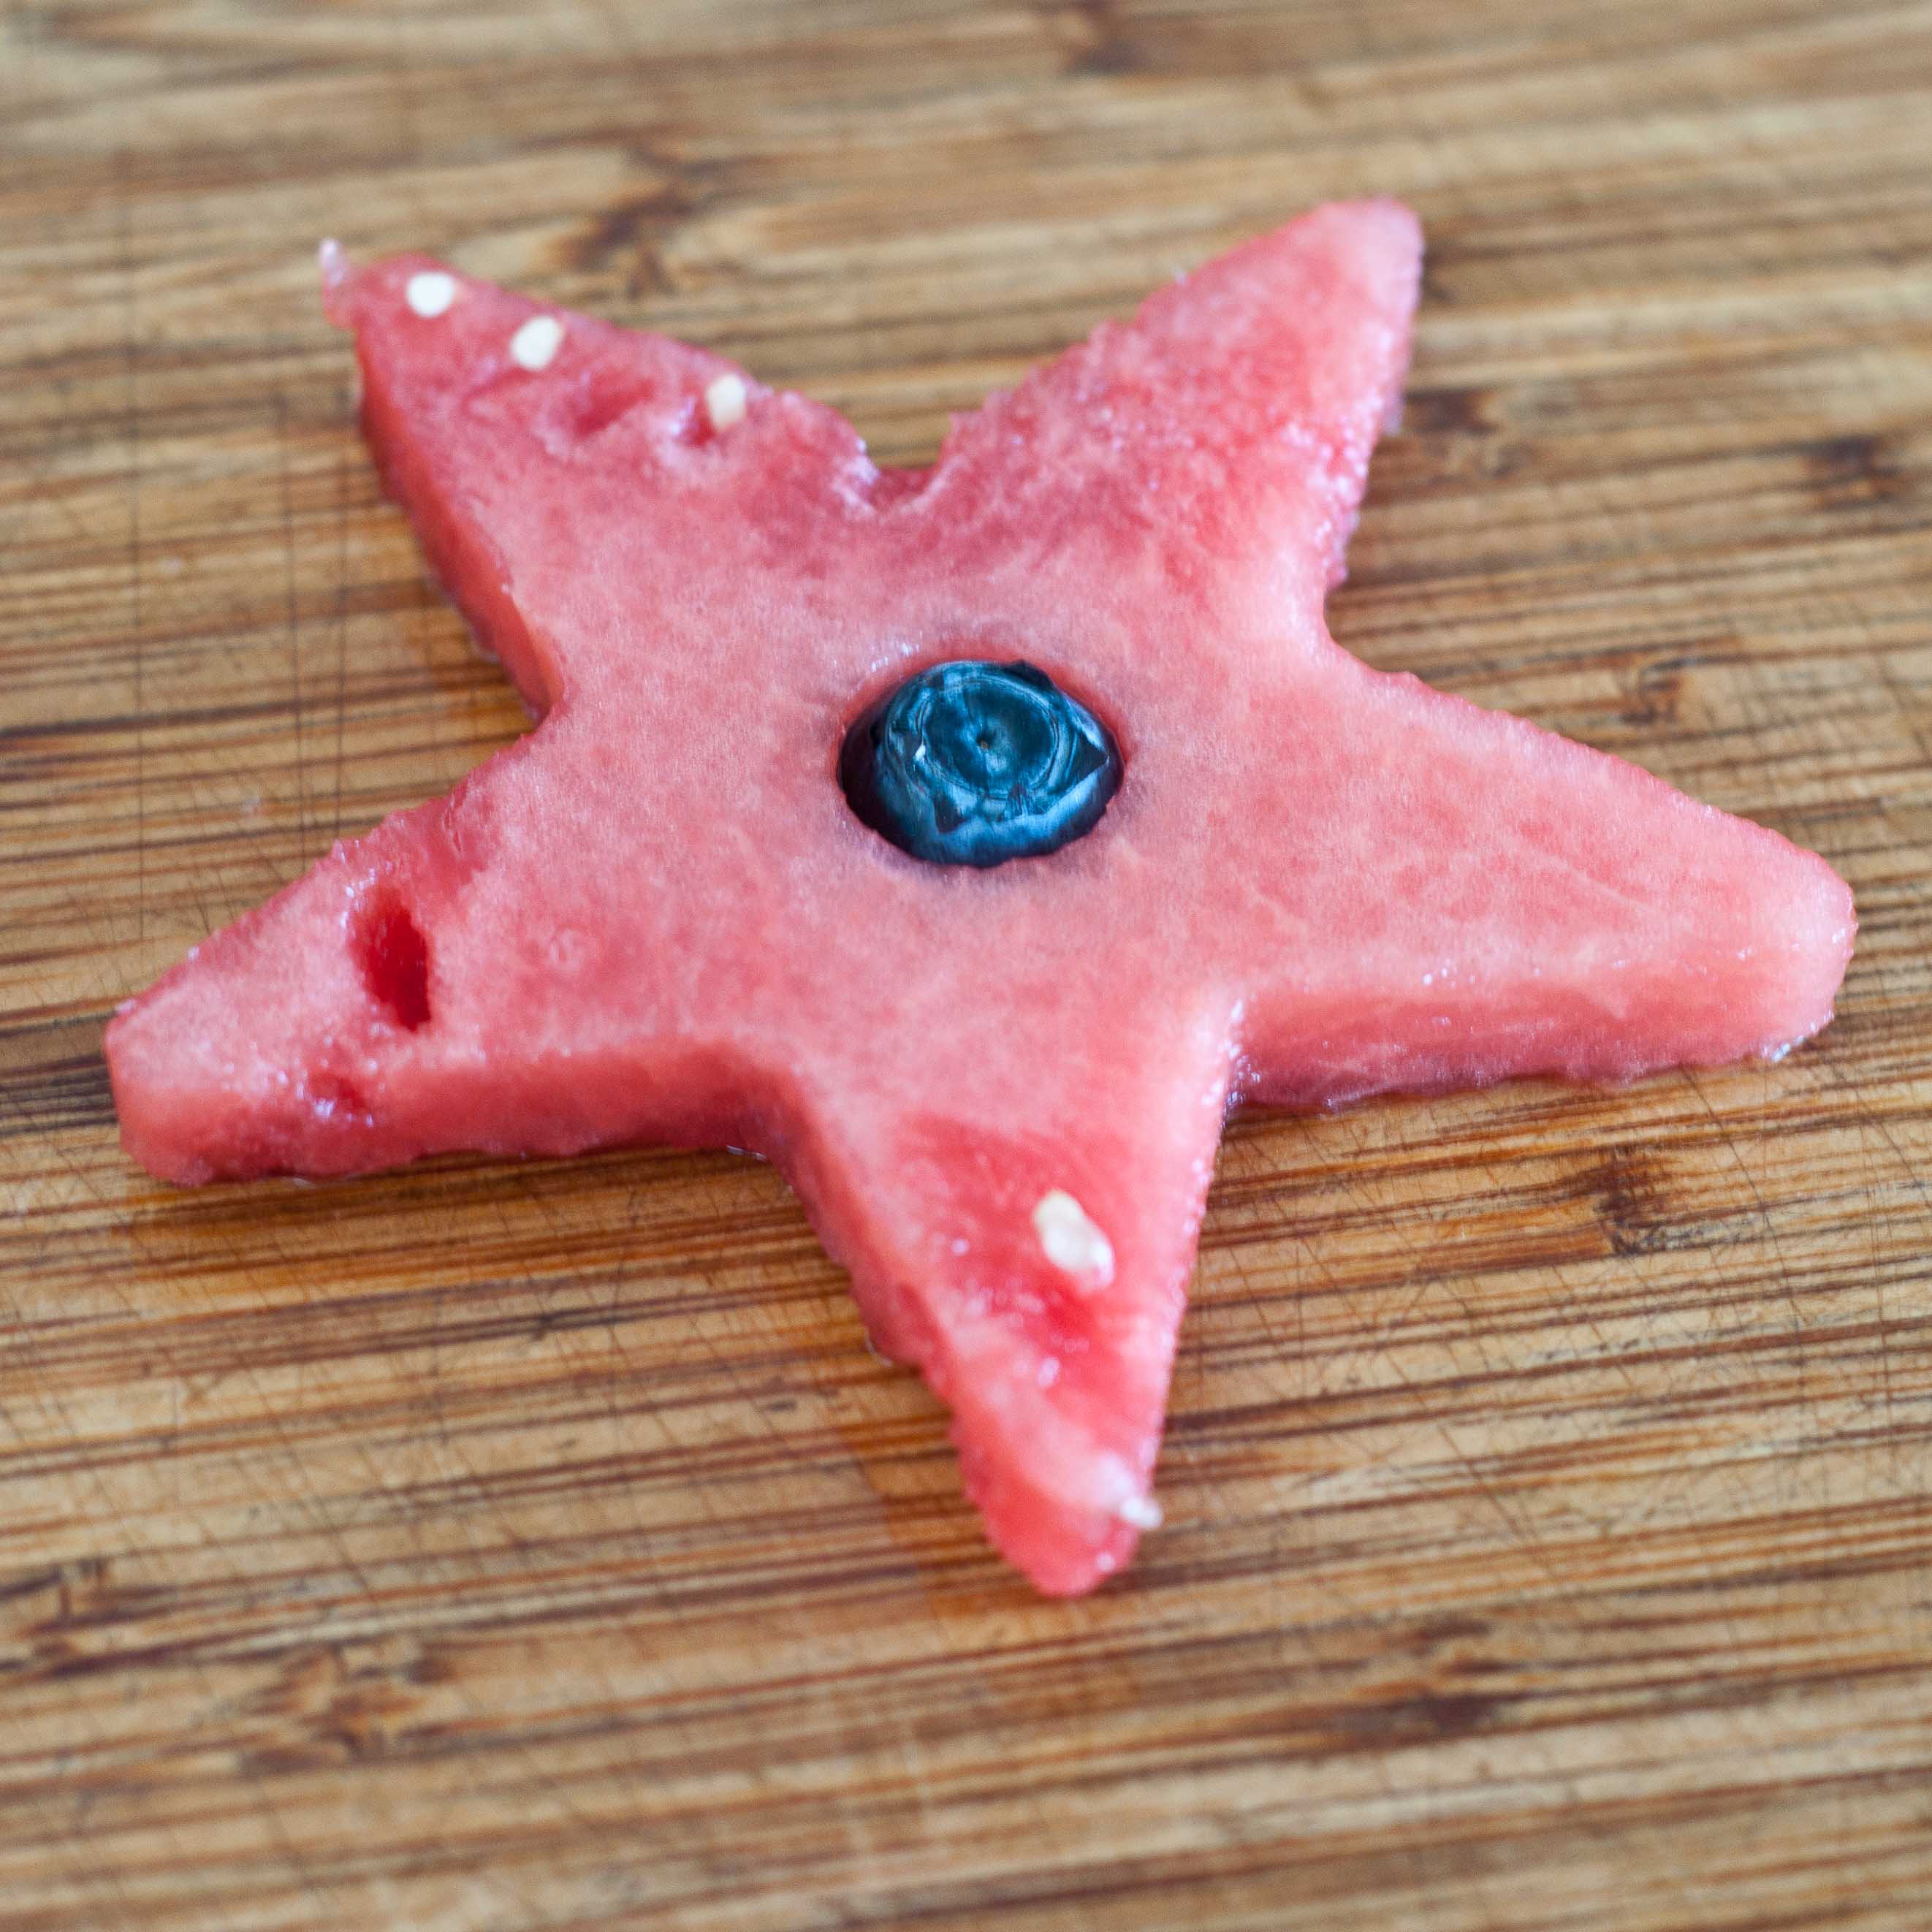
I know this is a little skeevey, but bear with me, use the cap to a Chapstick tube to cut out a hole in the center of your star. It’s odd that I’m asking you to go find a tube of Chapstick to add to your kitchen equipment, but if you are anything like me, you have handfuls of those things in every drawer and purse in your house.
Just push the cap all the way through the center of the star. The hole is the perfect size for a large blueberry.
Step Four:
Place a blueberry in the hole in the center of the star.
Step Five:
Press a six inch skewer into the watermelon and through the blueberry.
Step Six:
Go to Tori’s site and she will tell you how to turn these suckers into boozy treats!
What to do with all those leftover Watermelon scarps:
For years I’ve been insisting that I hate coconut. Ever since those crappy Almond Joys and Mounds bars started taking up valuable real estate in my orange plastic pumpkin during childhood Halloweens, I convinced myself that coconut was to blame. Assaulting me with it’s odd texture that wasn’t quite crunch and wasn’t quite chewy and it definitely was not caramel.
And with the loathsome of all Trick or Treat offerings, the Neapolitan Sundaes as a side kicks in my Trow Away pile of post Halloween candy sorting, my distain was cemented. I hated coconut.
Even when I discover Malibu Rum in college, and I would only buy coconut scented sunscreen because the smell made me blissfuly happy, I still wouldn’t release my grudge.
And even, after years of growing up with the idea that International Cuisine was Costco Lasagna and Taco Bell, I figured out that I adored Chicken Panang so much I wanted to bathe in it, still my aversion persisted.
And when I waitressed in dozens of mid-level family style restaurants, with shrimp shooters and extreme fajitas avoiding conversation about my Flare, and I was introduced to the white trash joy of Coconut Shrimp, it changed nothing.
I hate it, I’m serious.
It wasn’t until I read a post from my friend Julia that It all clicked. I don’t hate it. I hate crappy candy. Huge difference.
I went directly to my nearest store and bought some Bob’s Red Mill Coconut and set out to bake.
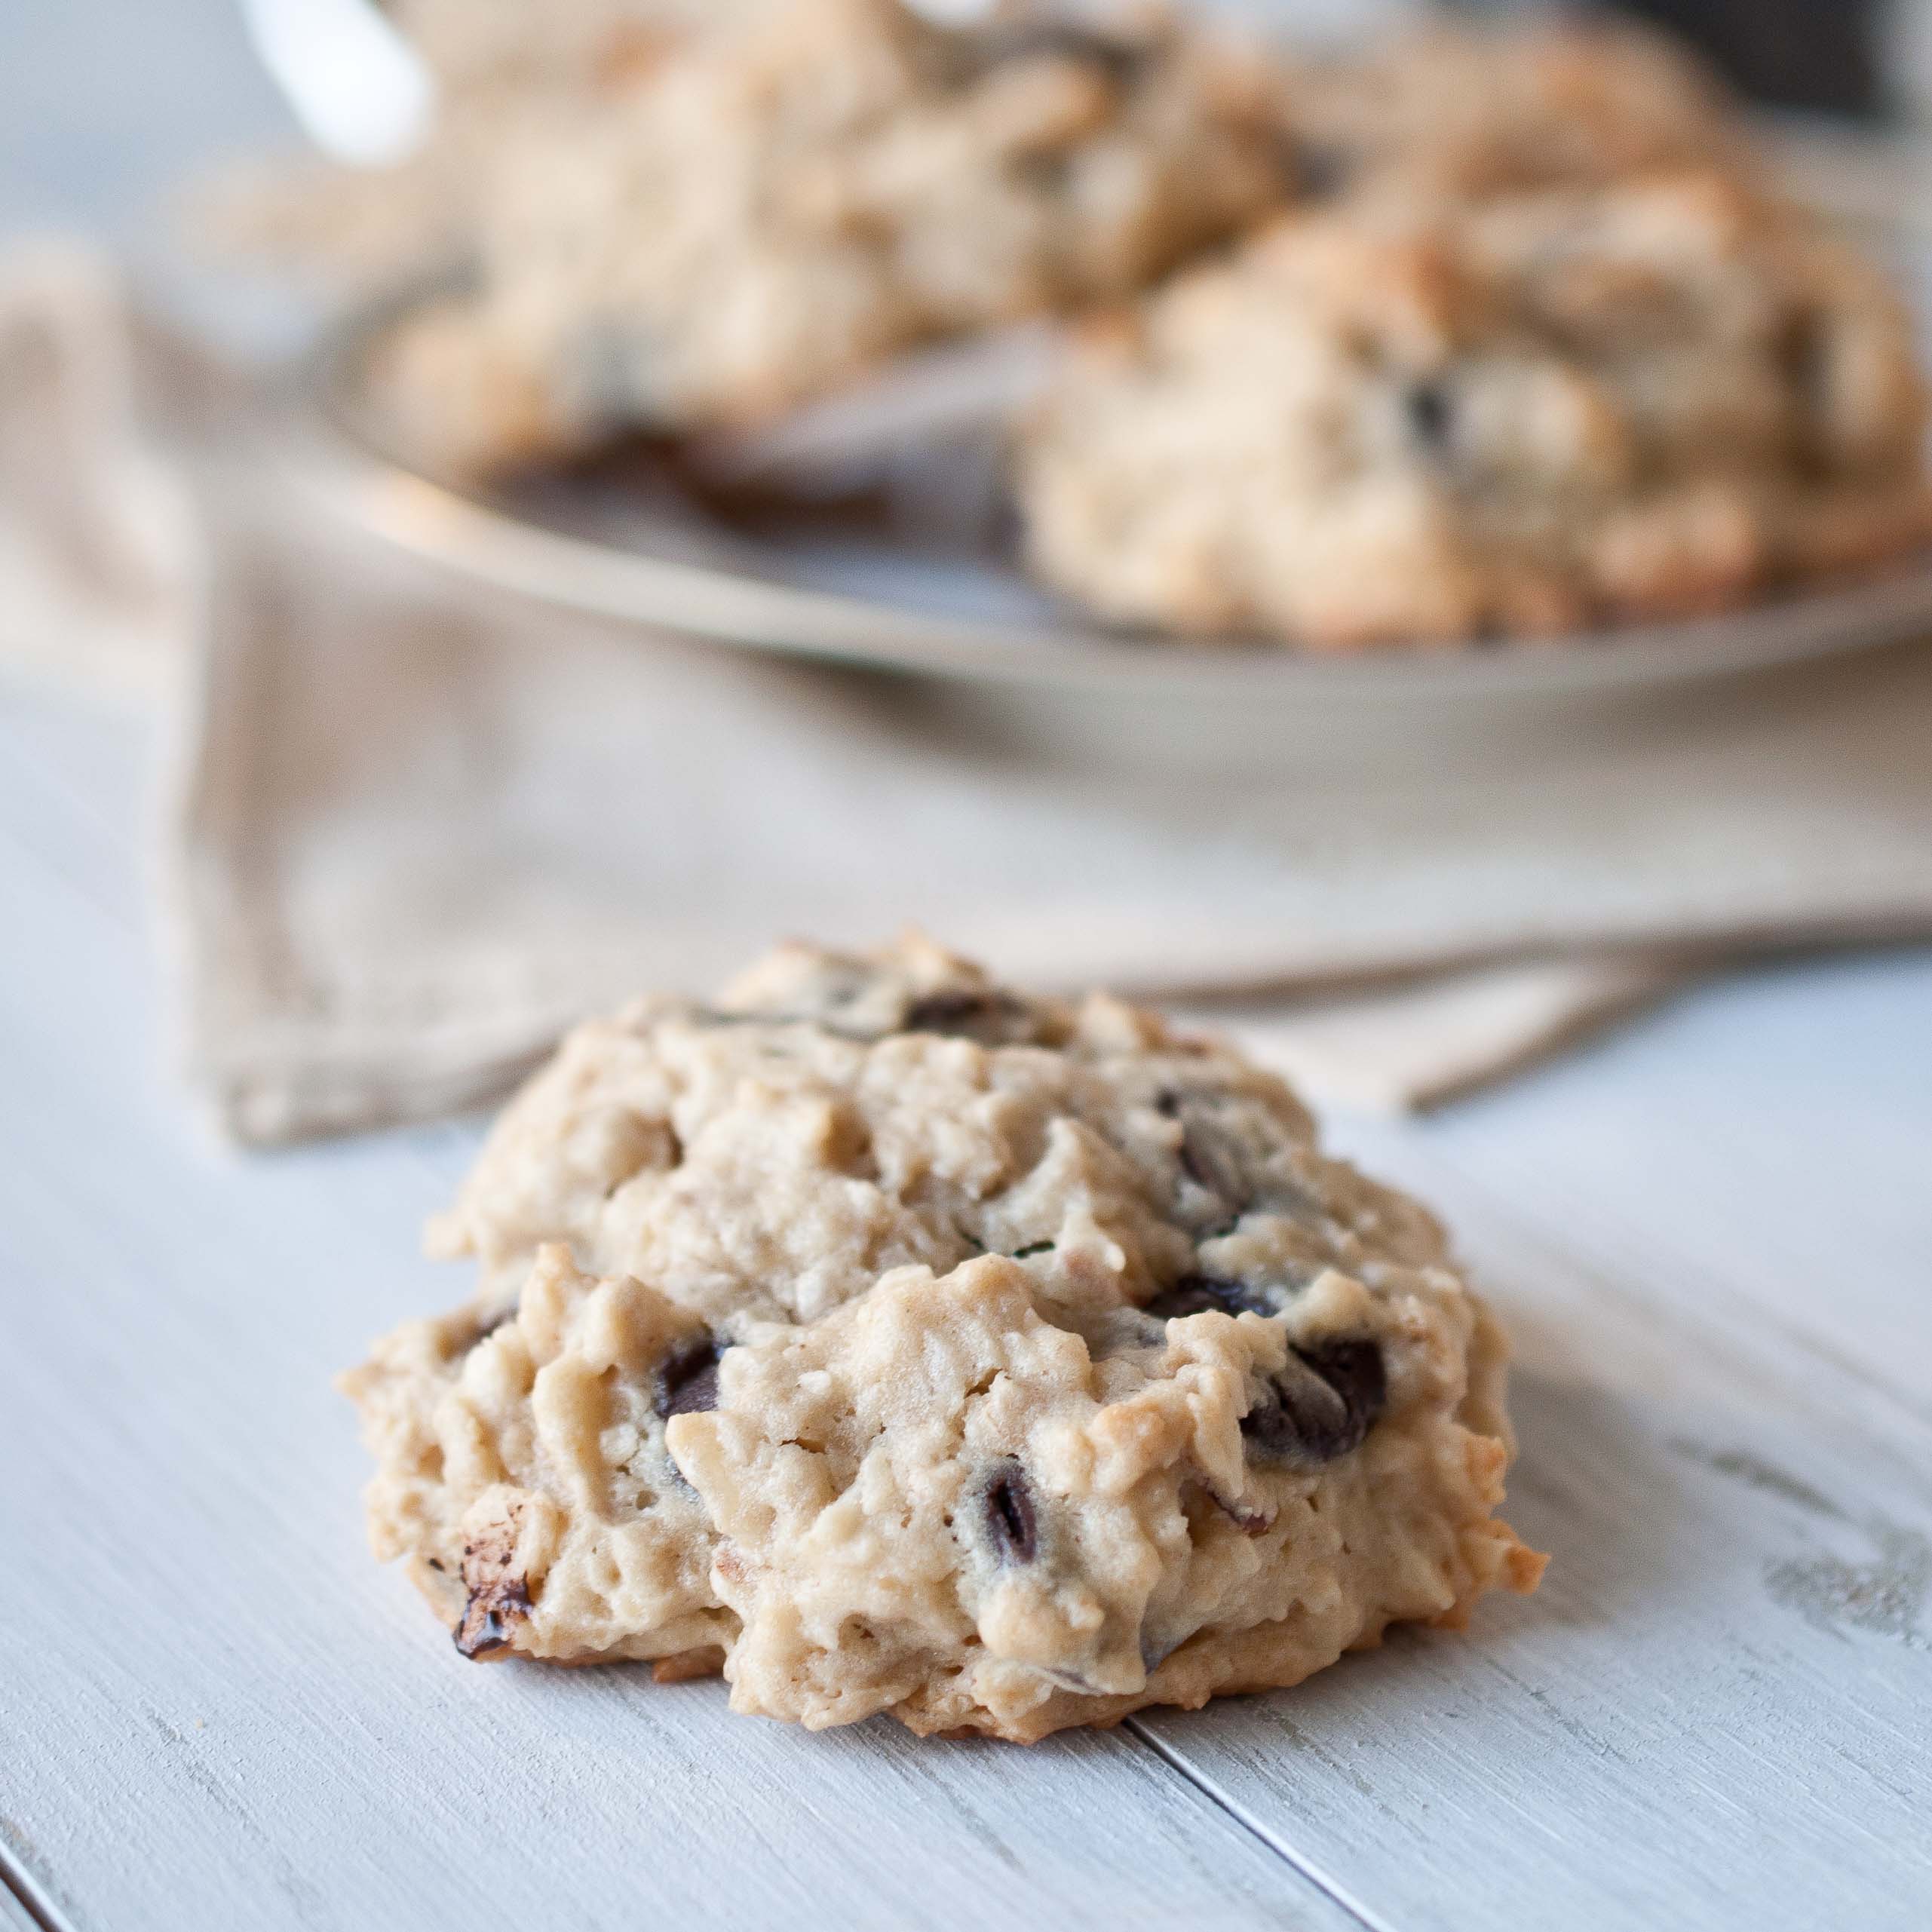
I made these for some friends who came over for a poker night, one of whom said, "No thanks, I don’t like coconut."
After I begged and pleaded for him to just take one tiny taste, he ate five cookies. Afterwards, he said to me: "I totally thought I hated coconut until I ate these cookies."
I have no idea what you mean.
Other than the fact that these cookies rule. And so does coconut.
My husband and I at Poker Night, not exactly winning,but having a great time.
Coconut Chocolate Chop Oatmeal Cookies
1 stick of butter
3/4 cup brown sugar
1/2 cup white sugar
1 egg
1 tsp vanilla
1/2 cup coconut milk fat (scraped off the top of a full fat can of coconut milk)
In the bowl of a stand mixer, cream the butter and both sugars. Add the egg and vanilla and beat on high until well combined. Add the coconut milk and beat until well combined.
In a separate bowl, add the remaining ingredients (other than the almonds and chocolate chips) and stir until well combined.
Add the dry ingredients into the stand mixer and mix on low until just barely combined. Add the chocolate chips and the almonds and mix again until barely combined.
Cover a baking sheet with parchment paper.
Using a cookie scoop or an ice cream scoop, scoop out balls approximately the six of a golf ball and place evenly on the baking sheet.
Refrigerate for 2 hours, up to 24.
Preheat oven to 350.
Bake for 20-22 minutes or until lightly golden brown. You don’t want to over cook these, so start to check on them at about 12 minutes in case your oven cooks way faster than mine. Especially if you skip the refrigeration step, room temperature cookies will be done a lot sooner. Once you pull them out of the oven, slide the parchment paper onto the counter and allow to cool.
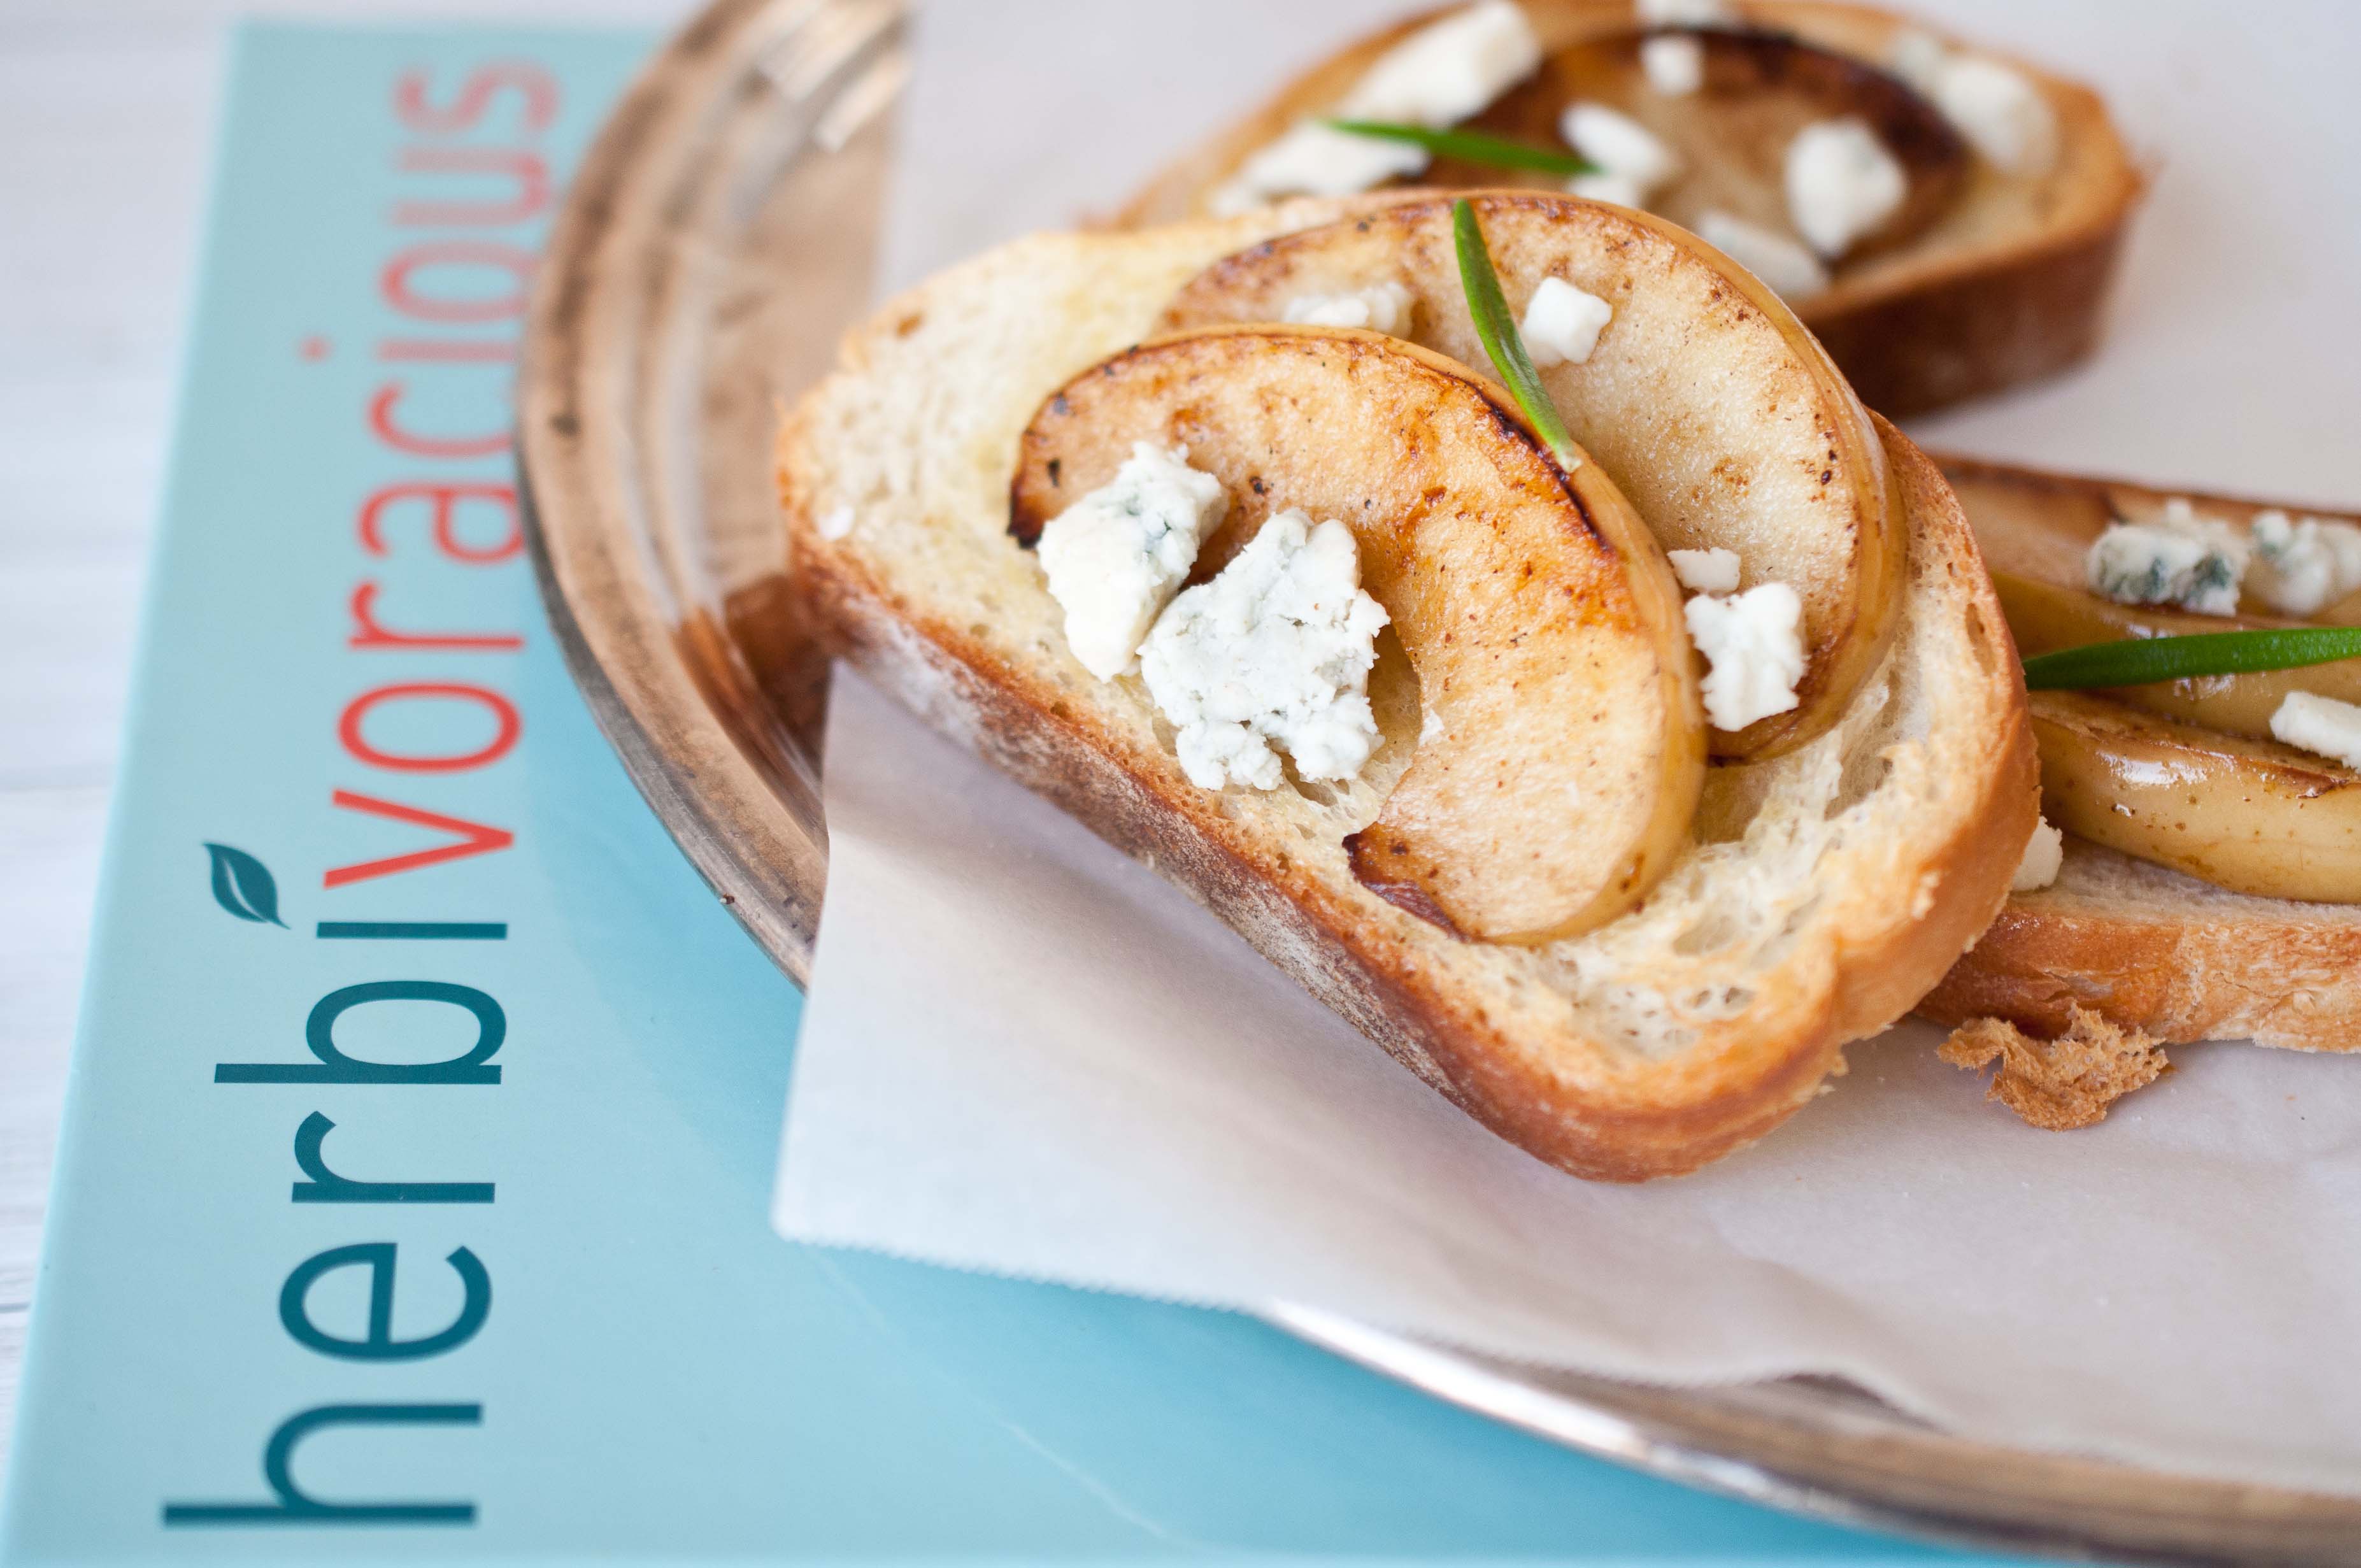
At a book release party for Michael Natikin’s Herbivoracious I fill my plate past capacity with the gorgeous spread laid out at a Culver City restaurant, his cookbook’s recipes incarnate. It isn’t until I’m halfway though the incredible tasty bites that I realize that it’s vegetarian. Of course it is, its Herbivoracious. This is how I like my vegetarian food, as a celebration of produce rather than and explanation for missing meat. This is what Michael has managed to do, turn out an entire book of recipes so full and beautiful that the addition of animal protein would be an imposition. Recipes that range from perfectly simple to complex and inspirational. This isn’t a book for vegetarians, or for accepting meat eaters, it’s a book for everyone who loves food.
Cookbooks, in a real life paper and page form, are even more important to me that ever. As I pull out my Grandmothers copy of The Joy of Cooking, with her notes scrawled in the margins with a soft pencil I can feel a connection with her that would have been lost if eReaders had been invented 50 years ago. I feel her in the pages, and she is still able to teach me what I was never able to learn when she was alive. I want this for my daughter, for my future Grandkids, another piece of me to be found in an old box, when they are ready to receive it. Cookbooks should be the last thing to be digitized, you won’t pass down a kindle, make notes in the blank spaces with a number 2 pencil.
But the main reason to buy cookbooks is simple: recipe testing. Cookbook recipes are tested, over and over, to insure that the unchangeable print is perfect. Bloggers make a recipe once, giving online recipes a much higher rate of flaws, my own included. You are our testers and your feedback gives us insight in how we write the recipes and if we later make changes to what we have already posted. With bloggers cranking out up to 10 recipes a week, you can hardly blame us. But cookbook authors take much more time and care, agonizing over measurements, yields, terms and times, getting hundreds of hours of opinions and feedback because once it prints, that’s it. No updating posts, or responding to comments, the recipe has to be perfect.
That is why you should buy cookbooks.
Even if you aren’t a vegetarian, ESPECIALLY if you aren’t a vegetarian, Michael Natikns book is a must own celebration of produce. Buy it, make notes in the margins, and pass it down to endless generation of food loving humans.
2 small apples such as Pink Lady, cut into 16 wedges
Tiny pinch of cayenne pepper (Don’t be afraid of this, it put this dish over the top!)
Freshly ground black pepper
¼ cup blue cheese (such as Blue de Causses or Gorgonzola dolce), at room temperature
Flaky sea salt (such as Maldon) or large crystal sea salt (such as red Hawaiian salt)
(I added a drizzle of raw honey)
1.Preheat oven or toaster oven to 400 degrees.
2. Set aside 32 nice looking tarragon leaves. In a mortar and pestle or mini food processor, roughly puree the remaining tarragon with the olive oil.
3. Brush the baguette slices with the tarragon oil, reserving the crushed tarragon. Toast in the oven (on a baking sheet) or toaster oven until golden brown and crispy, about 5 minutes.
4. Melt the butter in a large skillet over medium heat. Cook the apples on in a single layer, working in batches if needed, until both sides are golden brown and somewhat tender, about 5 minutes. Season with a pinch of cayenne pepper and several grinds of black pepper.
5. To serve, arrange two slices of cooked apple on each crostini. Top with ½ teaspoon of the blue cheese, a speck of the crushed tarragon, two whole tarragon leaves, and a few grains of sea salt.(Drizzle with raw honey, if desired)
Don’t Feed The Trolls: How to Survive Online Bullies
In the age of living online, the greatest gift are the people you meet. The biggest drawback? The people you meet. Once a skeptic of online friendships, I’ve felt the connections made across the globe from one screen to another. A richness lent to my world through knowing people who live in such far off places, we never could have connected, seen our similarities, shared our thoughts and support, had it not been for two lap tops with internet connections. I’ve also seen the dark side of the vail that the computer brings, an entire society of online bullies waiting with snark and nastiness to prey on anyone with a voice.
The blog comments I’ve seen from online bullies rage wildly from strange with a twist of insanity, to angry and hateful. The following is a list of comments I’ve seen posted to online blogs, to people who get paid little or nothing for the recipes that they post:
"I hope your baby dies. I hate you"
"Ugh, I can’t stand this girl. Will you just shut up already?!"
"This recipe sucks, it’s probably why your husband left you."
"I bet you just adopted that baby so you could get more blog hits."
"This is the most disgusting recipe I’ve ever made in my life. I substituted [lists 3 major substitutions] and it was horrible! Think before you blog, you stupid B—-!"
"It’s no wonder her husband died if she cooks like this! She pretty much killed him herself, is she trying to kill my husband too?"
I know. Horrifying. People fail to realize that another human, possibly a stay at home Mom looking for a connection to the outside world, a widow, an introvert with crippling agoraphobia, or just and average joe, will read that and be incredibly hurt. We all remember the worst comment that was ever posted to our blogs, the sting from a complete stranger who’s hate has invaded our world. I’ve recently seen two celebrities melt down on Twitter, responding to the nasty comments, defending themselves, lashing out, retweeting insults, indulging those Trolls who seek to disperse hate.
Celebrity, blogger, or just an average mom with a twitter following, here are some rules to help us all cope:
Five Rules to Survive Online Bullies
1. Don’t Feed the Trolls. Don’t respond, engage or even post comments made out of sheer hate and anger. If a comment is just made to hurt, there is no reason to post it and you have no moral or civic obligation to do so. Delete the comment and shake the thought of it from your head.
2. Find Power In Silence. To stay silent and to be silenced are not the same thing. There is powder in silence, feel it. There is no response to a bully or a nasty comment that makes you look cool or superior, you are only wallowing in the mud by responding.
3. Feel Pity. Child Actor turned writer, Mara Wilson said on her blog recently: "Very few intelligent, successful, attractive, confident, happy people spend their time bashing people they have never met. Just be glad you are not that person." A comment a stranger makes about you says a lot more about them then it will ever say about you.
4. Strangers Will Defend You. More often than not, when I see a nasty comment posted on a blog, I watch others rush to the aid of the blogger. People who don’t know that blogger or the commenter, but who do know right from wrong, and are quick to rush to your defense.
5. Feel Important. No one throws rocks at Tiny Tim. If you are a blogger or a celebrity, the negative comments you receive will rise in direct proportion to how important people think you are. If they didn’t think of you as successful, they wouldn’t even bother. Negative comments are a direct result of doing something right, try to think of it that way.
I try to follow these rules on both this blog, as well as my other blog, The Beeroness, which has garnered a much higher level of praise as well as exponentially higher level of nastiness. With the good comes the bad, finding your own inner filter will help you enjoy more of the experience.
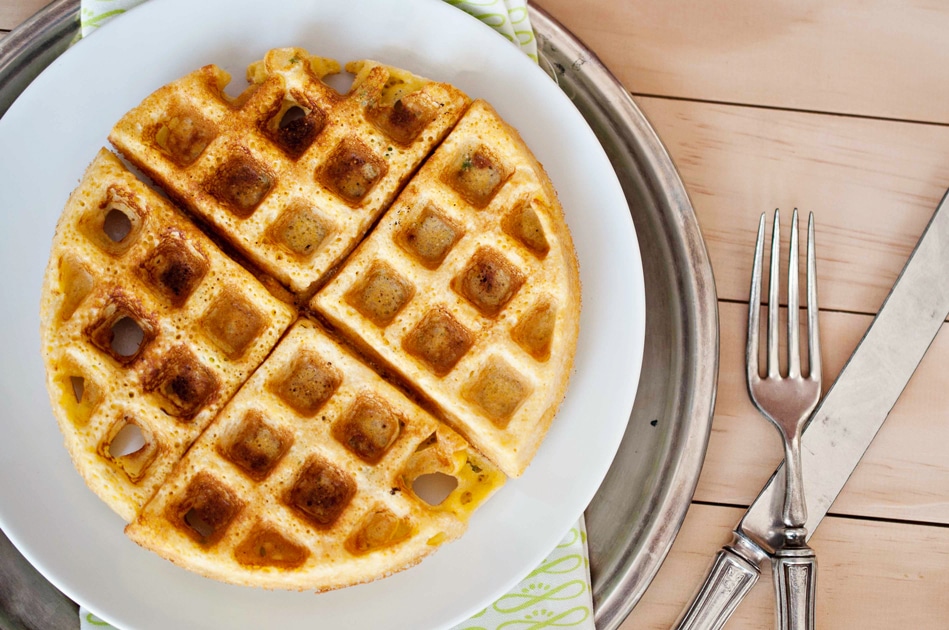
In a completely unrelated note, these Jalapeno Corn Waffles are perfect for brunch, or to serve with Fried Chicken. And you’ll want to drink the Sriracha Maple syrup on it’s own.
Jalapeno Corn Waffles with Sriracha Maple Syrup
Waffles:
1 cup fine yellow corn meal
1/2 cup flour
1 tsp baking powder
1/2 cup corn kernels
1 large jalapeno, chopped, stem and seeds removed
1/2 tsp salt
1/4 cup cheddar cheese
1 tbs brown sugar
1/2 cup melted butter
1 cup whole milk
1 tbs canola oil
1 egg
For the Syrup:
1/4 cup real maple syrup
1 tsp sriracha chili sauce
(Makes 4-6)
Preheat your waffle iron.
In a bowl, combine the corn meal, flour, baking powder, corn, jalapeno, salt, cheese, and brown sugar, mix. In a separate bowl, add the melted butter, milk, oil and the egg, beat until well combined. Make a well in the dry ingredients, add the wet ingredients and mix until just barely combined. Spray waffle iron with cooking spray if recommended, cook in waffle iron according to manufactures specifications.
Mix the maple syrup and sriracha and serve with the waffles.
Microwave mug cakes first cake into my consciousness about 10 years ago through the pre-facebook existence of the email forward. I found them to be completely smarmy, the culinary equivalent of a Jerry Springer episode. My first though was, "Oh, yeah like I need QUICKER ways to get fatter." Email deleted.
But then I found myself in my new place, without the gas turned on yet, but with a new microwave and the urge to celebrate.
I caved.
I made my little family microwave cupcakes to celebrate the move and the fact that I was finally back in a kitchen. Just remember that if you find yourself with unexpected guests and only about 5 minutes to whip up a dessert, this is a viable option.
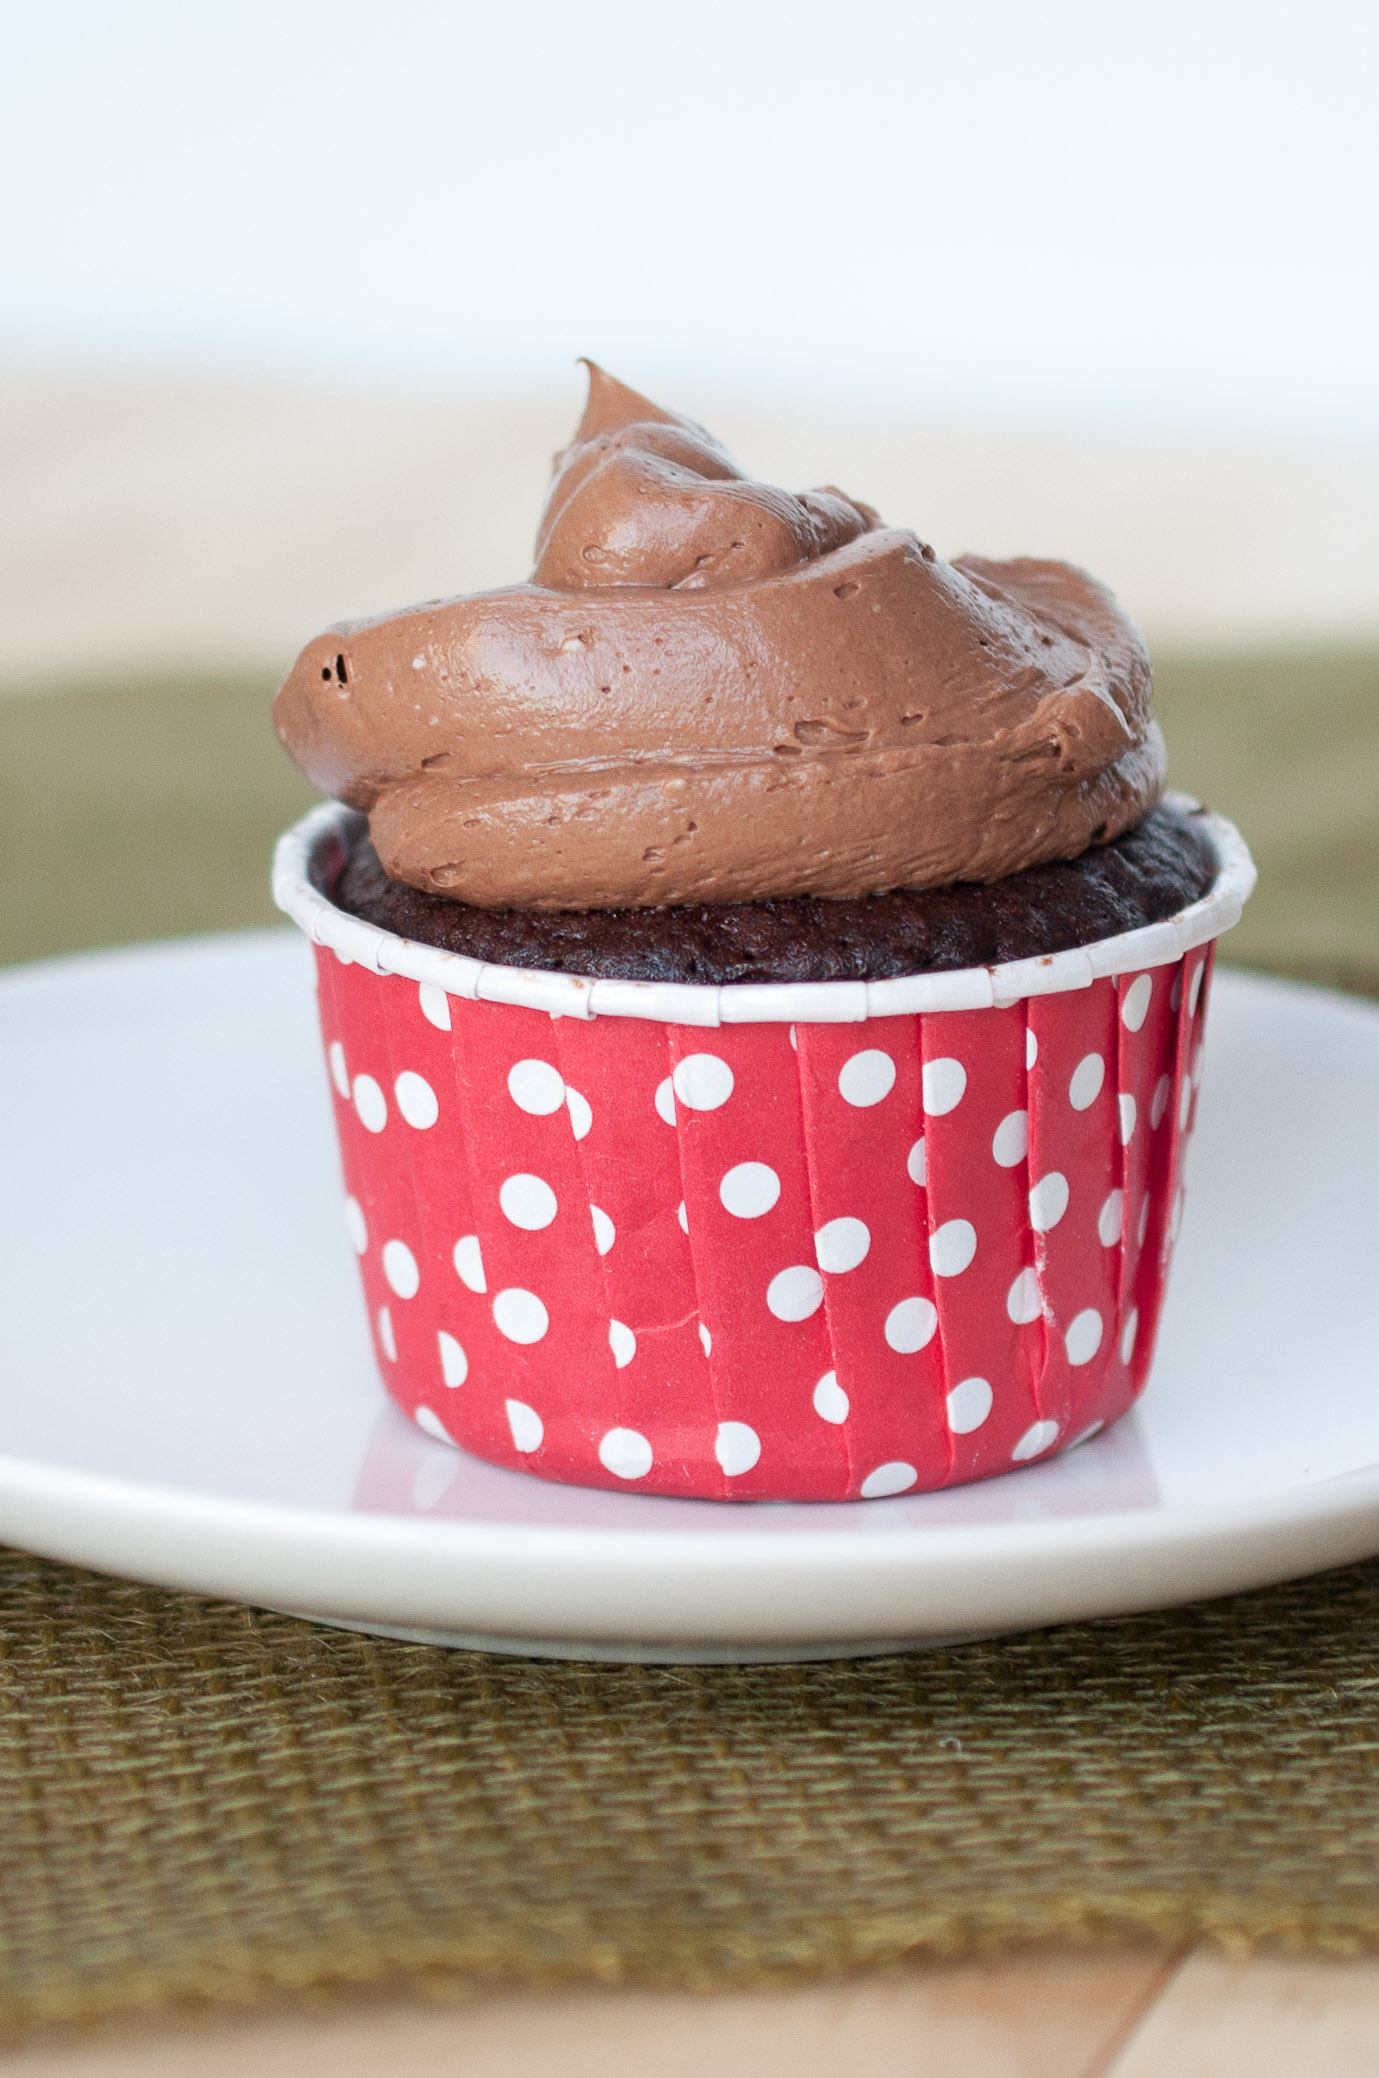
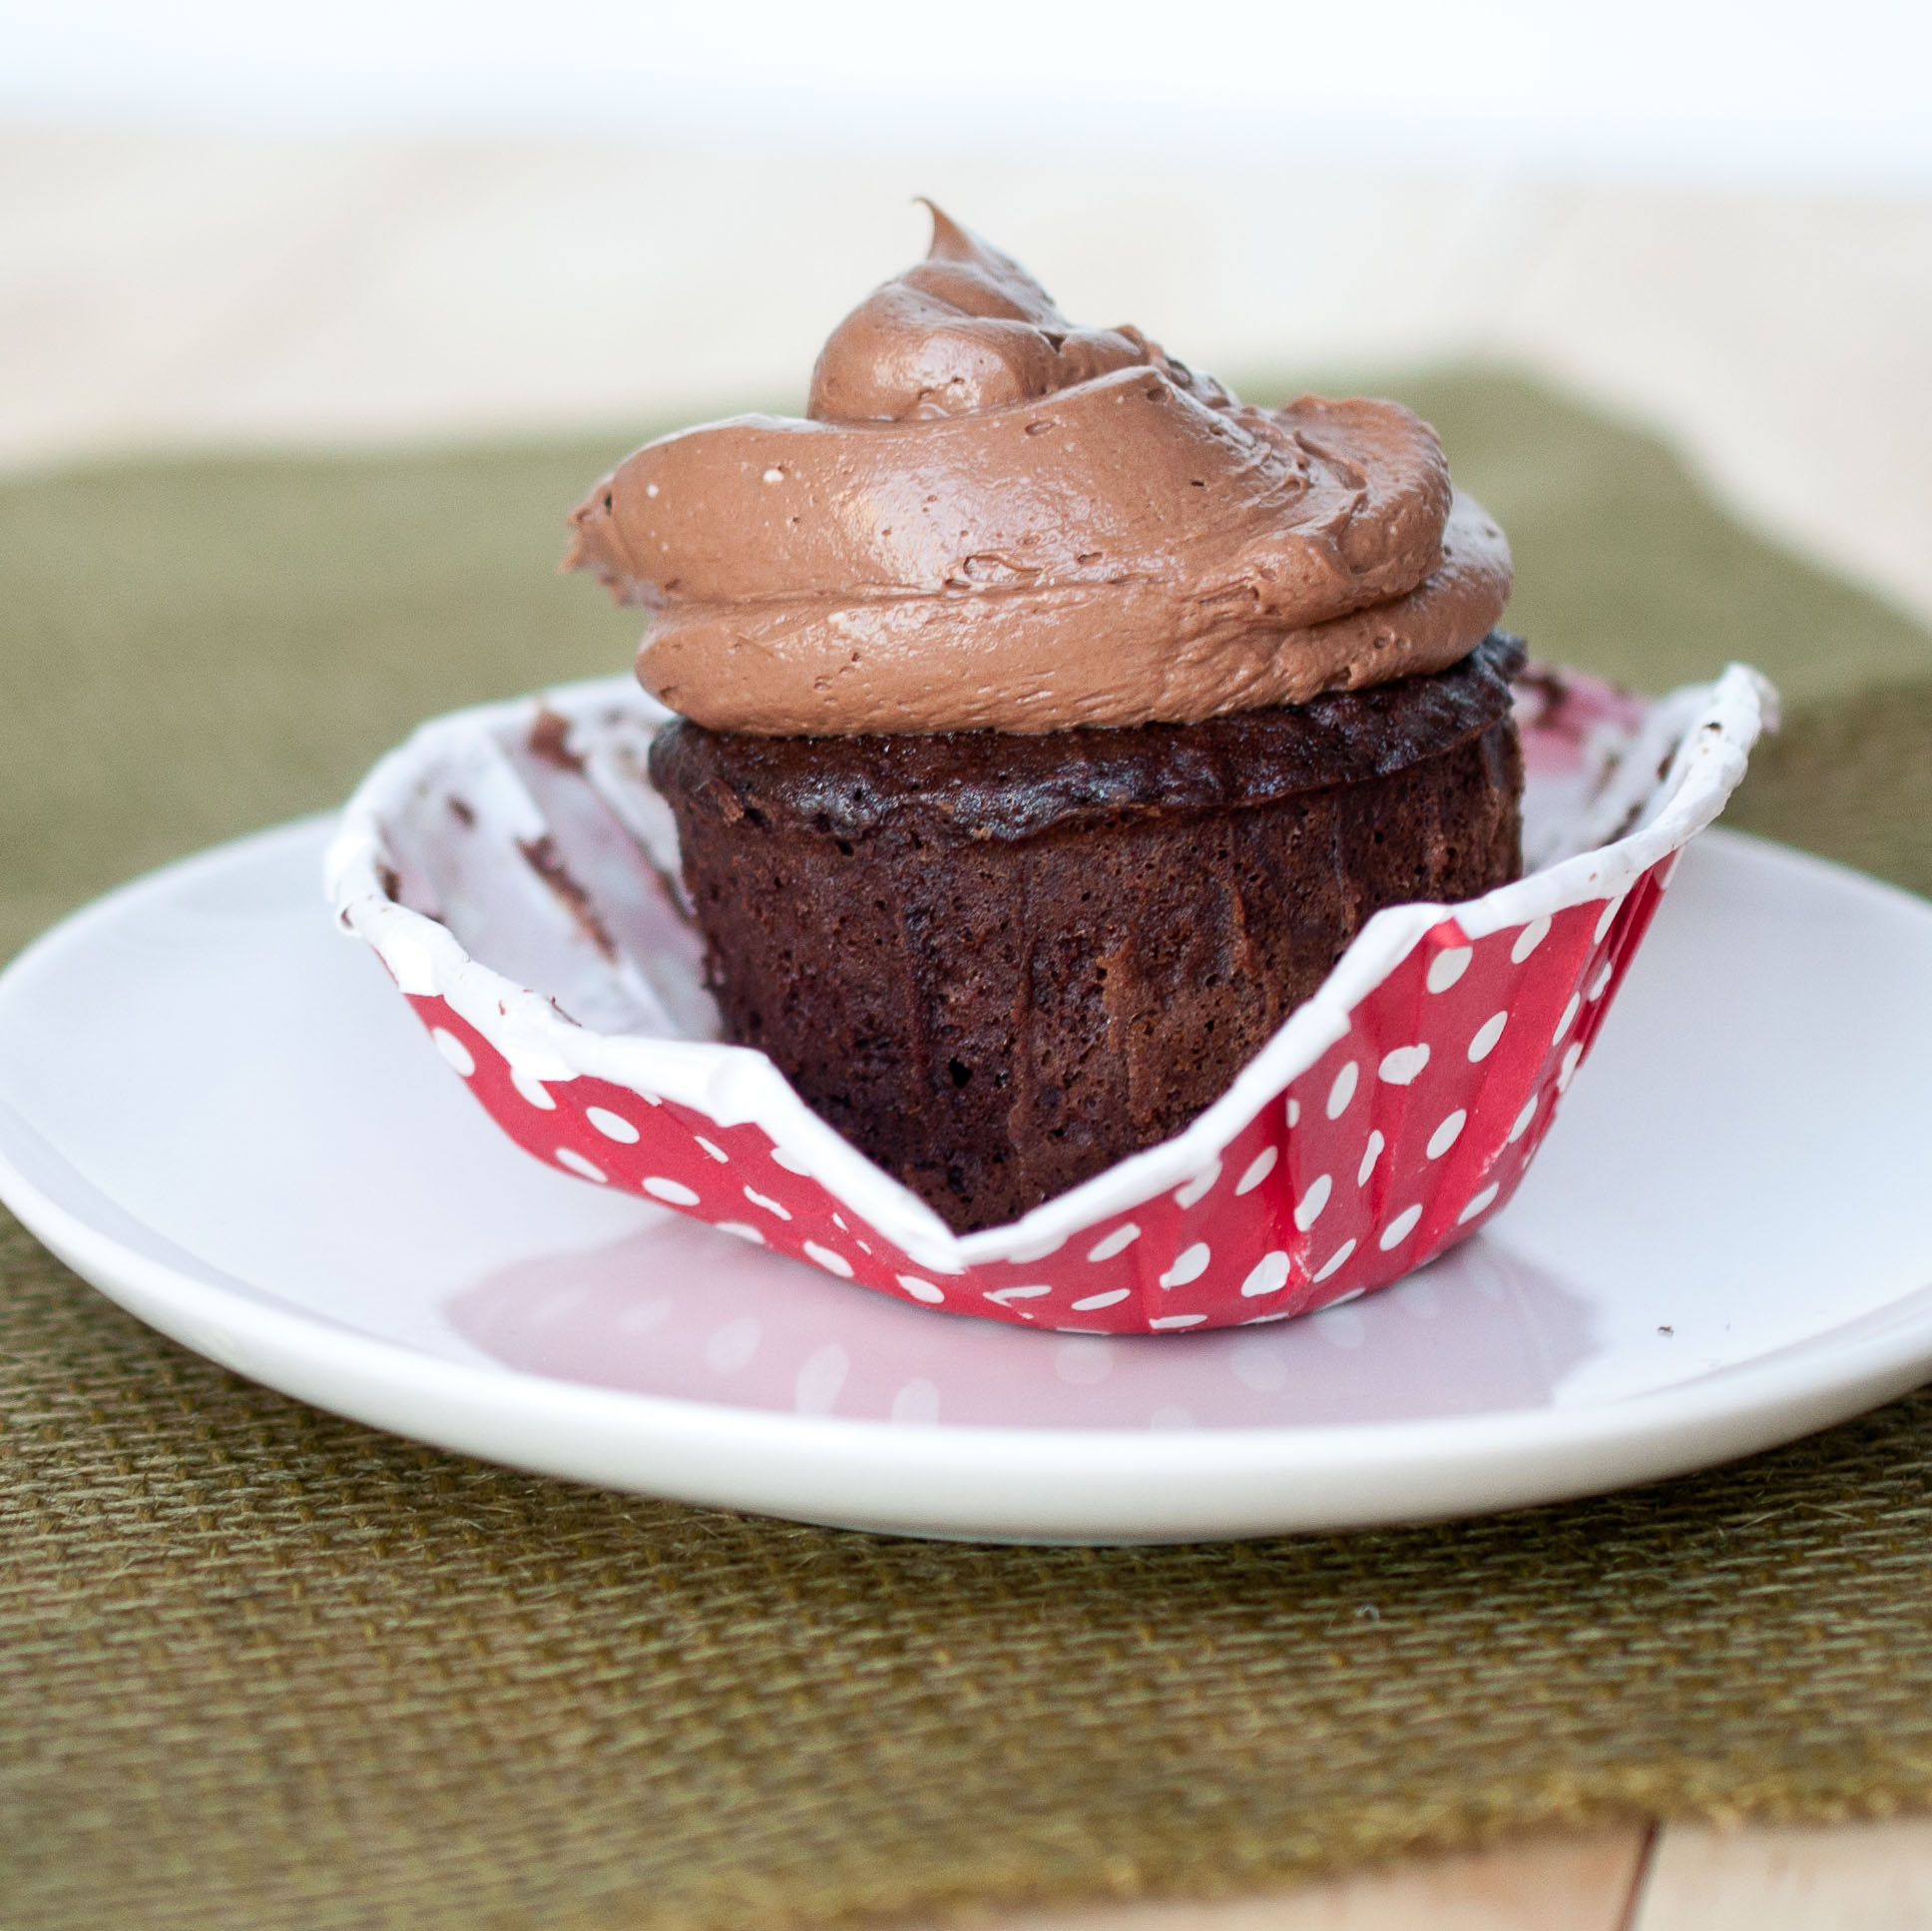
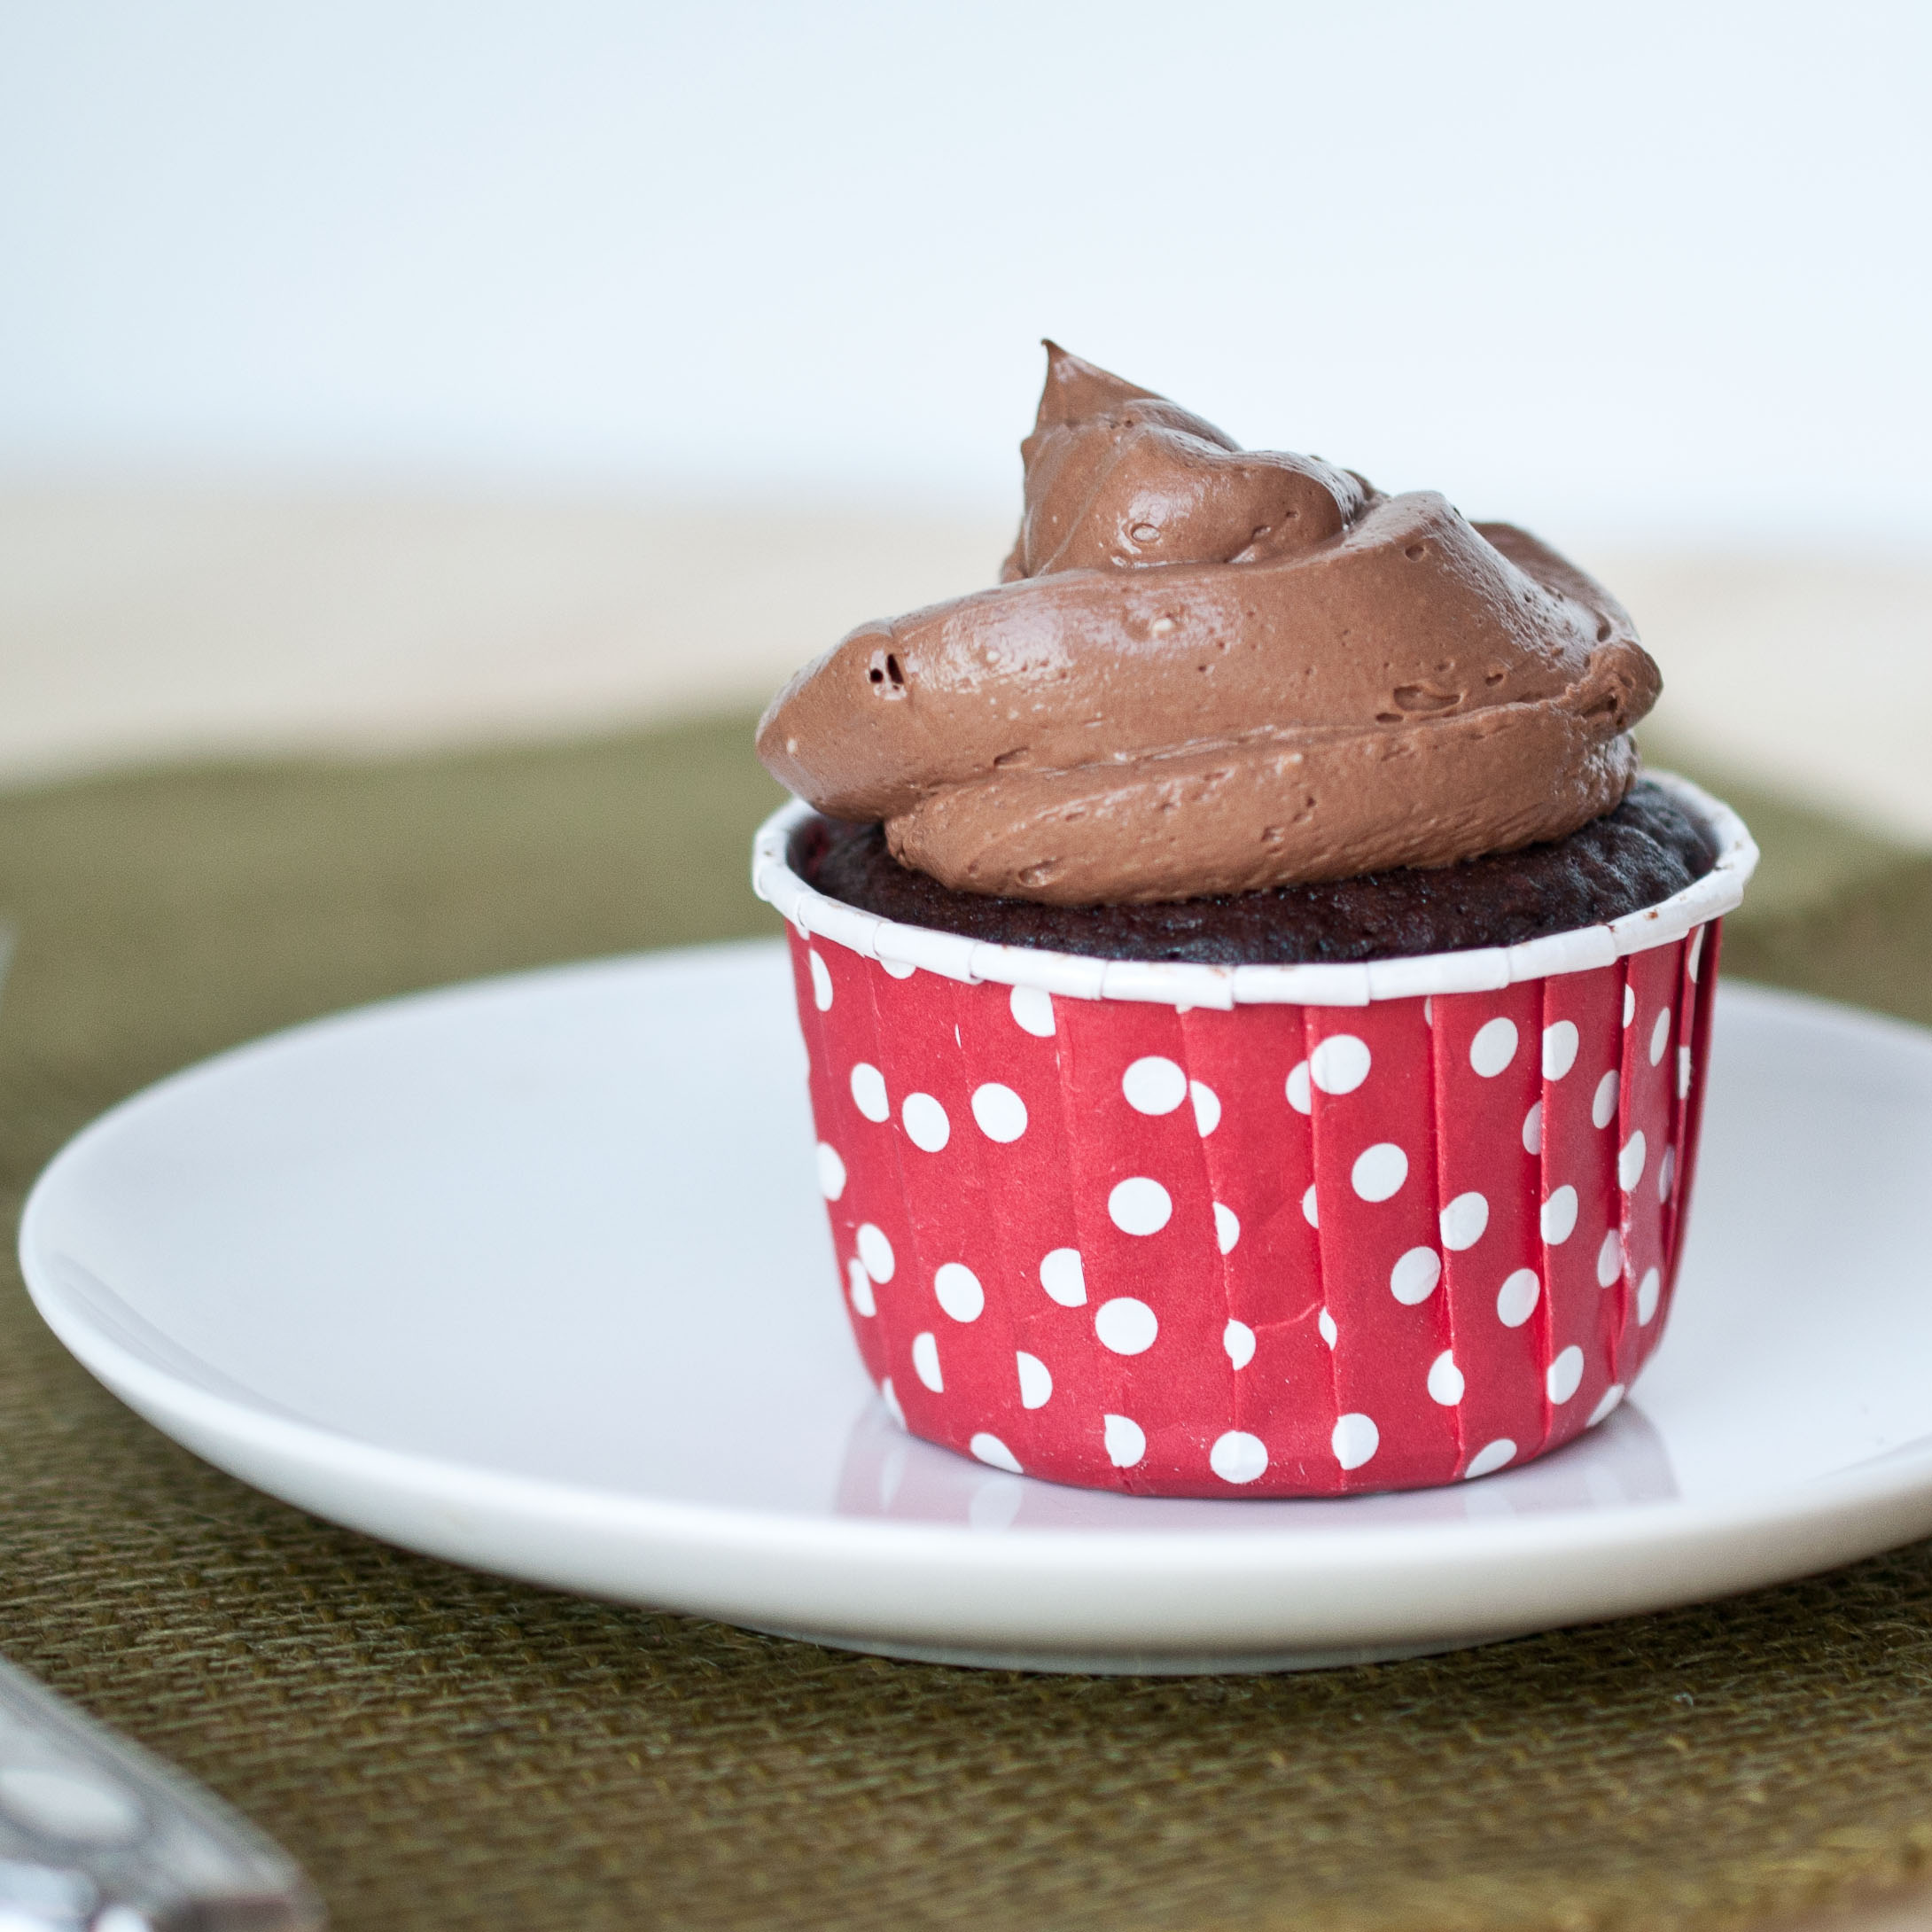
The secret to making these Smarmy Mug Cakes in cupcake form, is the baking cups. I love the crap out of these things. I always use them to make cupcakes because they are much cuter than the regular cupcake papers, and they don’t need muffin tins, just place them on a baking sheet and fill to half capacity. These were left over from Taters, Lets Have A Ball party and bought them from Sweet Lulu, but you can also buy plain white ones on Amazon. The trick is to only fill them half way.
Smarmy Mug Cake, Cupcake Edition
1/4 cup dark chocolate chips
2 tbs butter
1 egg
1 tbs oil
1 tbs milk
1/4 cup sugar
pinch of salt
2 tbs cocoa powder (unsweetened)
2 tbs flour
1/8 tsp baking powder
Frosting:
1/2 cup (4oz) cream cheese
1/4 milk
1/3 cup powdered sugar (plus more if you want it sweeter)
2 tbs cocoa powder
(if you don’t like cream cheese frosting, heat 3 tbs milk or cream in the microwave until steamy, then pour over 1/3 cup chocolate chips, stir until melted. Pour the chocolate sauce over the cupcake. It will be messy, but delicious)
(Makes 3)
In a microwave safe bowl, add the chocolate chips and the butter. Microwave for 20 seconds, stir and repeat until melted.
In a separate bowl, add the egg, oil, milk, sugar and salt and beat with a fork until well combined. Add the melted chocolate and stir again. Sprinkle the cocoa powder, flour and baking powder over the egg mixture and stir again with the fork until well combined.
Distribute equally between three baking cups (standard cupcake papers will not work). I also added 4 chocolate chips to the very center of each cupcake to make a bit of a molten center. Microwave on high for 1 to 1.5 minutes. The "cooking" time will depend largely on the power of your microwave. Mine took 1 minute 15 seconds.
You want to let the cupcake cool a bit because right out of the microwave they are screaming hot. While they cool, make the frosting. Add the milk and the cream cheese to a bowl and beat on high until smooth and creamy. Then add the powdered sugar and the cocoa powder and beat until combined. Add the frosting to a zip lock bag and cut about 1/2 inch off the bottom corner. Pipe the frosting into the cupcake. Serve with a fork.
I’m back. Sort of. When I say that I’m move into my new place, all that means is that my stuff is physically there.
In boxes. Lots and lots of boxes. But the gas isn’t on yet, so I can’t cook, and showers have been very cold.
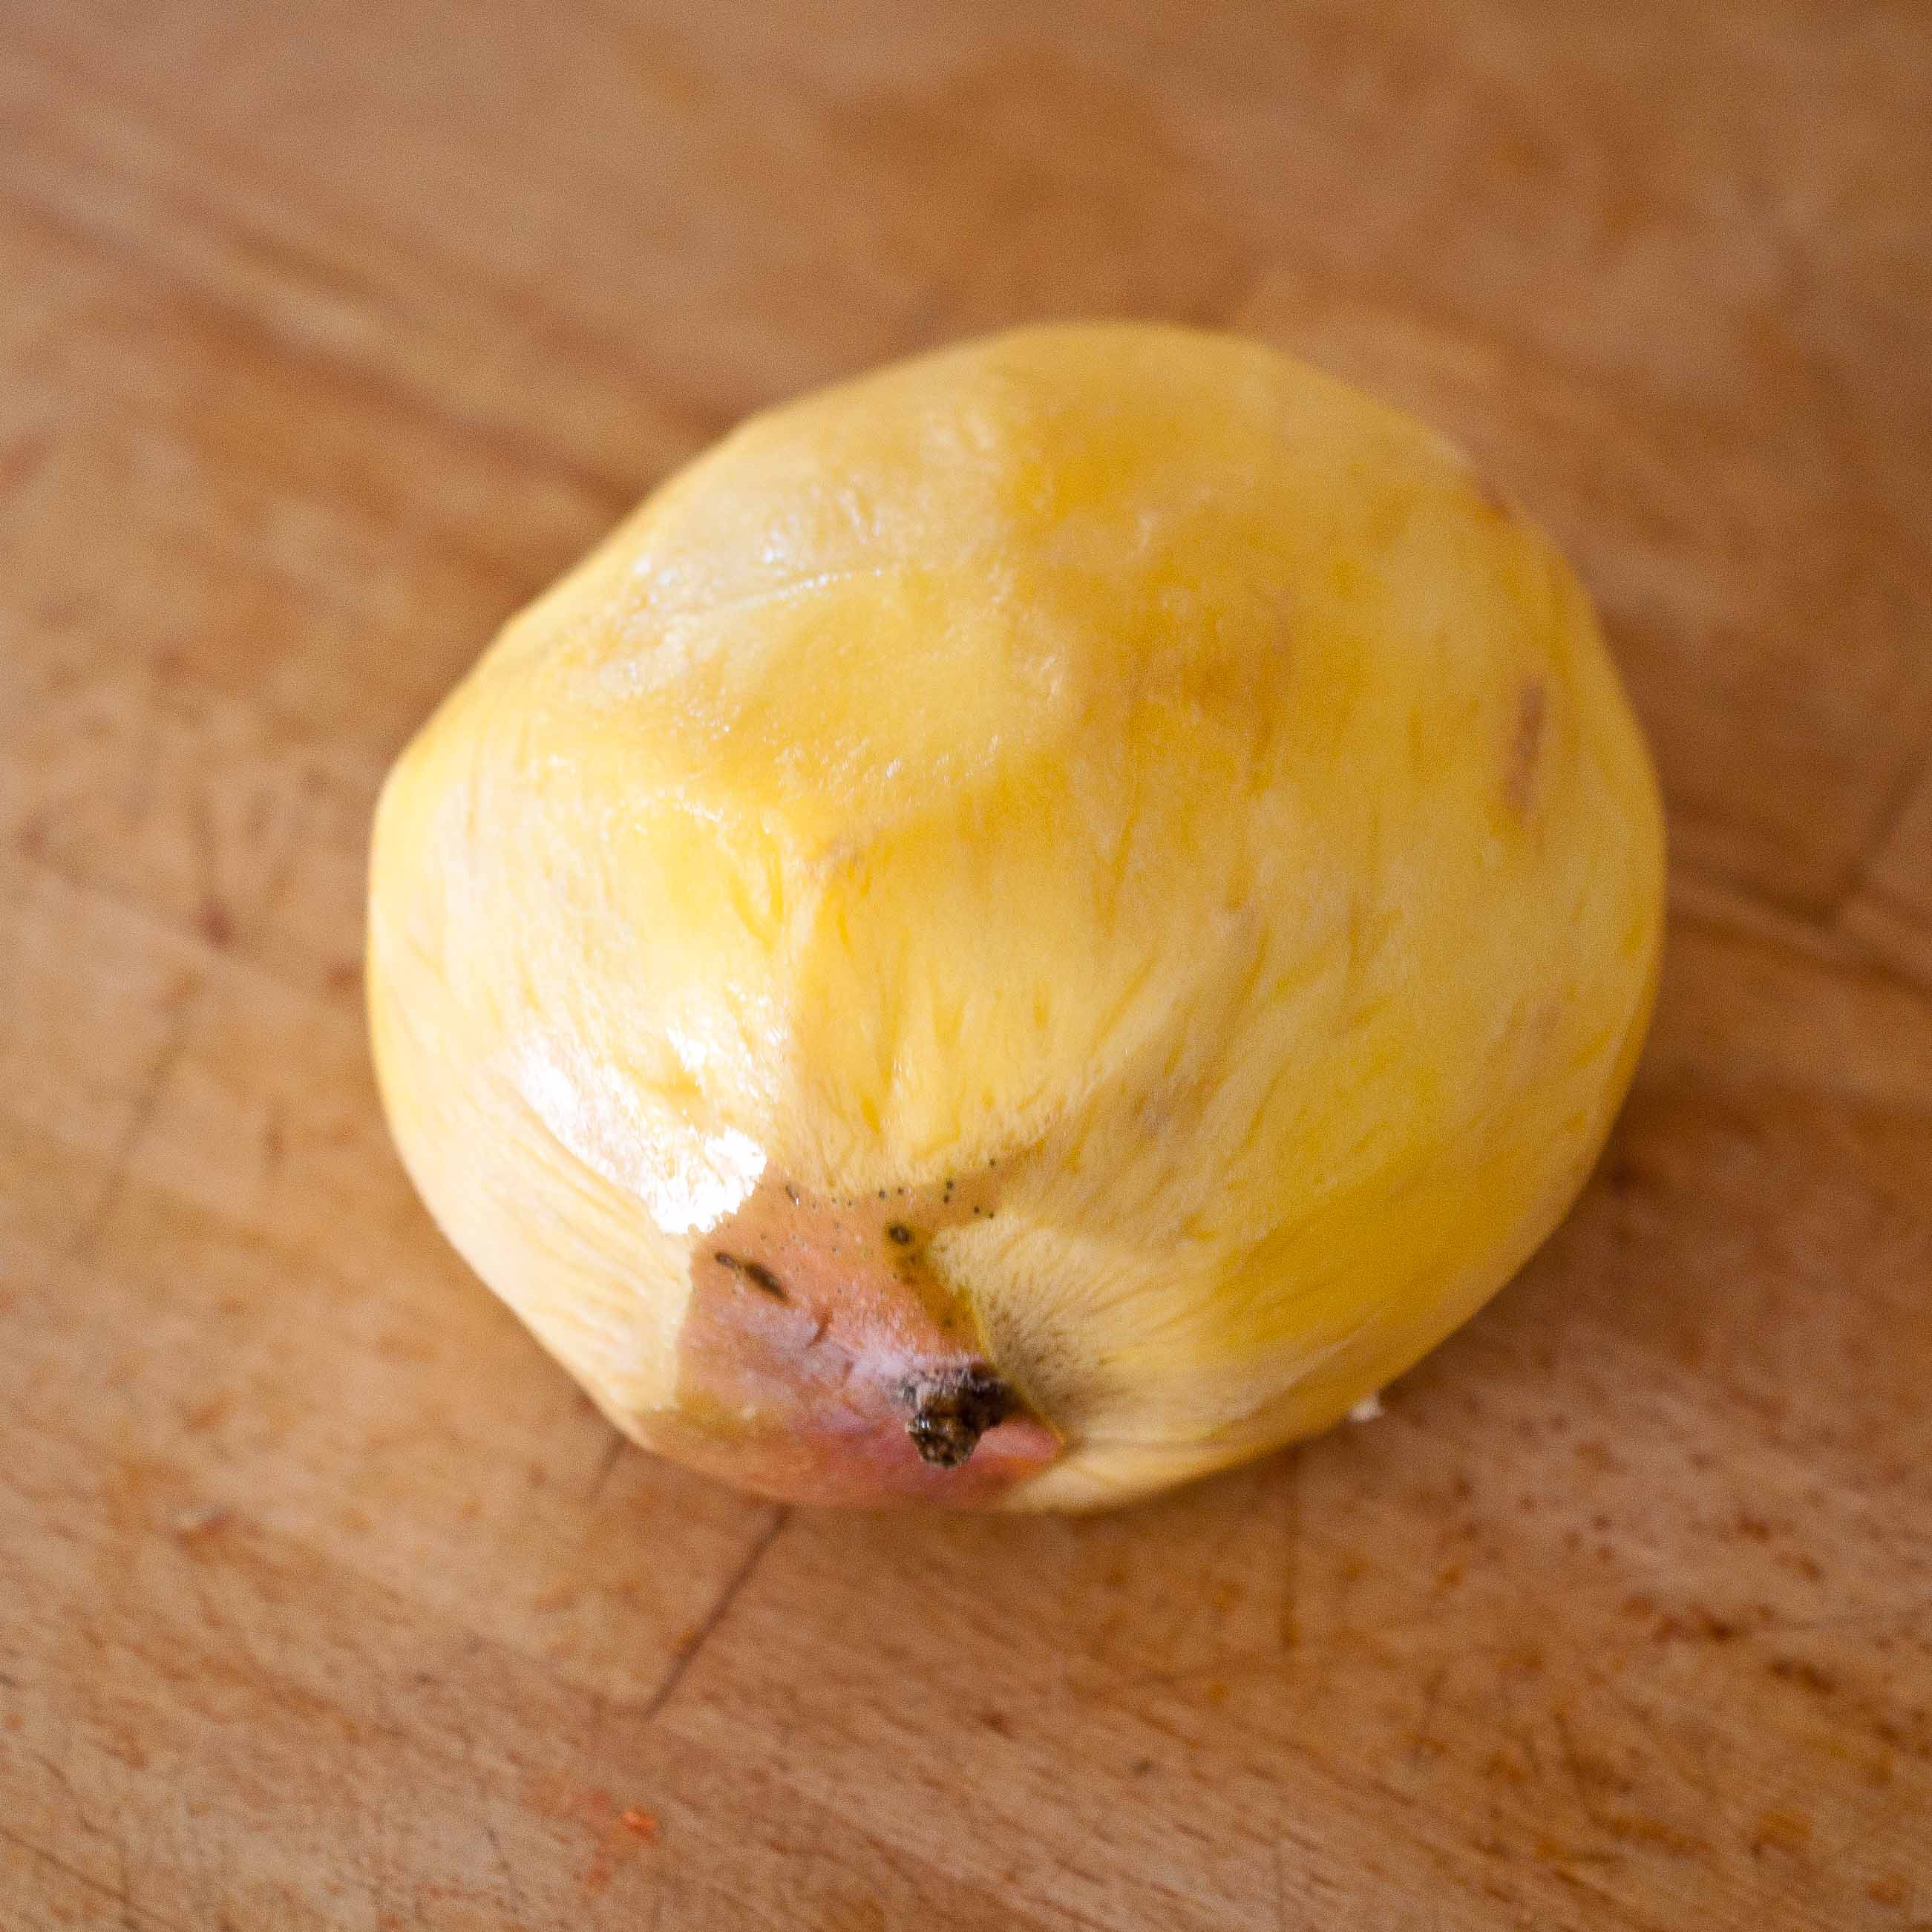
Like this mango.
So the theme for this week is about food you can cook without a stove.
Which can be tricky. But when you are so sick of take out and pizza and all you want to do is cook a meal for your family and the stove is gas which hasn’t been turned on yet and the new place doesn’t have a microwave and your old place had a built in one that had to stay and you can’t figure out which of the billion boxes holds the cord to the electric griddle, you have to make do.
So this is what I made for breakfast for my first morning in the new house:
Scrambled eggs in the waffle maker. Totally works.
Bacon cooked on an electric crepes maker.
Toast.
It may have been my most creative use of heating elements, but it wasn’t the most delicious breakfast ever to be made by my hands.
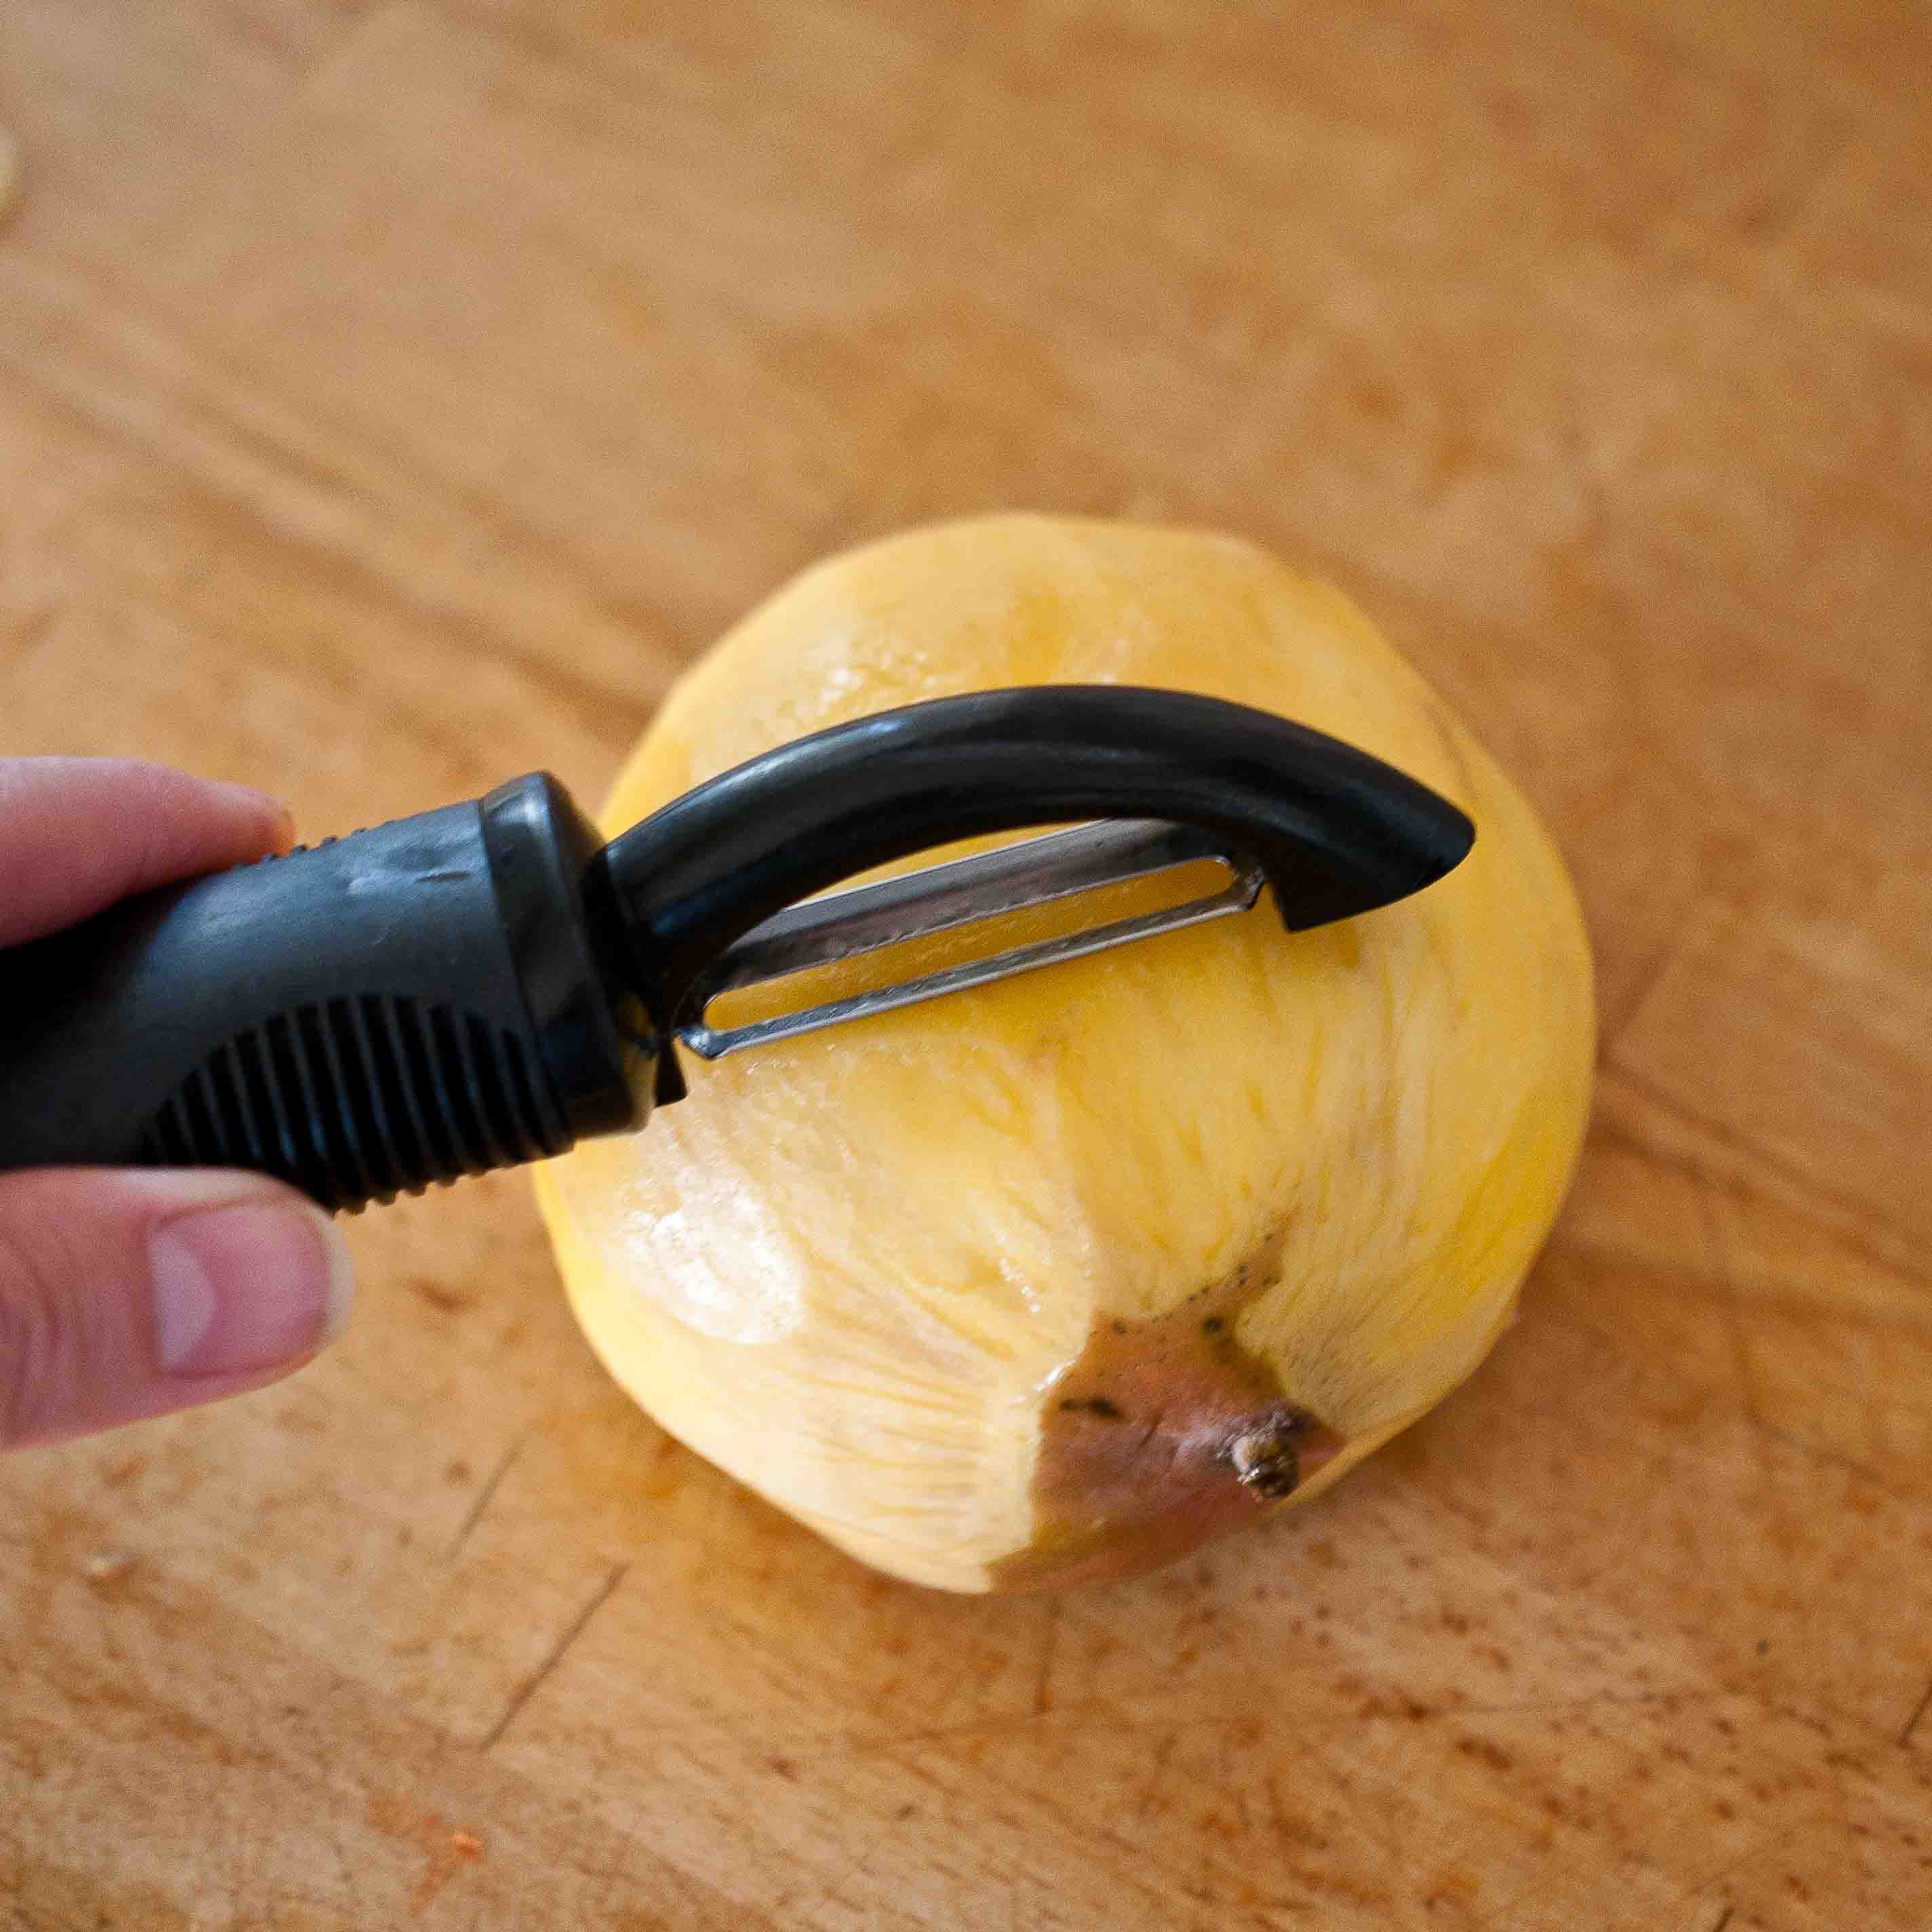
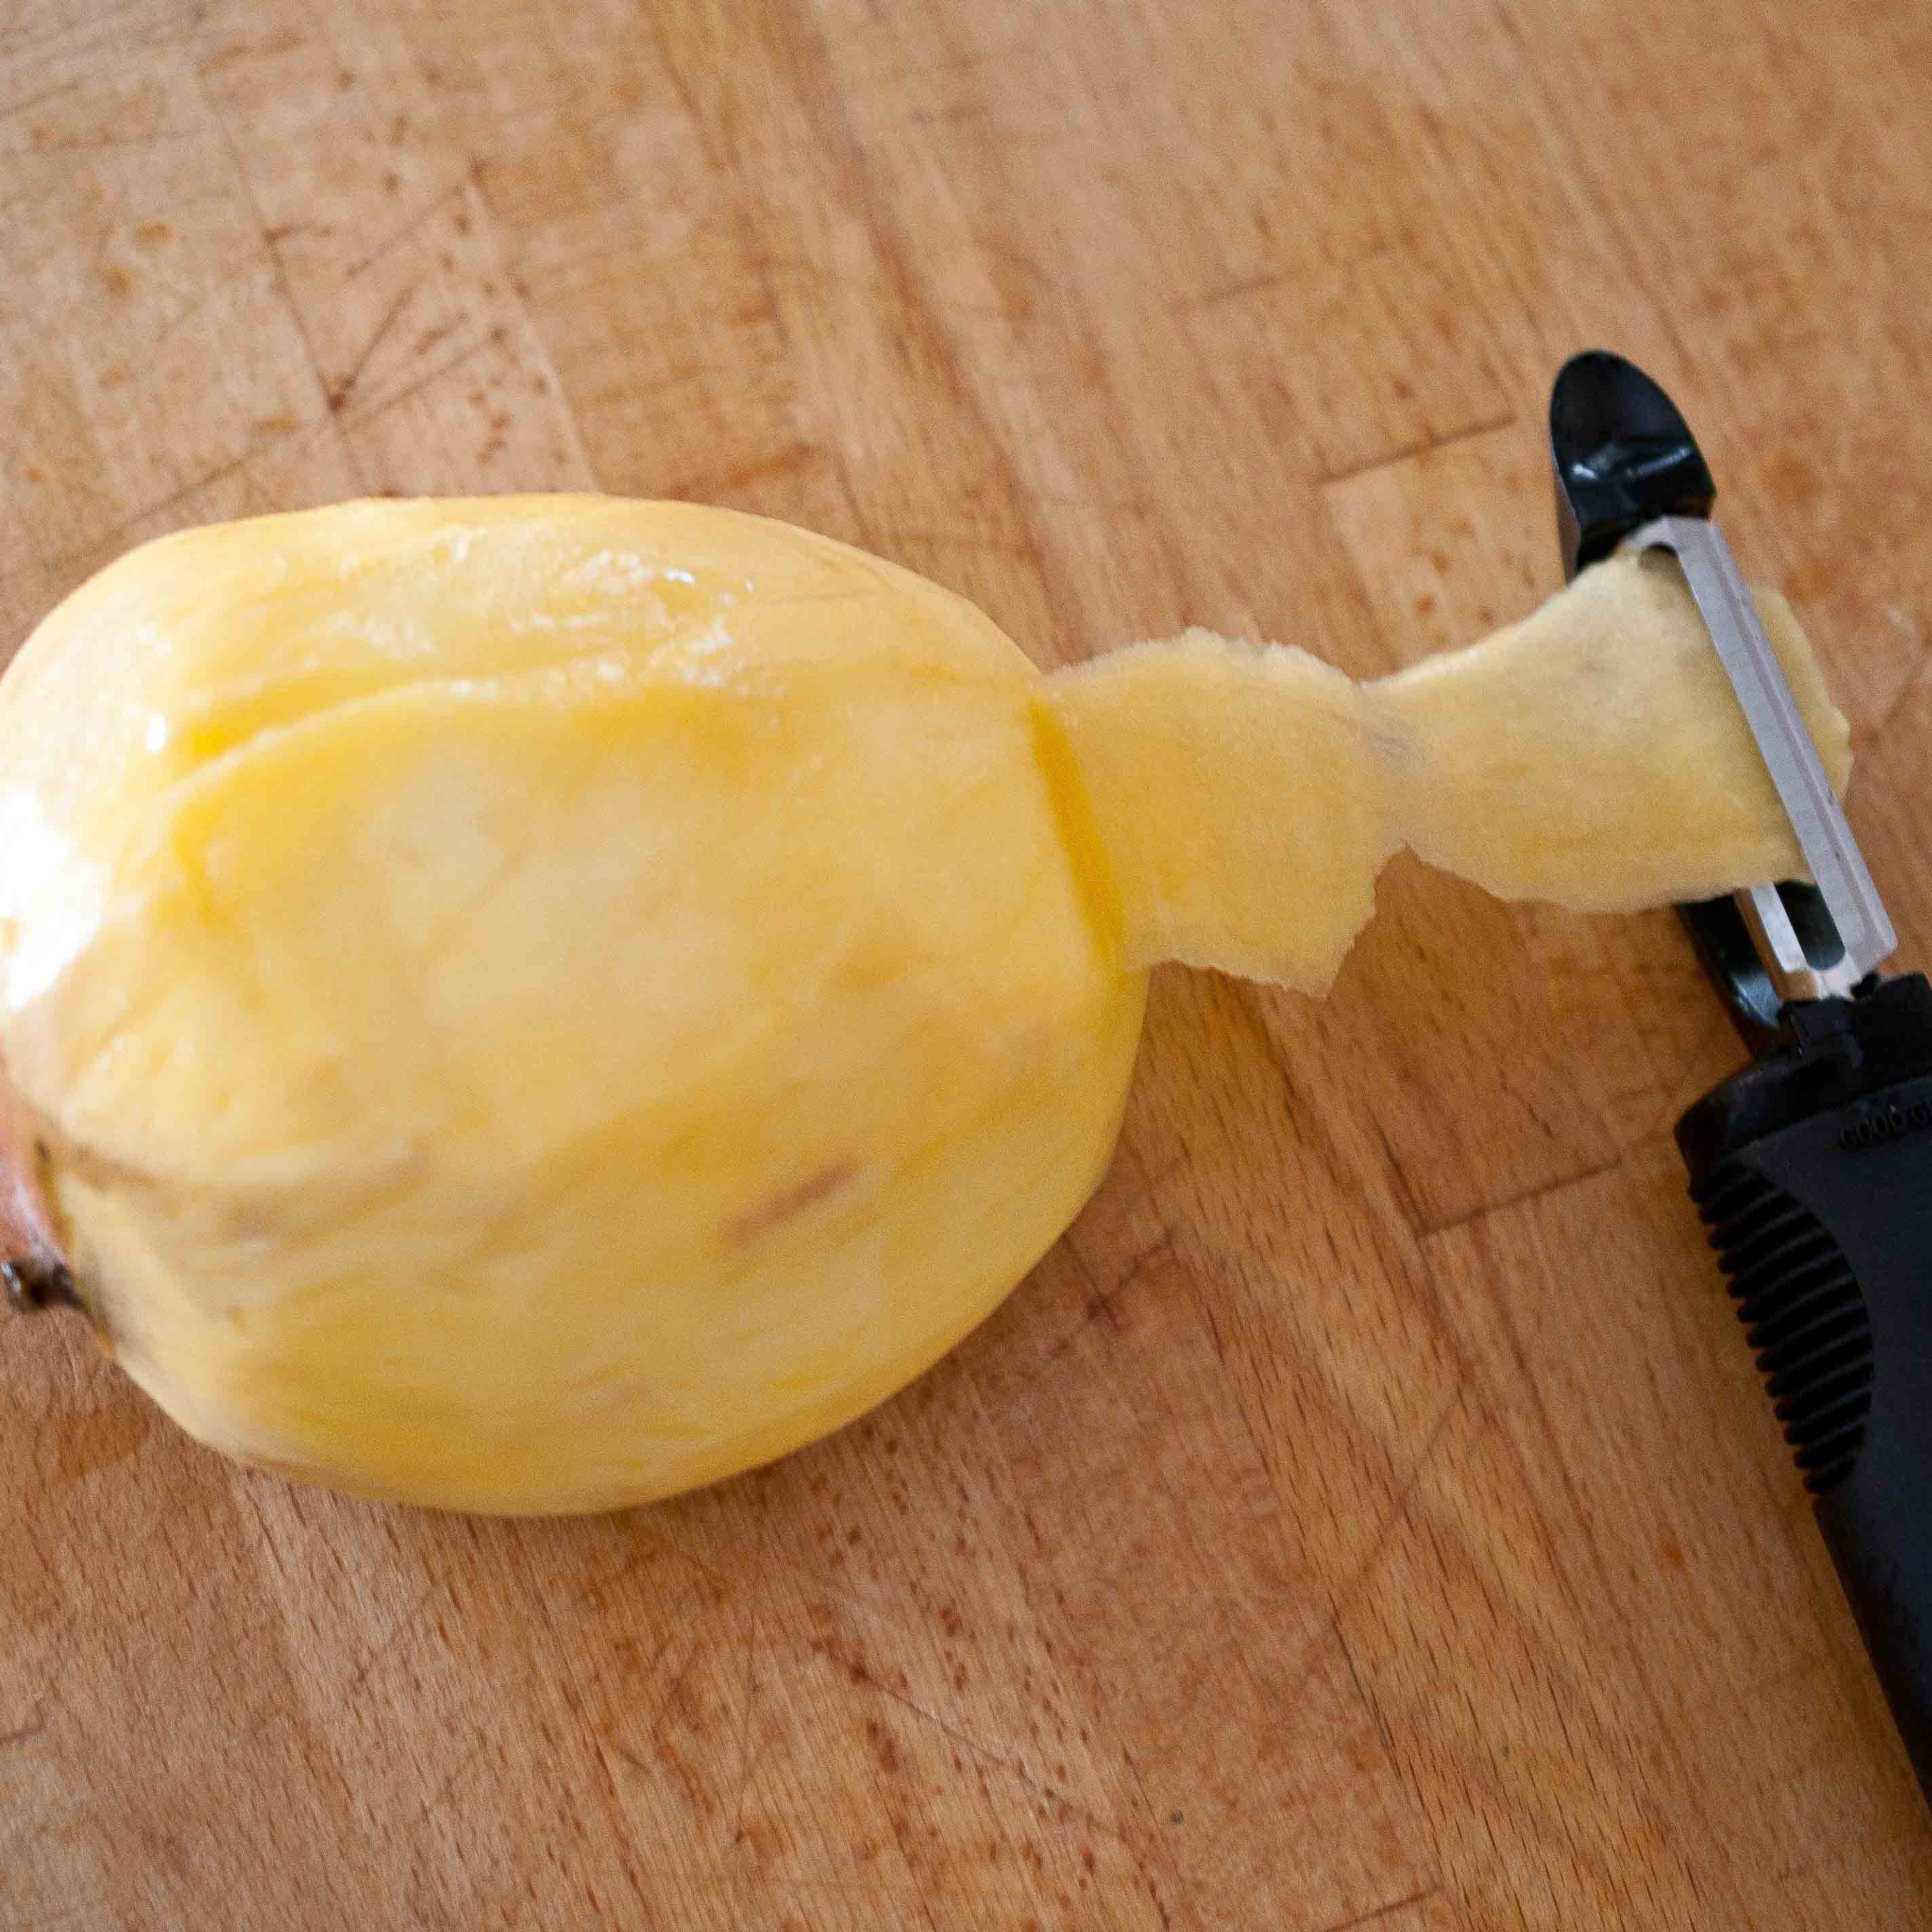
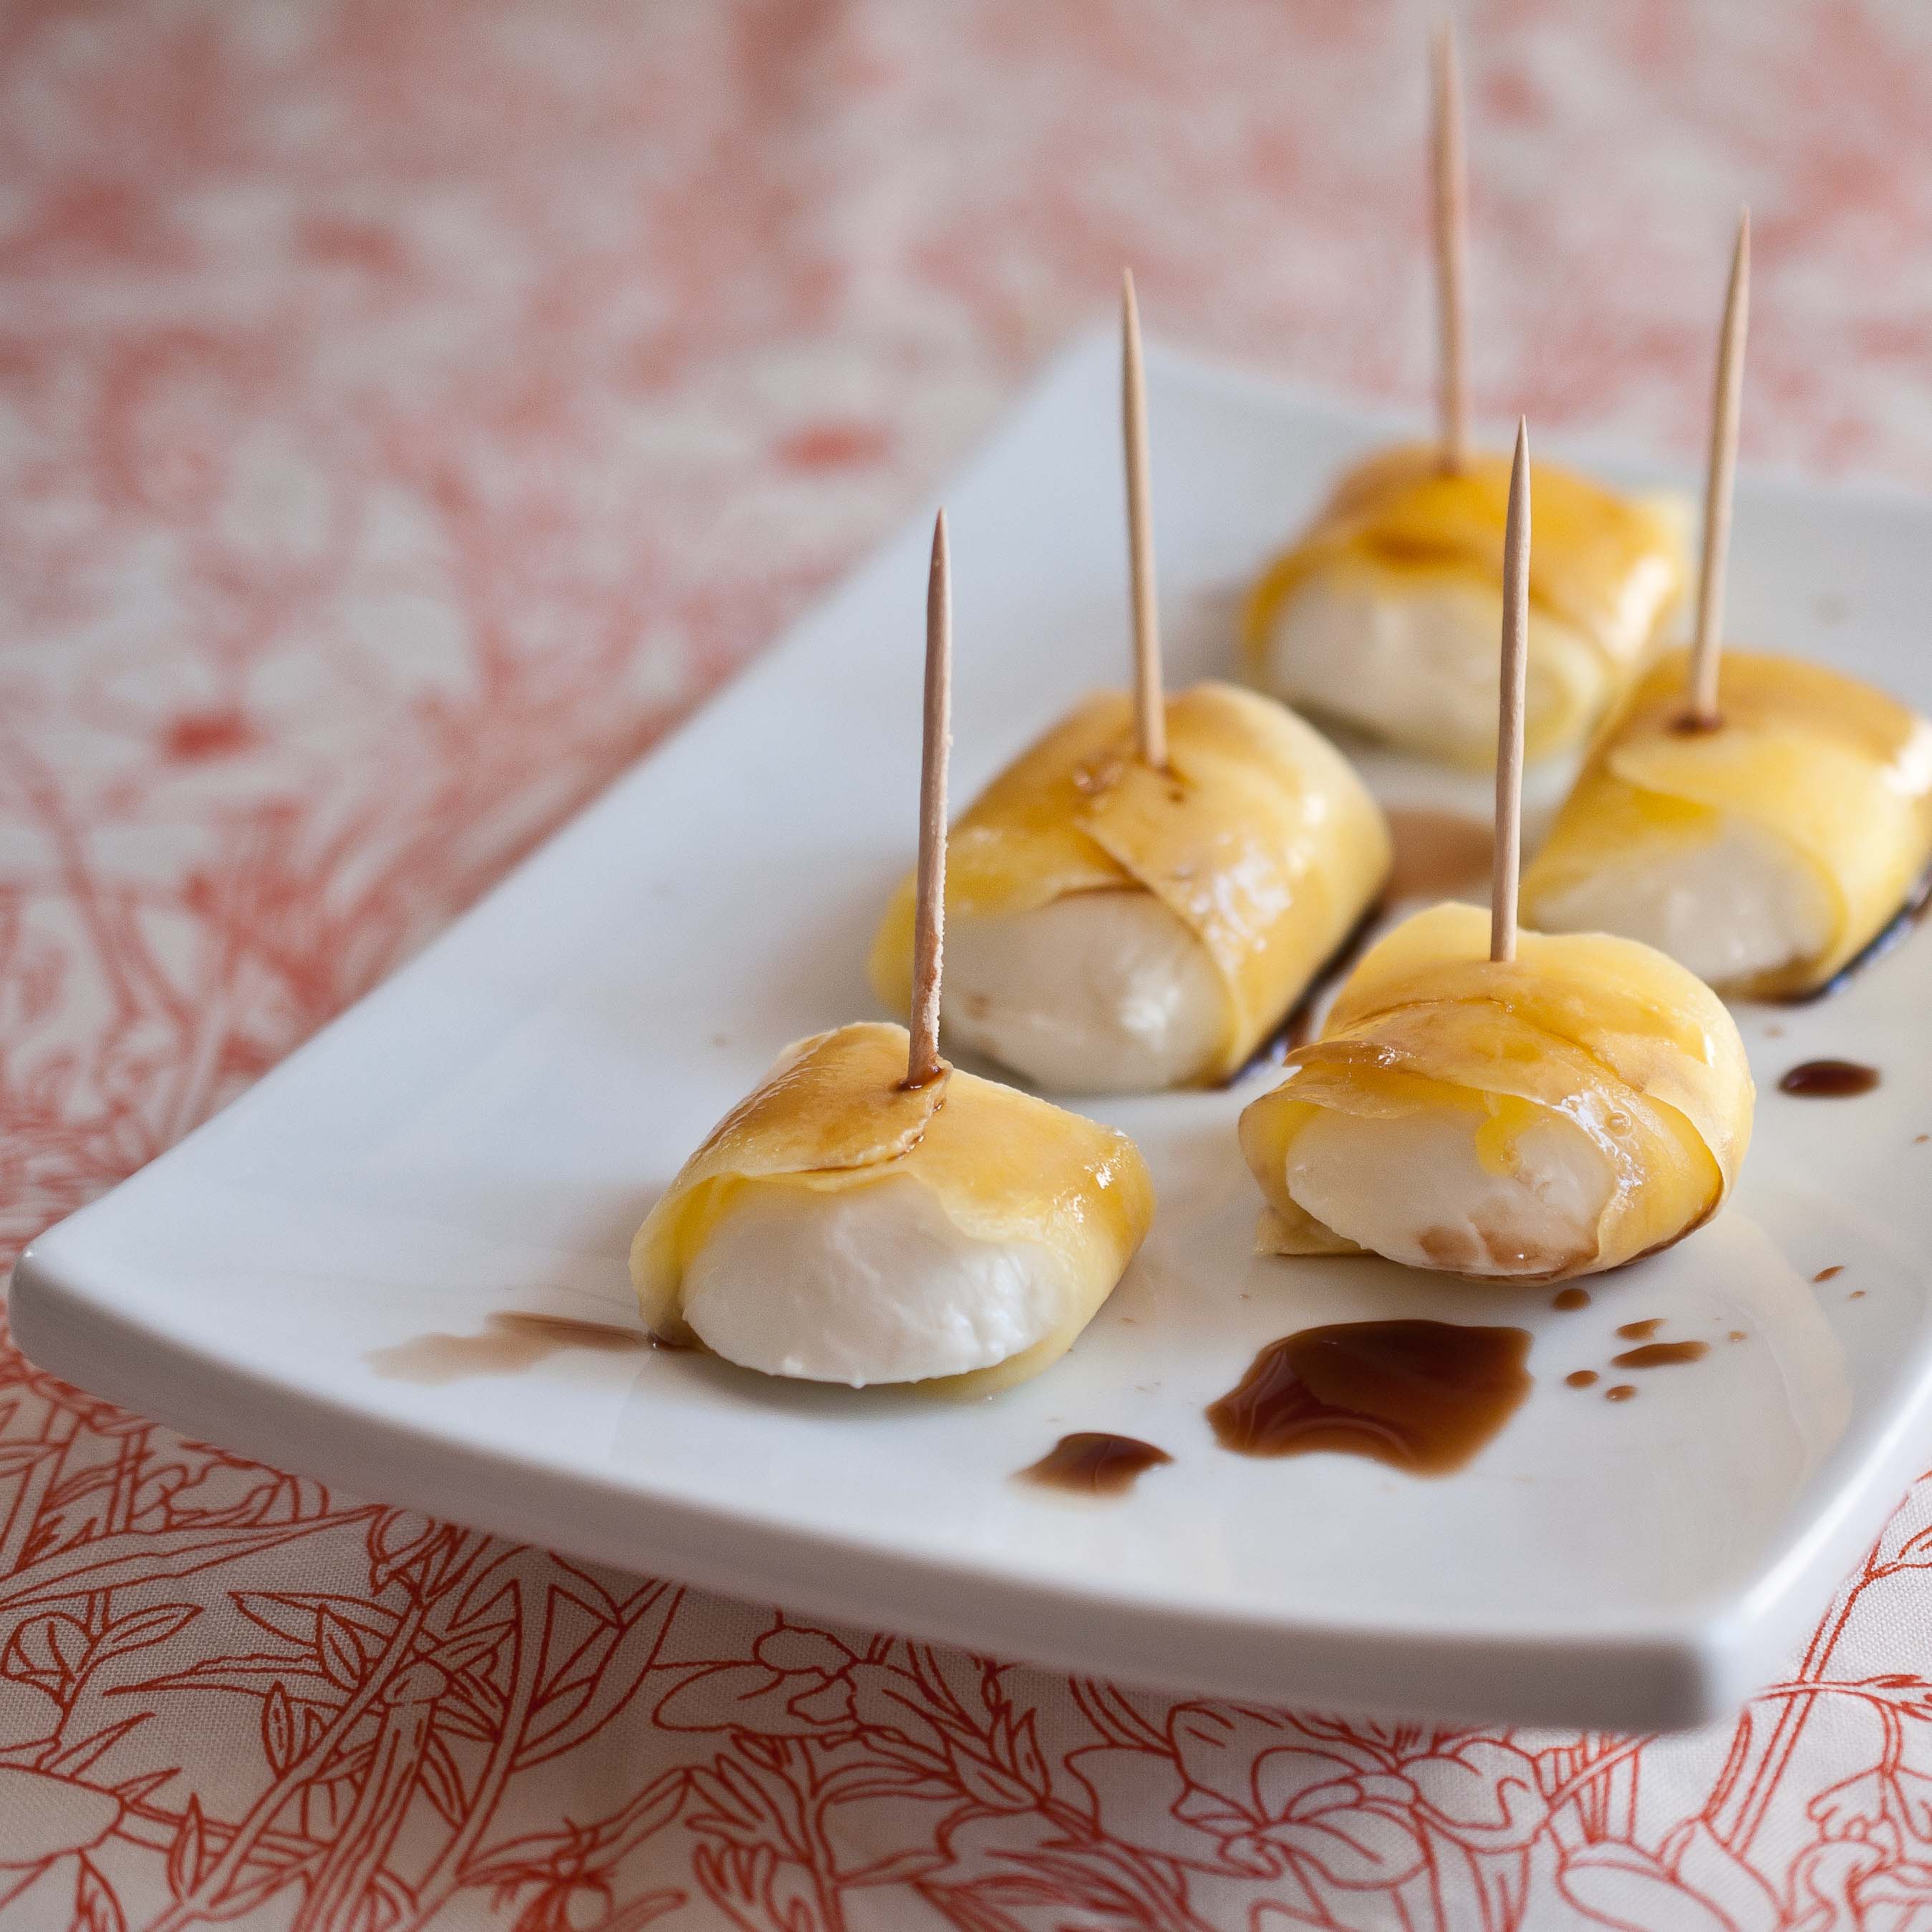
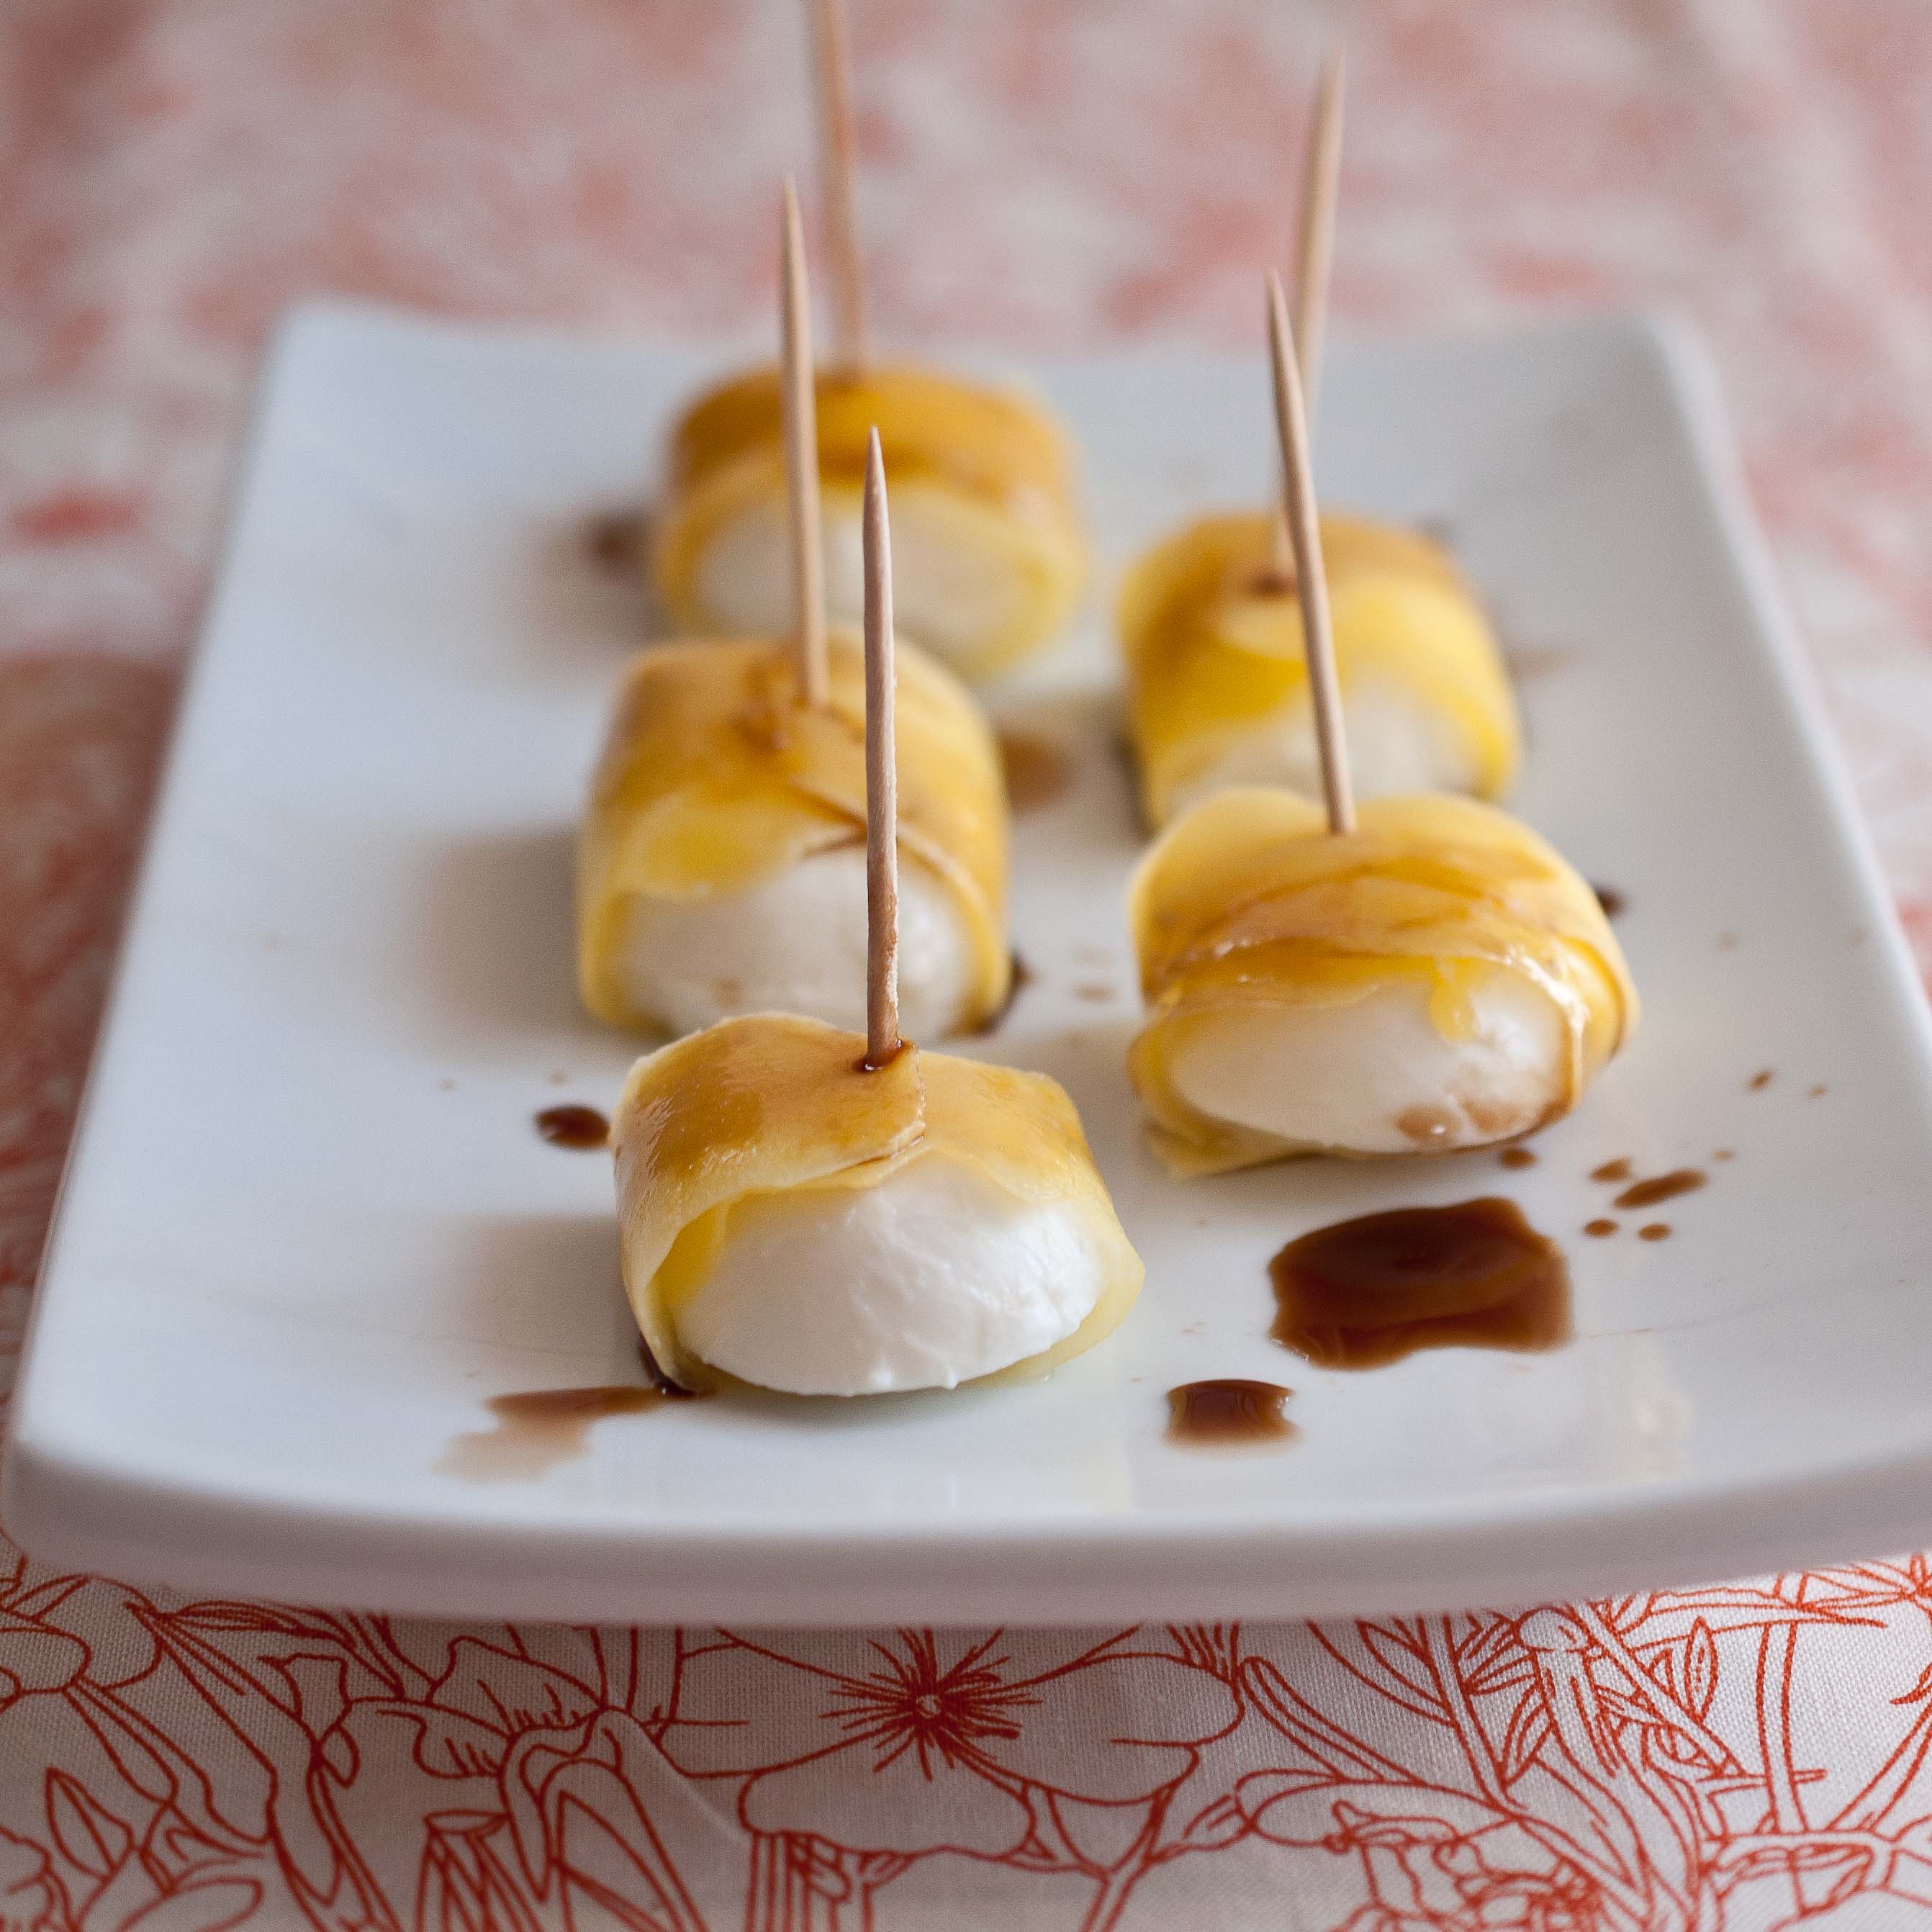
In keeping with the motto of my life: Figure out what is great about the situation that you are in and enjoy the crap out of it, I decided to give you a tasty treat that requires no cooking. It only has three ingredients and the only tricky part is shaving the mango with the vegetable peeler. But even if you need two of three strips of mango to go around the mozzarella ball, who cares. Its easy and tasty and looks fancy. Don’t sweat it.
I hope to bring you pictures of my new place soon, right now the mess isn’t nearly charming enough to be photogrpahed. Except Taters room, it’s her perfect little sanctuary in the midst of the chaos, even the pictures are hung and every box has been unpacked. Other than that, the rest can wait.
Mango Wrapped Mozzarella
1 large mango
12 Bocconcini or Ciliegine sized mozzarella balls
2 tbs balsamic vinegar
Peel the mango with a vegetable peeler. once the peel has been removed, shave thin slices of the mango with the vegetable peeler until you have enough to cover the mozzarella balls.
Wrap the mozzarella balls with the mango slices and secure with a toothpick. Drizzle with balsamic vinegar.
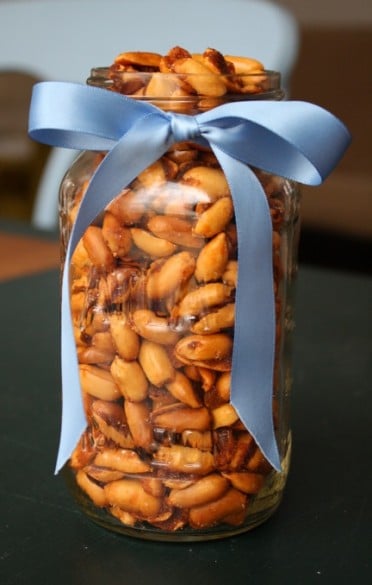
We had this little talk last week about Chipotle, and how much I adore it. I gave you a list of really great things you can make once you open an entire can.
And you all give me a bit of a sideways glance and said, "Or, you could just freeze it."
Turns out, you all are much more brilliant than I will ever be. And that lead me to wonder what other things I let go to waste when, had I asked you all, I would have know that I could just freeze it and use it when I need it. So here is a list, you probably can tell that I love lists. Quick, organized, and to the point. LISTS! Here is another one for you:
Things You Didn’t Even Know You Can Freeze
(and by YOU, I really mean ME)
1. Fresh herbs. Seriously, who have even thought? Oh, that’s right, you. Not me, I never would have thought to chop a few chives, make sure the rest was dry, put it in a ziplock bag and then freeze it for later use. Brilliant.
2. Citrus. Why didn’t I think about this durring my love affair with blood orange season? You need to break the citrus down, but you can freeze the juice in ice cube trays and then freeze the cubes in zip lock bags. You can also freeze the zest in zip lock bags. I would love to have a bag of juice when I make more of these.
3. Tomato Paste. This will come in handy. I only need about a tbs at a time, and freezing the rest will help me avoid the "do I toss the rest now, or put it in the fridge and then toss it when it inevitably goes bad?" Mental debate that goes on in my head.
4. Strawberries! I knew that one. or more accuratly: I’ve seen them frozen at the grocery store, and I know how quickly fresh ones go bad so WHY have I never just put those berries on the verge of going bad into freezer bags and store them in the freezer?? I will now.
5. Rice & Grains. Make one huge batch of rice or quinoa at the beginning of the month and then portion them out into small containers or zip lock bags for use through out the month. Such a time saver.
So please, if there are any "You Can Freeze That??!" Foods that you want to add to my list, just let me know.
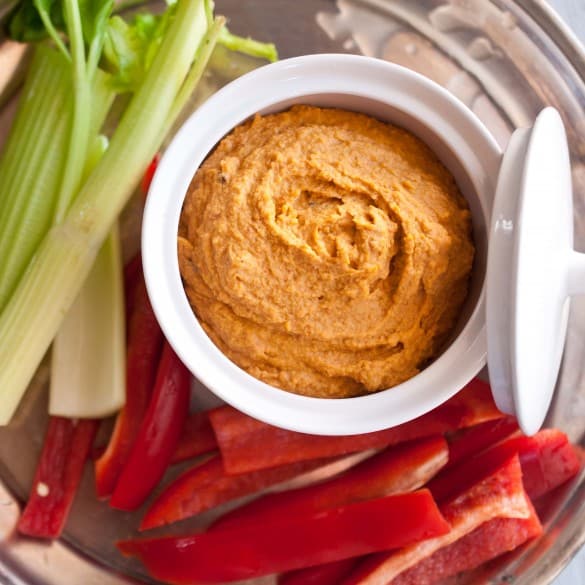
This sauce went on nearly everything I ate for about 3 days. Including, steamed artichokes, grilled chicken, mexican quinoa salad and tacos. There would have been more had I not run out.
Chipotle Blender Béarnaise
2 tbs chopped cilantro
¼ cup chopped shallots
¼ cup champagne vinegar
¼ cup white wine
3 egg yolks
1 stick unsalted butter, melted
1 chipotle pepper in adobo sauce, canned
2 tsp adobo sauce from can
Add the cilantro, shallots, vinegar, and wine to a pan over medium heat. Allow to simmer and reduce until about 2 tbs of liquid remain, about ten minutes. Remove from heat and allow to cool.
In a food processor add the reduction, egg yolks, chipotle and adobo sauce, process until well combined. Melt the butter until very hot and just starting to bubble. Remove the stopper from the top of the food processor lid. Turn on the food processor, allowing to process for a few seconds before beginning to slowly pour the melted butter into the food processor while it is still running. Allow to process until well combined and frothy, about 3 minutes.
Serve over every possible savory substance in your kitchen, chicken, steak, vegetables, shrimp, a spoon.
When you get pregnant, people love to warn you about what will be missing from your new life once the baby comes. "You’ll never sleep again!!" They laugh upon hearing the great news. "Have sex now while you can!" His friends will tell him. "You are going to be so broke, those little suckers are expensive!" as if you just bought a tanking stock against their best financial advice.
What they don’t tell you is that you will worry constantly. About everything. An irrational, gut wrenching fear that is so far beyond the non-mom worries you once had, any other type of fear just seems absurd. Even rational, legitimate non-mom fears seem silly in the face of your completely irrational New Mom fears. Forget that old fear of getting mugged late at night in a parking garage that has always given you the creeps, what about a Zombie attack?! What would I do with the baby if there are Zombies? She’s like a tiny appetizer! Fear of getting cancer? Forget it, what if a Mountain Lion wanders into the house and wants to eat the baby! Again, she’s like a tasty little morsel! What would I do?! I need a plan!
You know how insane you’re being. You know it’s crazy. But you can’t help it. Forget sleep and sex and money, the hardest part of being a new mom is the crazy worry that wraps itself around you like a Boa Constrictor and squeezes the air right out of your lungs (Oh No! Boa constrictors?! What would I do if I’m at the park and one of those things got a hold of the baby?! Do they have those in California? Must. Google. It.)
So, for the sake of my own sanity, and I have to admit that I’m sure I’m WAY crazier than most of you, I’ve devised a few rules to help me cope:
1. Don’t watch the news. Especially local news. No good can come of bored reporters looking to sensationalize a story. Just watch reruns of Friends instead. This also applies to clinking on that story of a dead/missing/maimed toddler on the front page of Yahoo news. Just don’t do it.
2. Use the phrase, "Does it end well?" when those friends and family members, who LOVE to relay to you the most tragic news, start to tell you about a story that they just heard. And if they even hesitate for a moment, yell in their face, "WHY ARE YOU TELLING A NEW MOM A STORY ABOUT A DEAD BABY??" It’s therapeutic, I promise.
3. Sometimes you have to make a plan. Even though it’s insane and you know that you will never be adrift at sea after your plane crashes in the atlantic with a toddler and a group of hungry cannibals, sometimes it makes you feel better to just make a plan so that your mind can rest.
4. Dumber People than you have raised kids. Sounds harsh, right? It makes me feel better. When I hear stories about crack addicted mothers living on the streets, turning tricks in dirty hotel rooms while the 6 year old and a newborn baby are locked in the closet, most people think, "That’s awful! Those poor kids!" Not me, I think, "Well if she didn’t manage to get her kids killed or eaten by the ravenous undead, I think I have a pretty good shot!" When I feel like I barely have a 50/50 shot of getting my kid out of childhood alive and intact, it makes me feel better to think, "Dumber people than me have done it."
And when all else fails, bake. But watch those Hansel & Gretel nightmares, those will keep you up at night.
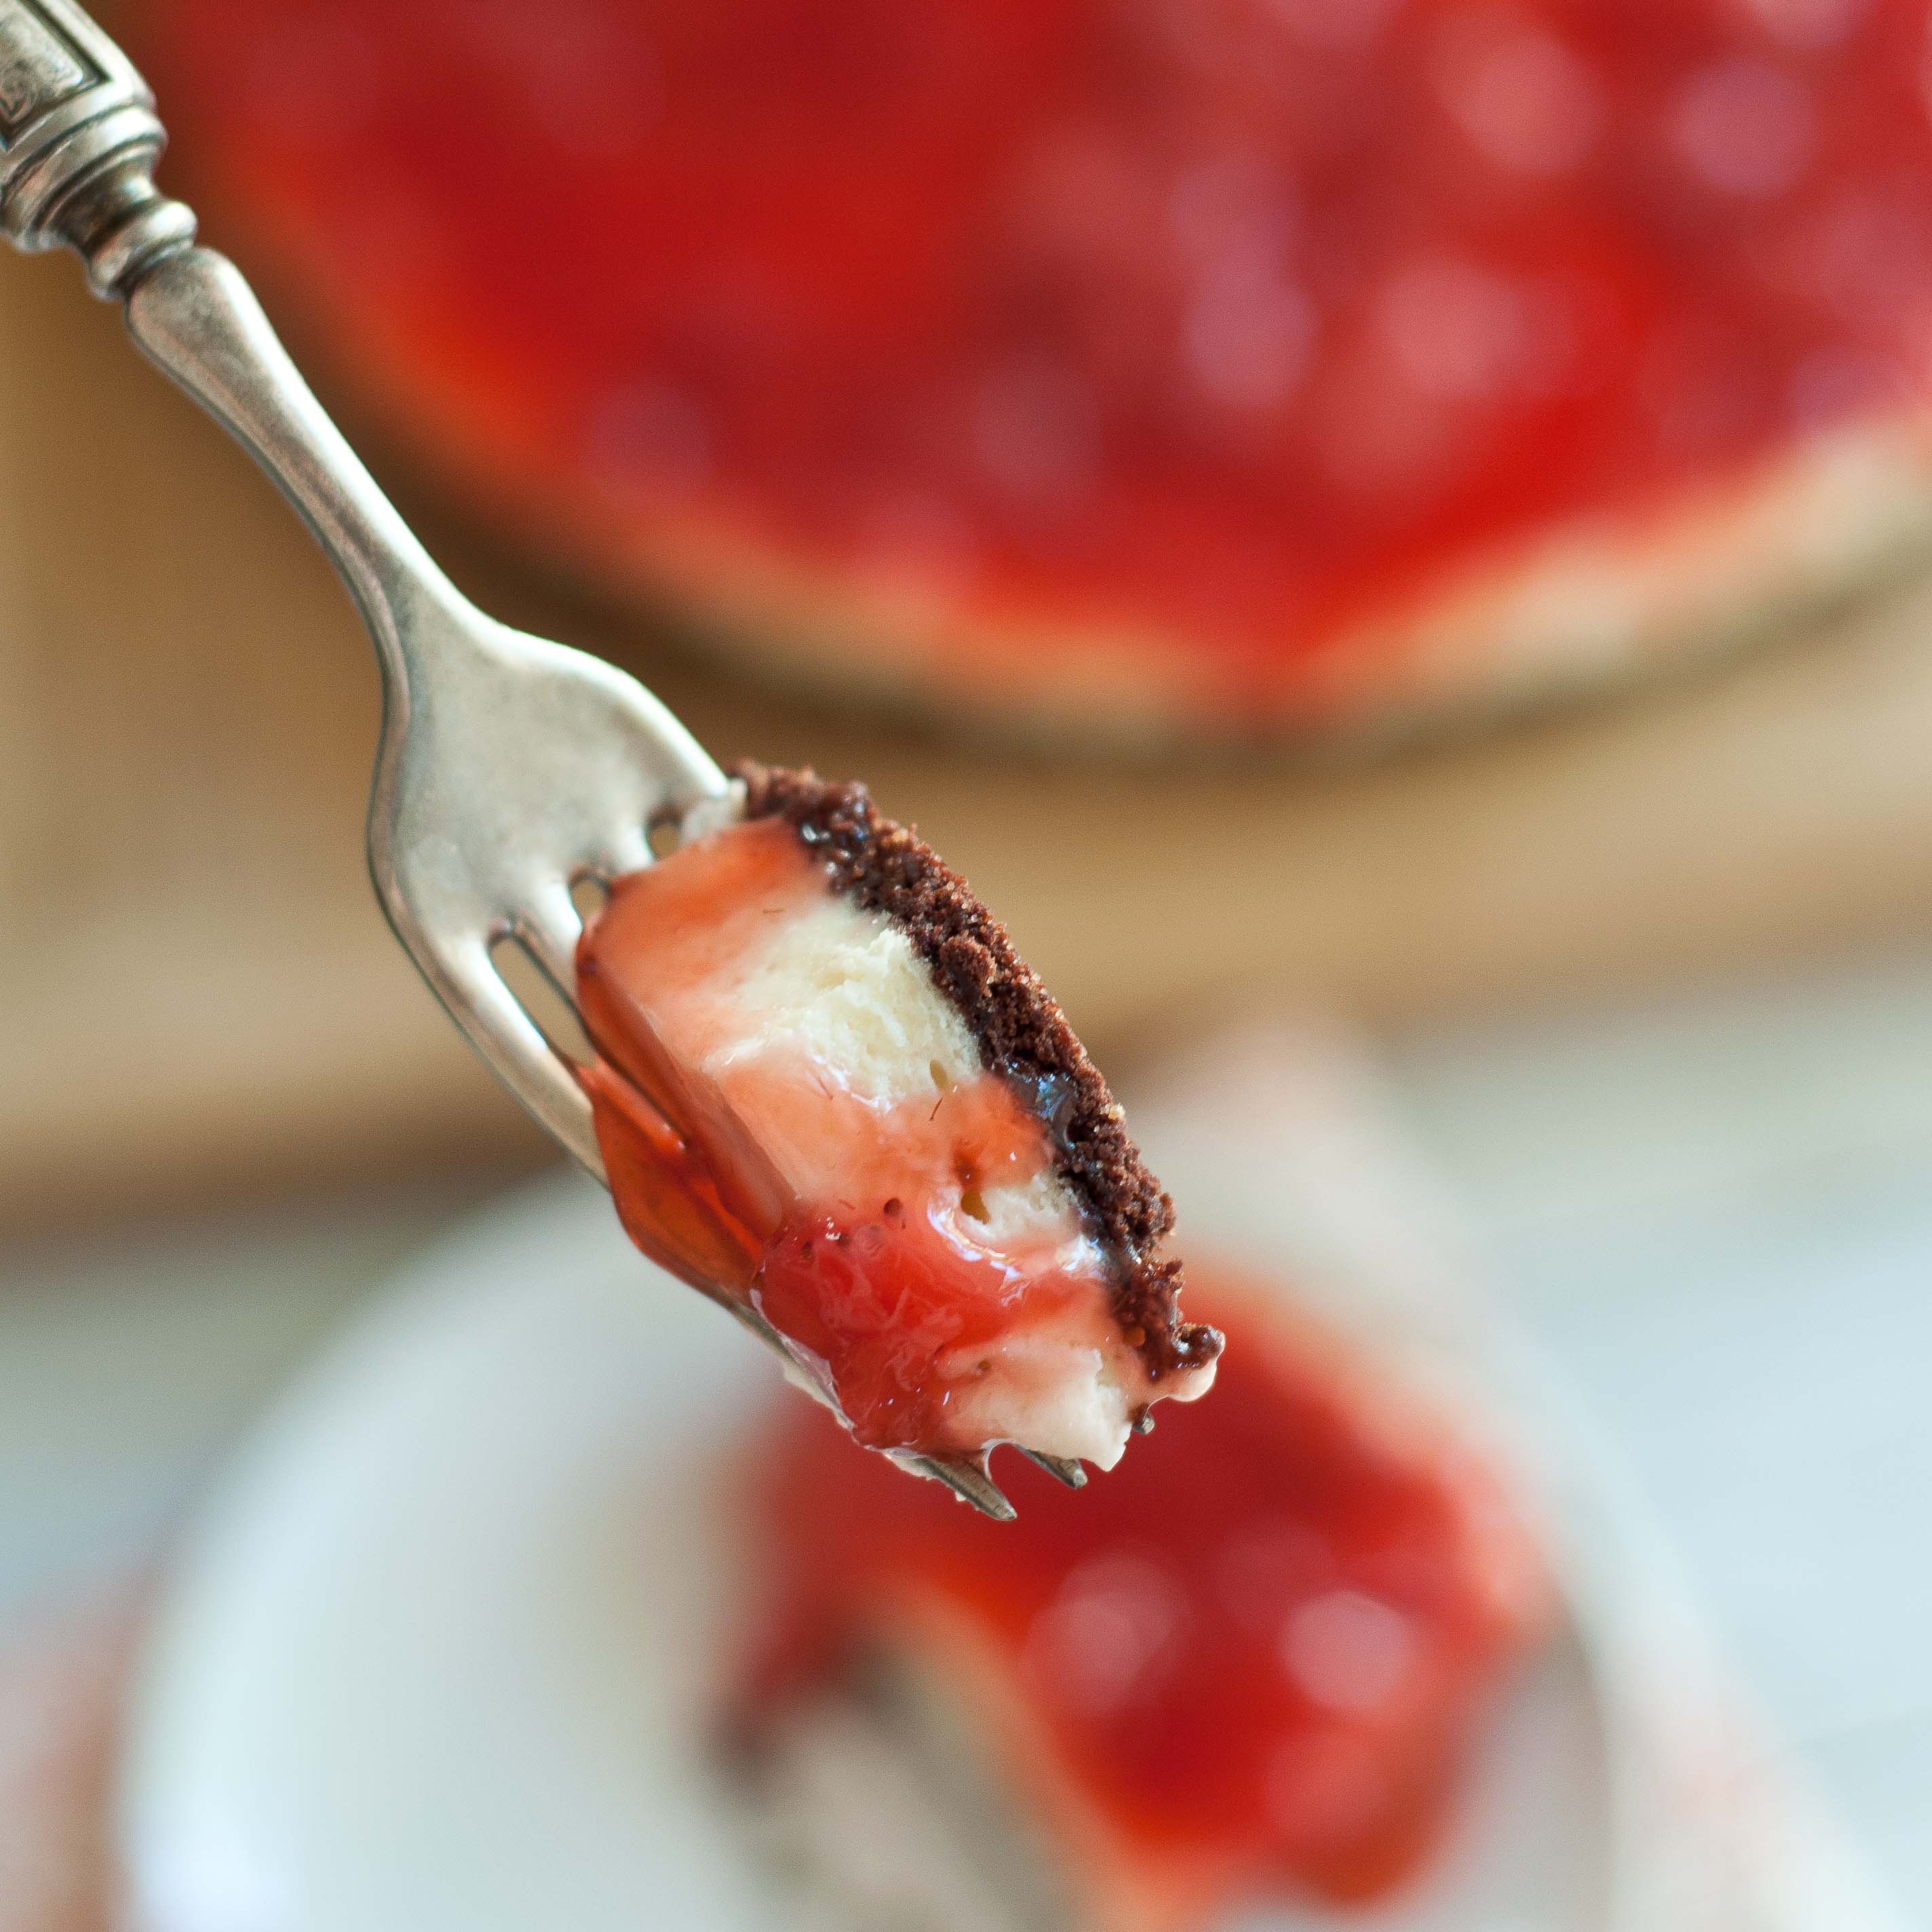
Chocolate Strawberry Cream Cheese Tart
Ingredients
Crust:
2 cups of chocolate graham cracker cookies (like Trader Joes Cat Cookies, or Teddy Grahams)
2 tbs brown sugar
3 tbs melted butter
Filling:
16oz cream cheese
2/3 cup sugar
1 egg
1 tsp vanilla extract
Topping:
2/3 cup water
1 tbs corn starch
3 cups fresh strawberries, sliced
1/2 cup sugar
Instructions
Preheat oven to 350.
In a food processor, add the chocolate graham crackers and brown sugar. Process until only crumbs remain. Add the melted butter and pulse until combined and it resembles wet sand. Dump into the bottom of a 9 inch tart pan with a removable bottom (that has been sprayed with cooking spray). Press very well into the bottom of the pan using the flat bottom of a heavy glass, measuring cup or mug.
In the bowl of a stand mixer, beat the cream cheese and the sugar until well combined and creamy, about 3 minutes. scrape the bottom and add the egg, beating until well combined. Scrape the bottom of the bowl and then add the vanilla and beat on high for about 2 minutes. Pour over the crust and smooth out with a spatula.
Bake at 350 for 20 minutes or until the center of the cream cheese doesn’t jiggle when the oven rack is shaken. This is not a "toothpick inserted in the center should come out clean" situation. Remove from oven.
While the tart is cooking, add the remaining ingredients to a pot over medium high heat. Allow to boil until thick and very bubbly for about 10 minutes, stirring frequently. Remove from heat and allow to cool.
Top the tart with the strawberries and chill until set, about 4 hours, before removing from the tart pan.
Creme Brulee and Bread pudding are two things that never occurred to me growing up. Creme Brulee was much to bourgeois for a kid who raised pigs in her back yard and bread pudding sounded like something you ate over Bingo hoping the Polident didn’t give out. As real life grown up, I realized that these are both really simple desserts that have a versatility and beautiful creaminess that have earned themselves a place in my kitchen. Bread pudding has been my way to use up the last bit of homemade pastries, cinnamon rolls and raisin bread that I hate to throw out but go stale so quickly. And Creme Brulee is so easy and lovely, lending itself very well to a multitude of flavors, it tends to be a Go-To for me when I’m a loss for what to serve.
Mixed together, it’s fairly addictive, easy to make and has a homestyle fanciness that’s perfect for so many get togethers.
Creme Brulee Bread Pudding
3 egg yolks
1/2 cup of sugar
1 1/4 cup of heavy cream
1 tsp vanilla
1/2 tsp slt
1/4 cup granulated sugar for brulee crust topping
3 cups bread, crust removed, cut into 1 inch cubes
Preheat oven to 300.
In a bowl, combine the yolks and 1/2 cup of sugar and whisk until light and frothy. In a pot, combine the cream, salt and vanilla and heat until steamy but not boiling. Remove from heat and allow to cool for about 10 minutes. While you whisk the eggs, slowly, slowly add the cream, whisking until combined. If there are any lumps or “eggy bits” in your cream mixture (possibly because you didn’t let your cream cool down) strain the custard through a mesh strainer.
Assemble 6 ceramic ramekins, or individual oven safe serving bowls in a baking dish. Add the bread cubes to each dish, pressing down a little bit to compact.
Pour into the custard over the bread until covered.
Add hot water to the baking dish until about half filled, the water rising to about half way up the sides of the ramekins.
Bake at 300 until the custard no longer wobbles when the rack is shaken, about 20-25 minutes (this is not a "tooth pick inserted in the middle should come out clean" situation).
Refridgerate until set, at least 2 hours. Just before serving, top the creme brulee with an even layer of granulated sugar. Pass the flame of a kitchen torch slowly and evenly over the sugar until it’s liquified and a light amber colored. Serve immediately. The sugar crust will start to break down after about an hour.
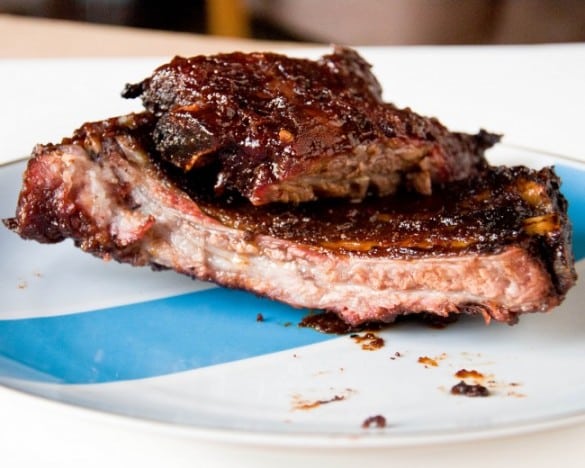
I don’t buy many things in cans. I DO buy Chipotle peppers, and those come in cans. I’ve had to become inventive with them, as I try to use the food in my fridge rather than let it go to waste. And although the can these gorgeous smoked Jalapenos come in is rather small, a little goes a long way and I end up with a lot left over.
Seeing as how I am asking you to open a can to make this here sandwich, I also wanted to leave you with a few other things you can do with the rest of that can, once you devour that spicy, smokey grilled cheese.
I rarely do "Internet Round-Ups," But Chipotle peppers and my desire to use the whole can has left me no choice, but has give me quite a few recipes that I can’t wait to try. Check them out:
Now you are fully equipped to use an entire can of Chipotle In Adobo.
Shiitake Mushroom & Chipotle Grilled Cheese
1 tbs olive oil
6-8 large shiitake mushrooms, sliced
2 chipotle peppers in adobo sauce, chopped (use gloves)
2 tbs cream cheese, softened
1 cup shredded cheddar cheese
2 tbs chopped cilantro
4 slices of bread
2 tbs butter, softened
In a pan over medium high heat, add the oil and allow to get hot but not smoking. Add the sliced mushrooms and sautee until dark and cooked through, remove from heat.
In a bowl, add the softened cream cheese and the chipotle peppers, stir until well combined. Add the cheddar cheese, mushrooms and cilantro and stir until combined.
Butter one side of each slice of bread. Return the pan used to cook the mushrooms to medium high heat, add one slice of bread, butter side down to the pan. Carefully slather half of the chiptole cheese mixture onto the bread and top with another slice, butter side up. Repeat for the additional slices of bread. Cook on each side until browned, about 4 minutes per side.
Remove from pan, slice and serve with a cold beer.
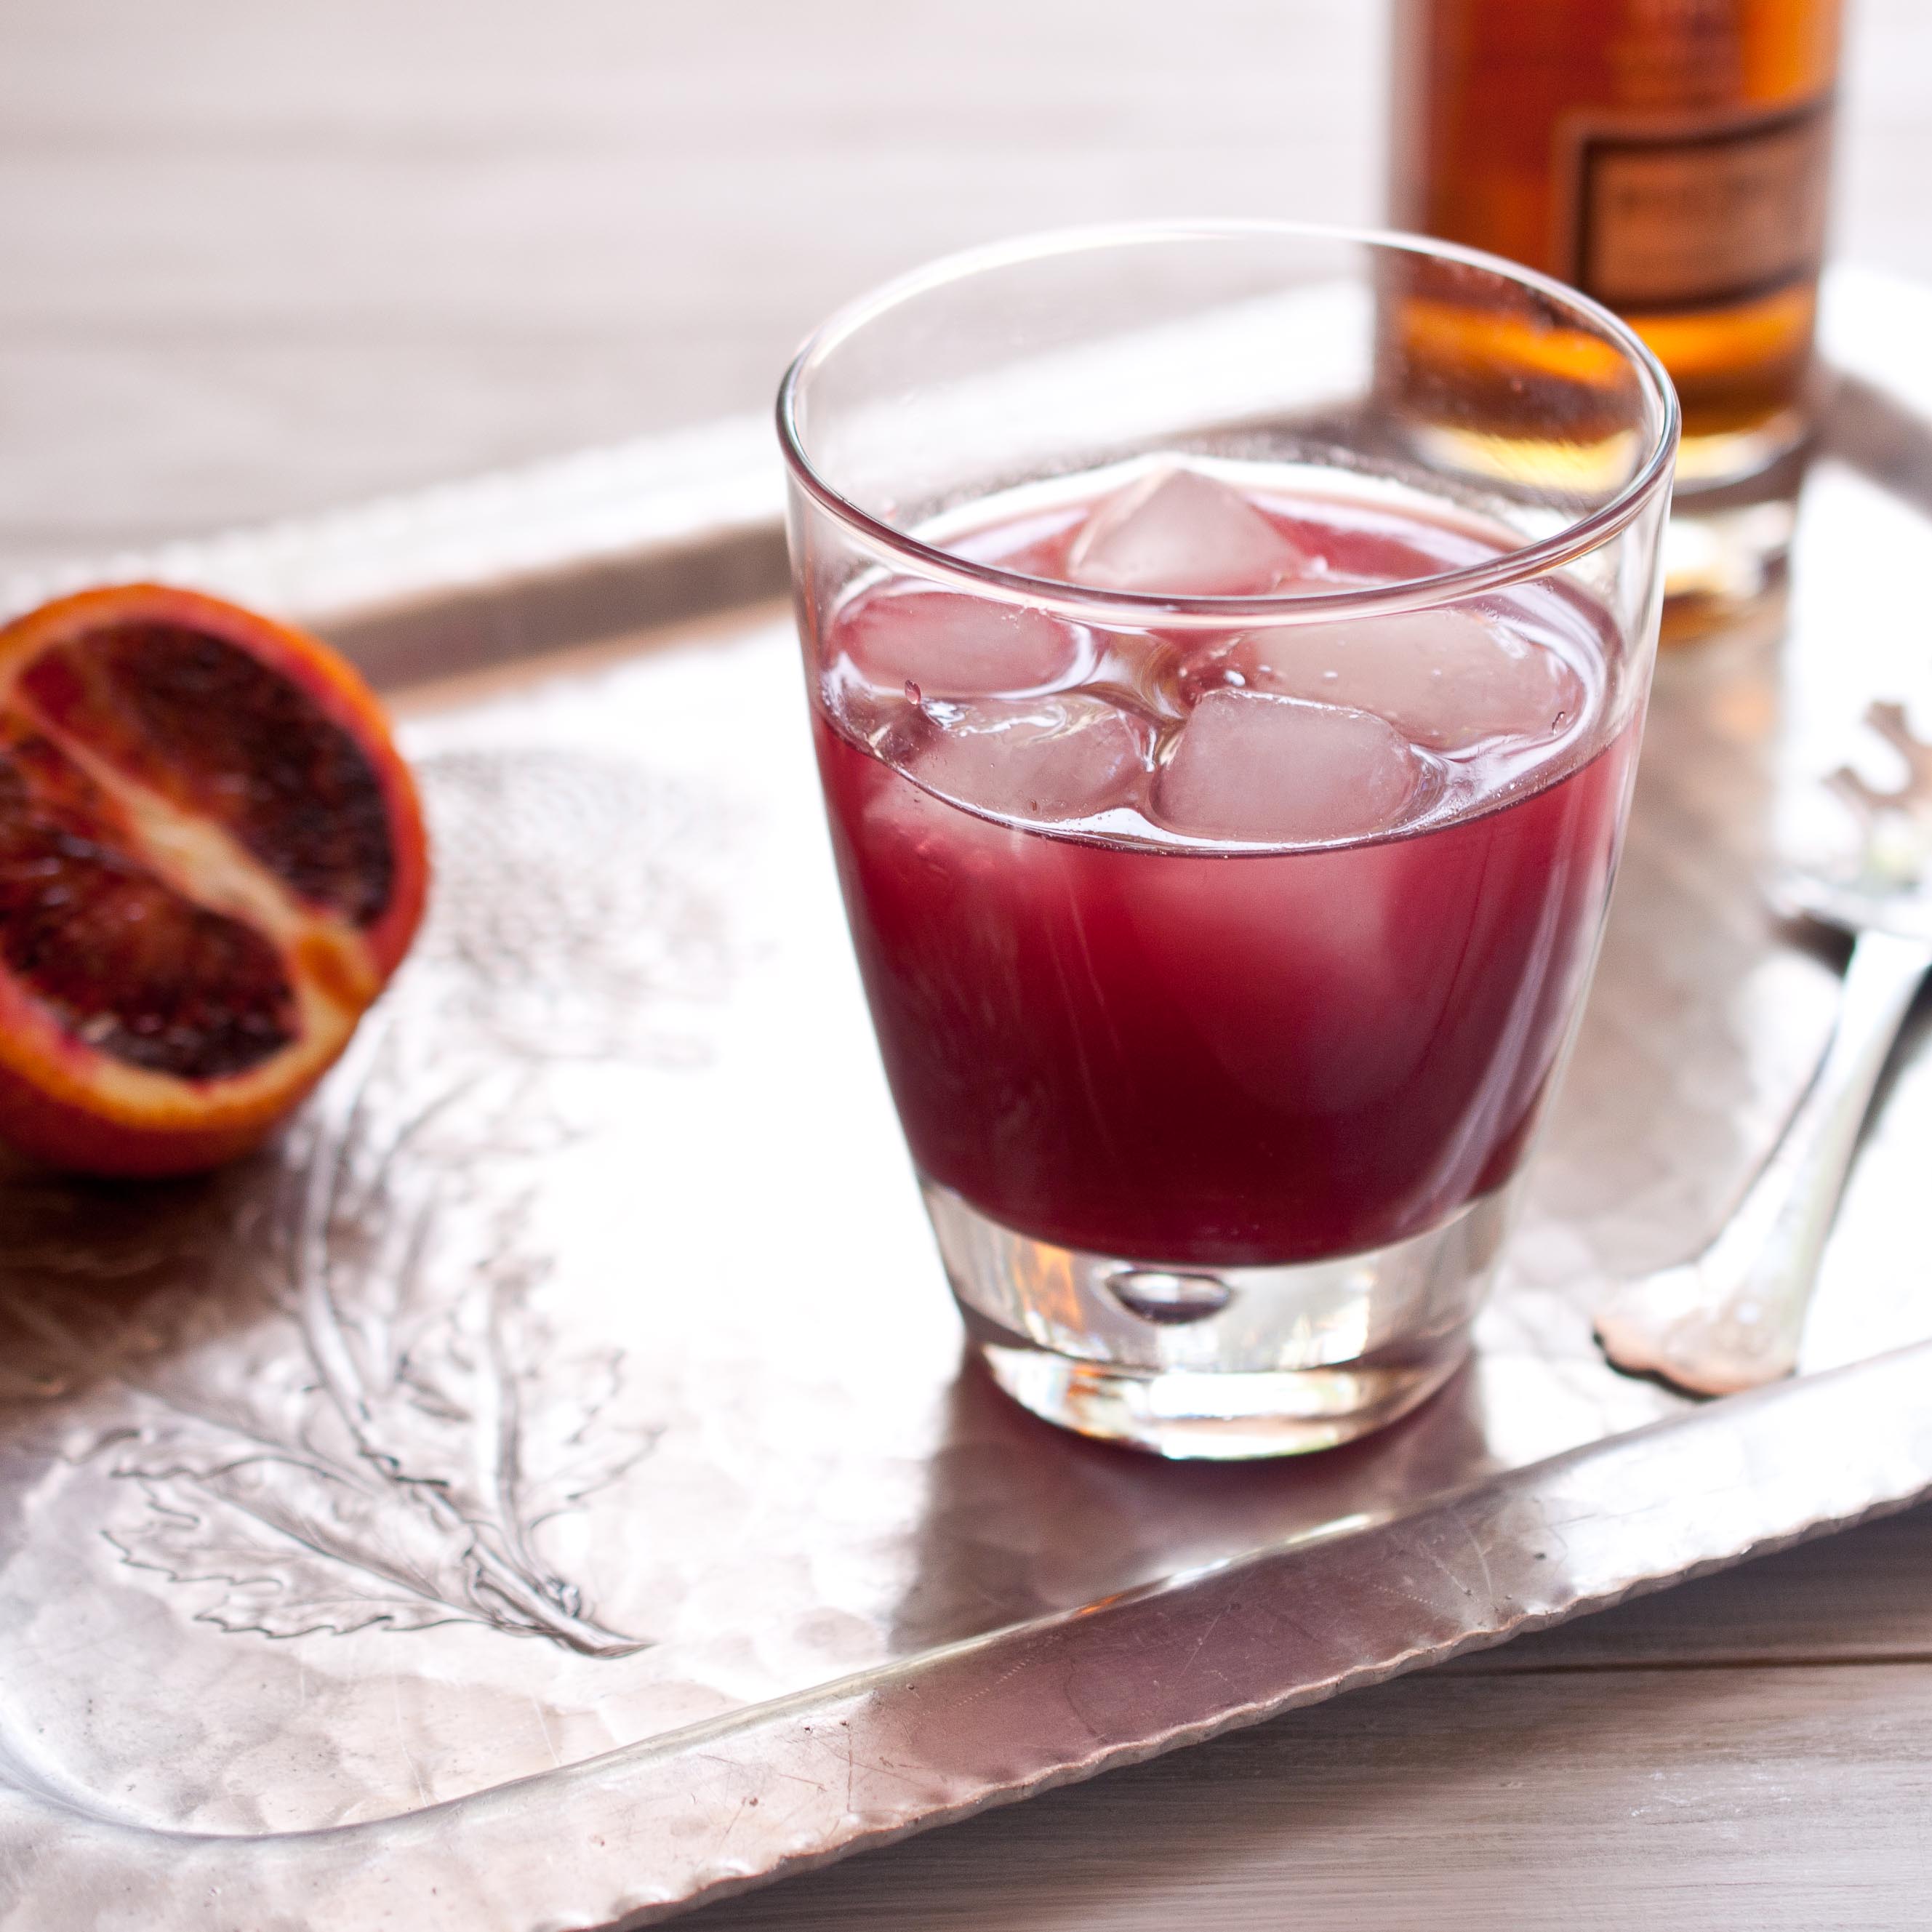
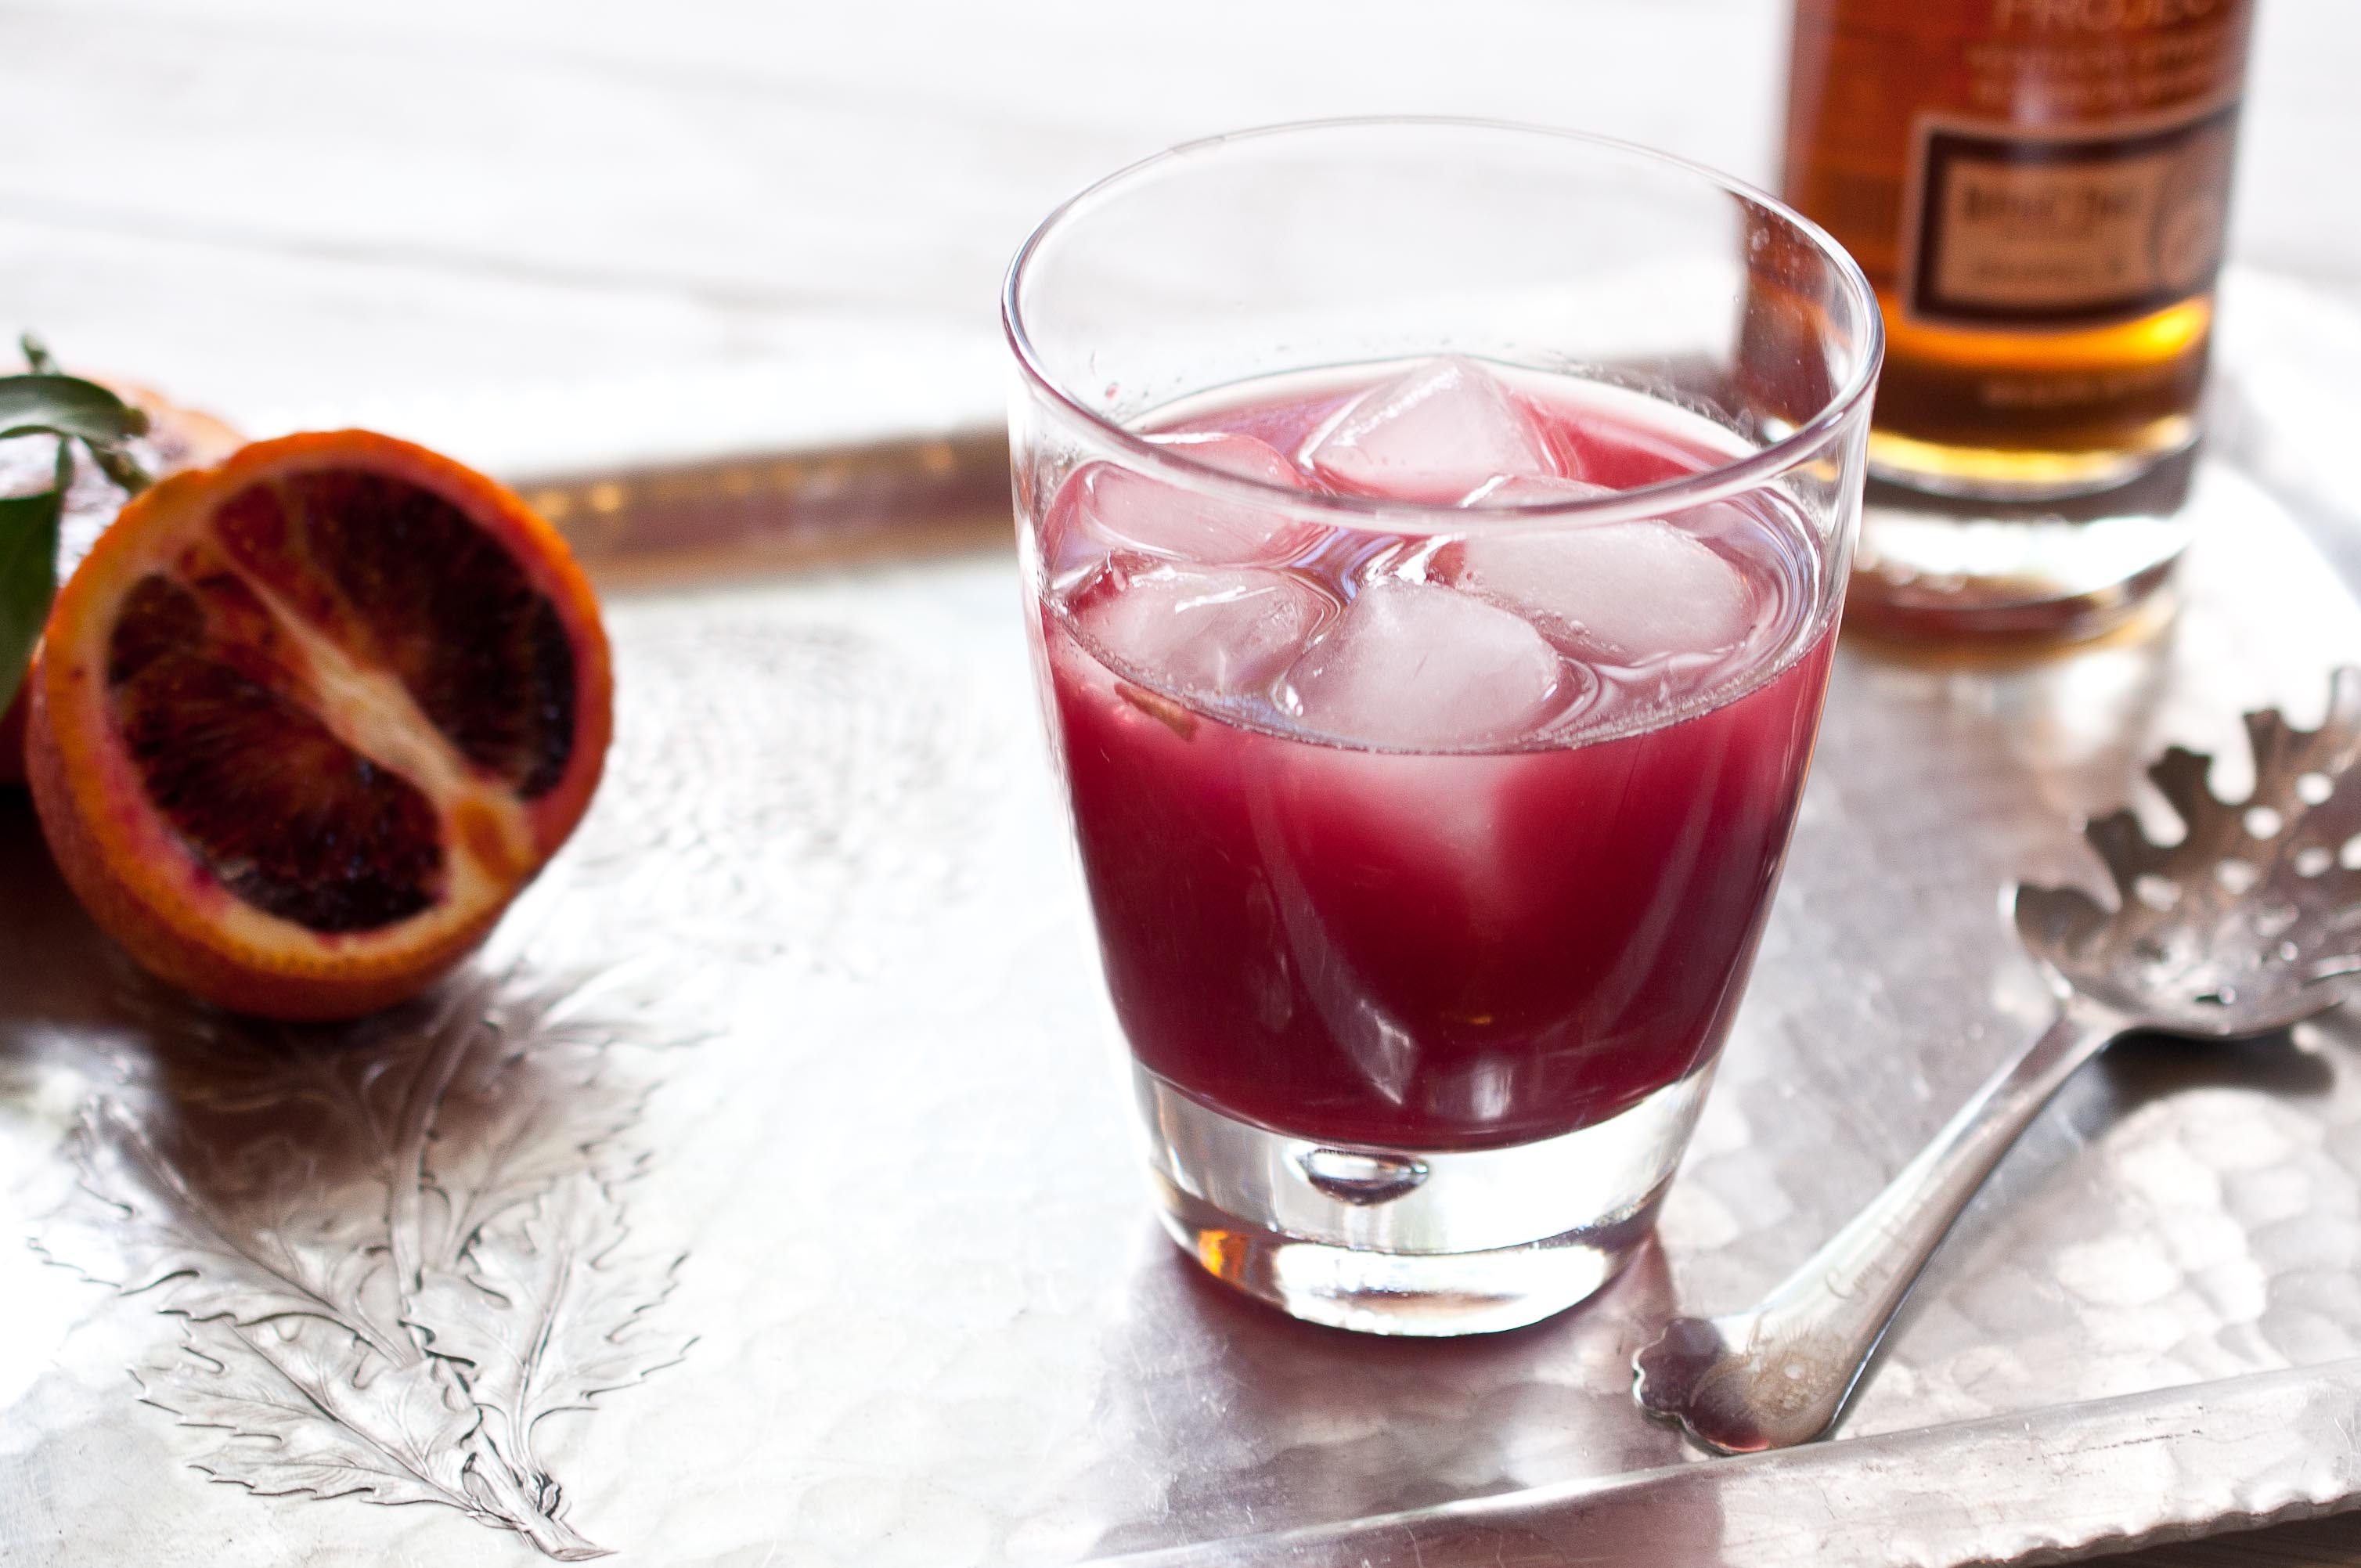
I don’t have a name for this drink. I like names. I love this cocktail. So you can see what type of conundrum this has created in my life. I’ve even gone against suit and made this three times since it’s invention two weeks ago.
If you have a creative, fun name for this cocktail, let me have it. I’ll give you full credit and I will finally be able to refer to this properly when I make it for guest.
Update: This drink now has a name: Hot Blooded
I’ve also learned a few things about drink making with peppers, something I am completely and whole heartedly in love with. Spicy drinks have even lured me away from my one try love of the drink world: Craft Beer. While beer will still hold the number one rank in my drinking life, spicy cocktails have snuck into a close second spot. But there are rules when concocting libations from such unpredictable ingredients. Here are some rules to keep in mind:
1. Most of the heat from pepper are in the seeds. The more seeds you leave in, the hotter it will become. Exponentially.
2. When peppers sit in alcohol it only takes seconds for the heat level to go from hot to way too hot. It happens faster than you would expect.
3. No two peppers are the same and there is no way to predict how hot the ones you have chosen will be.
4. Alcohol intensifies heat. I learned this when writing an article about How To Pair Food & Wine, high alcohol beverages increase the heat level in food. The same rule applies to making cocktails with peppers.
5. Sugar mellows heat. Adding more sugar can lower the heat level a bit.
6. Use gloves. For the LOVE. You only have to forget once, and then try to take your contacts out a few hours later to NEVER do that again. If you do forget, the best way to remove the peppers evilness from your fingers is to rub copious amounts of olive oil into your hands for about 5 minutes, and then wash the olive oil off with very warm water and dish soap.
Hot Blooded:
Jalapeno, Blood Orange & Whiskey
(Named by Seth)
1 cup fresh squeezed blood orange juice
2 tbs Agave
1/2 cup whiskey
1 medium sized jalapeno, chopped, stem removed (about 2 tbs)
In a cocktail shaker, add the blood orange juice, agave and whiskey, stir until combined. Add the jalapenos, replace the shaker cap and shake three times, immediately pour through a strainer into highball glasses filled with ice, straining out the jalapenos. Discard the jalapenos.
*I made this cocktail three times. The first time I made it with hand squeezed blood oranges, by far the best choice. Knowing that blood orange season is on it’s last legs, I wanted an alternative. I made it with regular orange juice and it just wasn’t as good. I also made it with Tropicana Trop50 Red Orange, while not as good as hand squeezed blood oranges,it was much better than regular orange juice, a fine substitute. And you can buy it in most grocery stores.
Update: I think we have a name. I had so much suggestions sent to me via email, Facebook, twitter and comments, but the one I can’t get out of my head is: Hot Blooded. Thanks in no small part to Foreigner. I also LOVED the idea of a TrueBlood name, since I am shamelessly addicted to that show, Bon Temp Sunrise?? Maybe not. Thank you to Seth for the new name! I can now get some rest.
It’s hard to be a home cook. Blindly navigating a world that seems to come so effortlessly to others. Comparing our kitchen failures with the extravagant successes we see other producing. Left to wonder why we can’t make a perfect soufflé even when we follow the directions with surgical exactness.
And those of us who reached adulthood with little more skill than it takes to boil water are thrown into the same world with those girls who learned how to make perfect ears of orecchiette pasta by the twirl of their Italian Grandmothers thumbs. Those of us whose childhood culinary training didn’t extend much past reheating and defrosting.
So when you sit there, tears in your eyes as your hard work has turned to a delated over-salted mess, I want you to remember a few things:
1. No one will post their failures on their blogs. Or post pictures of them on their Facebook page. When you compare your failures with everyones success, its not fair to you.
2. Everyone fails. Ask anyone who has ever cooked and they will tell you culinary tails of epic failures. Horrible, inedible food that we will never speak of in the light of day. Sometimes we figure out why we created such a disaster, sometimes it remains a mystery.
3. Great cooks don’t give up. Sure, they fail. A lot. But they don’t give up. Focus more on your success than your failures and just keep going.
4. Make a list of the recipes that you want to tackle. Make it as huge and as grandiose as you want, you have your entire life to master them. No matter how often you make them, and what the end result is, vow to learn something from each batch.
5. Remove emotion. In order to figure out how it is that you have ended up with such a kitchen failure on your hands, you have to be able to look at it objectivly. It is hard not get emotional when you feel like you failed, but that isn’t going to teach you anything. Did you really follow the steps exactly, or are you just saying that to make yourself feel better? Did you use the ingredients that were listed or did you use a substitute thinking it would be ok? If you can use each recipe as a learning tool, it wasn’t a waste. Sometimes it’s the recipes fault, sometimes it’s the ingredients fault, and yes, sometimes it is your fault. But it’s all part of the learning process. We have all tried to change a recipe thinking it would be fine, and sometimes it isn’t. Now you know.
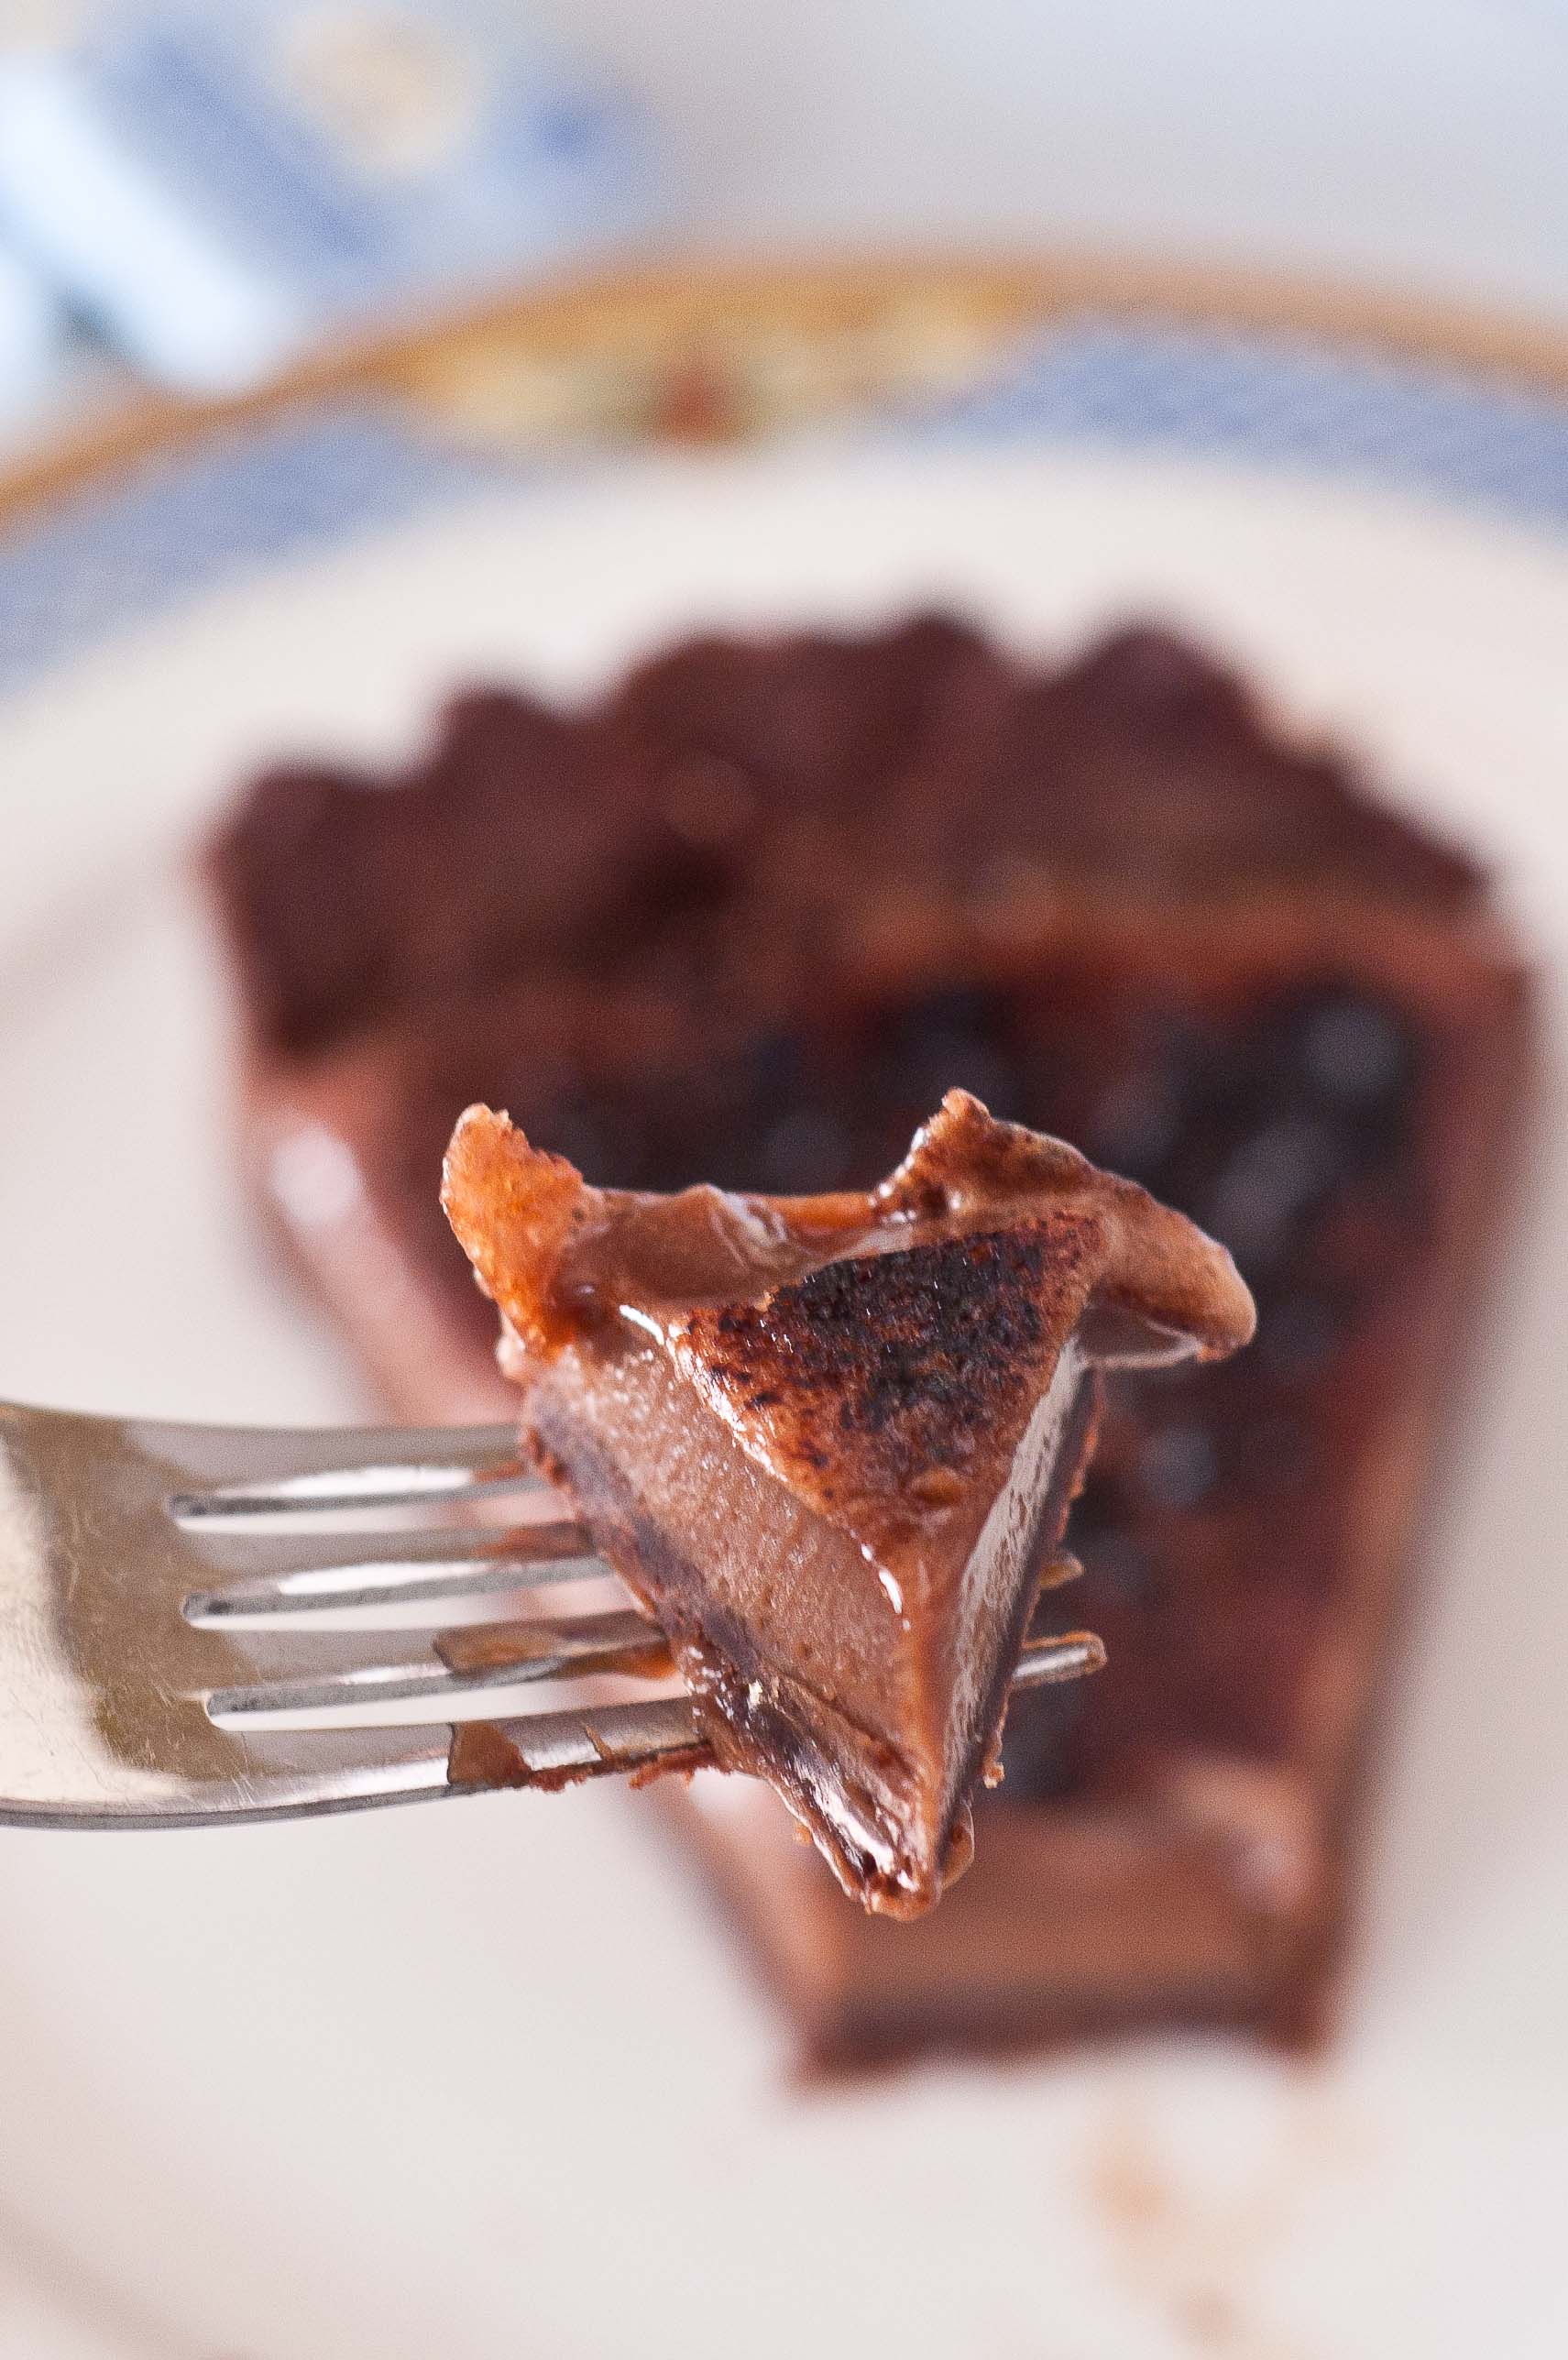
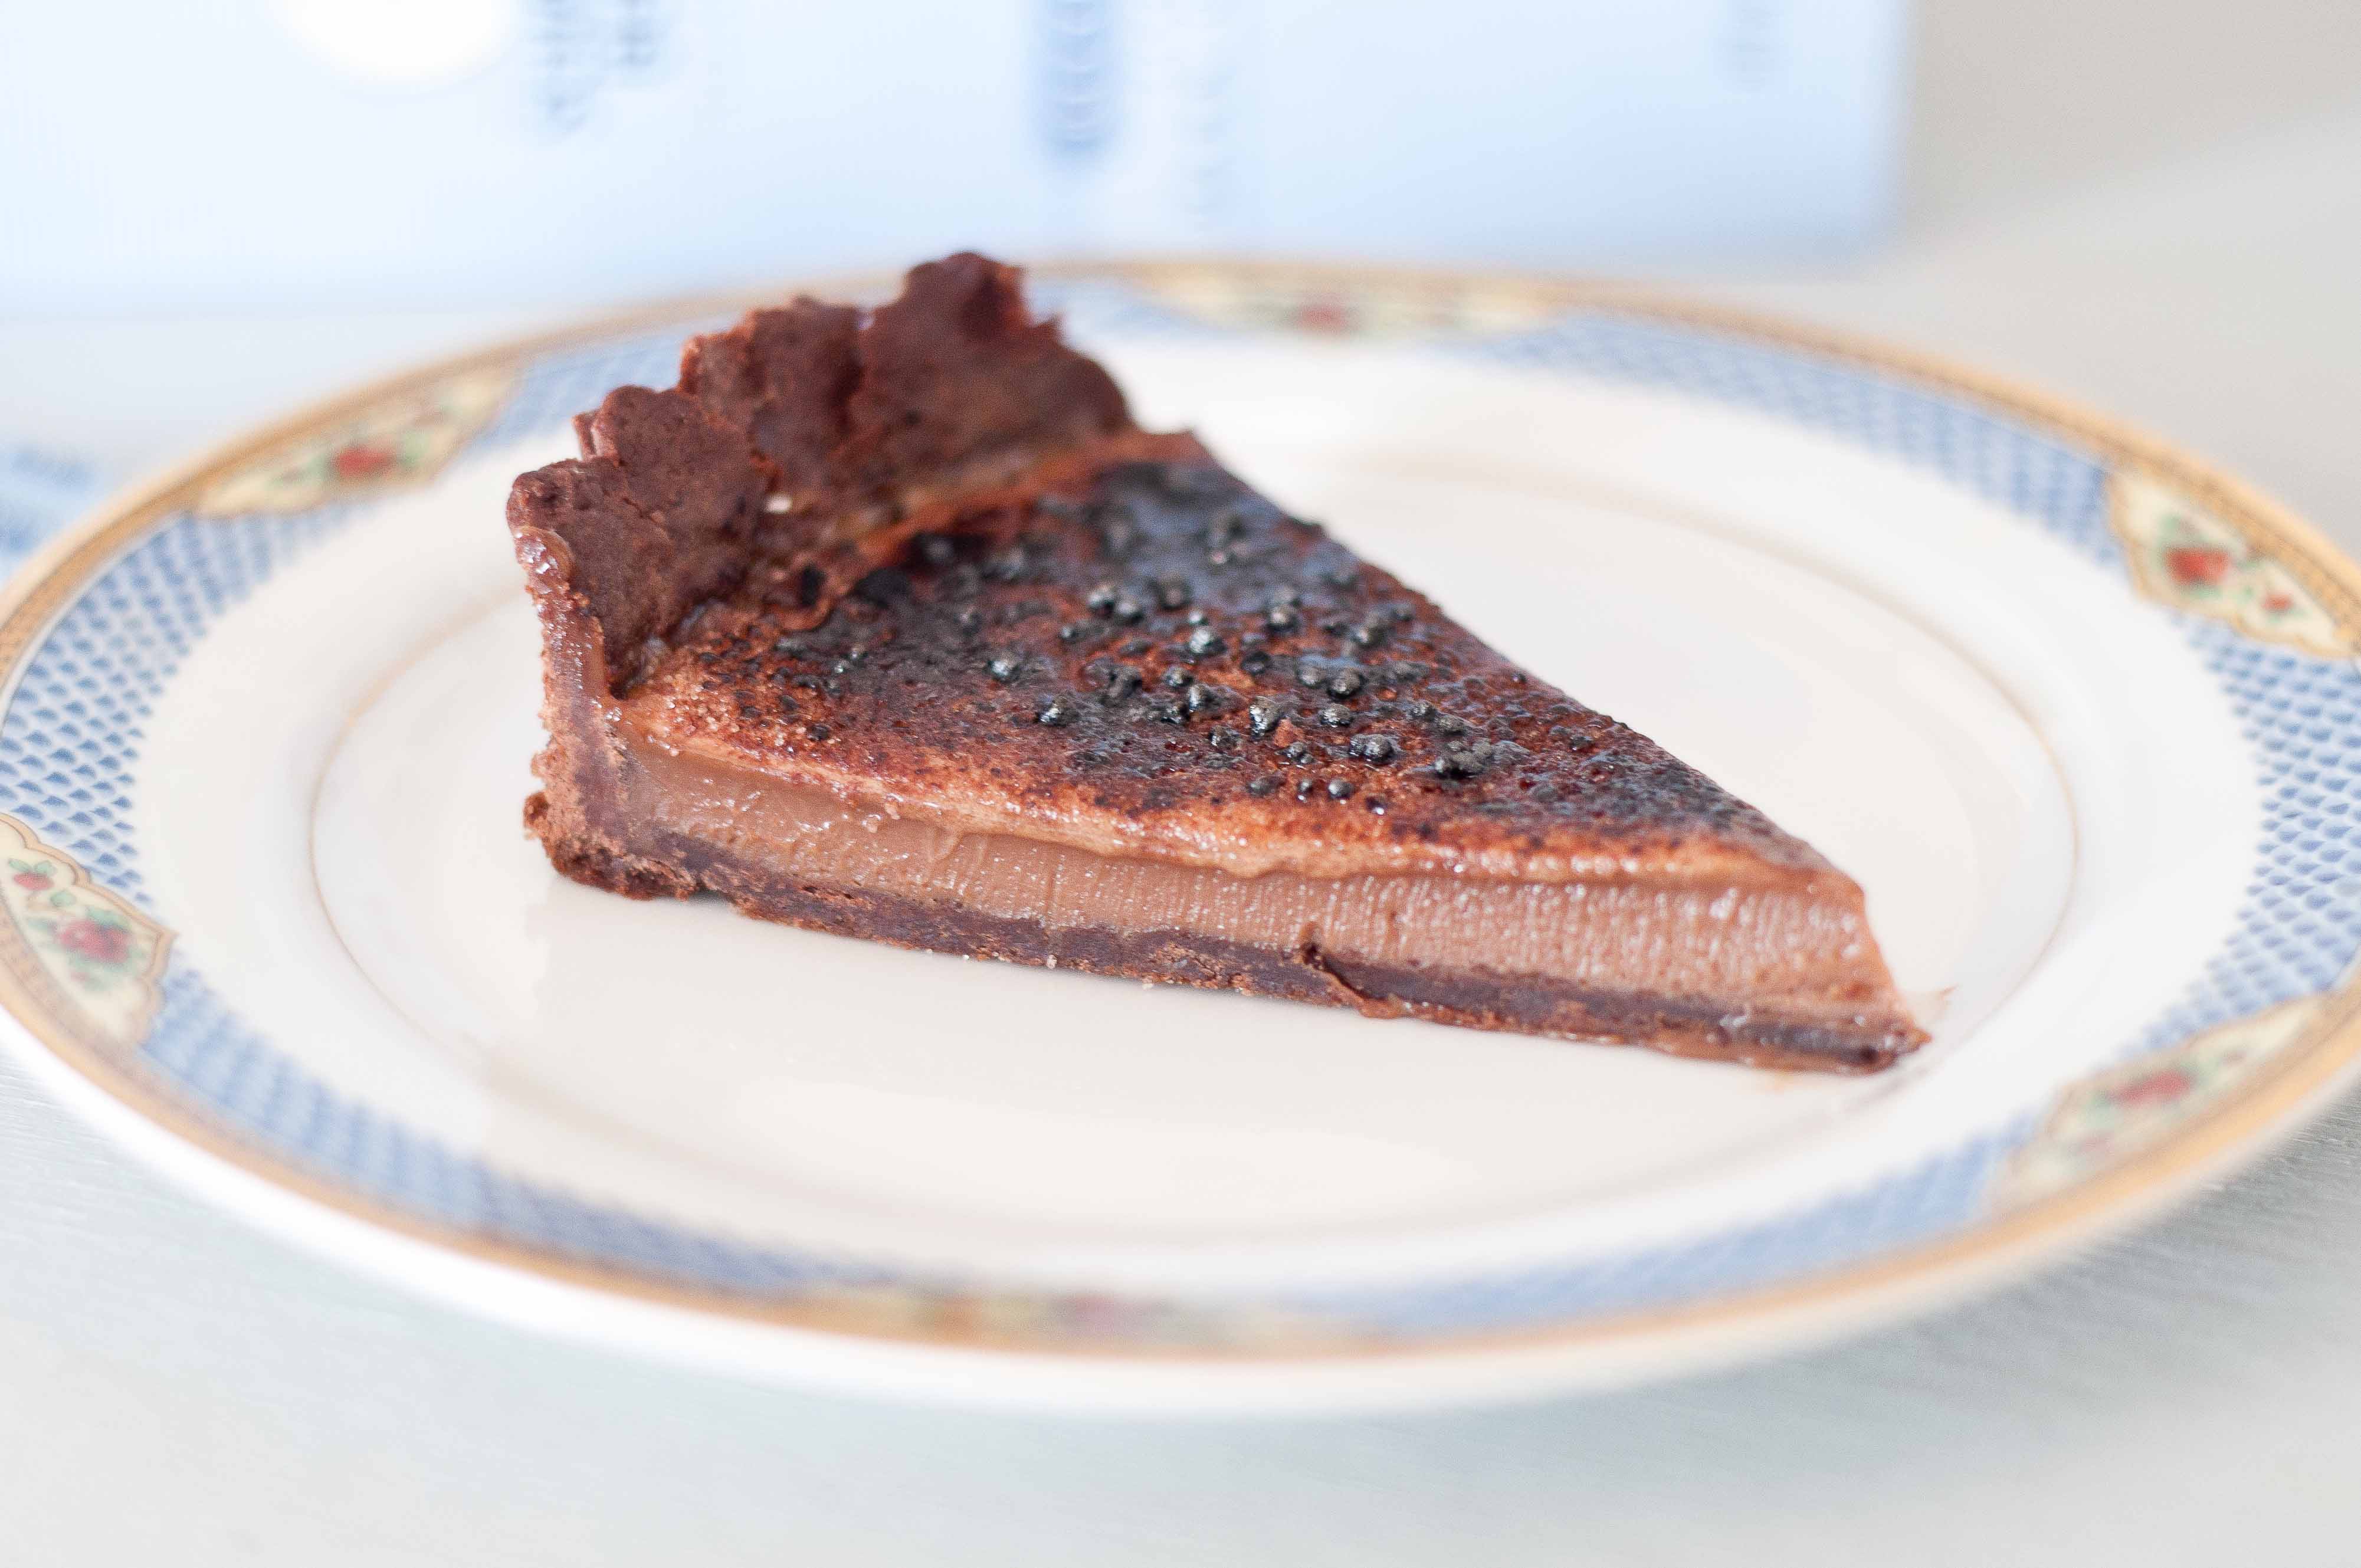
The first recipe on my list of recipes to master was Creme Brulee. It sounded so fancy and grown up, I wanted to learn to make something that was elegant and French and I was shocked at how easy it was. You do need a few kitchen tools, but the recipe and the steps are simple. And the result is incredible. For this recipe, I added a chocolate tart crust and a cocoa powder laced brulee topping.
And a kitchen tip from one of my kitchen failures: Don’t touch the melted sugar before it’s cooled, it will give you the worst mother Eff-ing burn of your life.
Dark Chocolate Crème Brulee Tart
Tart Crust:
1 cup of all-purpose flour
1/4 cup Unsweetened Cocoa Powder
1/4 cup sugar
1/2 tsp salt
10 tbs of unsalted butter, cut into small cubes
3-5 tbs ice cold water
Custard:
4 egg yolks
1/2 cup of sugar
1 3/4 cup of heavy cream
1 3oz bar of 70% Cacao Bittersweet Chocolate, broken into small pieces
1 tsp espresso powder
1/2 tsp salt
Brulee Sugar Topping:
1/4 cup granulated sugar
1 tsp Unsweetened Cocoa Powder
In a food processor, combine the 1/2 cup flour, sugars, cocoa powder and salt. Pulse to combine. Add the cubes of butter and process until combined, about 1-2 minutes. Add the remaining flour and process again. Your dough should resemble course meal. Move to a large bowl and add 3 tbs of the water, knead to combine (if you add the water to the dough with the food processor, your crust will turn into a cracker). Add the additional water if your dough is too dry.
Form into a disk, wrap completely with plastic wrap and chill for at least 1 hour (you can also make the crust a day ahead and allow to chill overnight).
Heat your oven to 375.
Once your tart is all chilled, remove from the fridge and roll out to an even thickness, making sure your dough is just large enough to completely cover the interior surface of the tart pan.
Add to a 9-inch tart pan with a removable bottom (that has been sprayed with butter flavored cooking spray), pressing into shape and removing any excess dough. If the dough is too fragile to transfer in one sheet, it is ok to press it into shape in pieces in the pan. Prick the bottom of the tart with a fork several times.
Place a sheet of parchment paper inside your tart and fill with pie weights. If you don’t have pie weights, you can use dried beans.
Bake for 20 minutes, reduce the oven temp to 300.
In a bowl, combine the yolks and 1/2 cup of sugar and whisk until light and frothy. In a pot over medium heat, combine the cream, salt, espresso powder and chocolate, stir continuously until chocolate has melted, reducing heat to avoid boiling if necessary. Remove from heat and allow to cool to room temperate for about 15 minutes (if you add the cream/chocolate mixture to your egg mixture when it is hot, you will end up with scrambled eggs. Allow to cool to avoid that).
While whisking the egg mixture, slowly add the cream until completely combined. Strain with a fine mesh strainer.
Place tart pan on a baking sheet and set in the oven, then add the custard to tart shell. Bake at 300 degrees until the edges are set and the middle is still wobbly (it will continue to set as it cools) about 35-40 minutes. Refrigerate for at least 2 hours and keep cold until ready to serve.
In a small bowl, add ¼ cup of sugar and 1 tsp cocoa powder, stir to combine. Add to the top of the tart in an even layer. Run a culinary torch over the top of the sugar, slowly and evenly, until it has all melted and is mostly dark. Due to the addition of the cocoa powder, this brulee topping is more likely to catch fire. Make sure to extinguish any fires instantly. You can also brulee with plain granulated sugar, leaving out the cocoa powder, if it makes you nervous! Serve immediately. Once the sugar has been bruleed, it will start to liquify after about an hour.
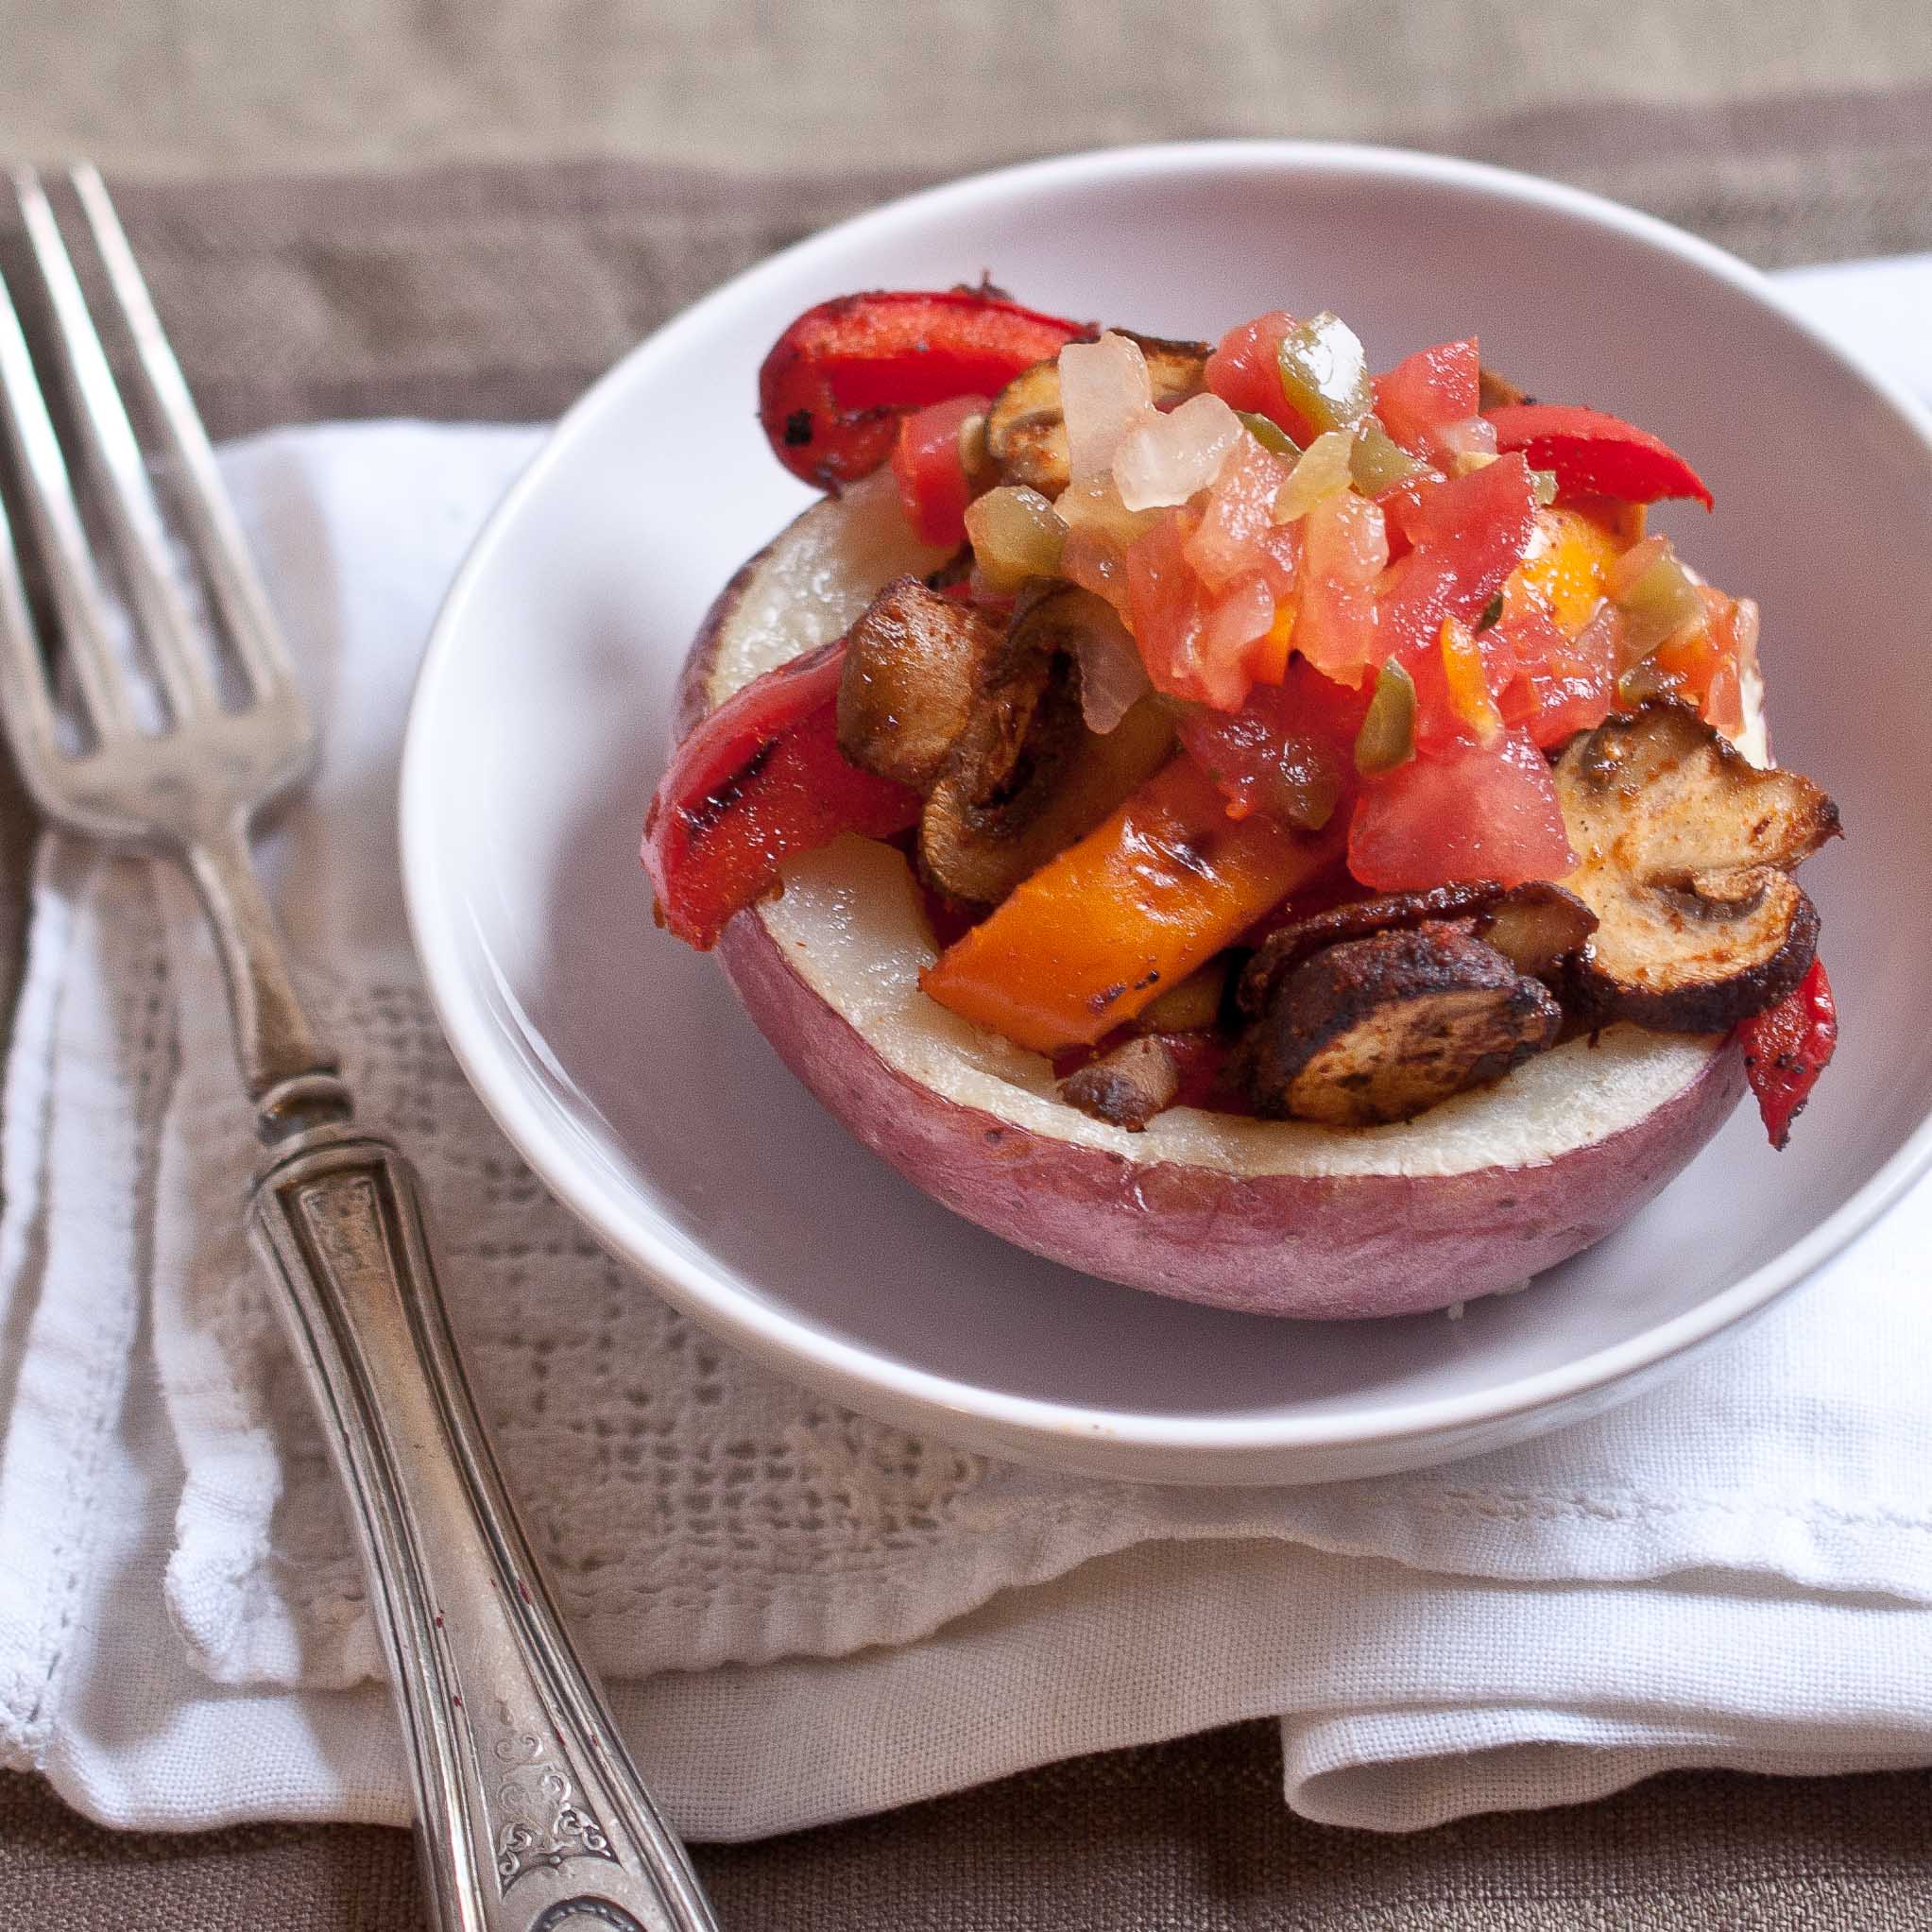
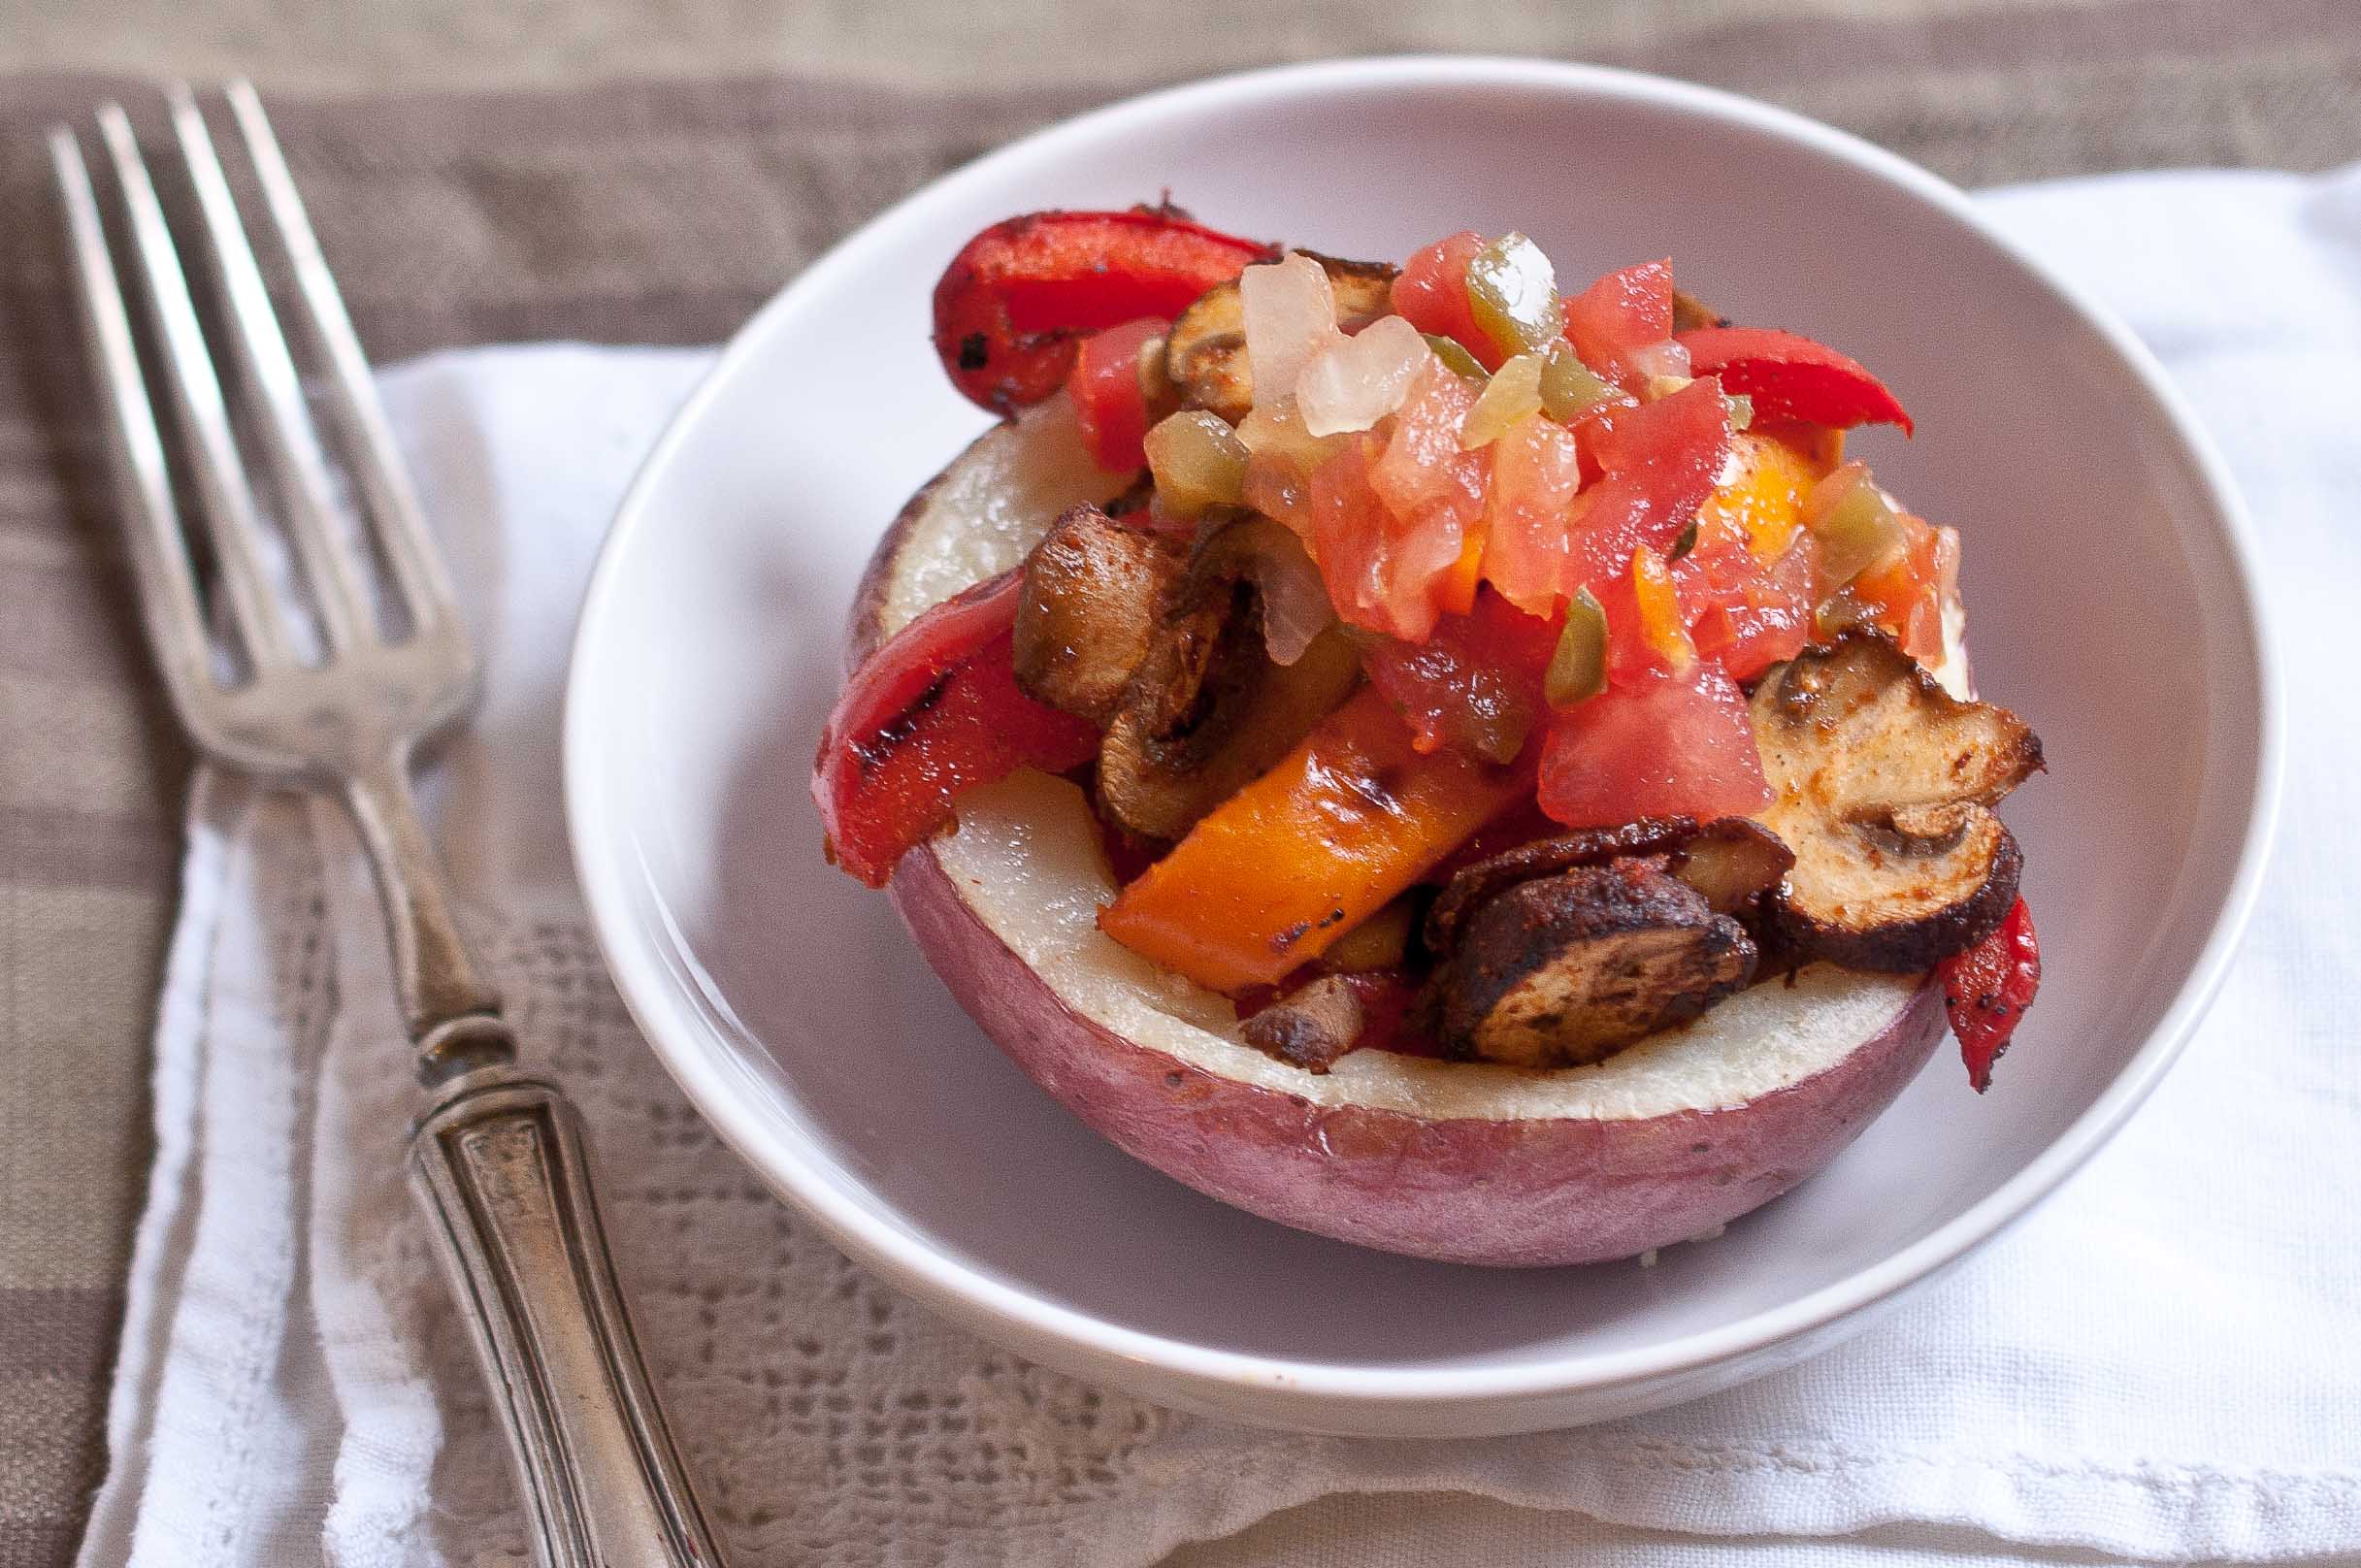
I’m not going to sit here and pretend that these are as good as the real thing. Those potato skins loaded up with bacon, sour cream and cheese that are somewhere around 62 calories per bite. But these make a great lunch durring my "I am GOING to lose those final 3 pounds" week. And they reheat really well, so you can make a batch on Sunday, and reheat them through out the week for lunch. With a side of this salad.
I’ve run the numbers and have come up with 62 calories each potato half, but that completely depends on the size of your potato and the amount of flesh you scoop out of it.
My Husband added fat free sour cream and shredded cheese. If you add a tbs of fat free sour cream and a tsp of shredded part skim mozzarella cheese, it will about double the calories in the potato. But, if you like it more and that will make you eat less, it may be worth it.
Also, this dish is:
Gluten Free
Vegan
Kosher for Passover
Skinny jeans friendly
Skinny Potato Skins
4 large red potatoes
1 large red bell pepper, thinly sliced, stem removed
1 large yellow bell pepper, thinly sliced, stem removed
Pierce the potatoes a few times with a fork and microwave on high for 5-7 minutes or until cooked through. Remove and allow to cool until enough to handle. Cut in half and scoop out most of the insides, leaving about 1/4 inch of the walls in tact. You can save the potato middles for mashed potatoes or potato cakes.
Place thinly sliced bell peppers, mushrooms, and garlic on a baking sheet. Spray lightly with olive oil cooking spray and sprinkle with fajita seasoning (or the homemade blend) and toss to coat.
Roast the vegetables in the oven for 15 minutes or until soft and the mushrooms have browned, tossing every 5-8 minutes with a heat safe spatula.
Place the skins on a baking sheet and brush the insides with melted smart balance light, sprinkle with salt. Bake at 400 for 10 minutes, allow to cool slightly.
Fill each potato skin with fajita veggies and top with Pico De Gallo.


