I spent 3 years as a vegetarian, and at the time it seemed simple. Eat things that aren’t animals. I didn’t think much more about it. It wasn’t until years later, while trying to cook for my vegetable loving friends that I have actually become acquainted with how many products that I assumed were animal free are not.
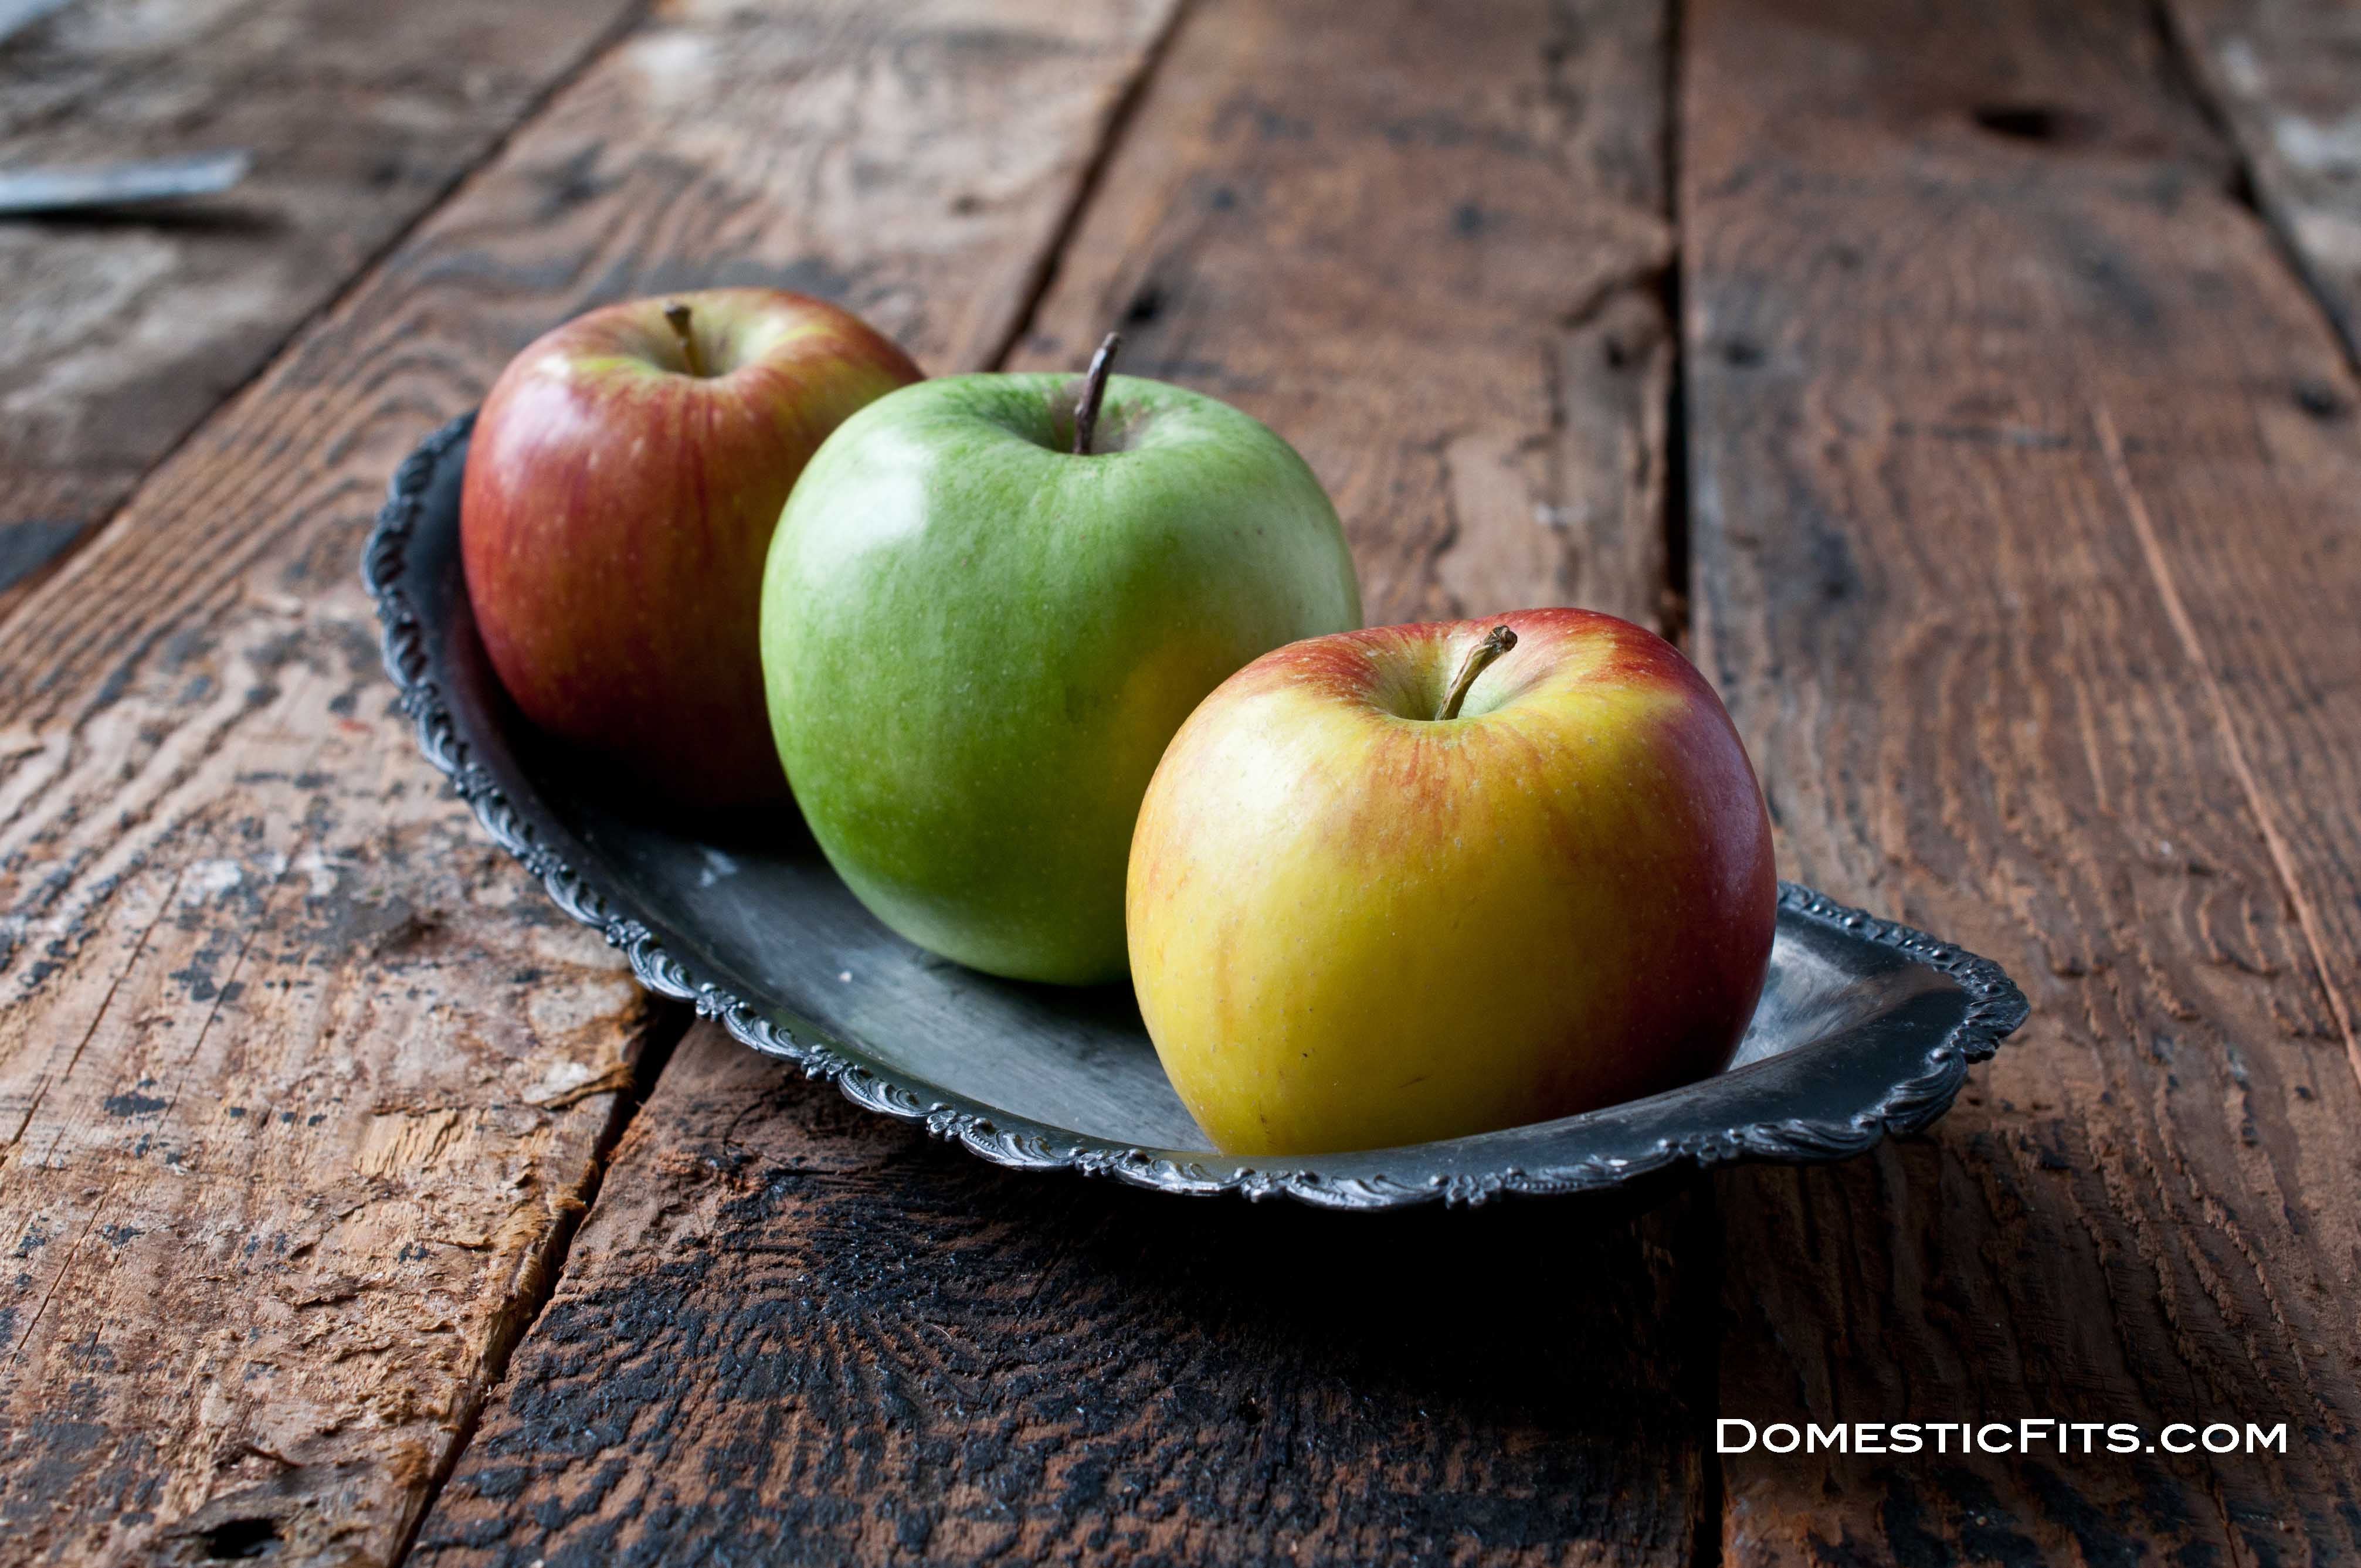
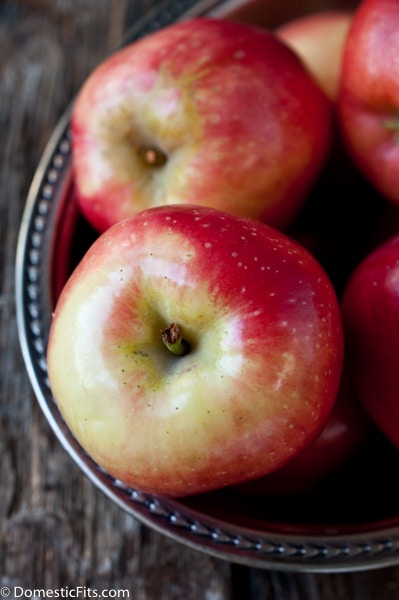
I grew up just feet from an apple orchard on a farm in Easter Washington. Although not as idyllic and charming as one may be led to imagine, I did walk away with an above average ability to name an apples variety just by looking at it. I’ve also learned a thing or two about which apples to use for what, and more importantly, why.
Apples not only run the spectrum of sour to candy like sweetness, but texture is also a huge issue. If a recipe calls for a Granny Smith and you use a Gala don’t be surprised if you end up with an overly sweet pie pan full of mush. Some apples hold up really well to high heat, others don’t. Some need more sugar, while others need very little. If a recipe calls for a specific type of apple, try your best to find that type, the recipes success may depend on it.
Red Delicious: This is the most popular apple in America and I have little idea why, other than it looks so beautiful in a fruit basket. The flesh easily turns to mush when cooked and texture is grainy. Try to avoid this when cooking and use it only raw, like in salads.
Granny Smith: Very popular baking apple because it holds up to high heat, keeping it’s shape during baking. It is also on the sour side, so if you’re substituting a different apple for recipe that calls for a Granny Smith, you might want to pull back on the sugar a bit. Still a great choice for baking, pies especially, but it tends to be best when mixed with another sweeter apple (like a Braeburn or Golden Delicious).
Honeycrisp: with a beautiful red and green skin, this apples has had a rapid rise in popularity among bakers in the past decade. With a snappy crispness, well balanced sweet-tart flavor and a flesh that wont let you down once baked, this is a variety to seek out when making an apple tart, apple pie or apple tart Tatin. If you can’t find the popular Honey Crisp, look for the Rome Beauty or a SweeTango. With similar qualities, these an excellent stand in.
McIntosh: This is another large red and green marbled beauty. It isn’t the best choice for baking because it tends to fall apart, but because of it’s strong apple flavors it’s a great choice for apple sauce makin'.
Cortland: This is one of the few apples that has tannins. Tannins are most often talked about when discussing wine, they give you that pucker feeling in the back of your throat when drinking a glass of vino. Because of that, Cortlands make a great addition to cider making.
Just be aware that "apple" is not one size fits all when it comes to baking. Making sure you have the right man for the job will help make sure you hit the mark when making those holiday pies.
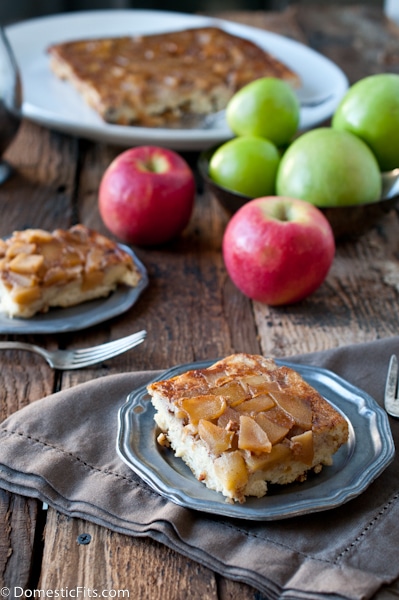
Apple Pie Bread Pudding
Ingredients
4 tbs butter
3 large Honeycrisp apples, peeled and chopped (about 4 ½ cups)
½ cup brown sugar
1 tsp cinnamon, divided
¼ tsp salt
1 loaf Italian bread, cut into cubes (about 8 cups)
4 large eggs
1 ½ cups milk
1/3 cup granulated sugar
¼ tsp nutmeg
1 tsp vanilla extract
¼ cup chopped pecans
Whipped cream (optional)
Instructions
Melt the butter in a pan over medium high heat. Add the apples, brown sugar, cinnamon, and ½ tsp salt. Allow to come to a low boil, stirring occasionally, until the liquid has turn thick and syrupy, about 15 minutes.
Spray a 7×11 (or 9×9) baking dish with cooking spray. Pour the apple mixture into the pan, avoiding the outer edges.
Top with bread cubes and pecans.
In a separate bowl whisk together the eggs, milk, sugar, nutmeg, vanilla and remaining ½ tsp salt. Pour evenly over the bread.
Cover and refrigerate for 1 hour and up to overnight.
Preheat oven to 375.
Bake for 40-45 minutes or until a knife inserted in the center comes out clean. If the bread starts to brown too early, cover with aluminum foil and continue to bake until cooked through.
Invert onto a serving tray, slice and served topped with whipped cream, if desired.
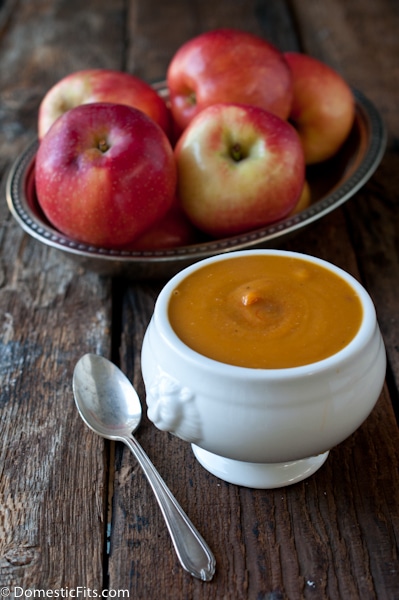
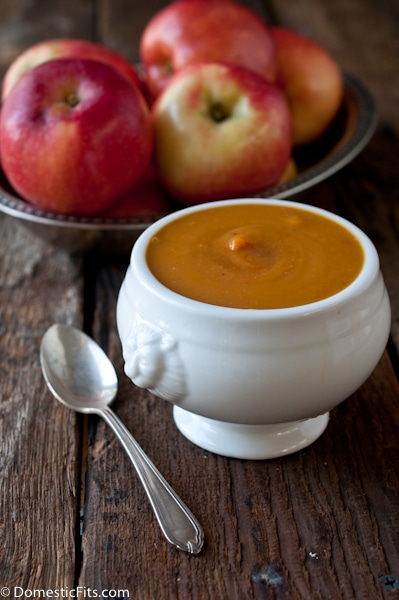
SweeTango apples seemed to come out of nowhere, at least to me. As someone who grew up mere feet from two different apple orchards in Easter Washington, it seemed like these fantastic little gems of produce brilliance appeared as if by magic as a brand new species of one of my favorite fruits. In the old school fashion of cross pollination (nothing new, plants have been doing this without human intervention since the dawn of time) the SweeTango is a cross between the fantastic Honey Crisp and a Zestar. The flavor is beautiful, but it’s the sharp snap crisp when you bite into one that’s unlike anything else out there. As much as I love the apples in this soup, it’s eating them raw that’s really the way to go.
I was introduced to the SweetTango at a press event at my favorite Los Angeles Resturant, Animal. A table at this sought after joint, and a meal cooked up by the celebrity chef-owner team of Vinny Dotolo and Jon Shook may take you months to secure and is on every LA based foodies Must Do list. I was thrilled to spend an afternoon among a small group of other writers, eating the dishes cooked up by Jon and Vinny themselves, all featuring SweeTango apples. Other than the chance to chat it up with on of my favorite local chefs, this soup was the highlight. Jon and Vinny even sent us home with the recipe. And even let me share it.
You could win an all expense paid trip to Los Angeles as well as an unforgettable dinner at Animal, one of LA’s best restaurants. Enter here.
Sweet Potato And SweeTango Apple Soup
Ingredients
1/4 lb Butter
1 cup Yellow onion, diced
1 cup SweeTango apple, peeled, cored, diced
1 cup Butternut squash, peeled, seeded, diced
1 cup Sweet potato, peeled, diced
2 1/2 cup chicken or vegetable stock
1 cup Heavy cream
1/4 cup Maple syrup
Salt and espelette pepper to taste
Instructions
In a 1 gallon pot, melt butter. Add vegetables cook until onions are translucent. Add stock, and cook for 20-30 min, or until vegetables are soft. Puree in blender, strain, and add cream and maple syrup. Season to taste, serve, and enjoy!
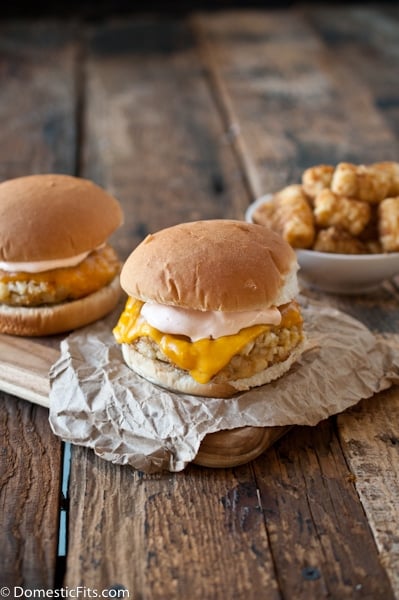
If I have a guilty-pleasure-trash-food-first-love-can’t-believe-I’m-admitting-this food, it’s tater tots. I own a deep fryer that has produced more tater tots than all other foods combined. I even created a Tater Tot Cone Holder for use at parties for my Tater Tot Bar with Accompanying Sauces.
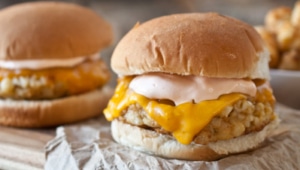
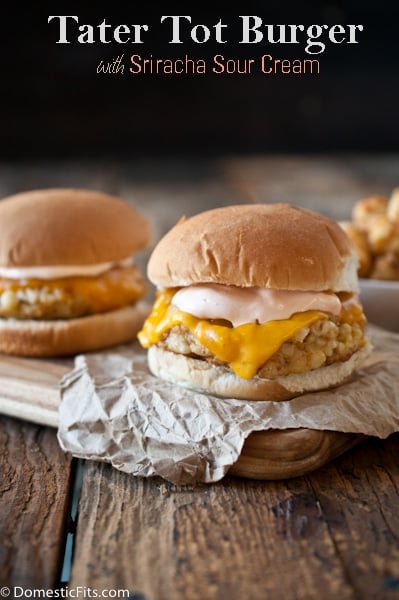
We all have Ore-ida, the inventor of tater tots, to thank for the best of all bad foods. And although they make a fabulous version (it is the original after all) I tend to favor the Trader Tots from Trader Joe’s. Either way, turning them into The Best Veggie Patty Of All Times is a great idea. No meat eater on the planet will complain about this meatless burger.
Tater Tot Burger with Sriracha Sour Cream
Yield: 4 burgers
Ingredients
2 cups tater tots (thawed if frozen)
2 eggs
1 tsp onion powder
¼ cup Italian style breadcrumbs
2 tbs olive oil
sliced cheddar cheese
4 hamburger buns
1 cup sour cream
2 tsp sriracha
Instructions
In a large bowl add the tater tots, eggs, onion powder, and breadcrumbs. Using a potato masher, mash and stir until well combined.
Form into 4 well compacted patties.
Heat the olive oil in a large skillet over medium high heat.
Gently place the patties in the skillet, allowing to brown before gently flipping.
Add the cheddar cheese and cook until melted.
Transfer to buns.
Mix together the sour cream and sriracha.
Top burgers with sriracha sour cream prior to serving.
Sriracha Sour Cream adapted from The Sriracha Cookbook. Buy it. Right now. For real.
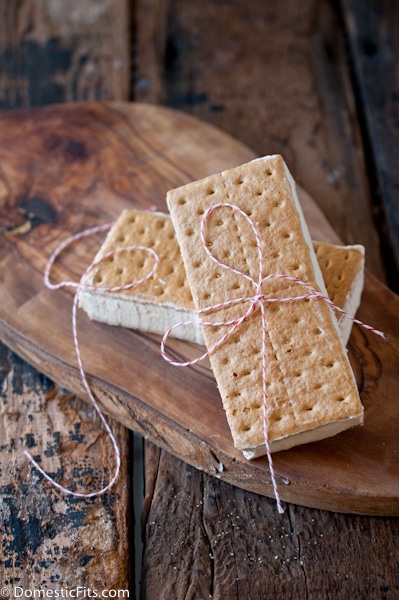
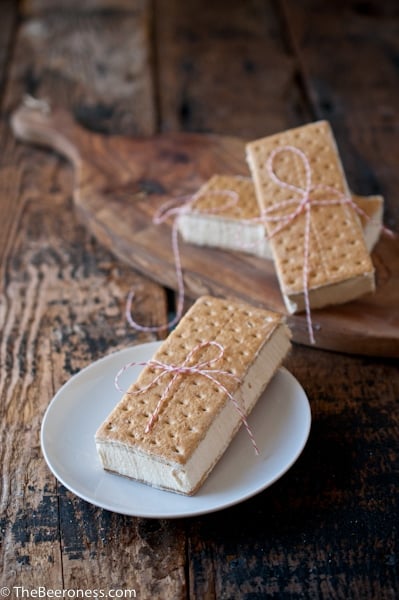
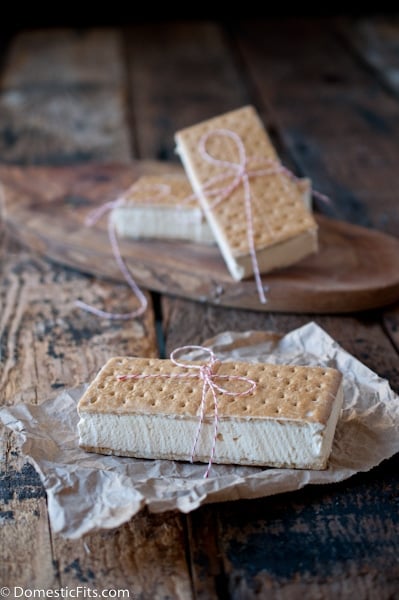
Three Ingredients, No Ice Cream Maker, Crazy Delicious Ice Cream Sandwiches was the first name for this recipe, although that did seem a bit long for a recipe that’s so short.
If you know me at all, you’ll know that I’m not a girl that goes for the Quick & Easy recipes, but sometimes I hear of a recipe that just seems too tempting not to try. I stole this recipe for an 80 year old woman I know. She made a version of these (that involved Cool-Whip) for a bingo game she was hosting, and told me all about how easy they were, and how everyone loved them. Easy, you say? None left, you say? I must try these easy and delicious treats, although I will be skipping that blue and white plastic tub.
She was right: easy, delicious and none left. The moral of the story is always listen to your elders.
And eat ice cream.
Easy Homemade Caramel Ice Cream Sandwiches
Ingredients
2 cups heavy cream, chilled
2/3 cup prepared caramel sauce, room temperature
12 standard sized graham crackers
Instructions
In the bowl of a stand mixer add the cream, whip on high until soft peaks start to form, slowly add the caramel sauce, mixing until well combined.
Spread the caramel whipped cream in a thick layer between two graham crackers, scraping off excess with a butter knife.
Place ice cream sandwiches on a large plate or baking sheet. Freeze until set, about 1 hour.
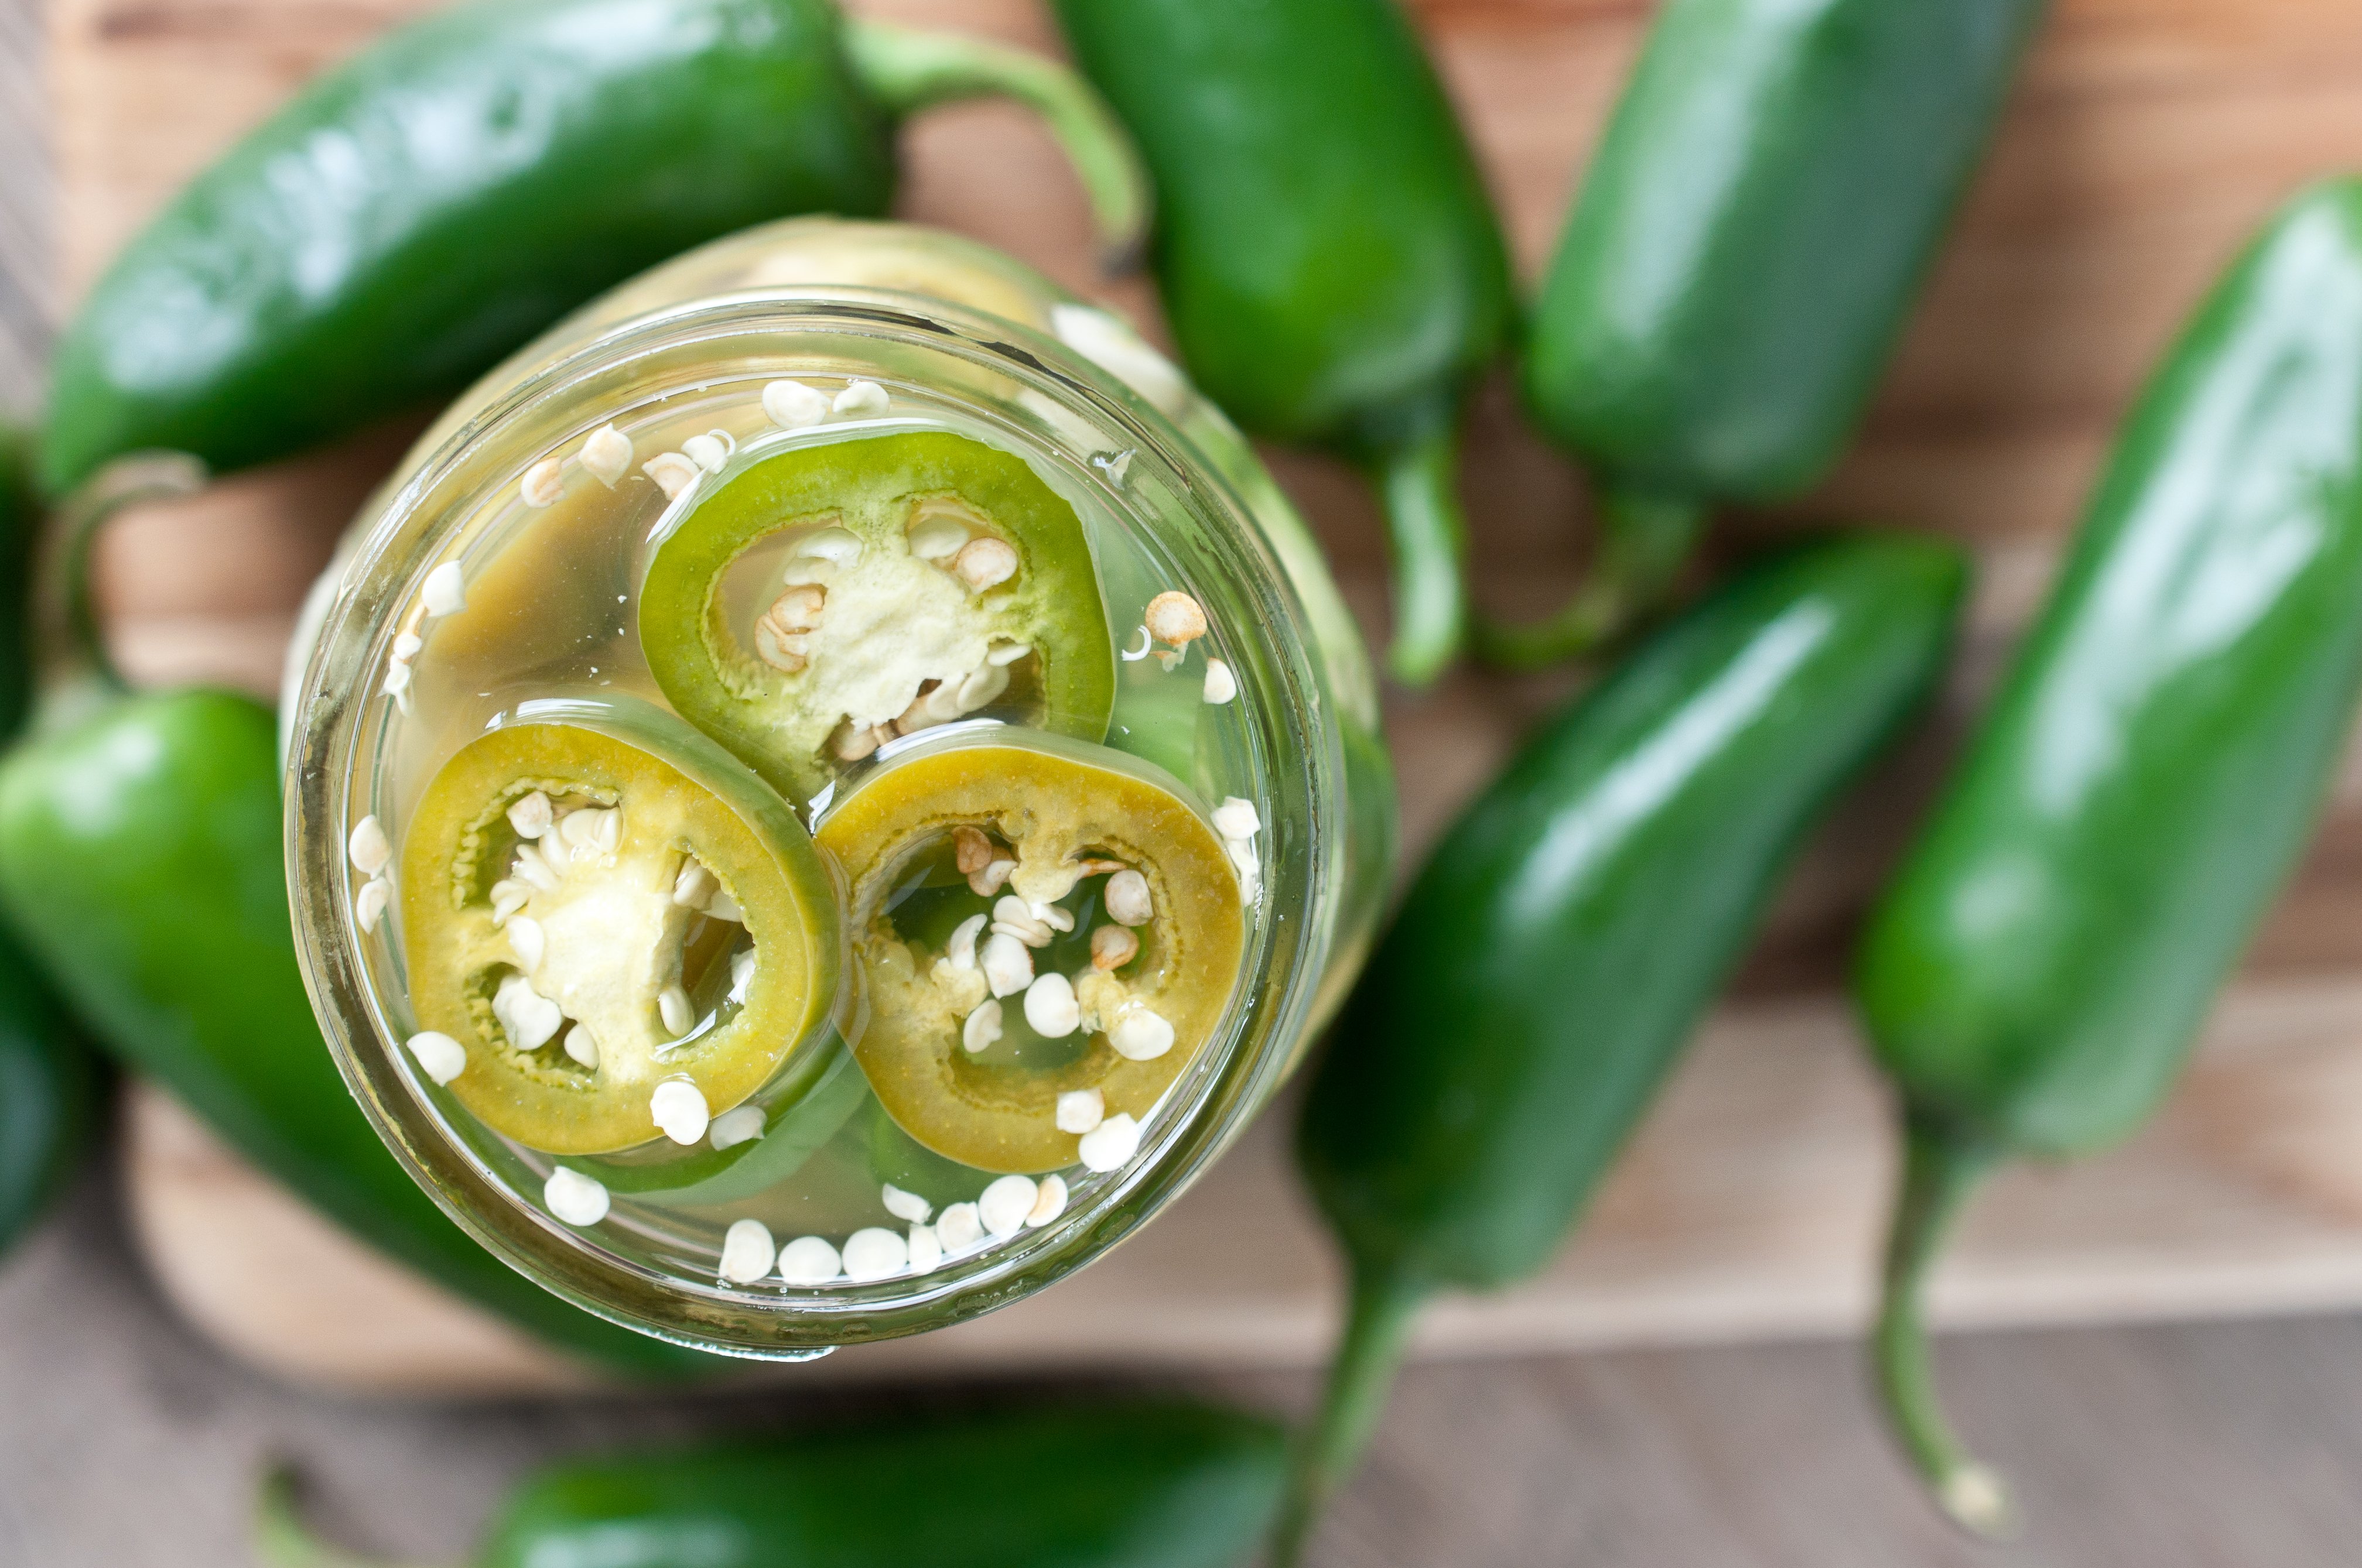
Jalapenos are abundant right now, but that’ll change very soon, when fall starts to chill the fields. I love the brightness of fresh jalapenos, but pickled jalapenos are a staple. Once I figured out how incredibly easy and cheap it is to make my own, I’ve never gone back. I even learned how to water bath can just so that I could make these in giant batches!
The tricky thing about jalapenos is that the heat level varies wildly, and there is no way to tell how hot an individual pepper is. But the good news is that most of the heat in the jalapeno is in the seeds and the membrane in the middle of the pepper, removing all or some will give you control over the final burn.
Once you have yourself a giant batch of beautifully pickled peppers, there is an enormous amount of uses from quesadillas to burgers, I just can’t get enough.
Pickled Jalapenos
Ingredients
15 large jalapenos
¾ cup water
¾ cup vinegar
3 tbs white sugar
2 tbs kosher salt
3 cloves garlic, thinly sliced
Instructions
Slice the jalapenos into ¼ inch rings. Remove all or none of the seeds, depending on desired heat level (the more seeds left in the peppers, the higher the heat level).
In a pot over medium high heat, add the water, vinegar, sugar, salt and garlic. Cook, stirring frequently, until the sugar and salt have dissolved, remove from heat. Allow to cool to room temperature before adding the jalapenos. Place peppers and pickling liquid in an airtight container, such as a canning jar, refrigerate for 4 days and up to three weeks.
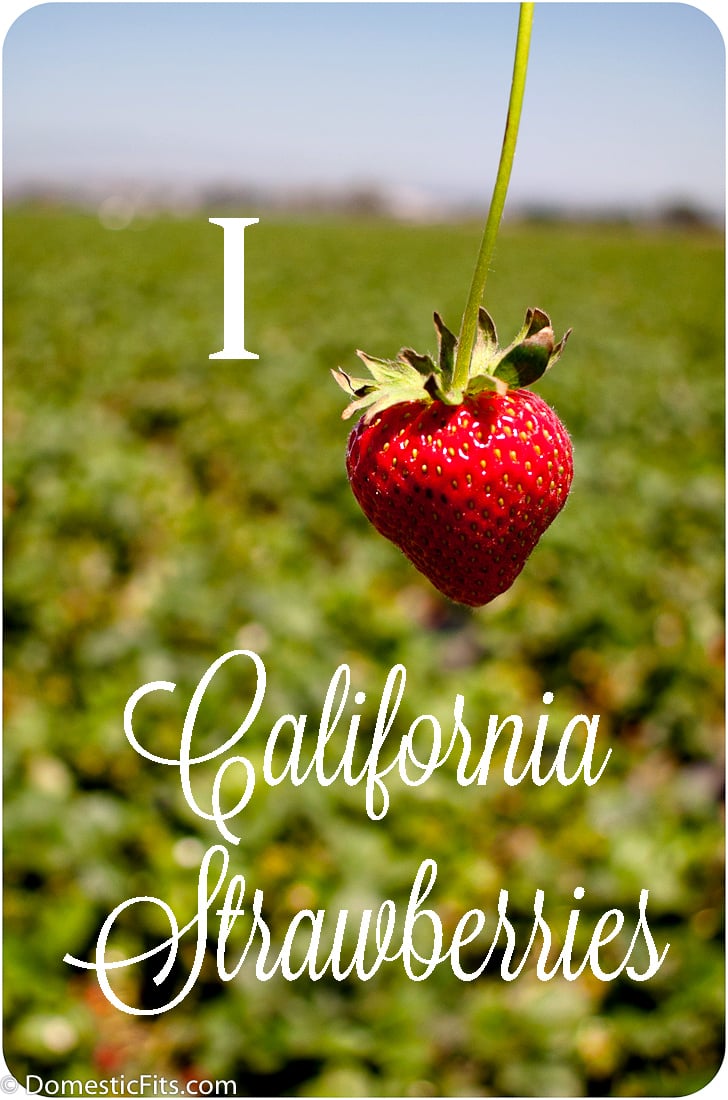
This post is sponsored by California Strawberries. All thoughts, opinions, and ideas are my own.
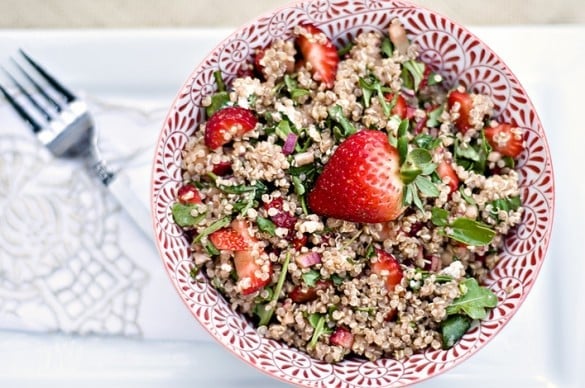
Lunch box meals are an enormously difficult challenge. You need to have the ability to create a meal that will dazzle a tiny human (no small feat), have the staying power to last in a little box that’s been tossed around in a kids backpack and probably sit at room temperature for a while, be quick to throw together the night before, and packed with nutrition. It’s not surprising that I find it easer to plan my Thanksgiving menu than a weeks worth of unique lunch box ideas.
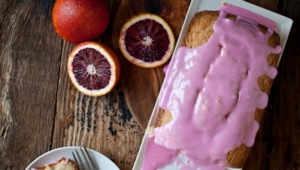
Strawberries are one of my favorite items to include in the lunch box, she loves strawberries as much as she loves candy but they have incredible health benefits that my growing tiny human needs in her little body. Strawberries are a super food, packed with fiber and vitamin C, plus strawberries are one of the most antioxidant dense fruits, packed with cancer fighters.
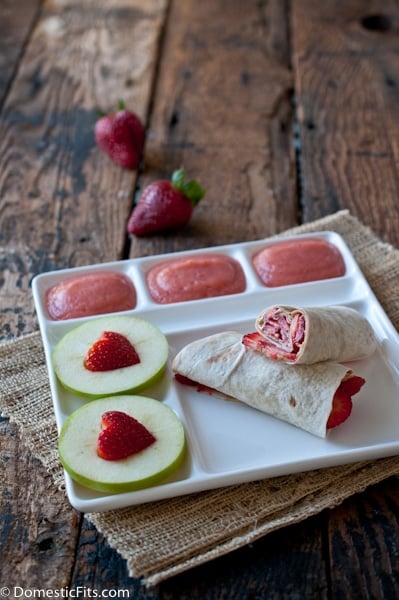
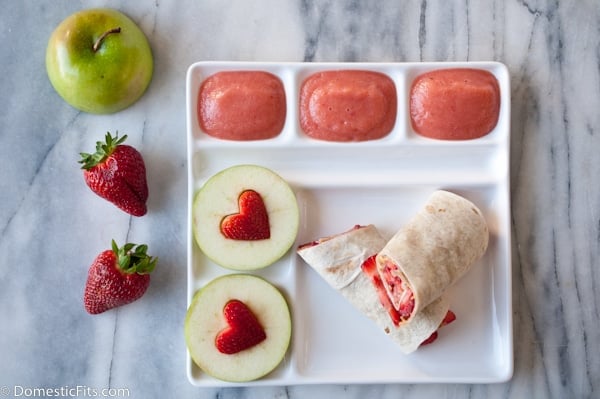
But more than anything, they’re so pretty. I know she’ll reach right for them. The sauce I make is just a combination of apple sauce and strawberries giving it a gorgeous natural pink color that inspired her to name it "Princess Sauce." When trying to move my family away from all artificial food coloring, strawberries are the perfect way to add stunning color in a natural and health filled way.
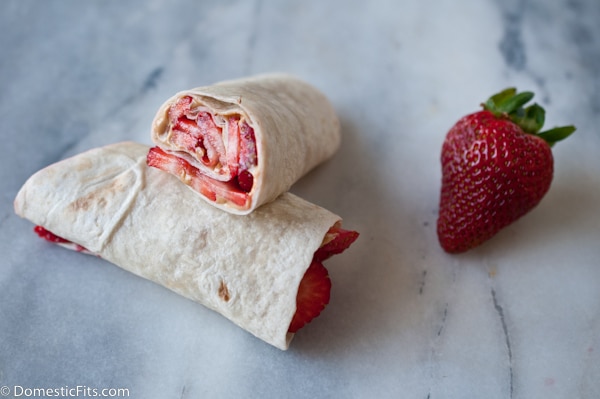
I also really love to make her these Strawberry Peanut butter Burritos. The sliced berries hold up better to a lunch box environment better than jam, there isn’t the risk of soggy bread. She also loves that it’s different than your average sandwich.
This lunch box meal takes less than ten minutes to throw together, and it’s packed with fiber, antioxidants, and general goodness, although she only sees fun finger food. Just the way I want it.
Strawberry Lovers Lunch
Ingredients
Peanut Butter Strawberry Burritos
1 6-inch flour tortilla
3 tbs creamy peanut butter
½ cup fresh sliced strawberries
Apples Heart Strawberries
1 granny smith apple
2-3 large strawberries
Princess Sauce
1/2 cup apple sauce
1/4 cup sliced strawberries
Instructions
For the peanut butter strawberry burritos
Spread the peanut butter liberally across the tortilla
Lay the strawberry slices in an even layer on top of the peanut butter, overlapping slightly.
Roll up into a burrito.
Slice in half, if desired.
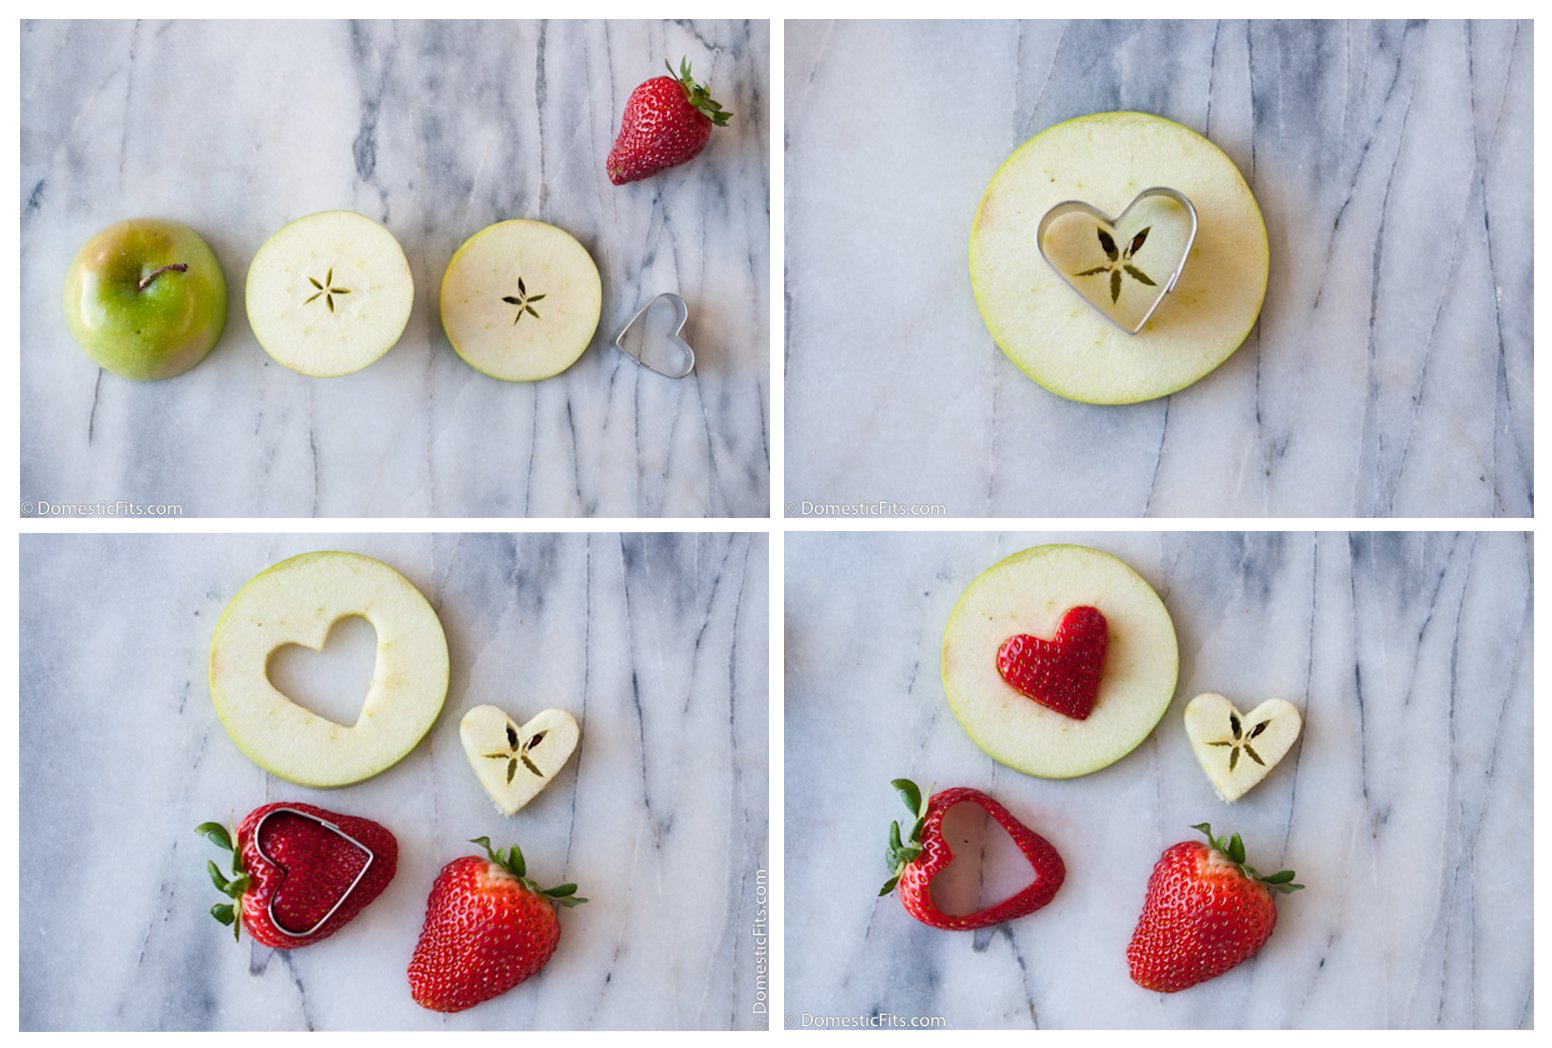
For the apples:
Cut the apple in half across the middle (rather than down the stem) Slice into 4 to 6 (½ inch) rings.
Using a small cookie cutter (I prefer a heart shape) remove the core.
Slice the strawberries down the center, through the leaves.
Using the same cookie cutter used to cut the apples, cut a shape out of each strawberry half. Place the strawberry in the hole in the center of the apple.
For the Princess Sauce:
Add apples sauce and strawberries to a small blender or food processor.
Before I became a member of Club Mom, I had no idea how much time I would spend obsessing over school lunches and after school snacks. Along with how hard it is to cut tiny fingernails and how accustom to contact with bodily fluids you become, these are things not mentioned in those baby books. Heads up kids, there is a LOT they don’t mention in the baby books.
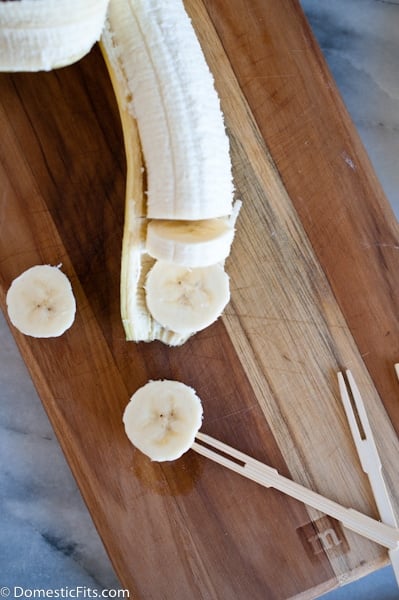
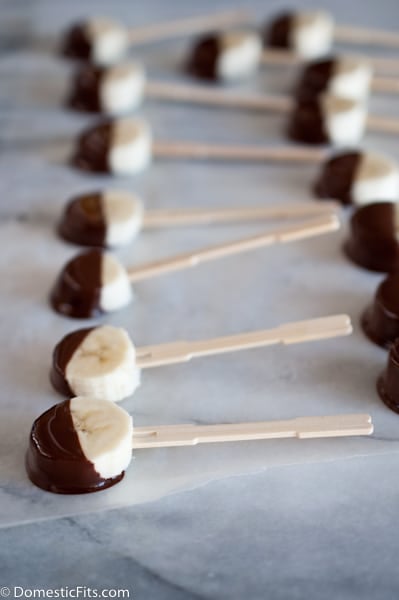
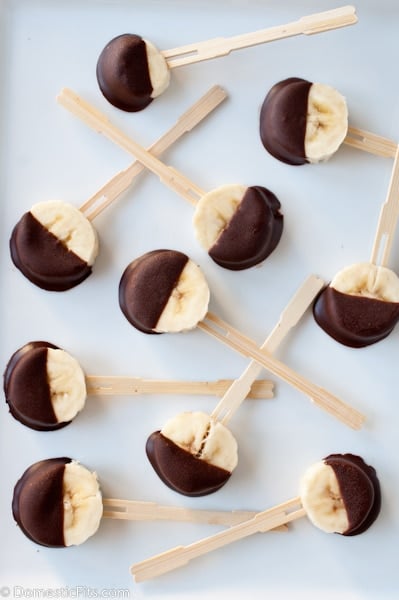
My little lady is a constant mover, more interested in sports than food at this point. She’s tiny and needs bites that are both nutrient and calorie dense to keep meat on her tiny bones. I started to make these because they’re portable, fruit filled, and just enough chocolate to get her interested.
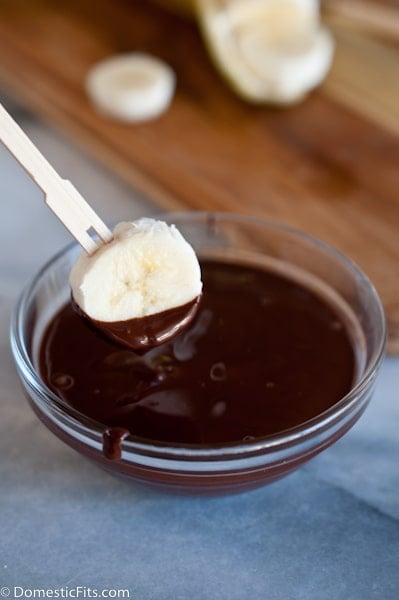
You can also make them with cinnamon chips, yogurt chips or peanut butter chips. It all works out about the same. Just slice the banana into 1/2 inch slices, add a toothpick, melt the chips in a microwave safe bowl, dip, add to a baking sheet covered with parchment paper and freeze. Once they’re frozen you can add them all to a large zip lock bag.
Couldn’t be easier.
And while I’m at it, California Strawberries is doing a fun Build a Better Lunch Box campaign and giving away these adorable lunch boxes. Cute, right? Enter the giveaway here.
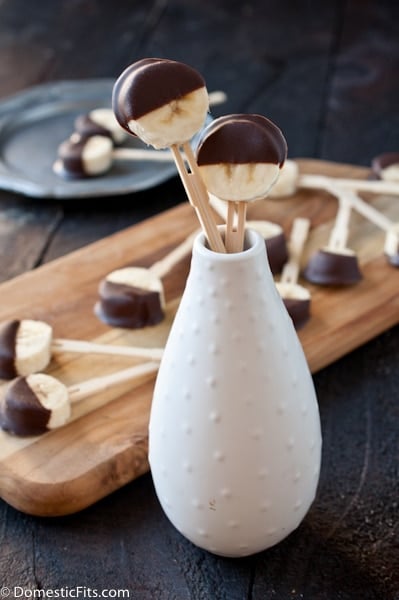
After School Snack: Chocolate Banana Pops
Ingredients
1 large banana, ripe but firm
1/3 cup chocolate chips (or peanut butter chips, or yogurt chips)
12 toothpicks
Instructions
Slice the banana into 1/2 to 3/4 inch thick slices.
Skewer with a toothpick.
Add the chips to a microwave safe bowl.
Microwave on high for 20 seconds, stir and repeat until melted.
One at a time, dip the banana bites into the melted chips, place on a baking sheet that has been covered with parchment paper.
I’ve spent the better part of the past few months obsessing over my new grill. After going a year without one, sad faceing at the grill recipes I saw on other blogs, I finally caved and bought one. As a way to feel a little less guilty about taunting the grill-less, I’ve teamed up with a bunch of other fantastic bloggers to offer one lucky reader a fantastic grill package worth over $500.
Although we are on the waining end of summer grill season, we are rapidly approaching tailgating season. The Coleman NXT 200 is powerful portable grill that’s perfect for fall football adventures and the gift card is a perfect way to add some accessorites to your grilling good times.
I have this Cameron Stove Top Smoker, it’s perfect to use indoors as well as on the grill. A good grill brush is important for when you want to cook more delicate food, or grill a pizza. And don’t forget a grill basket for those vegetables.
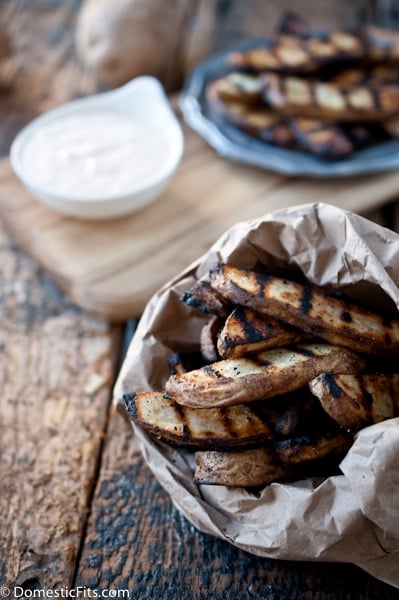
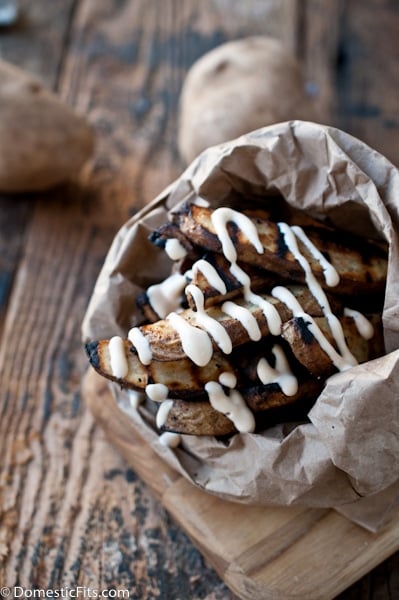
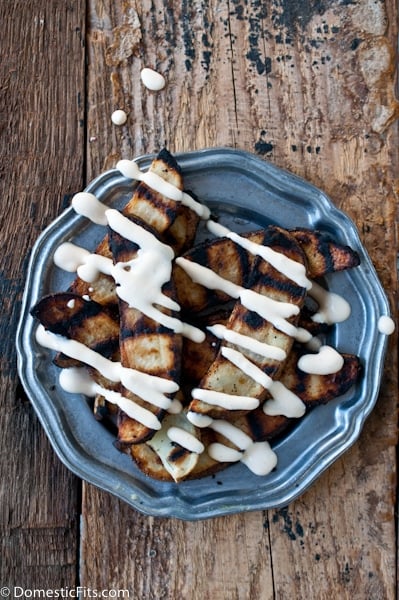
In the spirit of grilling and tailgate food, I’ve whipped up some grilled Tailgate Fries with Sriracha Buttermilk Cream Sauce. Enjoy, and don’t forget to visit the other great bloggers hosting this giveaway!
In a large bowl stir together the water and 3 tbs salt until the salt has dissolved.
Cut the potatoes into ½ inch wedges.
Soak the potatoes in the salt water for 30 minutes at room temperature.
Remove from water and dry well.
Add potatoes to a large baking dish or rimmed baking sheet.
Drizzle with olive oil and spices, toss to coat.
Preheat the grill to medium high.
Add the potatoes to the grill, close the lid and allow to cook until strong grill makrs appear, about 5 minutes. Turn and continue to cook until tender when pierced with a fork.
To make the sauce whisk together all sauce ingredients until well combined. Add to a squeeze bottle, drizzle over fries.
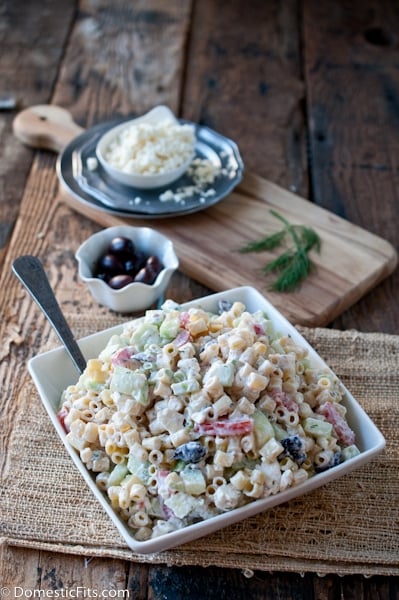
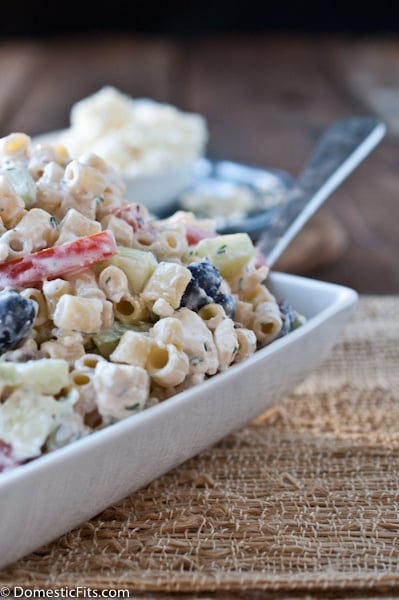
I can’t sit here and tell you that I have no idea why I love to Greek-ify things. I’ve already told you about my midnight boat experience between Italy and Greece, and the indelible moment that created in my life. More than that, it was Igoumenitsa, a port in Greece, where I realized how important food was to me.
I was broke, I’d worked three jobs for two semesters of my senior year of college to save enough money to send myself on a poorly researched trip through Europe, and I was short on cash. But even with the dwindling funds I decided to spend a the last bit of cash I had on a small piece of Baklava because I figured it was the last time I would ever have the chance to eat such an iconic Greek dessert in Greece.
It’s these little stories you collect over your life that give me no regrets of being firmly inside my thirties. I’ve done well, I suppose, on collecting stories over the past decade. If there is nothing else you do with your life, collect stories you’re proud to dazzle a crowd with over a glass of wine. It makes growing up so worth it.
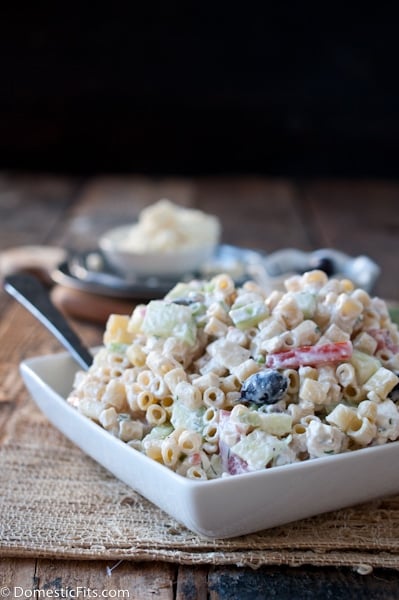
Greek Pasta Salad
Ingredients
2 cups ditalini pasta
1 cup Greek yogurt
2 tbs fresh lemon juice
1 English cucumber, peeled and dice ( about 2 cups)
¼ cup diced green onions
2 tbs dill, minced
½ cup Kalamata olives, pitted and chopped
1 cup chopped tomatoes, ripe but firm
½ cup crumbled feta
¼ cup red onion, finely diced
½ tsp garlic powder
salt and pepper to taste
Instructions
Cook pasta according to package directions until al dente. Add to a large bowl, allow to cool to room temperature.
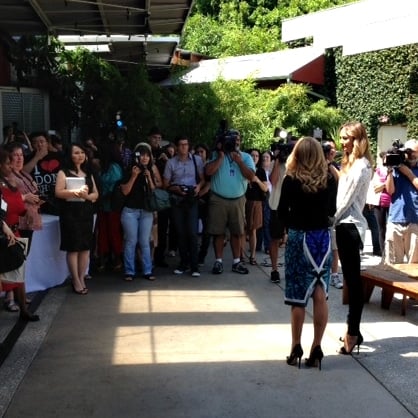
Back in January I very vaguely mentioned that I was involved in a Super Secret project that involved being sequestered without phone or internet for almost a week. My intention was not to be ambiguous, but to adhere to the Non Disclosure agreement I signed with Lifetime TV. Yesterday I was finally able to start talking about what I was working on, and if you follow me in Instagram, you already know.
I was on a brand new TV show with the Lifetime Network called Supermarket Superstars. The premise of the show is to take people with great ideas for food related products and turn those ideas into product lines on grocery store shelves. The producers of Shark Tank and Project Runway joined forces for the show.
The producers were amazing, really wanting everyone to root for us all. It was obvious in everything we did, they wanted us to talk about ourselves, our brands, our websites (my book!), and even cast the show with people you want to see succed. It’s not a show that’s full of cliche characters you want to see fail. They cast the show full of really wonderful people, really great ideas and fascinating stories.
Stacy Keibler, Debbi Fields (THE Miss Fields Cookies), Chef Michael Chiarello, and branding expert Chris Cornyn guided us through this process with so much encouragement and faith in what we could be. "We want you all to win!" I just kept hearing, the entire staff cheering us on, giving us amazing feedback, and they couldn’t stop talking about the opportunities this type of exposure could bring us. It was a great show to be a part of.
I spent the time developing a line of beer infused food products, you’ll have to watch the show to see what happens. It airs on July 22 on Lifetime TV at 10pm. My episode airs on August 22nd at 10:30pm, and even features my husband my little Tater! They spent an entire day just following us around, filming me with my family and friends, cooking, photographing, editing, and even (of course) drinking beer at a local brewery.
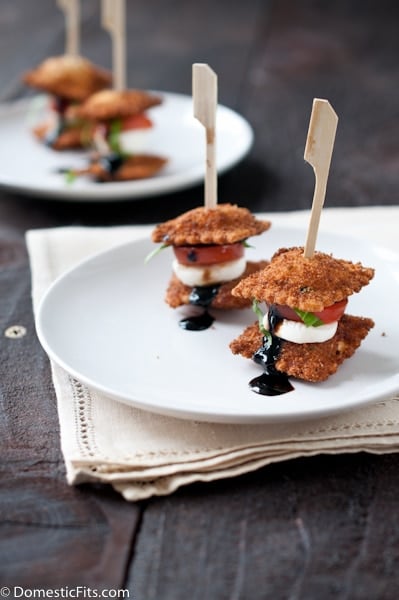
Once the show airs, I’ll give you an update and some behind the scenes info that I’m not able to share right now. Until then I have a fun little appetizer that I hope you love.
Place about 5 inches of oil in a pot over medium high heat. Attach a deep fry thermometer and adjust heat to maintain between 325F and 350F.
In a small bowl beat together the eggs and milk.
In a separate bowl add the Italian bread crumbs.
Working in batches dip the raviolis in the milk mixture and then dredge in the bread crumbs.
Fry until golden brown on both sides, about 1-2 minutes per side. Use a metal slotted spoon to remove from oil, allow to drain on a stack of paper towels.
Place half of the raviolis on a serving platter. Top with a slice of mozzarella, and then a slice of tomato, some basil and a drizzle of balsamic glaze. Top with remaining raviolis, secure stack with a toothpick.
Notes
It’s best to use small raviolis for this, look for ones (or make some) that are about 1 1/2 inch square.
I’m really hard on myself, I’ve told you that before. I’m a nothing-is-ever-good-enough kind of person. Lately, my photos have been in my line of fire when it comes to Stuff I’m Not Good Enough At. I can’t figure it out, why the light is never that beautiful, why the images aren’t compelling enough, why the heck I can NEVER master the over head shot. By the way, this all drives my husband crazy, because in the Grand Tradition of Amazing Husbands, he thinks I’m the most talented person in the world, let’s not disrupt that delusion, I sort of like it.
So, one of my tangible fixation for resolving at least some of the issues I have with my sub par photos was this slightly deranged idea that I NEEDED a reclaimed wood table. I NEEDED it (#firstworldproblems). I priced this absolutely necessary item, and in the Los Angeles area, this need could be fulfilled for the low, low price of about $2000. My aforementioned Amazing Husband disagreed that this was an actual need after seeing the price tag for such items.
I couldn’t stop thinking about such a need, and scoured Craigslist for the possibility that I might be able to pick one up. But as luck might have it, an old house in my neighborhood started to get torn apart. It was a 1920’s California Bungalow and the sight of it being ripped apart made me a little heartsick.
As I drove home one night, I noticed a stack of gorgeous antique wood, full of age and scars that I couldn’t get out of my mind. After dinner I pulled on a pair of old boots, waited for the workmen to leave for the day, and began to dig the gorgeous planks out of the trash piles.
I had two very specific feelings about this slightly insane venture of trespassing to dig through a trash pile, at dusk, in East Los Angeles. First, I felt like a crazy person (and clearly an amateur who didn’t think to bring gloves to dig through construction waste and old wood) as I tried to ignore the freaked out looks from passers by. Second, that I was heroically saving this amazing wood from the fate of a land fill (also slightly insane that I was heroizing myself for something so selfish).
After I got home with Heroically Aquired Gorgeous Wood, I used actual real life and potentially dangerous power tools to nail it together, saw off the excess and I then had myself a Personally Reclaimed Wood (prop) Table. And posted the picture of my slightly insane venture on Instagram.
Although I’m fairly certain that my newly acquired fake table did not improve my photos, I’m still happy to have him in my house instead of a landfill.
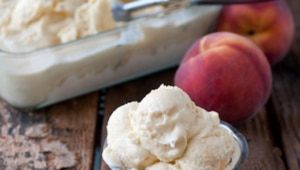
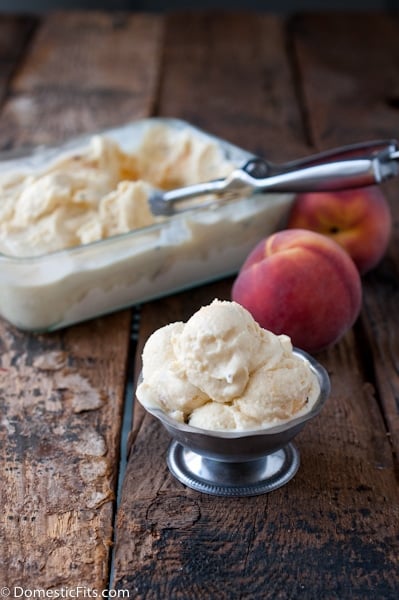
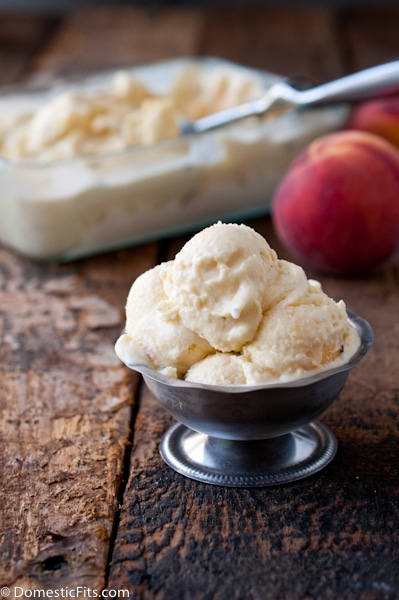
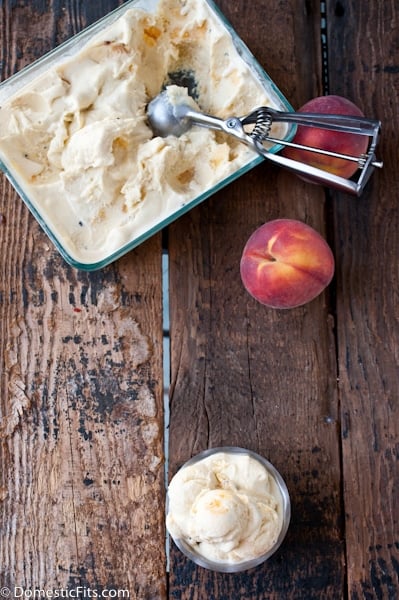
Grilled Peach Ice Cream
Ingredients
1 cup sugar
2 cups cream
1 cup whole milk
1 teaspoon vanilla extract
4 egg yolks
4 yellow peaches cut in half, pit removed
Grape seed or canola oil
Instructions
In a sauce pan off heat whisk together the sugar, cream, milk, vanilla, and egg yolks until very well combined.
Place the saucepan over medium heat, stirring constantly until it thickens enough to coat the back of a spatula.
Transfer to an airtight container (strain through a fine mesh strainer if any lumps were created), refrigerate until chilled, about 4 hours and up to 24.
Preheat the grill to medium high heat (alternately, a cast iron grill pan can be used).
Brush the cut side of the peaches with oil. Place, cut side down, on a hot grill. Close the lid and allow to grill until deep grill marks appear, about 4 minutes.
Remove from grill and gently peel the skin away (should remove easily).
Chop the peaches.
Add the peaches and the ice cream base to your ice cream maker and churn according to the manufacturer’s instructions. Freeze until set, about 2 hours.
Remove from freezer about 5 minutes prior to serving to make scooping easier.
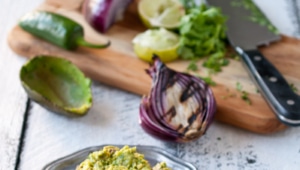
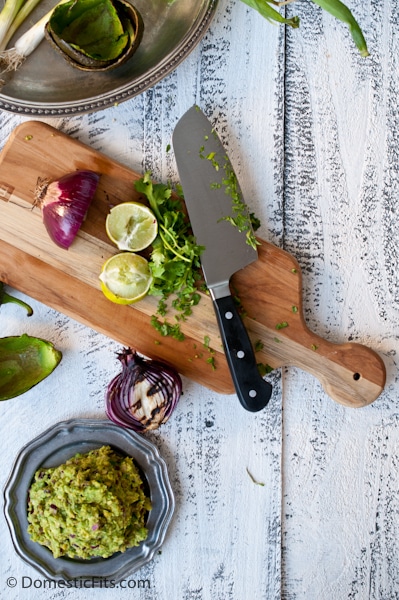
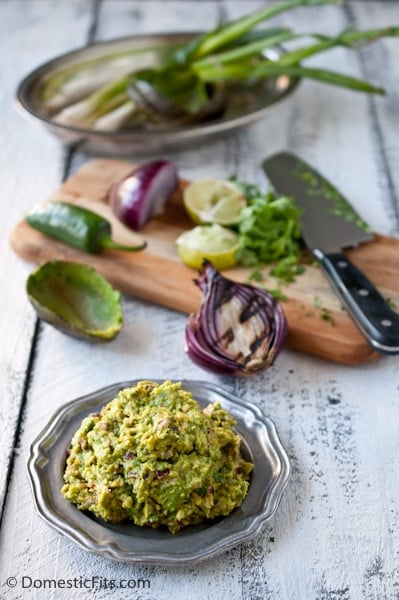
This grilled guacamole isn’t just a product of my grill junky status, grilling avocados is a fantastic idea and the perfect way to get some of that wonderful smoke flavors into your favorite summer dip. After all, the 4th of July is right around the corner, and next to Thanksgiving, it’s America’s favorite reason to take a day off work, eat too much food, and spend the day with people we love.
Of course meat was made for the grill, but vegetables have an ever better transformation when cooked with fire. When comes to grilling, anything goes, don’t forget about how amazing fruit is when it has a bit of char, or even slices of pound cake. Don’t discount pizza, it’s quick and fabulous off the grill.
Try something new next time you break out your grill, who knows, you might just find a new way to impress your guests.
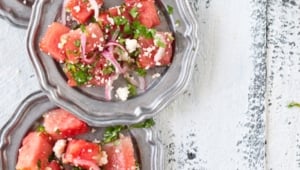
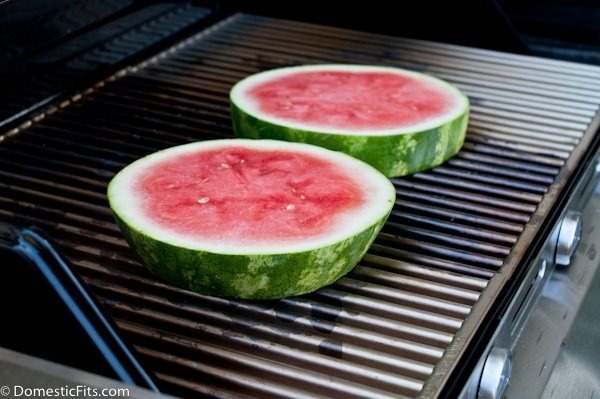
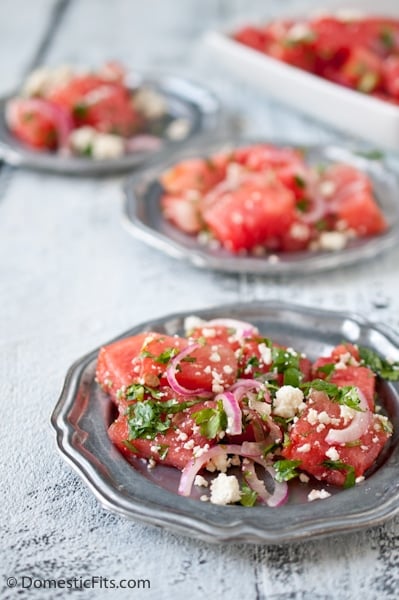
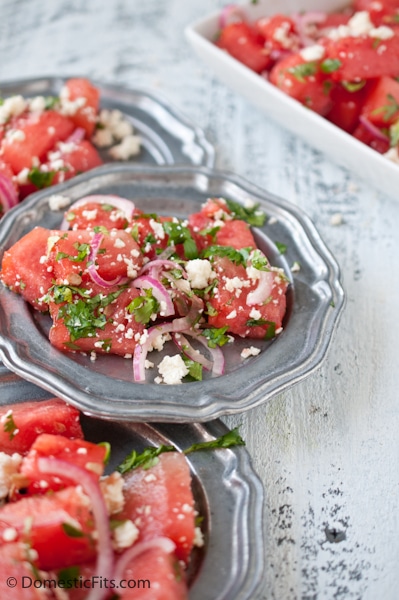
Grilled watermelon salad is the perfect summer side dish. Slice up some watermelon rings, throw them on the grill (literally if you’re brave enough), wait for some gorgeous smokey grill marks to spear and you’re half way there.
If you don’t have a grill, a grill pan will work fine. You can also skip the egregious use of fire all together and just cut the watermelon into bite sized chunks. The saltiness of the Cotija and the briny quick-pickled red onions set of that great sweetness of in-season watermelons.
It’s also a great salad to serve at room temperature, making it the perfect low maintenance side dish to serve on your summer party table. It also has a lovely sweetness that pairs well with a spicy food, I served it with these wings. It does not, however, keep very well. If you plan to make it ahead of time, keep all of the components separate and toss just prior to serving.
If you need a patriotic plan for the rest of the watermelon, check this out.
Grilled Watermelon Salad
Ingredients
¼ cup apple cider vinegar (or rice wine)
1 tbs raw honey
½ red onion, very thinly sliced
2 slices (2 inch thick each) watermelon
½ cup crumbed Cotija cheese (can substitute feta)
¼ cup chopped cilantro
Instructions
In a small bowl whisk together the vinegar and honey. Add the red onions, toss to coat. Cover and refrigerate for 20 minutes.
Place the watermelon slices on a hot grill until grill marks appear, about 3 minutes per side.
Remove the watermelon rind and chop the grilled watermelon into bite sized chunks, place in a large serving bowl.
Pour the red onion and the vinegar over the watermelon. Sprinkle with Cotija cheese and cilantro.
My grill broke last summer. We were in the middle of a move, and I still held onto the hope that we could fix it, so it wasn’t replaced. In Southern California, grillin' isn’t just a summer activity, it’s a year long love affair, making an entire 13 months sans grill a really long time to deprive myself of the chard glory of fire cooked food.
We just replaced it this past weekend and I can’t get enough of it. I had been trying to satisfy my urge to grill via my grill pan. Although it is a pretty fantastic pan, after making this corn on my stove top in a grill pan I couldn’t take it anymore, I had to have the real thing. I think I’ve officially reached Grill Junky status, lets hope I can keep it under control.
Hope you don’t mind too much, but I’ll be posting my grilling adventures over the next few weeks. And probably well into fall.
My favorite pinterest board right now is my Grillin' like a Villain. Feel free to post links to grilled food I should be aware of!
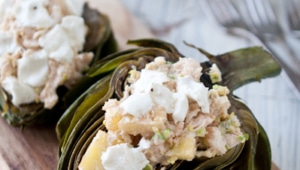
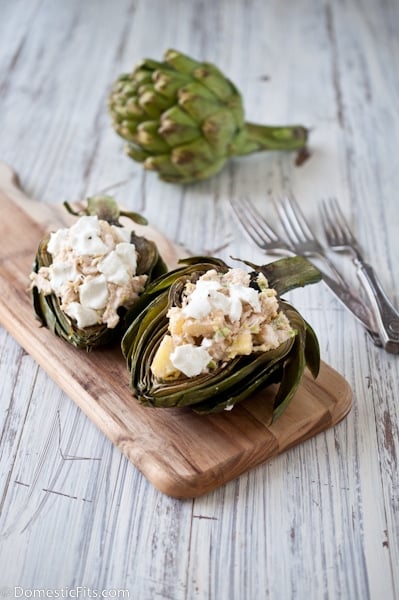
Grilled Artichokes with Crab Filling
Prep Time: 10 minutes
Cook Time: 28 minutes
Yield: 4 servings
Ingredients
For the Artichokes:
2 fresh artichoke
4 tbs melted butter
2 tbs lemon juice
½ tsp salt
½ tsp pepper
Vegetable oil for the grill
For the Filling:
4 rings fresh pineapples (cut off rind and remove core)
12 ounces fresh lump crab meat
½ cup sour cream
½ tsp salt
½ tsp pepper
½ tsp chili powder
½ tsp mustard powder
¼ tsp hot pepper sauce
8 large Brussels sprouts
2 ounce crumbled goat cheese
Instructions
Prepare a pot of lightly salted boiling water. Preheat the grill
Slice the artichokes down the center, lengthwise. Using a melon baller and a paring knife remove the hair from the choke as well as the inner purple leaves, leaving a cavity in the center of the each artichoke half.
Boil in the pot of lightly salted boiling water until the outer leaves tear away easily, about 20 minutes.
Grill the pineapple rings until strong grill marks appear on each side, about 3 minutes per side. Remove from grill, allow to cool slightly, chop.
In a small bowl stir together the crab meat, pineapple, sour cream, hot pepper sauce, ½ tsp each of salt, pepper, chili powder, and mustard powder.
Using a cheese crater, grate the Brussels sprouts, this should equal about 2/3 cup. Stir the grated Brussels sprouts into the crab mixture.
Once the artichokes are done cooking, remove from water and allow to drain.
Mix the melted butter, lemon juice, salt and pepper together in a small bowl. Brush artichokes on all sides with melted butter mixture.
Brush the grill with vegetable oil. Grill artichokes, cut side down, until nice grill marks appear, about 5-8 minutes. Baste artichokes with melted butter while grilling.
Remove from grill, fill the cavity of each artichoke with crab mixture and top with crumbled goat cheese. Return to the grill, crab side up, and cook just until the filling is warm and the cheese has started to melt, about 3 minutes.
Serve immediately.
Notes
Starting at the outside and working inward, use the artichoke leaves to scoop out and eat the filling.
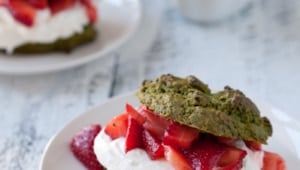
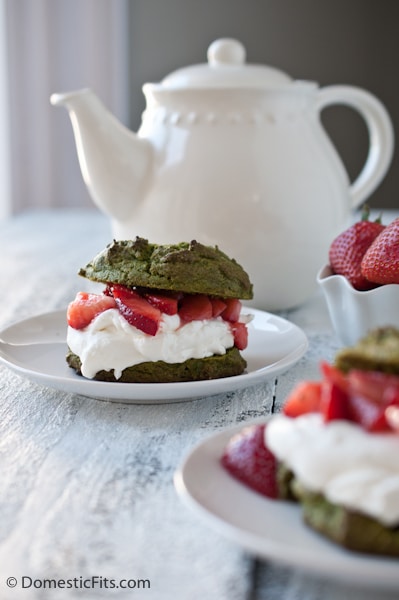
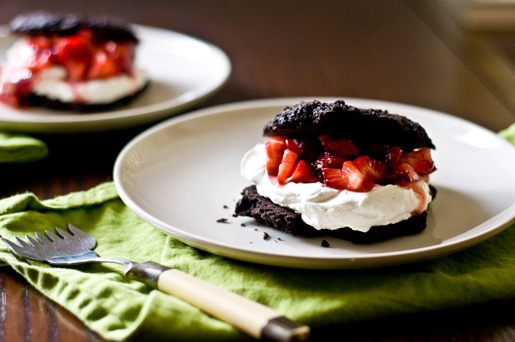
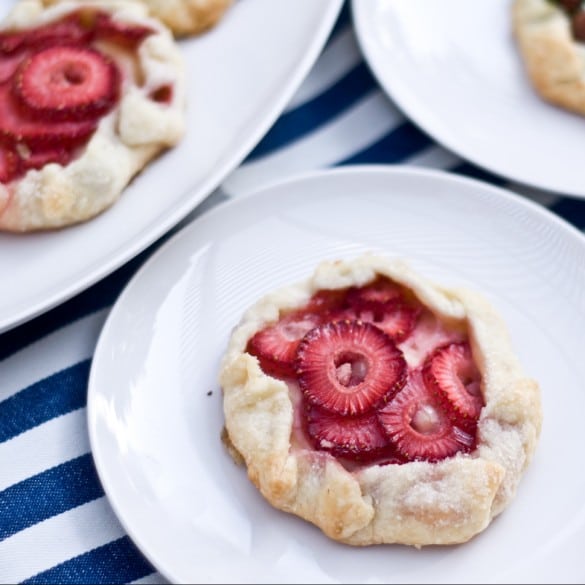
My first official assignment as a Brand Ambassador for California Strawberry Commission was to re-invent the strawberry shortcake. After a brief stop on the idea of another chocolate strawberry shortcake, and possibly a lemon lavender version, I settled on a matcha version, something I hope is new to you all (I like to feel inventive!), and matcha goes so well with strawberries.
I’ve had Matcha powder (Japanese green tea powder) in the back of my mind for a while, on my list of foods to bake with. It gives a great contrast of color and flavor to the gorgeous strawberries, if you’re a matcha lover, I think you’ll agree.
I also have a pin contest to tell you all about. It’s a great excuse to spend a little extra time on pinterest while checking out some fantastic strawberry recipes, getting inspired for those summer cook-outs and trying to win some extra cash!
Matcha Strawberry Shortcakes with Lime Whipped Cream
Prep Time: 10 minutes
Cook Time: 18 minutes
Yield: 6 servings
Ingredients
For the Shortcakes:
1 ½ cups all purpose flour
½ cup granulated sugar
1-2 tbs matcha powder*
1 tsp baking powder
1 tsp baking soda
pinch salt
6 tbs chilled unsalted butter, cut into cubes
½ cup whole milk
For the Strawberries:
4 cups strawberries, cleaned and chopped
¾ cup granulated sugar
2 tsp lime juice
For the Lime Whipped Cream:
1 ½ cups chilled heavy cream (or whipping cream)
1/3 cup powdered sugar
1 tsp lime zest
1 tsp lime juice
Instructions
Preheat oven to 400
Add flour, sugar, matcha, baking powder, baking soda and salt to a food processor, pulse to combine.
Add the butter cubes, process until the butter is incorporated, about 1 minute.
Add the milk, process until just combined.
Line a baking sheet with parchment paper. Drop large spoonful’s (about the size of a lime) onto the baking sheet, evenly spaced.
Bake at 400 for 15-18 minutes or until the tops have just started to brown, remove from oven and allow to cool.
In a large bowl, stir together the strawberries, lime juice and granulated sugar, set aside.
Once the shortcakes have cooled, make the whipped cream. In the bowl of a stand mixer beat the cream, powdered sugar and lime zest until soft peaks form. While the mixer is runner, add the lime juice, beat until incorporated.
Split the shortcakes and fill with strawberries and whipped cream.
Notes
*Note: 2 tablespoons of matcha powder will give you a strong green tea flavor and a deeper green color. If you want a more mild, mellow flavor, add only 1 tablespoon.
I’m can’t decide what I’m more excited about, the best grilled vegetable recipes I’ve made in years, or this awesome giveaway.
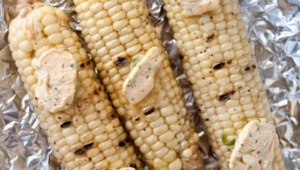
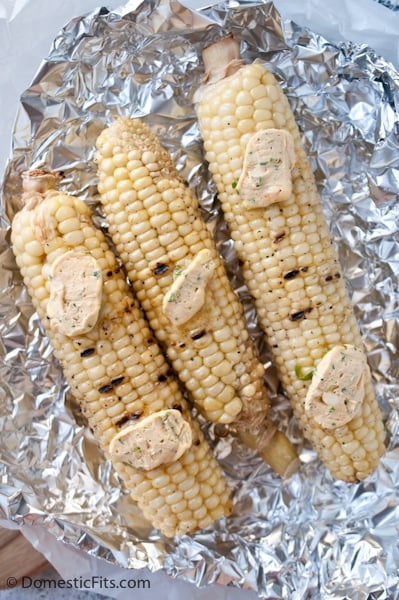
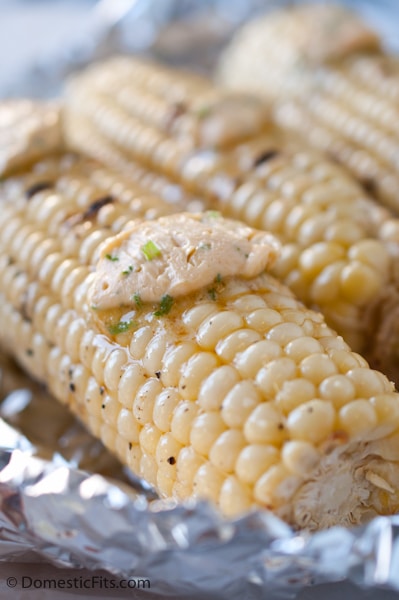
Lets talk about this corn for a second. Of course the original purpose of the corn itself was merely as a vehicle for the Sriracha butter, which I adapted from The Sriracha Cookbook (you should buy it, and the Veggie Lovers version), but the sweetness of the grilled corn with the spicy butter made me forget that I had acctually made other things for dinner. This is a meal all by itself. I would also recommend serving it American State Fair style in bed of aluminum foil so that you don’t miss all that fabulous butter that will melt away. And don’t be shy about adding it to your other grilled foods, shrimp and zucchini would love to take a dip in this stuff.
Now, we can chat about this little giveaway. I’ve teamed up with some other awesome bloggers to give one lucky reader a shiny new iPad:
Give them a visit, enter to win and GOOD LUCK! And if you don’t win, you can always console yourself with some tasty, spicy, grilled corn.
Grilled Corn with Sriracha Scallion Butter
Ingredients
1 stick butter, softened
1 clove garlic, minced
¼ cup scallions, chopped
2 tsp sriracha
6 ears corn
2 tbs olive oil
salt and pepper
Instructions
Place butter in a stand mixer with a paddle attachment (or a small food processor) along with garlic, scallions and sriracha. Process until all ingredients are well combined.
Scrape onto a sheet of plastic wrap. Roll into a log shape, refridgerate until chilled and firm, about 1 hour. Can be made up to 3 days in advance.
Remove the husks and the silk from the corn, leave stalk on, if still attached. Rub corn with olive oil, salt and pepper all sides.
Cook on a preheated grill for 15-20 minutes, rotating every 3-5 minutes.
Place grilled corn on a sheet of aluminum foil, top with a few slices of sriracha butter, fold foil around corn.
I’m so excited to tell you that I’ve been asked to be a Brand Ambassador for California Strawberry Commission. Given my complete love of strawberries, this is fantastic for me. To be honest, I’ve been asked to be a brand ambassador before but it was never a good fit, I ended up turing other companies down. I can’t endorse a company that I don’t have complete faith in putting my name on the line for. I’m absolutely proud to represent a product as fantastic as California strawberries and I was thrilled to be asked and accepted without hesitation. I love strawberries and the best ones come from California.
I’m working on some strawberry recipes, I have a great savory recipe that just isn’t ready to post yet. It’s good, but I want it to be great so I’ll be working on it a bit more before I’m ready to send into into digital print.
May is National Strawberry Month, but really, you don’t need an excuse to grab some strawberries now that they are everywhere. But if you do need some ideas, here are some strawberry recipes that I love so much:
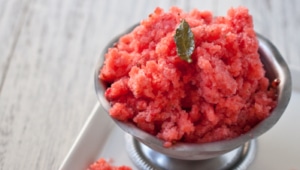
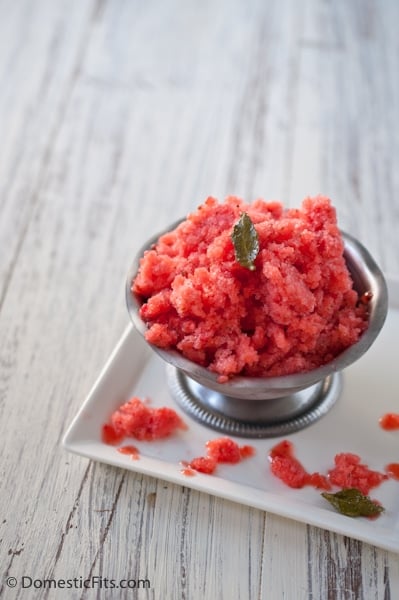
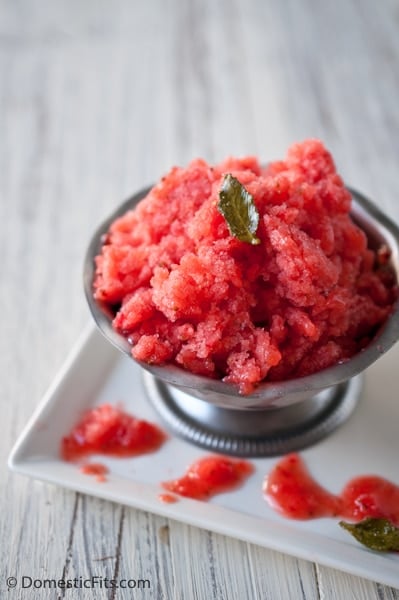
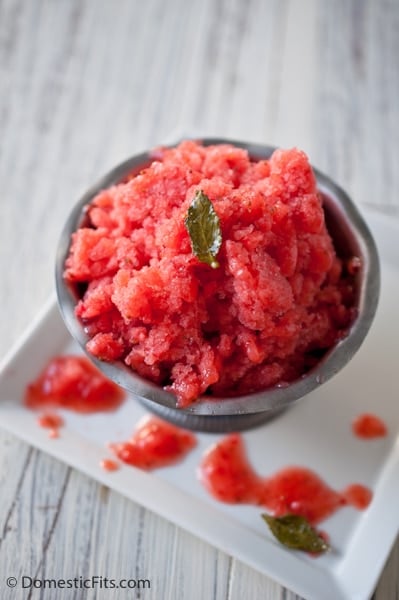
And now, the man of the hour, a recipe for a strawberry granita that requires no special equipment and makes a great final dish for those summer dinner parties on the patio that we are all looking forward to.
Strawberry Granita with Candied Mint Leaves
Ingredients
For the Granita:
1 cup very hot tap water
½ cup sugar
3 cups strawberries, chopped
1 lemon, juiced and zested
For the Candied Mint:
10-15 mint leaves
2 tbs corn syrup
1 Tbs very hot tap water
3 tbs white sugar
Instructions
Put the very hot water in a small bowl or measuring cup. Add the sugar and stir until it dissolves (microwave for 30 seconds if the sugar doesn’t dissolve).
Add the sugar water, strawberries, lemon juice, an lemon zest to a blender or food processor. Process until smooth, about 3 minutes.
Pour into a glass baking dish (7×11 or 9×13 will work well) place in the freezer.
Stir every 30 minutes, combining the frozen edges into the center. Once the granita is mostly frozen, rake the surface with a fork to create flakey mound. Cover and freeze until ready to serve.
To make the candied basil:
Preheat the oven to 175.
Place 2 tbs of corn syrup and 1 tbs hot water in a small bowl, stir until well combined.
Line a baking sheet with parchment paper.
Dip the leaves in the corn syrup water, lay them on the parchment paper. Sprinkle with sugar, turn over, sprinkle with additional sugar (make more leaves than you need, some of them don’t survive the process as well as other, you’ll want extras).
Place in the 175 degree oven for 20 minutes, flip over and cook until dry and sugar has crystalized, about 30 additional minutes.
Notes
Boozy Option: To make this a Strawberry Mojito Granita, add 1/4 cup white rum and 5 mint leaves to the blender with the sugar water, strawberries, lemon zest and lemon juice and just proceed with the rest of the recipe.