One big food blogger secret is that we rarely make recipes more than once. It’s true. And sad. It’s this constant race to provide new, fun, exciting, creative content for you that leaves us little time to revisit those recipes that we love. Of course, there are always those few recipes that we will make all the time, for the rest of our lives even if it means missing an opportunity to create a new post. This is one of those recipes for me. All I want to do now is make it all over again and add bacon and parmesean cheese.
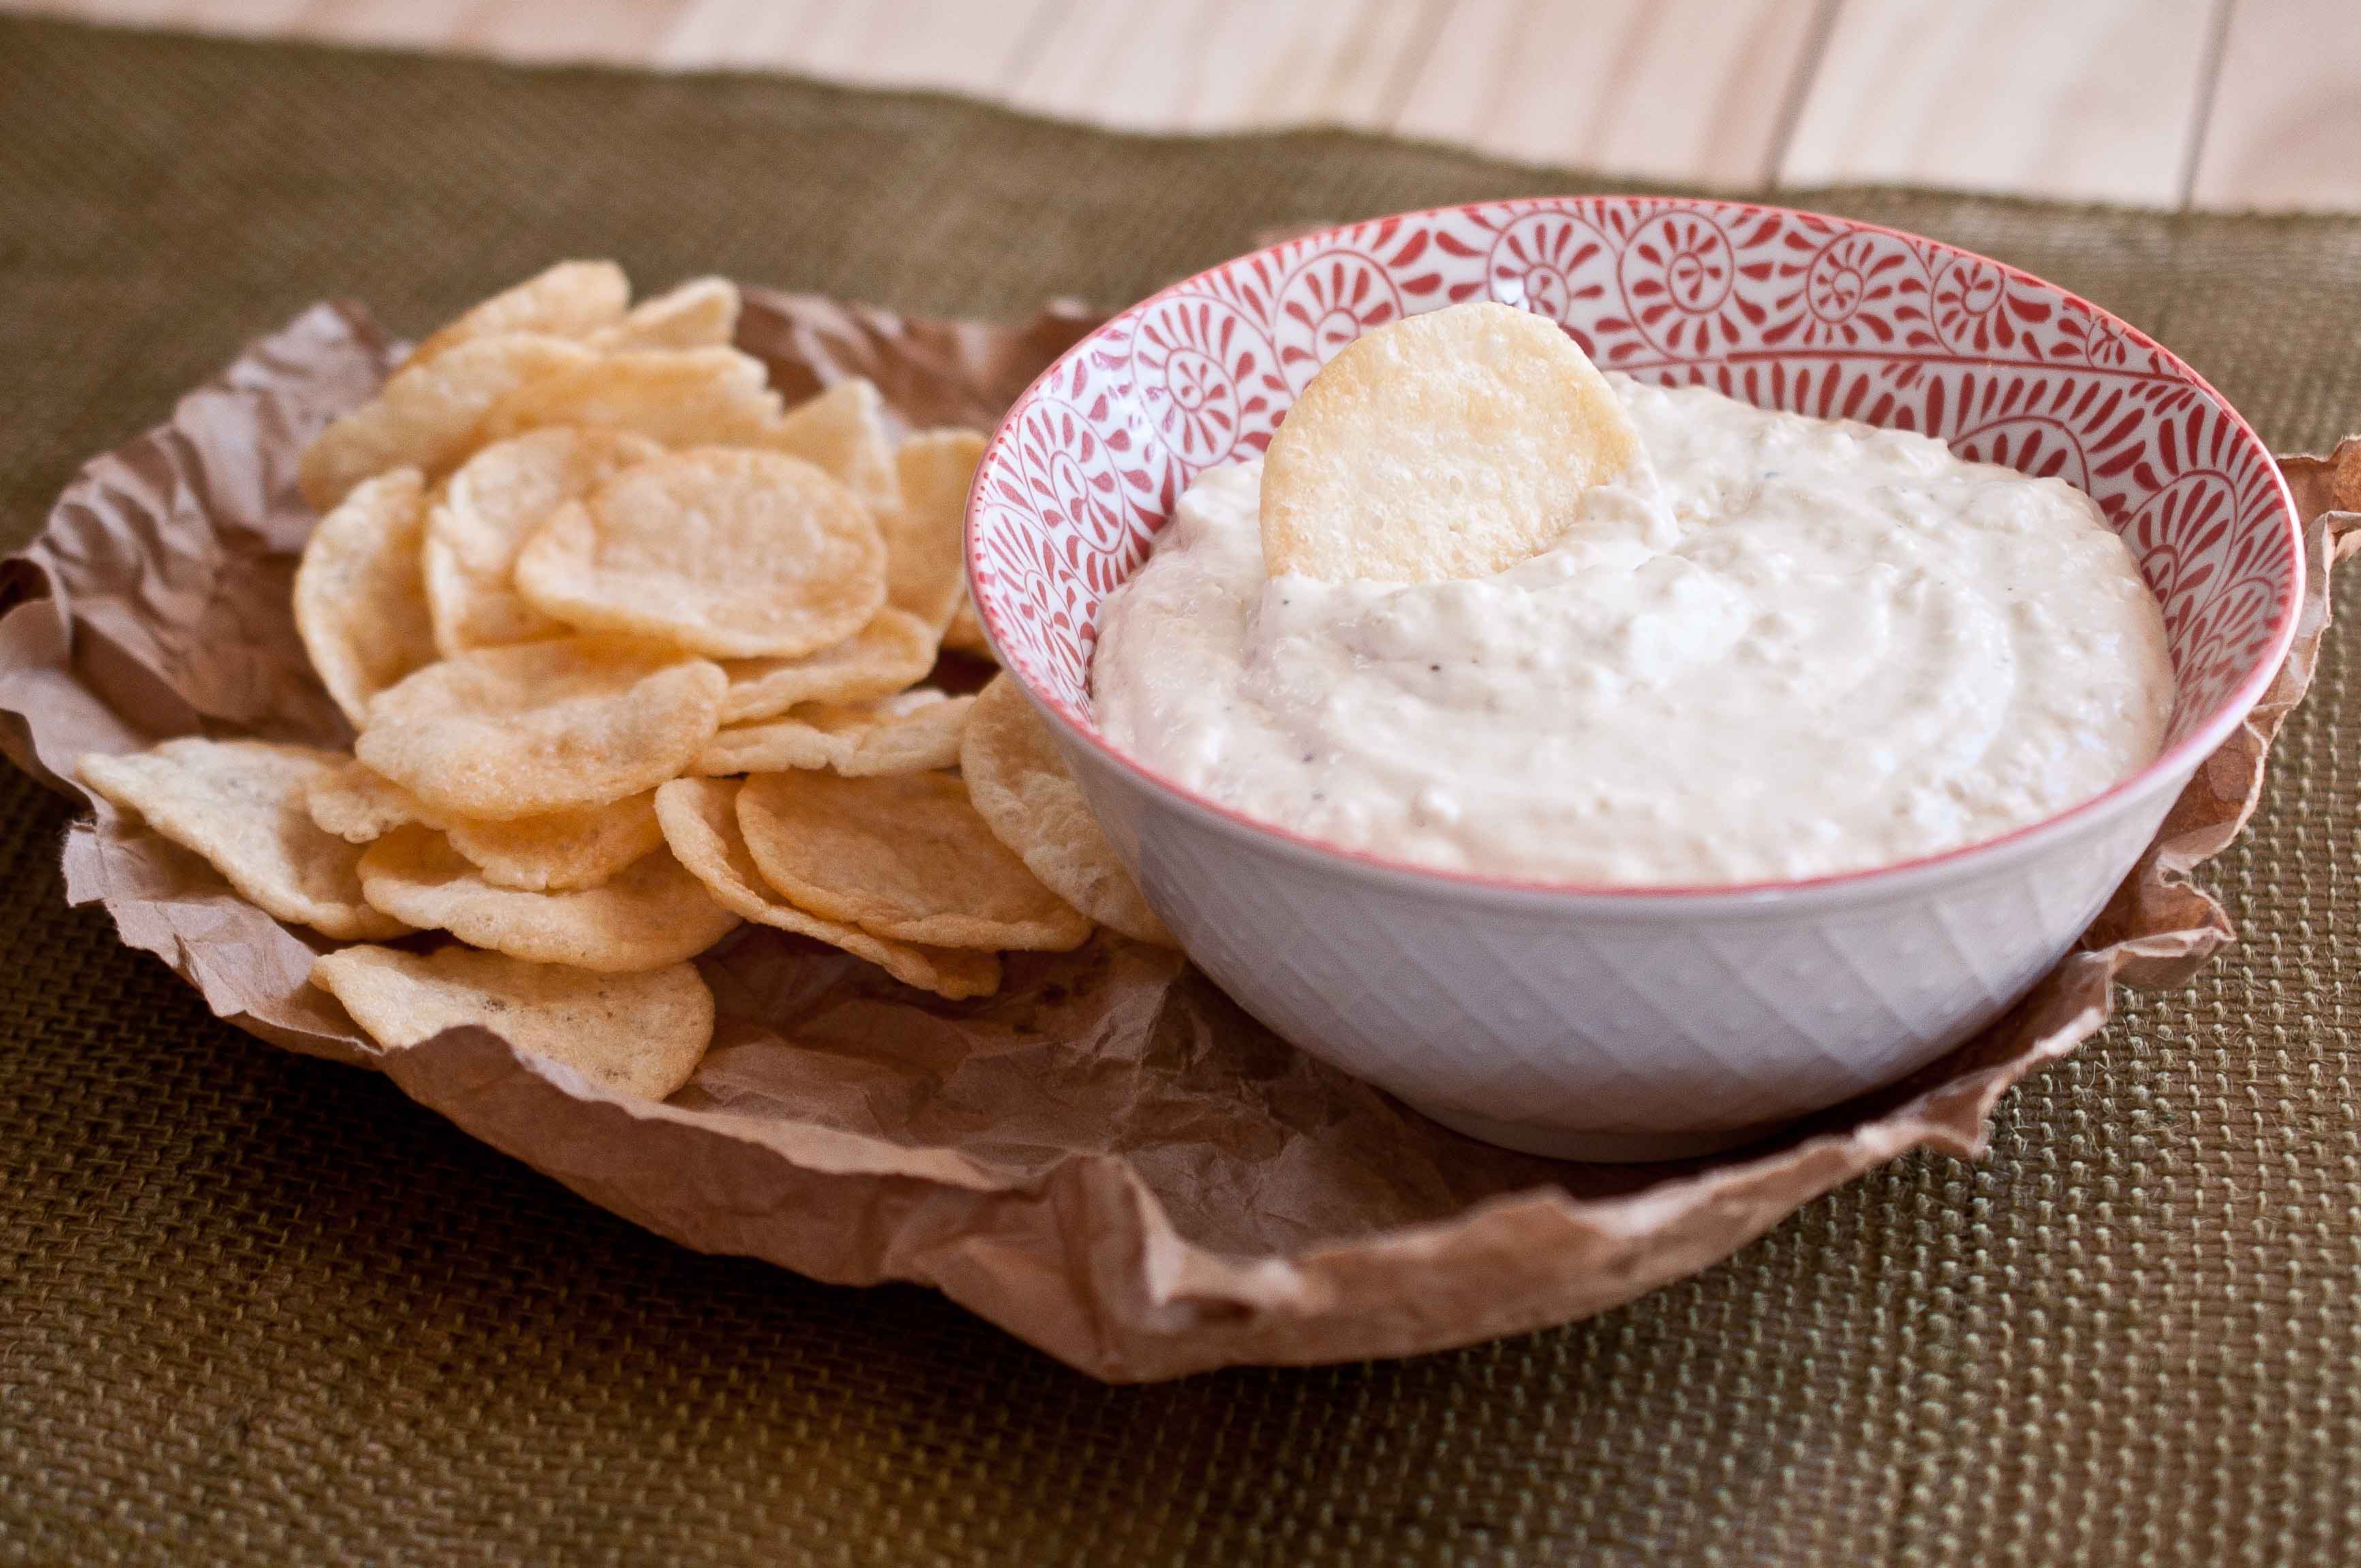
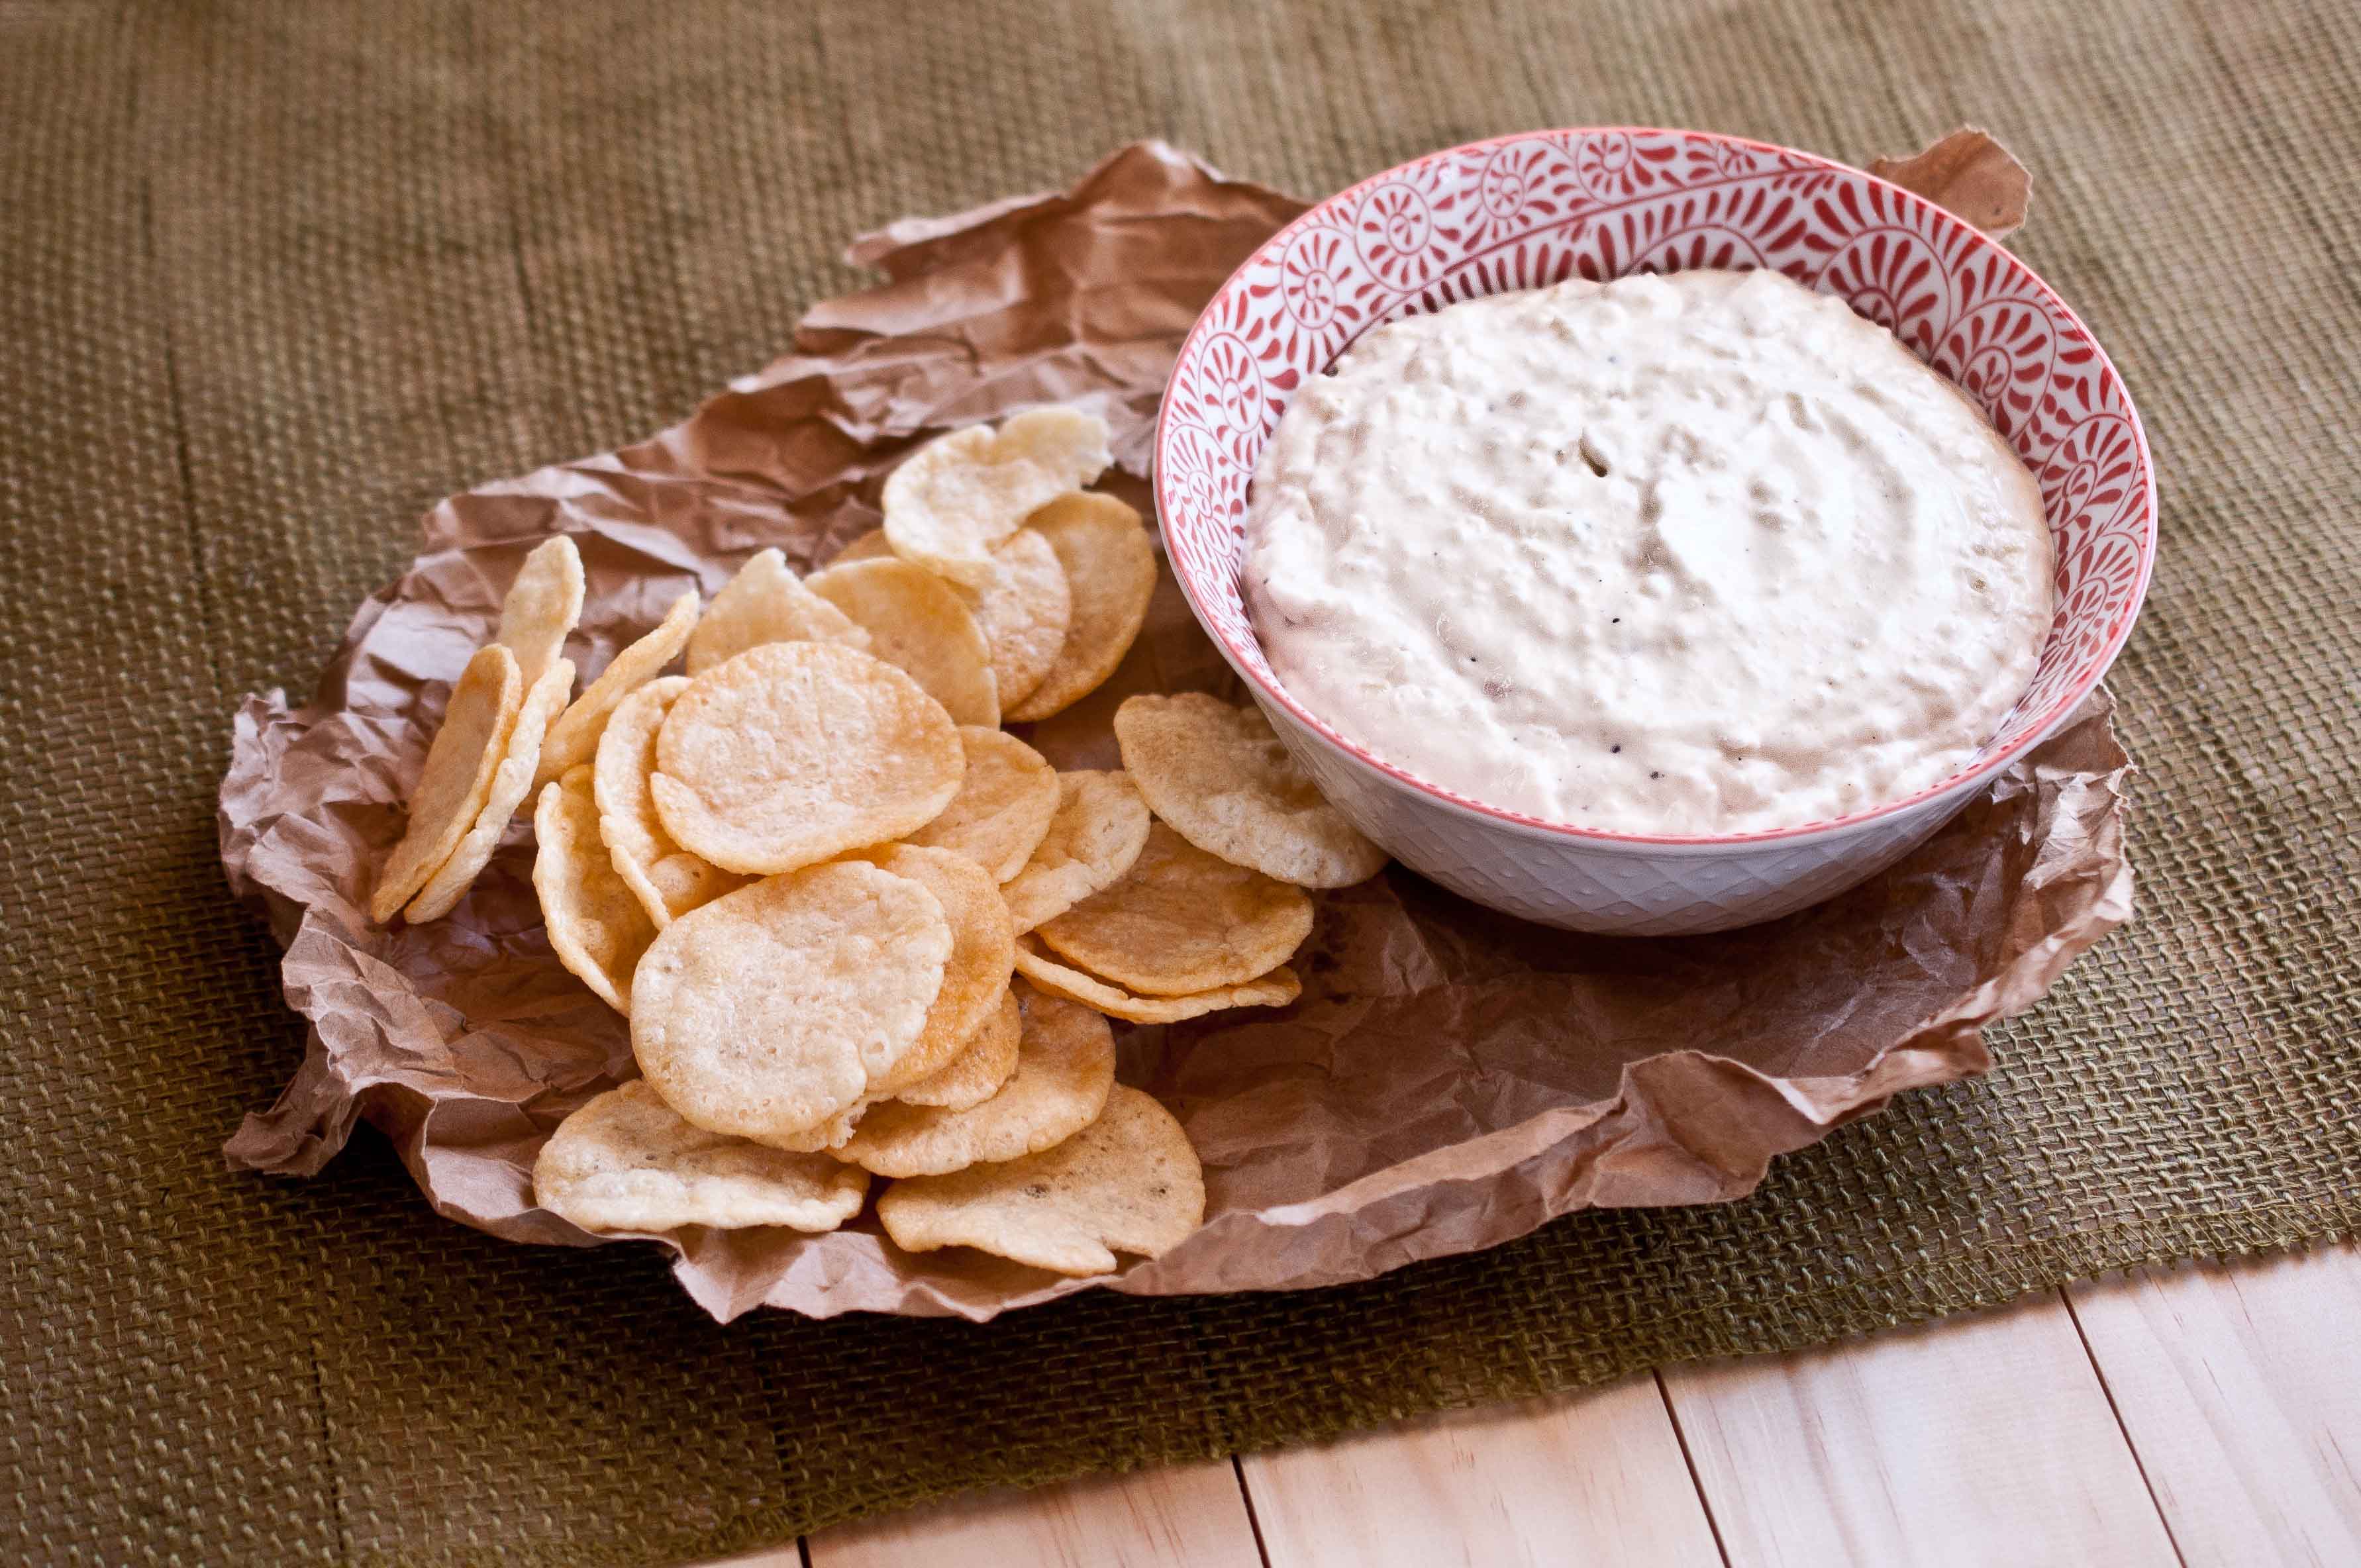
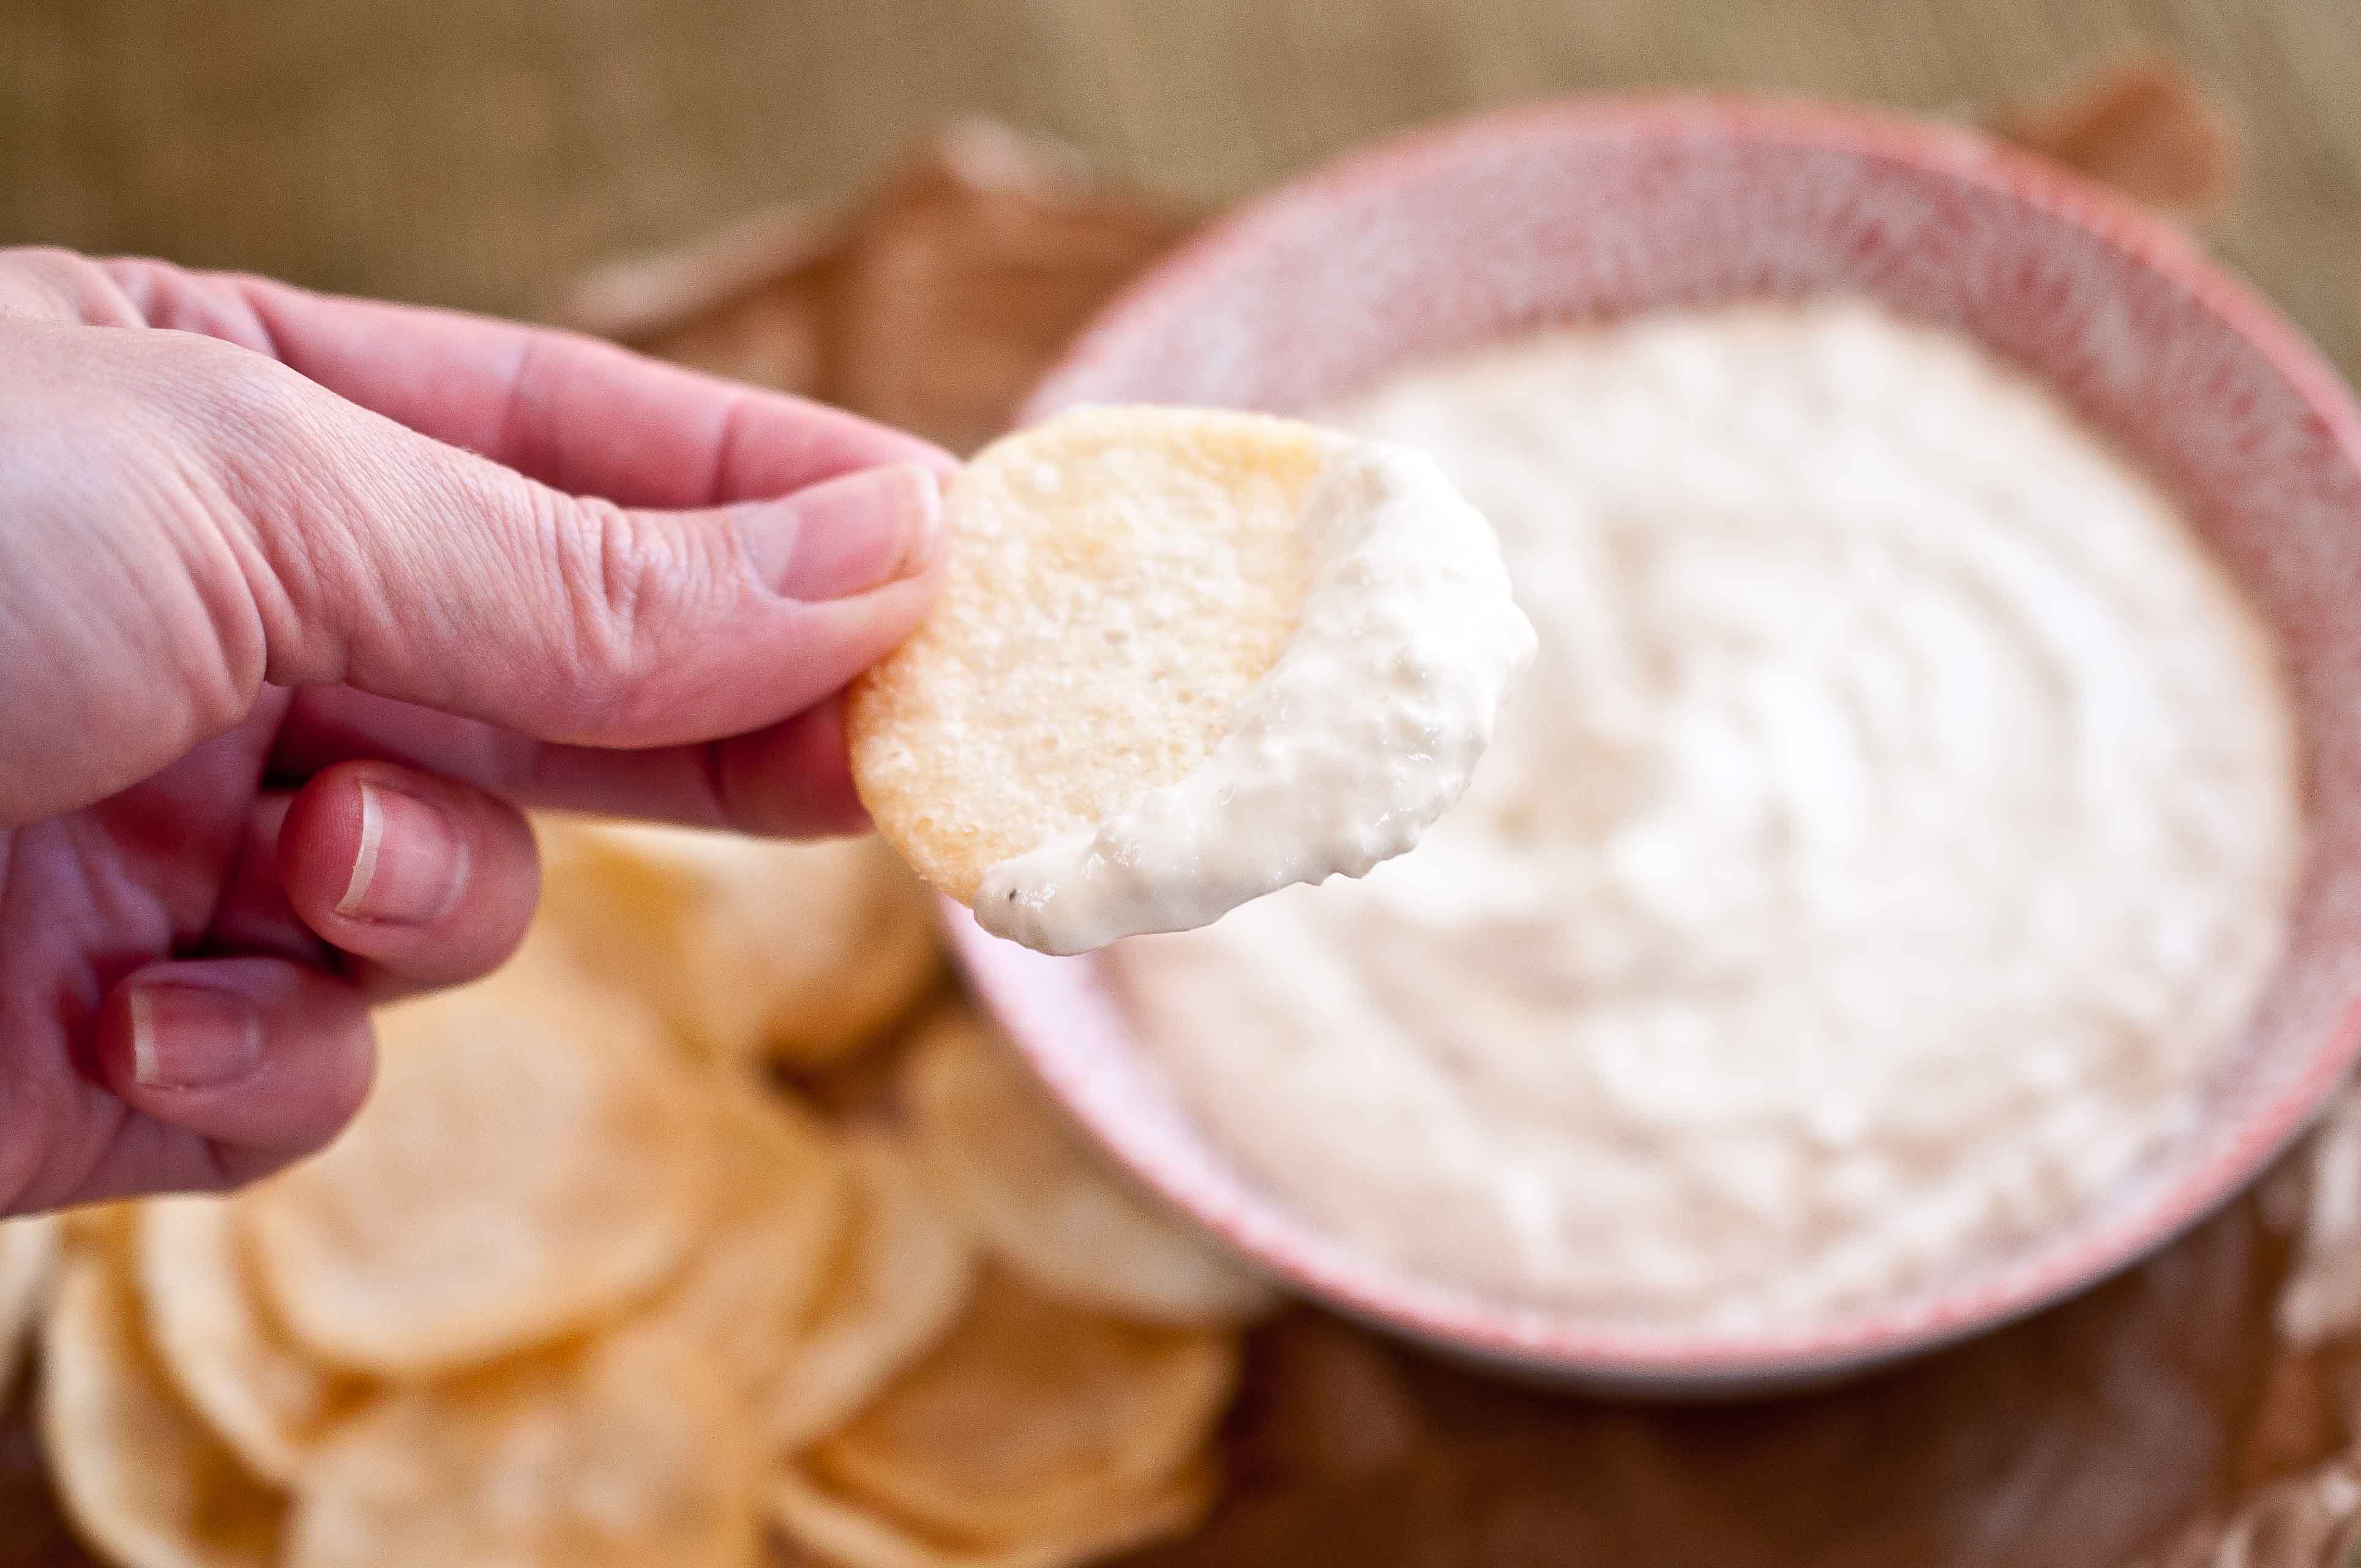
So addictive, creamy and delicious.
It’s a simple recipe with only a few ingredients. It isn’t hard to make but it does take time to develop the flavors, time that is well worth it. I’m moving myself and my family away from process’s foods as much as I can, a little at a time and this is my way of having that onion dip that everyone’s mom used to make with the instant soup mix packet, but with loads more flavor and no mysterious chemicals.
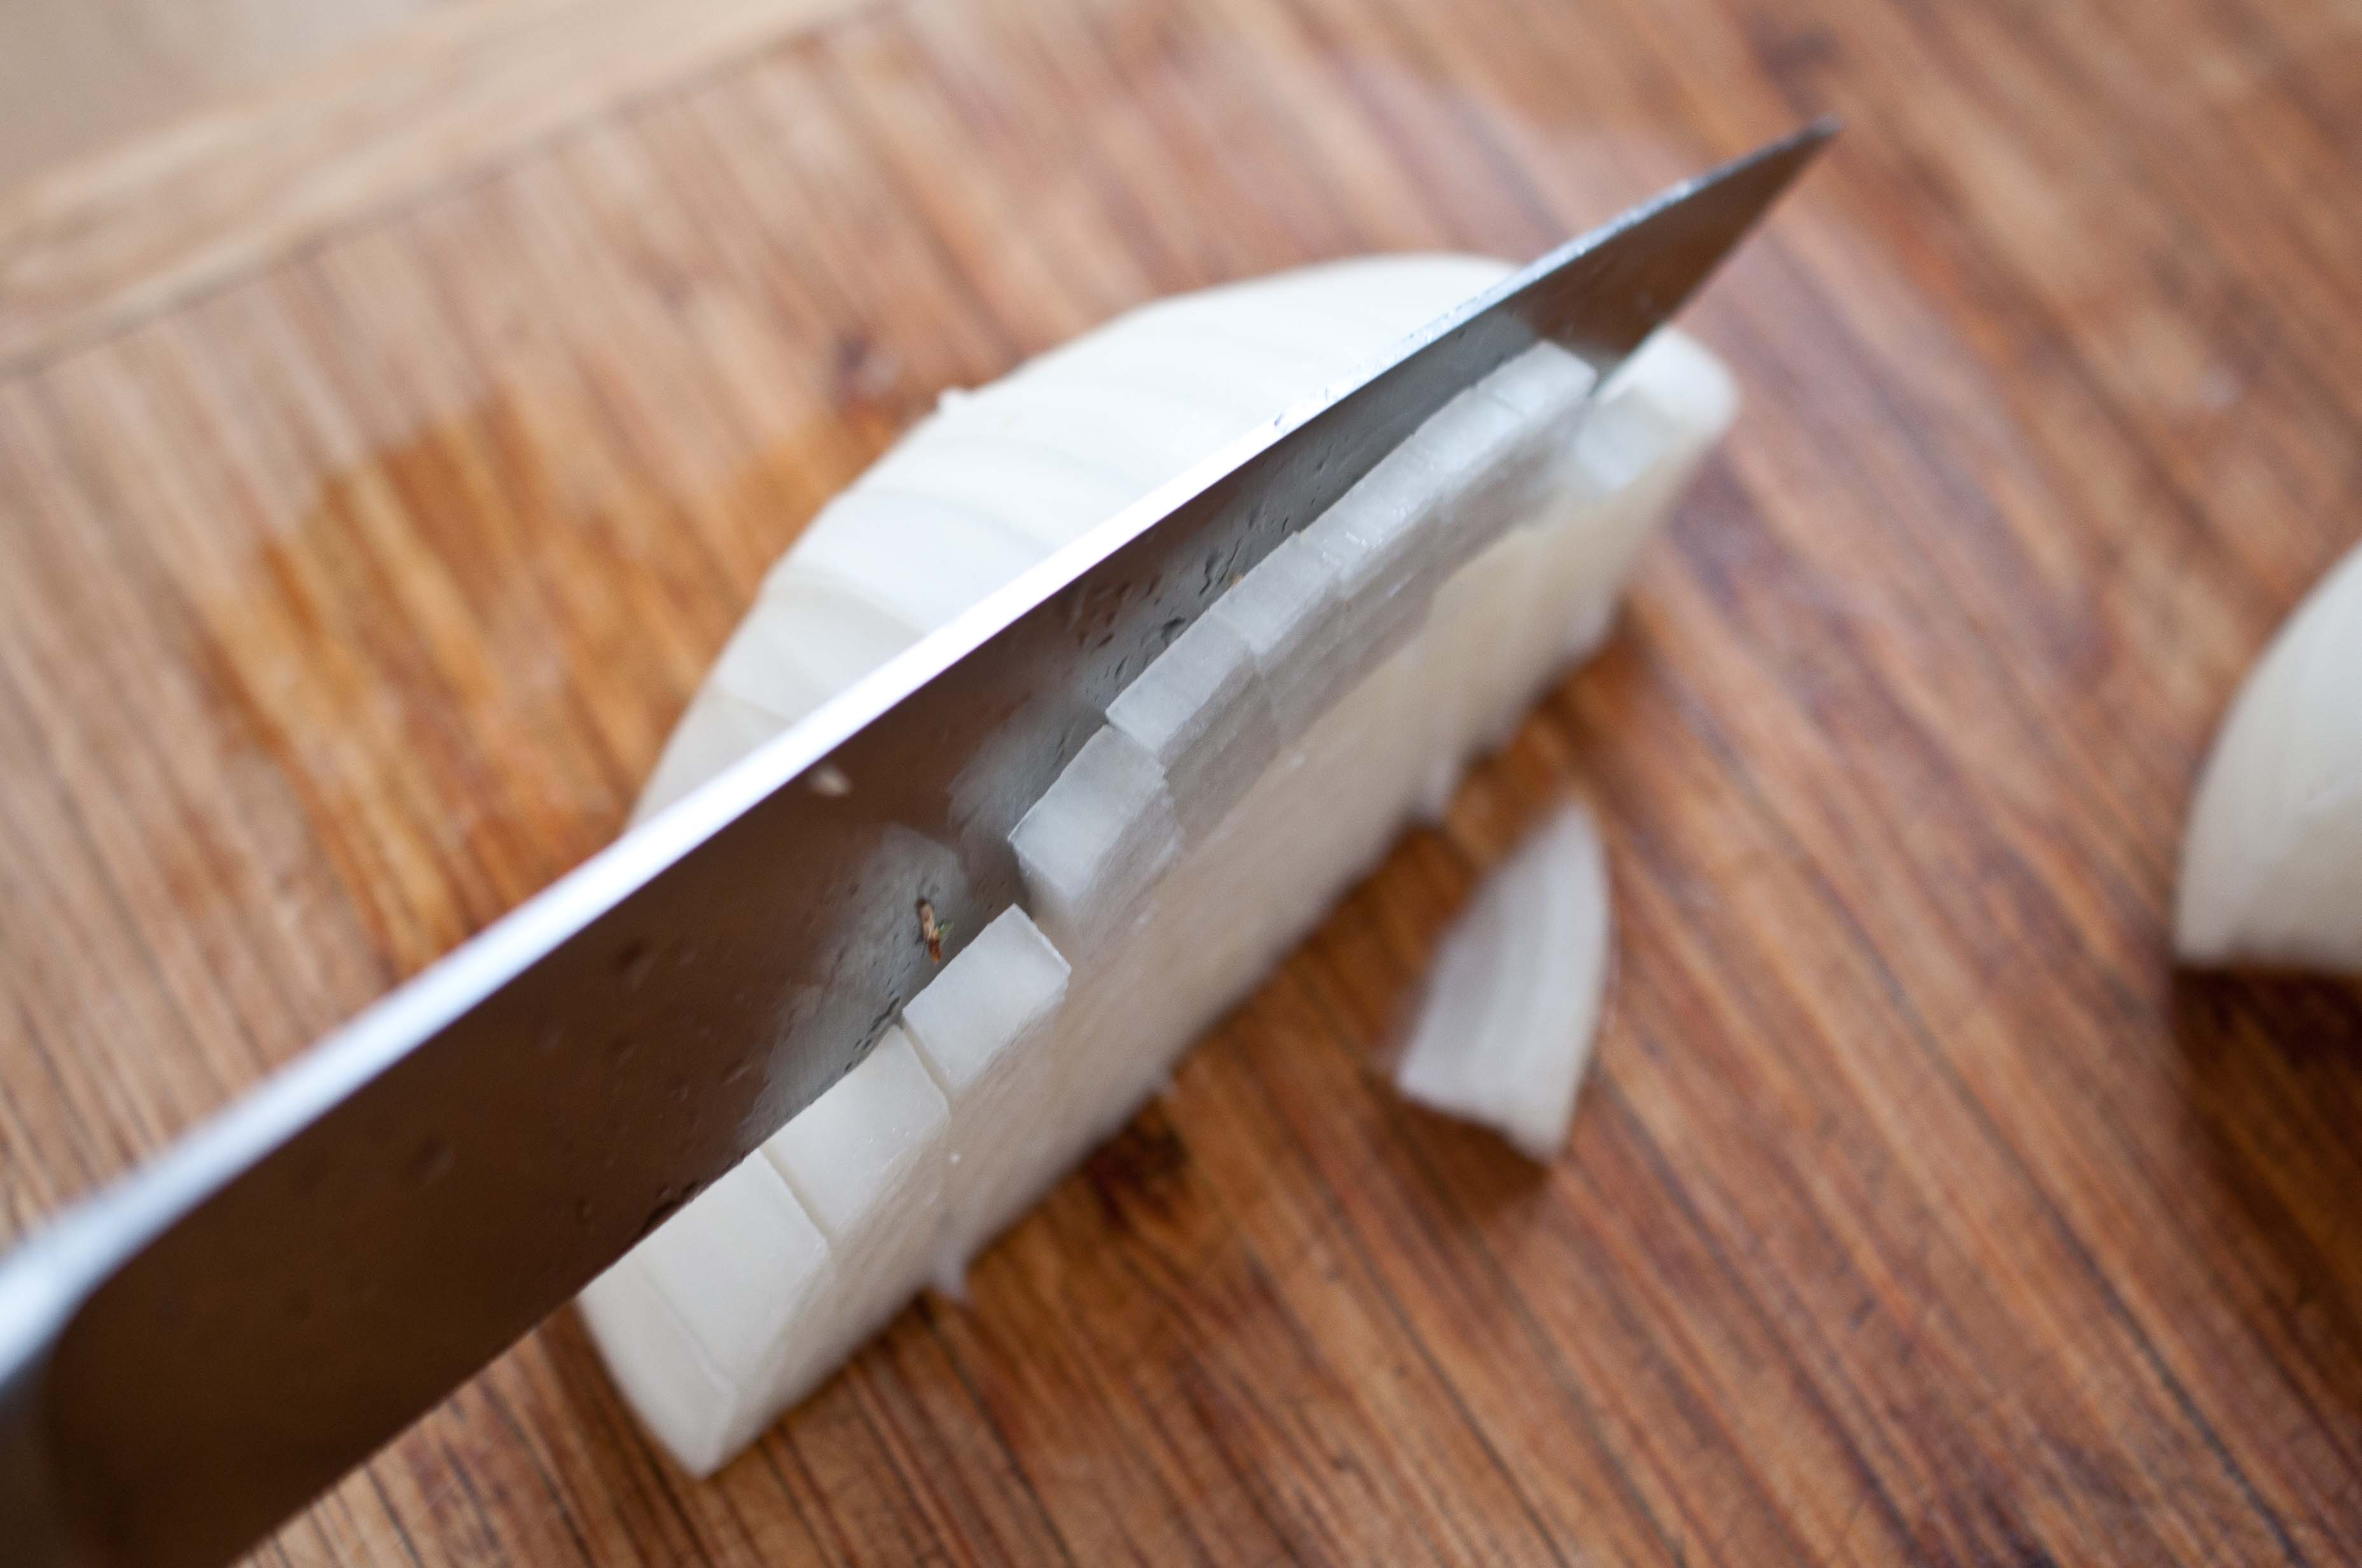
Also, I’m going to show you the right way to cut an onion.
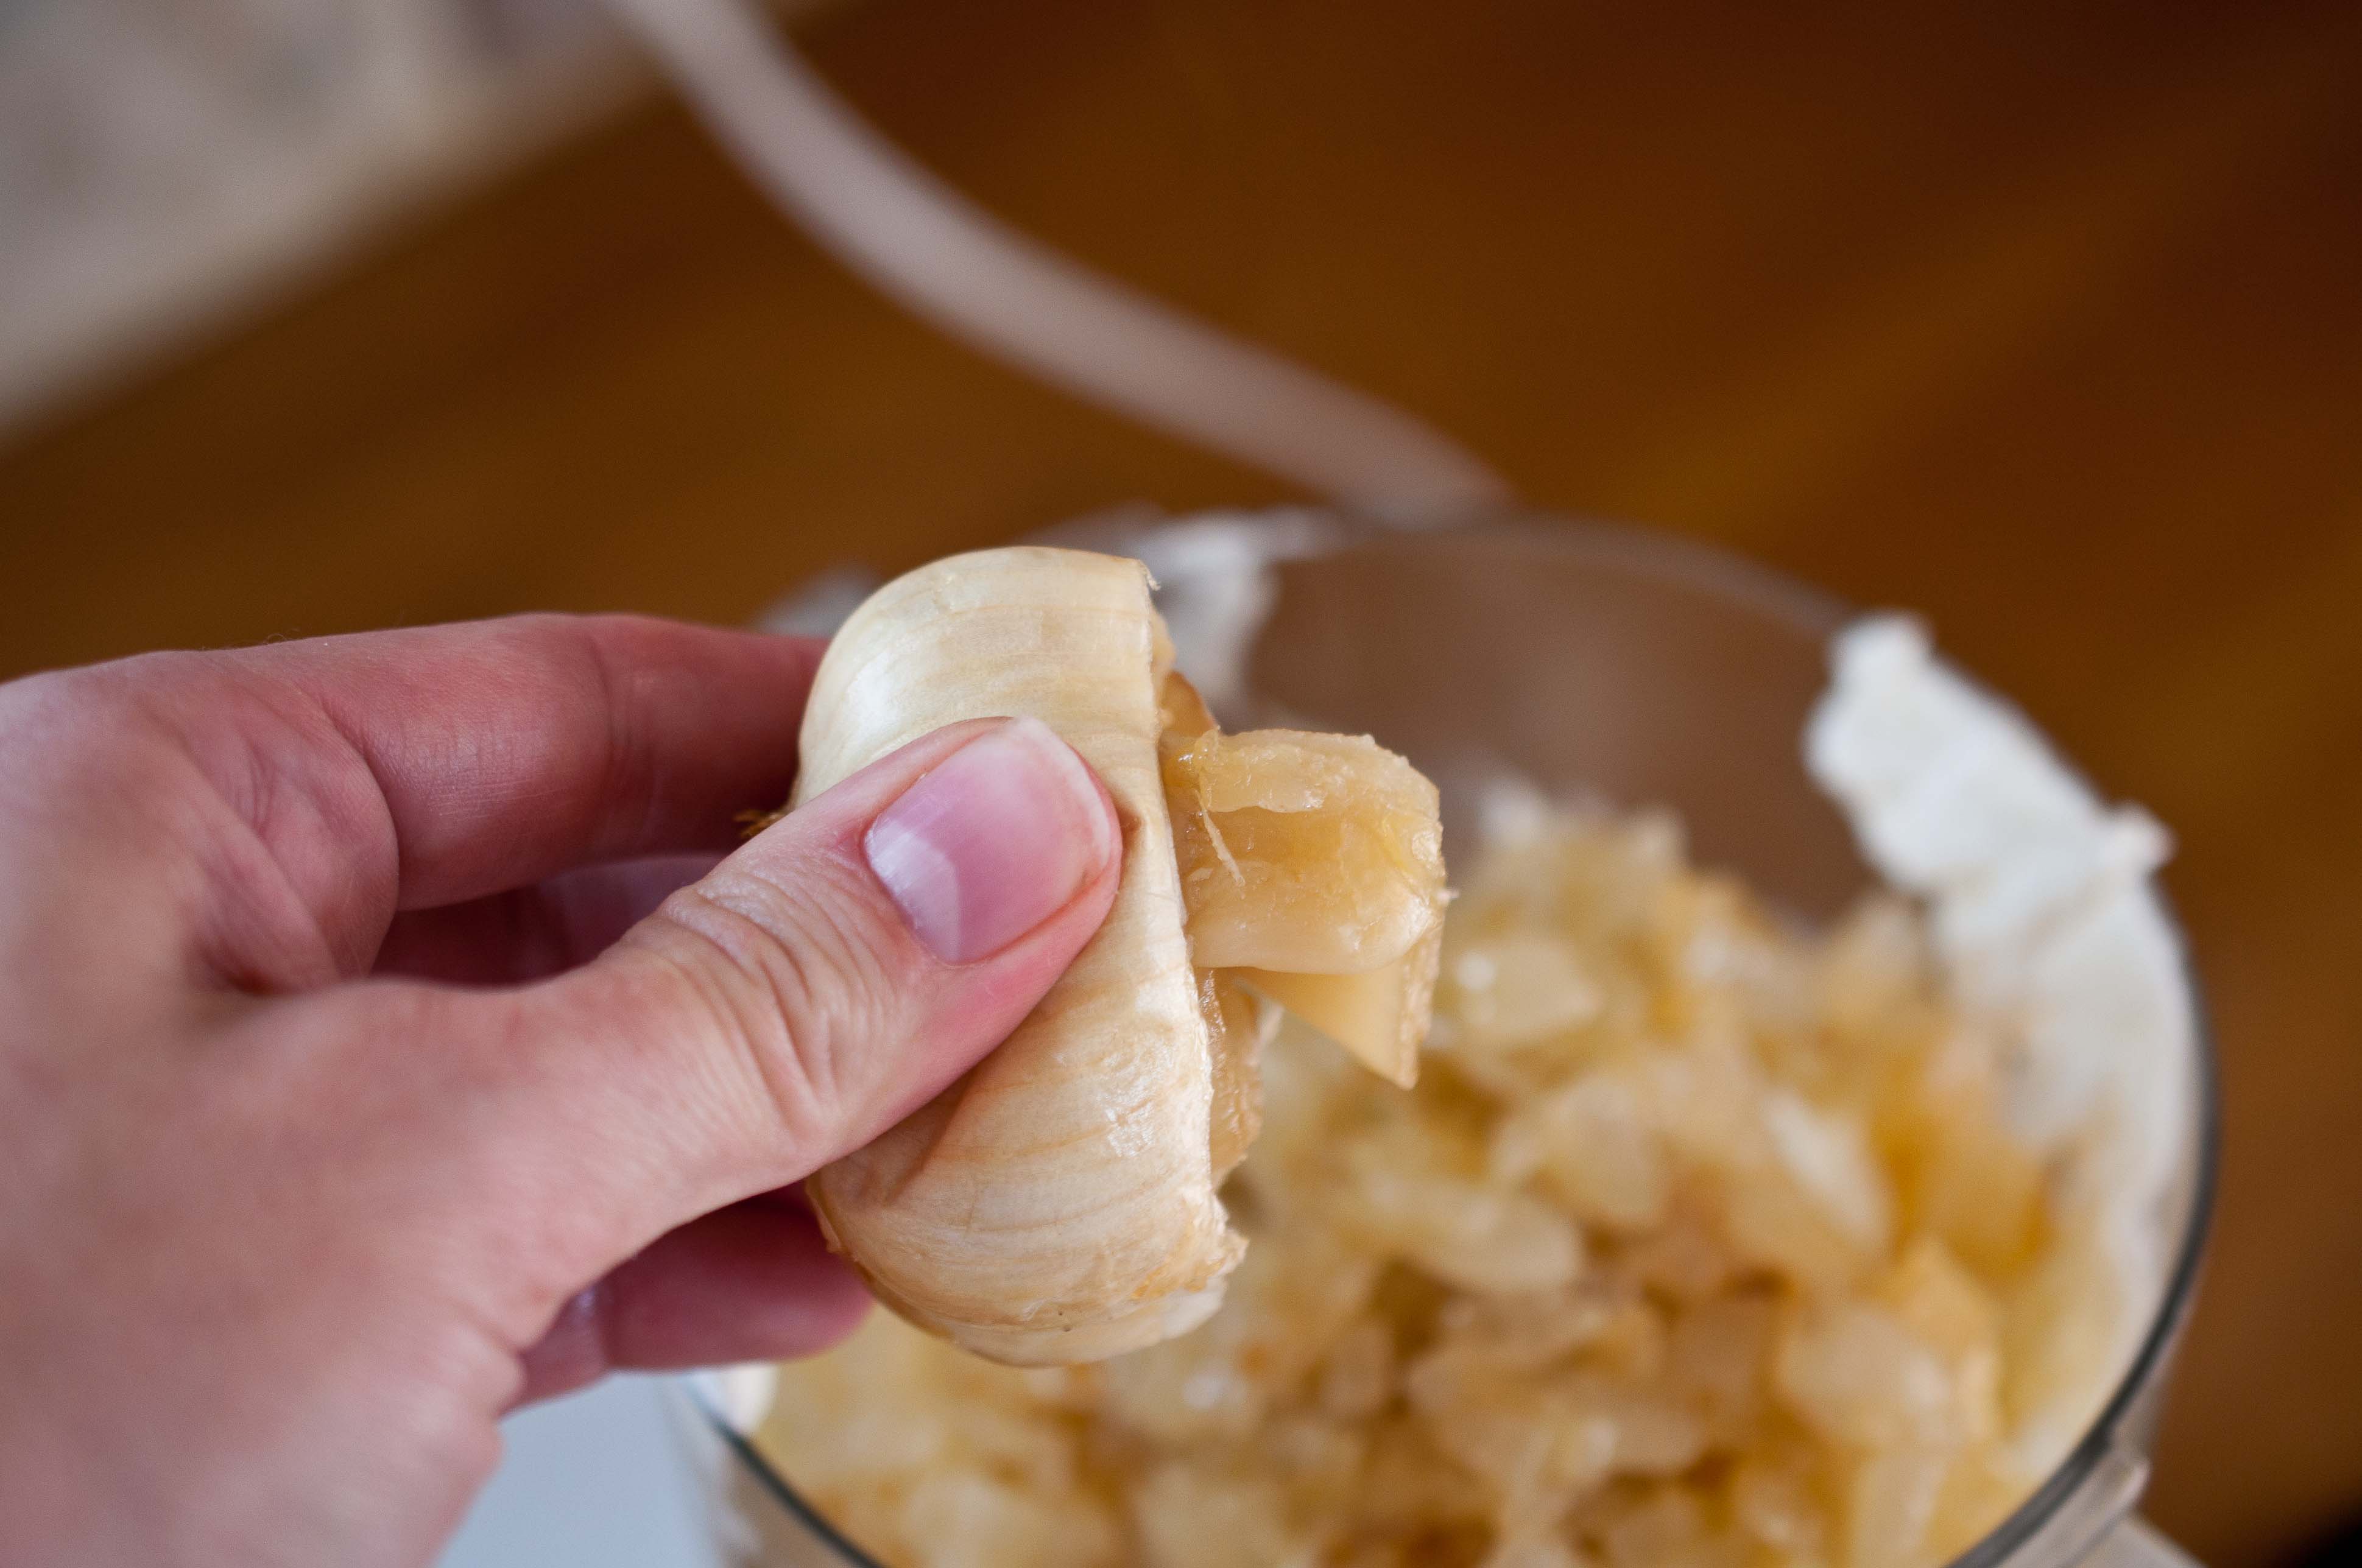
And how to roast garlic.
Two skills that I hope stick with you for the rest of your life. My kitchen would be a much different place without onions and roasted garlic.
Roasted Garlic and Caramelized Onion Dip
1 whole white onion (I used a Walla Walla Sweet onion)
1/4 cup olive oil, plus 1 tbs, divided
1 large head of garlic
8 oz cream cheese (softened)
1/4 cup sour cream
salt and pepper to taste
How to cut an onion:
Cut the onion in quarters.
With the tip of the knife close to the center, make vertical cuts all the across the onion, about 1/4 inch apart.
Then cut the onion in the other direction, cutting across the cuts you just made.
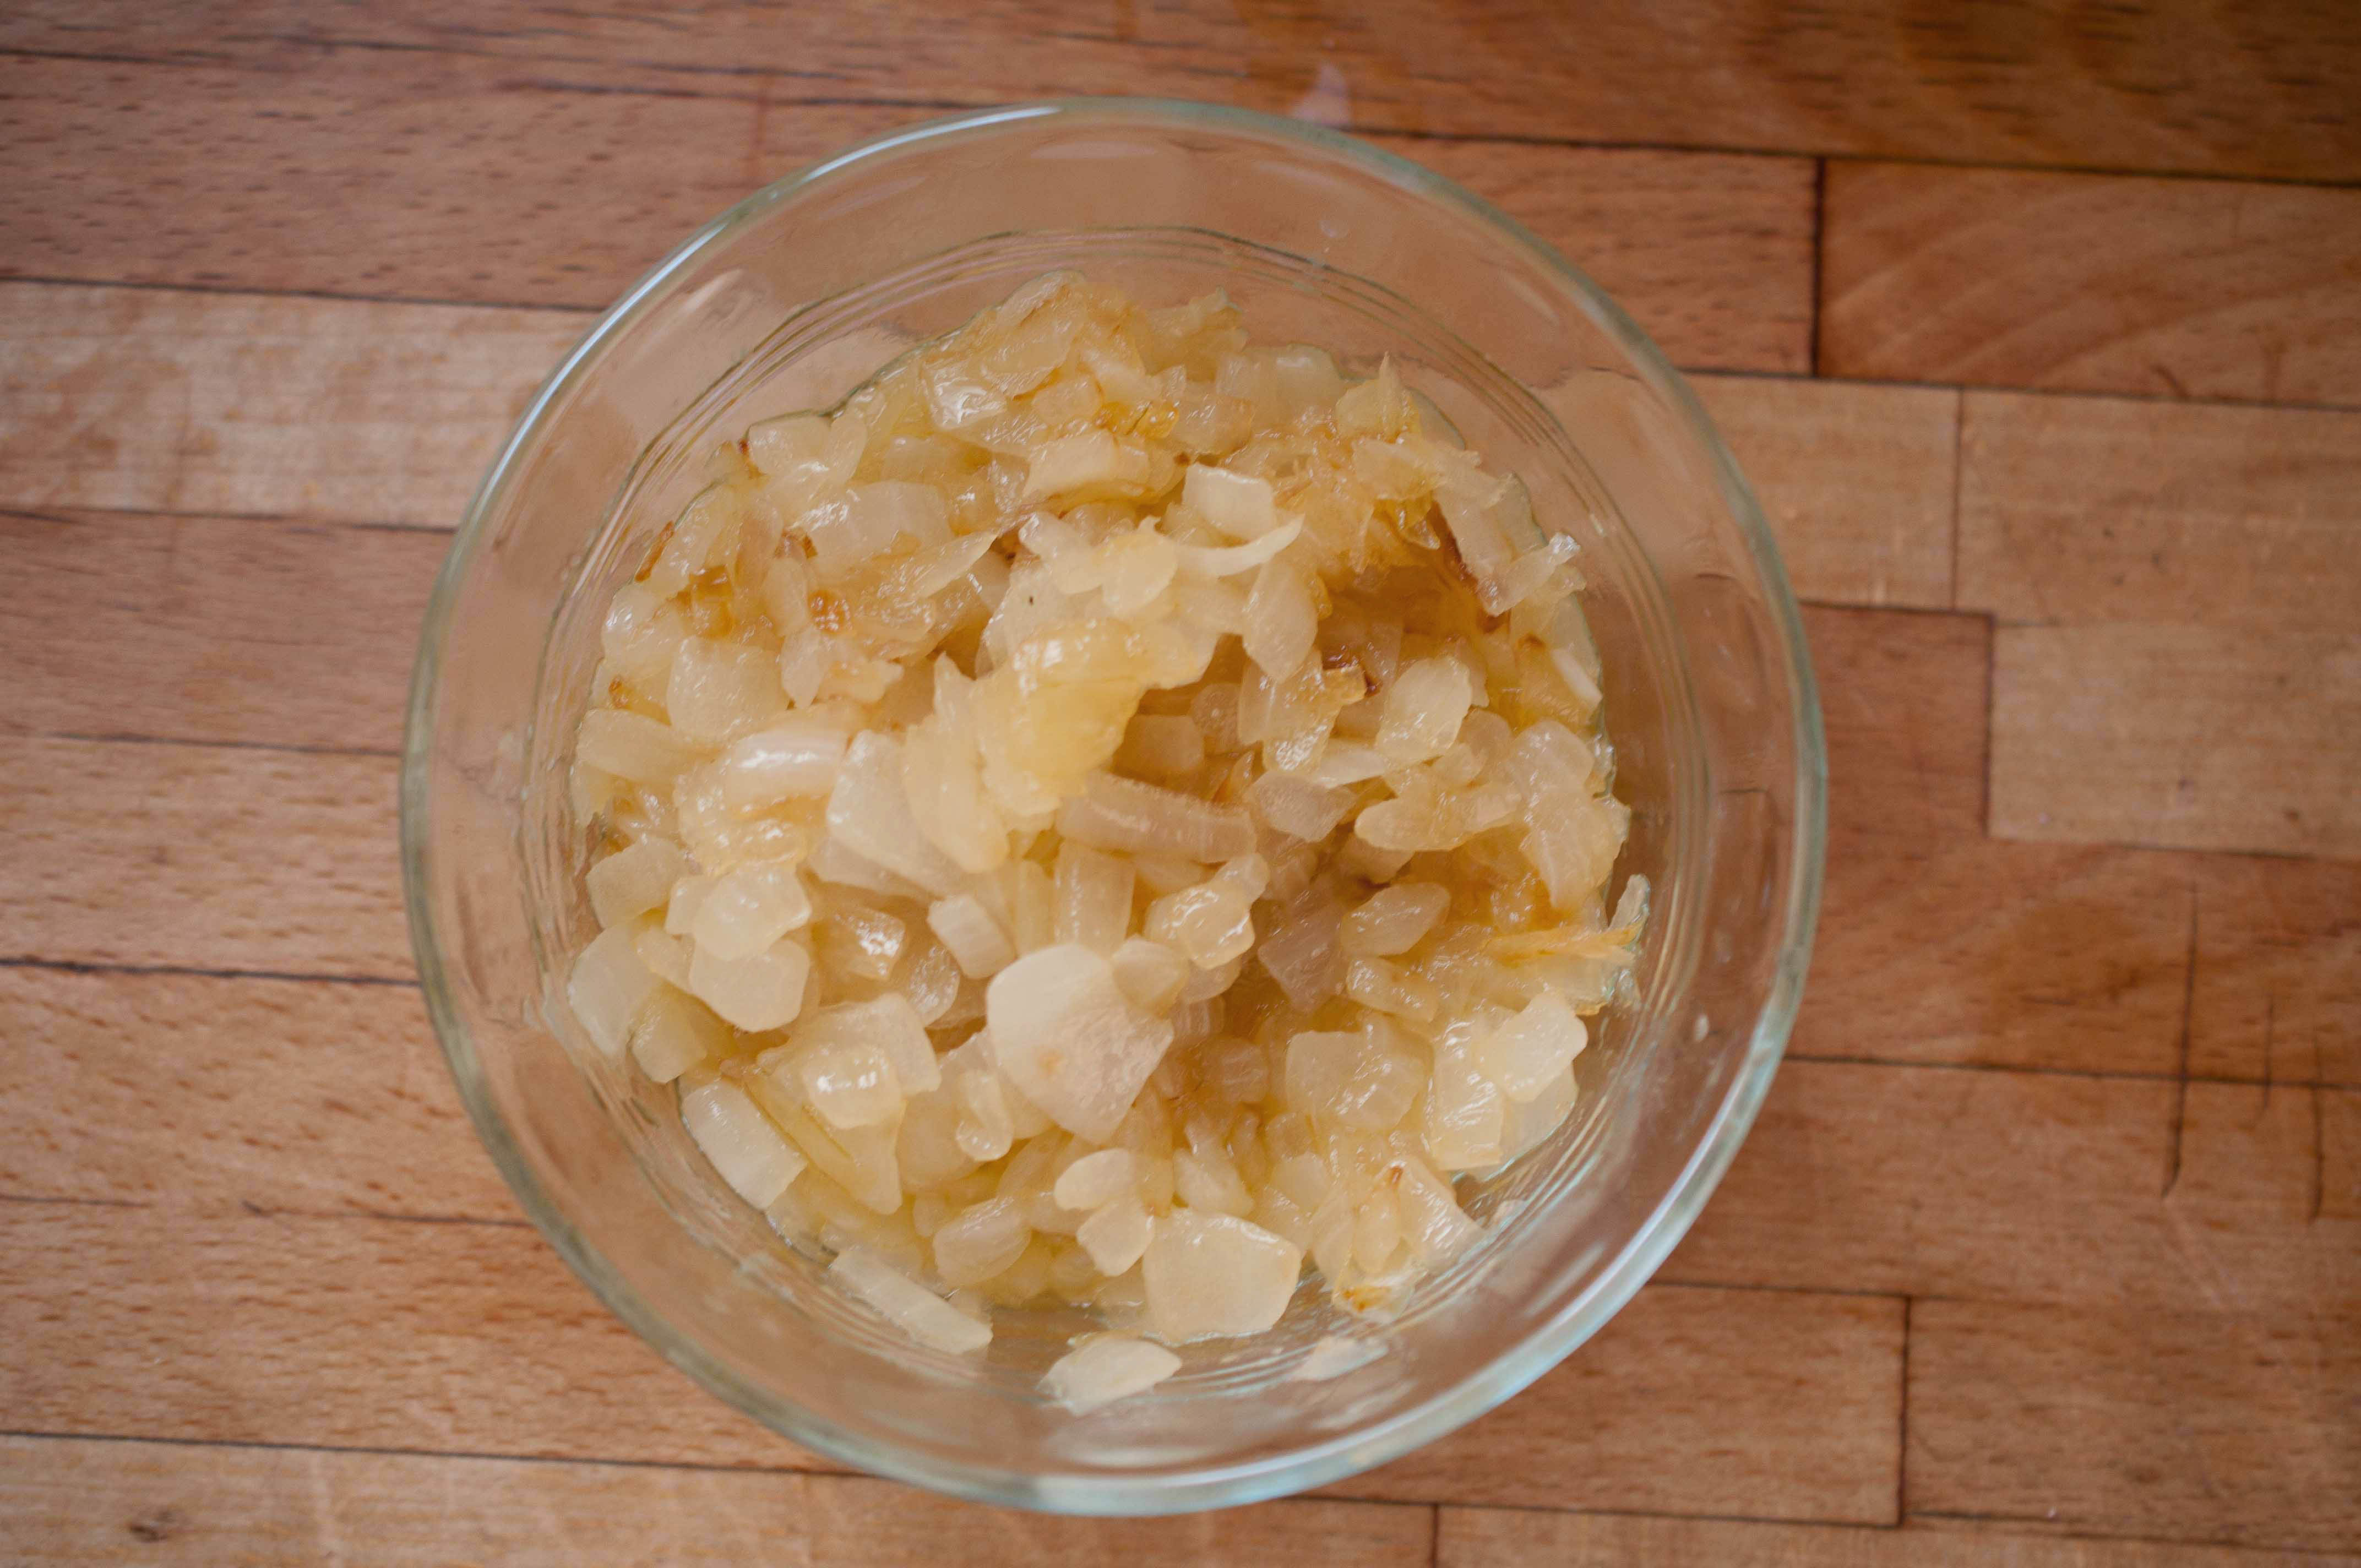
In a large pot or dutch oven, heat 1/4 cup olive oil. The key to caramelizing onions, and not BROWNING them, is: low and slow. Heat the olive oil over medium heat until shimmery, then reduce the heat to low and add the onions and a pinch of salt. Stir occasionally until the onions are soft and have turned an amber color. You want them to have that amber color or the sugars in the onion haven’t been caramelized yet and the flavors are not developed. This will take between 30 and 40 minutes, but you only have to stir occasionally so it isn’t a lot of work.
How to roast garlic:
This is very easy and gives you the most incredible tasting stuff. If you haven’t roasted a head of garlic yet, you should.
Preheat the oven to 400.
Cut the top off of the head of garlic.
Place on a sheet of aluminum foil and drizzle with 1 tbs olive oil.
Fold the foil up over the garlic into a tight packet. Place in a baking dish (I use a muffin tin) and place in the oven.
Bake at 400 for 30 minutes, or until garlic is soft and starting to turn an amber color.
Once you have brought out those incredible flavors in your garlic and your onions, break out the food processor.
Add the softened cream cheese, sour cream, onions and squeeze the garlic head until the soft cloves pop out and add them to the food processor as well.
Process until smooth and creamy. Add salt and pepper to taste.
So simple, so good.
Next time, I’m gonna try it with bacon and Parmesan cheese. I’ll let you know how it goes.
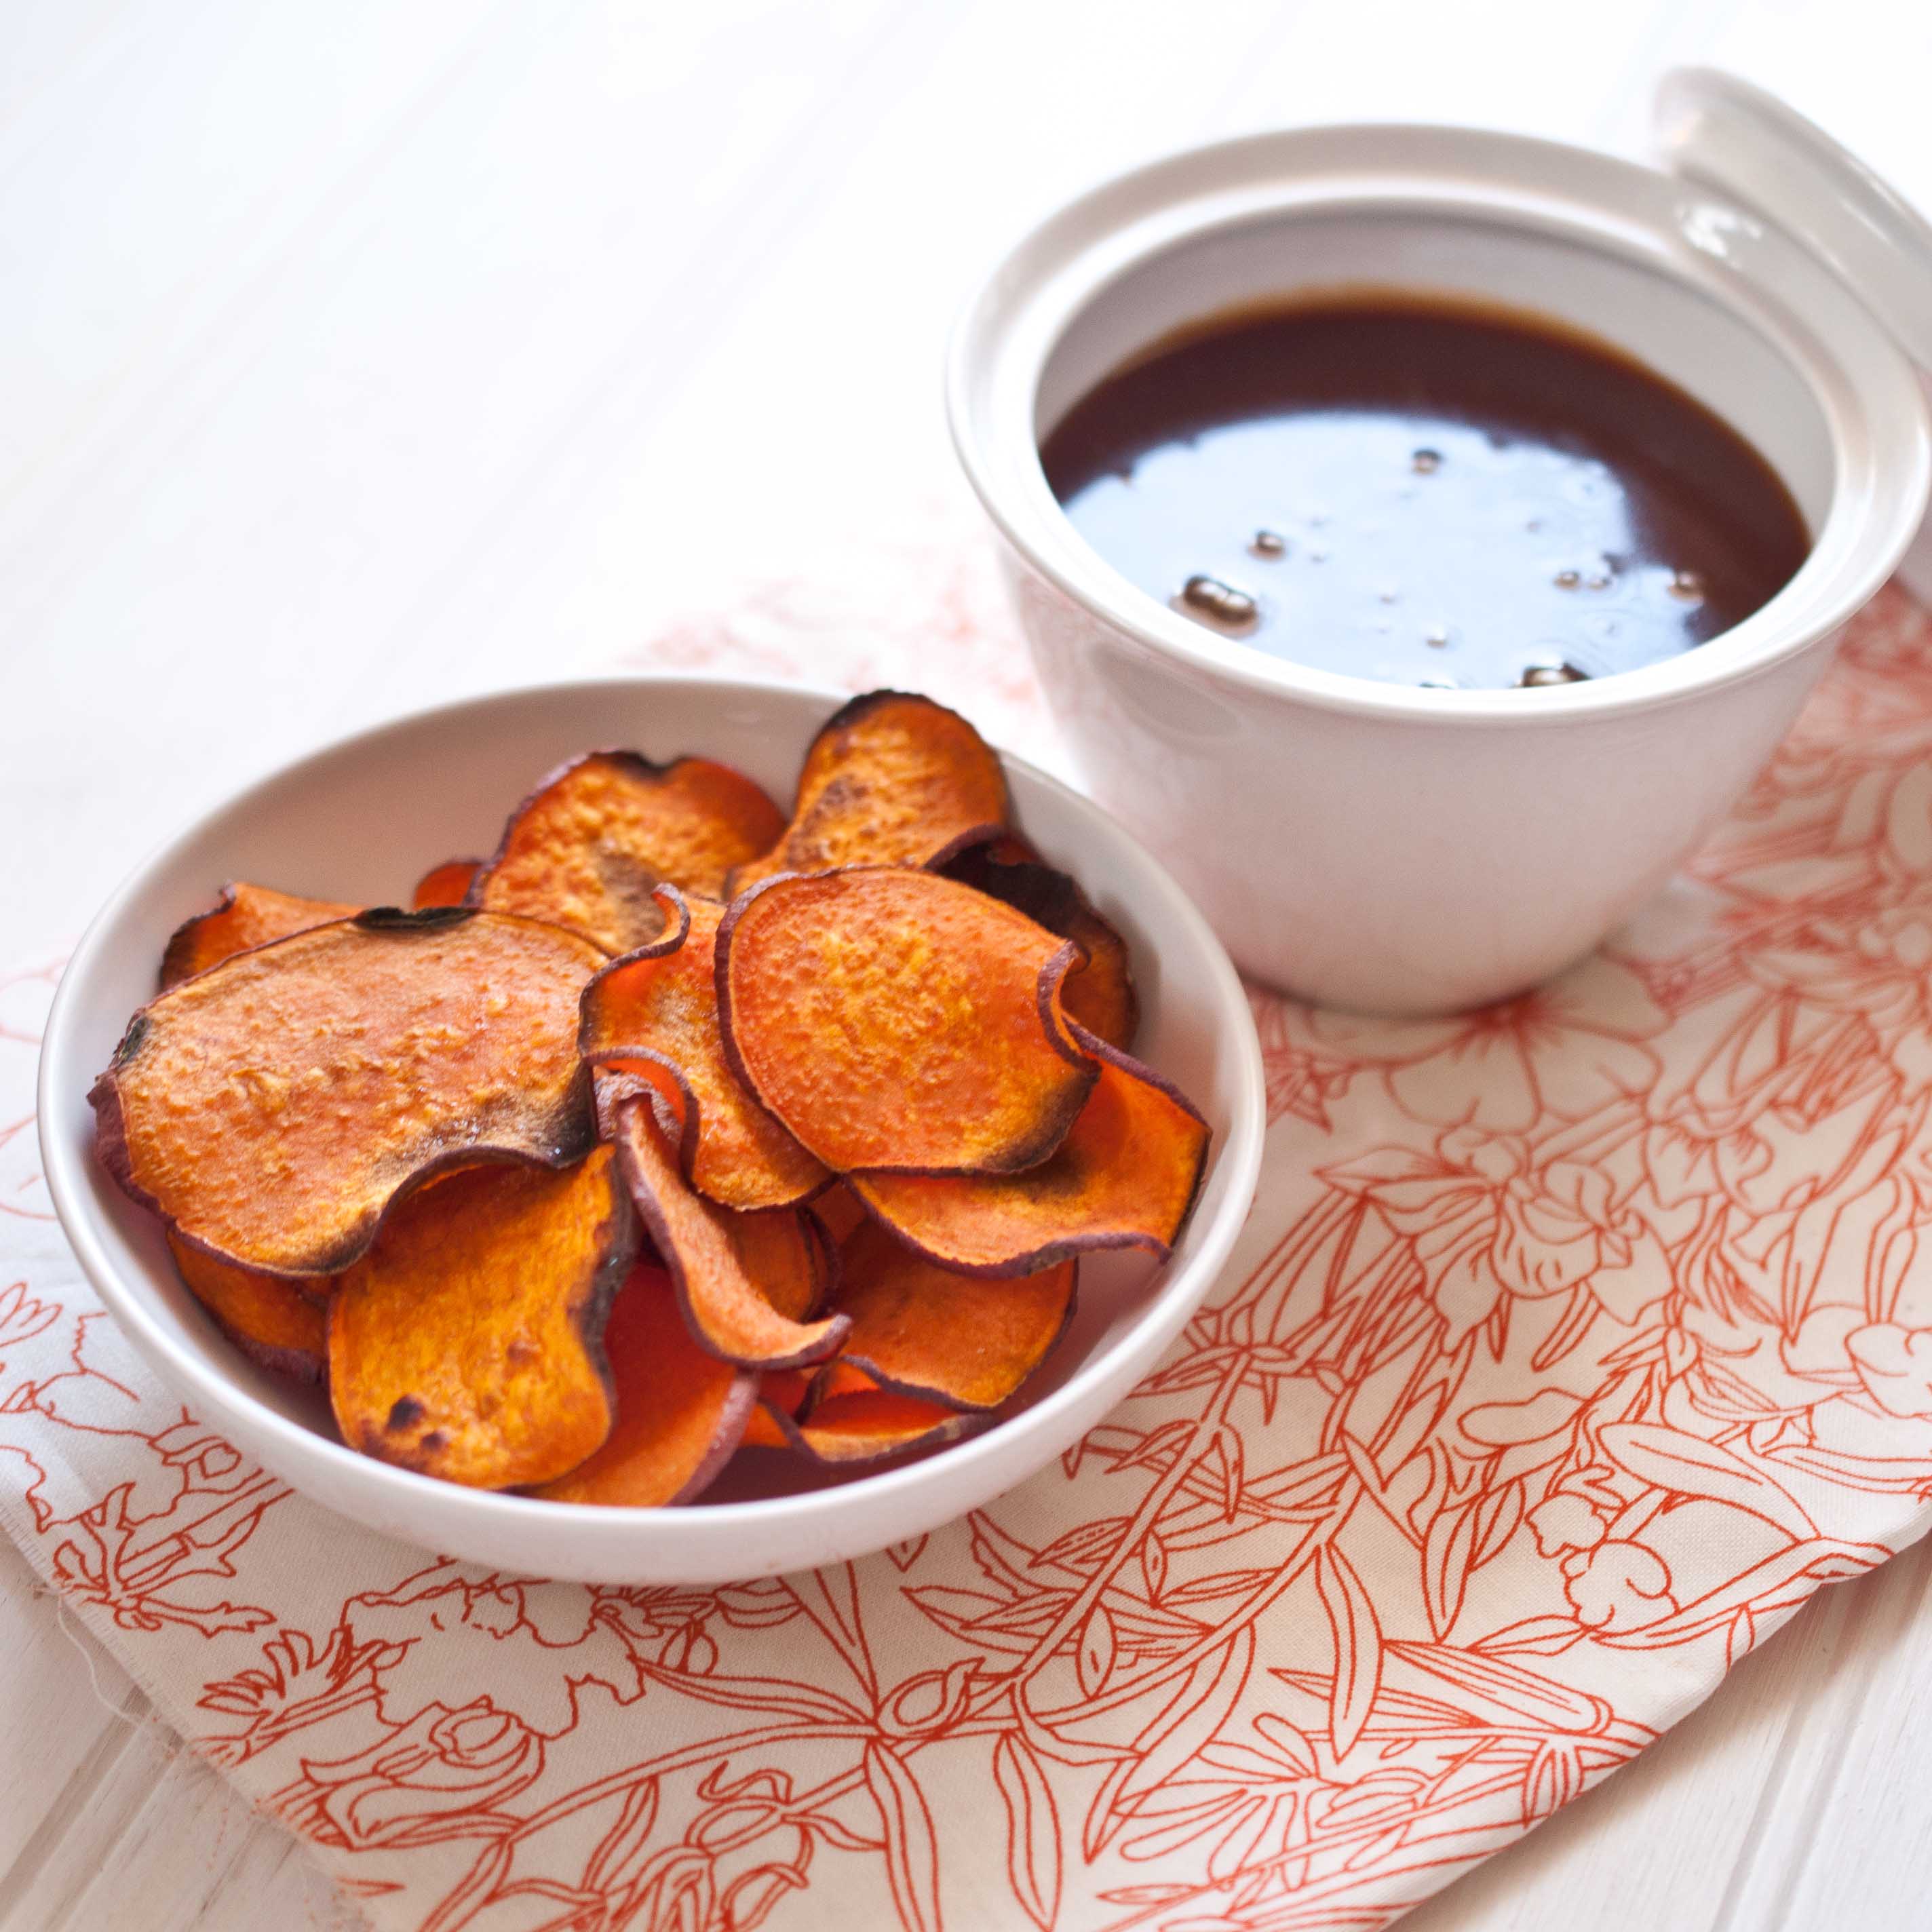
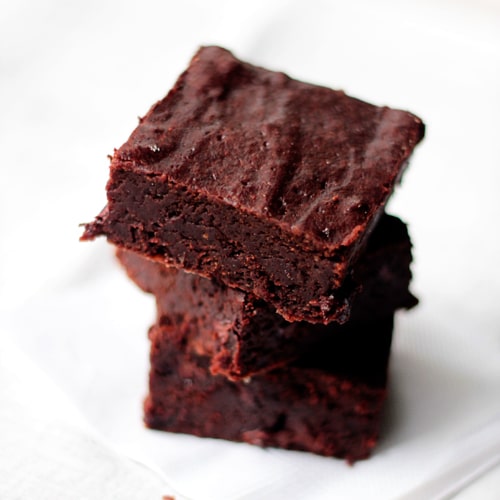
The where so cute, slightly chewy and a little crunchy.
And they are even healthy. Only about 7 calorie each. But, no one eats ONE, that’s insane. So, think of it like 70 calories if you have 10, or 140 if you have 20. And it makes you think that you are eating something that’s bad for you, which makes it taste better.
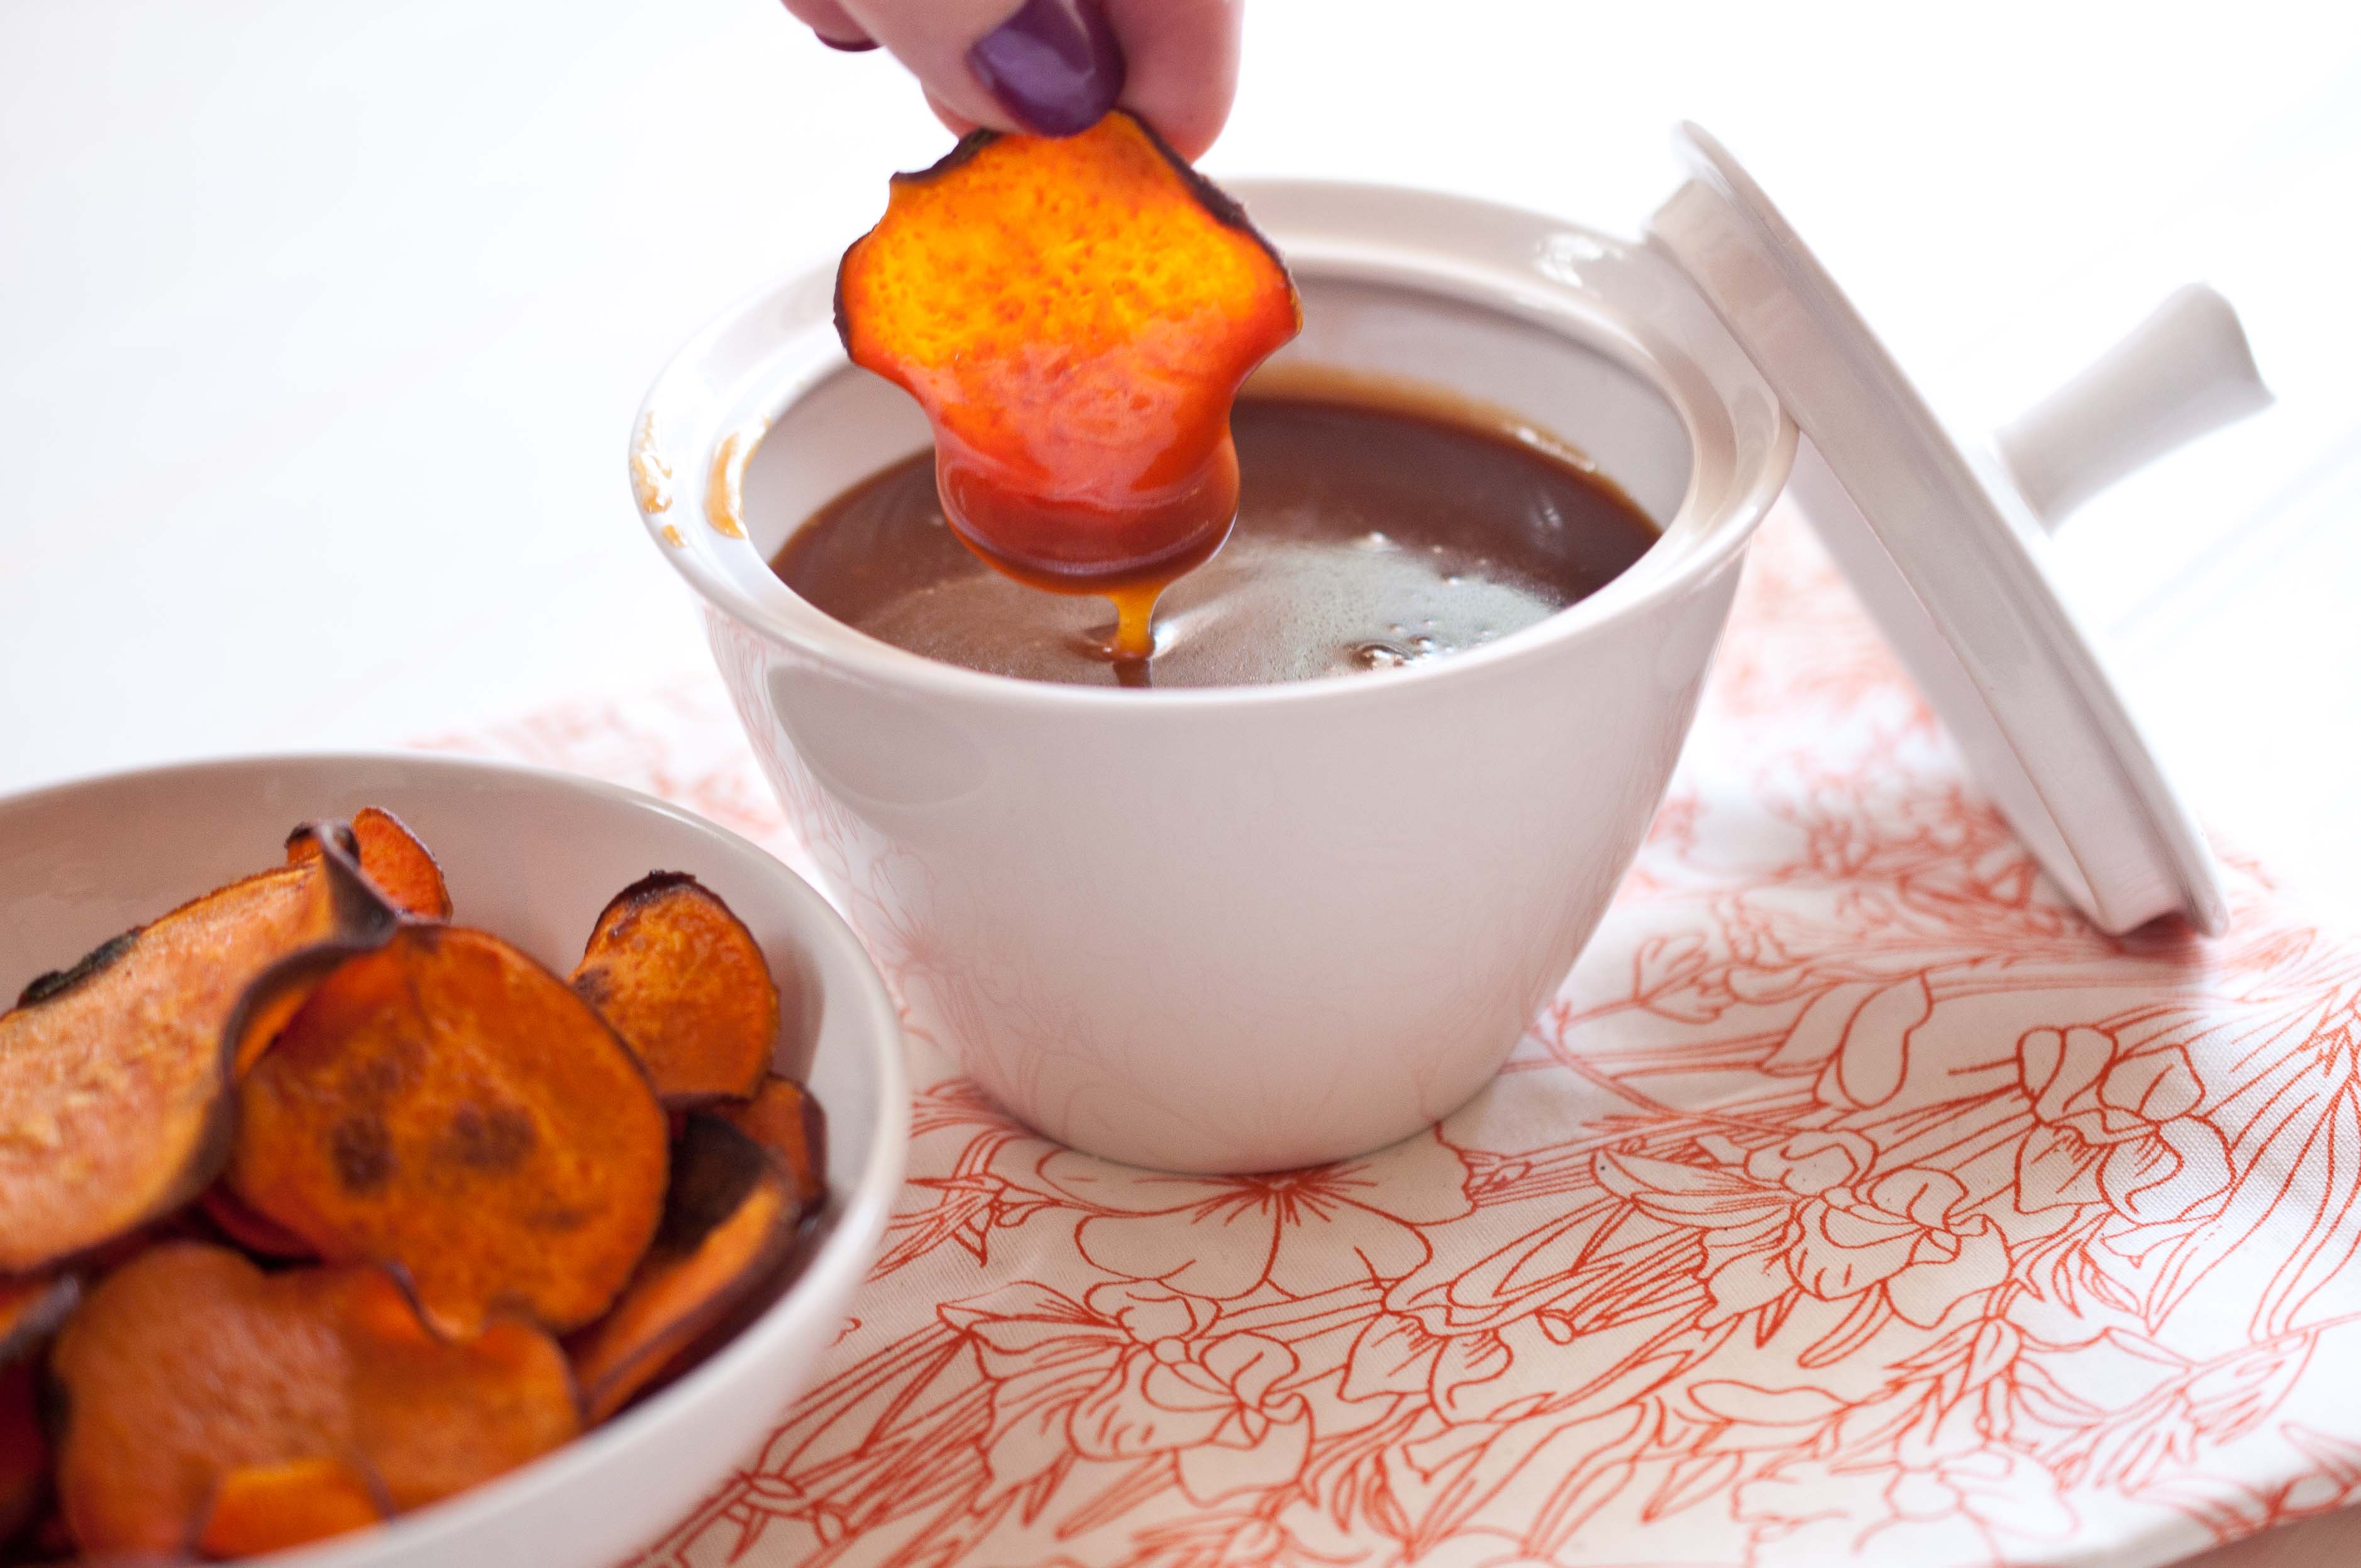
But of course, I got to thinkings. About how much I like to dip things.
And how in love I am with sauces. Even though this Cinnamon Caramel Dipping sauce makes it SO much less healthy, its super yummy. And it’s a good example of that balance thing I’m always running my mouth about.
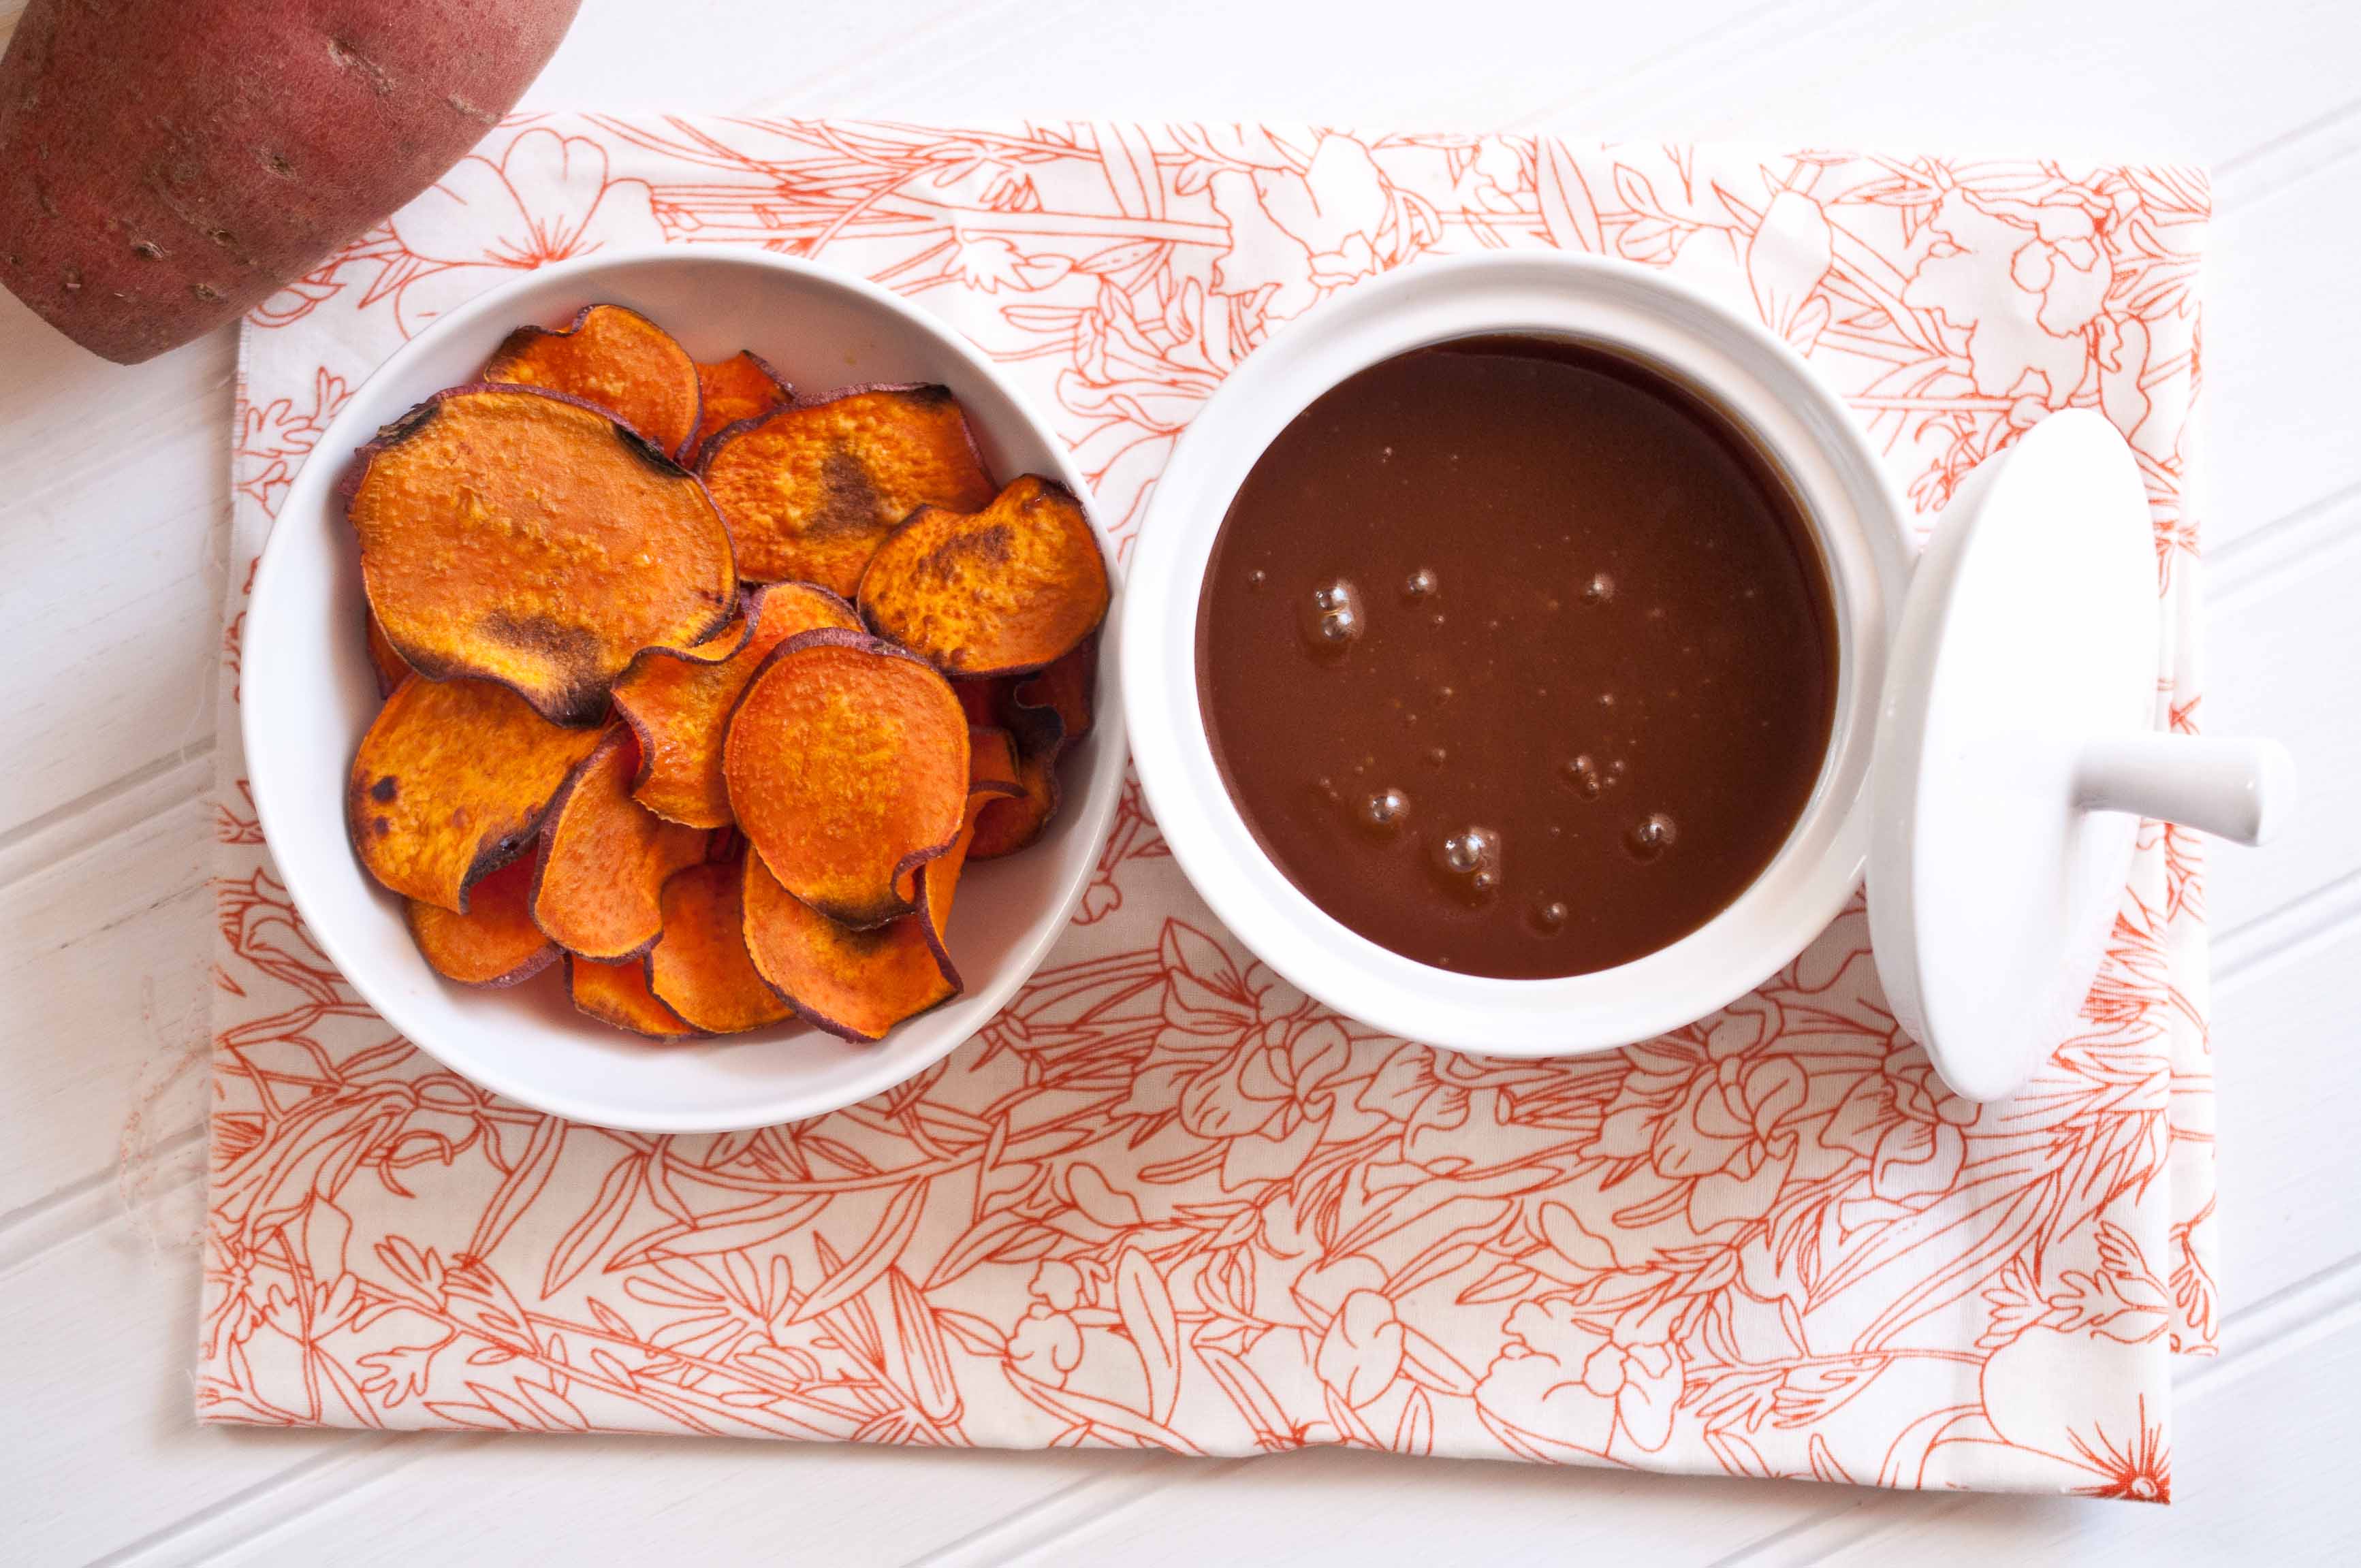
Baked Sweet Potato Chips With Cinnamon Caramel Dipping Sauce
2 large sweet potatos
Olive oil flavored cooking spray
1/4 tsp sugar
Caramel Sauce:
1/2 cup sugar
2 tbs honey
4 tbs unsalted butter, cut into cubes
1/2 cup heavy cream
1/4 tsp cinnamon
1/2 tsp vanilla
Preheat oven to 375
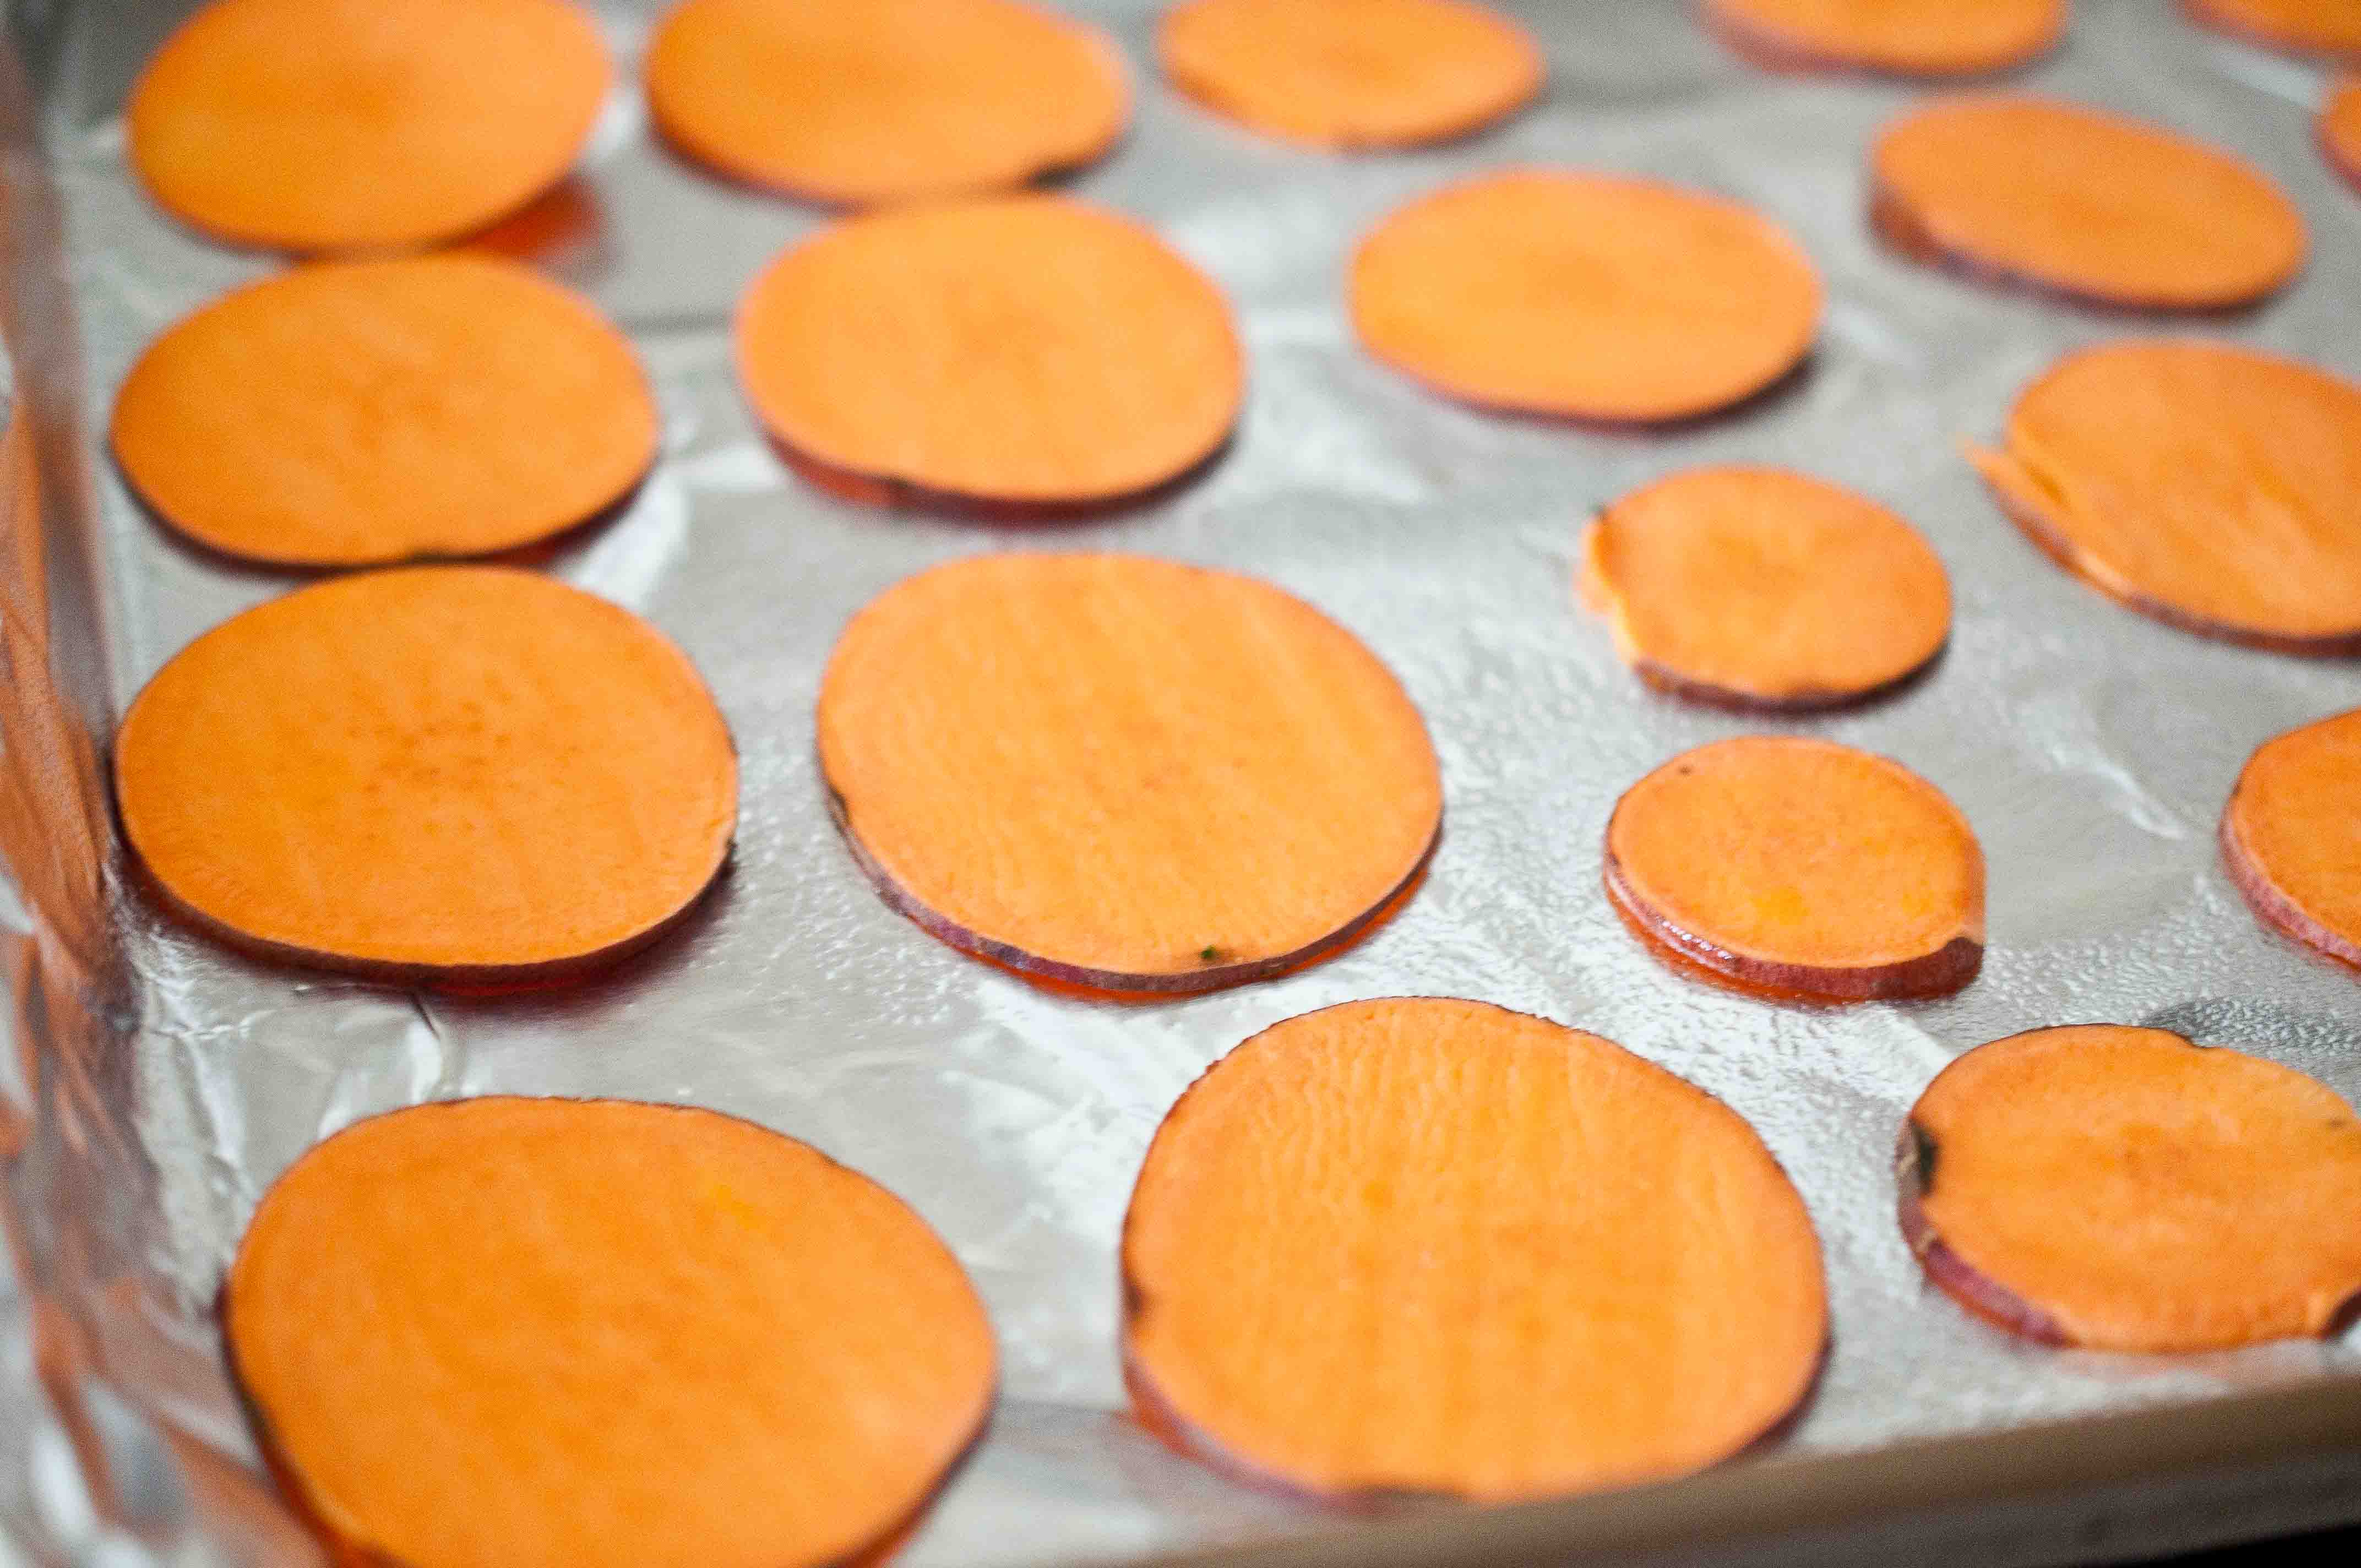
Slice the potatoes as thin as you can possibly make them. Using a mandolin slicer is the best way to do this, as it insures that your potato slices will cook evenly. If you don’t have a slicer, use this as an opportunity to practice those knife skills! Remember that thick slices will yield much different results.
Cover a baking sheet with aluminum foil, shiny side up. Spray with olive oil spray. Arrange the potatoes in a single layer on the baking sheet, making sure they don’t touch each other. Spray lightly with olive oil spray and sprinkle lightly with sugar. Flip the slices over and repeat. Bake at 375 for ten minutes. flip over and continue to bake until the potatoes are browned, about 8-10 minutes. Keep a close eye on your chips, they go from done to burned very quickly.
Make the sauce:
In a pot over high heat, add the sugar and the honey. Stir until the sugar is disolved, do not stir again while the caramel is cooking, but swirl the pan every 30 seconds to redistribute the caramel sauce. Allow to cook until the sugar is an amber color and about 220-225 degrees. Remove from heat and stir in the butter. Add the cream, vanilla and cinnamon and stir until combined and the sauce stops bubbling. Allow to cool a bit before serving.
By now, you have probably heard a thing or two about this scandal with Paula Deen. If you haven’t, here is a recap:
Paula Dean was diagnosed with Type 2 Diabetes.
Three years ago.
The number 1 treatment for Type 2 Diabetes is diet and exercise.
She continues to cook large volumes of high fat, high sugar food on TV, in her restaurants and cook books.
She now wants to endorse a Type 2 diabetes drug and "comes clean" about her diagnoses.
The public freaks out.
Although we all have opinions about, well, just about everything and everyone we have ever met, I’m not concerned about Paul Deen. I don’t know her, and it’s none of my business.
But I am concerned about you. And me. And what I feel like is my responsibility to you. I have quite a few "special occasion" food recipes on this blog, made with high fat, high calorie, high sugar ingredients. And I hope that doesn’t give you the wrong idea.
Learning from someone else’s mistakes is better than making one yourself, the same dramatic positive changes without the mess to clean up. Use her as inspiration, not as fodder for gossip. She is unhealthy and needs to make changes in her life, but that’s her business. How can we take this all in, look at ourself and see how to make our own changes rather than making her the villain? How can we help the people we love who are living unhealthy lives? How can we all be in this together and use it as a way to live better and eat better?
How can we have those uncomfortable conversations with people we love who are killing themselves with food? You know who just popped into your head when you read that. Why haven’t you talk to that person?
Use Paul’s story as an icebreaker in your own life. As inspiration to change.
Whether she decides to change or not, who cares?
I’m glad this came out, but can we stop pointing fingers and starting living better?
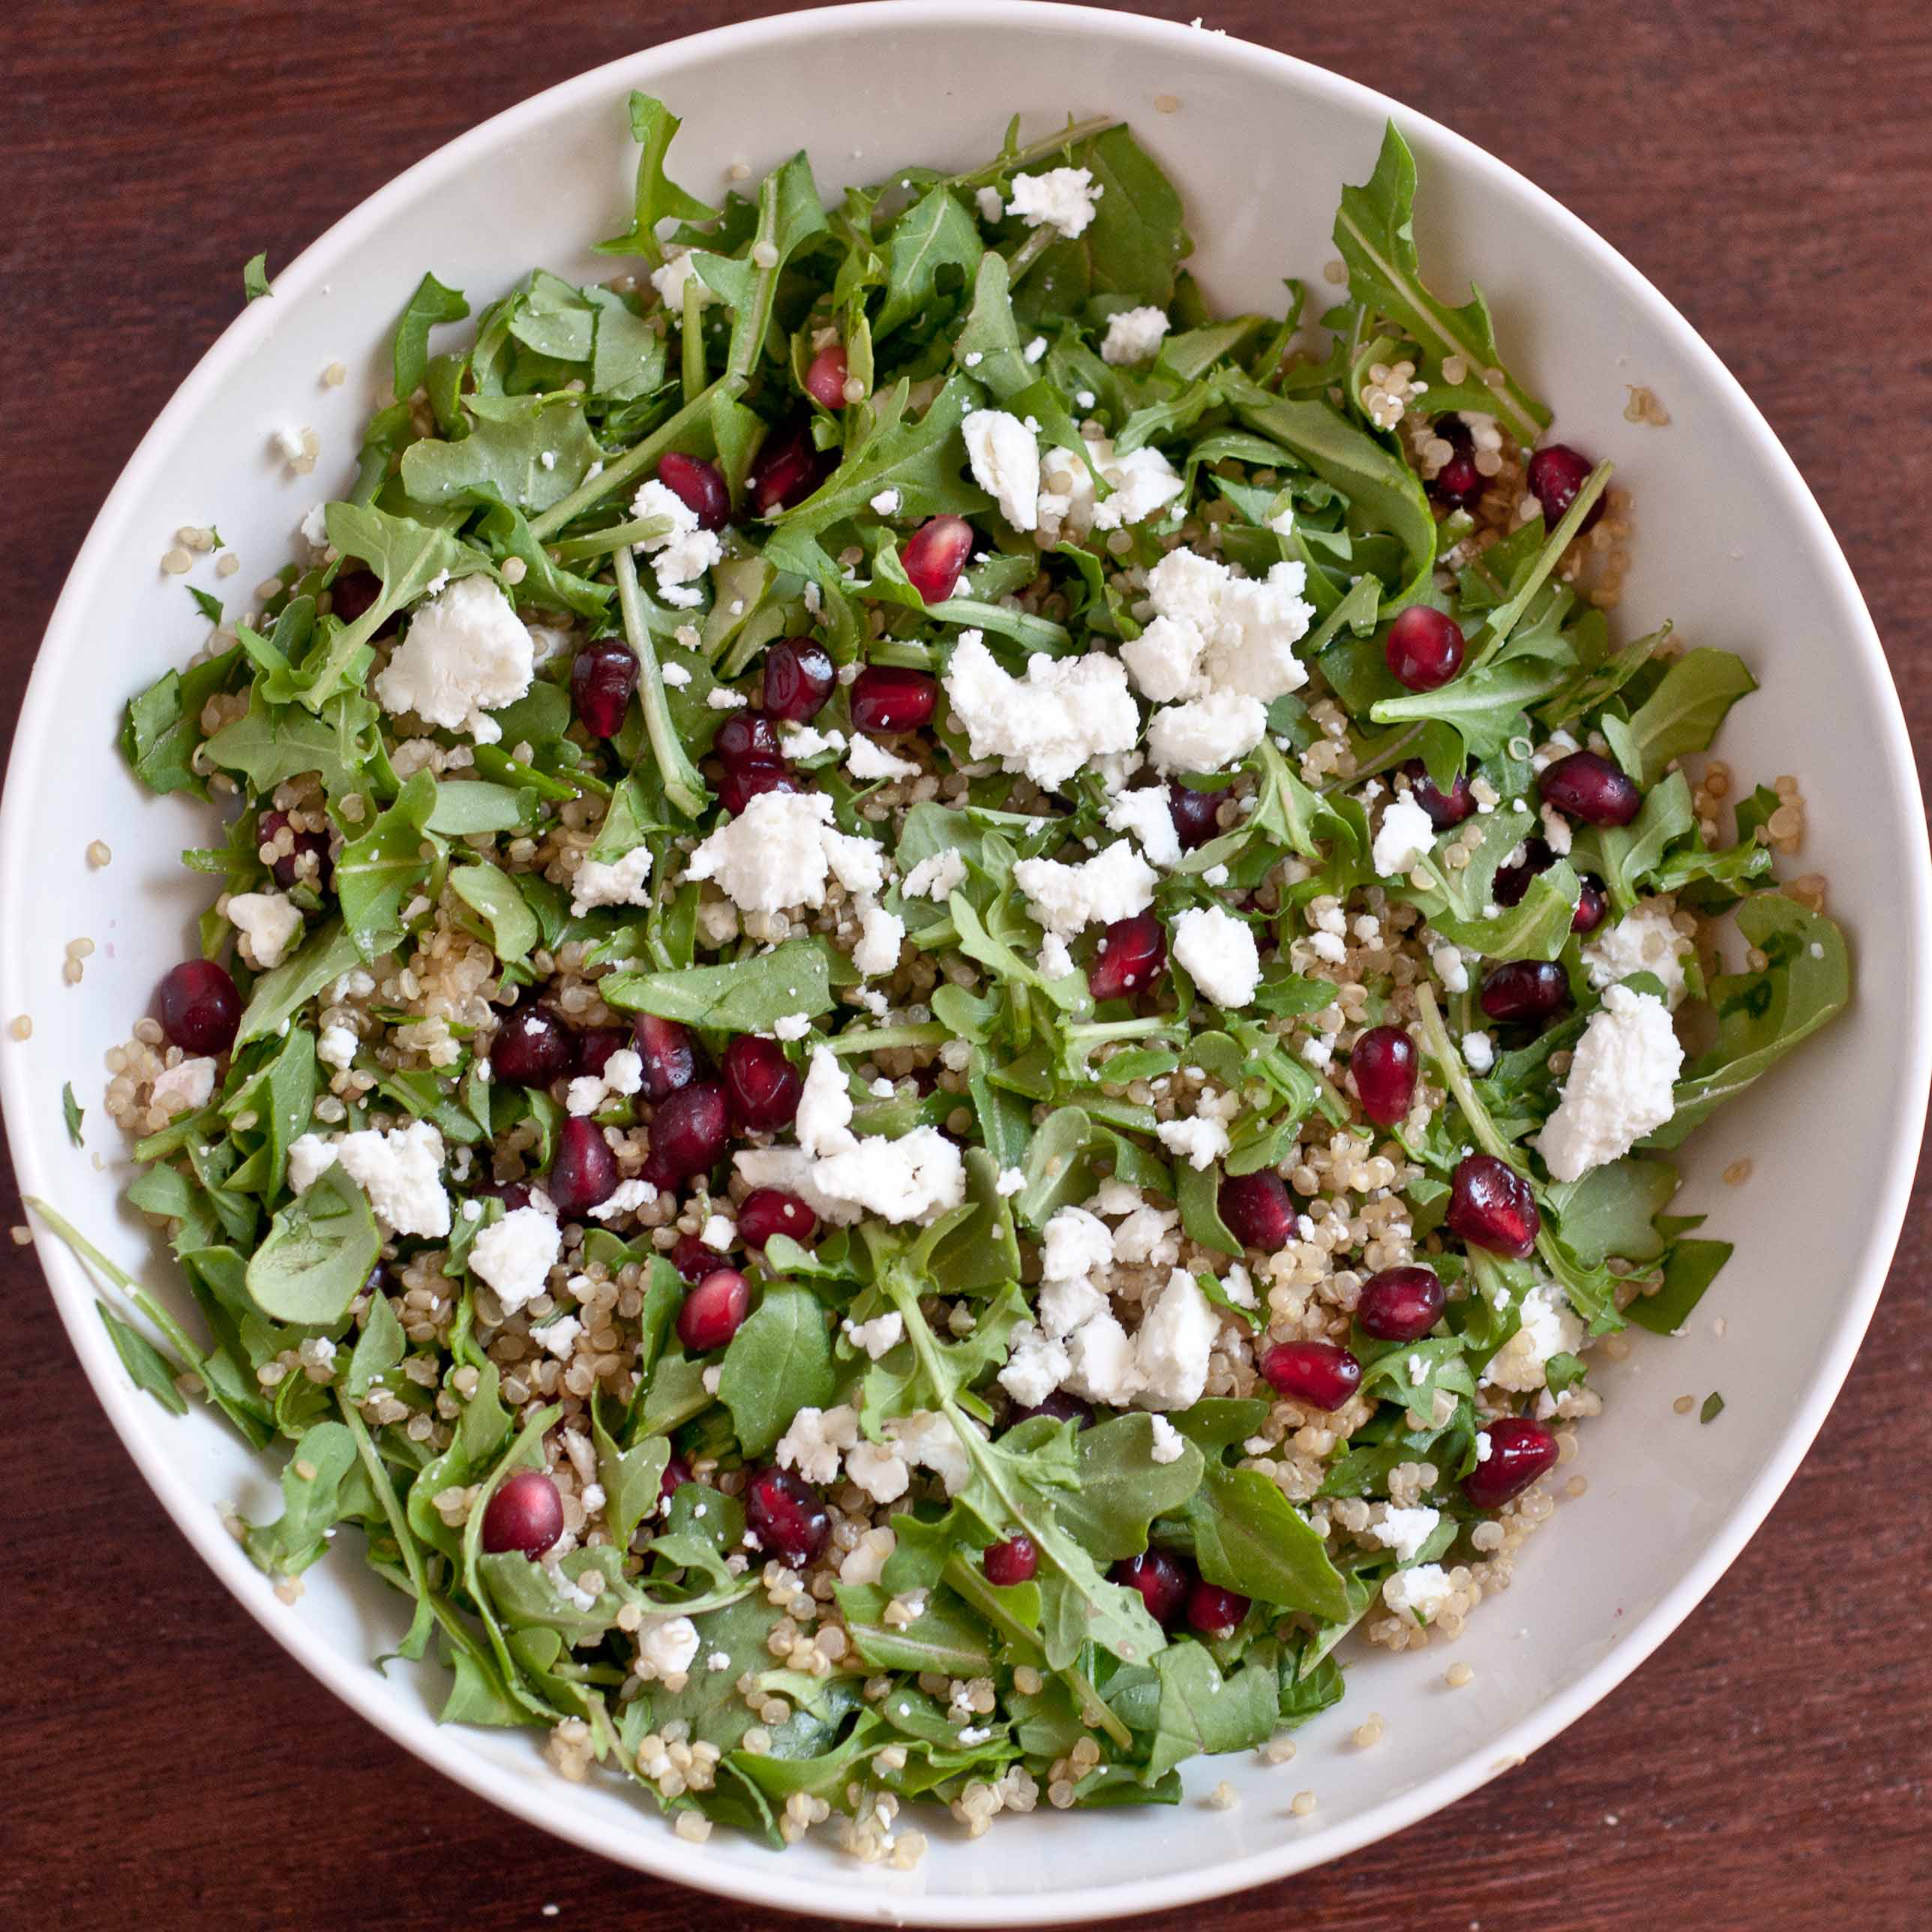
Here is my salad, my way of staying in shape. I eat it about 5 days a week in various forms and this one is my favorite.
Chocked full of protein, iron, amino acids, general good stuff. It also keeps me full until dinner.
So I made this resolution to not be so hard on myself.
This is a resolution I made, not for myself as much as for my daughter. And how I model womanhood to her.
I want to show her how to focus more on her successes than her failures.
Hold her strengths closer than she holds her weaknesses.
Our children only learn so much from our words, but our actions, especially those that we think they don’t see, are ingrained in who they are.
I’ve stopped using self deprecating statements, as my vow not to model for her what I so badly want to protect her from.
As I see her tiny body grow more and more into a mirror of my own, I now realize that all the things I say about myself, I am inadvertently saying about this tiny "Me" who is now running around trying to mimic what I do.
It’s cute when she says, "Bacon, Yum!"
Would it be as cute if she looks in the mirror and says, "I’m too fat to wear this"?
I don’t get to pick and choose what she picks up from me. I can just be more aware of my own attitudes and try to shape them into what I want her to pick up. And hope that I do my best to eliminate the mentalities that cause me to say hateful things about myself.
I want to teach her to look back on her mistakes with a postivive filter.
Not to say:
"What was I thinking?"
But instead to try and figure out:
"What was I learning?"
How the heck does this relate to Mac N Cheese soup? Well, most of you have resolutions about weight. Some of you probably even need to lose weight for health reasons. But if you have a daughter, or even a sensitive son, please don’t say:
"I don’t want to be so fat anymore."
Instead:
"I want to be healthier. Run faster, jump higher."
Because, the truth is, unlike a lot of regrets we have in life:
Your weight is fixable.
That is great news, because so many things we have done aren’t. Make a plan, stick to it. Focus on your success, not your failure and give yourself time to make it happen. Because,if you have kids, our resolutions aren’t that different. They are for our kids, modeling how to live. Eat how you want them to eat and they will follow suit.
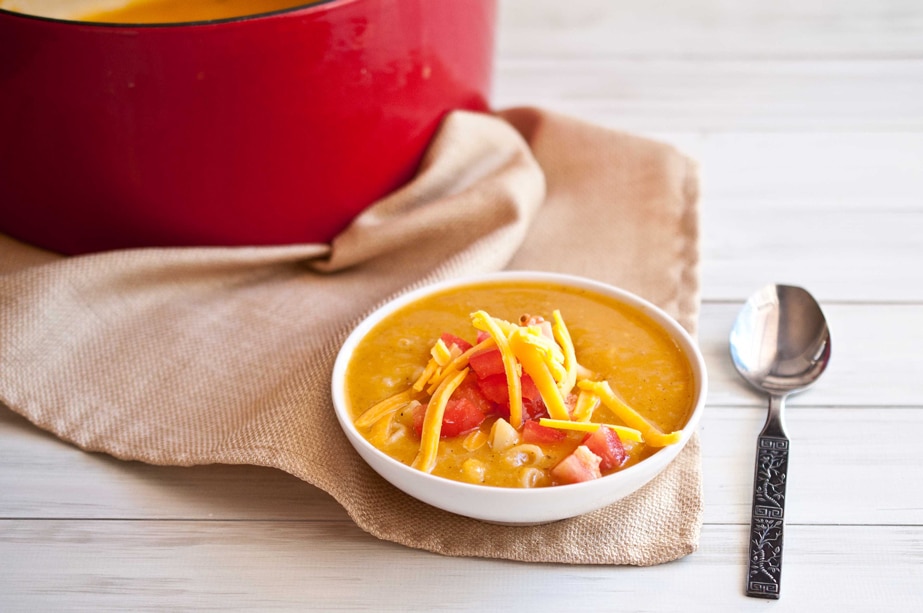
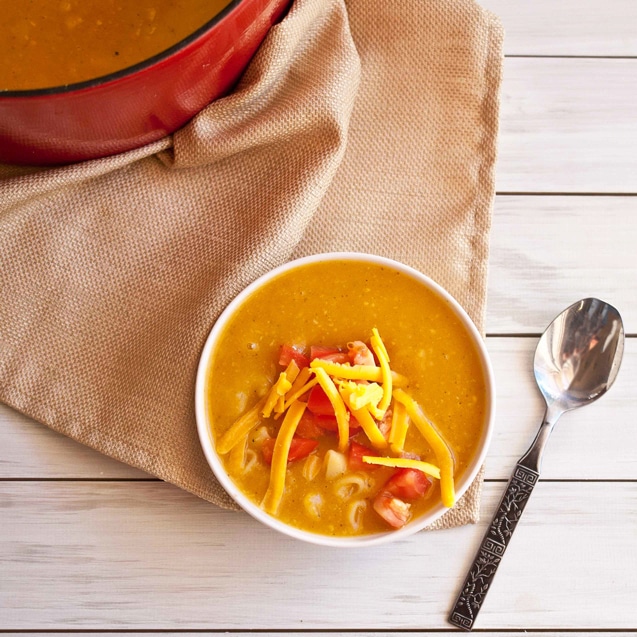
Mac N Cheese soup is great way to do this. It’s familiar, with just a bit of the high calories stuff. I’m focusing on the strengths of the food to bring it into a high flavor, low calorie food.
I used the Recipe Calorie Calculator on Spark people to find out how many calories are in this. It’s a great tool for homemade food. You can even adjust the ingredients to see how you can get the same amount of food for less calories.
Healthy Soup Recipe: 220 Calorie Mac N Cheese Soup
Ingredients
2 tbs Smart Balance Light (or other low cal margarine spread)
1/3 cup red onions, chopped
4 cloves of garlic, minced
1 tbs flour
6 cups of low sodium, fat free chicken broth
3 cups of butternut squash, fresh, peeled and chopped
2/3 cup Macaroni noodles
1/3 cup sharp cheddar, shredded
1/2 tsp chili powder
Salt and pepper to taste
1 cup chopped tomatoes
Makes 4 servings.
Instructions
In a large pot or dutch oven over medium high heat, melt the Smart Balance Light. Add the onions and cook until soft and translucent, but not browned. Add the garlic and stir until you can smell them cooking, about 20 seconds. Add the flour and whisk until combined with the butter spread and no flour lumps remain. Add the broth and bring to a boil. Add the cubes of butternut squash, place the lid on at an angle allowing the steam to vent, boiling until the squash is very soft. Remove from heat and allow to cool a bit. Using an immersion blender, puree the squash until smooth and creamy. Return to heat. Add the noodles and cook until al dente. Add the cheese and stir until melted. Remove from heat and add the spices, adjusting to your preference. Add to bowls and top with chopped tomatoes.
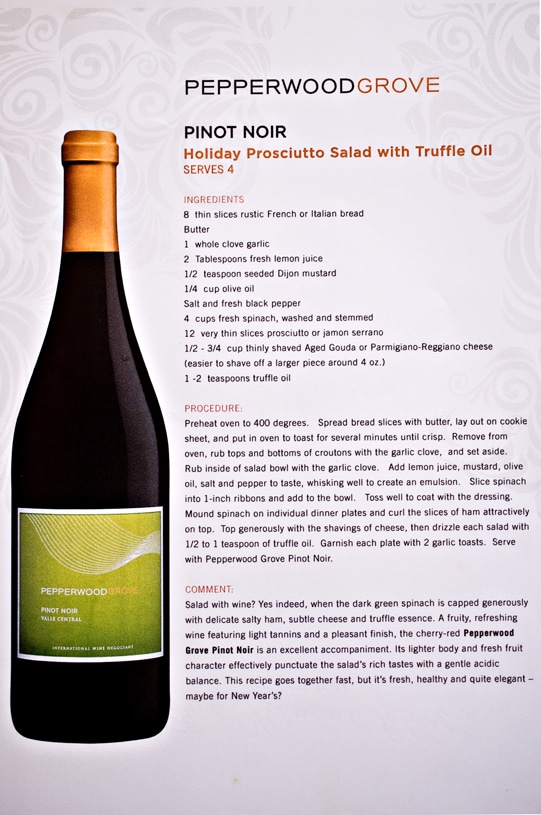
I loved (LOVED!!) this recipe and pairing. I am much more of a red wine person and learning about versatile red, with a higher acidity and lower tannin level than most reds, I am able to serve a red wine as a stand in where most people would typically put a white. Because, remember, pairing is more about acid and tannin levels than white versus red.
I CAN have a red wine with white meat!! As long as I can pick the right one.
I really liked this wine, and I loved that I am now able to pair a red wine with white meat if I so desire. Still maybe a bit to tannin heavy for a light, white fish, but works perfect with pork or possibly a chicken dish. AND It’s UNDER $10!! I love that. I love that I can serve a beautiful wine, paired perfectly with my beautiful salad, and no one will ever know that I so incredibly affordable.
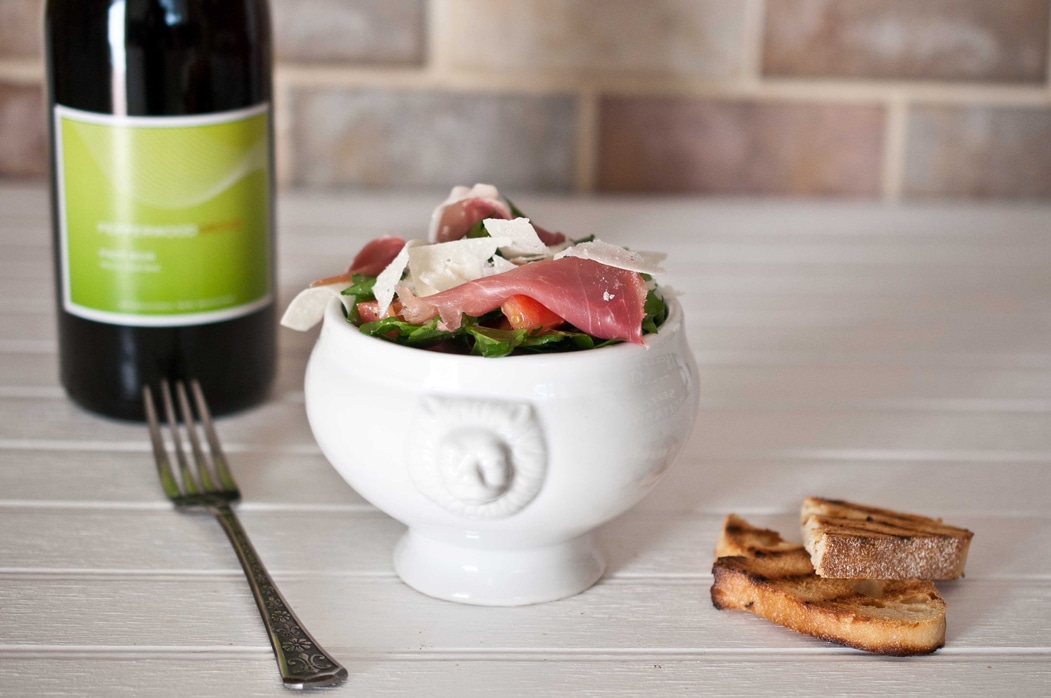
This was a recipe that I followed the closest. And I loved it so much I made it twice in the same week. It is easy, full of flavor and has a fancy boldness that is perfect for a dinner party.
It has a super easy homemade dressing that you mix right in the salad bowl.
Since I had truffle oil on hand from when I made this, I used it in place of the olive oil.
Instead of rubbing the bowl and the bread with garlic, I used a microplane to grate it to a paste and spread it on the bread, and just added the garlic paste to the dressing
I grilled the bread slices on my grill pan and served them on the side
I added chopped tomatoes
I really hope you love this salad as much as I did, its simple, fresh and delicious.
Seek out the wine if you can, and remember that it is a red that you can pair with high acid dishes if you are one of those people who doesn’t particularly fall in love with whites.
More food and wine parings coming this week. Stay tuned!
In 1985 AIDS had formed the perfect storm of mass hysteria. A catastrophic cocktail of ignorance, death and wild-rumors-routinely-reported-as-fact on the Nightly news had whipped the world in to a wide eyed, froth mouth frenzy. We were all going to die, it was air born now, right? It was piped into the water supply by the communists, wasn’t it? It’s the bubonic plague of this generation and will surely swallow up one third of civilization. As I entered the second grade, the loud cries of the public were largely muted by my bubble of Care Bears and Fraggle Rock, until AIDS walked into my elementary school in the form of a five year old boy named Ryan Thomas.
Photo of Ryan and his Father, (from www.aclu-sc.org)
The youngest of three boys, Ryan had contracted the virus from a blood transfusion shortly after birth, arguably the worst time in history to do battle with the AIDS monster and what it had created in and around Santa Rosa Road Elementary school. His presence at the school had thrown the surrounding public and all of its housewives into a polo shirt clad lynch mob. They wanted him out. How dare a 5 year old want to go to kindergarten?! A line of station wagons pulled their kids out of school so fast only a trail of checkered Vans was left. “Mom, is it a vacation day? Why is the school so empty?” I asked from the back of our 12 passanger van as we pulled in to the lot on what I thought would be a typical fall morning. She threw the shifter bar on the steering column into park, swiveling around to look at us. “There is a Kindergarten boy named Ryan how has a disease. There isn’t a cure for it, so he will die. There are only a few ways to get it, like a blood transfusion, and that is how he got it.” She explained that we couldn’t get it from playing with Ryan, using the bathroom or drinking fountain after him and that it was OK to hug him. That morning I learned that the very thin and pale boy, Richard, who sat next to me in class, was Ryan’s big brother. Our teacher announced that Richard had a presentation for us and asked us to keep our minds and hearts opens, disregarding anything that we had heard before. Richard pushed his tiny frame out of his yellow metal desk and dragged the weight of the world to the front of the class. “I want to talk about AIDS, my brother has it.” The class was frozen on the words that came out of his burdened old soul. I’m sure I heard a lot of words spoken from the front of the class that year, but his were the only ones I remember. Later that day the playground was full of chatter about this grown-up topic. Debates about what Richard had said, what other teacher and parents said ("Better safe than sorry!") and who was right. My mom was right, Richard had reinforced that, and no one would sway my mind. That evening, my sister who didn’t have the gift of the Old Souls teaching lowered her fork to her diner plate, “Mom, the other kids moms are saying to leave Ryan alone, like we should be scared of him.” My mom hardly looked up from the highchair that currently had her attention, to speak the wisest sentence of 1985, “You should be much more afraid of ignorant housewives than of Ryan Thomas.”
Ryan Thomas died Thanksgiving Day, 1991 at the age of ten.
I have no idea what happened to his family, or his brother Richard. But I would love for him to know how much his words impacted me. Helped me to stand up to fear and ignorance. Helped me to see through mass hysteria, right to the truth.
I almost didn’t post this. But this afternoon I read an article about a 13-year-old boy who was denied admission to school because he is HIV possitive. The world needs more Richard Thomas’s.
Teach your kids how to be like him. I’m gonna do my best.
Because this is a food blog:
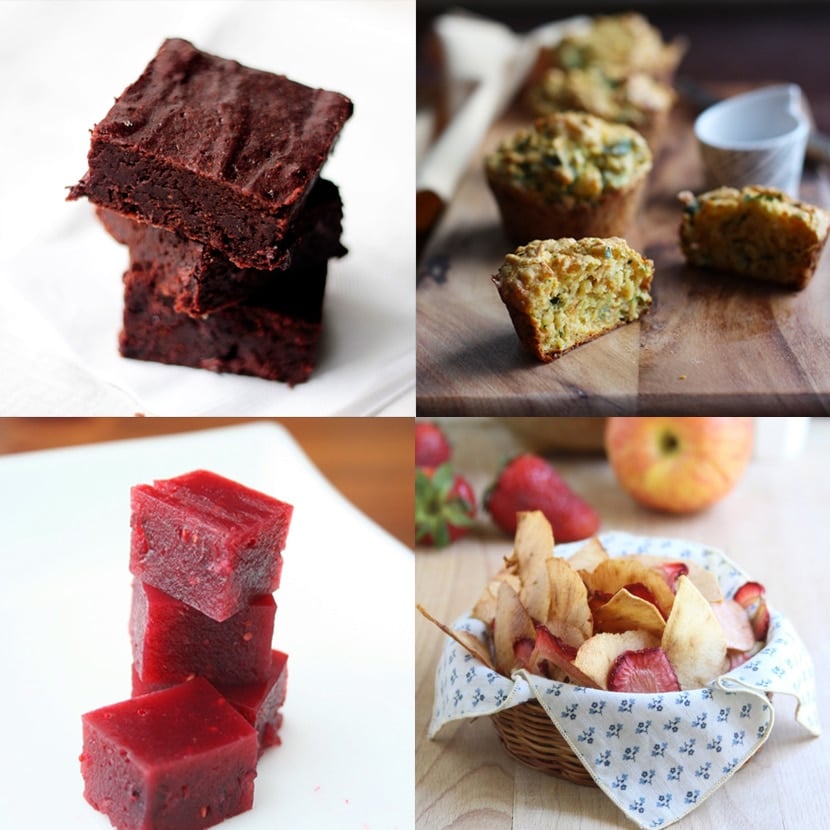
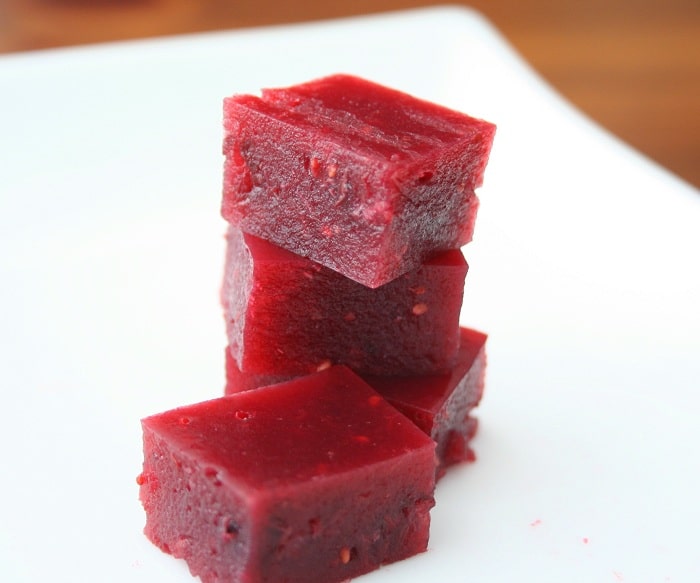
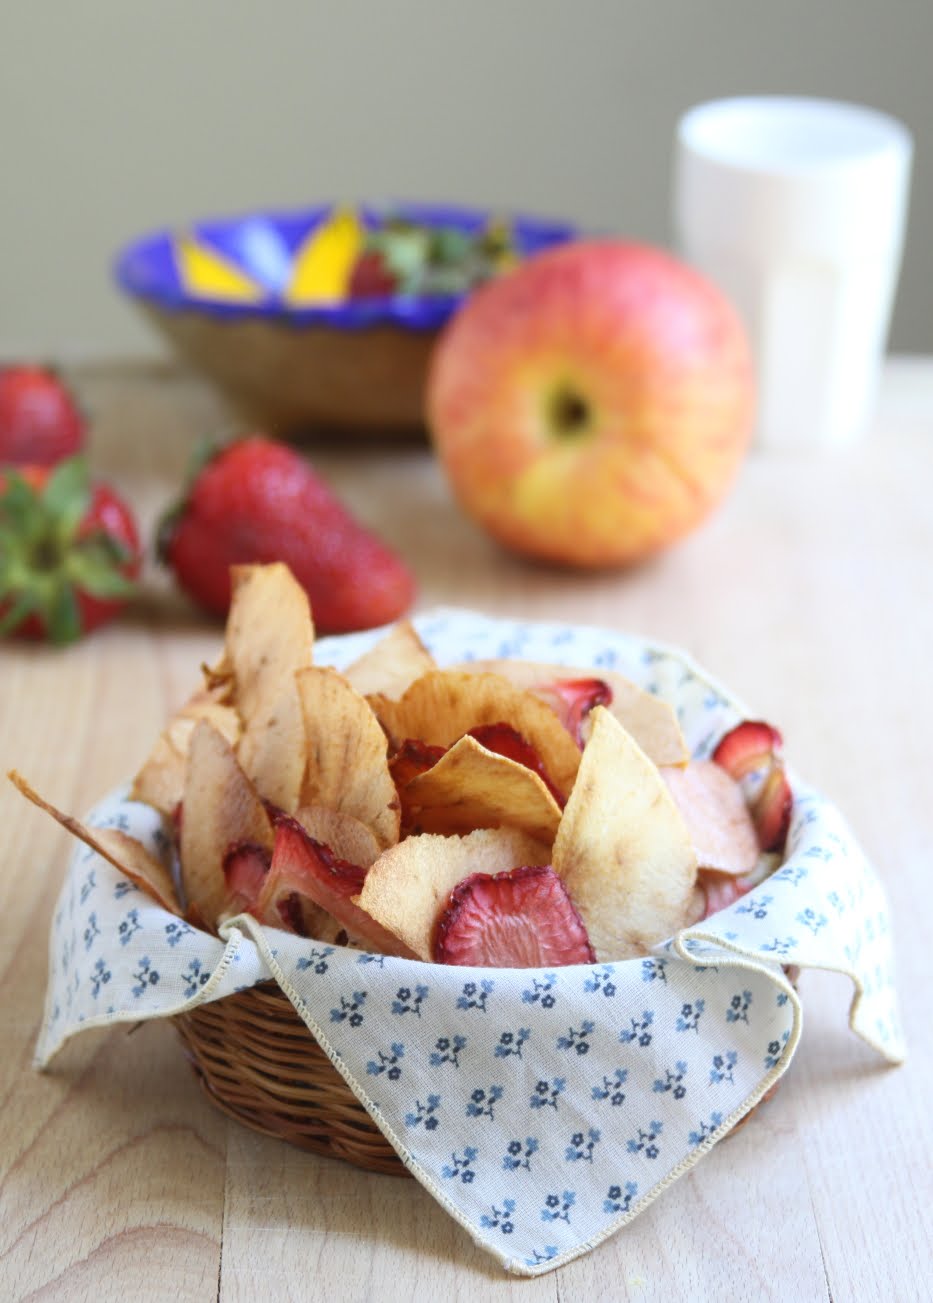
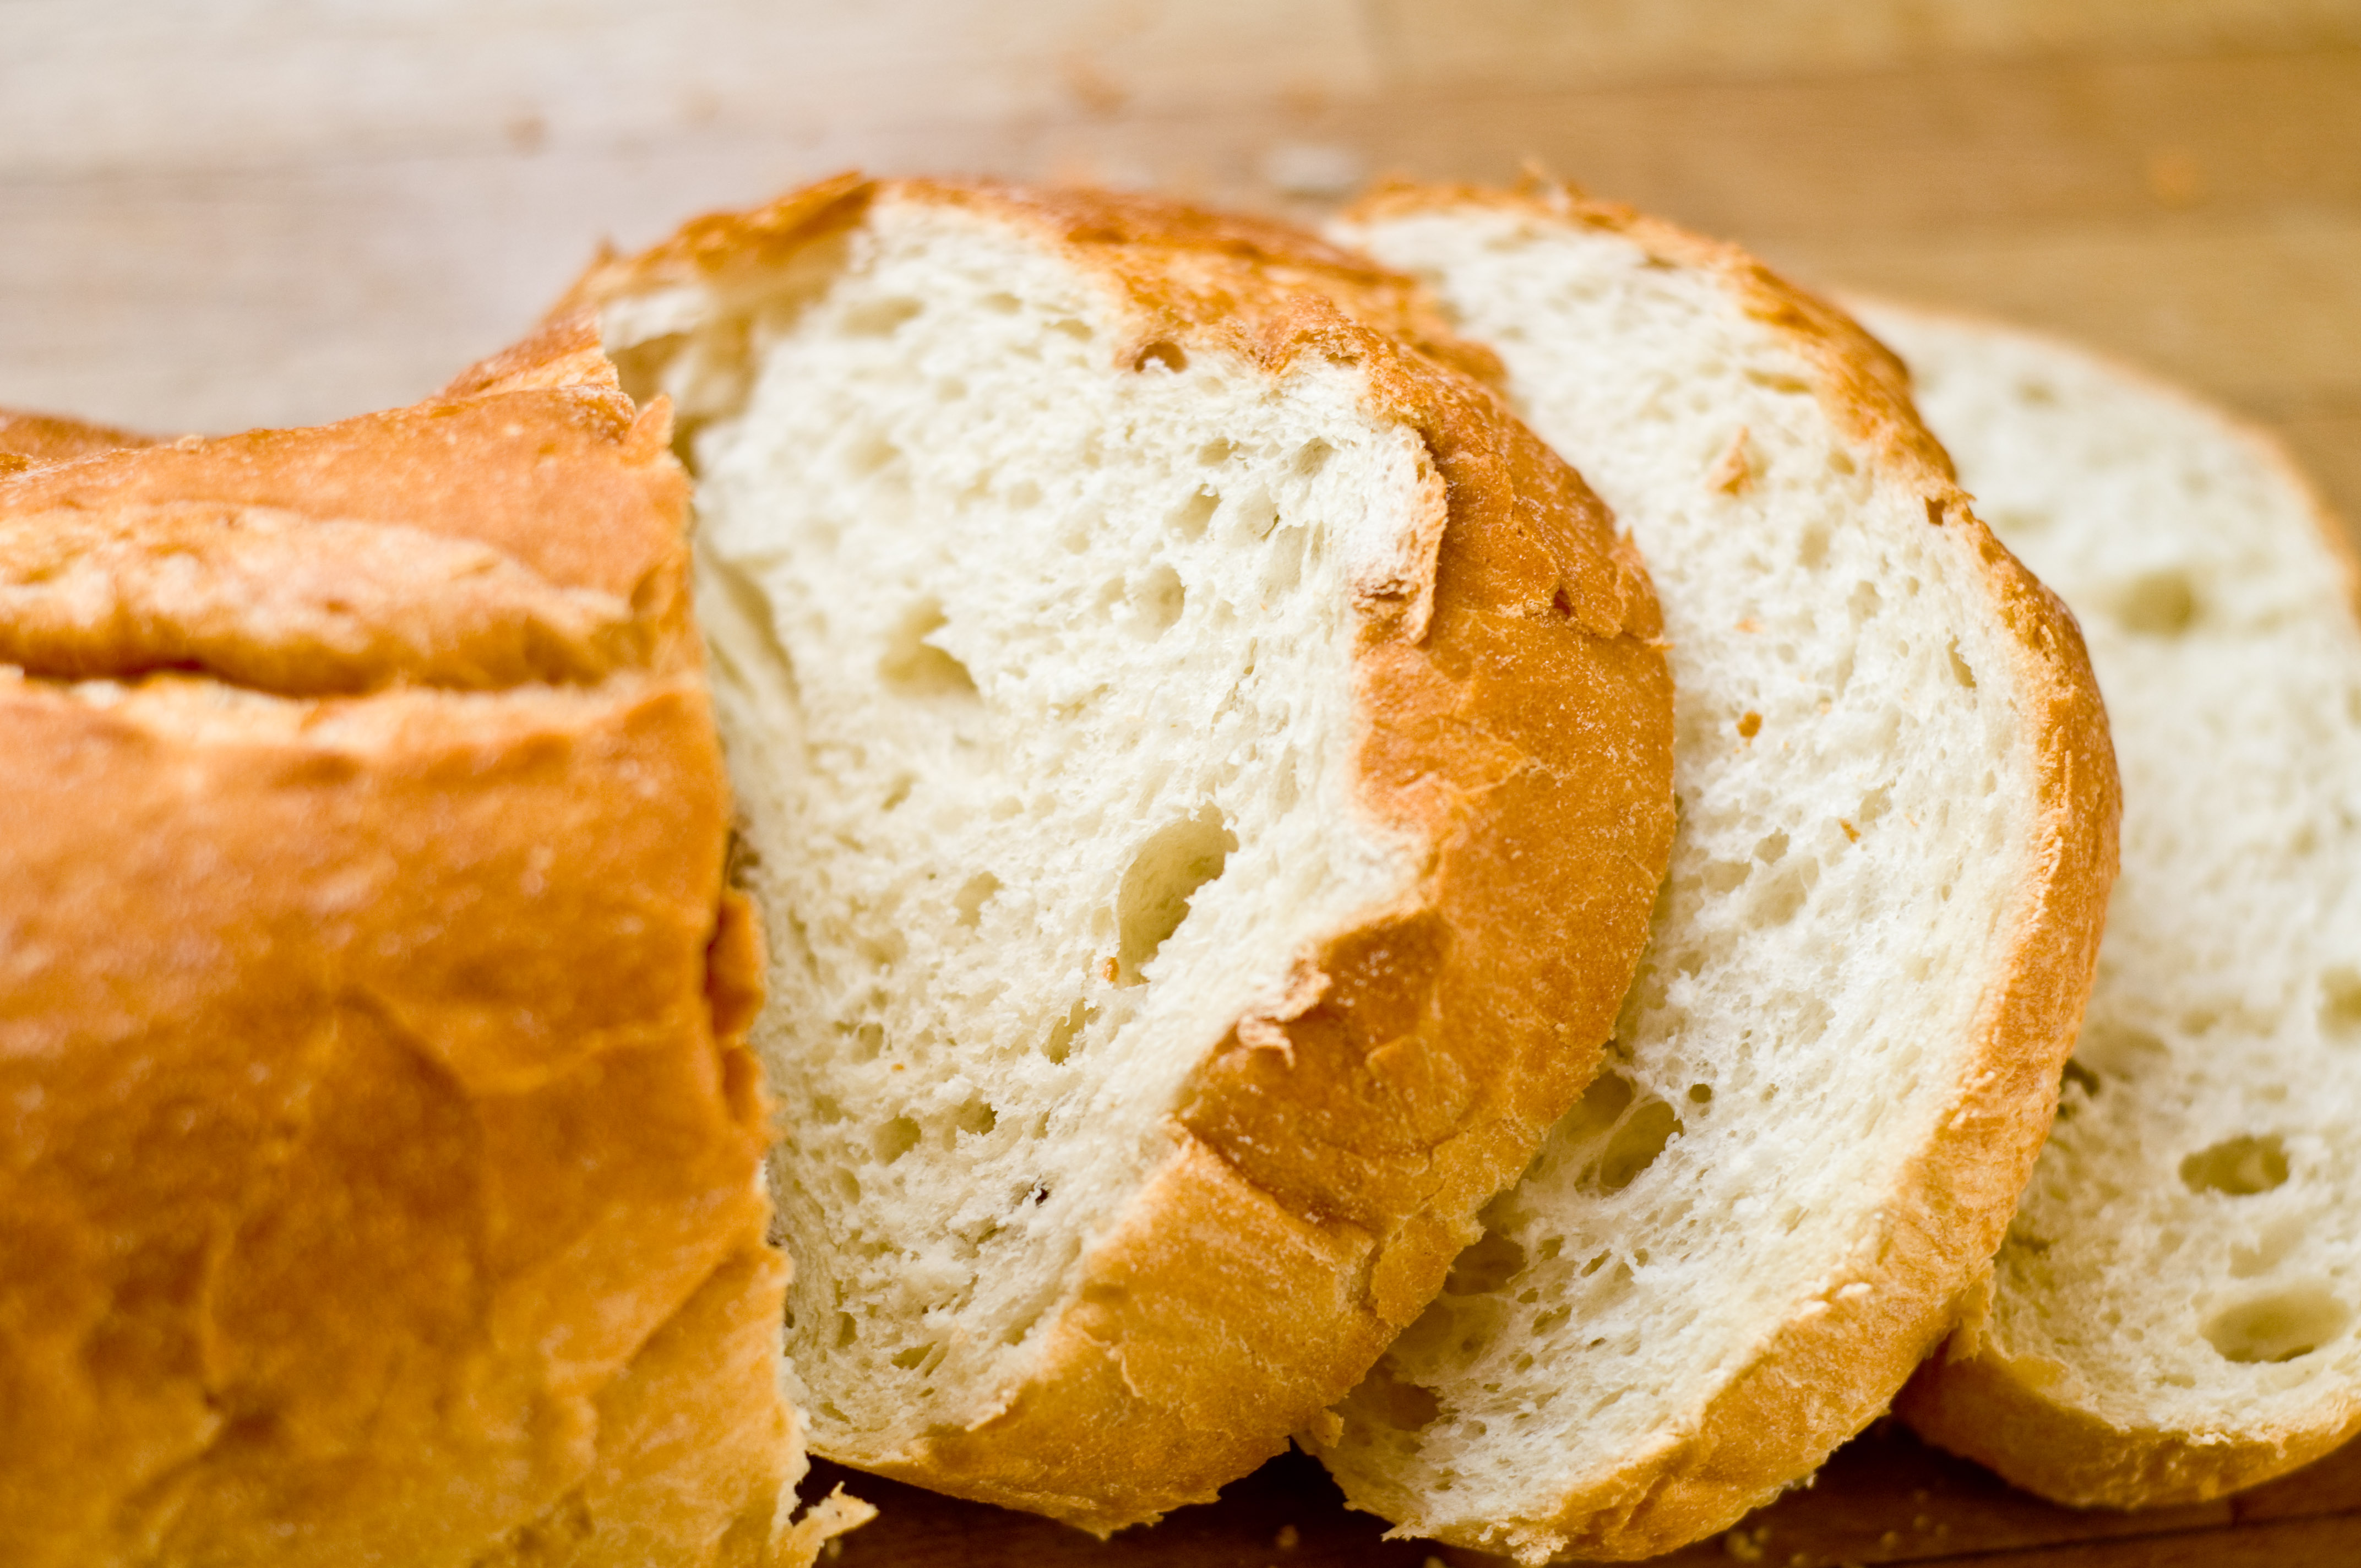
In honor of Ryan, and kids everywhere with HIV and AIDS, here are 4 healthy treats. Perfect for all kids.
I get asked a lot of questions as a food blogger. Some are about food. Some are about blogging. Some are more personal. But one of the most common questions I get asked is, "How do you stay so skinny when you cook so much food?!"
First, it’s hard. Really.
Work, being a mom, a wife, a blogger. AND trying to stay in shape is a lot of work.
A lot.
Here are some of the rules that I use to a balance food blog and skinny jeans:
1. I don’t eat fast food. It is a really rare occasion when I do, and never, ever, ever for dinner. More of a road trip occasion, or an I’m running late so I’m going to grab the one sandwich under 400 calories at Quiznos occasion. And no chips, and an unsweetened iced tea.
2. I always eat breakfast. Once in a while I have fatty things, like that french toast I still can’t stop thinking about. But 5 out of 7 days, its 2 slices of reduced calorie whole wheat toast (or whole wheat english muffin) with 1/2 tbs peanut butter each. For breakfast, you want the trifecta: low cal, high protein, good carbs.
3. I read ALL the labels of everything I put in my mouth. And just assume that you will have more than the serving size. For instance: most cereal puts a "serving size" of 3/4 a cup. Really? That’s less than my cup of coffee. You will probably have more like 2 cups. So that cereal that you think is only 175 calories. It’s probably more like 430. Thats like eating a burger. But at least the burger is worth it. Bottom line, if you are counting calories, measuring your food is a BIG part of that.
4. Snack well. I like to get the most food possible for the least amount of calories. It’s like a game. But I don’t eat a lot of processed foods, and even when I did, those 100 calorie packs aren’t really a calorie bargin. I want 2, and if I’m going to eat 200 calories, I’d rather have a snickers. This is one of my go to snacks: 1 cucumber, peeled and sliced, drizzled with lemon juice, sprinkled with salt and chili powder. It’s like 15 calories. I also do that to radish slices. Crispy and salty. Like chips, but good for you.
5. Know your weaknesses. I know I like to cook big breakfast on the weekend, and eat more for dinner when I get to cook for other people. So on the weekdays, I eat a low dairy, high plant, low fat diet. Such as: Salads with low-cal dressing (or just balsamic vinegar) or even my favorite salsa instead of dressing, non-dairy soups, roasted veggies with skinless chicken.
6. Know your calories. I have the Lose It app on my phone (it’s free) and I try to stay under 1,600 calories a day during the week. Give up calories where you can, but don’t feel like you have "earned" an extra slice of pie. That just ruins all the work you did. The truth is, unless you are an Olympic swimmer who burns 14,000 calories a day, you will never reach your goal weight with exercise alone. Never. You have to get your eating in check. Can you indulge? Sure, once in a while, but make sure you make up for it but eating lots of plants. Don’t starve yourself, it makes your body store everything as fat. So you are hungry and still gaining. That sucks. Think of calories like you think of money. You only have so many (probably around 1,700 a day if you’re a girl) to spend before you go "into debt" (meaning: gain weight). Is that mediocre lunch really worth half of your calorie budget? Do you like that White Chocolate Mocha from Starbucks 600X more than a regular cup of coffee? Because that’s how many more calories are in it (a venti White Chocolate Mocha, with whip has 620 calories, a plain cup of coffee has about 5 calories). Spend where it counts, cut when it doesn’t.
7. Find the WHY. I have a Masters Degree in Psychology. Did you know that? It’s true. The mental part is hard. Probably harder than being hungry, is being unmotivated. Write a list of WHY you want to stay (or get) in shape and post it everywhere, and keep updating it. And talk yourself down when you do want to grab for that bad stuff. Oh, and don’t keep in the house, it just makes it that much more difficult for yourself.
(pretty much my WHY for everything good in my life)
8. Replacement behaviors. This is an important part of therapizing yourself. Find your bad habits and replace them with good ones. For me: 3pm candy jar. My coworkers all have them, and I do as well. Instead of wandering around chatting with the intention of snacking, I walked my office building for 15 minutes, stairs and all. Now, my candy jar is filled with candy I don’t like and I’m not even tempted to eat, just for those people who come to visit with the intention of snacking.
9. Just have one. If you really want to try a new recipe for cupcakes, pie, cookies, thats OK. Try and plan to make them when you can give the rest away. For me, most of the fun of cooking is having a recipe in my head and trying to figure out how to make it work in the kitchen. But most of my food, the sugary, high fat stuff, is given away. Take it to the office, or to a friends house, or let your husband take it to his office. Find a charity, like a women’s shelter, that might want it. Or throw it out. It sucks to waste food, but is it really doing any good taunting you from the fridge? Or, you can make a half or a quarter of the original recipe using an online site like Half Recipe.
10. Move a lot. Even though exercise doesn’t burn as many calories as we would like, it’s still important to move. For me, it’s spin class. Because it’s the most amount of calories I can burn in the least amount of time. If I really push myself, do everything that spin guy is yelling at me to do, I can burn nearly 700 calories in an hour. Thats a lot. Do that 3 times a week and thats 30 lbs a year. Find something that you will actually do, and do it. A lot. Spoil yourself with dance class, then treat yourself to shrimp cocktail (fairly low cal treat).
11. Water is essential. Get a water bottle and carry it around like a security blanket. First, it flushes out your body. Second, the human thirst reflex is so weak, it is often mistaken for hunger. Drink a lot of water and you will eat less and glow more.
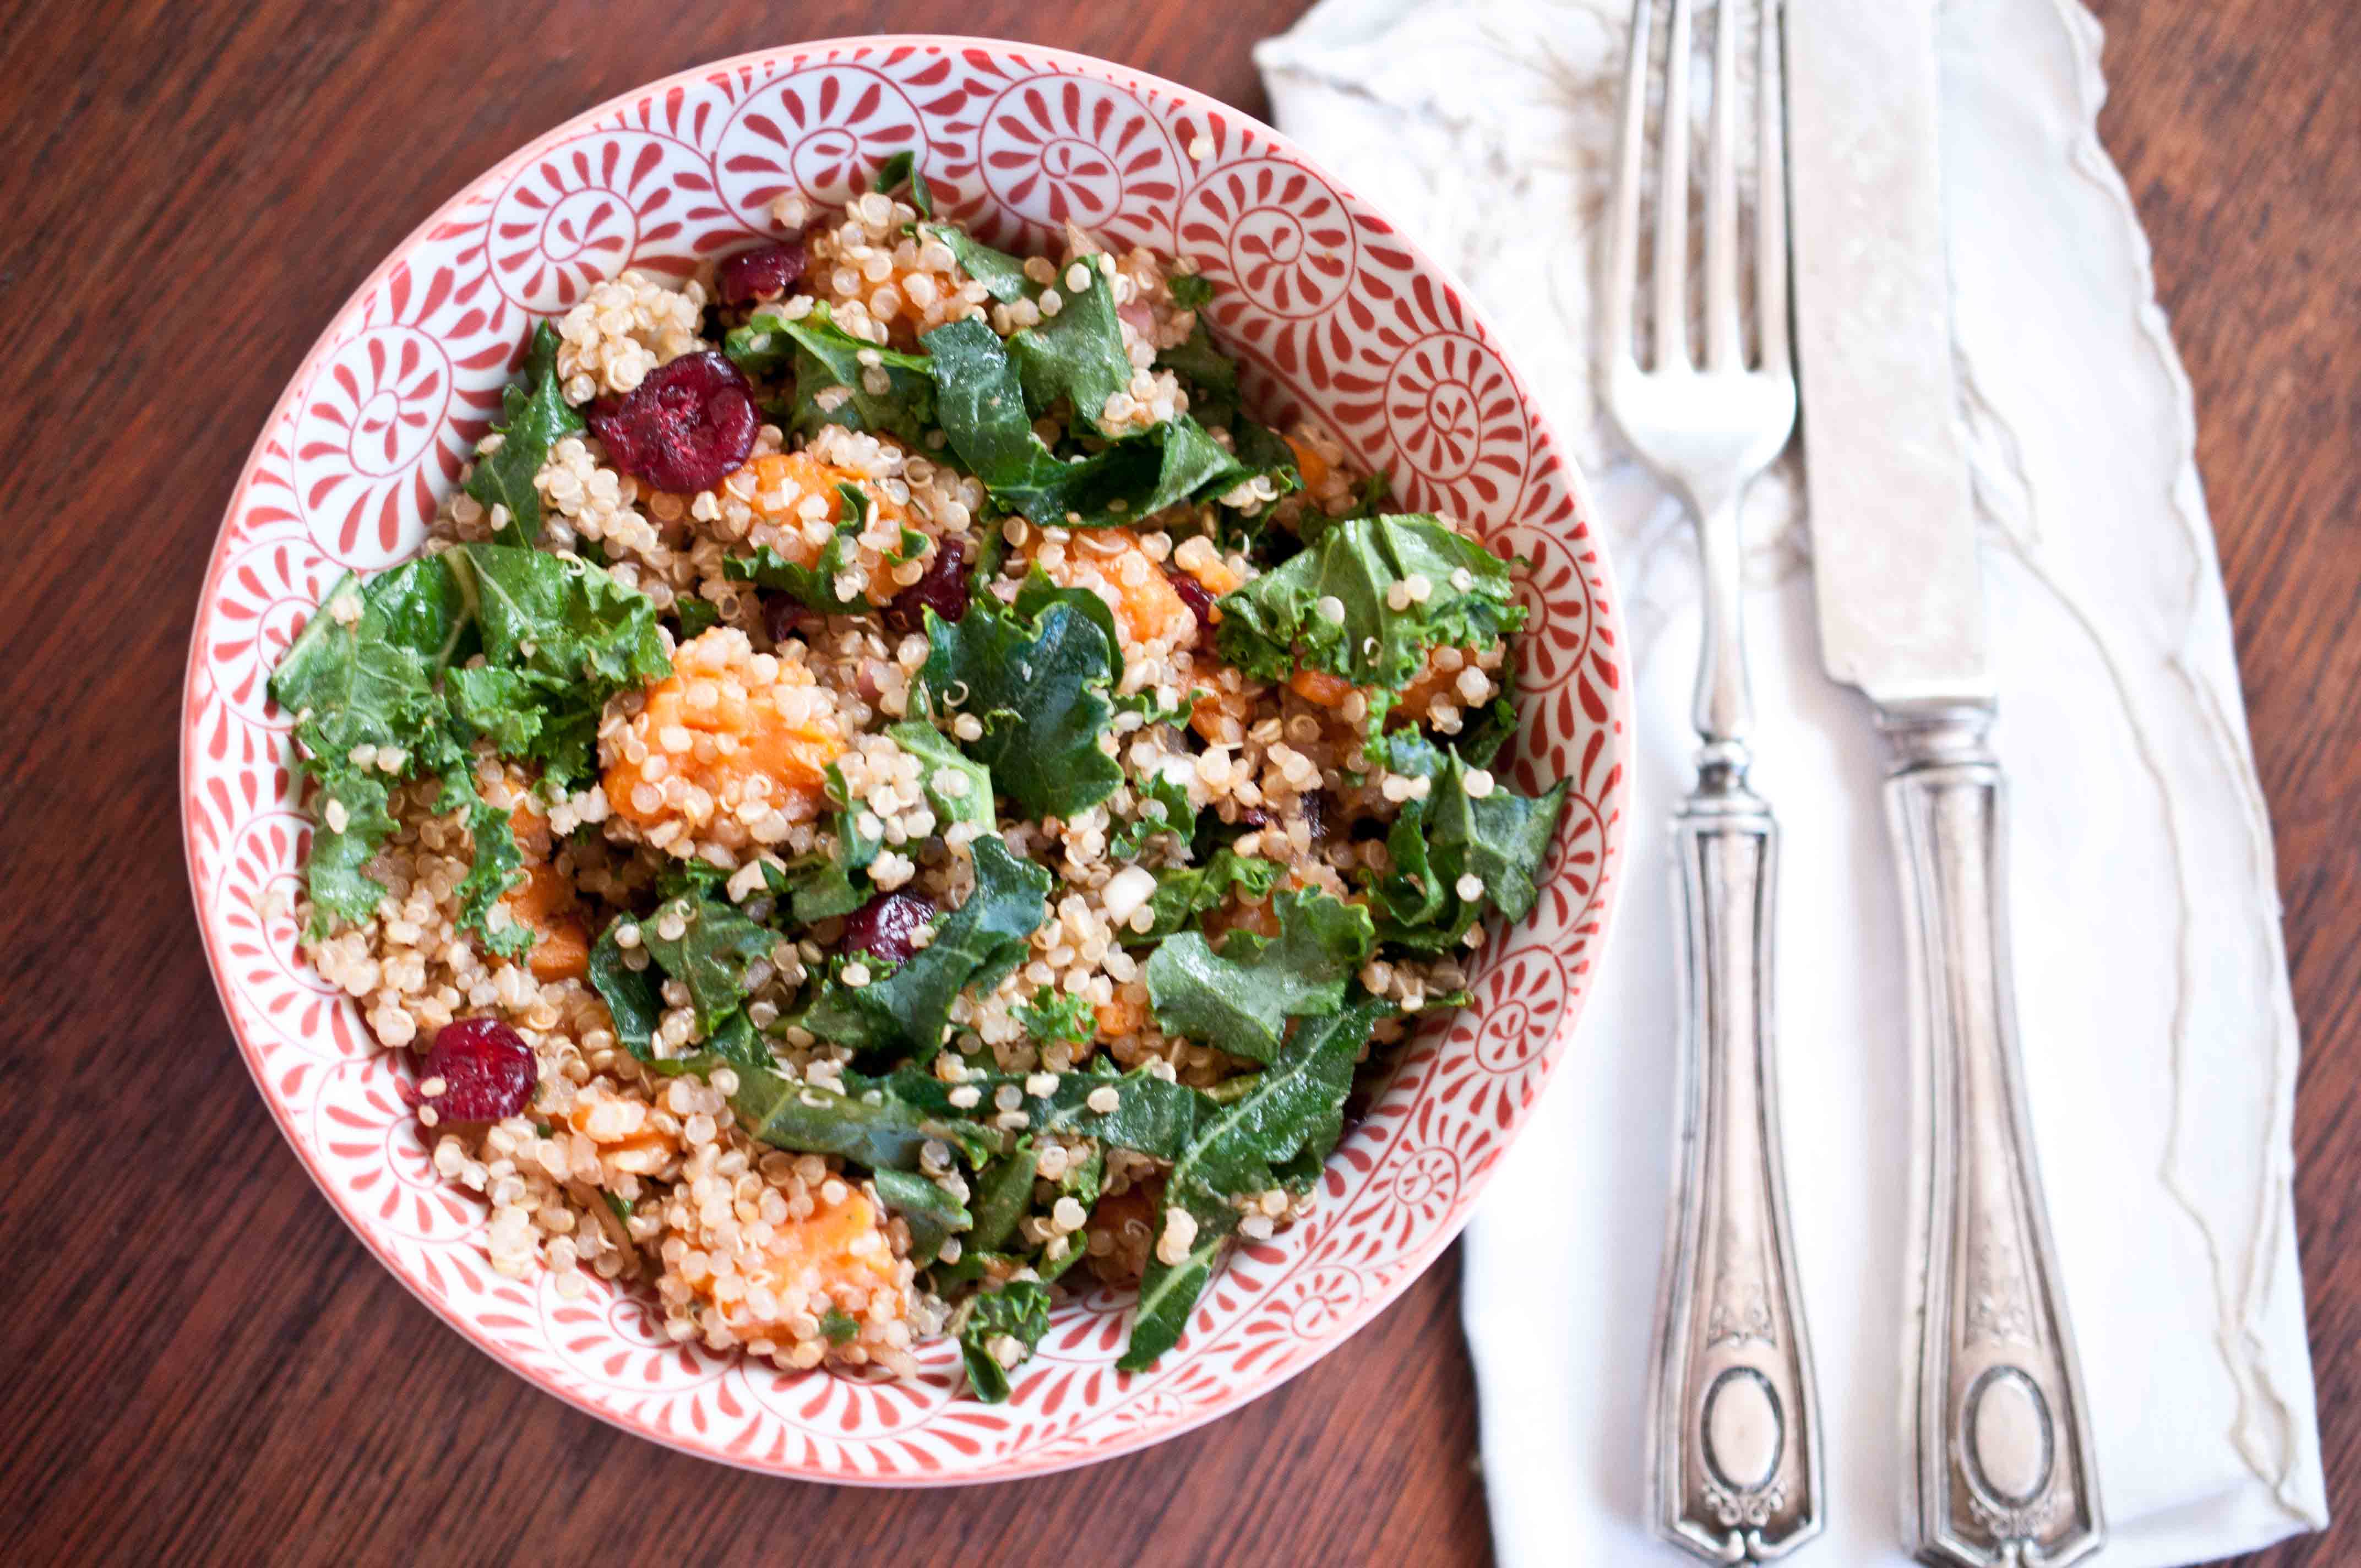
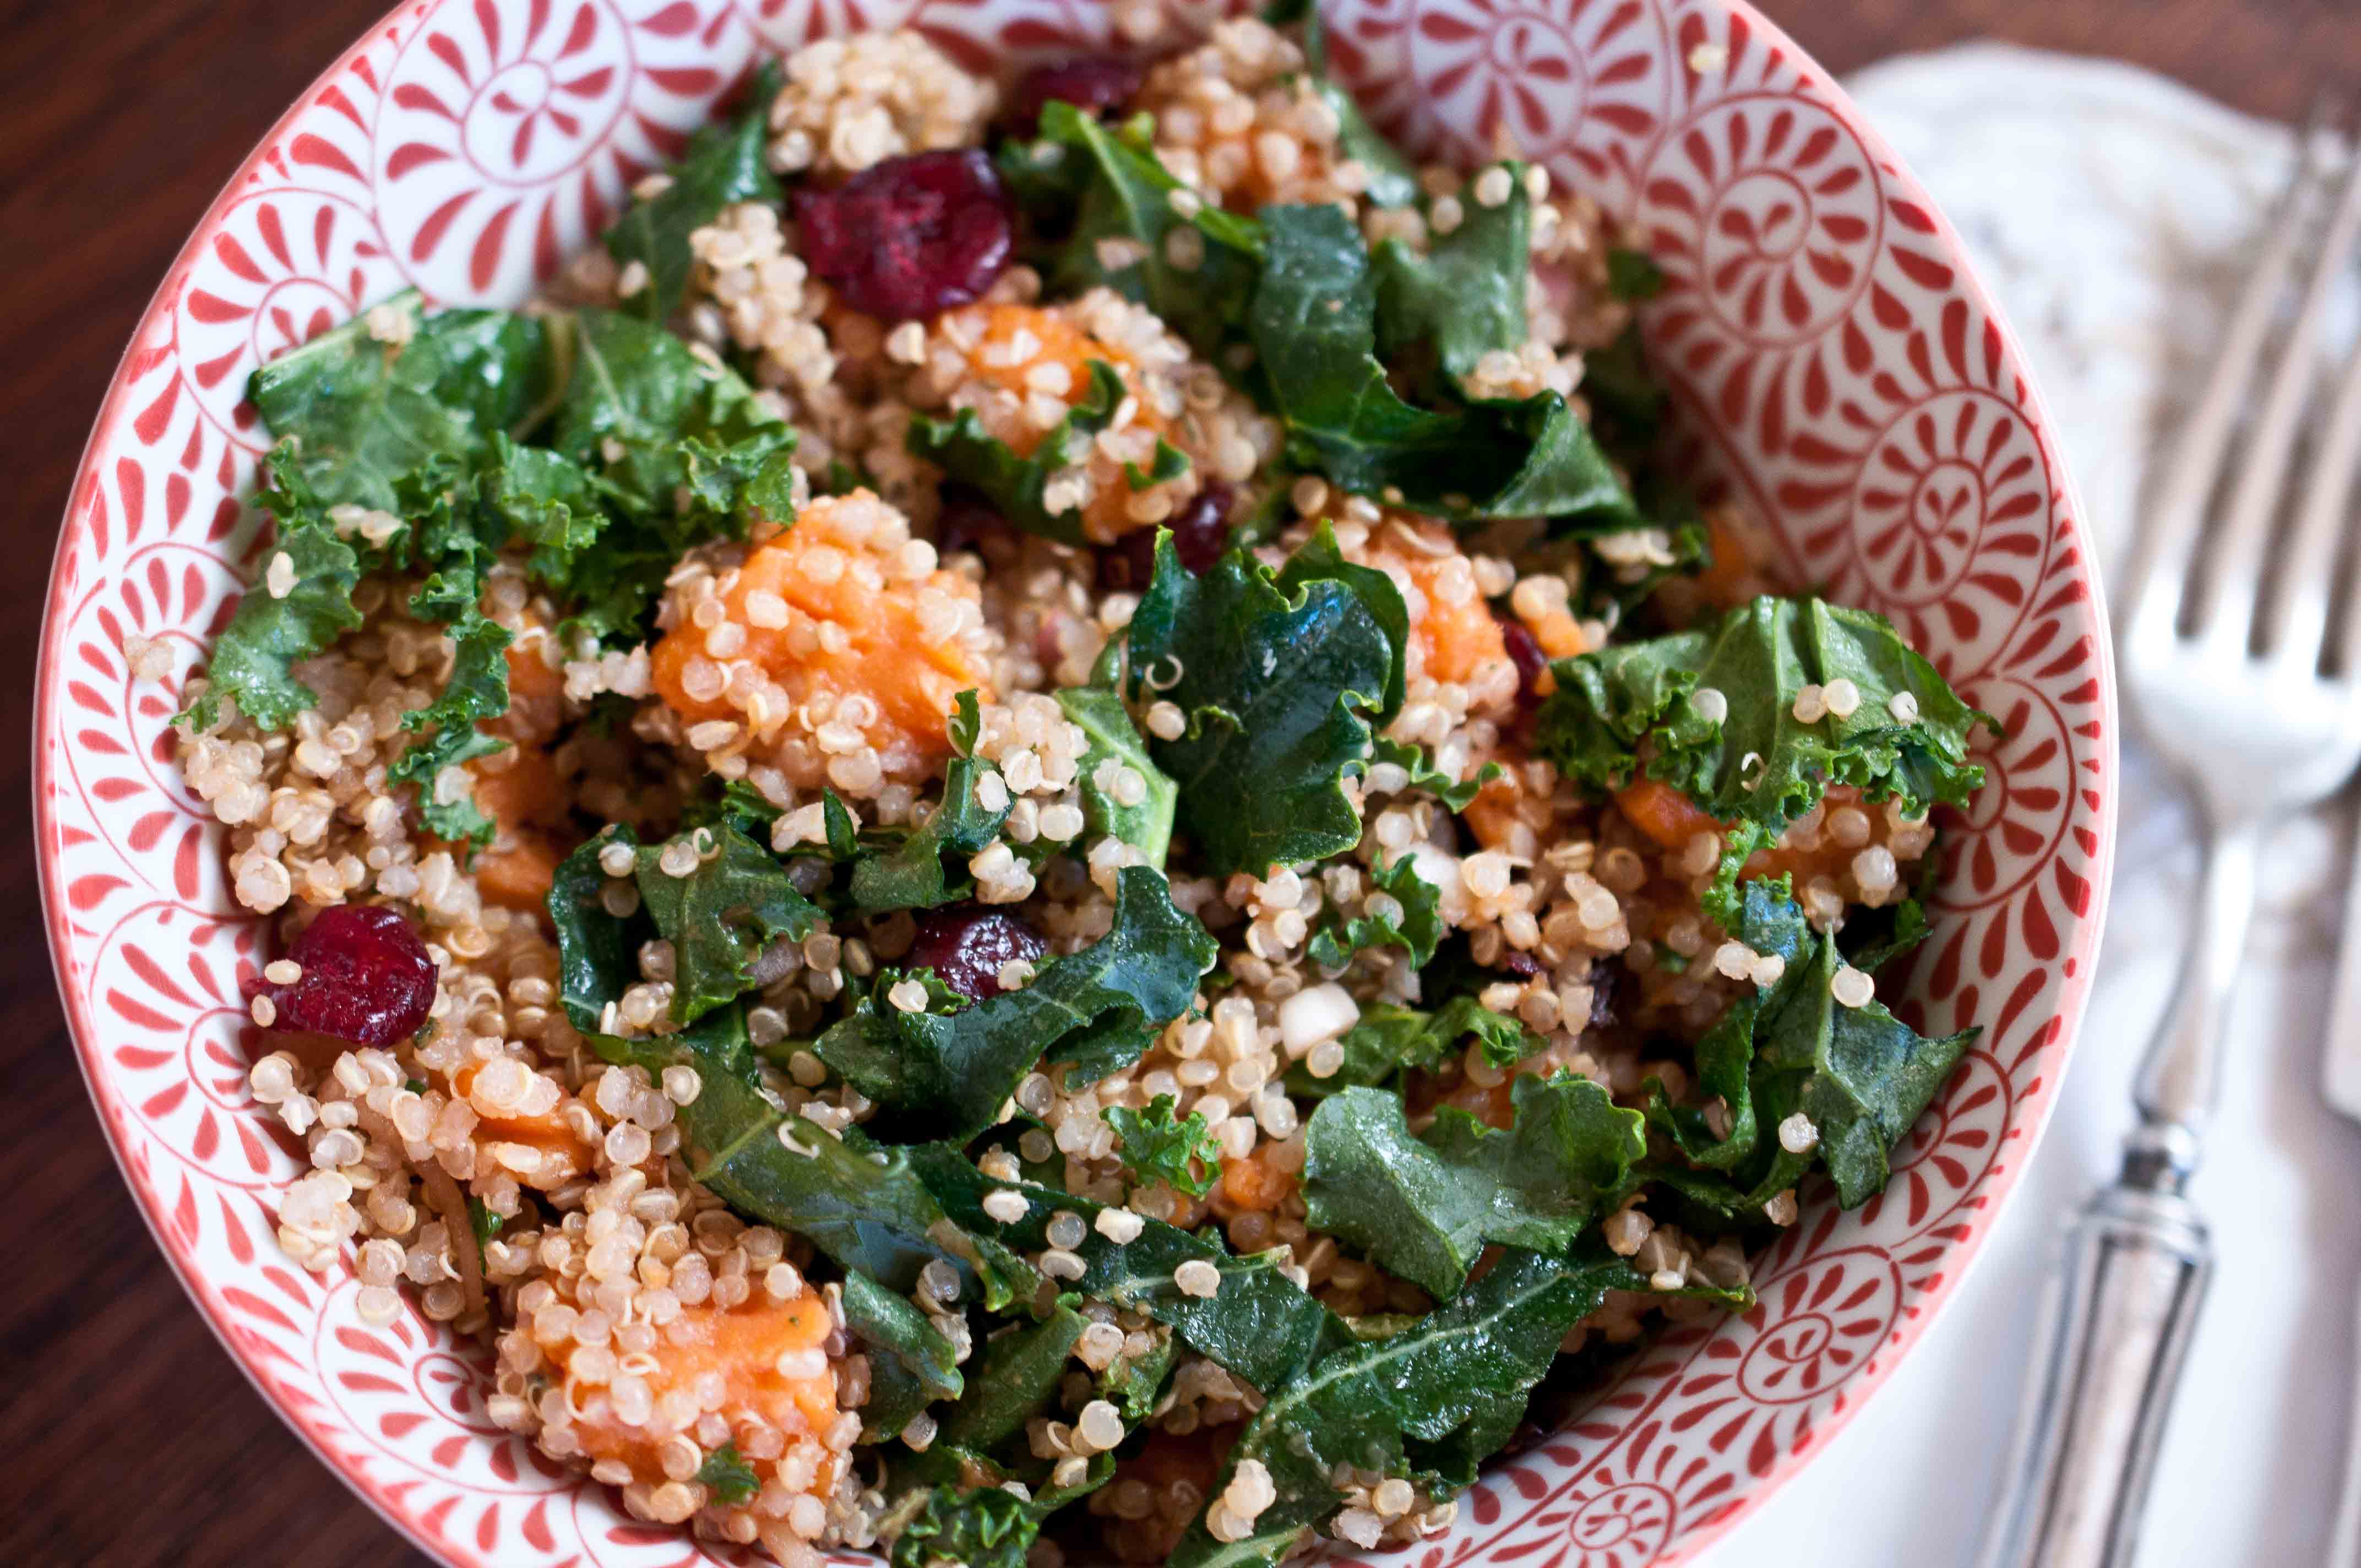
Now onto the recipe. This makes 2 large entree sized portions, at about 330 calories each, or 4 side salad portions at about 165. If you want a little more, you can add 3oz grilled skinless chicken.
Sweet Potato Quinoa Salad
1 large sweet potatoes, peeled and diced
1 cup cooked quinoa
1 tsp fresh sage, minced
1 1/2 cups fresh kale, chopped
1/3 cup dried cranberries
1 large roasted red bell pepper, chopped
2 tbs shallots, minced
2 tbs balsamic vinegar
2 tsp raw honey (sub agave for vegan)
1/4 tsp salt
1/2 tsp black pepper
Boil the sweet potatoes in a large pot of lightly salted, boiling water until fork tender, about 5-8 minutes. Remove from water with a slotted spoon, allow to drain. I did a guest post of Eating Rules about the proper way to cook quinoa, if you are interested.
In a large bowl, combine the quinoa, sweet potatoes, sage, kale, cranberries, and red pepper. In a small bowl, add the shallots, balsamic, honey, salt and pepper, stirring to combine. Drizzle over the quinoa salad, tossing to coat.
Legal Disclaimer: I am not a nutritionsinst. The ideas presented here are just what works for me.
Thanksgiving is the perfect holiday because gratefulness is such an underrated personality trait. I wish people admired that quality in others like they admire shoes and jewelry and waist size.
"She is SO grateful! I wish I had that."
We should start the day that like. Before we ever get out of bed, list the things you are thankful for.
If you aren’t feelin' in a Thankful kinda mood right now, this’ll do it:
I’ve know quite a few survivors of the Nazi Holocaust. Most of whom are in their 90’s now. I know a man who was in Auschwitz concentration camp and went to the gas chamber. Twice. Both times, something was broken, and the entire chamber full of terrified, naked, sobbing Jewish men, women and children where told to go back to their cells. To this day, when something goes wrong, a toilet breaks, his phone service is down, his car needs work, he will always say, "Thank God for things that break! Broken pipes saved my life!" Nothing like a concentration camp story to put your life in perspective, right?!
No matter what you are facing, what is wrong, or what is hard to deal with. Take some time to think about what is right in your world. Hold the good closer than you hold the bad. I have so much to be thankful for, and I hope a day never comes that I stop thinking that.
Every Thursday, not just the 4th Thursday in November, we should take some time and to list the things we are thankful for, no matter how long or short that list is.
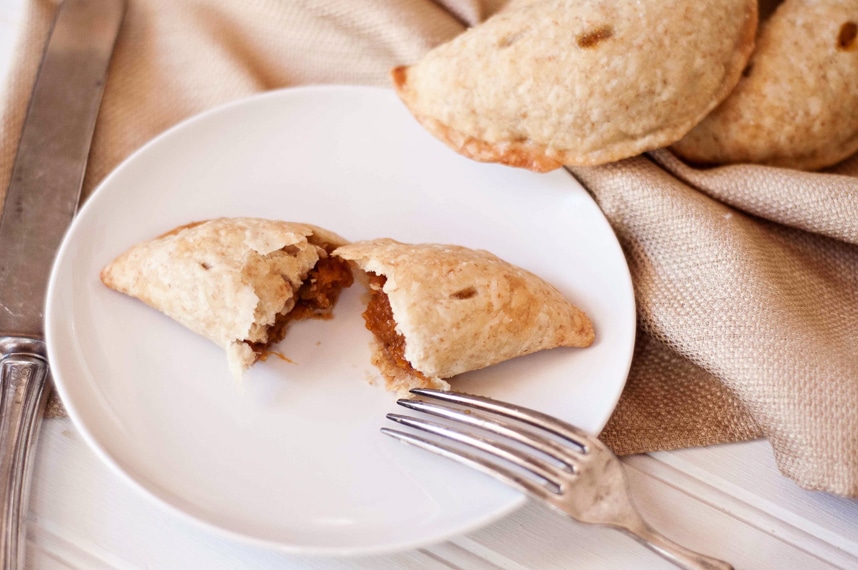
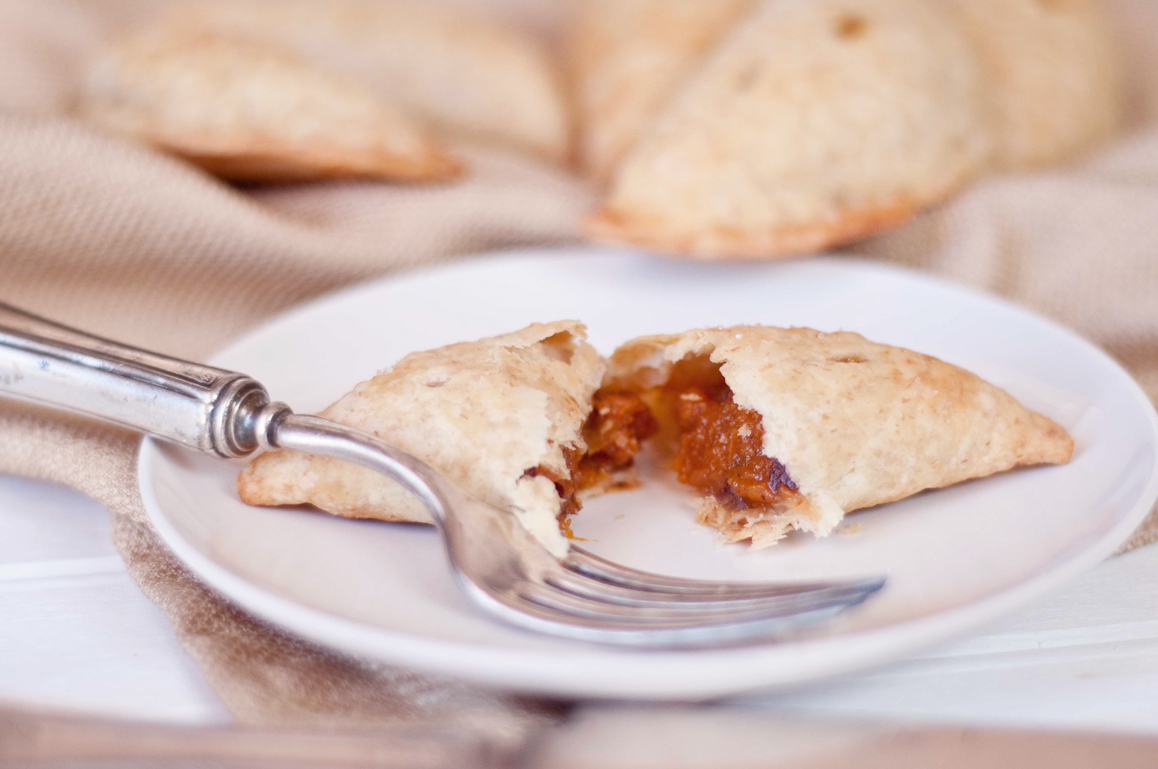
Oh, yeah, food. That’s why you’re here. These little guys are pretty fantastic. Plus, you don’t just have to limit them to your leftover candied yams, fill these with what ever you have. Other great empanada combos:
Turkey (chopped), mashed potatoes & gravy
Stuffing & cranberry sauce
Mac & Cheese
But, even if you didn’t make yams, or you don’t celebrate Thanksgiving and want to make these, I’ll give you an easy candied yam mash recipe that will be perfect for the filling.
Thanksgiving Leftover Empanadas: Candied Yams
For The Dough:
2 1/4 cup flour
1 tsp salt
10 tbs butter, cold, cut into cubes
1 egg
1/3 cup ice water
For the Filling:
2 cups leftover candied yams, Mashed
OR
2 large yams, peeled and chopped (about 4 cups)
1/2 stick butter (4 tbs), chopped into cubes
1/4 cup maple syrup
1/2 cup brown sugar
1/2 tsp salt
1 tsp cinnamon
1/2 tsp nutmeg
1/4 cup pecans
Topping:
1/4 cup maple syrup
1/2 tsp salt
Put 1 1/2 cups of flour and the salt in a food processor, pulse for a second to combine. Add the butter and process until combined. Add the remaining flour and process again. Move to a bowl. In a small bowl, beat the egg and water together until well combined then add the egg/water to the dough with a wooden spoon. If you add the water and egg with the food processor, your dough will turn out crispy and cracker like.
Form into a disk, cover with plastic wrap and chill for at least 1 hour.
Preheat oven to 400.
If you are using leftovers you can skip this next paragraph.
Place your chopped yams in a large loaf pan, sprinkle the top with cubes of butter. Drizzle with the maple syrup and then top with the brown sugar.
Bake, uncovered at 400 for about 40 minutes or until the yams are fork tender. Remove from the oven and allow to cool a bit. Drain off most of the liquid (leaving about 2 tbs in the bottom of the pan). Mash with a potato masher until mixture until creamy, add the pecans, cinnamon, nutmeg and stir.
Once your dough is chilled, roll it out to an even thickness on a flowered surface. Cut out 4 inch circles. I don’t have a 4 inch circle cutter, so I used a margarita glass.
Brush the edges of each circle with water. Put about 2 tbs of filling in the middle, leaving the sides clear. Fold the circle over and press the edges together well to make a secure seal. Put three small slits on the top of the empanadas to allow steam to escape. Place on a baking sheet sprayed with cooking spray (or covered with parchment paper). Brush the top with maple syrup, sprinkle with a small amount of salt.
Bake at 400 for 20-22 minutes or until golden brown. Eat, smile, be thankful.
Take a second to like Domestic Fits Facebook Page to receive info about new post in your feed.
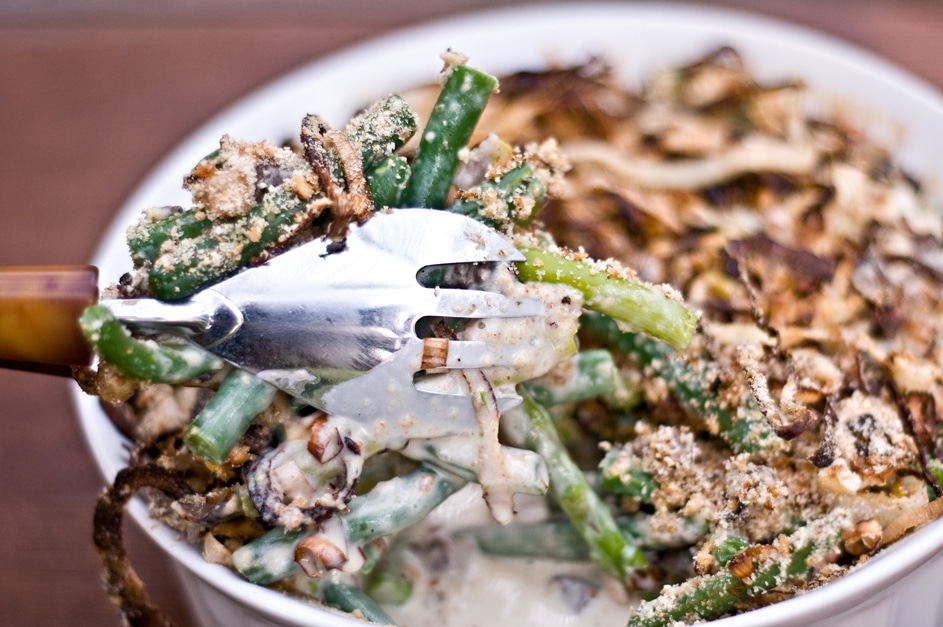
I have a lot of Non-American readers, making it necessary for my to explain why I’m doing a post about a green bean casserole.
In America, we have this very strange tradition of making our Thanksgiving feast from cans of food. Nearly every dish that most Americans grew up eating on that November Holiday involved a can of soup, or a package of Jell-o. I see you all, nodding your American heads in agreement. A smile for Grandmas Jell-o salad that still graces your Holiday table because your own kids would FLIP if it wasn’t there in that big Pyrex bowl. I know, don’t think I was exempt from this in my upbringing. But we are grown-ups now. We live in a country that has over 13 million acres of farm land dedicated to fruits and veggetables. We even grow 100 million TONS of produce every year.
We should eat it.
A lot of it. Eat food, not chemicals.
Try it, my American friends, we are lucky enough to live in a country with more produce that we could ever eat. Let’s give it a shot.
Could you do it? Cook an entire Thanksgiving without ONE can? I’m gonna.
Grown-up Homemade Green Bean Casserole
Ingredients
Topping:
2 leeks
1 large white onion
1 tbs olive oil
1/2 cup Panko bread crumbs
1 tbs salt
Casserole:
5 cups fresh green beans, trimmed and cut in half
2 tbs butter
4 cups Crimini mushrooms (baby bella), washed and chopped
3 large cloves of garlic, chopped
1 cup of chicken broth
2 tbs flour
1 cup cream
Instructions
Preheat oven to 400.
Cut the leeks (white and very light green portion only) into thin rings. Cut the onion into thin slices. place in a small bowl and toss with the olive oil to coat. Add to a baking sheet and add the Panko bread crumbs and salt, toss to combine.
Bake at 375 for about 25 minutes, tossing about every 8-10 minutes. Remove from the oven when a golden brown color is reached.
Place the green beans in a pot of rapidly boiling water. Boil for 5 minutes and immediately drain by pouring into a colander, rinse with cold water for 2 minutes to stop the cooking.
In a sauce pan over medium heat, melt the butter. Add the mushrooms and cook for about 5 minutes, or until they turn a dark brown. Add the garlic and cook for about 30 seconds.
In a separate bowl, add the chicken broth and the flour, stir to combine. Pour into the pan through a mesh strainer to remove any flour lumps. Stir until thickened, about 3-5 minutes. Remove from heat, add the cream and stir until combined. Return to heat and allow to cook until thickened, about 5 minutes. Remove from heat, add the green beans and 1/2 cup of the onion/leek mixture, stir. Pour into a 2 quart baking dish.
Time management tip: If you want to make this the day before Thanksgiving, this is where you stop. Cover the baking dish and put it into the fridge. Put the cooled onion/leek mixture in a separate container of Ziplock bag to prevent them from getting soggy from sitting on the top of the casserole all night.
Bake at 375 for 10 minutes, covered with aluminum foil. Remove foil, add onions, and bake for 10 more minutes or until warmed through.
(note: if you are cooking this after removing from the fridge, as in the above Tip, cook covered for 20 minutes then add the onions and bake for ten more.)
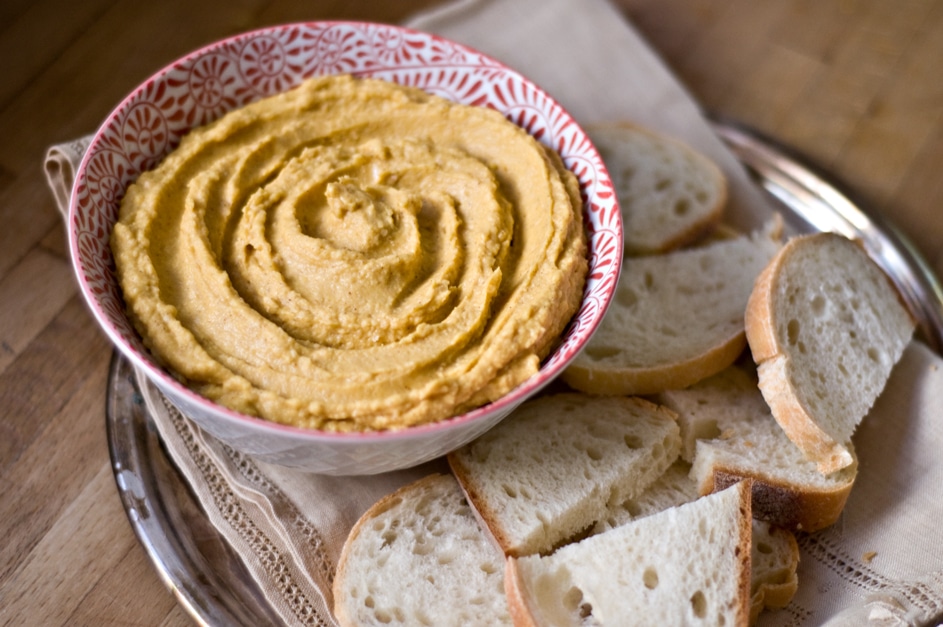
So, what do you do when you roast 4 pumpkins and end up with several containers FULL of homemade pumpkin puree? AND you have a husband that "Isn’t really crazy about that whole pumpkin flavor"? Besides the Pumpkin Pie With Bourbon Whipped Cream I made, and the Pumpkin Cranberry Cookies, I made hummus. Hummus, cookies and pie that I had the sole responsibility of consuming, which also turned into a few extra, much needed, workouts and spin classes. Totally worth it.
This hummus also became the "dressing" on my salad for lunch, and the schemer for my ham sandwich at lunch the next day. So many yummy uses.
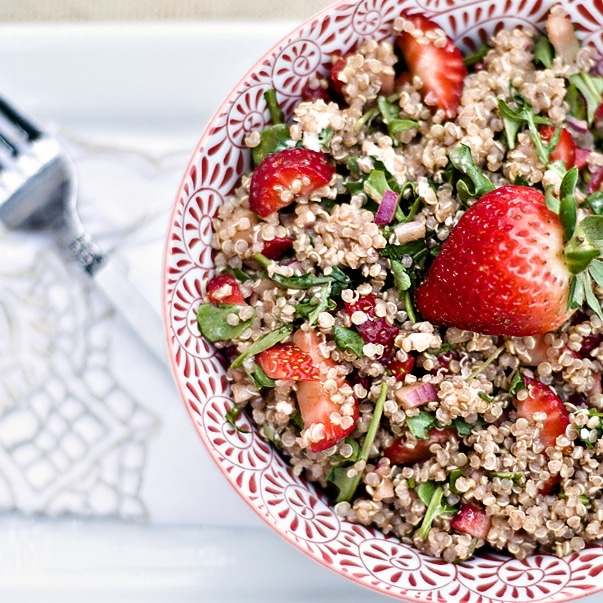
I’ve been eating a lot of quinoa salads ever since I did a guest post for Eating Rules. The post was about the amazingness of quinoa and how to make it the right way, as in not mushy. Andrew, of Eating Rules, posed a challenge to the world at large to give up processed food for one month, and somewhere around 3,000 people have accepted. Could you do it? Could you give up all processed foods for an entire month? You can start small, maybe one week, or maybe one meal per week for a month. How about "Unprocessed Wednesday Night Dinners" for the rest of the year. What is unprocessed? That been quite the discussion, for more information read this. But the short answer is, don’t eat food that has ingredients you don’t (or couldn’t) have in your kitchen. Skip the boxed, frozen, prepackaged, canned and chemical laden foods. Keep the journey from the farm to your table as short as possible. Cook with real, whole vegetables, fresh meats, grains that aren’t labeled "Instant" or "Success" or "Minute" but just: rice or quinoa. Make biscuits from scratch, roast a whole chicken, steam some vegetables, or grill some meat. You can do it. And the less processed foods your family eats, the healthier you’ll all be. For some inspiration to ditch the 37 ingredient bags of food, check out this family who did it and chronicled the highs and the lows.
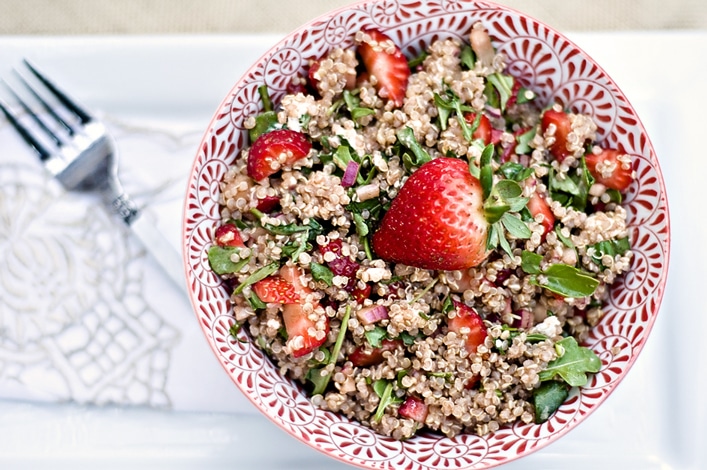
Strawberry, Goat Cheese and Quinoa Salad
1 cup of quinoa, cooked
1 cup Strawberries, hulled and chopped
3 oz goat cheese, crumbled
½ cup chopped arugula
1 tbs basil, chopped
¼ cup balsamic vinegar
1/8 tsp salt
2 tbs red onions, minced
2 tbs honey
In a bowl add the quinoa, strawberries, goat cheese, basil, arugula and toss combine. In a separate bowl, whisk together the balsamic vinegar, salt, onions and honey. Drizzle the balsamic mixture over the quinoa/strawberry mixture and toss to coat. Serve immediately.
(Makes 2 large salads, or 4 small side dish salads.)
Barbecue season is upon us. And as much as we need a great sundress and cute pair of wedge heels, we also need great party recipes. What makes a party food recipe great? Three qualities: 1. Tasty (obviously) 2. Travels well (in the event of off site parties) 3. Possible to sit at room temperature for a period of time without becoming a huge mess (sorry cheese dip and ice cream cake, we still love you)
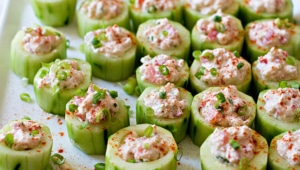
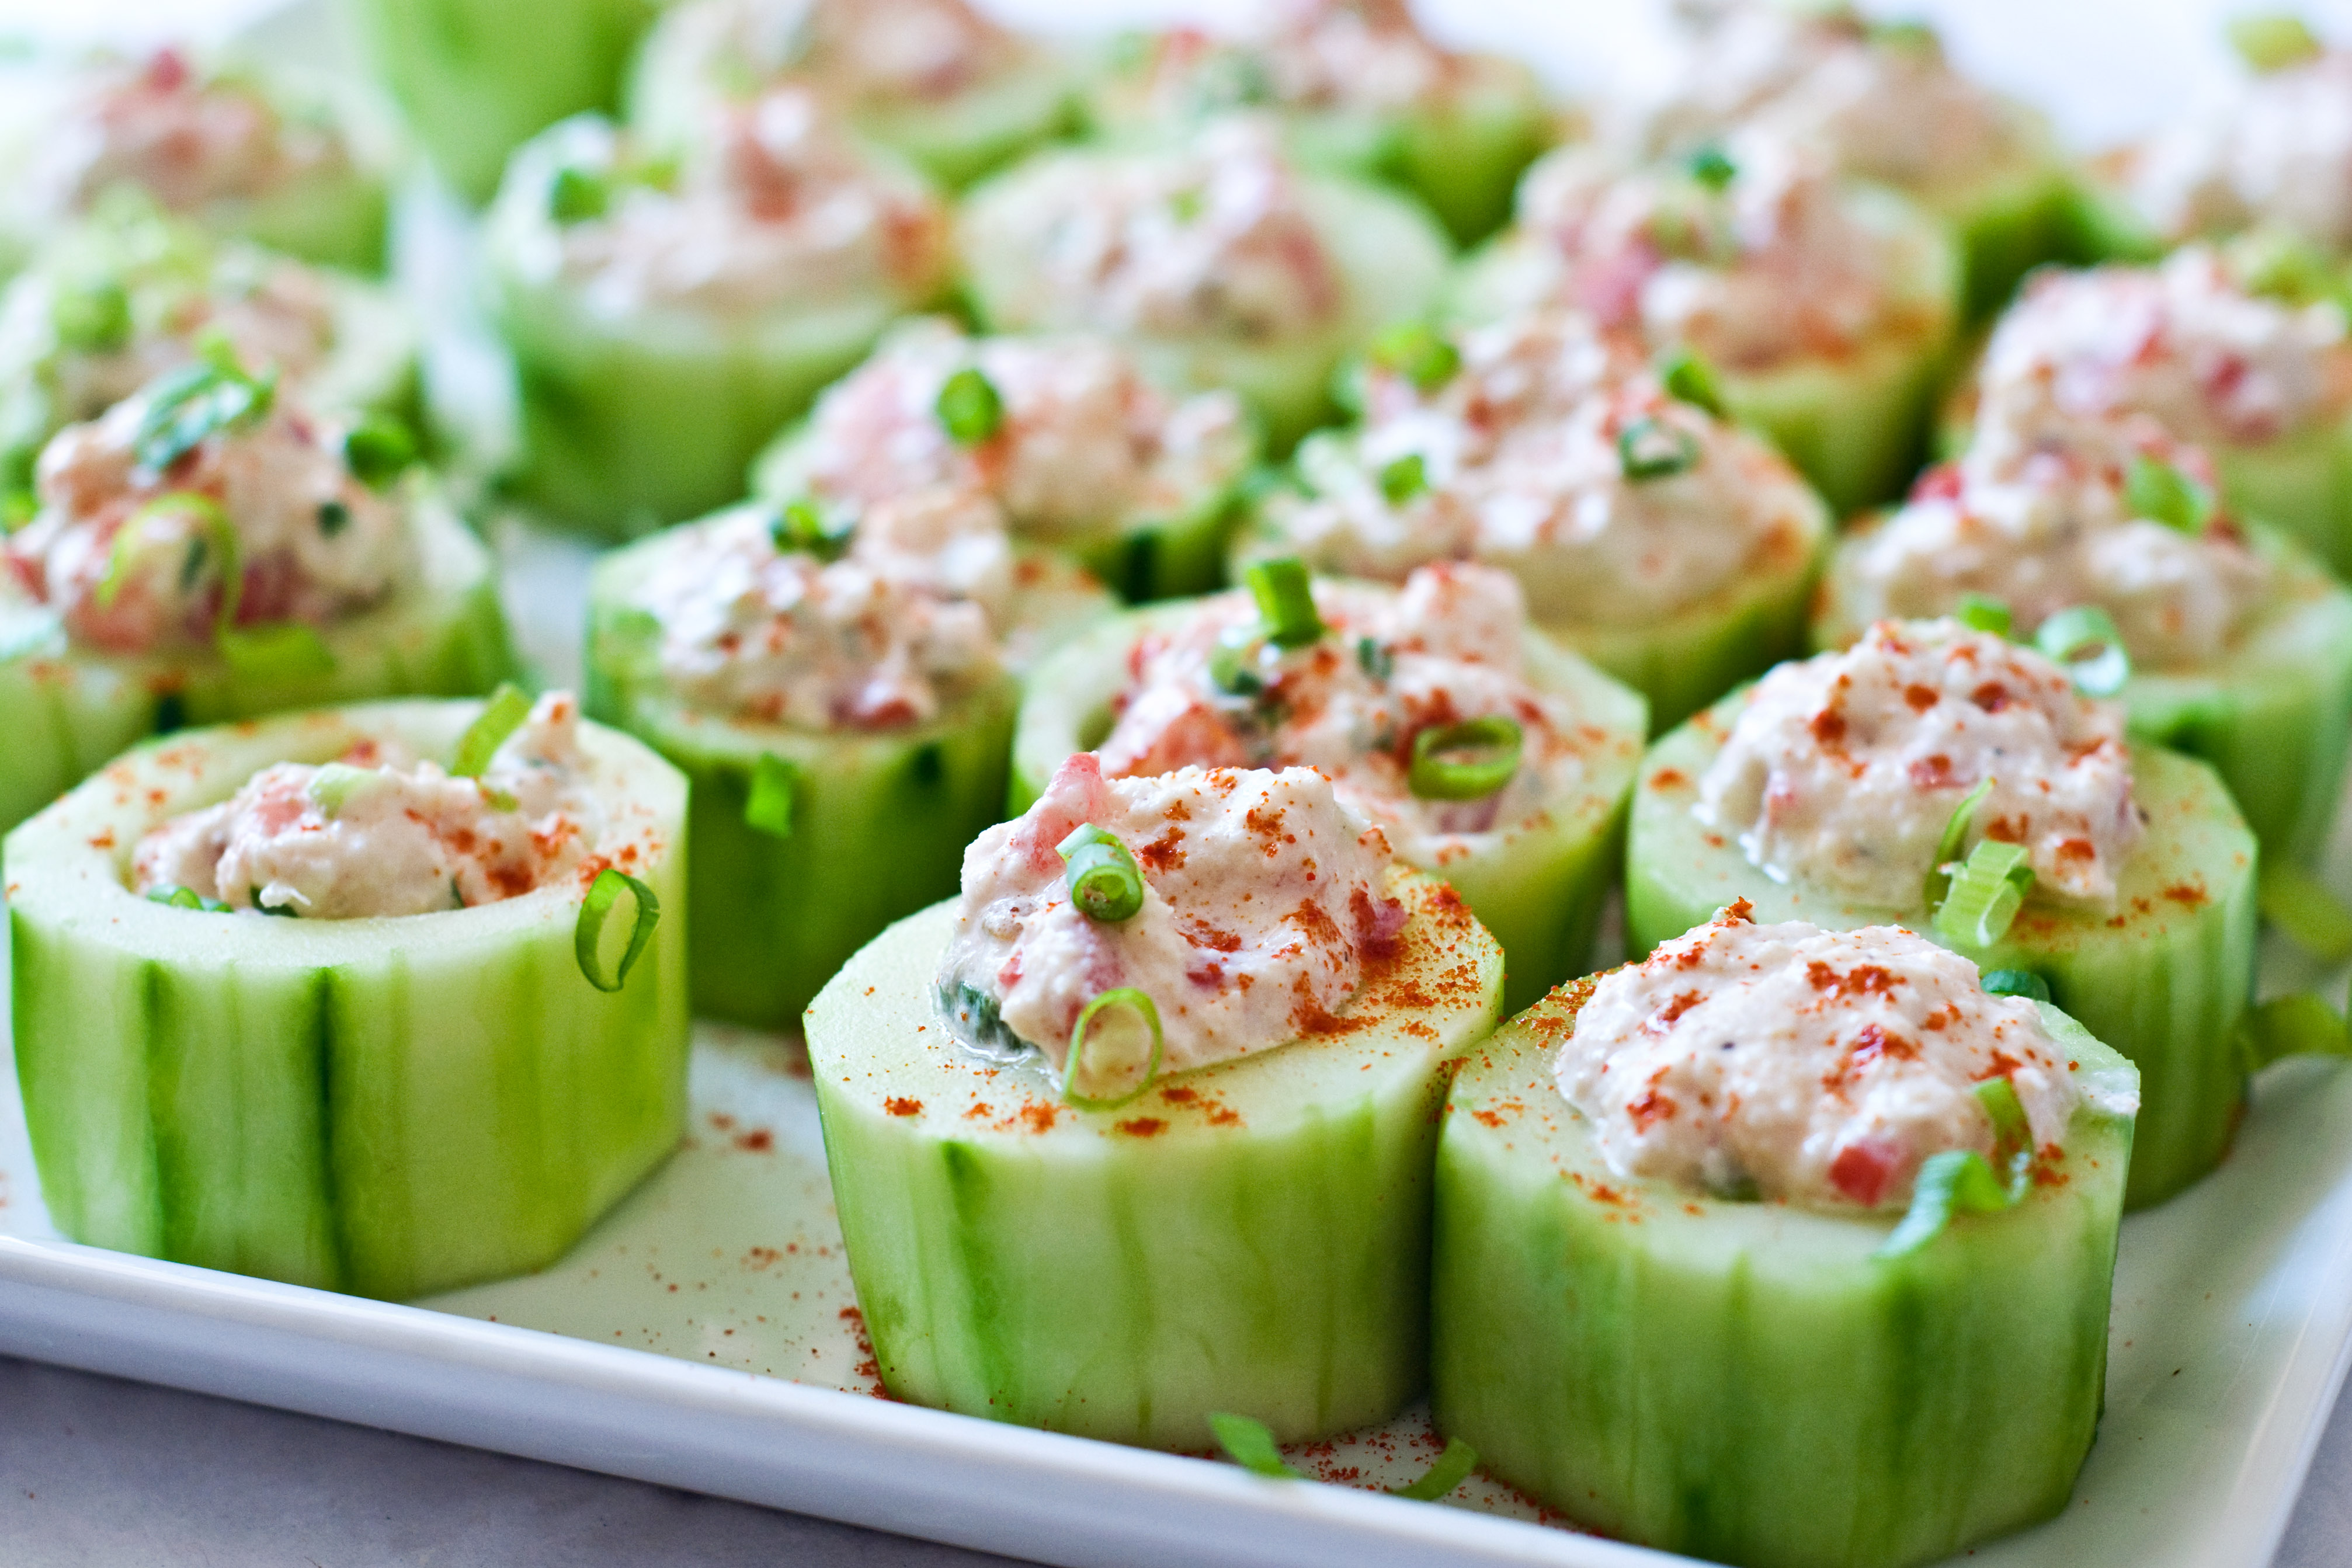
5. And the reason you are all here today: Cucumber Cups Stuffed With Spicy Crab
I saw these a few years ago on Iron chef. Cups made of cucumber. Brilliant. I am embarrassed to say that it took me nearly a year to figure out how it was done. Turns out, it’s so easy. All you need is a melon baller.
Remove the peel from the cucumbers using a vegetable peeler. Cut the cucumber into 2 inch slices. Using a small melon baller, scoop out most of the inside. You want to leave the walls and a thick portion of the bottom intact.
In a bowl, combine the sour cream and the cream cheese with a fork until well combined. add the remaining ingredients and stir until combined. Fill each of the cucumber cups with the crab dip. Refrigerate until ready to serve. Serve within 2 hours of making.
This week I started writing a regular feature for the Glendale Examiner on farmers markets and creating original recipes from what I find there. I love all of what is involved in the previous statement. Farmers markets are one of favorite places to be. Cooking and writing recipes has become a part of who I am. Writing is a skill that I have dedicated myself to learning. And I get to photograph the entire adventure. Now if only this hobby would pay the bills and I could finally quit my day job! Maybe someday, with a lot of work, I’ll be able to tittle my post: I Quit My Job + A Recipe.
The La Canada farmers market is only about a mile from my house. It sits right below the Angeles National Forest, still charred from a fire that ravaged it a few years ago. Although on the smaller side, this particular market has a diverse selection of goods including homemade cheese, imported salts and fresh caught seafood. You can read more about my adventures at the La Canada Market on my Examiner page.
I have a special place in my heart for great salt and Hepp’s does it better than most. Don’t ever underestimate the power a great salt has on your cooking. Used properly it can make your food taste 20% better. You can make the same dish as the guy next to you and your salt will make people remember yours and forget his. It has a sneaky way of hiding in your dish, it’s own flavor largely concealed, springing up and grabbing onto the flavors of the other ingredients, brightening and popping them. If a dish tastes “flat” it’s most likely due to salt not being able to do his job. Salt on the caliber that Hepp’s offers is also a fantastic gift for a foodie, just sayin’.
Somehow, after only a few minutes in his booth, I began to develops a slight crush on Country Fresh Herbs. I was so incredibly impressed by how beautiful and, well, fresh everything looked. It was like produce heaven. My favorite was the Shisido peppers, this is what I want my Trick Or Treat basket to look like next year:
After an hour of wandering among the booths, being sidetracked again and again, I selected 5 ingredients and slowly formulated a recipe.
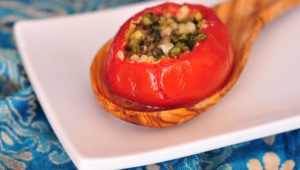
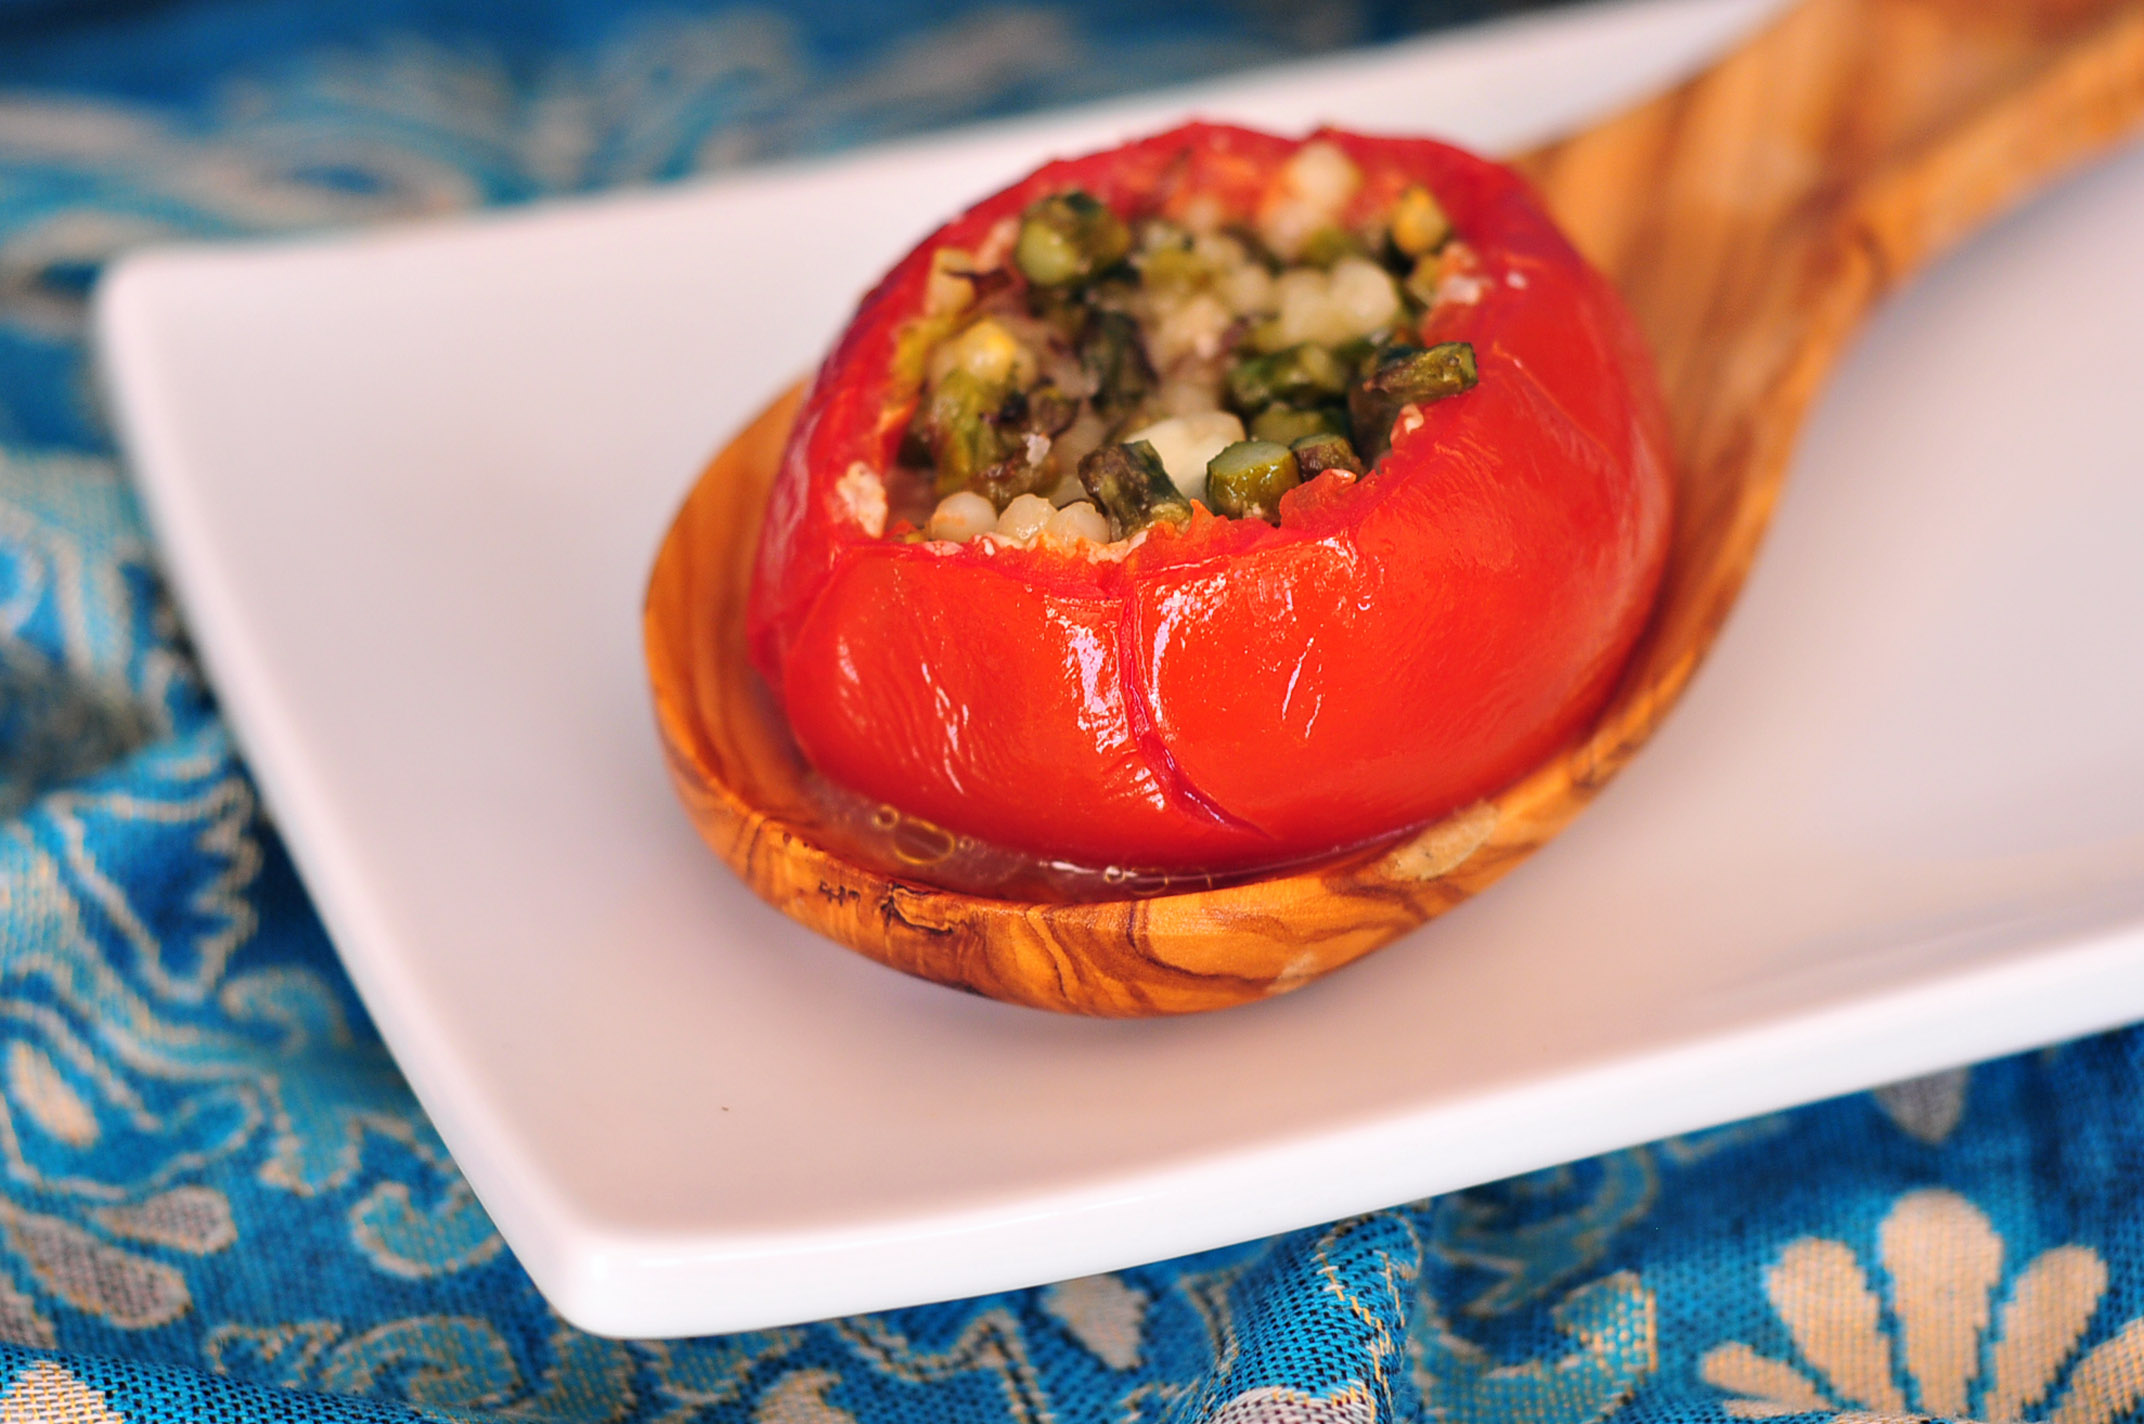
Roasted Tomatoes Stuffed with Goat Cheese and Asparagus
Ingredients:
5 Beefsteak Tomatoes
1 tbs Olive Oil, plus ¼ cup divided
¾ cup Fresh Asparagus, chopped (top half of the stalks only)
1 tbs Chopped Shisido Peppers, seeds removed
½ tsp Salt, plus 1 tsp divided
½ tsp black pepper
1/3 cup Goat Cheese
¼ Cup Israeli Cous Cous
Preheat oven to 425. In a skillet over medium-high heat, add 1 tbs olive oil. Once the oil is hot, add the asparagus, peppers, ½ tsp salt and pepper, cooking until the vegetables are slightly soft, about 5 minutes.
Remove from heat, allowing to cool a bit. Cut a thin slice off the top of every tomato, enough to expose the insides. Using a spoon, remove the flesh and seeds from the inside of each tomato, leaving the walls and bottomintact.
Add the goat cheese and Cous Cous to the asparagus pan, stir until combined. In a large bowl, add the remaining olive oil and salt, toss the tomatoes until well coated. Place the tomatoes in a baking dish, cut side up. Fill each tomato with the goat cheese and asparagus mixture.
Cover with aluminum foil and bake for 30 minutes.
Although not officially part of this recipe, I sprinkled each tomato with a bit of my Hepps salt before eating. I might have an addiction in the making.
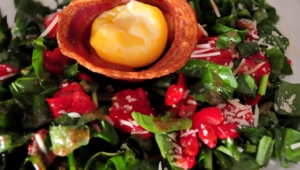
There is a beautiful restaurant in Chicago called the Blackbird. They have this amazing little salad that they serve in a crispy basket made out of potatoes. So brilliant. This got me thinking about other foods that would make great crispy edible baskets…bacon.Of course.
It really doesn’t matter what kind of salad you serve this on top of, because the bacon and egg yolk are clearly the star. I just used what I had on hand.
Ingredients:
2 cups of chopped fresh spinach
1/4 cup chopped roasted red peppers
2 tbs shredded fresh parmesan
2 tbs olive oil
1 tbs balasmic vinegar
1 tsp crouse ground mustard
1 tbs fresh lemon juice
salt and pepper to taste
2-4 strips of bacon (depending on thickness)
1 egg yolk (or two, if you’re like me and pop the first on when trying to separate it from the whites)
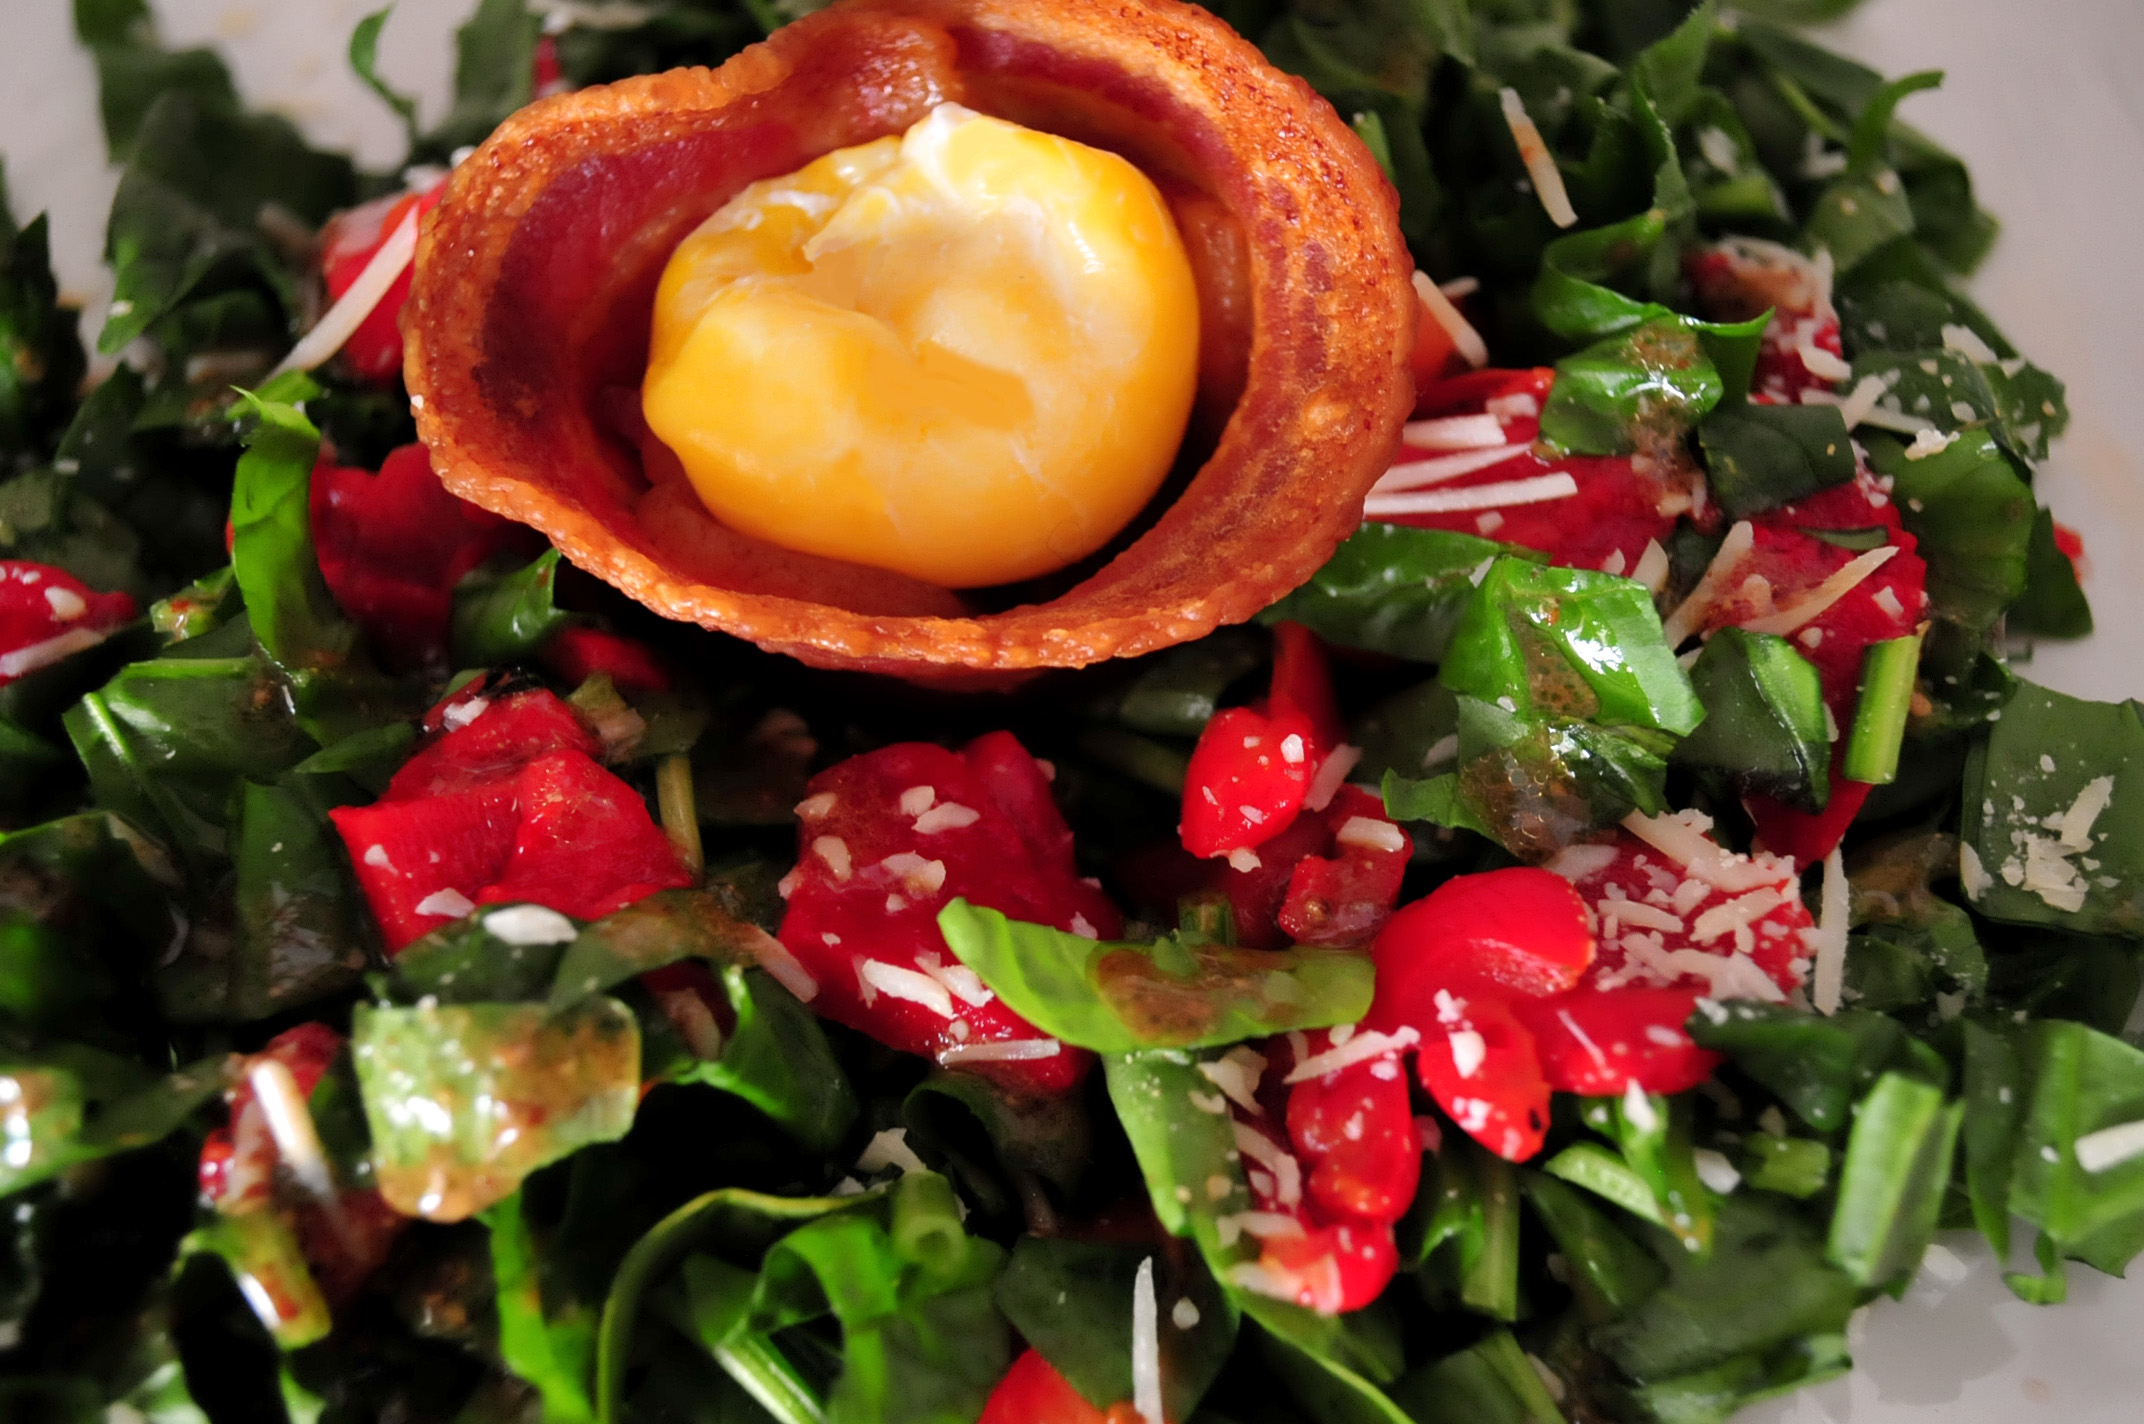
Start with the bacon. Preheat oven to 350. Take one or two strips and line the inside walls of a muffin pan. I had really thick bacon so that’s what I used, but I think the next time I make this, super thin bacon would work really well. Cut a second strip in half and use it to line the bottom of the pan, overlapping with the sides.
Bake until its stable enough to hold together on its own, about 15 minutes, but again, this will depend on your bacon thickness. Transfer to a baking dish and continue to cook until its crispy.
(At this point, you may want to add a pot of water to the stove to boil.)
While your bacon basket is crisping, assemble your salad veggies on a plate. Add the oil, vinegar, and mustard to a bowl and stir it up
Then add the lemon and stir some more.
Top the salad with the dressing, salt and pepper and toss a bit. Add the beautiful bacon basket to the top.
Separate your egg yolk from your white and flash poach. I’m not completely sure if “Flash Poach” is an actual term, but in Fits Land it means to poach for one minute in rapidly boiling water until the yolk is slightly encapsulated so that it doesn’t break apart upon entering afore mentioned crispy basket.
Add the egg yolk to the basket and stand back and revel in the beauty of a salad that you can’t wait to eat.
Gratin simply means “with a browned crust of bread crumbs and cheese” or, “Yummy, creamy and Melty.” OK, that last one is just mine, but in my opinion, pretty darn accurate. Sadly, too many people have never formed a relationship with Gratin outside of a dehydrated Betty Crocker box that my Grandmother called “Potatoes All Rotten”. Y’all are missing out. Homemade Gratins are fantastic and easy and will most likely always grace my holiday tables. This one is my favorite. I hope that if you are one of those who still bares the scars of adolescent forced prepackaged food trauma, that you will give this recipe a try. Really, its like therapy.
Ingredients:
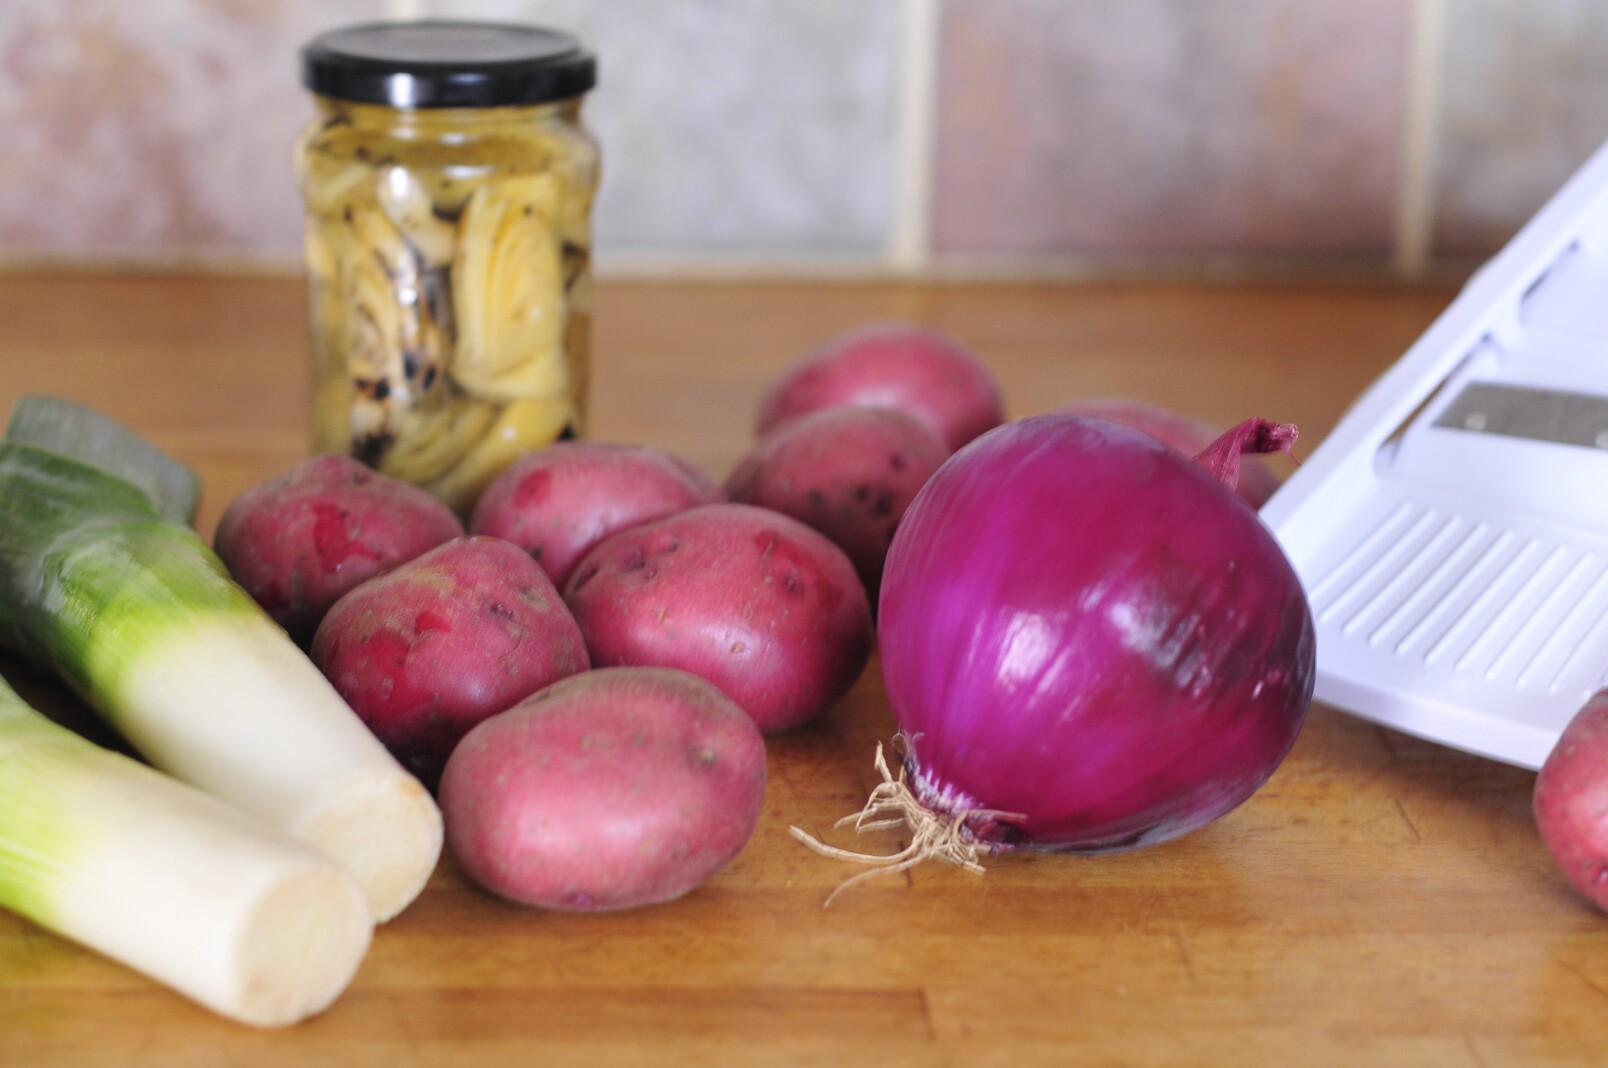
3 large leeks
1/2 a large red onion
8 medium sized red potatoes, peeled
1/4 stick of butter
3 cloves of garlic, minced
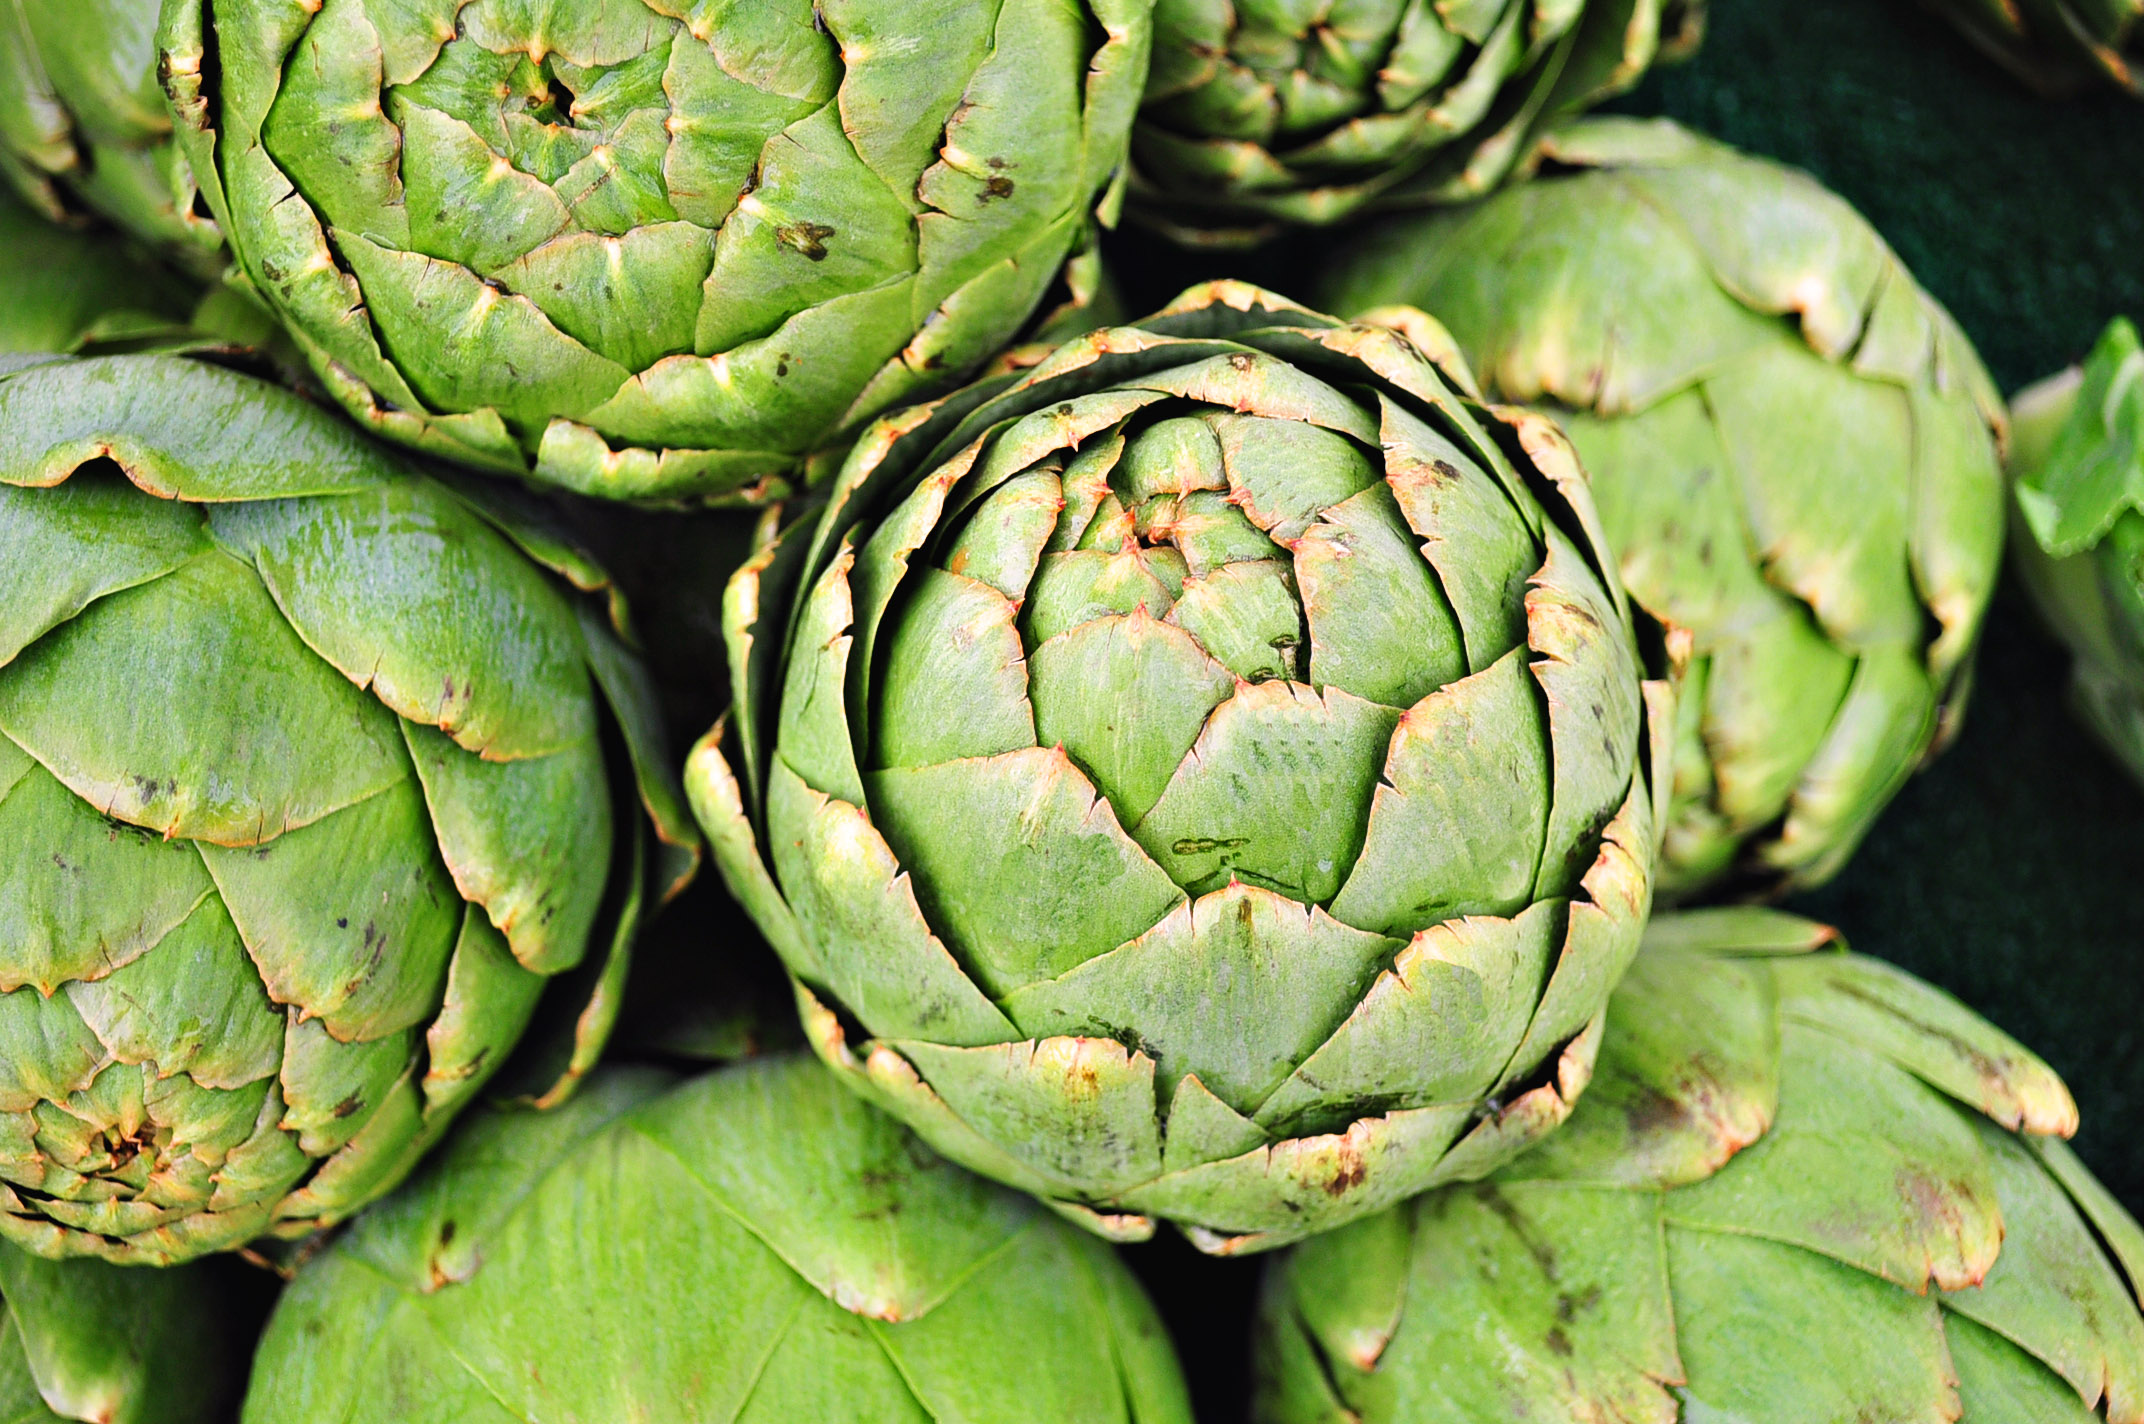
12 oz of artichoke hearts (2 small jars, drained)
1 cup heavy cream
1 cup grated Swiss or Gruyere plus 1/2 cup, divided
If I were writing this for one of those cooking contests I love to enter, I would tell you to boil the potatoes for 5 minutes in lightly salted water. BUT for you, I’ll give the shortcut. In a microwave safe bowl, add the potatoes and cover completely with water. Microwave for about 8 minutes or until you are able to get a fork through the potatoes, but they are still a little firm, check after 5 minutes in case your microwave is WAY more powerful than mine, it’s old. This will allow all the veggies to cook at the same rate while in the oven rather than over cooking some and under cooking others.
Then remove them and place on paper towels to soak up excess liquid, if not, you’ll have a soupy gratin
In a large sauce pan over medium high heat, heat the butter until melted. Add the garlic, onions, & leeks and cook until soft and slightly caramelized. Then add the cream, salt and pepper and reduce heat and bring to a gentle simmer. Add one cup of the cheese and the artichokes and cook until cheese is melted.
In a baking dish (I used 8 inch round) arrange the potatoes in tight concentric circles
Using a slotted spoon, top the potatoes with a layer of the veggie/cheese mixture.
Add another layer of potatoes and another layer of veggies. Spoon about 1/2 a cup of the remaining cheesy cream mixture that the veggies where just in, onto the gratin. Top with remaining 1/2 cup Swiss cheese and then Panko, salt and pepper.
Cover in foil and bake for 20 minutes. Uncover and bake for an additional 15-20 minutes or until the top lives up to its Gratin title and the center is no longer cold. You can also make this a day ahead of time, just increase the cooking time to 30 minutes covered and then 20 uncovered if it’s out-of-the-fridge-cold.