
Dessert

Strawberry Oatmeal Cookies & The State Of Food Writing

Fish Where There Are Fish: The State of Food Writing

Amanda Hesser wrote an article last week for FOOD52 that, in summation, stated that food writing is dead. This drew critiques, criticism, praise, and response articles all over the web. When posted by a mutual friend on Facebook, Babette Pepaj (of TechMUNCH and Bakespace) disagreed, "Fish where there are fish," she stated.

This isn’t the first time I’ve been on the fringes of an idustry in the midst of a tornado like change, all the "Old Schoolers" looking down with dismay as the ripples seems to be coming from a throng of new and unexperienced talent waiting to take a stab in a new and digital format. 

When I moved to Los Angeles in the late 90’s as a teenager, my husband, then boyfriend, joined a year later with a band that had just signed a major record deal. He worked his way around the scene, taking jobs at major recording studios, tour managing bands, production, A&R scouting, drum coaching, all while the music industry was still the giant beast of the 1980’s, the A&R guys holding the keys to the kingdom with that illusive Record Contract dangling from their fingers. It wasn’t long before the beast started to crumble and the curtain was pulled from the Great And Mighty Oz.

It all seemed to start with Napster. A brilliant idea, even if illegal and poorly thought out, that brought the Music Industry Beast to its knees. First, largely ignored. Then a few lawsuits, then a few more, then Metallica chimed in. No one, save for a few smart people over at Apple, stopped to hear the cry from the public of, "This Is What We Want." I asked my husbands boss (he was working for a Recording Company headed by a well known music producer) why they didn’t pick up where Napster left off, "Why don’t you sell the songs on your own website? let people download them?" The response was lots of legal jargon, with a dash of, "artist want to sell records, not singles."  iTunes disagreed and well know how that went.

Years later, sitting in a bar called The Short Stop, chatting with a small-band-trying-to-make-good in Silverlake, California I asked about that illusive record deal. "We don’t need one, " said the guitar player, "I can get my songs onto iTunes, I can book my own shows. I don’t need to give anyone 90% of my money." He was right. They went on to be the biggest band ever to come out of Silverlake, although I now only see them on Guitar Hero or the Grammys, they will always be the guys (and girl) I used to buy beers for and chat about literature & music with.

Fish where there are fish. Although the sad reality is that the music industry is a ghost town to us now, the mighty and wealthy clamoring to get jobs, moving out of town to find work or wallowing on unemployment, we have a few friends who are making money. For the most part, those are people who started businesses to help artist help themselves. À la carte services that help the musicians maintian control, while assisting them in doing things they don’t know how to do for themselves. PR people, managers, booking, pressing of collectable vinyl, merch, all overseen by the artist. Of course the days of multi-million dollar musicians are largely behind us, more people are making a decent, but modest living, fishing where there is fish.

How does this translate to food writing? We’ll see. Will the only people that make money those who assist blogger with tech help, running ads, photography tutorials and book deals? Amanda Hesser may be right about HER food writing world being dead, and those mighty giants have started to crumble, but what will rise up in its place? What will the dawning of the new food world look like? The truth is, people will always write about food. How and where the money will be made is a different issue.

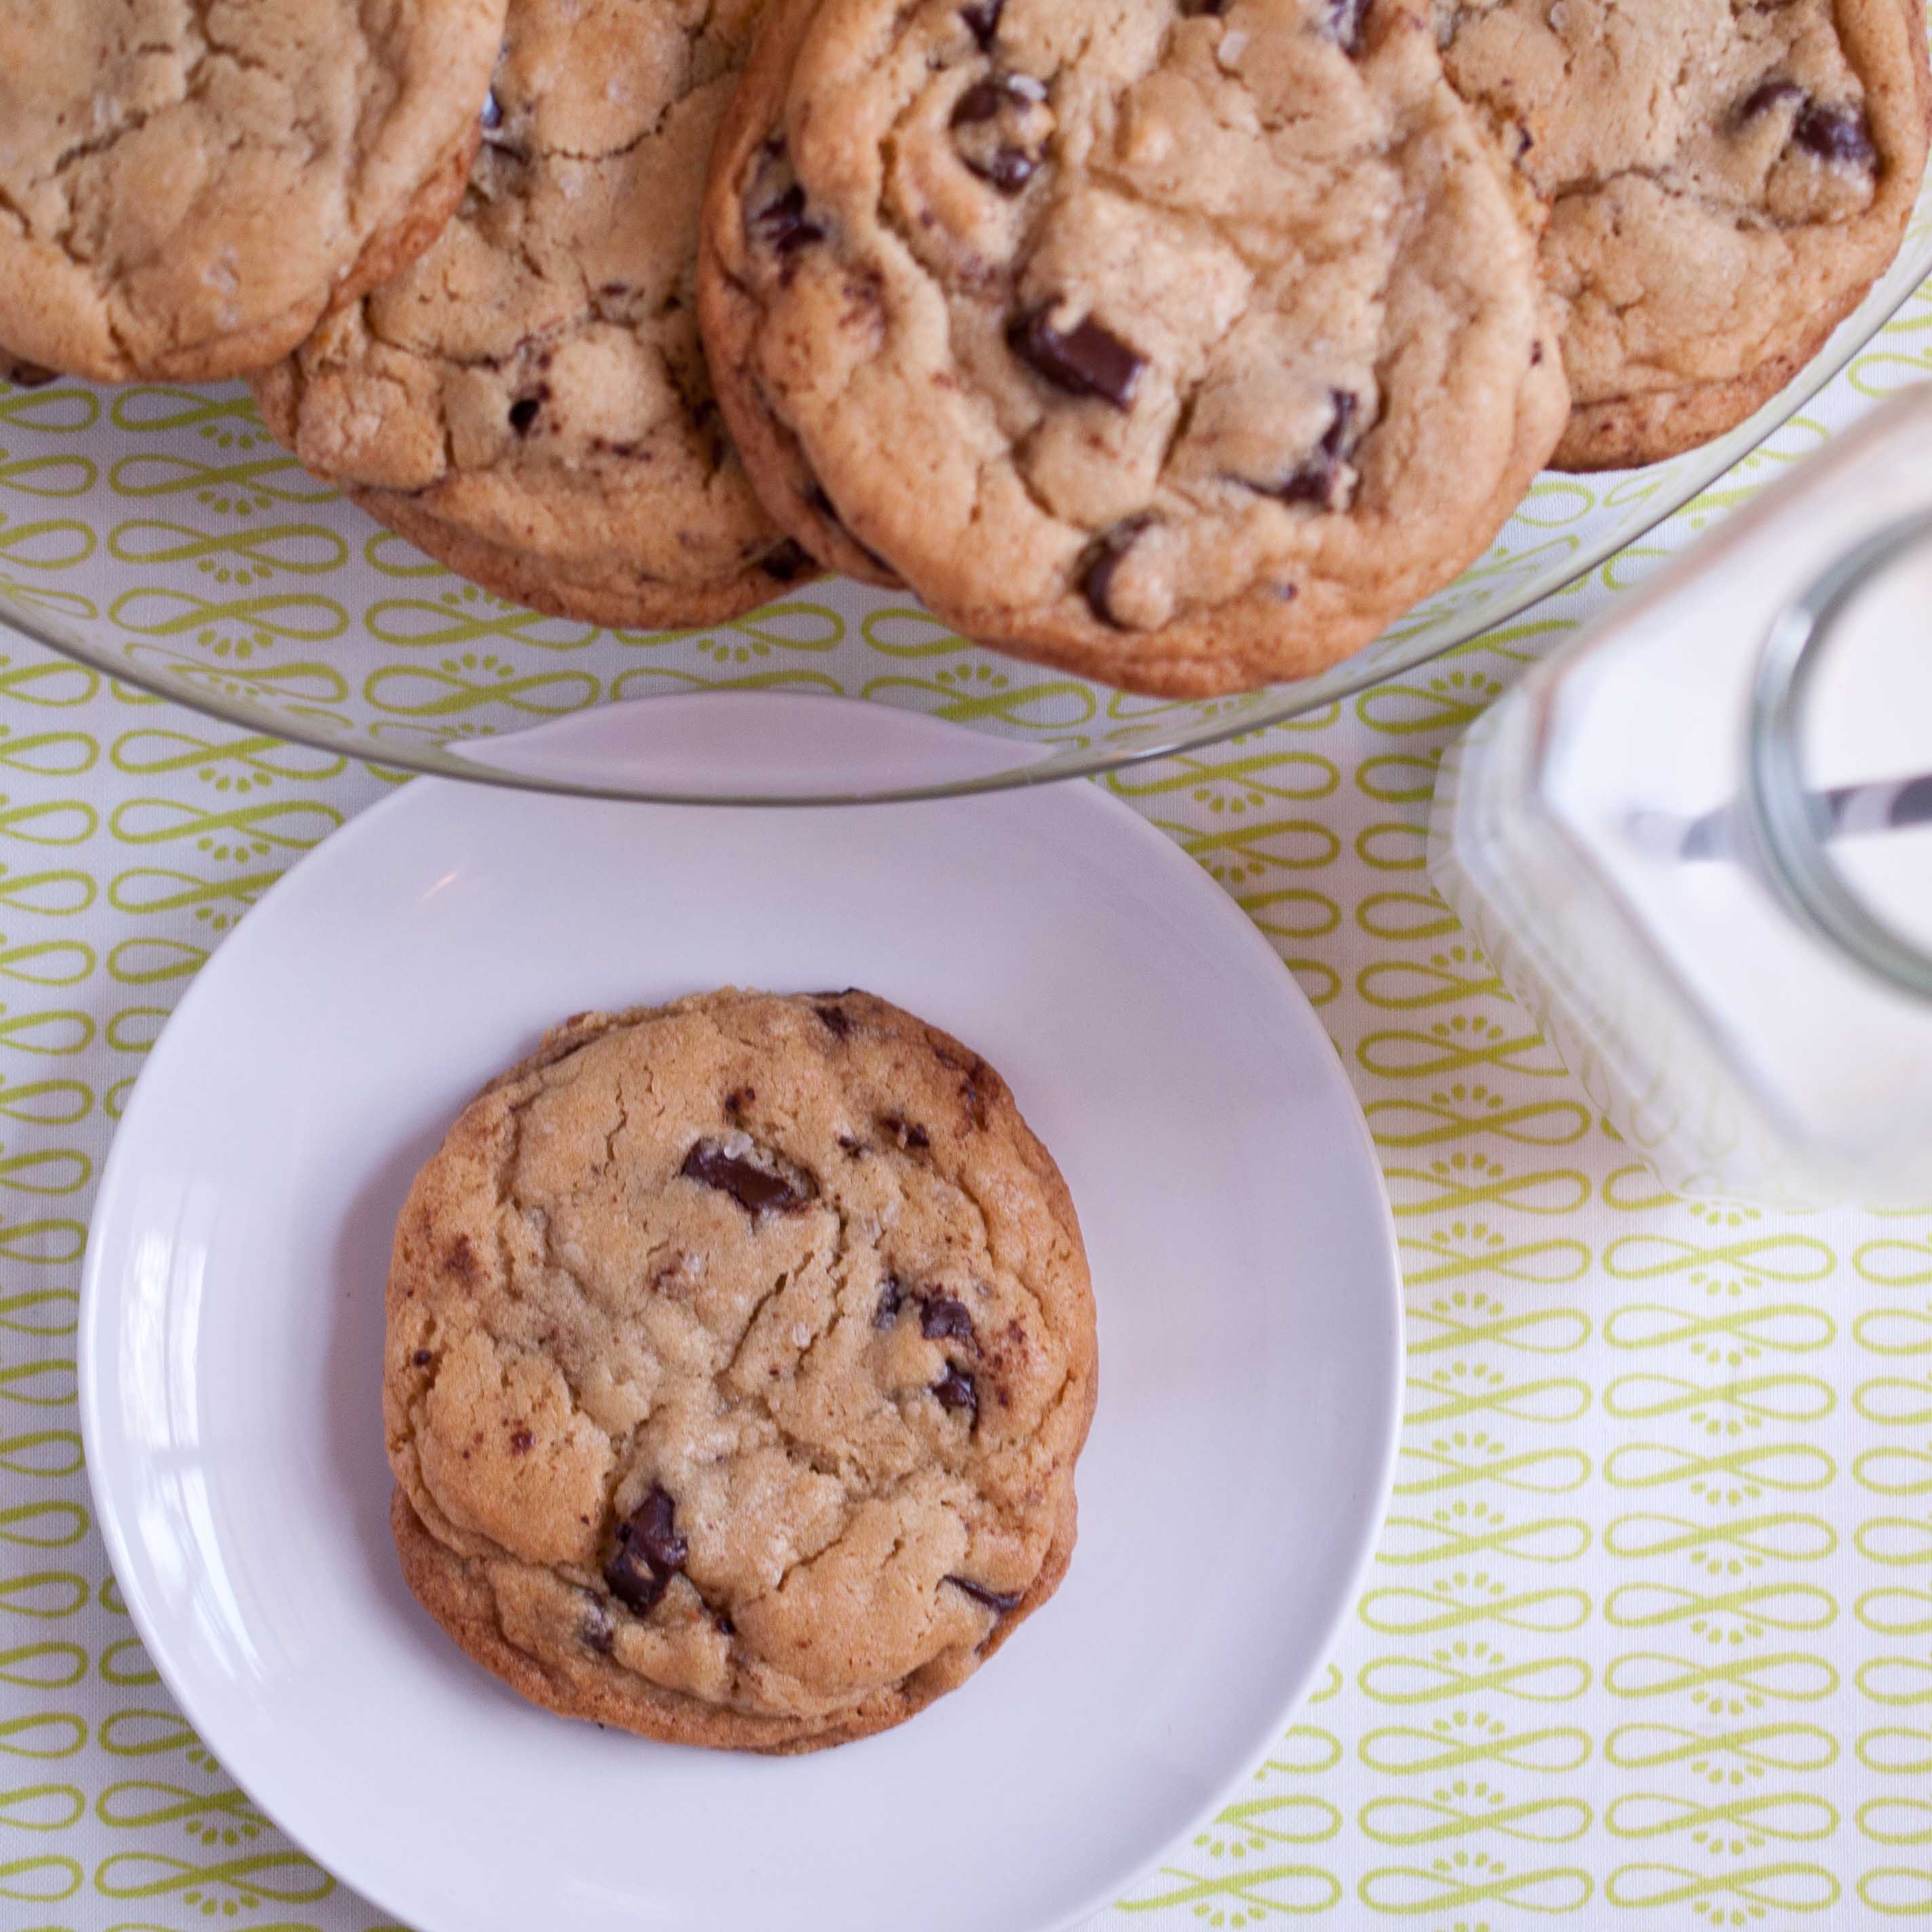
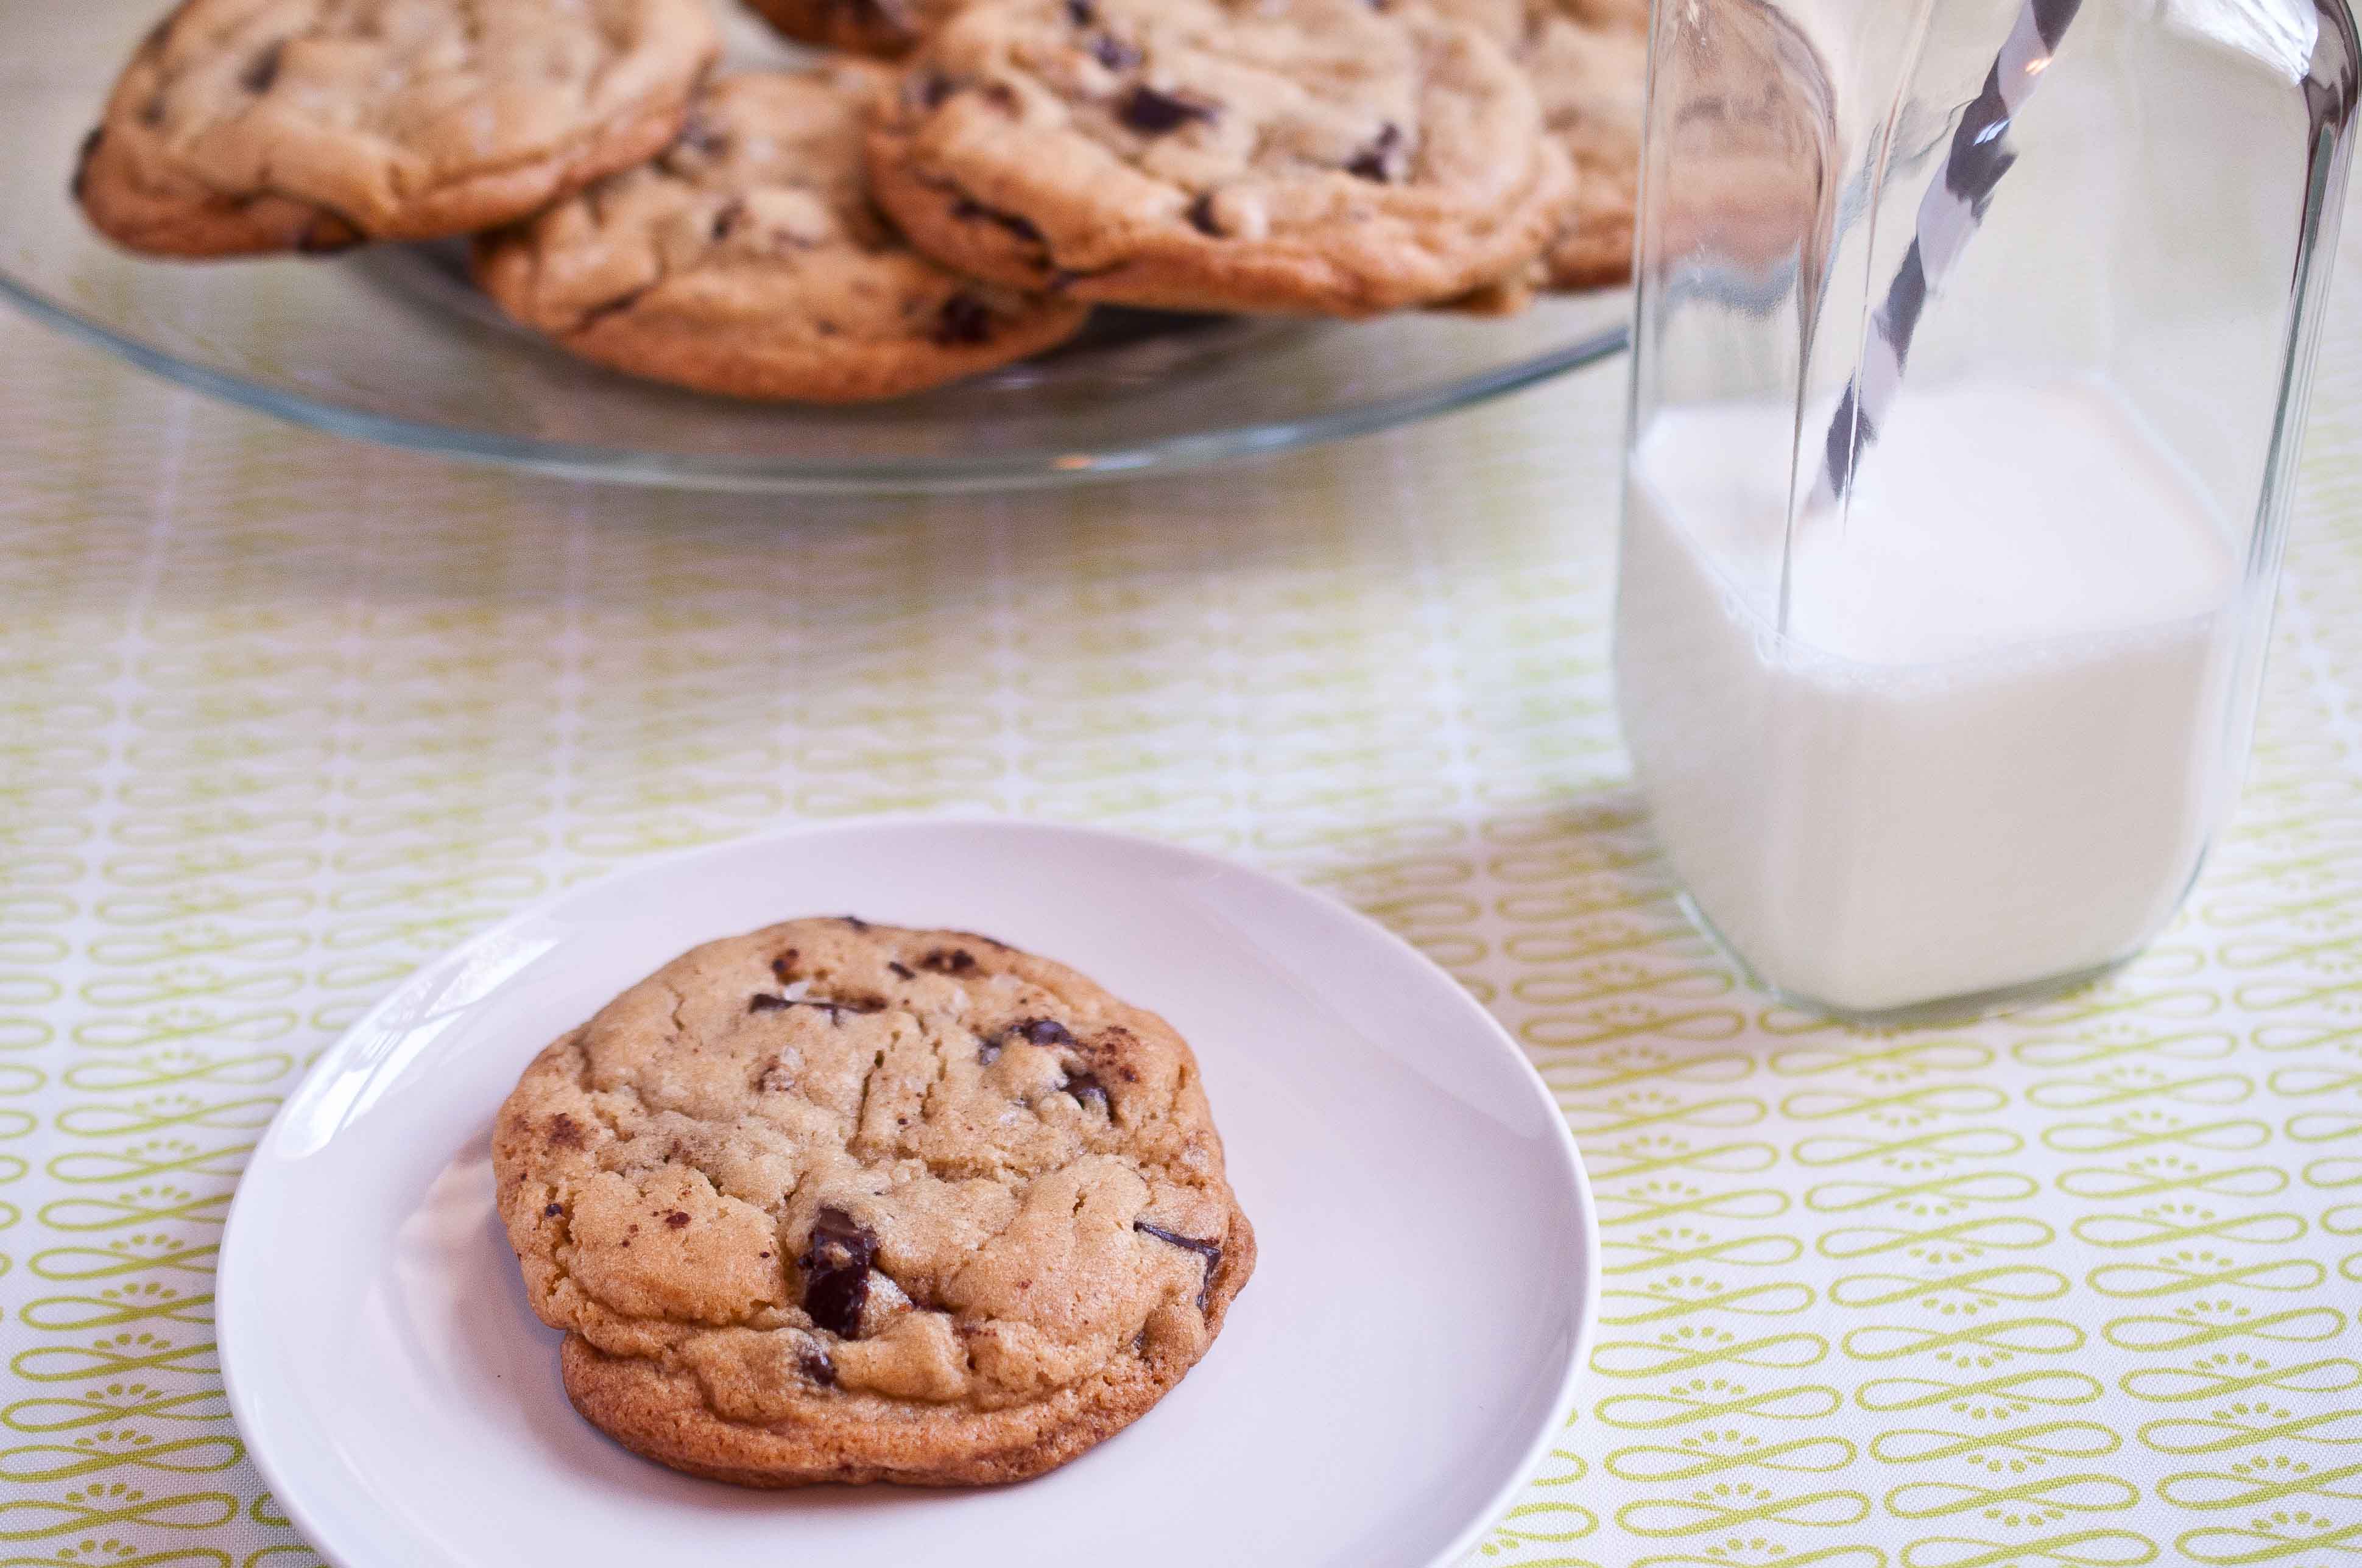
I’m not going to pretend to link this to cookies, so here they are:

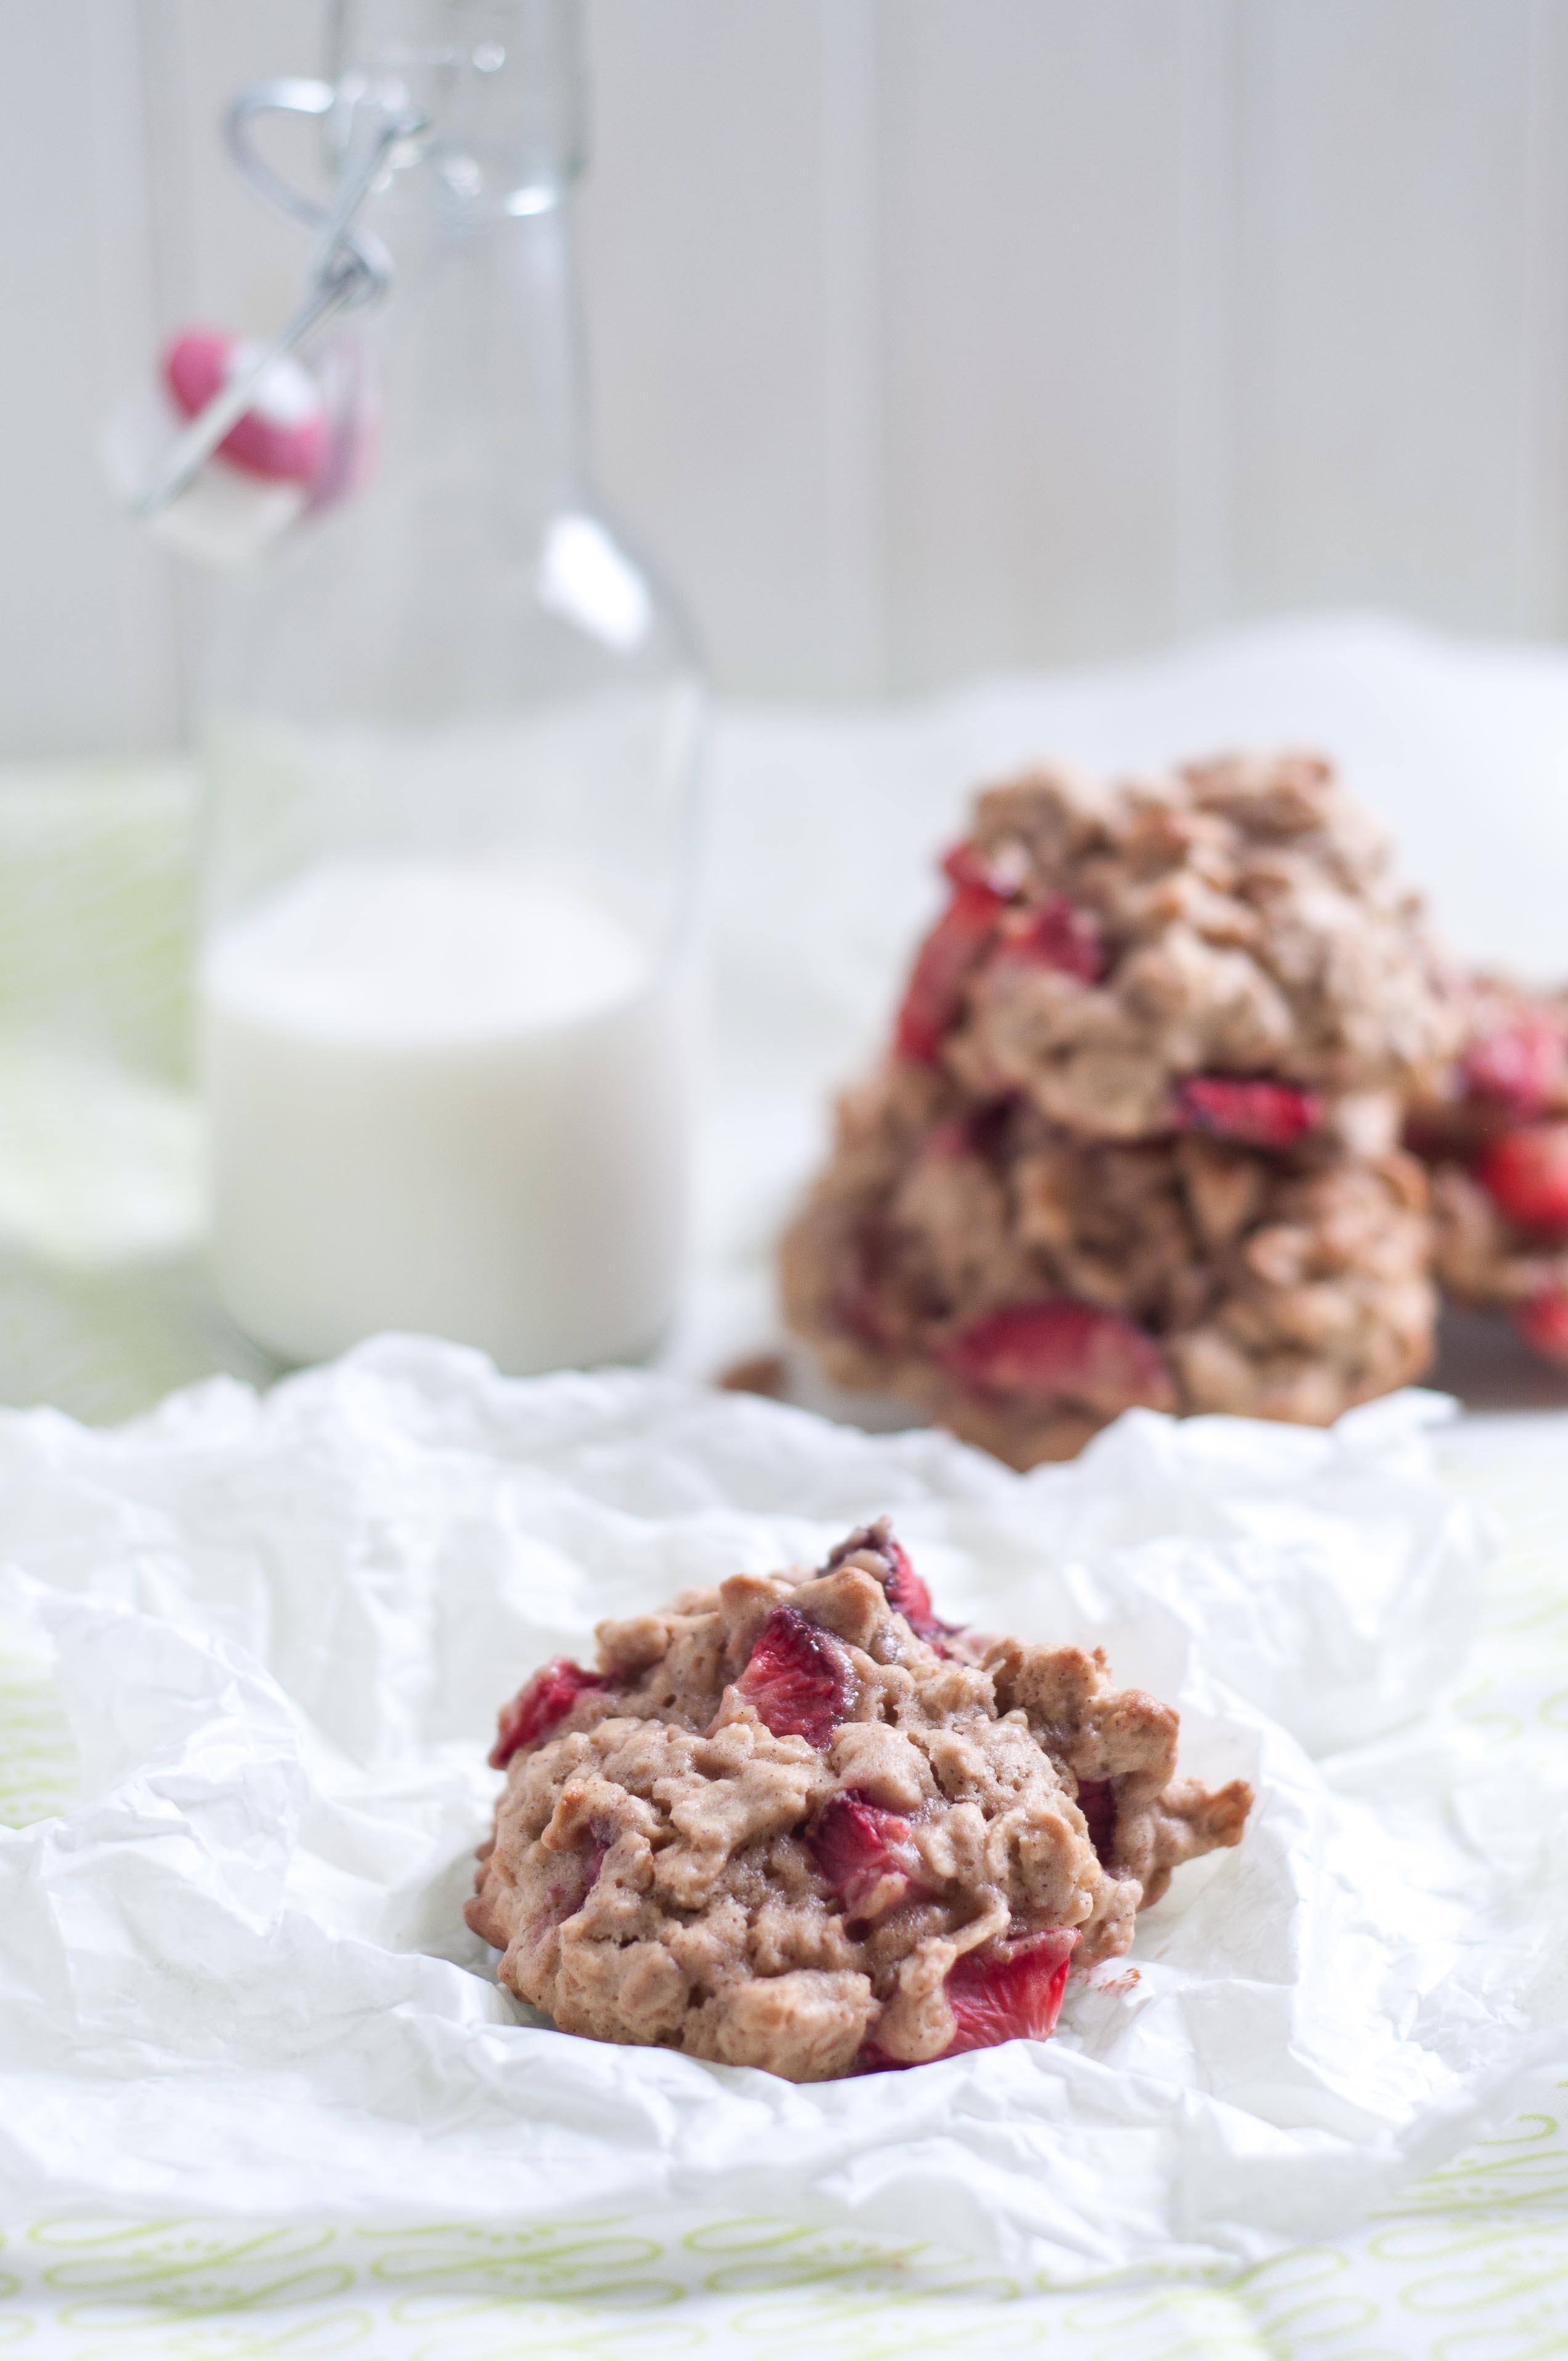
Strawberry Oatmeal Cookies For Two

(makes only 6, because the last thing I need is 48 cookies just sitting around my house)

1/4 cup butter

1/2 cup brown sugar

1 egg

1/2 tsp vanilla

3/4 cup oats

2/3 cup flour

1/2 tsp baking powder

1/4 tsp cinnamon

3/4 cup chopped strawberries (feel free to use those un-pretty ones on their last legs)

In the bowl of a stand mixer, cream the butter and the sugar. Add the egg, and beat on high. Scrape the bottom of the bowl and add the vanilla and beat again. Add the oats, flour, baking powder, cinnamon and beat until combined. Stir in the strawberries.

Cover a baking sheet with parchment paper (or spray with cooking spray) and drop large spoonfuls of dough on to the sheet, leaving space between each cookie.

Preheat the oven to 350.

Place the baking sheet in the refrigerator to chill for 20 minutes.

Bake at 350 for 12-15 minutes or until the cookies turn a light golden brown and are cooked through. Slide the parchment paper off the baking sheet onto the counter and allow the cookies to cool. 

Pin This Post


Follow me on twitter

Follow me on Pinterest

Like Domestic Fits on Facebook


Creme Brulee Bread Pudding

Creme Brulee and Bread pudding are two things that never occurred to me growing up. Creme Brulee was much to bourgeois for a kid who raised pigs in her back yard and bread pudding sounded like something you ate over Bingo hoping the Polident didn’t give out.  As  real life grown up, I realized that these are both really simple desserts that have a versatility and beautiful creaminess that have earned themselves a place in my kitchen. Bread pudding has been my way to use up the last bit of homemade pastries, cinnamon rolls and raisin bread that I hate to throw out but go stale so quickly. And Creme Brulee is so easy and lovely, lending itself very well to a multitude of flavors, it tends to be a Go-To for me when I’m a loss for what to serve. 

Mixed together, it’s fairly addictive, easy to make and has a homestyle fanciness that’s perfect for so many get togethers. 


Creme Brulee Bread Pudding

3 egg yolks

1/2 cup of sugar

1 1/4 cup of heavy cream

1 tsp vanilla

1/2 tsp slt

1/4 cup granulated sugar for brulee crust topping

3 cups bread, crust removed, cut into 1 inch cubes

Preheat oven to 300. 

In a bowl, combine the yolks and 1/2 cup of sugar and whisk until light and frothy. In a pot, combine the cream, salt and vanilla and heat until steamy but not boiling. Remove from heat and allow to cool for about 10 minutes. While you whisk the eggs, slowly, slowly add the cream, whisking until combined. If there are any lumps or “eggy bits” in your cream mixture (possibly because you didn’t let your cream cool down) strain the custard through a mesh strainer.

Assemble 6 ceramic ramekins, or individual oven safe serving bowls in a baking dish. Add the bread cubes to each dish, pressing down a little bit to compact. 

Pour into the custard over the bread until covered. 

Add hot water to the baking dish until about half filled, the water rising to about half way up the sides of the ramekins. 

Bake at 300 until the custard no longer wobbles when the rack is shaken, about 20-25 minutes (this is not a "tooth pick inserted in the middle should come out clean" situation).

Refridgerate until set, at least 2 hours. Just before serving, top the creme brulee with an even layer of granulated sugar. Pass the flame of a kitchen torch slowly and evenly over the sugar until it’s liquified and a light amber colored. Serve immediately. The sugar crust will start to break down after about an hour.

Pin This Post!

Follow me on twitter

Follow me on Pinterest

Like Domestic Fits on Facebook


Chocolate Beer Cheesecake With A Pretzel Crust

Choosing a beer for a recipe isn’t as arbitrary as it may appear. It also isn’t difficult, but it does require thought and planning. Substituting your favorite beer in a recipe isn’t always a good idea, and may result in an end product that is nowhere near the intentions of the recipes author.

Where do you start? The recipe or the beer?

A fair question, and it’s a toss up. Which ever way you begin, the recipe or the beer, make sure to be mindful of the flavors. Dark beers go well with "dark" recipes. If that beer you want to cook with is a stout, look for a recipe that calls for "dark" ingredients: chocolate, beef, bacon, etc. If the beer you love is a Pilsner, look for a recipe with "light" ingredients, lemon, chicken, fish, etc. There is some room to move around with this rule, but finding complimentary flavors is the key to success when cooking with beer.

Be careful with IPA’s. It’s incredibly difficult to cook with high hop beers due to the fact that the hops reduce to a very bitter product. If you are in love with an IPA, or another high hop beer, strong starches and sugar mellow hops a bit. Try a pumpkin muffin, or a sweet potato pie. Or look for recipes where the beer won’t be reduced, like marinades, beermixology cocktails, or dips.

If the recipe is where you want to start, make note of the flavors and try to find a beer that mimics those. If you want to bake a chocolate dessert, for example, look for a beer with chocolate notes, or coffee, or malt. Look at the list of flavor notes that the beer has and try to imagine those in your dish. Most large chain retailers of craft beer (like BevMo or Total Wine) have cards near the beers that explain the flavors in that beer and give you a fairly accurate flavor profile. If you are making a chicken soup, for instance, you might look for a beer with lemon or basil notes, not a beer with coffee and caramel notes.

Now that you have had your crash course in beer recipe development, please, go cook your beer loving hearts out. And don’t forget to share.

For this recipe, I choose Lagunitas Wilco Tango Foxtrot. I had four craft beers, mostly stouts, that were in the running for this recipe, and all would have made great choices. In the end, it came down to a gut feeling. Lagunitas WTF won out, although loosly categories as a "brown? ale" and more hops that I would generally recommend for this recipe, the flavors of chocolate and malt were an incredible fit for this recipe. This is a beer to keep an eye out for, it’s smooth and bold and fantastic. A fabulous drinking and cooking beer.

A chocolate stout makes an excellent choice for this recipe as well. I’ve made it with both and although I love the WTF, a chocolate stout seems to give more consistent results as far as a general beer style.

If you can’t get your grubby little hands on some WTF, a stout with notes of chocolate would make a great substitution.

Chocolate Beer Cheesecake With A Pretzel Crust

Chocolate Beer Cheesecake With A Pretzel Crust

Ingredients
  

For the Crust:

  • 4 standard sized graham crackers
  • 1 cup pretzel rods
  • 2 tbs brown sugar
  • 3 tbs melted butter unsalted

For the filling:

  • 7 oz dark chocolate 60%
  • 1 cup Chocolate Stout or Laguanitas WTF
  • 3, 8 oz packages of cream cheese softened
  • 1 1/4 cup sugar
  • 3 eggs
  • 2 tbs flour
  • 1/3 cup cocoa powder
  • 1/2 salt
  • 1 tbs espresso powder

For the Sour Cream Topping:

  • 1 cup sour cream
  • 1/4 cup powdered sugar
  • 2 tbs Lagunitas WTF

Instructions
 

  • Place one oven rack in the middle position, with one rack below. Preheat oven to 325.
  • In a food processor add the graham crackers, brown sugar and the pretzels and process until it's the consistency of crumbs. Turn the food processor on, remove the stopper from the lid and slowly add the butter and process until it resembles wet sand.
  • Coat the inside of a 9 inch spring form pan with butter. Pour the crust into the spring form pan. Using the bottom of a heavy, flat bottom glass, press the crust very well into the bottom of the pan until well compacted.
  • In a pot over medium high heat, add the beer and the chocolate, stir until melted and remove from heat. Allow to cool.
  • In the bowl of a stand mixer add the cream cheese and the sugar and mix until smooth. One at a time, add the eggs, scraping the bottom of the bowl between additions. Pour the cooled chocolate into the mixer and beat until well combined. Lift the head of the mixer and sprinkle the flour, cocoa powder, espresso powder and salt over the batter, stir on low speed until just combined.
  • Pour the batter into the pan over the crust.
  • Place the pan in the oven in the middle position. Place a baking dish on the rack below the cheesecake, fill with water.
  • If you have experience with a water bath, feel free to use that technique instead of the water pan below the cheesecake.
  • Bake the cheesecake until the center just slightly jiggles, but doesn't slosh, when you shake the rack, about 60-75 minutes. This isn't a situation where a tooth pick inserted in the middle should come out clean, you just need the center to set and it will continue to set as it cools. Remove from oven.
  • For the sour cream topping: add the ingredients to a bowl and whisk until well combined. Top the cheesecake with the sour cream topping and return to the oven for 8 minutes. Remove cheesecake and chill in the pan until ready to serve, at least 3 hours.

Join me: FacebookTwitter 

Chocolate Creme Brulee Tart & Dealing With Kitchen Failures

It’s hard to be a home cook. Blindly navigating a world that seems to come so effortlessly to others. Comparing our kitchen failures with the extravagant successes we see other producing. Left to wonder why we can’t make a perfect soufflé even when we follow the directions with surgical exactness. 

And those of us who reached adulthood with little more skill than it takes to boil water are thrown into the same world with those girls who learned how to make perfect ears of orecchiette pasta by the twirl of their Italian Grandmothers thumbs. Those of us whose childhood culinary training didn’t extend much past reheating and defrosting. 

So when you sit there, tears in your eyes as your hard work has turned to a delated over-salted mess, I want you to remember a few things:

1. No one will post their failures on their blogs. Or post pictures of them on their Facebook page. When you compare your failures with everyones success, its not fair to you. 

2. Everyone fails. Ask anyone who has ever cooked and they will tell you culinary tails of epic failures. Horrible, inedible food that we will never speak of in the light of day. Sometimes we figure out why we created such a disaster, sometimes it remains a mystery. 

3. Great cooks don’t give up. Sure, they fail. A lot. But they don’t give up. Focus more on your success than your failures and just keep going. 

4. Make a list of the recipes that you want to tackle. Make it as huge and as grandiose as you want, you have your entire life to master them. No matter how often you make them, and what the end result is, vow to learn something from each batch. 

5. Remove emotion.  In order to figure out how it is that you have ended up with such a kitchen failure on your hands, you have to be able to look at it objectivly. It is hard not get emotional when you feel like you failed, but that isn’t going to teach you anything. Did you really follow the steps exactly, or are you just saying that to make yourself feel better? Did you use the ingredients that were listed or did you use a substitute thinking it would be ok? If you can use each recipe as a learning tool, it wasn’t a waste. Sometimes it’s the recipes fault, sometimes it’s the ingredients fault, and yes, sometimes it is your fault. But it’s all part of the learning process. We have all tried to change a recipe thinking it would be fine, and sometimes it isn’t. Now you know. 

The first recipe on my list of recipes to master was Creme Brulee. It sounded so fancy and grown up, I wanted to learn to make something that was elegant and French and I was shocked at how easy it was. You do need a few kitchen tools, but the recipe and the steps are simple. And the result is incredible. For this recipe, I added a chocolate tart crust and a cocoa powder laced brulee topping. 

And a kitchen tip from one of my kitchen failures: Don’t touch the melted sugar before it’s cooled, it will give you the worst mother Eff-ing burn of your life. 

Dark Chocolate Crème Brulee Tart

Tart Crust:

1 cup of all-purpose flour

1/4 cup Unsweetened Cocoa Powder

1/4 cup sugar

1/2 tsp salt

10 tbs of unsalted butter, cut into small cubes

3-5 tbs ice cold water

Custard:

4 egg yolks

1/2 cup of sugar

1 3/4 cup of heavy cream

1 3oz bar of 70% Cacao Bittersweet Chocolate, broken into small pieces

1 tsp espresso powder

1/2 tsp salt

Brulee Sugar Topping:

1/4 cup granulated sugar

1 tsp Unsweetened Cocoa Powder

In a food processor, combine the 1/2 cup flour, sugars, cocoa powder and salt. Pulse to combine. Add the cubes of butter and process until combined, about 1-2 minutes. Add the remaining flour and process again. Your dough should resemble course meal. Move to a large bowl and add 3 tbs of the water, knead to combine (if you add the water to the dough with the food processor, your crust will turn into a cracker). Add the additional water if your dough is too dry.

Form into a disk, wrap completely with plastic wrap and chill for at least 1 hour (you can also make the crust a day ahead and allow to chill overnight).  

Heat your oven to 375.

Once your tart is all chilled, remove from the fridge and roll out to an even thickness, making sure your dough is just large enough to completely cover the interior surface of the tart pan.

Add to a 9-inch tart pan with a removable bottom (that has been sprayed with butter flavored cooking spray), pressing into shape and removing any excess dough. If the dough is too fragile to transfer in one sheet, it is ok to press it into shape in pieces in the pan.  Prick the bottom of the tart with a fork several times.

Place a sheet of parchment paper inside your tart and fill with pie weights. If you don’t have pie weights, you can use dried beans. 

Bake for 20 minutes, reduce the oven temp to 300.

In a bowl, combine the yolks and 1/2 cup of sugar and whisk until light and frothy. In a pot over medium heat, combine the cream, salt, espresso powder and chocolate, stir continuously until chocolate has melted, reducing heat to avoid boiling if necessary. Remove from heat and allow to cool to room temperate for about 15 minutes (if you add the cream/chocolate mixture to your egg mixture when it is hot, you will end up with scrambled eggs. Allow to cool to avoid that).

While whisking the egg mixture, slowly add the cream until completely combined. Strain with a fine mesh strainer.

Place tart pan on a baking sheet and set in the oven, then add the custard to tart shell. Bake at 300 degrees until the edges are set and the middle is still wobbly (it will continue to set as it cools) about 35-40 minutes. Refrigerate for at least 2 hours and keep cold until ready to serve.

In a small bowl, add ¼ cup of sugar and 1 tsp cocoa powder, stir to combine. Add to the top of the tart in an even layer. Run a culinary torch over the top of the sugar, slowly and evenly, until it has all melted and is mostly dark. Due to the addition of the cocoa powder, this brulee topping is more likely to catch fire. Make sure to extinguish any fires instantly. You can also brulee with plain granulated sugar, leaving out the cocoa powder, if it makes you nervous!  Serve immediately. Once the sugar has been bruleed, it will start to liquify after about an hour. 

Pin this Post!

Follow me on twitter

Follow me on Pinterest

Like Domestic Fits on Facebook


Saison Caramelized Pineapple Beer Shortcakes

Beer people are so often missunderstood and stereotyped.

Don’t mistake our inherent low maintenance for a lack of opinion. Don’t think that our love of indulgence translates to a lack of self-control. Just because we have a adoration for a high calorie beverage, doesn’t mean that we aren’t concerned with healthy living. And our love for a good ole fashion dive bar doesn’t tarnish out Mensa standings.

And as much as we would love for you to understand exactly why we drive 20 minutes out of our way on Friday afternoon to make sure that we have an exciting stash of Craft Beer for the weekend, we also want you to drink what you want. If you love wine, or whiskey, or even a famous Macro brew, that’s ok. More of the good stuff for us.

And if everyone else in the world stopped drinking Lost Abbey Carnevale Ale, or if it became so fervently distributed to every home in America that it was dubbed the new King of Beers and the Beer Snobs decided it was no longer desirable, it wouldn’t matter one bit. I would still drive to Northridge on Fridays to make sure I could find a bottle or two for the weekend, if need be.

I’m pretty sure that it was just a coincidence that the first time I was able to get my hands on this Special Release from Lost Abbey, was also the same day that I saw fresh pineapple at my local market for the first time this year, but it could also be fate. The flavors mixed so beautifully that I’ll have a hard time ever baking with pineapple again and not having the urge to reaching for this beer.

Saison Caramelized Pineapple Beer Shortcakes

For the Beer Shortcakes:

2 cups all purpose flour

2 tsp baking powder

1/4 tsp salt

1/2 cup sugar

1/2 cup butter

1 egg, beaten

1/2 cup Saison Beer(Los Abbey Carnevale recommended)

For the Saison Caramelized Pineapples:

4 cups fresh pineapple, chopped

1/2 cup brown sugar

1/2 cup white sugar

1 stick butter

1 cup Saison beer (Los Abbey Carnevale recommended)

For the Ale Chantilly Cream:

1 1/3 cup heavy cream

2/3 cup powdered sugar

2 tbs Saison Beer (Los Abbey Carnevale recommended)

(6-8 servings)

Preheat oven to 425

In a food processor, add the flour, baking powder, salt and 1/2 cup sugar, pulse to combine. Add the butter and process until it resembles coarse meal. Add the beaten egg and the beer and process until just barely combined, abut 30 seconds. Don’t over process or your shortcakes will be tough.

The shortcakes will be very moist, and have more of a "drop biscuit" style than those that you roll out.

Place a sheet of parchment paper over a baking sheet. Using your hands, or two spoons, place about 1/4 cup of the dough onto the parchment paper and form into a loose ball. Dough should make between 6 and 8 shortcakes, depending on the size you want.

Bake for 12-15 minutes of until the shortcakes have turned a light golden brown and a tooth pick in the center comes out clean. Slide the parchment paper off the baking sheet and onto a flat surface and allow to cool.

Add all of the Caramelized Pineapple ingredients to a pan over high heat. Stir frequently (or continuously) until the liquid has reduced so much that the pan seems to only contain pineapples and frothy bubbles, about 10-12 minutes. Allow to cool to room temperature.

Just prior to serving, make the whiped cream.

Add all of the ingredients to a stand mixer and beat on high until soft peaks form, about 3 minutes.

To assemble, just split the shortcakes in half down the center, add the whipped cream, then the pineapples. Serve with a cold glass of Lost Abbey Carnevale.

Chocolate Porter Beer Tart With Porter Whipped Cream

The creaminess of chocolate pairs so well with a well crafted porter. For this tart I used Firestone Walker Reserve Porter, it has the perfect balance of flavors for this recipe with notes of chocolate, coffee, caramel and a touch of a citrus taste. You also want to use a really well made chocolate, because, like beer, craft chocolate has well developed flavors that can’t be matched by the "Macro" chocolatiers. I used Sharffen Berger 62% Semi Sweet chocolate for the perfect balance of richness and sweetness.

I’m a sucker for a well made dark beer, and this recipe pairs well with the cold bottle of Porter.

I also made a porter whipped cream, with a rich smooth sweetness and notes of dark beer, you’ll want to eat this right out of the mixing bowl.

 Chocolate Porter Beer Tart

For the crust:

1 cup crushed chocolate wafer cookies or chocolate graham crackers (NOT chocolate covered)

1 tbs brown sugar

3 tbs melted butter

For the filling:

2 (16 oz) cups semi sweet chocolate (Like Scharffen Berger 62%), broken into chunks

1 1/2 (12 tbs) sticks of butter

1/2 cup heavy cream

1 cup porter beer (I used Firestone Walkers Reserve Porter)

1/4 cup powdered sugar (plus additional 1/4 cup if desired)

For the porter whipped cream:

1 cup heavy cream

2/3 cup powdered sugar

2 tbs porter beer (I used Firestone Walkers Reserve Porter)

Preheat oven to 350.

In a food processor, add the chocolate wafer cookies and brown sugar. Pulse until nothing remains but fine crumbs. While the food processor is still running, remove the spout stopper and slowly add the melted butter. Process until it resembles wet sand.

Press very firmly into the bottom of a 9 inch spring form pan (or tart pan with removable bottom) that has been sprayed with butter flavored cooking spray.

Bake at 350 for 12 minutes or until tart crust starts to look dry and you can smell it cooking. Remove from oven and allow to cool.

In a double boiler add the chocolate and the butter, stir over medium-high heat until chocolate has melted. If you don’t have a double boiler, you can place a metal bowl over a pot that has a few inches of water at the bottom. Make sure that the bottom of the metal bowl does not touch the water in the pot.

Add the beer and stir until combined. Remove from heat and allow to cool for 5 minutes. Add the cream and stir to combine. Sprinkle 1/4 cup of powdered sugar over the chocolate and whisk until combined. I like my desserts on the bitter side, as I suspect a lot of you beer lovers do as well. The sweetness level of this dessert will depend on the type of beer you use as well as the level of sweetness you enjoy. Taste the chocolate and decide weather or not you want it sweeter and add additional sugar accordingly.

Pour chocolate in the spring form pan over the curst. Chill until set, about 4 hours.

In the bowl of a stand mixer, add the cream, 2/3 cup powdered sugar and 2 tbs of porter. Whip on high until soft peaks form, about 3 minutes.

Once the tart has set, remove the sides of the spring for pan (or tart pan) and serve topped with whipped cream.

Salted Peanut Butter Caramel Bars with Peanut Butter Chocolate Chip Shortbread Crust

Peanut butter was named one of the Top 5 Foods That Should Have A Place Your Diet by CNN.

Whoever wrote that probably wouldn’t have wanted you to mix it with butter and sugar, but regardless of the increased amount of calories and fat, you can still feel good about giving yourself a healthy dose of antioxidants. And eating a Super Food that has protein and fiber,  lowers cholesterol and your risk of heat disease.

Because, like I told you at the beginning of the year, I’m trying to seek a balance in my life. If I am going to have a fabulously delicious dessert, I also want it to have some good stuff in it too.

I have also decided to cut food dyes out of my diet all together by the end of the year. Because, unlike peanut butter, they have zero benefits, lots of risks and are known carcinogens. I’ll write more about that later once I’ve figured out how to conconct an all natural red food dye.

I don’t want to be perfect, I just want to find a balance in my life. Peanut butter caramel bars are a great balance, giving you a dose of healthy goodness with an incredible dessert. But don’t misunderstand me, this is in no way a diet food. They are high in calories and a treat that you should enjoy every once in a while, but at least you have the peace of mind that there are also health benefits.

Peanut Butter Chocolate Chip Shortbread:

For the shortbread crust:

¾ cup Brown Sugar

1 sticks of Butter

½ cup Creamy Peanut Butter

1 tsp vanilla

1 tsp Salt

2 cups Flour

1 tsp Baking Powder

1 ½ cups Dark Chocolate Chips

Peanut Butter Caramel Sauce:

1/2 cup heavy cream

¼ cup Creamy Peanut Butter

1/2 cup sugar

1/3 cup light corn syrup

1 stick of butter

½ tsp vanilla

1/2 tsp course sea salt

Line the bottom of an 11 x 7 inch baking dish with parchment paper, allowing the paper to go up and over the edges of the pan.

In the bowl of a stand mixer, cream the butter and sugar. Add the peanut butter and vanilla and beat on high until well combined. In a separate bowl combine flour, salt, and baking powder, stir to combine. Add the flour mixture to the stand mixer and beat on medium speed until mixed well with the butter mixture, scraping the bottom of the bowl occasionally. Gently fold in the chocolate chips.

Press the shortbread into the bottom of the baking dish in one even layer. Chill in the refrigerator for 30 minutes. Preheat the oven to 350. Bake for 25 minutes or until the edges have turned a golden brown and have started to look dry. Allow to chill in the fridge for 10-15 minutes.

In a pot over medium high heat, add the peanut butter and the cream. Stir continuously until the peanut butter has melted and is well combined with the cream. Remove from heat, add the vanilla and set aside.

In a separate pot over medium high heat, combine the sugar, & corn syrup. Stir until the sugar has dissolved. Allow to boil, without stirring, until the mixture reaches 230 degrees, about 5 minutes. While the caramel is cooking, do not stir, but swirl the pan every 30 seconds to redistribute the caramel sauce evenly. Once 230 degrees is reached, add the butter, stirring to allow it to distribute and melt, then remove from heat. Stir in the peanut butter cream, adding slowly as it will bubble up furiously.

Pour the caramel over the shortbread and refrigerate for 4 hours, or until set. Sprinkle the top with the sea salt. Remove from pan using the parchment paper and cut into squares. 

Pin this post!


Follow me on twitter

Follow me on Pinterest

Like Domestic Fits on Facebook


Irish Beer Brownies With Mint Sour Cream Frosting

This week will be full of recipes for Guinness. Although I will always favor local craft beer, I do harbor a soft spot for Ireland and their World Famous Brewery. Just out of college I scraped together enough money to put myself on a flight from LAX to Dublin.  I landed in Ireland on a drizzly morning, jet lagged and confused. I had no idea where to go, or how to get there. Before I really knew what was happening, I was being dragged though the streets of Dublin by a charming Irishman, clad in a newsboy cap and green wool sweater.  Through his thick accent I was able to discern that he was taking me to a youth hostel at the foot of the Guinness brewery.  Once we arrived at our destination, he said goodbye with a smile and a cheerful wave and he was on his way, leaving me to realized that this kind stranger had walked at least a mile in the wrong direction just to make sure I found a bed for the evening.

Although most of you will be breaking out the famous Irish Stout this weekend, I will be sticking with beer brewed a little closer to home. Rogue Brewery makes several beers that would be perfect for this recipe, including the Chocolate Stout, the Double Chocolate Stout, or even the Hazelnut Brown Nectar, I choose to go with the Mocha Porter although the idea of the Irish Lager almost drew me in.

Whatever you decide to consume on St. Patrick’s day, just remember:

Good beer does not need green food dye.

Drink well.

Irish Beer Brownies With Mint Sour Cream Frosting

For the brownies:

12 ounces dark beer, such as Rouge Mocha Porter

1 stick unsalted butter

10 ounces dark chocolate

3 whole eggs plus 2 additional egg whites

1 1/2 cups sugar

1 tsp vanilla

1 cup flour

For the Mint Sour Cream Frosting:

2 sticks of butter, softened

1/2 cup sour cream

2 1/2 cups powdered sugar

1/2 tsp mint extract

In a sauce pan over medium high heat, cook the beer until reduced to about 3/4 of a cup, about 10 minutes.

Add the butter, stir until melted. Remove from heat and add the chocolate, stirring until melted, remove from heat and allow to cool slightly.

In the bowl of a stand mixer, add the eggs, additional whites and sugar. Beat on high until very light and frothy, about 5 minutes. Add the vanilla and mix until combined. While the mixer is still on high, slowly add the chocolate mixture in a slow stream. Once about half the chocolate mixture has been added to the egg mixture, dump the remaining chocolate into the stand mixer allowing to mix until combined. Add the flour mixture and stir on low until just combined, don’t over mix once the flour has been added or your brownies will be tough.

Generously spray a 9×12 inch glass baking dish with butter flavored cooking spray. Pour the batter into the pan. Bake at 350 for 45-55 minutes or until the surface of the brownies begin to look dry and cracked and a tester inserted into center comes out with a few moist crumbs attached.

Make the frosting:

Softened butter is important to this process. If you use cold butter your frosting will have the consistency of ground beef, but melted butter will give you frosting that is too soft.

Add the softened butter and the sour cream to a stand mixer and beat until well combined. Add the sugar and beat on low until the sugar is mostly mixed in. Add the mint and beat on high until frosting is light and fluff.

Allow the brownies to cool before frosting.


Lemon Pilsner Cake

 If you have ever had the opportunity to talk to a brewmaster, you have seen it. You’ve seen that look that lets you know that there is an art and a respect for what they do that goes far past what most Americans experience at their day jobs. The look that tells you that the paycheck isn’t the reason he does the job. The flavors, the journey, the solving of the problems that yield to an end result of a drinkable, shareable masterpiece. You’ve seen that look.

It’s because of that look that I try to create recipes that respect the years of love and hard work that go into the process of making Craft Beer. I had the idea of making a lemon cake with pilsner, but the issue is always the hops. Hops are a hard ingredient to cook and bake with, given that they often reduce to a very bitter product. Scrimshaw Pilsner, while still a pilsner, has a low, and well balanced hop taste. It is also from one of my favorite breweries, North Coast, that produces an incredible variety of craft beer. And you can bet that if you are ever lucky enough to take a tour of the brewery, you will see that look I’m talking about, all over the place.

Lemon Pilsner Cake

1 1/2 cups cake flour

1 tsp baking powder

1/2 tsp baking soda

1/3 tsp salt

2 tbs lemon zest

1 cup (2 sticks) unsalted butter

1 1/4 cup sugar

3 eggs

1/4 cup fresh squeezed lemon juice

1/2 cup Pilsner

Icing:

4 oz cream cheese, softened (cold cream cheese will result in lumpy icing)

1 cup powdered sugar

1/4 cup heavy cream

1/4 cup Pilsner

1/2 tsp vanilla

Direction:

Preheat oven to 350.

Spray a large loaf pan with butter flavored cooking spray.

In a large bowl, combine the flour, baking powder, baking soda, salt and lemon zest until well mixed.

In the bowl of  stand mixer, cream the butter and sugar until well combined. Add the eggs, one at a time, beating well and scraping the bowl between additions. Add the lemon juice and mix until well combined. Turn the mixer on low and add the flour a bit at a time until just barely combined, do not over mix.

Remove the bowl from the stand mixer and add the pilsner, stirring with a wooden spoon until just combined. Pour into prepared loaf pan. Bake at 350 for 45-55 minutes or until the top turns a light golden brown and a tooth pick inserted in the center comes out clean. Allow to cool before serving.

In the bowl of a stand mixer, add the cream cheese and the powdered sugar, beating until well combined. Add the remaining ingredients and whip until smooth.

Top the cake with the icing, chill prior to serving.

 Cooking and baking with craft beer. 

Girl Scout Samoas Waffles Recipe With Coconut Caramel Sauce

I had a couple of crack dealers show up at my door the other day. Looking all smug in their green little uniforms, pretending to be nothing more than just innocent little children. But they knew what they were doing, trying to force me to buy their crack. Or Girl Scout cookies. Whatever. I don’t need this guy with his cartoon gun to help me choose my favorite cookie, that’s easy: Samoas.

And you need to get creative when you have 17 boxes of cookies because you remember what it was like to try and sell stuff as a kid, and people shut their door in your face or calculated the cost per ounce and then told you it wasn’t a "good buy" as if that was the point, then once you grow up, you are a total sucker for kids selling crack. I mean cookies.

I’ll tell you my brilliant selling strategy I used when I was a kid.

Picture this:

Late 1980’s, tiny, blond, innocent looking elementary school kid with huge blue eyes outside the grocery store. My target was hip looking men in their early 20’s.

Me: "Sir, will you help us raise money for Rick Dees?"

Him: "What happened to Rick Dees?"

Me: "He’s in the hospital, he fell off the Top 40."

Worked every time. They laughed and then bought cookies. Humor and crack cookies are a dangerous combination.

Another dangerous combo? Waffles and crack cookies.

Girl Scout Samoas Waffles With Coconut Caramel Sauce

6 Girl Scout Samoas Cookies

2 cups flour

2 tsp baking powder

1/2 tsp salt

1 tbs sugar

3 eggs, divided into whites and yolks

1 3/4 cup milk

1 tbs vegetable oil

1 tsp vanilla extract

Butter flavored cooking spray

Coconut Caramel Sauce Recipe

Preheat waffle iron.

Roughly chop the cookies and put them in a food processor, processing until mostly crumbs are left. A few larger pieces are fine.

You’ll need three bowls.

On one bowl, put the cookies crumbs, flour, baking powder, salt and sugar. Stir until combined.

in the second bowl, put the egg yolks, milk, vanilla and oil, whisk until combined.

In the third bowl, add the egg whites and beat with a hand mixer until frothy and very light, about 4 minutes.

Make a well in the dry ingredients and add the milk mixture, stirring until just combined. Don’t over mix.

Gently fold in the egg whites.

Spray the inside of the waffle iron with butter flavored spray. Cook the waffles according to waffle iron specifications. 

Top with caramel sauce, and additional Samoas crumbs if you wanna get craaaazy. 

Follow me on twitter

Follow me on Pinterest

Like Domestic Fits on Facebook

Pin this post!

Coconut Caramel Sauce

The phrase, "If I had a gun to my head, and was forced to choose between [A. non-imporant thing] and [B. non-important thing]…" is hilarious.

Maybe it’s because I’m all hopped up on caffeine and DayQuil, but the thought of some masked man running around with a fire arm demanding that someone choose between Ryan Gosling and Ryan Reynolds fills me with the giggles.

The image I have is of a cartoon man, a hybrid of The Hamburgler and a bank robber from Ducktales running rampant through a mall, guns flying: "EDWARD OR JACOB!?!" It’s like a real life game of Would You Rather? with disastrous consequences. 

+

So lets say that I someday meet this striped shirt, leather newsboy cap wearing, eye-masked character and he forces, yes, FORCES me to choose between chocolate and caramel…my choice would be caramel. * Sigh * I’m so sorry chocolate, but I had a GUN to my HEAD. 

Coconut Caramel Sauce

1 cup sugar

1/4 cup light corn syrup 

2 tbs butter

1/2 cup coconut milk

In a pot over high heat, melt the sugar and corn syrup. Stir until melted, then stop stirring, allowing to boil untouched. You will start to see the edges of the sauce turn a dark amber, while the center is still clear. Swirl the pan, without stirring, to redistribute the sugar so the edges don’t cook faster than the middle. Once the entire pot is an amber color and you can smell the caramel flavors, remove the pan from the heat (about 8-10 minutes). Stir in the butter, the sauce will bubble up furiously. Add the coconut milk and stir until well combined. Allow to cool to room temperature before serving. Store in the fridge in an air tight container.

Printable: Coconut Caramel Sauce 

Follow me on twitter

Follow me on Pinterest

Take a second to Like Domestic Fits on Facebook to receive updates about new posts in your feed!

Bruleed Blood Orange and Ricotta Mini Cheesecakes

That miniature cheesecake pan I have has begun to taunt me from my kitchen.

Reminding me that my previous reasons for not making cheesecake, namely my drive to avoid having an entire huge cheesecake in my fridge, is now void.

Small, adorable cheesecakes and the ability to "test" a recipe without having to deal with an entire HUGE cheesecake.

And I had an unsightly amount of homemade ricotta after deciding that I should not just make one batch, but I really needed to make two because it was so much better than anything I have ever bought in the grocery store.

All willpower was lost once I remembered the blood oranges I had.

And then I began to wonder how that delicious sour cream topping, that you are sometimes lucky enough to find on top of a cheesecake, would taste if you made it with ricotta.

Then I decided that it needed the crunch of a bruleed sugar crust on top.

I really just don’t know when to stop.


Bruleed Blood Orange and Ricotta Miniature Cheesecakes

I used the Chicago Metallics Miniature Cheesecake pan, and this recipe made 12. You can also use a standard muffin tin lined with cupcake papers, this recipe will make about 6. If you want to make a standard sized cheesecake in a spring-form pan, I would suggest that you triple the recipe. 

Crust:

4 standard sized graham crackers (about 3/4 cup crushed)

2 tbs brown sugar

3 tbs melted butter

Cheesecake:

8 oz cream cheese, softened

1/4 cup ricotta

1/2 cup sugar

1 egg

1 tbs orange zest

1/4 cup freshly squeezed blood orange juice

Topping:

1/3 cup ricotta

1/3 cup powdered sugar

1/4 tsp vanilla

Plus 2 tbs granulated sugar for the brulee crust

Preheat oven to 375.

In a food processor, add the graham crackers and brown sugar, process until nothing is left but crumbs. Add the butter and process until it resembles wet sand, adding more butter or graham crackers if necessary to achieve the right consistency. 

Place metal disks into place in the bottom of each slot. Spray with butter flavored cooking spray.

Place about 1 tbs of crust into the bottom each Cheesecake slot. Press very well into place until compacted. 

Place the cream cheese and ricotta in the bowl of a stand mixer and beat on high until well combined. Add 1/2 cup granulated sugar beat on high until creamed. Add the egg, orange juice, and zest and beat until well combined, scraping the bottom of the bowl to make sure all ingredients are well combined. 

Spoon the batter on top of the crust, filling the cheesecake slots until 3/4 of the way full. 

Bake at 375 for 12-15 minutes or until the cheesecakes no longer giggle in the middle when the rack is shaken. This is not a situation where "a tooth pick inserted in the middle comes out clean."

Allow to cool for 20 minutes before attempting to remove from pan. 

Once cool, press upward in the hole on the bottom of the pan. Disk should remove easily. 

Once the cheesecakes cool, they will sink in the center, this is normal.

In a small bowl, mix the ricotta, powdered sugar and vanilla until well combined. 

Top each cheesecake with enough ricotta mixture to fill to hole in the center until level.

Chill until ready to serve, at least on hour. 

Just prior to serving, sprinkle an even layer of granulated sugar over each cheesecake. 

Slowly pass a kitchen torch over the sugar until it melts into a liquid and becomes a golden brown. 

Be careful, sugar burns are super nasty and hurt like a mother. 

Seriously. 

Don’t brulee the sugar until just prior to serving, the sugar will start to turn to liquid after about an hour.


.


Best Chocolate Chip Cookie Recipe Ever

Here I am with a super bold statement of "Best Ever."

Finding the perfect cookie recipe for what you love in a cookie is a bit of a personal journey. Figuring out what you want, and how to make that happen. For me, I love a cookie to be soft, chewy, puffy without being cakey and the perfect amount of chocolate chips.  

I did my research. Years of baking, problem solving, reading and asking people.

Consulting pastry chefs, New York times articles, Grandmas, kids, chocolate companies, and my big Sister.

It all finally paid off. This recipe is based on the famous and ground breaking New York Times 36 hour, Jaques Torres recipe with a bunch of additional advice and changes.

I like to call them Thursday Night Cookies, because if you want to have them over the weekend, you should probably start making them on Thursday night. The wait is worth it, I promise.

If you like the kind of cookies that I like, you will love these. 

Thursday Night Cookies

Ingredients

  • 2 cups cake flour
  • 1 1/2 cups bread flour
  • 1 tsp corn starch
  • 1 1/2 tsp baking powder
  • 1 1/4 tsp baking soda
  • 1 tsp salt, plus 1/2 tsp divided
  • 1 1/4 cups (2 1/2 sticks) unsalted butter
  • 1 1/3 cup brown sugar
  • 1 cup white sugar
  • 2 egg
  • 2 tsp vanilla extract
  • 3 cups dark chocolate chips

(makes about 30 cookies)

Instructions

  1. In a large bowl, combine both types of flour, baking soda, baking powder, corn starch and 1 tsp salt. All types of flour have different properties and will produce difference results, the combination of these two different types gives you cookies that are both soft and chewy. You won’t get these results if you just use one type or if you use all-purpose flour.
  2. In the bowl of a stand mixer, fitted with a paddle attachment, cream the butter with both types of sugar, scraping the bottom of the bowl periodically to ensure the ingredients are well combined. Add the eggs, one at at time, and then the vanilla, beat very well and scraping the inside of the bowl between addition.
  3. Reduce speed on the stand mixer to low and add the dry ingredients until just barely combined, making sure to scrape the bottom of the bowl to ensure that the butter and flour are all combined. Add the chocolate chips and stir until incorporated. You don’t want to over mix or your cookies will be tough.
  4. This is where you will need some self control. The butter needs to reconstitute as a solid or the cookies won’t cook well. Place a sheet of plastic wrap over the bowl and press it against the top of the cookie dough, making a tight seal.
  5. Place the cookies in the refrigerator to chill for at least 24 hours, preferably 36 hours. This is important, don’t skip this step or the cookies will spread and become dry and crispy.
  6. Preheat oven to 350. Line a cookie sheet with parchment paper and using a cookie scoop, or an ice cream scoop, make balls of dough that are a bit larger than a golf ball. Place on a baking sheet, with ample space between each cookie. Sprinkle lightly with the remaining salt. (Only about 6 cookies will fit on a standard cookie sheet.)
  7. Bake each cookie sheet one at a time for 21-23 minutes (*Note: Jaques Torres and I got this cooking time, but I hear from others that they are getting much shorter cooking times. Keep a close eye on your first batch) or until the cookies are just starting to get a light golden brown. Don’t over bake, the cookies will continue to bake about an additional 10 percent after being removed from the oven. Immediately transfer to a wire rack or a row of paper towels. (Here is a great tip from Michelle Tepper: Try cooking on parchment paper and just sliding the whole sheet off of the cookie tray and onto the counter to cool.)

*if you absolutly CAN NOT wait 36 hours, here is the only shortcut I will allow, although the cookies won’t be AS good:
Once the cookie dough is made, scoop the large golf ball sized cookies onto the cookie sheets, cover and then chill them for at LEAST 4 hours. Not one second shorter. This will only work if the dough is in a ball on the cookie sheet, not if it is still in the bowl.

Miniature Cheesecake Pan Review & Miniature Lemon Goat Cheese Cheesecake

Cheesecake is a very dangerous thing to make.

Not in the way that Creme Brulee is dangerous, with the open flame and molten sugar that you just want to touch before it’s dry giving yourself the worst sugar burn of your life and using words that should never be said in public. 

But in more of a, I-totally-don’t-care-if-this-will-make-me-gain-137-pounds-if-I-eat-the-whole-thing, kind of way.

But I love it. LOOOOOOVE it.

And then there is this mini cheesecake pan. It’s a fabulous little invention that offers tiny, portion controlled mini-cheesecakes. Let’s be honest, they aren’t good for you, but eating one won’t make you gain 137 pounds.

(Photo from:Chicago Metallic)

Here is the low down on this little pan, the one that made these adorable cheesecakes:

Chicago Metallic Mini Cheesecake Pan, 12 Cavity

Specifics:

Brand: Chicago Metallic

Dimensions: 1.75″ h x 10.75″ w x 14.00″ 

12-cavity mini cheesecake pan made of heavy-duty aluminized steel

Each cavity comes with pop-up bottom disc for simple dessert removal

Measures 13-8/9 by 10-3/5; each cavity measures 2 by 2 by 1-1/2 inches; 25-year limited warranty

Pros:

Creates adorable, small Cheesecakes that bake quickly and provide the right amount of dessert for a small group.

The metal disk inserts make it easy to remove the cheesecakes from their pan, without the use of a cupcake papers which tend to ruin the over all effect.

 The shape is much more attractive than those mini-cheesecakes bake in muffin tins.

Perfect for parties. 

Cons:

Although the product states that it is dishwasher safe, that does not seem to be the case. The small metal disks are almost impossible to get clean in the dishwasher, and the metal pan does not seem to respond well either. Making hand washing a must for this pan.

The Cheesecakes were a bit smaller than I would have liked.

The excessive use of the word "Cavity" on the product materials along with the word "Cheesecake" conjures up disturbing images of Dessert with Jeffery Dahmer. 

Overall:

I really liked this pan and the options that it provides. Although the size was much smaller than I had expected (slightly larger than a mini muffin) the amount of batter needed was small as well, making it easy to throw together without a pound of cream cheese. This also leaves the option of making your basic, go-to, regular sized New York Cheesecake recipe, splitting it up into three different batches and adding different flavors to each, giving your guests three options instead of one. Variety is always a plus.

I love it and will probably use it until it falls apart. You can buy one here

Lemon Goat Cheese Mini Cheesecakes

Crust:

3/4 cup crushed graham crackers

3 tbs melted butter

2 tbs brown sugar

Cheesecake:

1 8 oz Package of (full fat) Cream Cheese (room temperature, very important)

2 oz Goat Cheese (room temp as well)

1/2 cup sugar

1 egg

1 tsp vanilla

1 tbs lemon zest

Lemon curd:

1 egg yolks

1/4 cup sugar

2 tsp lemon zest

1/2 cup lemon juice

1/2 tsp corn starch

2 tbs butter

Preheat oven to 375

In a food processor, add the graham crackers and brown sugar, process until nothing is left but crumbs. Add the butter and process until it resembles wet sand, adding more butter or graham crackers if necessary to achieve the right consistency. 

Place metal disks into place in the bottom of each slot. Spray with butter flavored cooking spray.

Place about 1 tbs of crust into the bottom each Cheesecake slot. Press verywell into place until compacted. 

Place the cream cheese and goat cheese in the bowl of a stand mixer and beat on high until well combined. Add the sugar beat on high until creamed. Add the egg, vanilla, and zest and beat until well combined, scraping the bottom of the bowl to make sure all ingredients are well combined. 

Spoon the batter on top of the crust, filling the cheesecake slots until almost full. 

Bake at 375 for 12-15 minutes or until the cheesecakes no longer giggle in the middle when the rack is shaken. This is not a situation where "a tooth pick inserted in the middle comes out clean."

Allow to cool for 20 minutes before attempting to remove from pan. 

Once cool, press upward in the hole on the bottom of the pan. Disk should remove easily. 

While the cheesecake is cooking, make the curd.

In a bowl, whisk together the egg yolks, sugar, zest, corn starch and lemon juice until well combined. 

Add to a pan over medium heat along with the butter and whisk constantly until thickened, about 8-10 minutes. Remove from heat. Allow pan to cool a bit, about ten minutes, and then place in the refrigerator to chill for about 20 minutes or until cool and thick. 

Once the curd has cooled, top the mini cheesecakes with about 1-2 tsp of curd. Chill until ready to serve. 

Blackberry Cabernet Wontons

I know that you can all tell how much I love party food, I’ve been making a lot of it these days. Food to serve to other people. Every country in the world will tell you how important food is to their culture, how community happens around a table, how love grows between mouthfuls of hand made food. It’s too bad that hasn’t become ingrained in Americans. We have "fast" food, as if we just need to get through the meal as quickly as possible to move on to better things like…reality TV? Whats the rush? Why don’t more people savor meal times, enjoy it as a journey and view food as too sacred to be "Fast"? Or take time to make food for as well as WITH their loved ones? 

Blackberry Cabernet Wontons 

3 cups of blackberries (fresh or frozen)

1 1/2 cups powdered sugar, (plus 1/4 cup for dusting, divided)

1/2 cup Cabernet Sauvignon

1/2 tsp salt

14-16 wonton wrappers

In a pot over medium heat, add the blackberries, 1 1/2 cups powdered sugar, wine and salt. allow to cook and reduce until the liquid becomes very thick, with tracks left behind when you drag a spoon through the pan, about 10-15 minutes. Frozen berries have a higher water content, so those will take longer than fresh.

Allow to cool.

Place the wonton wrappers on a flat surface. Brush all of the edges with water.

Place about 1 to 2 tsp of blackberries in the center of the wonton paper.

Fold the wonton paper in half to form a triangle, press the edges together until very well sealed.

Brush the bottom of the triangle with water and fold the corners into the center and press into shape.

Heat 1/4 to 1/2 cup of oil (enough to form about 1/2 inch of oil in the bottom of your pan) in a pan over medium-high heat.

Cook the wontons, about 6 at a time, on each side until golden brown. About 3 minutes per side.

Remove from pan and allow to dry on a stack of paper towels. 

Sprinkle with powdered sugar. 

Jalapeno Popper Filled Potato Bites

Everyone has guilty pleasure foods. No matter how "foodie" you think you are, there is a food that you love, but would never want to be eating if Thomas Keller decided to peek in your kitchen window. 

For me, that’s good ole American bar food. Nachos, potato skins, jalapeno poppers, onion rings. Love it. Plus, it just brings up good memories. Do you have any BAD memories of eating chicken wings and drinking a beer? 

Here are two of my great guilt pleasure loves, in one bite. The love child of Jalapeno Poppers and Potato Skins. 

Jalapeno Popper Filled Potato Bites

12 baby red potatoes

3 tbs butter

1/2 cup chopped red onion

4 cloves of garlic, minced

4 medium sized fresh jalapenos, seeded and chopped

8 oz cream cheese

1/2 cup parmesan cheese 

4 strips of bacon, cooked and chopped (you can leave this out if you are vegetarian)

1/2 tsp Kosher or sea salt

1/2 tsp pepper

In a large pot of lightly salted water, boil the potatoes until fork tender, about 18-22 minutes. You want the potatoes to be soft enough to bite into, but firm enough to hold their shape as mini cups. 

Remove from water and allow to cool for about 10 minutes. Cut each potato in half, down the middle. You want to cut the potatoes in a way that will allow them to lay as flat as possible. The best may to do this is to just place them on a flat surface and see how they naturally want to lay and cut parallel to the surface they are sitting on. If you cut them according to what looks nice, they may roll all over once they are filled. 

Once they are cut, remove most of the inside with a mellon baller, leaving enough of the walls and bottom intact to hold the filling. 

Make sure and save that potato middles you just scooped out, you will add them to the filling. 

In a pan over medium-high heat, melt the butter. Add the onions and cook until opaque. Add the jalapenos and stir, cooking until Jalapenos are soft, about 5 minutes. Add the garlic and stir. Add the cream cheese and stir until melted. Remove from heat and add the potato middles and mash with a potato masher until combined. Return to heat and add the bacon, parmesan cheese, salt and pepper and stir until cheese is melted. Allow to cool, then fill the potatoes. Serve warm. 

Printable: Jalpeno Popper Potato Bites

Make sure and Like Domestic Fits on Facebook to receive updates about new posts in your feed. 


Superbowl Snack: Chocolate Covered Strawberry Footballs

There are so many great things about living in Los Angeles. In my 20’s I got to partake in a lot of them. My husband is a musician and we ran around with a very Music Industry crowd. Late nights, parties, back stage passes, Rock Stars, watching our friends become famous, blah, blah.

The best thing about California? The produce.

Seriously. If you ever visit LA, skip Hollywood Blvd (don’t worry, it sucks) and head for a farmers market. We have them nearly every single day of the year, with the exception of a few major holidays.

Tuesday in October? Head to Culver City or Silverlake. Thursday in February? There is a great one in Hollywood called Yamashiro.

And Strawberries are in season nearly all year. Did you know that California grows 50% of the produce for the entire United States? It also grows 75% of the produce for the Western side of Canada.

And, California has the best strawberries in the world. If you ever make it to California, put: "Eat a real California Strawberry" on your to do list. California grows 85% of the strawberries in the US. 

I do realize that there is a chance that when that little ball game rolls around in a few weeks, (what’s it called again? The Super Bowl?) you might not live in a place as lucky as Strawberry-afornia or have access to these beauties year round. That’s OK, just tuck this idea away in your head and make them for a sports themed birthday party sometime over the summer.


Chocolate Strawberry Footballs
1 1/2 cups dark chocolate chips
12-14 large strawberries
1/4 cup white chocolate chips
you will also need:
2 Coffee mugs
piping bag
#2 tip 
Parchment paper
In a microwave safe coffee mug add the dark chocolate chips. I’ve found this to be the best vessel for strawberry dipping. If the bowl you use is too wide then the melted chocolate is too shallow, and it’s hard to get the strawberries dipped. 
Microwave on high for 30 seconds. Stir and repeat until melted. Don’t over heat or your chocolate will seize and there is really no coming back from that. 
Grab the strawberry by the leaves (make sure strawberries are completely dry or the chocolate won’t stick).
Dip in the chocolate and swirl around carefully until coated. 
Hold above the coffee mug for a few seconds to allow the excess to drip off.
Place on a sheet of parchment paper to dry. 
Push forward slightly to avoid a pool of dried chocolate forming in the front of your berry. 

Allow to dry for about 15 minutes. 
In a separate coffee mug (or really, any microwave safe bowl will work for this), add the white chocolate. Microwave on high for 20 seconds and stir, repeat until melted. You have to be even more careful with white chocolate, it tends to seize quicker. It isn’t actually chocolate, its cocoa butter solids so it behaves differently. If it does seize, you can try and add a few drops of canola oil, but you might just need to toss it out and start over. 

Pour the white chocolate into your piping bag. Pipe on a stripe at the top and one at the bottom of your strawberries. 

Then pipe a line down the middle of the berry. 
Then pipe 5 or 6 lines across the middle line. 
Tips:
-Let the white chocolate cool a bit, but not harden, before piping. If it’s too hot, it’ll be really runny. 
-When piping the lines, double back a bit to avoid the "strings" of white chocolate from dripping down the sides. 
-Serve chilled
-Don’t make more that 24 hours in advance, strawberries tend to shrink a bit as they age.