I know that you can all tell how much I love party food, I’ve been making a lot of it these days. Food to serve to other people. Every country in the world will tell you how important food is to their culture, how community happens around a table, how love grows between mouthfuls of hand made food. It’s too bad that hasn’t become ingrained in Americans. We have "fast" food, as if we just need to get through the meal as quickly as possible to move on to better things like…reality TV? Whats the rush? Why don’t more people savor meal times, enjoy it as a journey and view food as too sacred to be "Fast"? Or take time to make food for as well as WITH their loved ones?
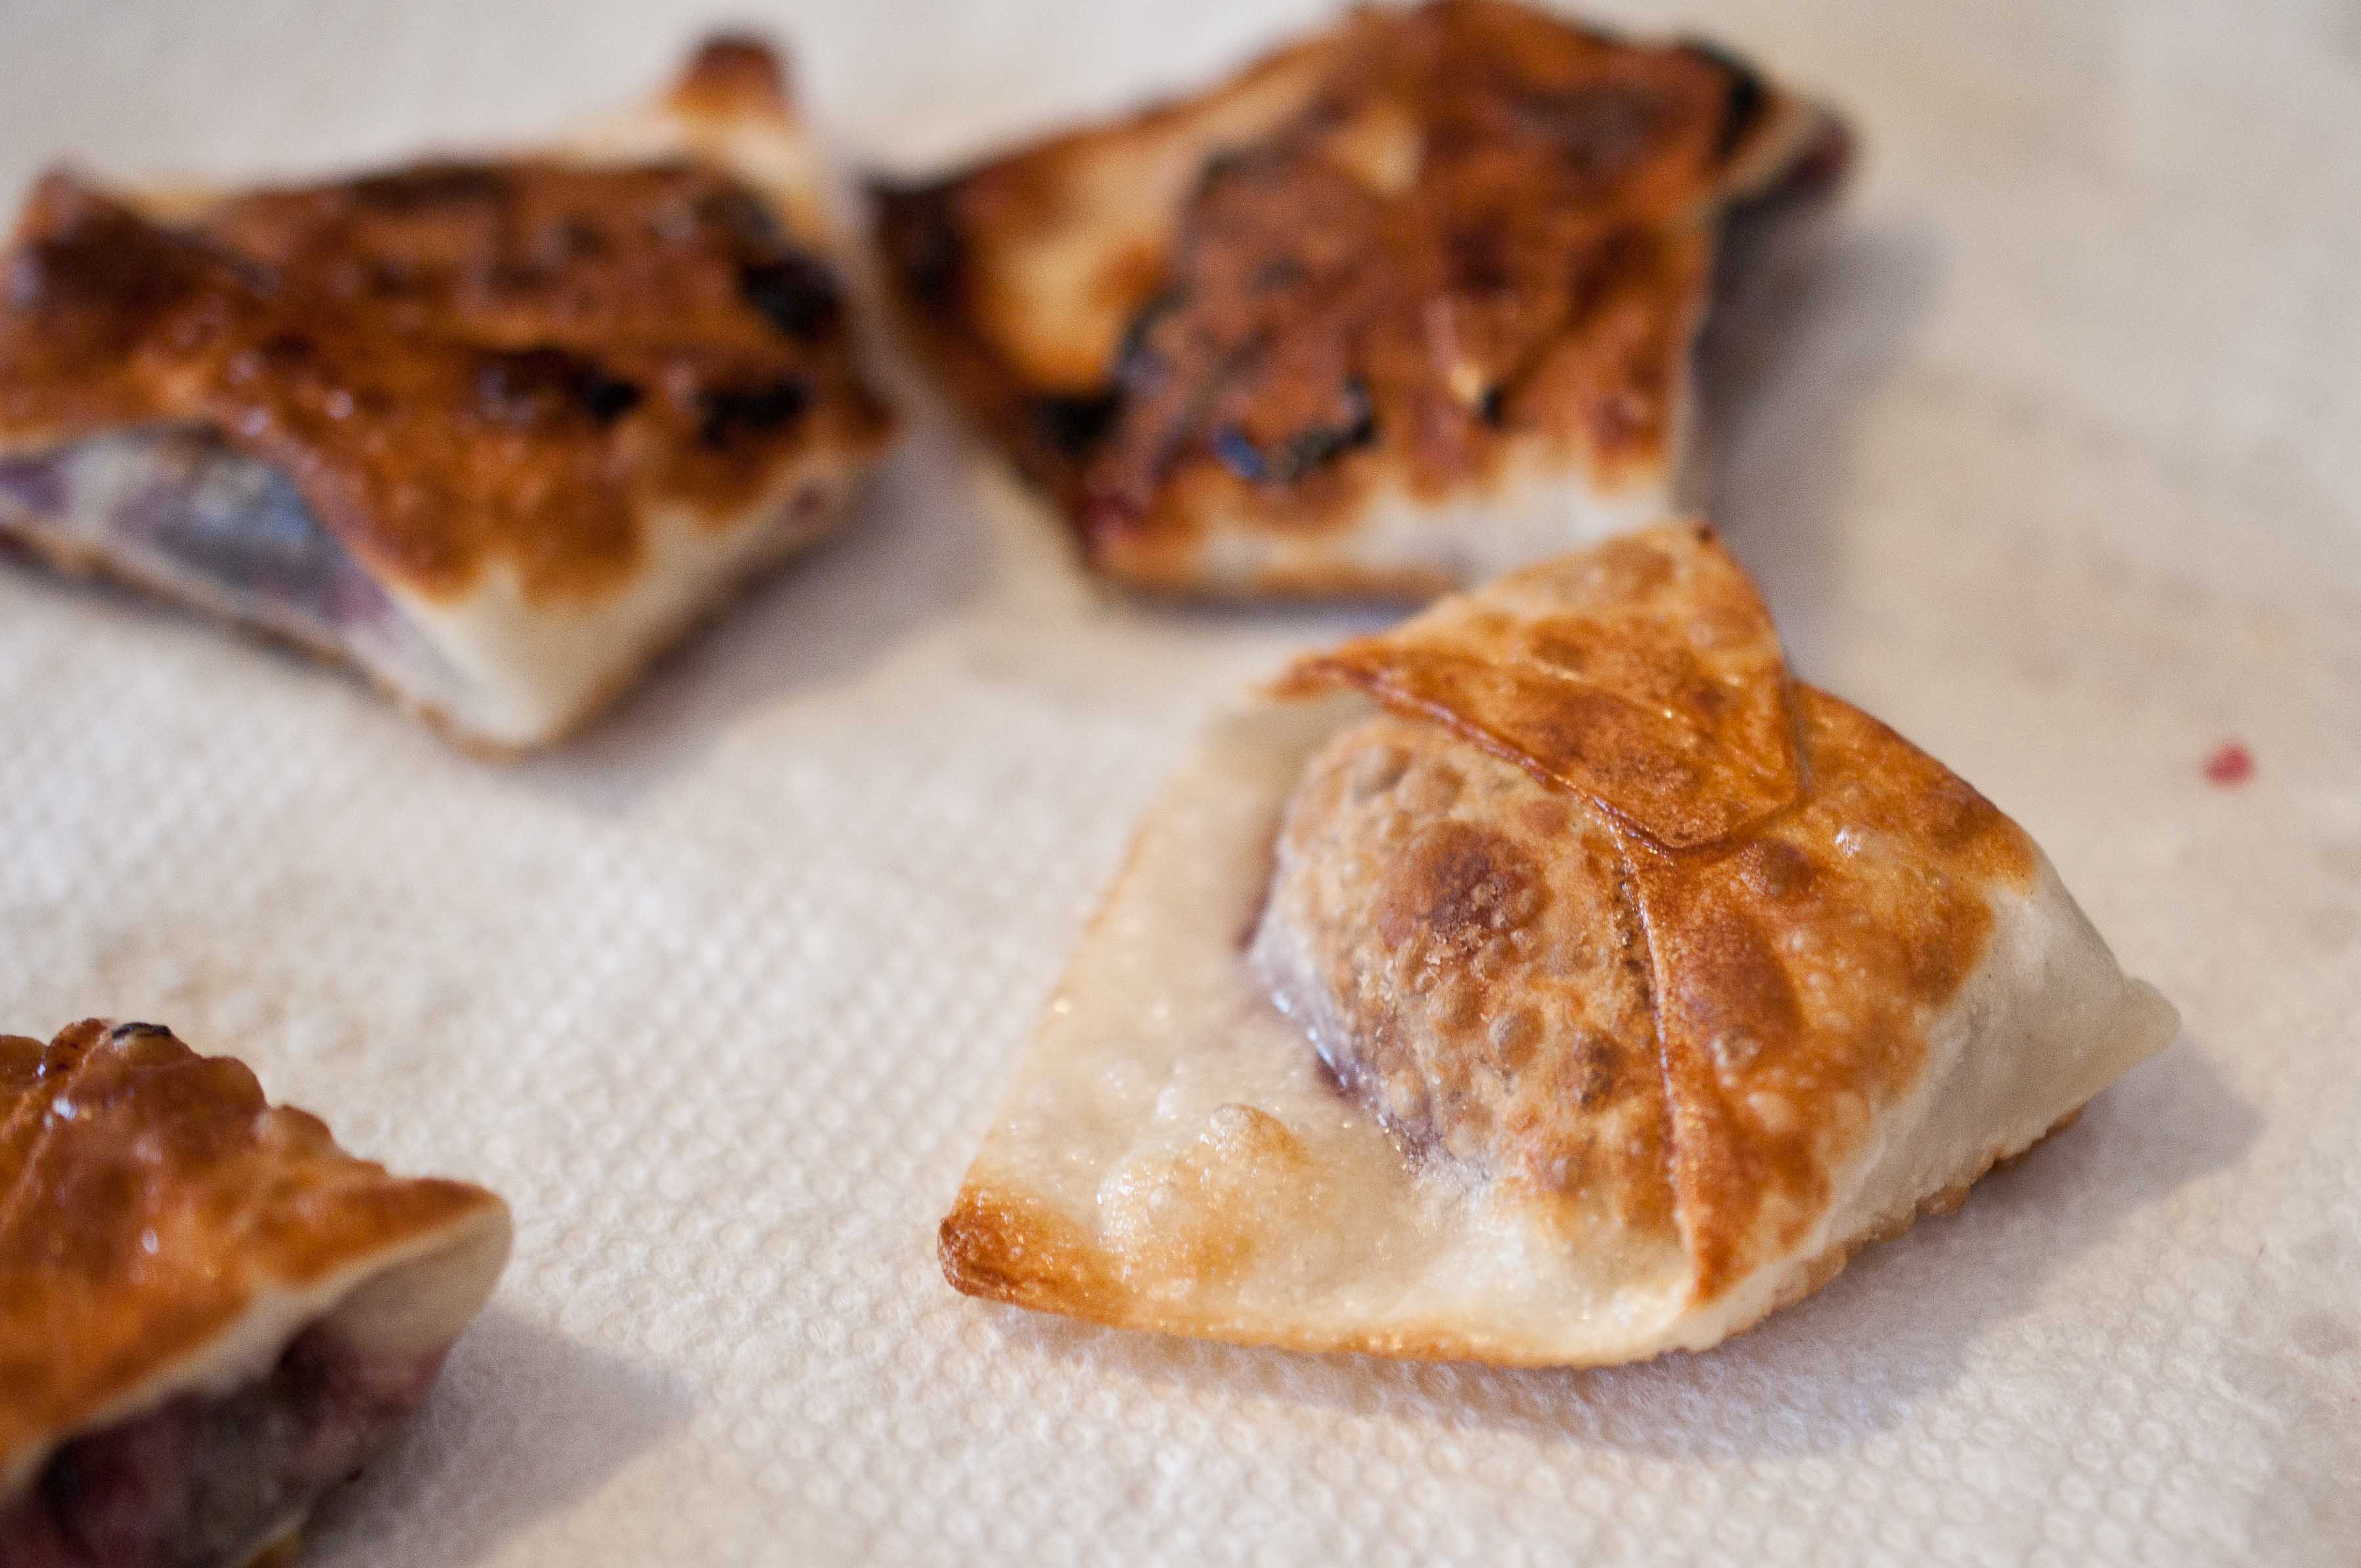
Blackberry Cabernet Wontons
3 cups of blackberries (fresh or frozen)
1 1/2 cups powdered sugar, (plus 1/4 cup for dusting, divided)
1/2 cup Cabernet Sauvignon
1/2 tsp salt
14-16 wonton wrappers
In a pot over medium heat, add the blackberries, 1 1/2 cups powdered sugar, wine and salt. allow to cook and reduce until the liquid becomes very thick, with tracks left behind when you drag a spoon through the pan, about 10-15 minutes. Frozen berries have a higher water content, so those will take longer than fresh.
Allow to cool.
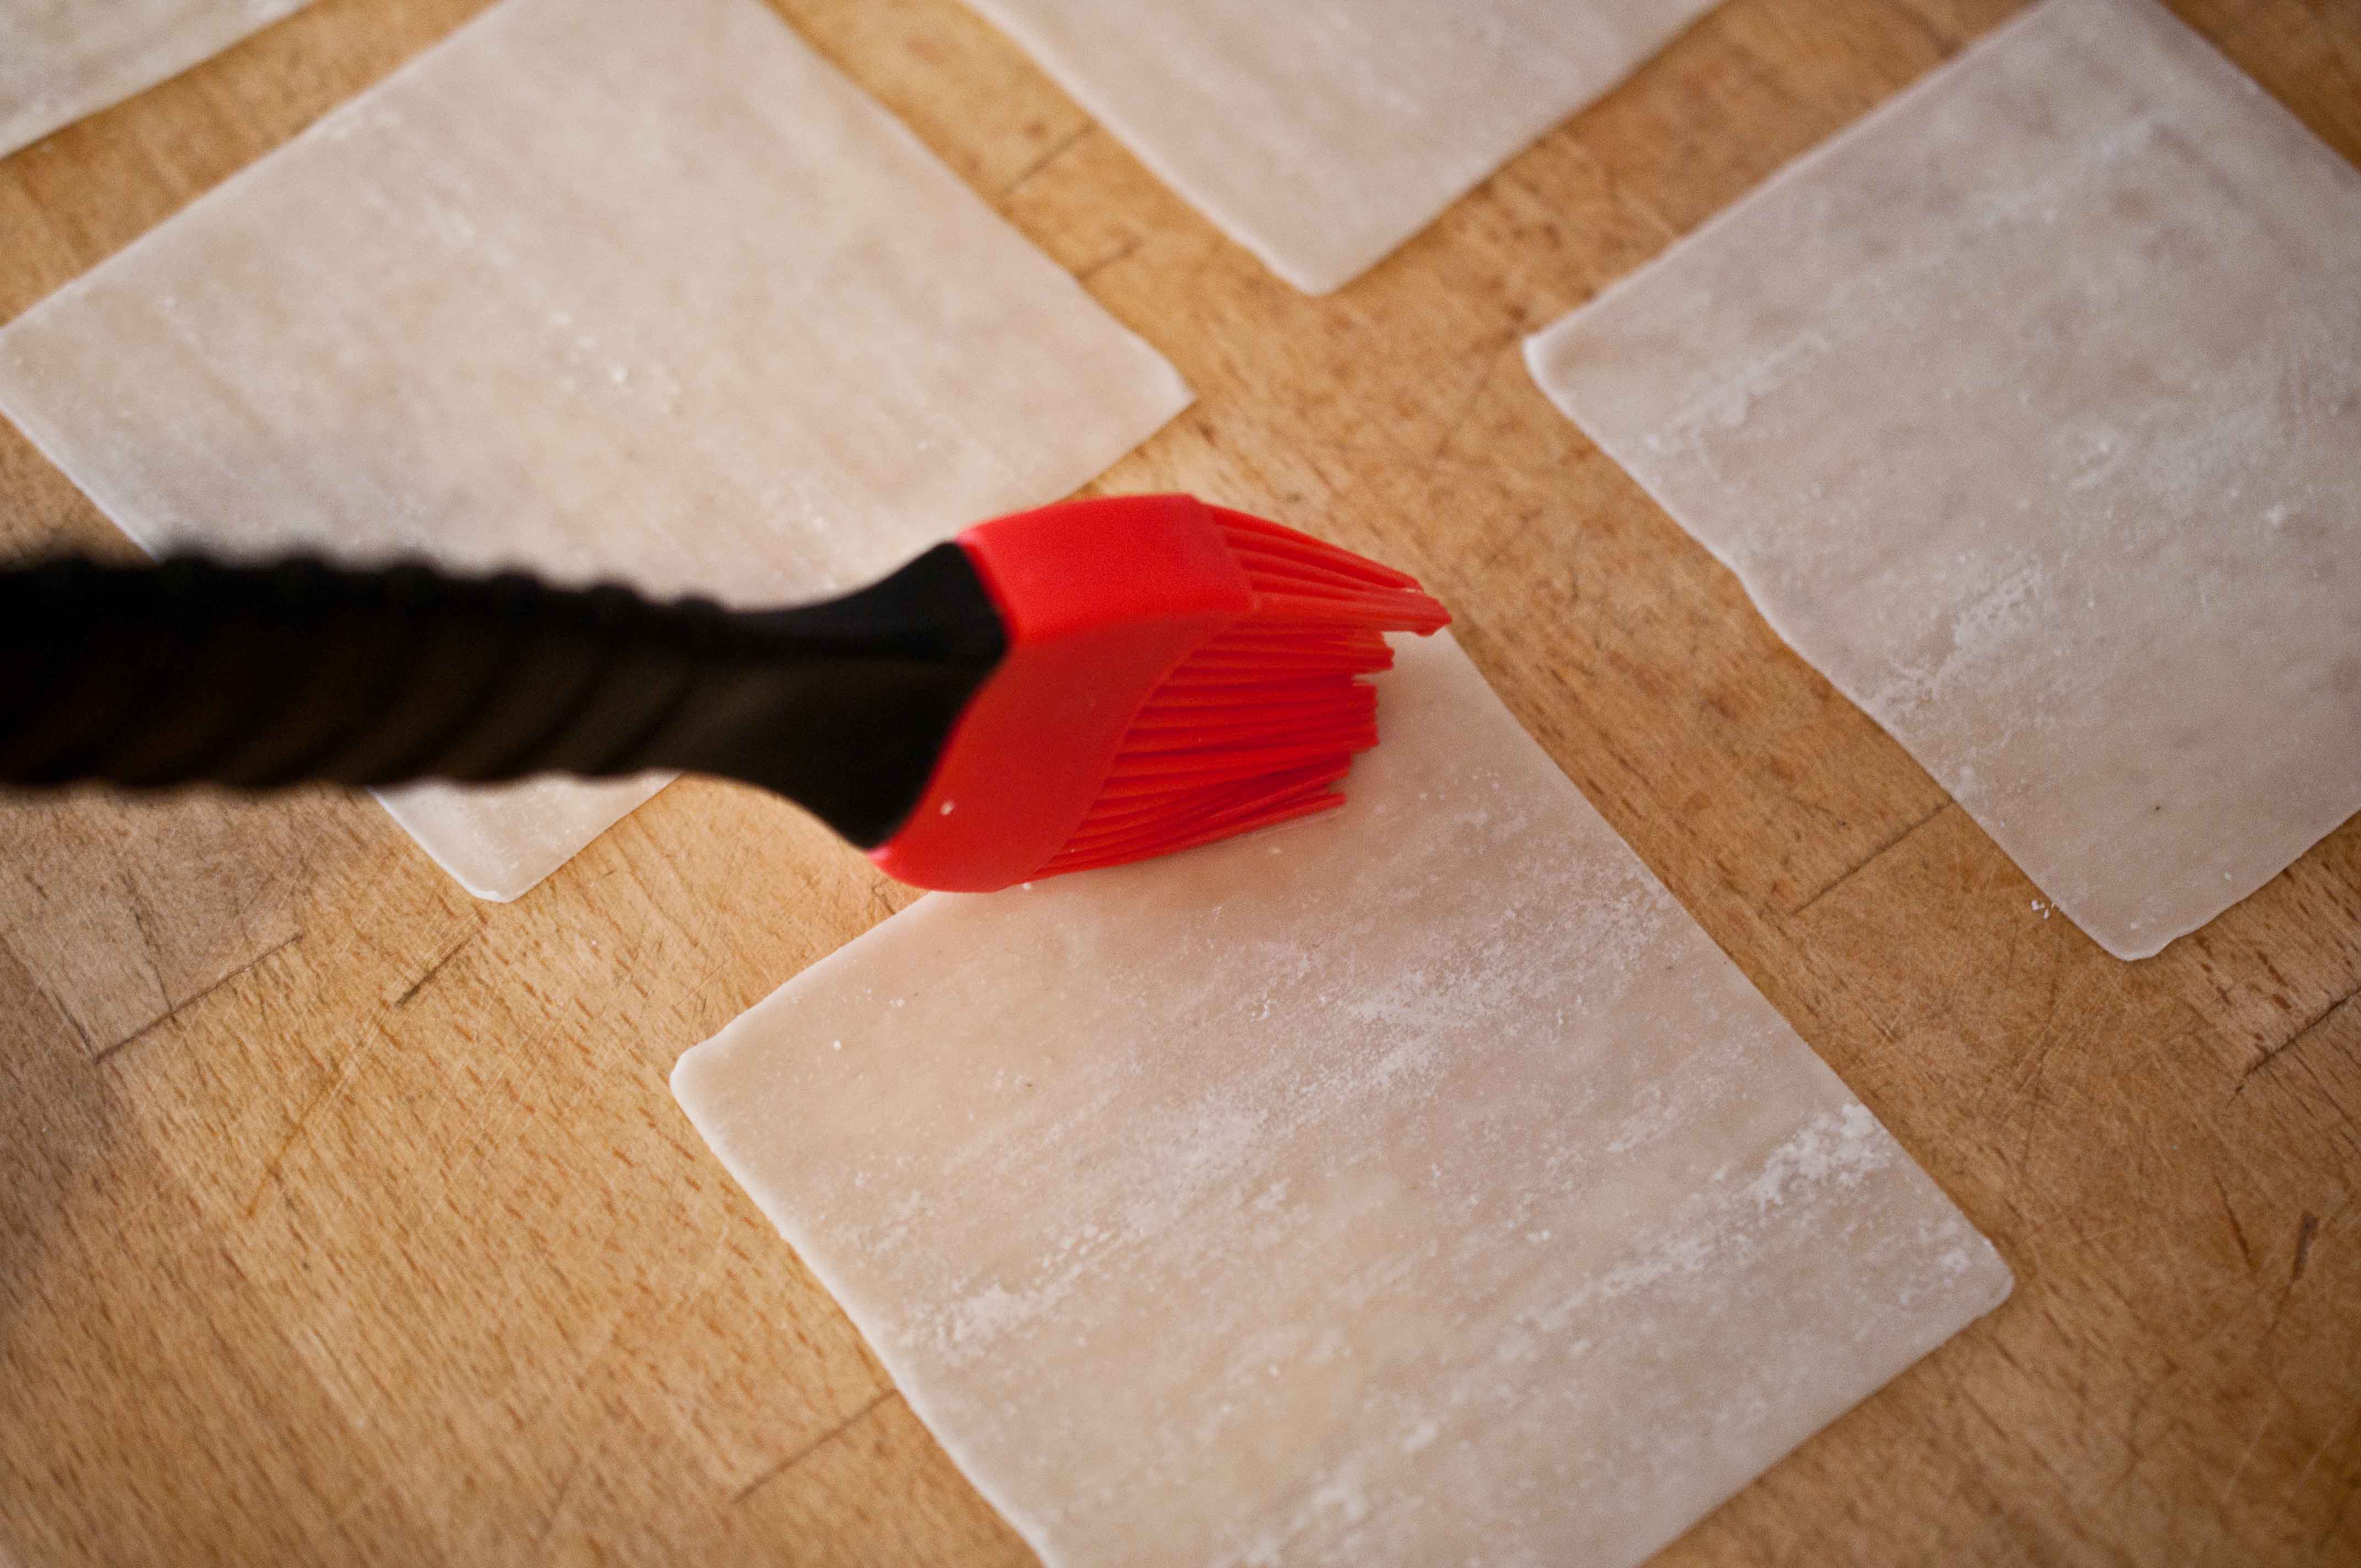
Place the wonton wrappers on a flat surface. Brush all of the edges with water.
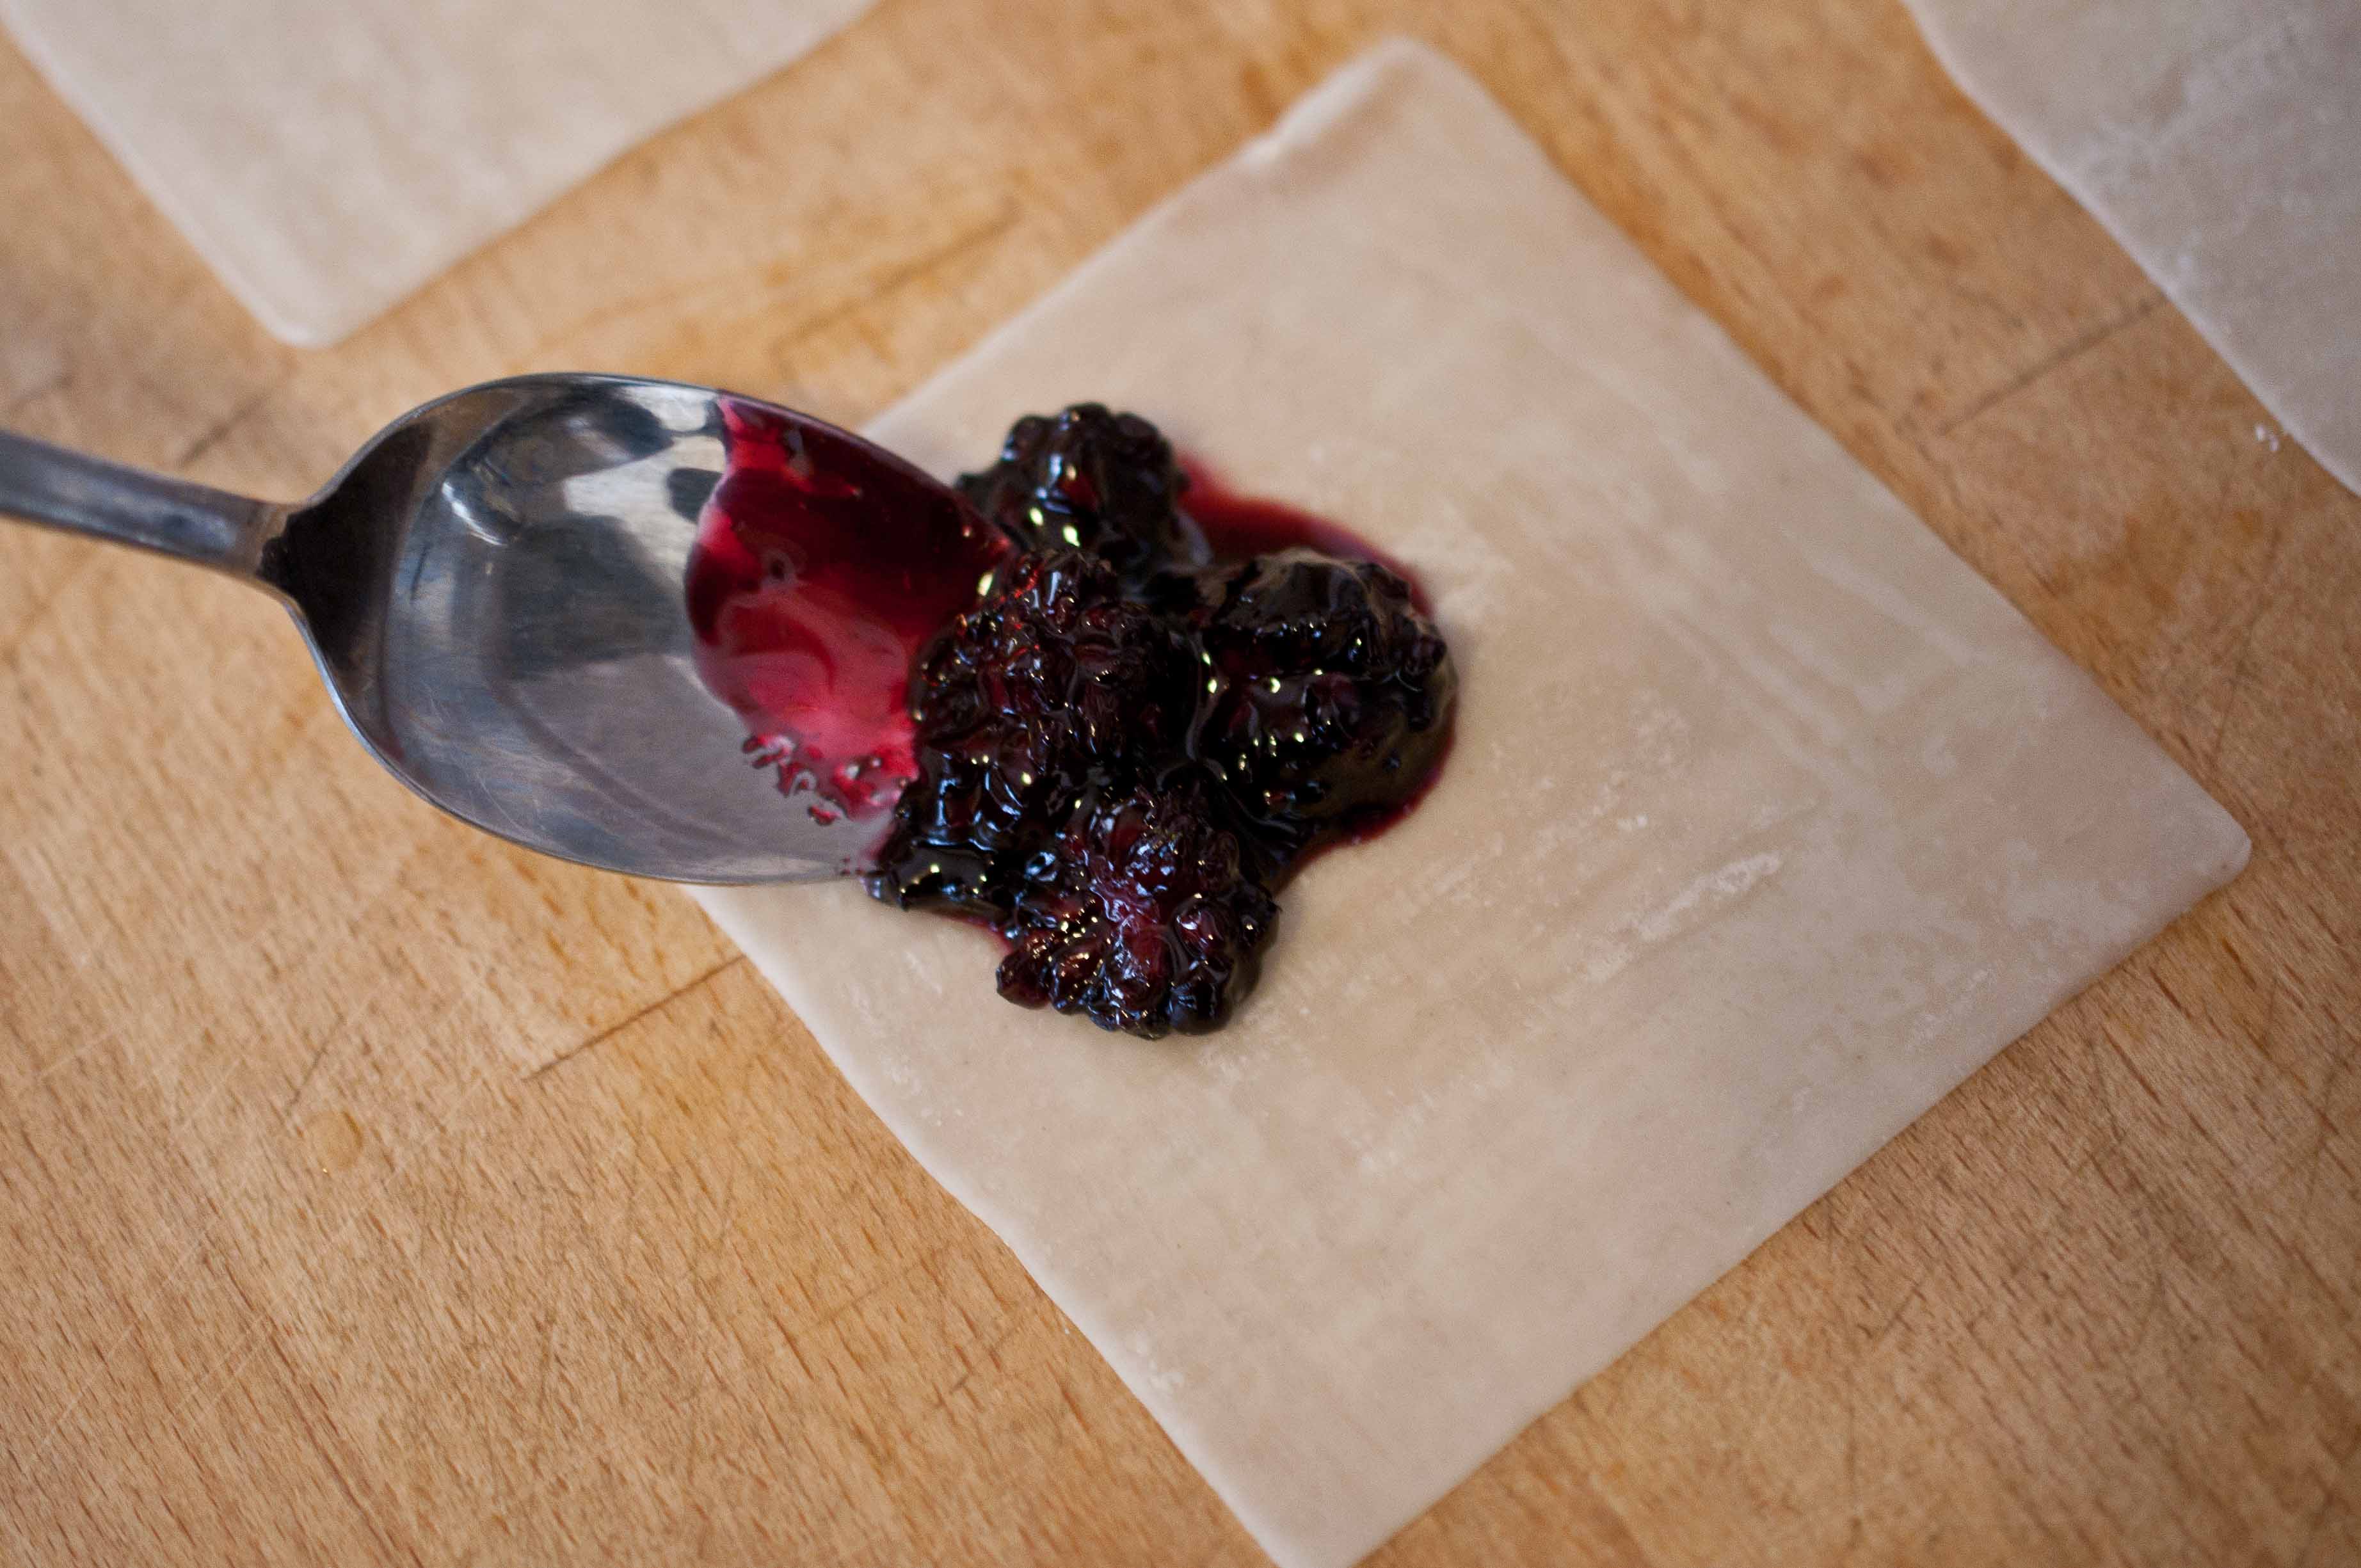
Place about 1 to 2 tsp of blackberries in the center of the wonton paper.
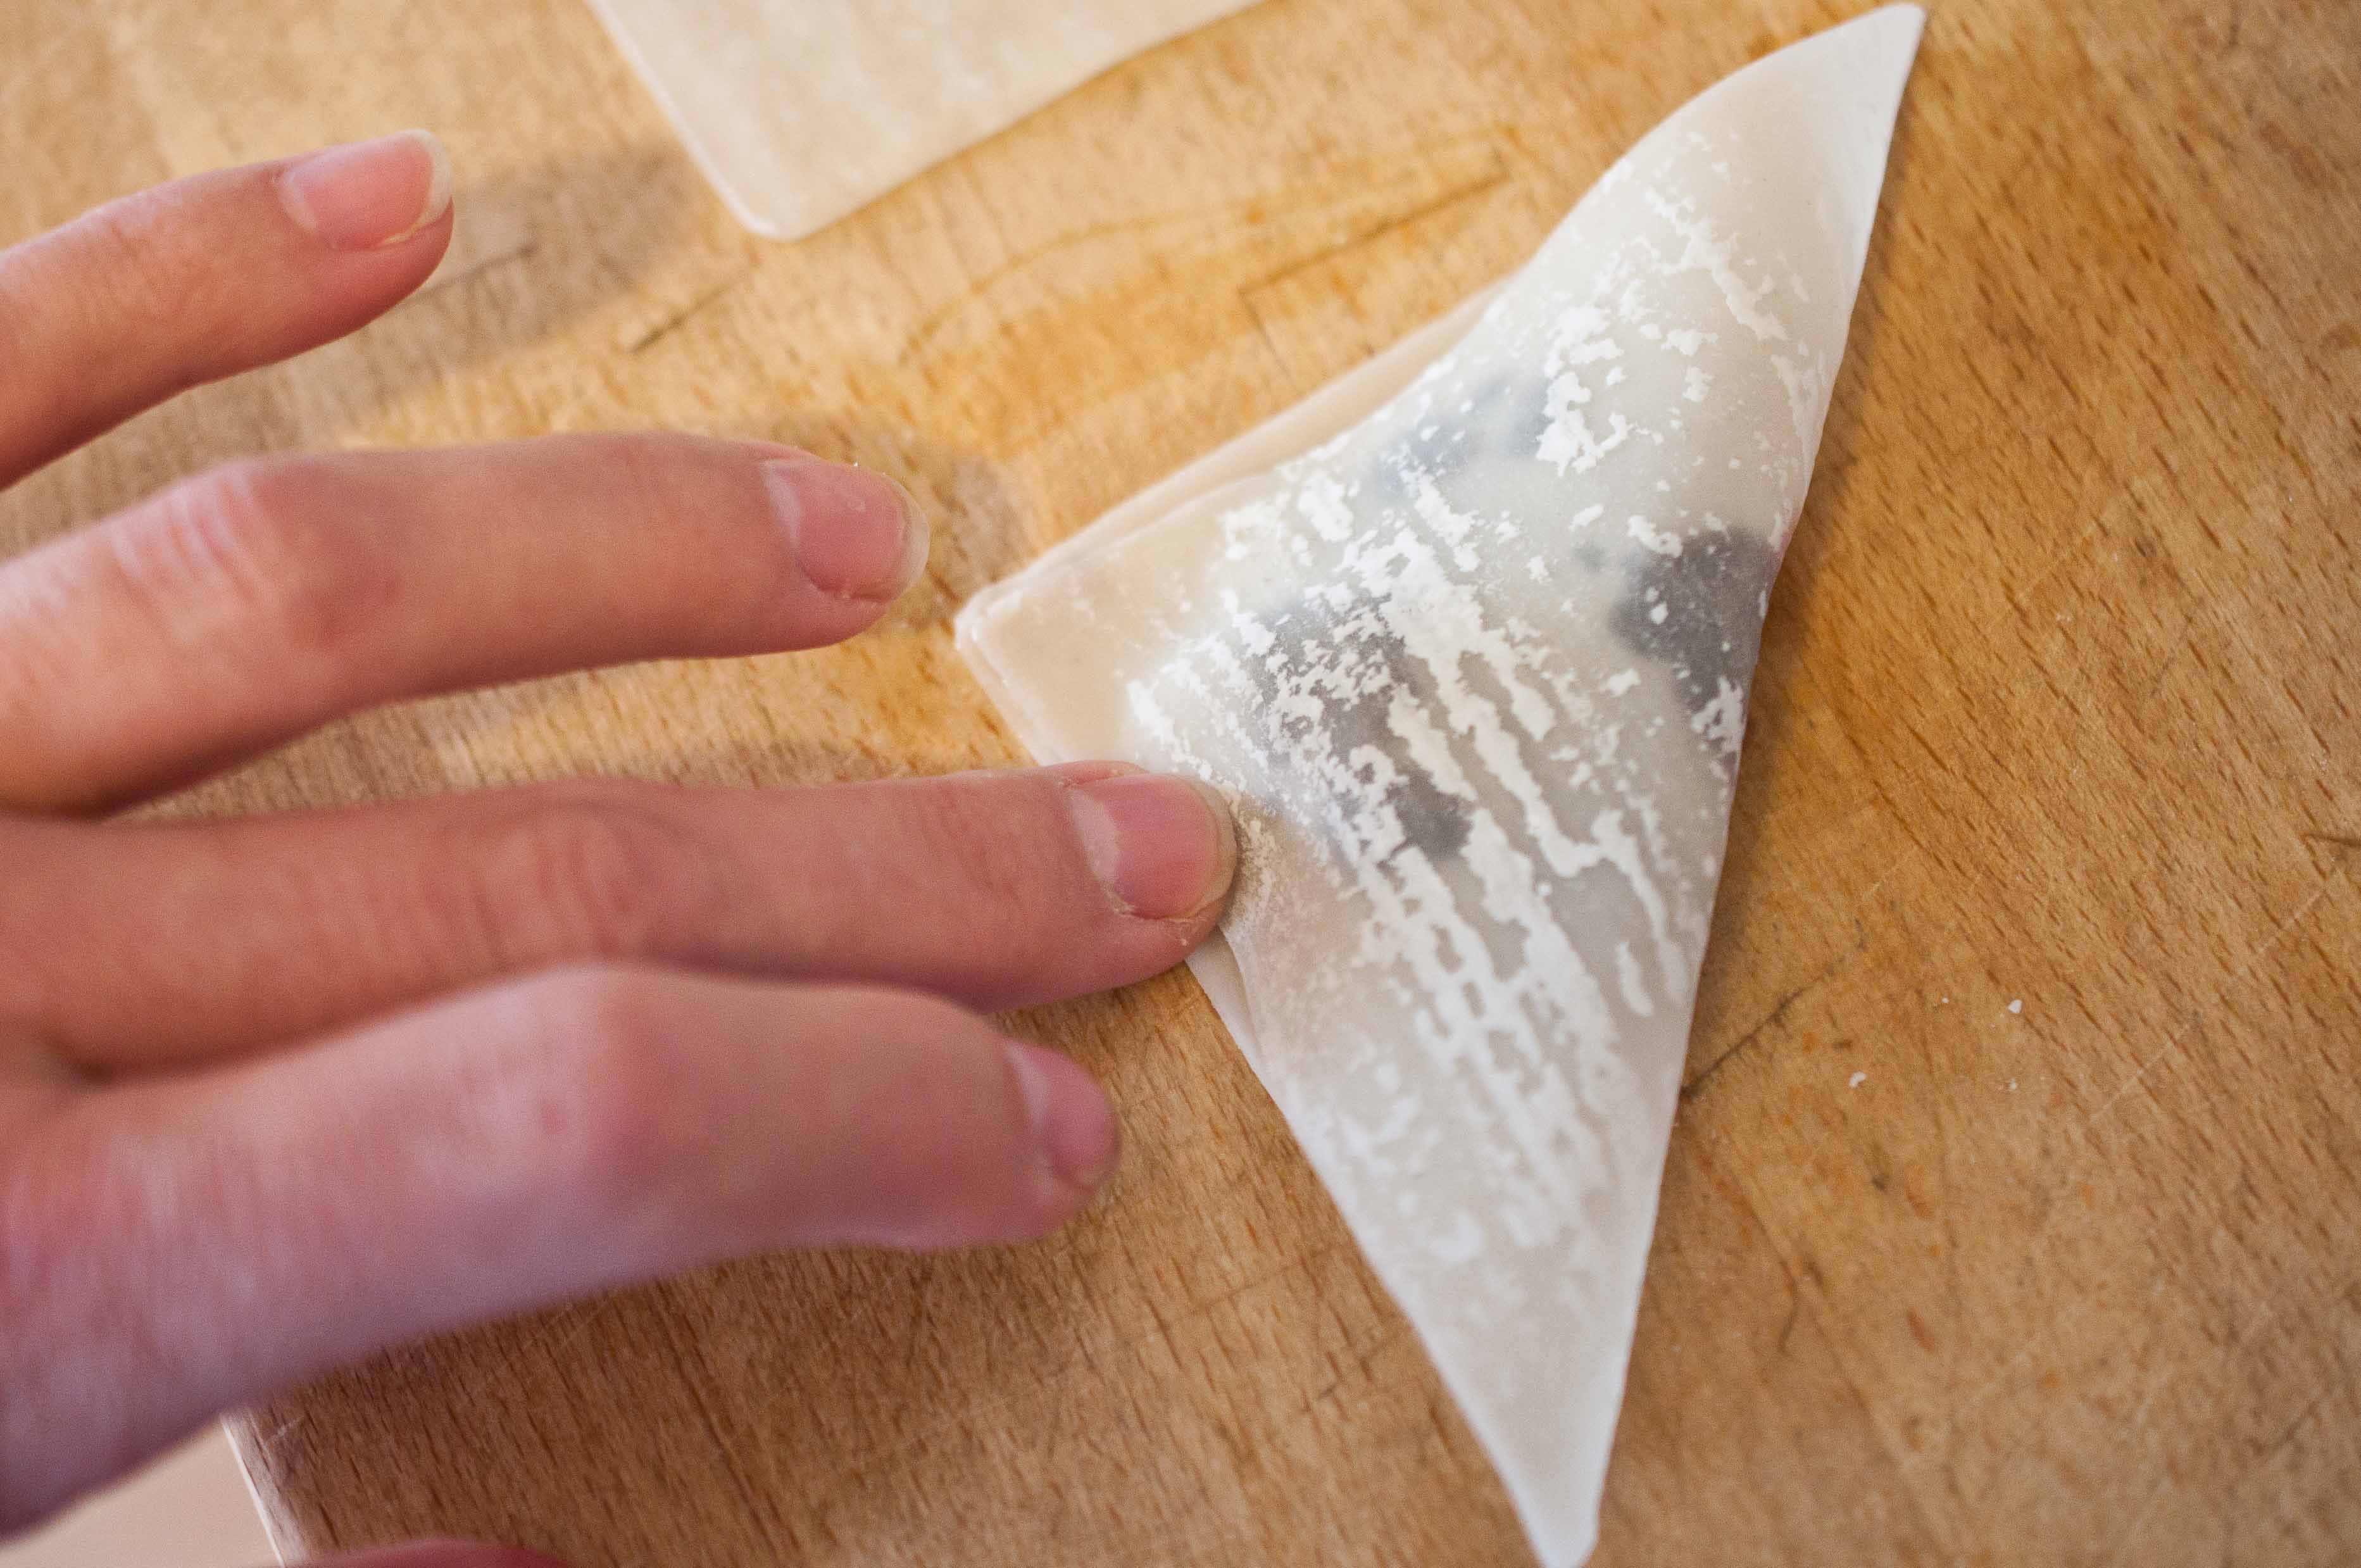
Fold the wonton paper in half to form a triangle, press the edges together until very well sealed.
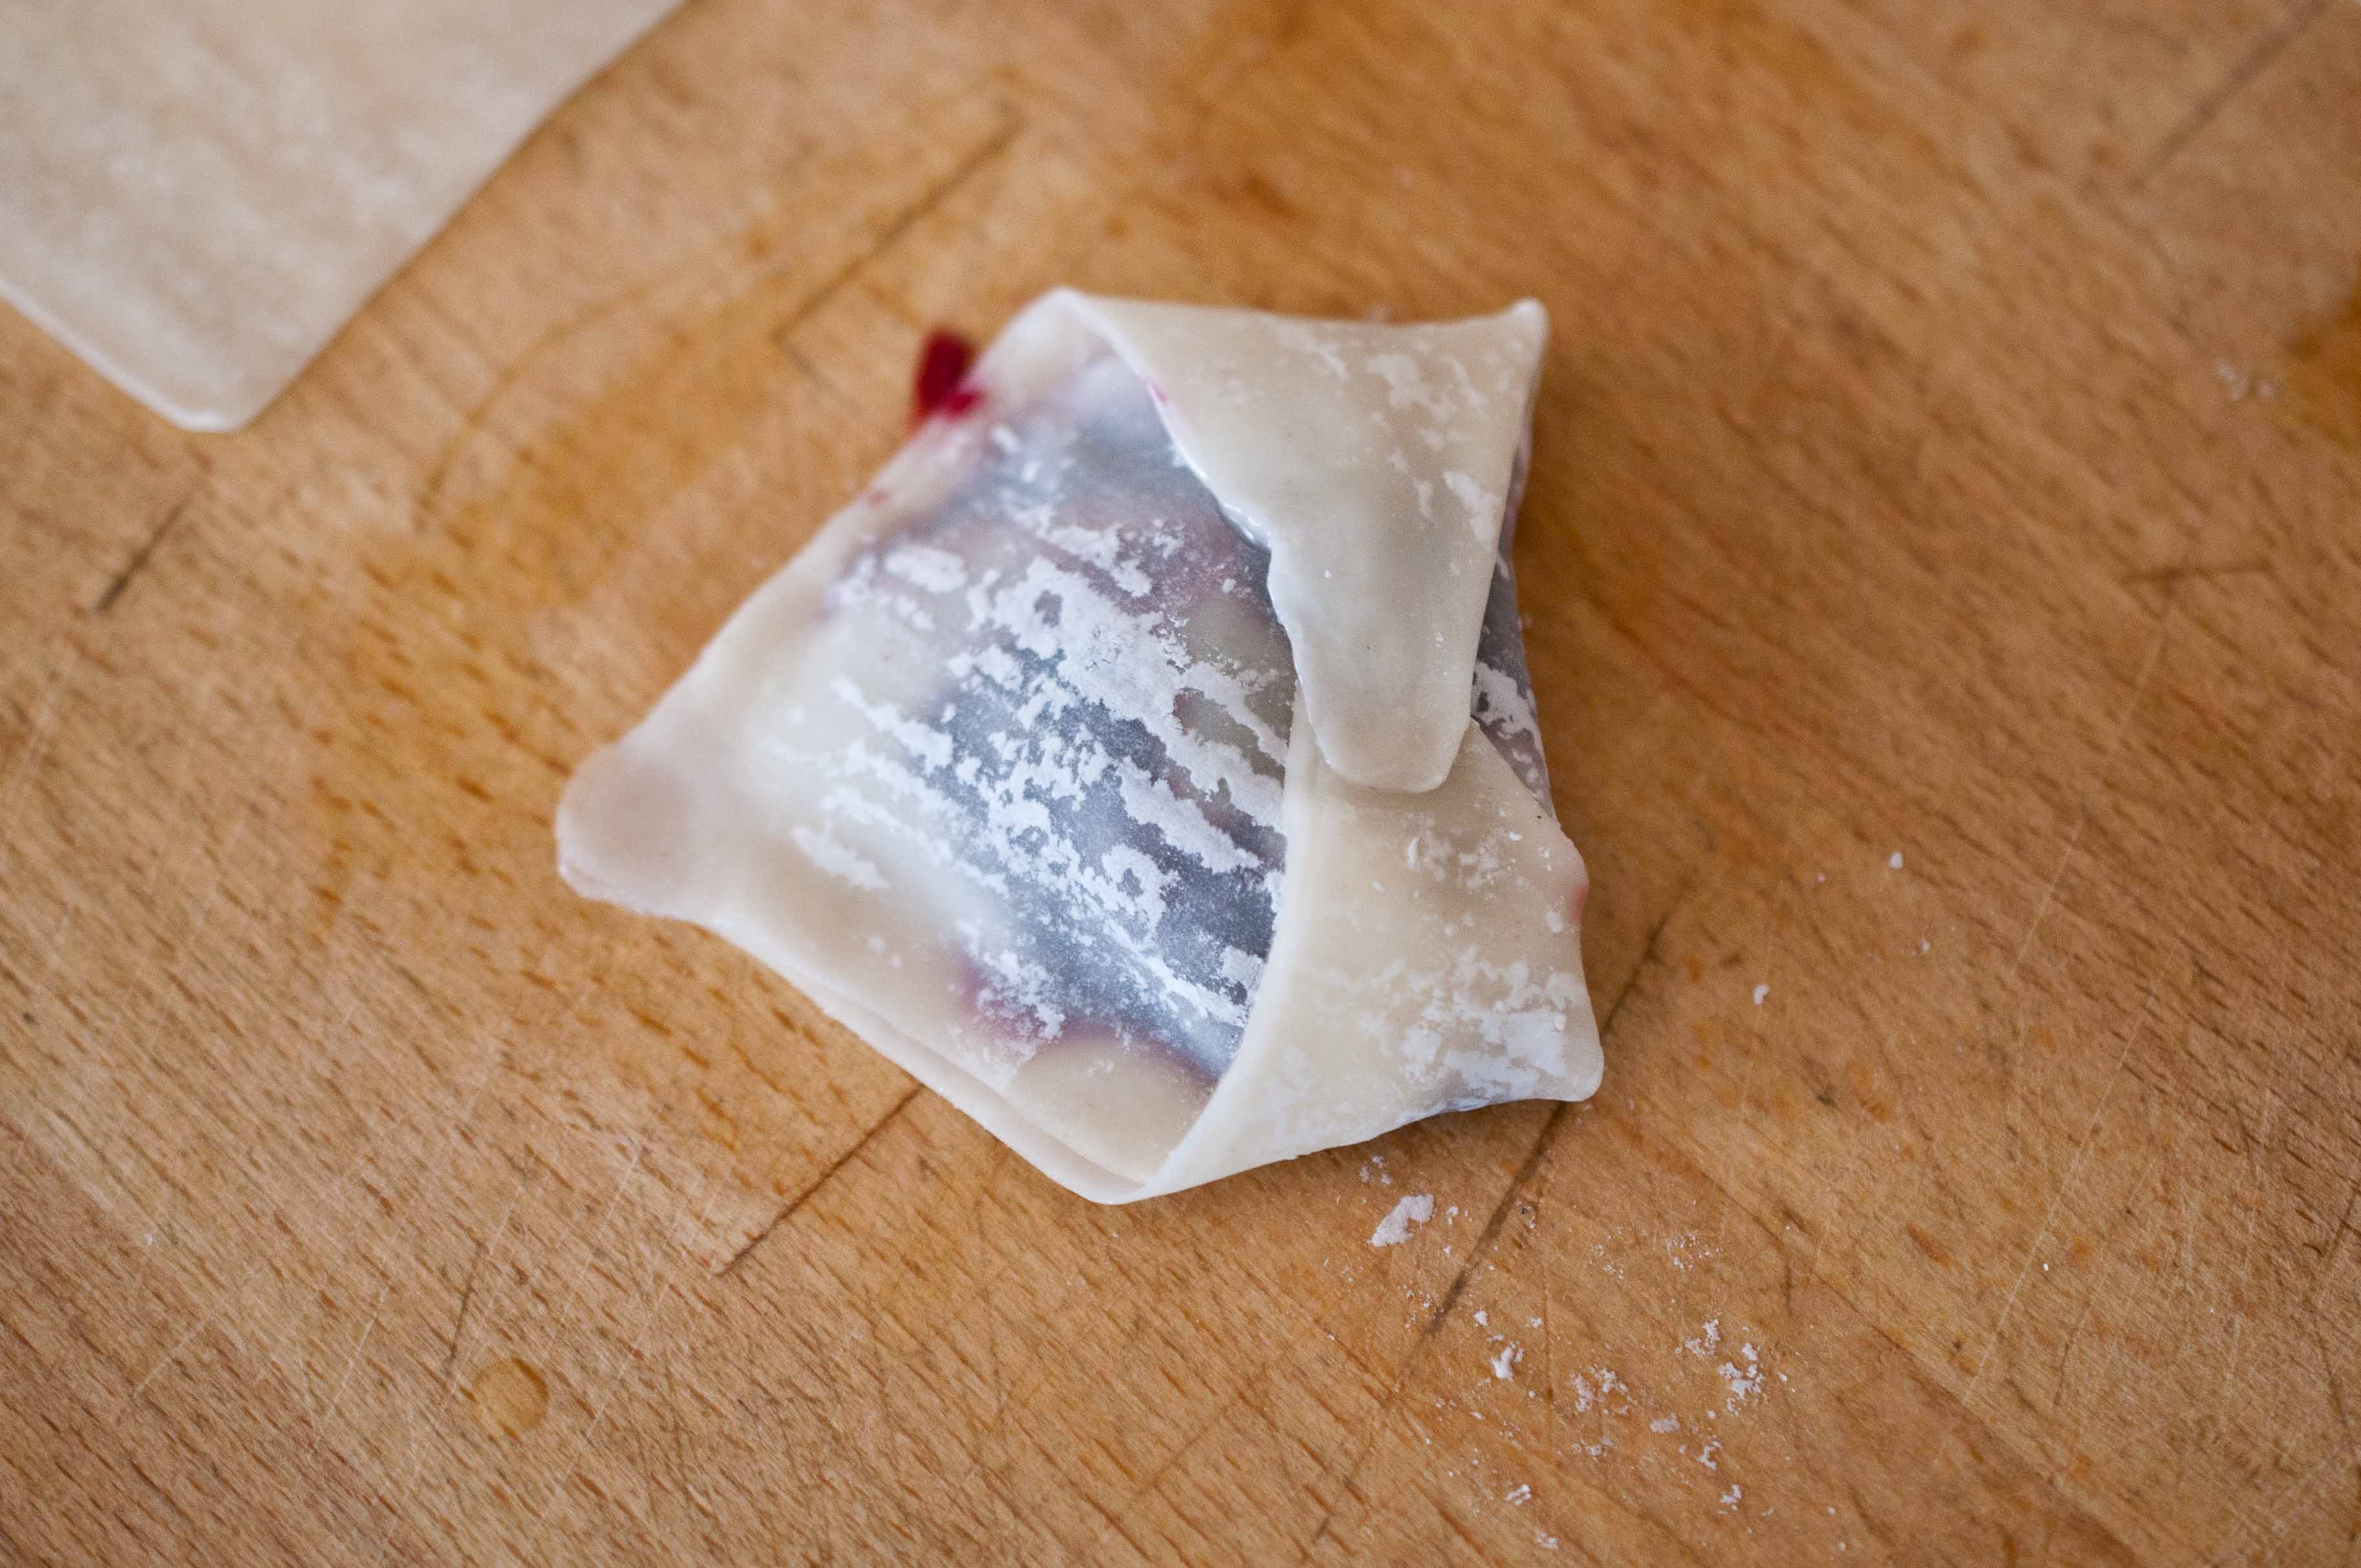
Brush the bottom of the triangle with water and fold the corners into the center and press into shape.
Heat 1/4 to 1/2 cup of oil (enough to form about 1/2 inch of oil in the bottom of your pan) in a pan over medium-high heat.
Cook the wontons, about 6 at a time, on each side until golden brown. About 3 minutes per side.
Remove from pan and allow to dry on a stack of paper towels.
I get asked a lot of questions as a food blogger. Some are about food. Some are about blogging. Some are more personal. But one of the most common questions I get asked is, "How do you stay so skinny when you cook so much food?!"
First, it’s hard. Really.
Work, being a mom, a wife, a blogger. AND trying to stay in shape is a lot of work.
A lot.
Here are some of the rules that I use to a balance food blog and skinny jeans:
1. I don’t eat fast food. It is a really rare occasion when I do, and never, ever, ever for dinner. More of a road trip occasion, or an I’m running late so I’m going to grab the one sandwich under 400 calories at Quiznos occasion. And no chips, and an unsweetened iced tea.
2. I always eat breakfast. Once in a while I have fatty things, like that french toast I still can’t stop thinking about. But 5 out of 7 days, its 2 slices of reduced calorie whole wheat toast (or whole wheat english muffin) with 1/2 tbs peanut butter each. For breakfast, you want the trifecta: low cal, high protein, good carbs.
3. I read ALL the labels of everything I put in my mouth. And just assume that you will have more than the serving size. For instance: most cereal puts a "serving size" of 3/4 a cup. Really? That’s less than my cup of coffee. You will probably have more like 2 cups. So that cereal that you think is only 175 calories. It’s probably more like 430. Thats like eating a burger. But at least the burger is worth it. Bottom line, if you are counting calories, measuring your food is a BIG part of that.
4. Snack well. I like to get the most food possible for the least amount of calories. It’s like a game. But I don’t eat a lot of processed foods, and even when I did, those 100 calorie packs aren’t really a calorie bargin. I want 2, and if I’m going to eat 200 calories, I’d rather have a snickers. This is one of my go to snacks: 1 cucumber, peeled and sliced, drizzled with lemon juice, sprinkled with salt and chili powder. It’s like 15 calories. I also do that to radish slices. Crispy and salty. Like chips, but good for you.
5. Know your weaknesses. I know I like to cook big breakfast on the weekend, and eat more for dinner when I get to cook for other people. So on the weekdays, I eat a low dairy, high plant, low fat diet. Such as: Salads with low-cal dressing (or just balsamic vinegar) or even my favorite salsa instead of dressing, non-dairy soups, roasted veggies with skinless chicken.
6. Know your calories. I have the Lose It app on my phone (it’s free) and I try to stay under 1,600 calories a day during the week. Give up calories where you can, but don’t feel like you have "earned" an extra slice of pie. That just ruins all the work you did. The truth is, unless you are an Olympic swimmer who burns 14,000 calories a day, you will never reach your goal weight with exercise alone. Never. You have to get your eating in check. Can you indulge? Sure, once in a while, but make sure you make up for it but eating lots of plants. Don’t starve yourself, it makes your body store everything as fat. So you are hungry and still gaining. That sucks. Think of calories like you think of money. You only have so many (probably around 1,700 a day if you’re a girl) to spend before you go "into debt" (meaning: gain weight). Is that mediocre lunch really worth half of your calorie budget? Do you like that White Chocolate Mocha from Starbucks 600X more than a regular cup of coffee? Because that’s how many more calories are in it (a venti White Chocolate Mocha, with whip has 620 calories, a plain cup of coffee has about 5 calories). Spend where it counts, cut when it doesn’t.
7. Find the WHY. I have a Masters Degree in Psychology. Did you know that? It’s true. The mental part is hard. Probably harder than being hungry, is being unmotivated. Write a list of WHY you want to stay (or get) in shape and post it everywhere, and keep updating it. And talk yourself down when you do want to grab for that bad stuff. Oh, and don’t keep in the house, it just makes it that much more difficult for yourself.
(pretty much my WHY for everything good in my life)
8. Replacement behaviors. This is an important part of therapizing yourself. Find your bad habits and replace them with good ones. For me: 3pm candy jar. My coworkers all have them, and I do as well. Instead of wandering around chatting with the intention of snacking, I walked my office building for 15 minutes, stairs and all. Now, my candy jar is filled with candy I don’t like and I’m not even tempted to eat, just for those people who come to visit with the intention of snacking.
9. Just have one. If you really want to try a new recipe for cupcakes, pie, cookies, thats OK. Try and plan to make them when you can give the rest away. For me, most of the fun of cooking is having a recipe in my head and trying to figure out how to make it work in the kitchen. But most of my food, the sugary, high fat stuff, is given away. Take it to the office, or to a friends house, or let your husband take it to his office. Find a charity, like a women’s shelter, that might want it. Or throw it out. It sucks to waste food, but is it really doing any good taunting you from the fridge? Or, you can make a half or a quarter of the original recipe using an online site like Half Recipe.
10. Move a lot. Even though exercise doesn’t burn as many calories as we would like, it’s still important to move. For me, it’s spin class. Because it’s the most amount of calories I can burn in the least amount of time. If I really push myself, do everything that spin guy is yelling at me to do, I can burn nearly 700 calories in an hour. Thats a lot. Do that 3 times a week and thats 30 lbs a year. Find something that you will actually do, and do it. A lot. Spoil yourself with dance class, then treat yourself to shrimp cocktail (fairly low cal treat).
11. Water is essential. Get a water bottle and carry it around like a security blanket. First, it flushes out your body. Second, the human thirst reflex is so weak, it is often mistaken for hunger. Drink a lot of water and you will eat less and glow more.
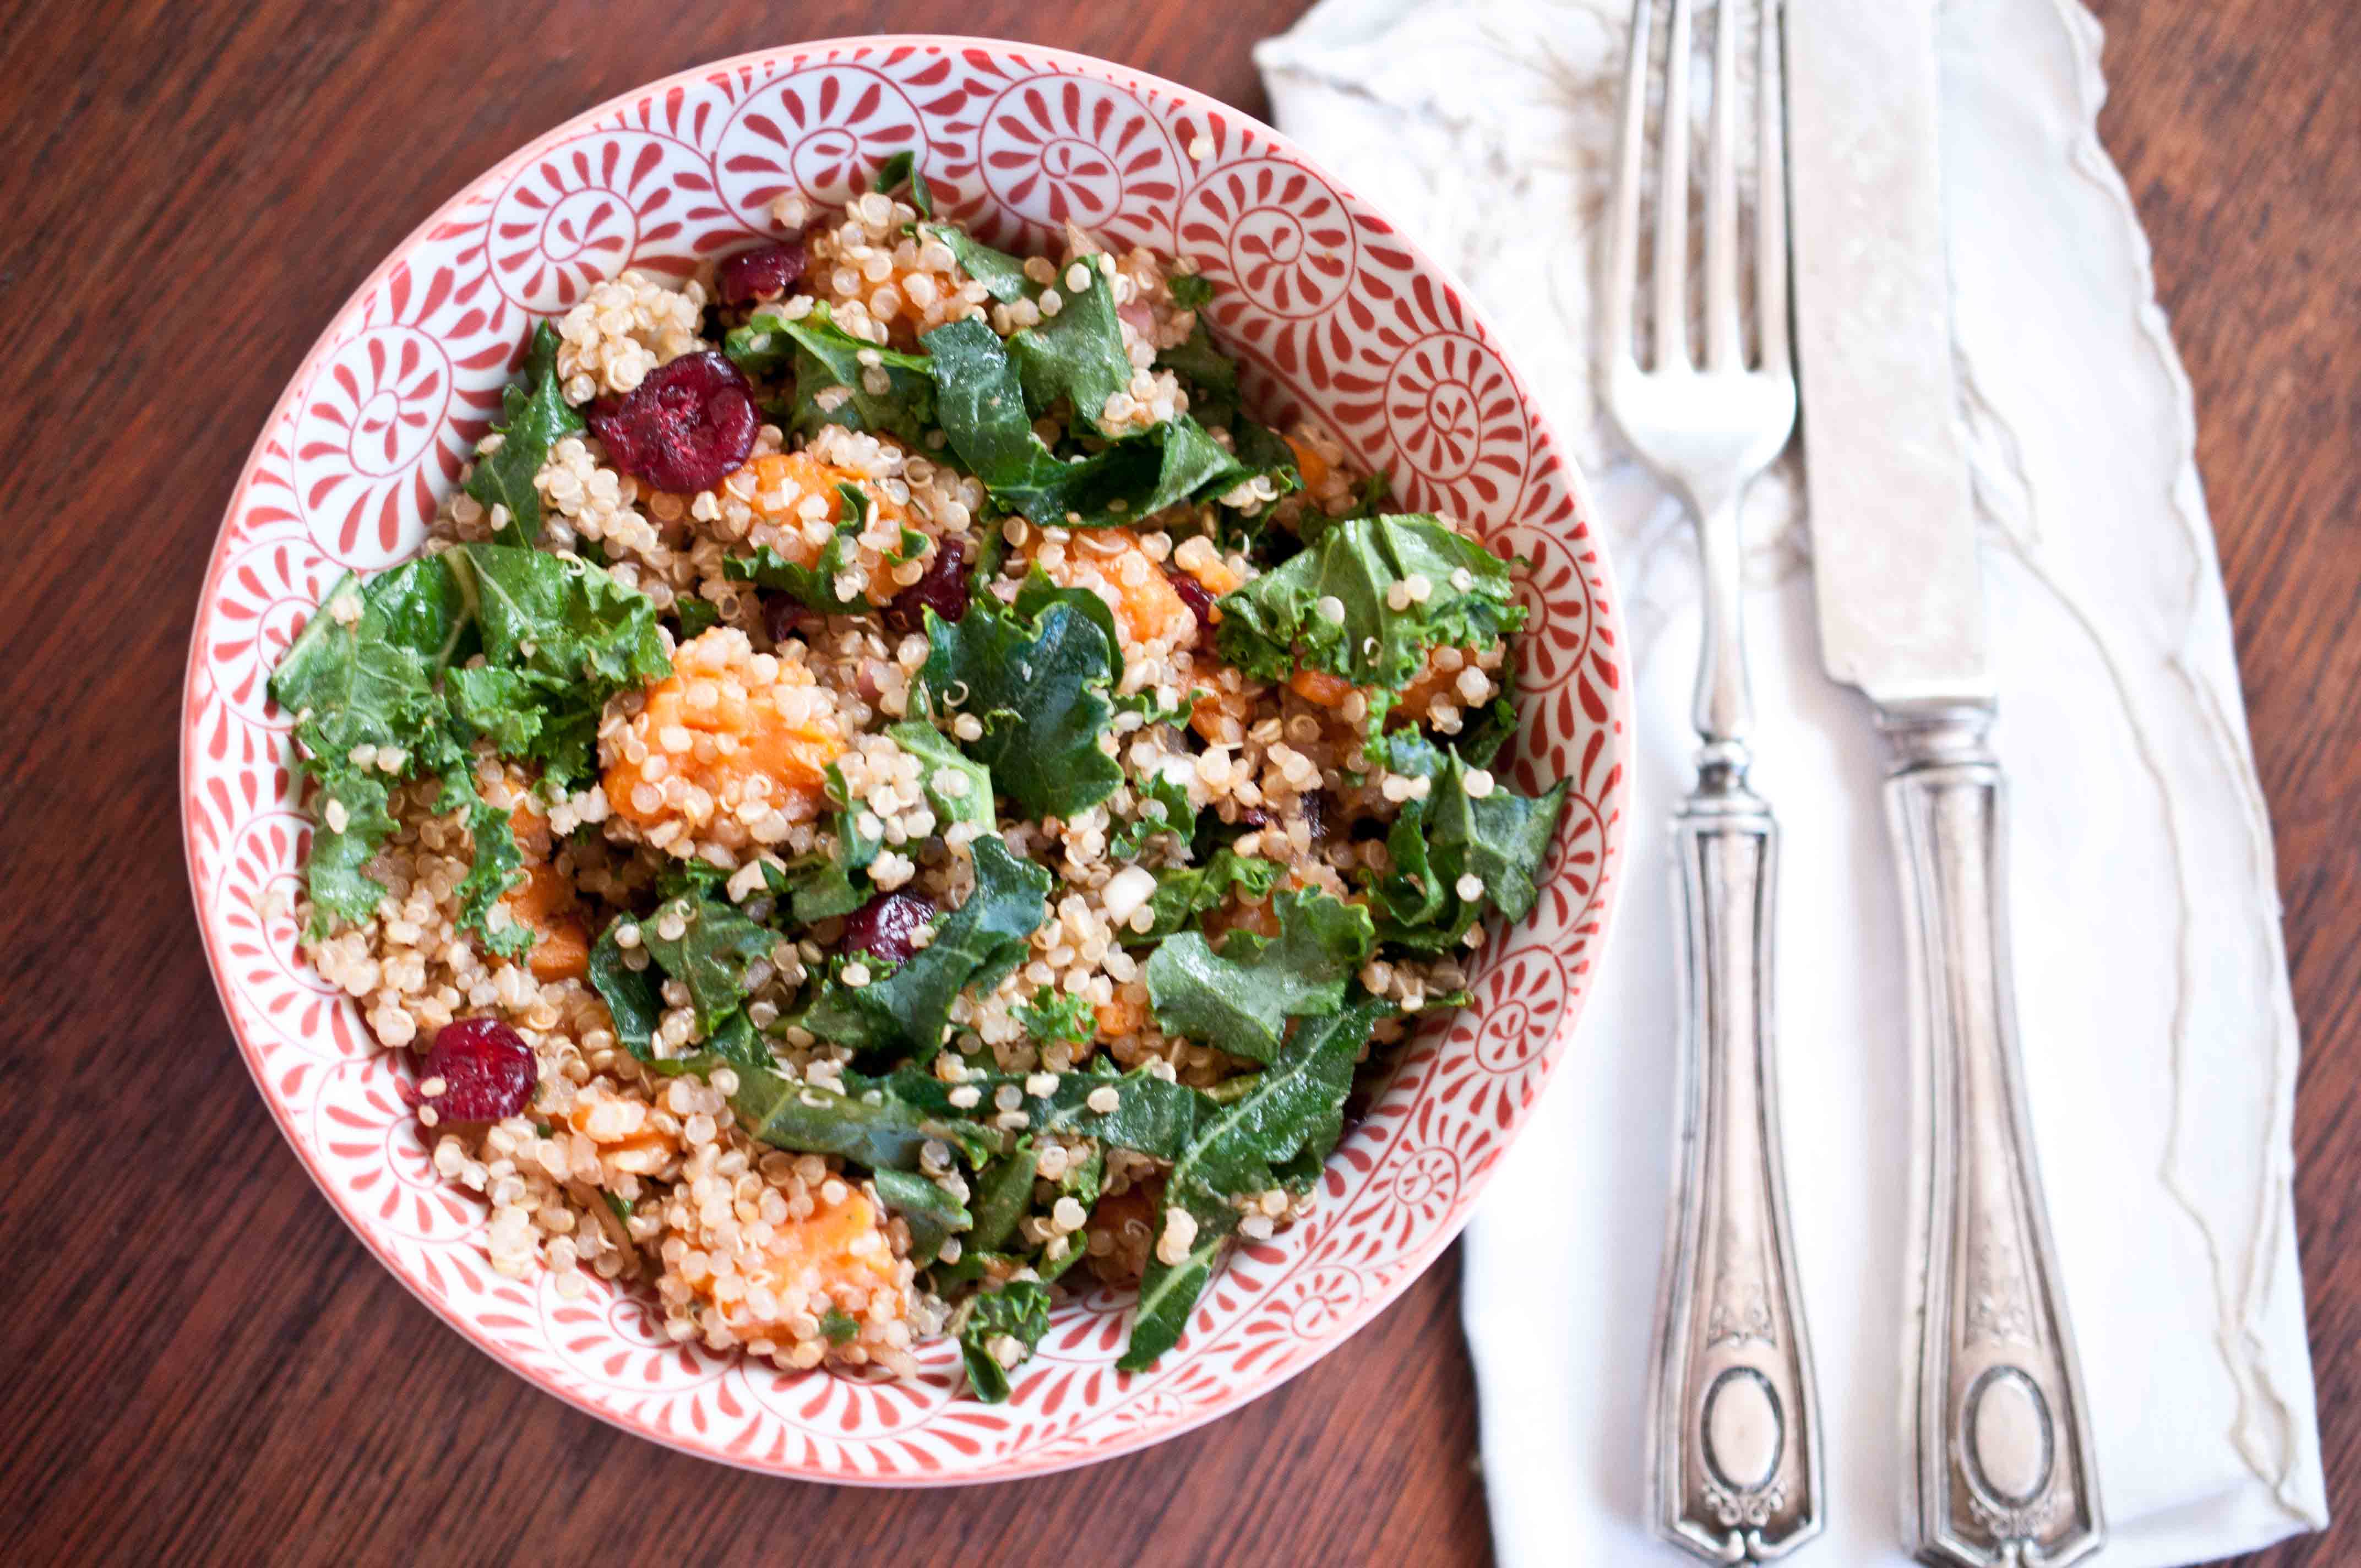
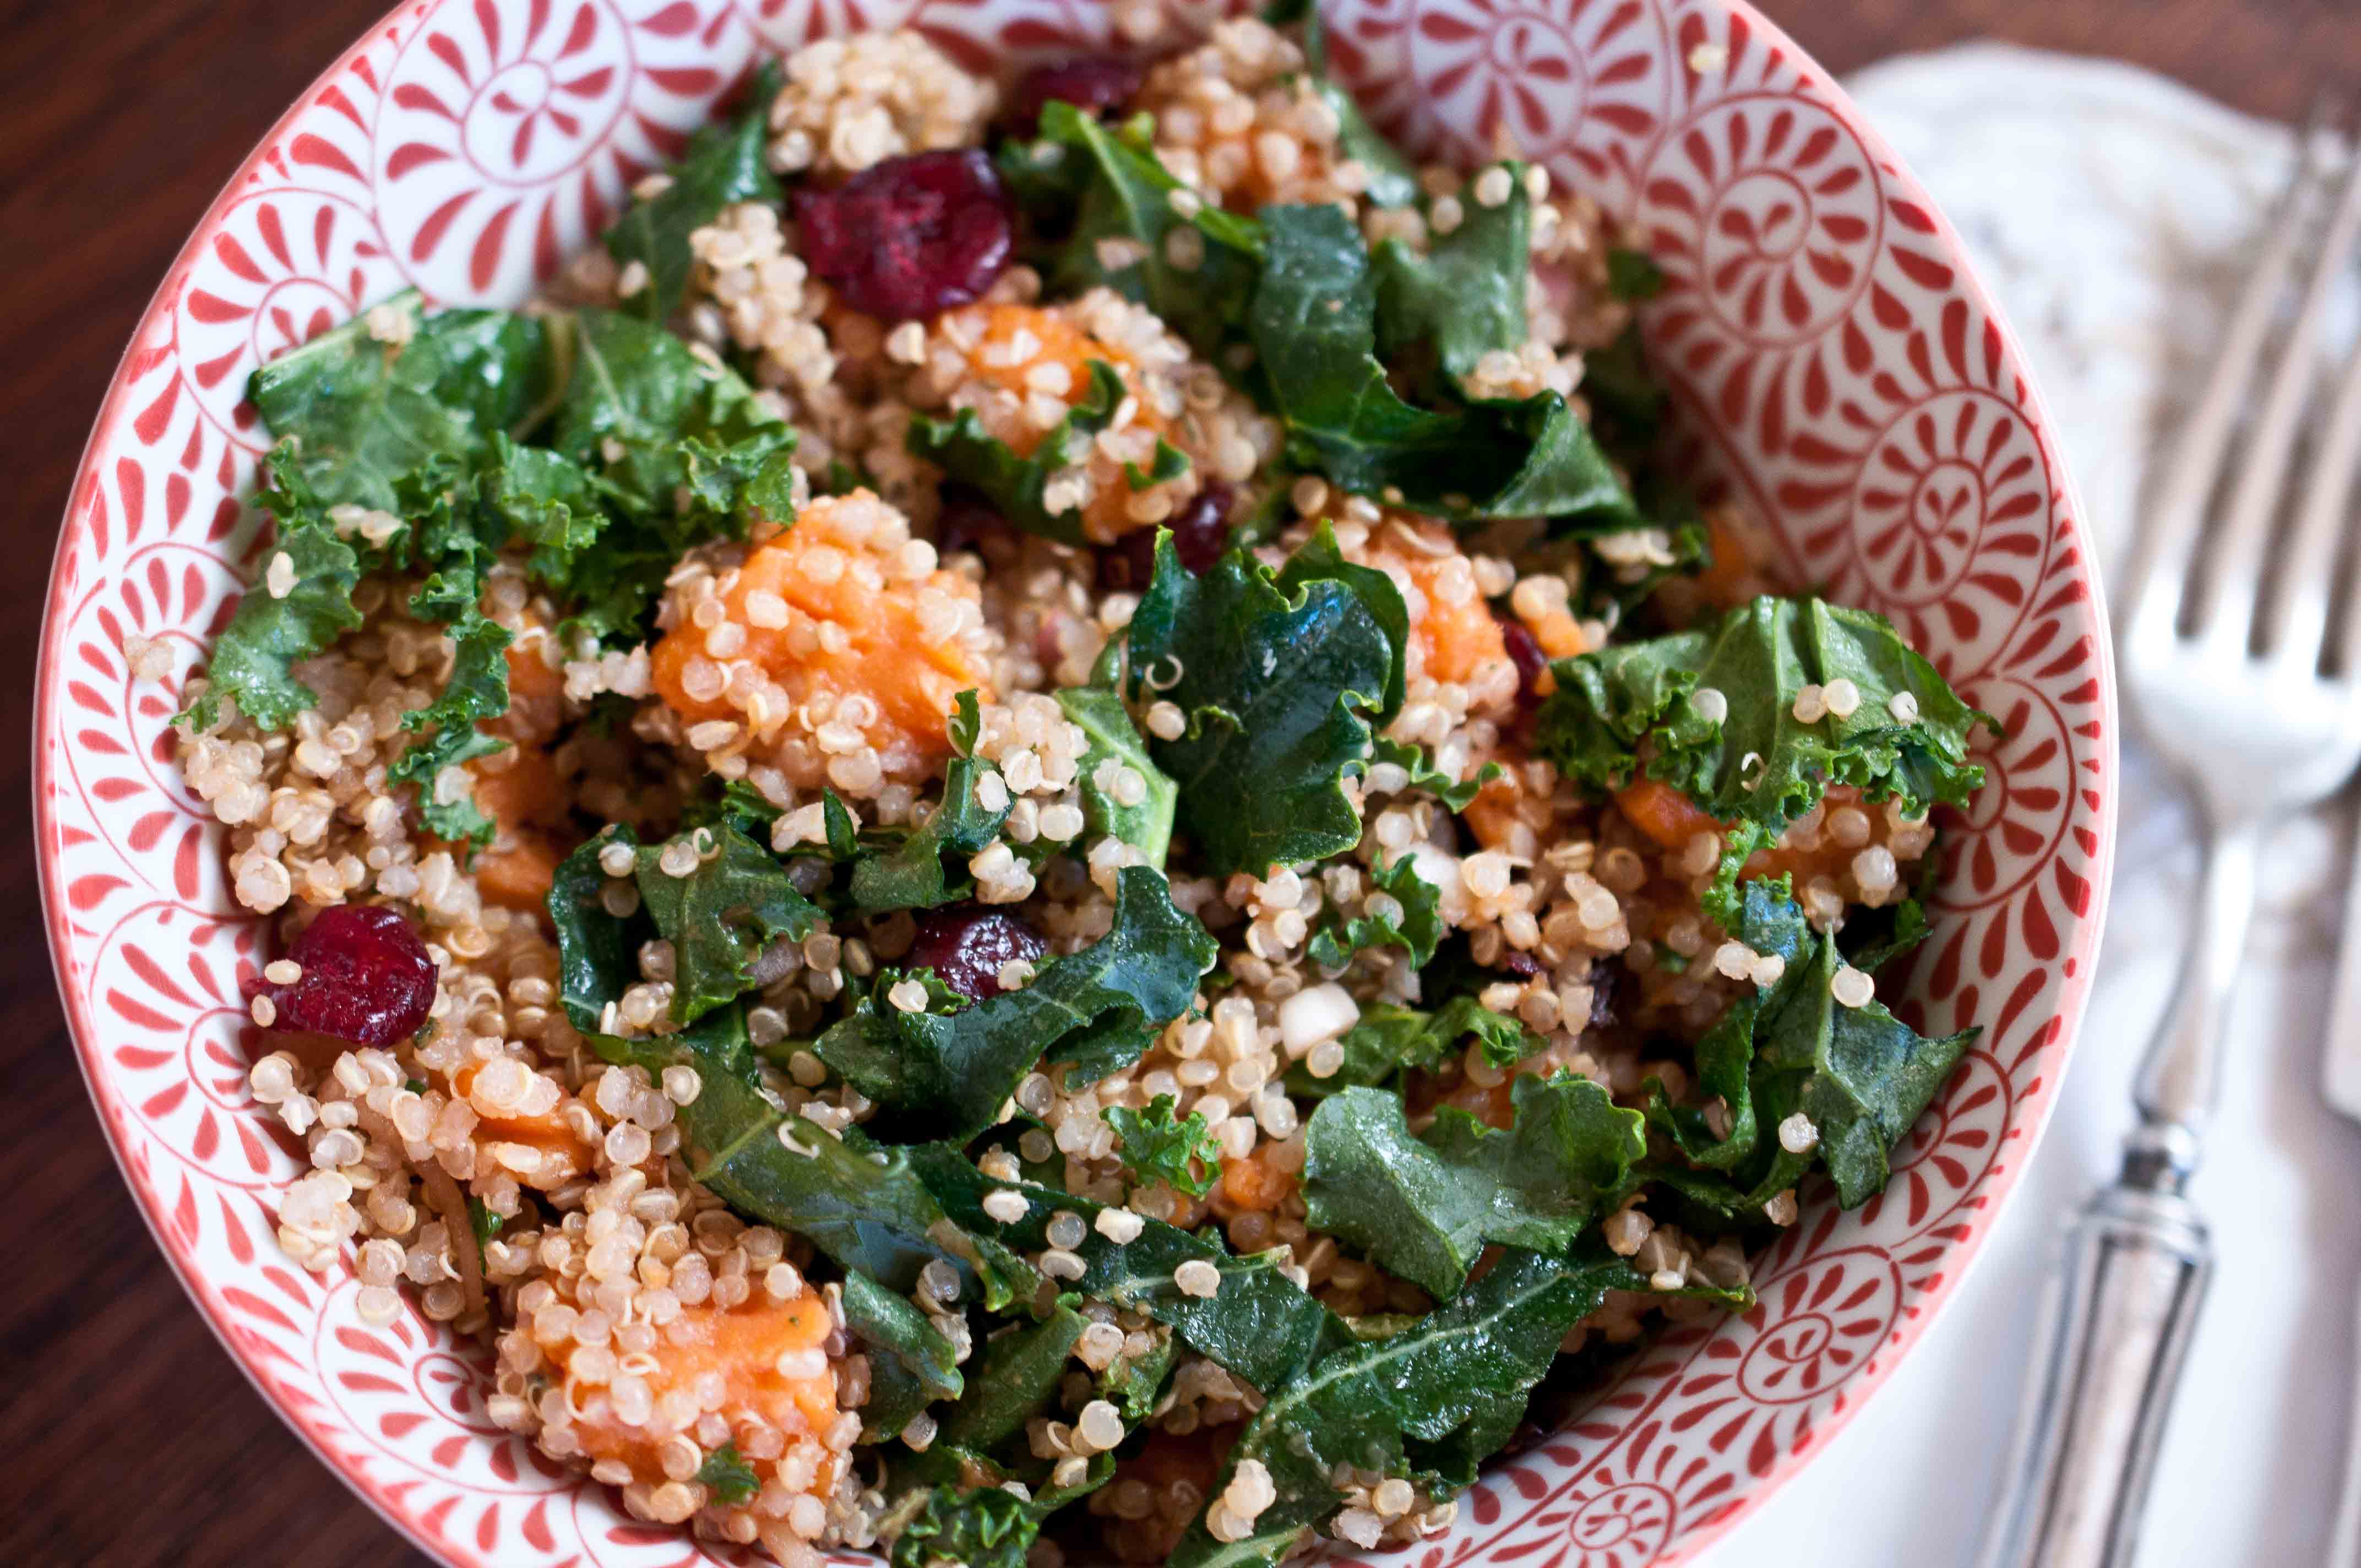
Now onto the recipe. This makes 2 large entree sized portions, at about 330 calories each, or 4 side salad portions at about 165. If you want a little more, you can add 3oz grilled skinless chicken.
Sweet Potato Quinoa Salad
1 large sweet potatoes, peeled and diced
1 cup cooked quinoa
1 tsp fresh sage, minced
1 1/2 cups fresh kale, chopped
1/3 cup dried cranberries
1 large roasted red bell pepper, chopped
2 tbs shallots, minced
2 tbs balsamic vinegar
2 tsp raw honey (sub agave for vegan)
1/4 tsp salt
1/2 tsp black pepper
Boil the sweet potatoes in a large pot of lightly salted, boiling water until fork tender, about 5-8 minutes. Remove from water with a slotted spoon, allow to drain. I did a guest post of Eating Rules about the proper way to cook quinoa, if you are interested.
In a large bowl, combine the quinoa, sweet potatoes, sage, kale, cranberries, and red pepper. In a small bowl, add the shallots, balsamic, honey, salt and pepper, stirring to combine. Drizzle over the quinoa salad, tossing to coat.
Legal Disclaimer: I am not a nutritionsinst. The ideas presented here are just what works for me.
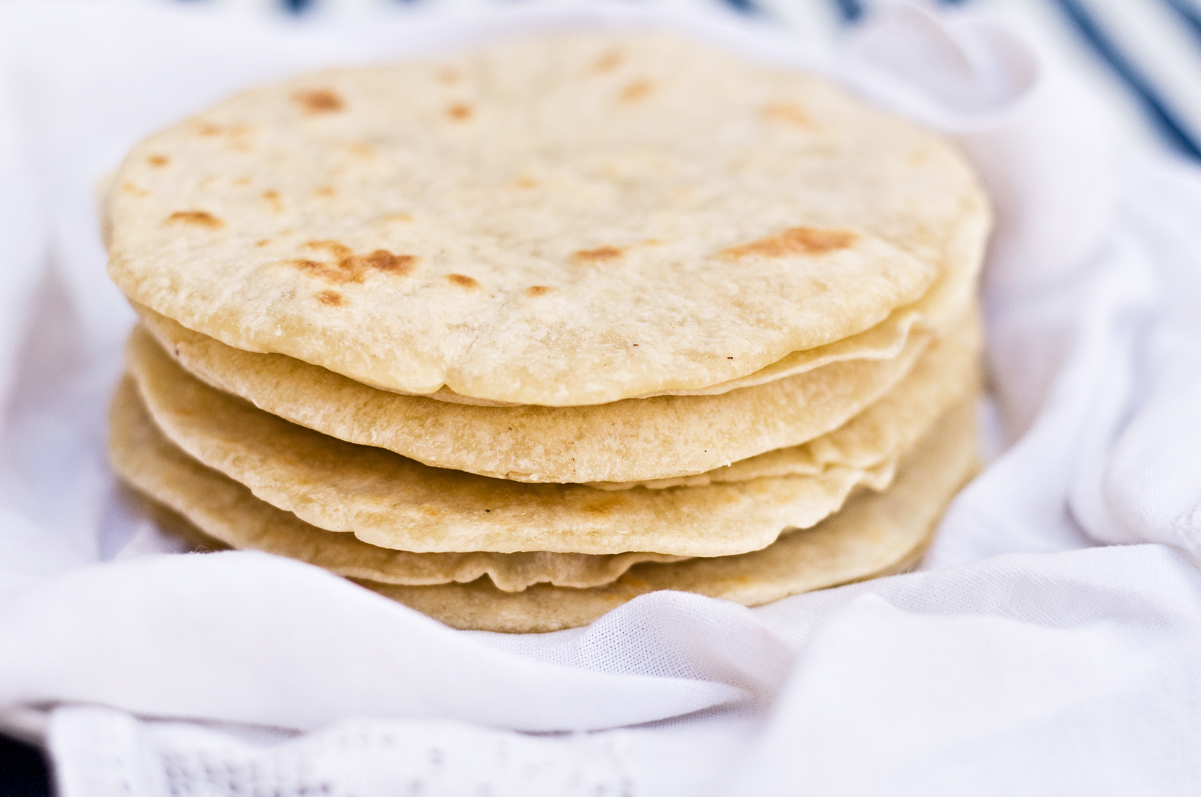
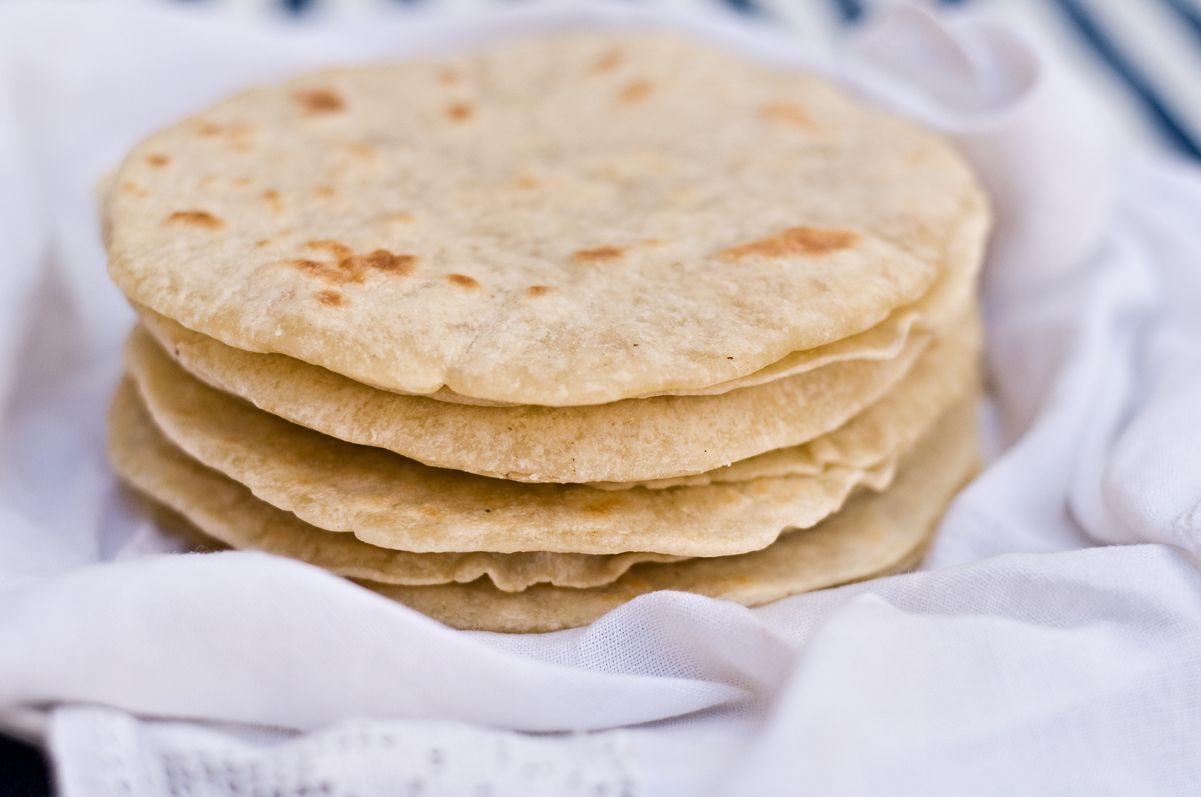
Every time that Mr. Fits, Tater and I are all home, lucky enough to wake up with no place to go, I make breakfast. I love this ritual, and I hope that it continues well into my old, old age (I do plan on living past 100, cooking the entire way, aided by a Rascal Scooter if necessary). Most of these breakfast involve bacon. For the past few months I have been saving the rendered bacon fat by pouring it through a mesh strainer into a small container and storing it in the fridge, waiting for brilliance to strike. I found the homemade tortilla recipe of the fabulous Rick Bayless (who is on my "Culinary Crush" list) and the bacon finally had a grand purpose. If you are kosher, vegetarian or watching your saturated fat intake, or just crazy enough not to like bacon, you can use vegetable shortening, Smart Balance Light (it’s actually vegan), butter or oil. Although the flavor won’t be the same if you use another fat and you will have to watch the ratios since these fats all behave differently. But if you can, save bacon drippings and try the bacon flavored tortillas, so incredible.
2 3/4 cups all-purpose flour, plus a little extra for rolling the tortillas
5 tablespoons of fat (bacon fat, vegetable shortening, etc)
3/4 teaspoon salt
about 3/4 cup very warm tap water
DIRECTIONS
As I mentioned previously, save your bacon grease by pouring it through a fine mesh strainer into a container with a tight lid (just pour the next round on the top of the previous) and keeping it in the fridge. This stuff is liquid gold, don’t pour it down the drain.
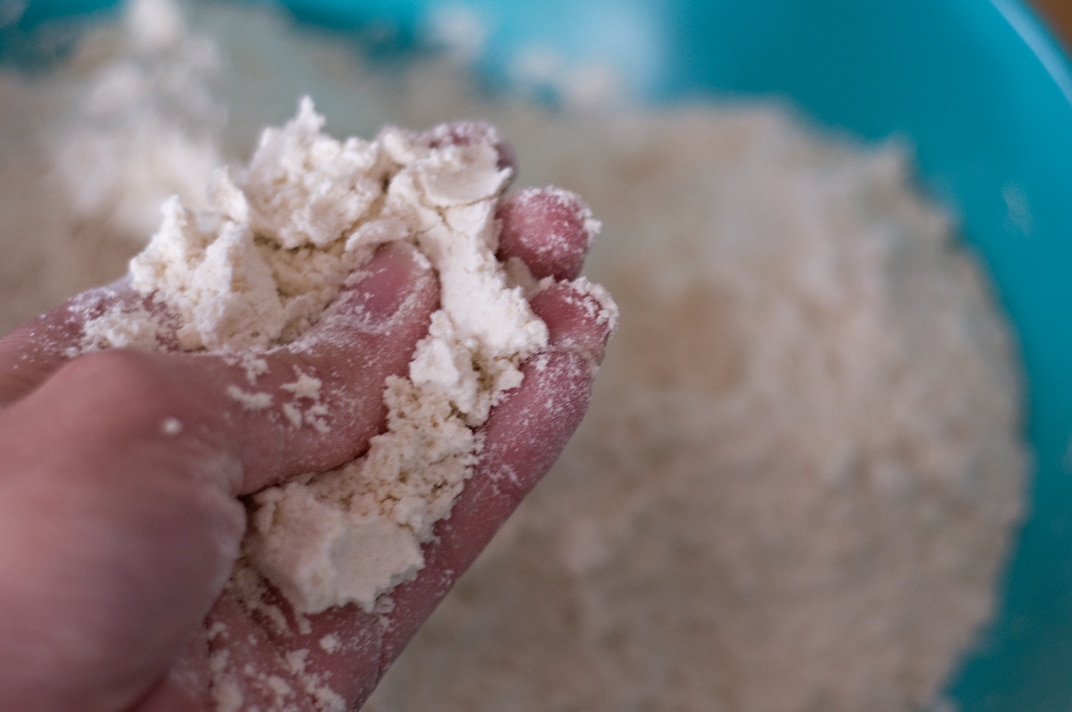
1. Combine the flour and fat (I used 5 tbs bacon fat) in a large mixing bowl, working in the fat with your fingers, until completely incorporated.
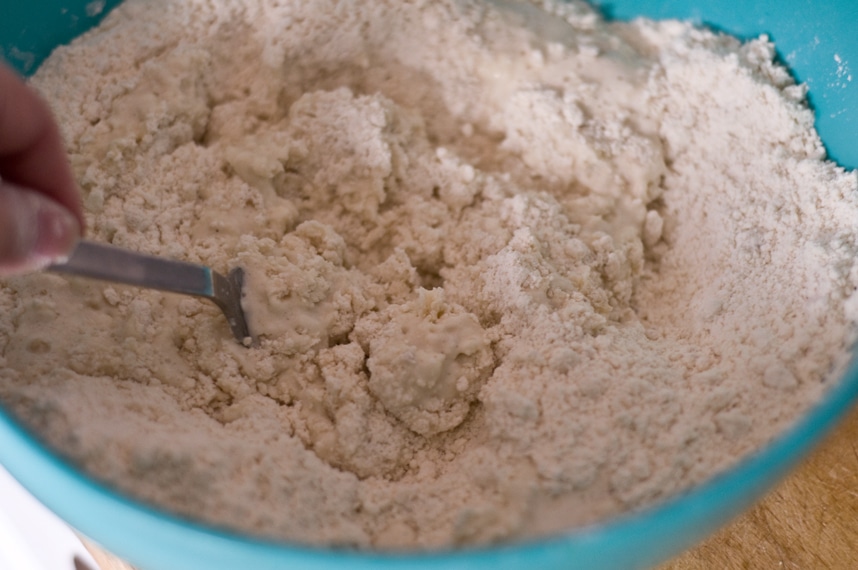
2. Dissolve the salt in the water, pour about 2/3 cup of it over the dry ingredients and immediately work it in with a fork.
The dough will be in large clumps rather than a homogeneous mass.
If all the dry ingredients haven’t been dampened, add the rest of the liquid (plus a little more, if necessary).
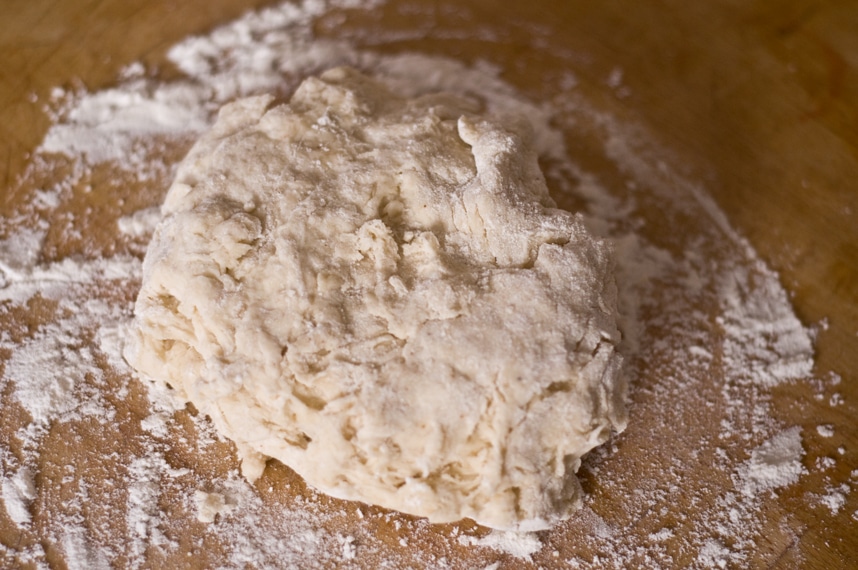
3. Scoop the dough onto your floured work surface
and knead until smooth.
It should be medium-stiff consistency — definitely not firm, but not quite as soft as most bread dough either. Cover with a towel and allow to rest for 30 minutes to an hour.
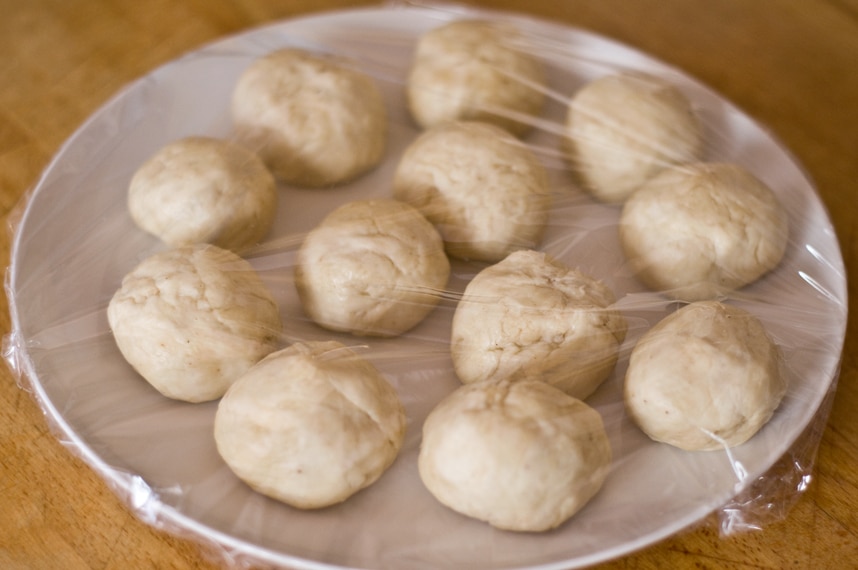
4. Rest the dough. Divide the dough into 12 portions and roll each into a ball. Set them on a plate, cover with plastic wrap and let rest at least 30 minutes (to make the dough less springy, easier to roll).
5. You can either press your tortillas using a tortilla press lined with parchment paper to prevent sticking, which I used
or you can roll them with a rolling pin using this method:
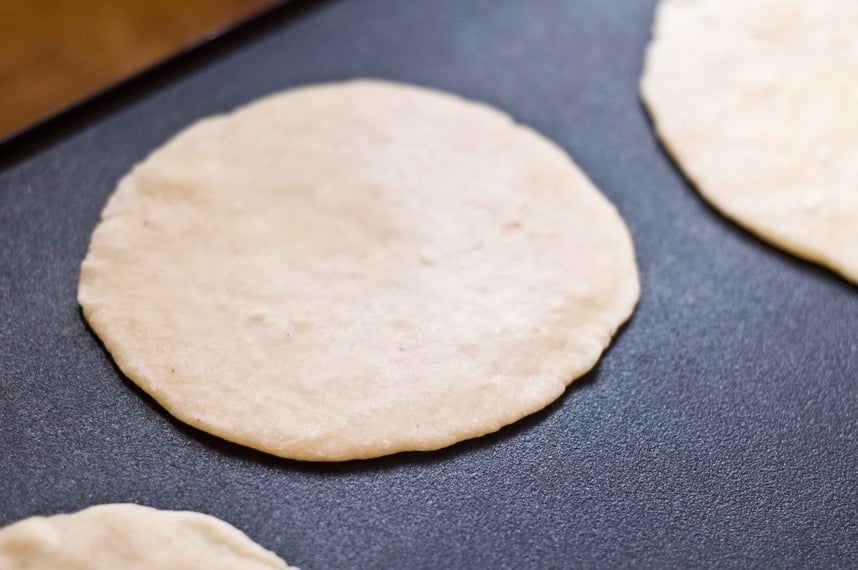
On a lightly floured surface, roll out a portion of the dough into an even 7-inch circle: Flatten a ball of dough, flour it, then roll forward and back across it; rotate a sixth of a turn and roll forward and back again; continue rotating and rolling until you reach a 7-inch circle, lightly flouring the tortilla and work surface from time to time.
Make sure the tortillas are very thin, almost thinner than you think they should be.
6. Heat an ungreased griddle or heavy skillet over medium to medium-high heat. Lay the tortilla on the hot griddle (you should hear a faint sizzle and see an almost immediate bubbling across the surface).
After 30 to 45 seconds, when there are browned splotches underneath, flip it over. You will know it is time to flip when the edges look dry and lighter in color. Bake 30 to 45 seconds more, until the other side is browned; don’t overbake the tortilla or it will become crisp. Remove and wrap in a cloth napkin placed in a tortilla warmer. Roll or press and then griddle-bake the remaining tortillas in the same manner and stacking them one on top of the other.
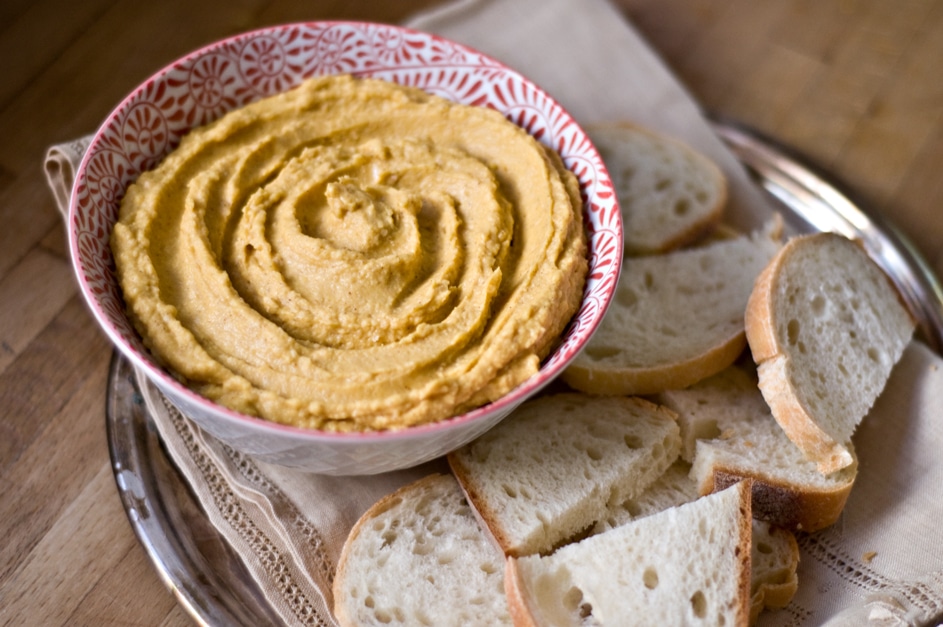
So, what do you do when you roast 4 pumpkins and end up with several containers FULL of homemade pumpkin puree? AND you have a husband that "Isn’t really crazy about that whole pumpkin flavor"? Besides the Pumpkin Pie With Bourbon Whipped Cream I made, and the Pumpkin Cranberry Cookies, I made hummus. Hummus, cookies and pie that I had the sole responsibility of consuming, which also turned into a few extra, much needed, workouts and spin classes. Totally worth it.
This hummus also became the "dressing" on my salad for lunch, and the schemer for my ham sandwich at lunch the next day. So many yummy uses.
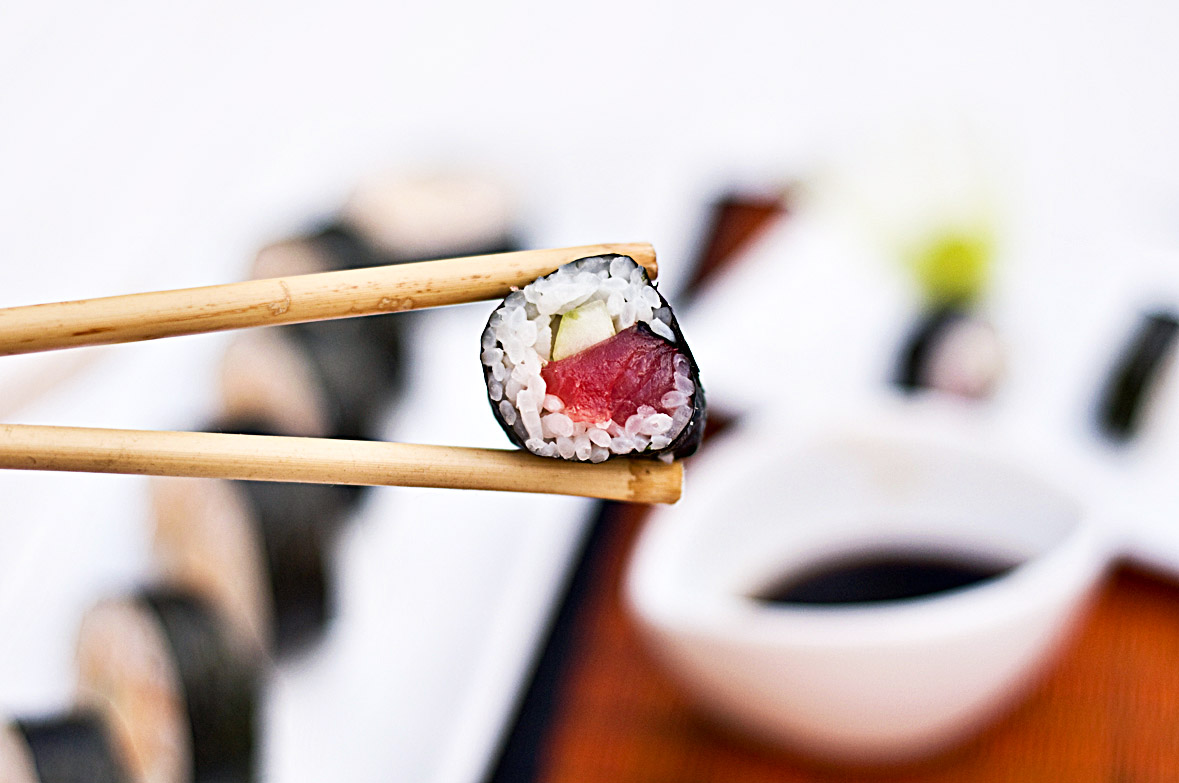
Sushi making is an art. A beautiful, delicious art. I’m not going to sit here and pretend that one little post will ever get anyone near the magic that happens behind a real sushi counter, but I WILL tell you that making a simple roll is easy enough to do at home. If you dare.
Make The Rice
Sushi rice isn’t like your every day rice and isn’t cooked the same way. The cooking method is different, and it is finished with a shot of sake (optional) and a vinegar dressing.
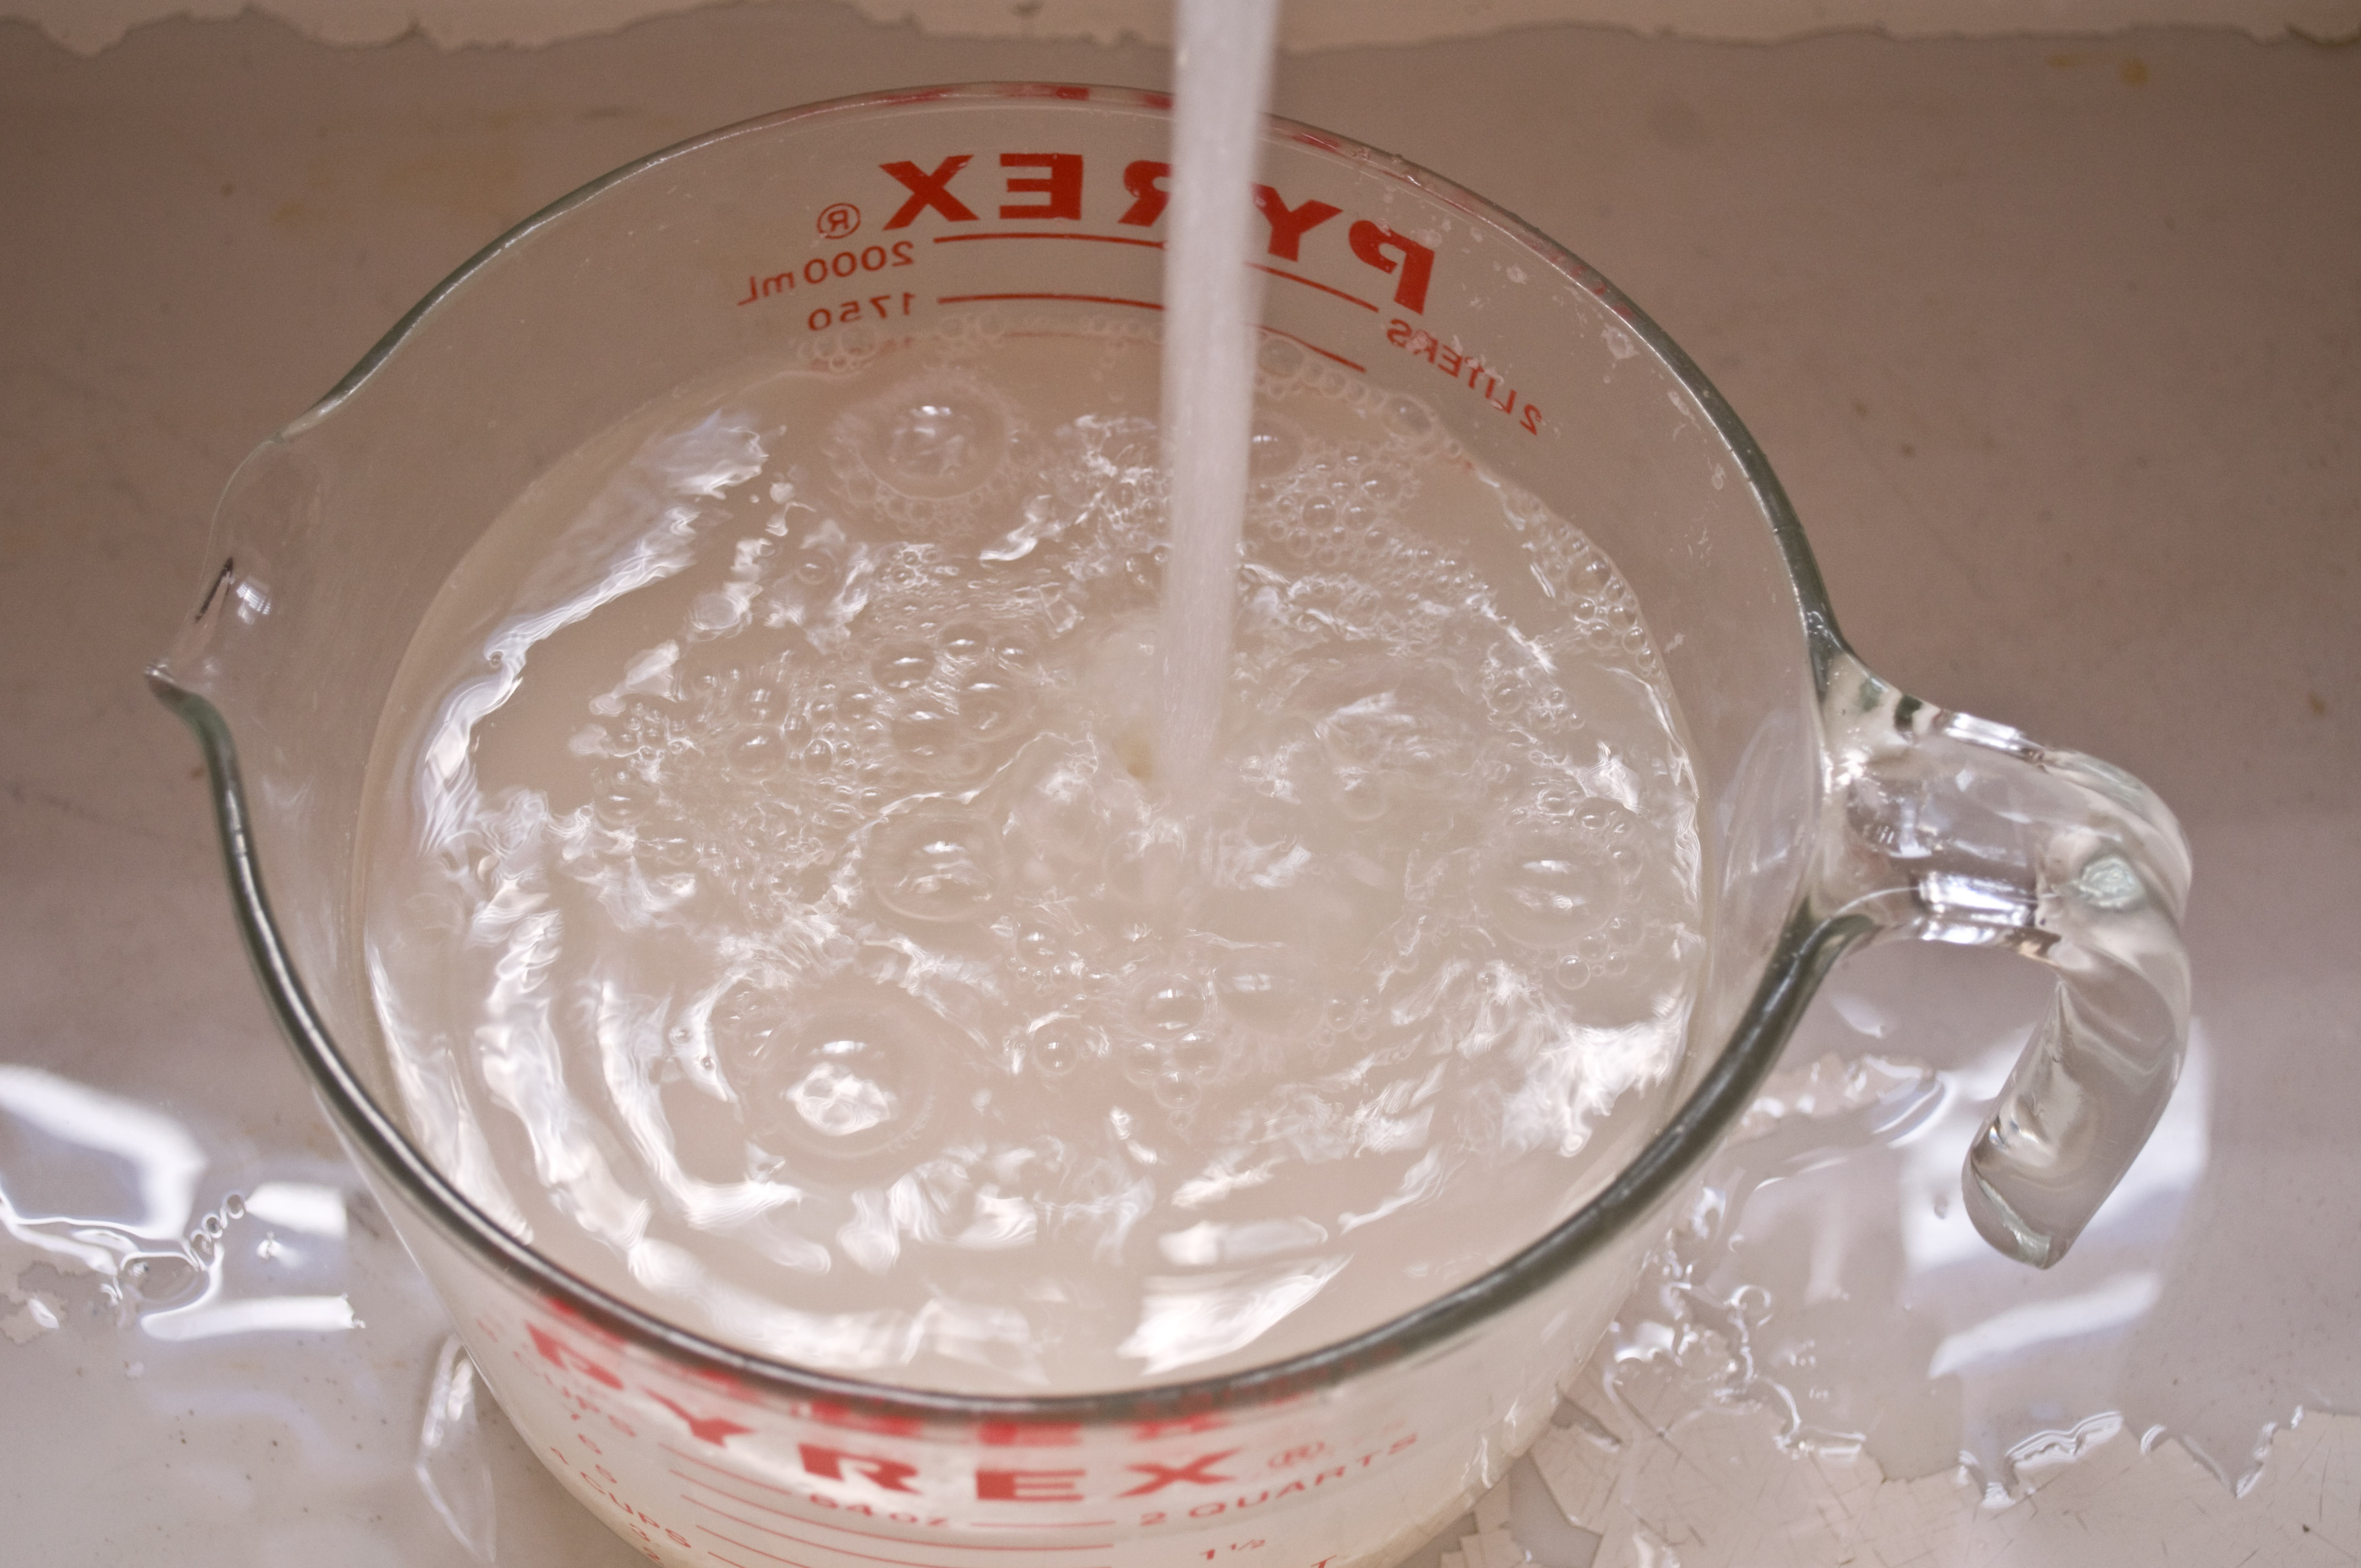
Put the rice in a large bowl and cover with cold tap water.
Swirl with your hands to remove any debris.
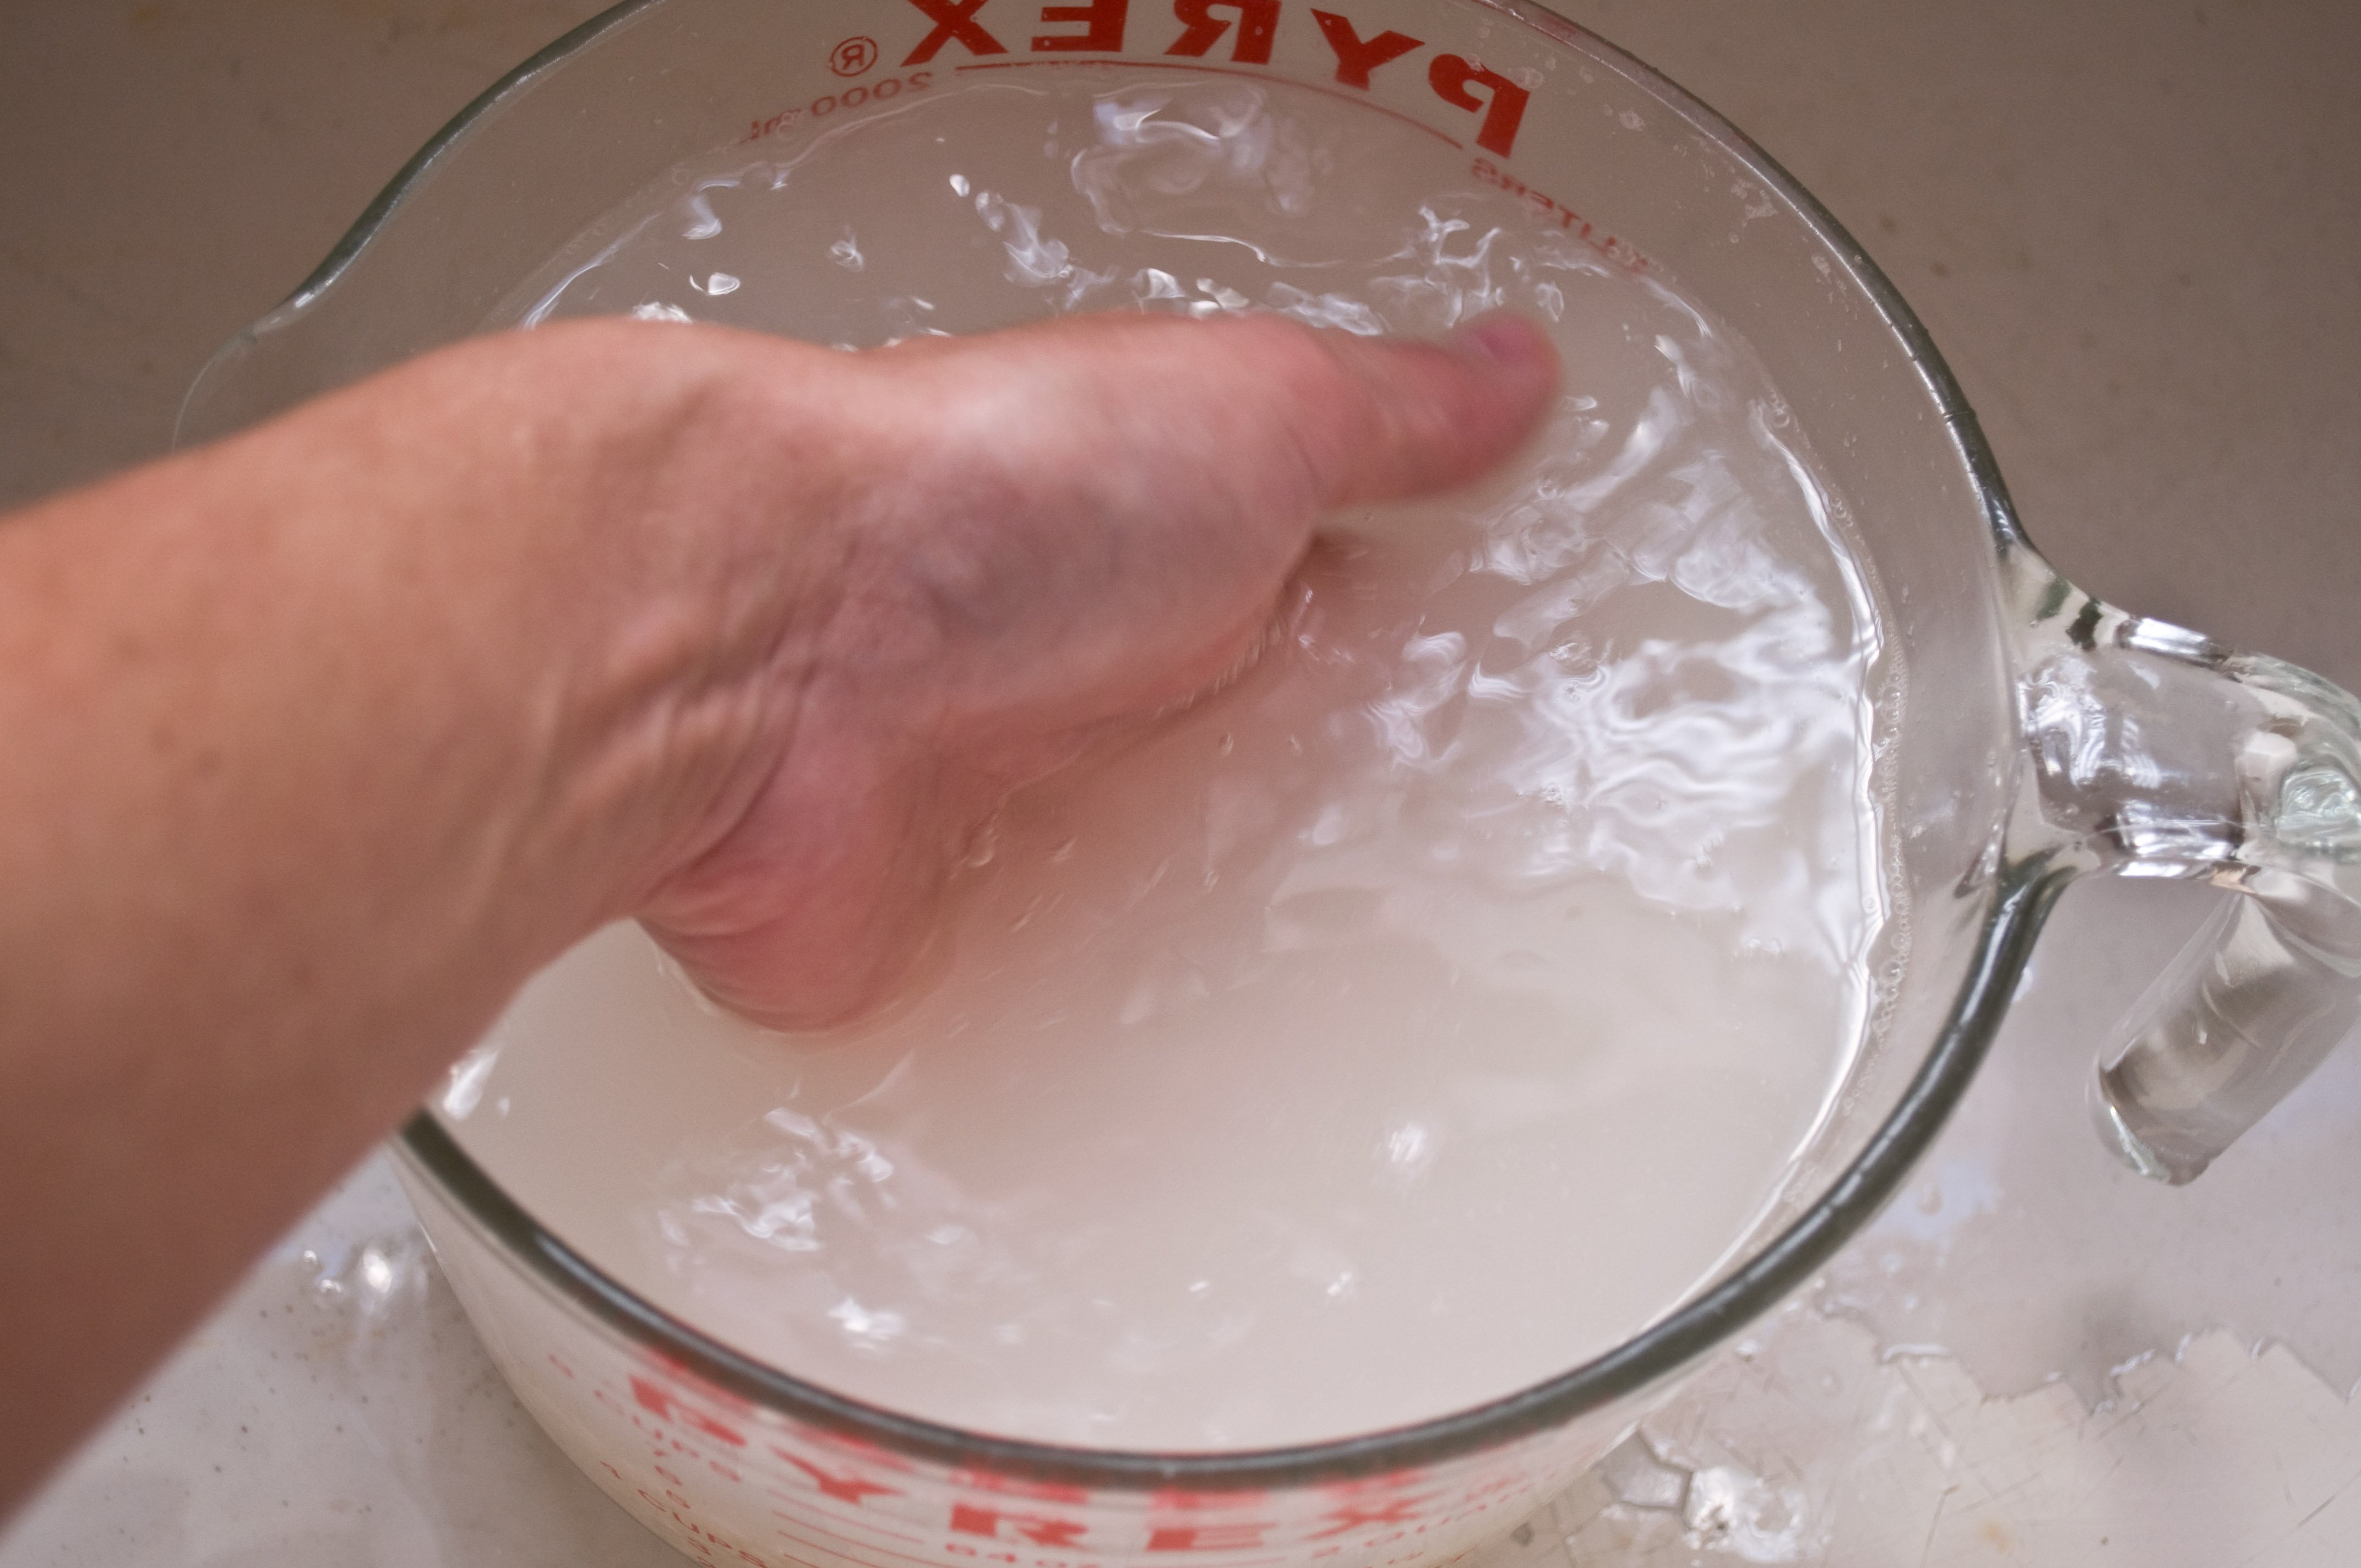
Drain the water off, using your hand to keep the rice in the bowl
Repeat two more times. By the third time, the water should be much less cloudy.
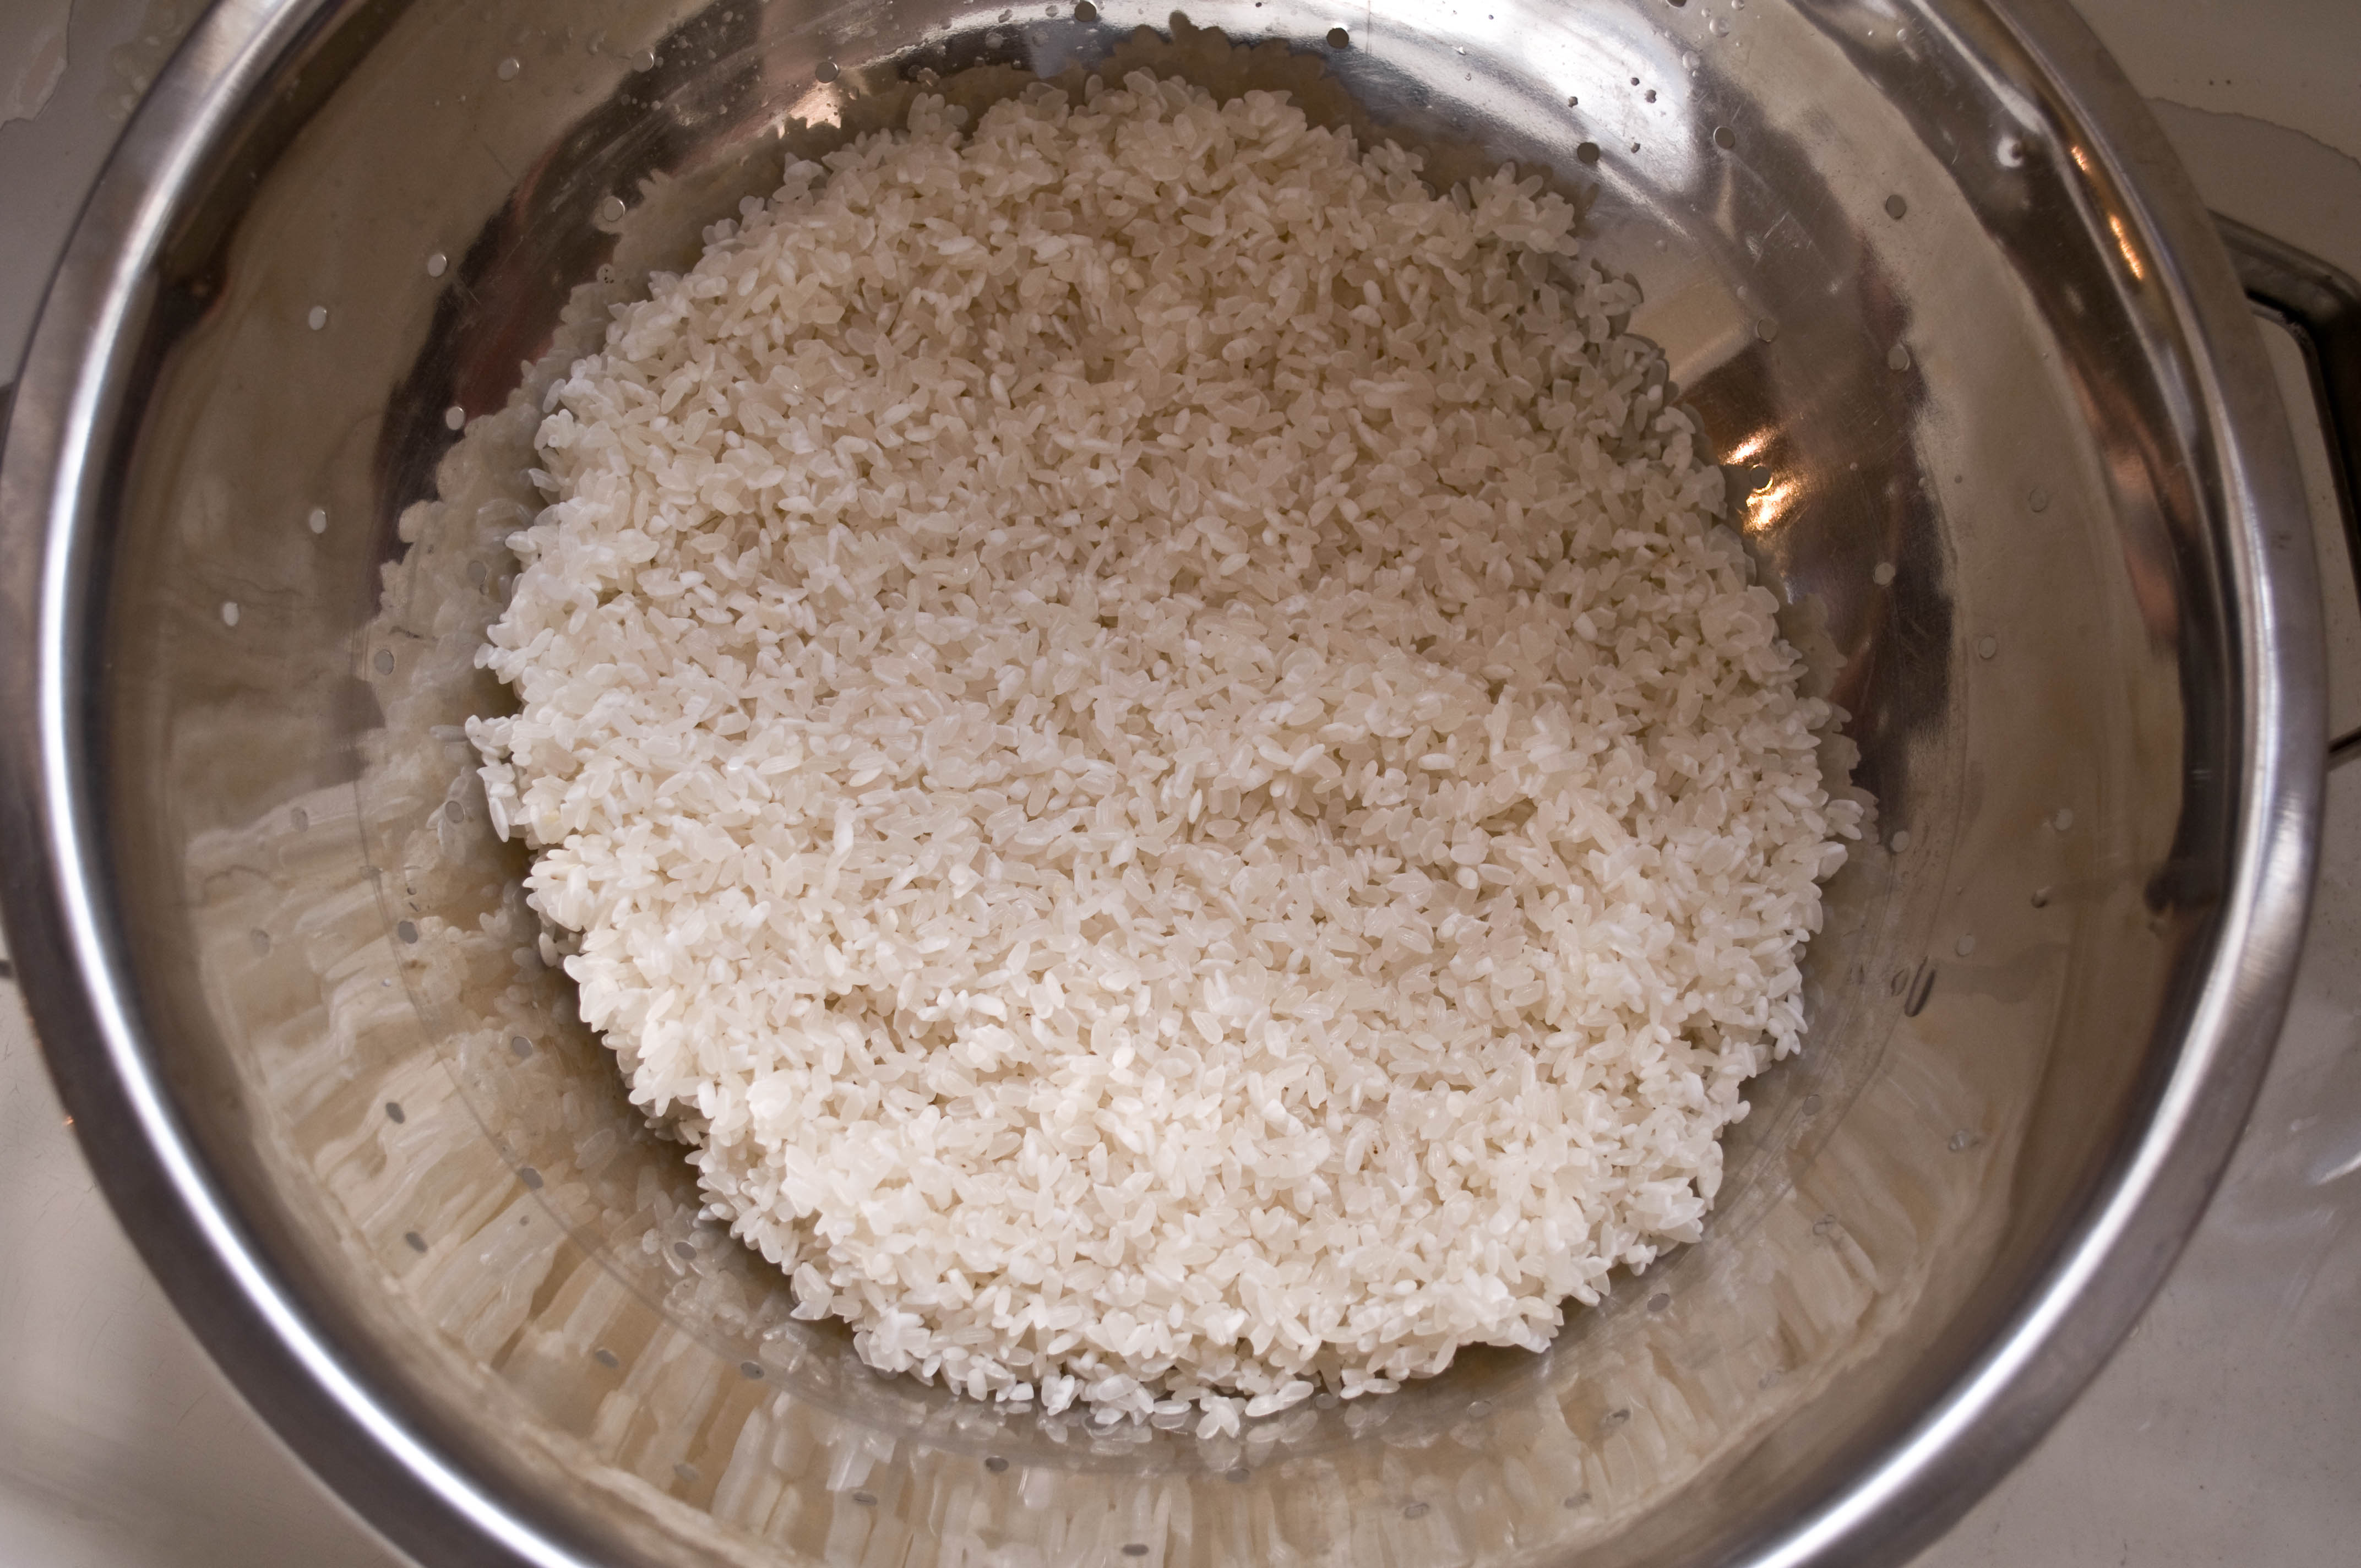
Put rice in a colander and allow to drain and dry, about 30 minutes.
Now here is where things get a little wierd. By all accounts, in my previous rice-cookin past, the ratio is 1 part rice to 2 parts water, right? Well, not in sushi land. Put your 3 cups of rice in a large sauce pan and cover with 3 cups of water. Yep, thats 1 part to 1 part. Don’t worry, it all works out.
Bring to a boil over high heat.
Cover and allow to boil over high heat (resist the urge to turn the heat down) for three minutes.
Then turn the heat to medium and cook for an an additional 5 minutes (I sure hope you have a kitchen timer).
Then turn the heat to low and cook for another 8 minutes.
There should be no visible water left. If you have a shot of Sake, drizzle it over the rice at this point. If you don’t have any Sake, don’t worry about. Remove from heat.
Cover with a towel or a cheese cloth, put the lid back on and allow to rest for ten minutes.
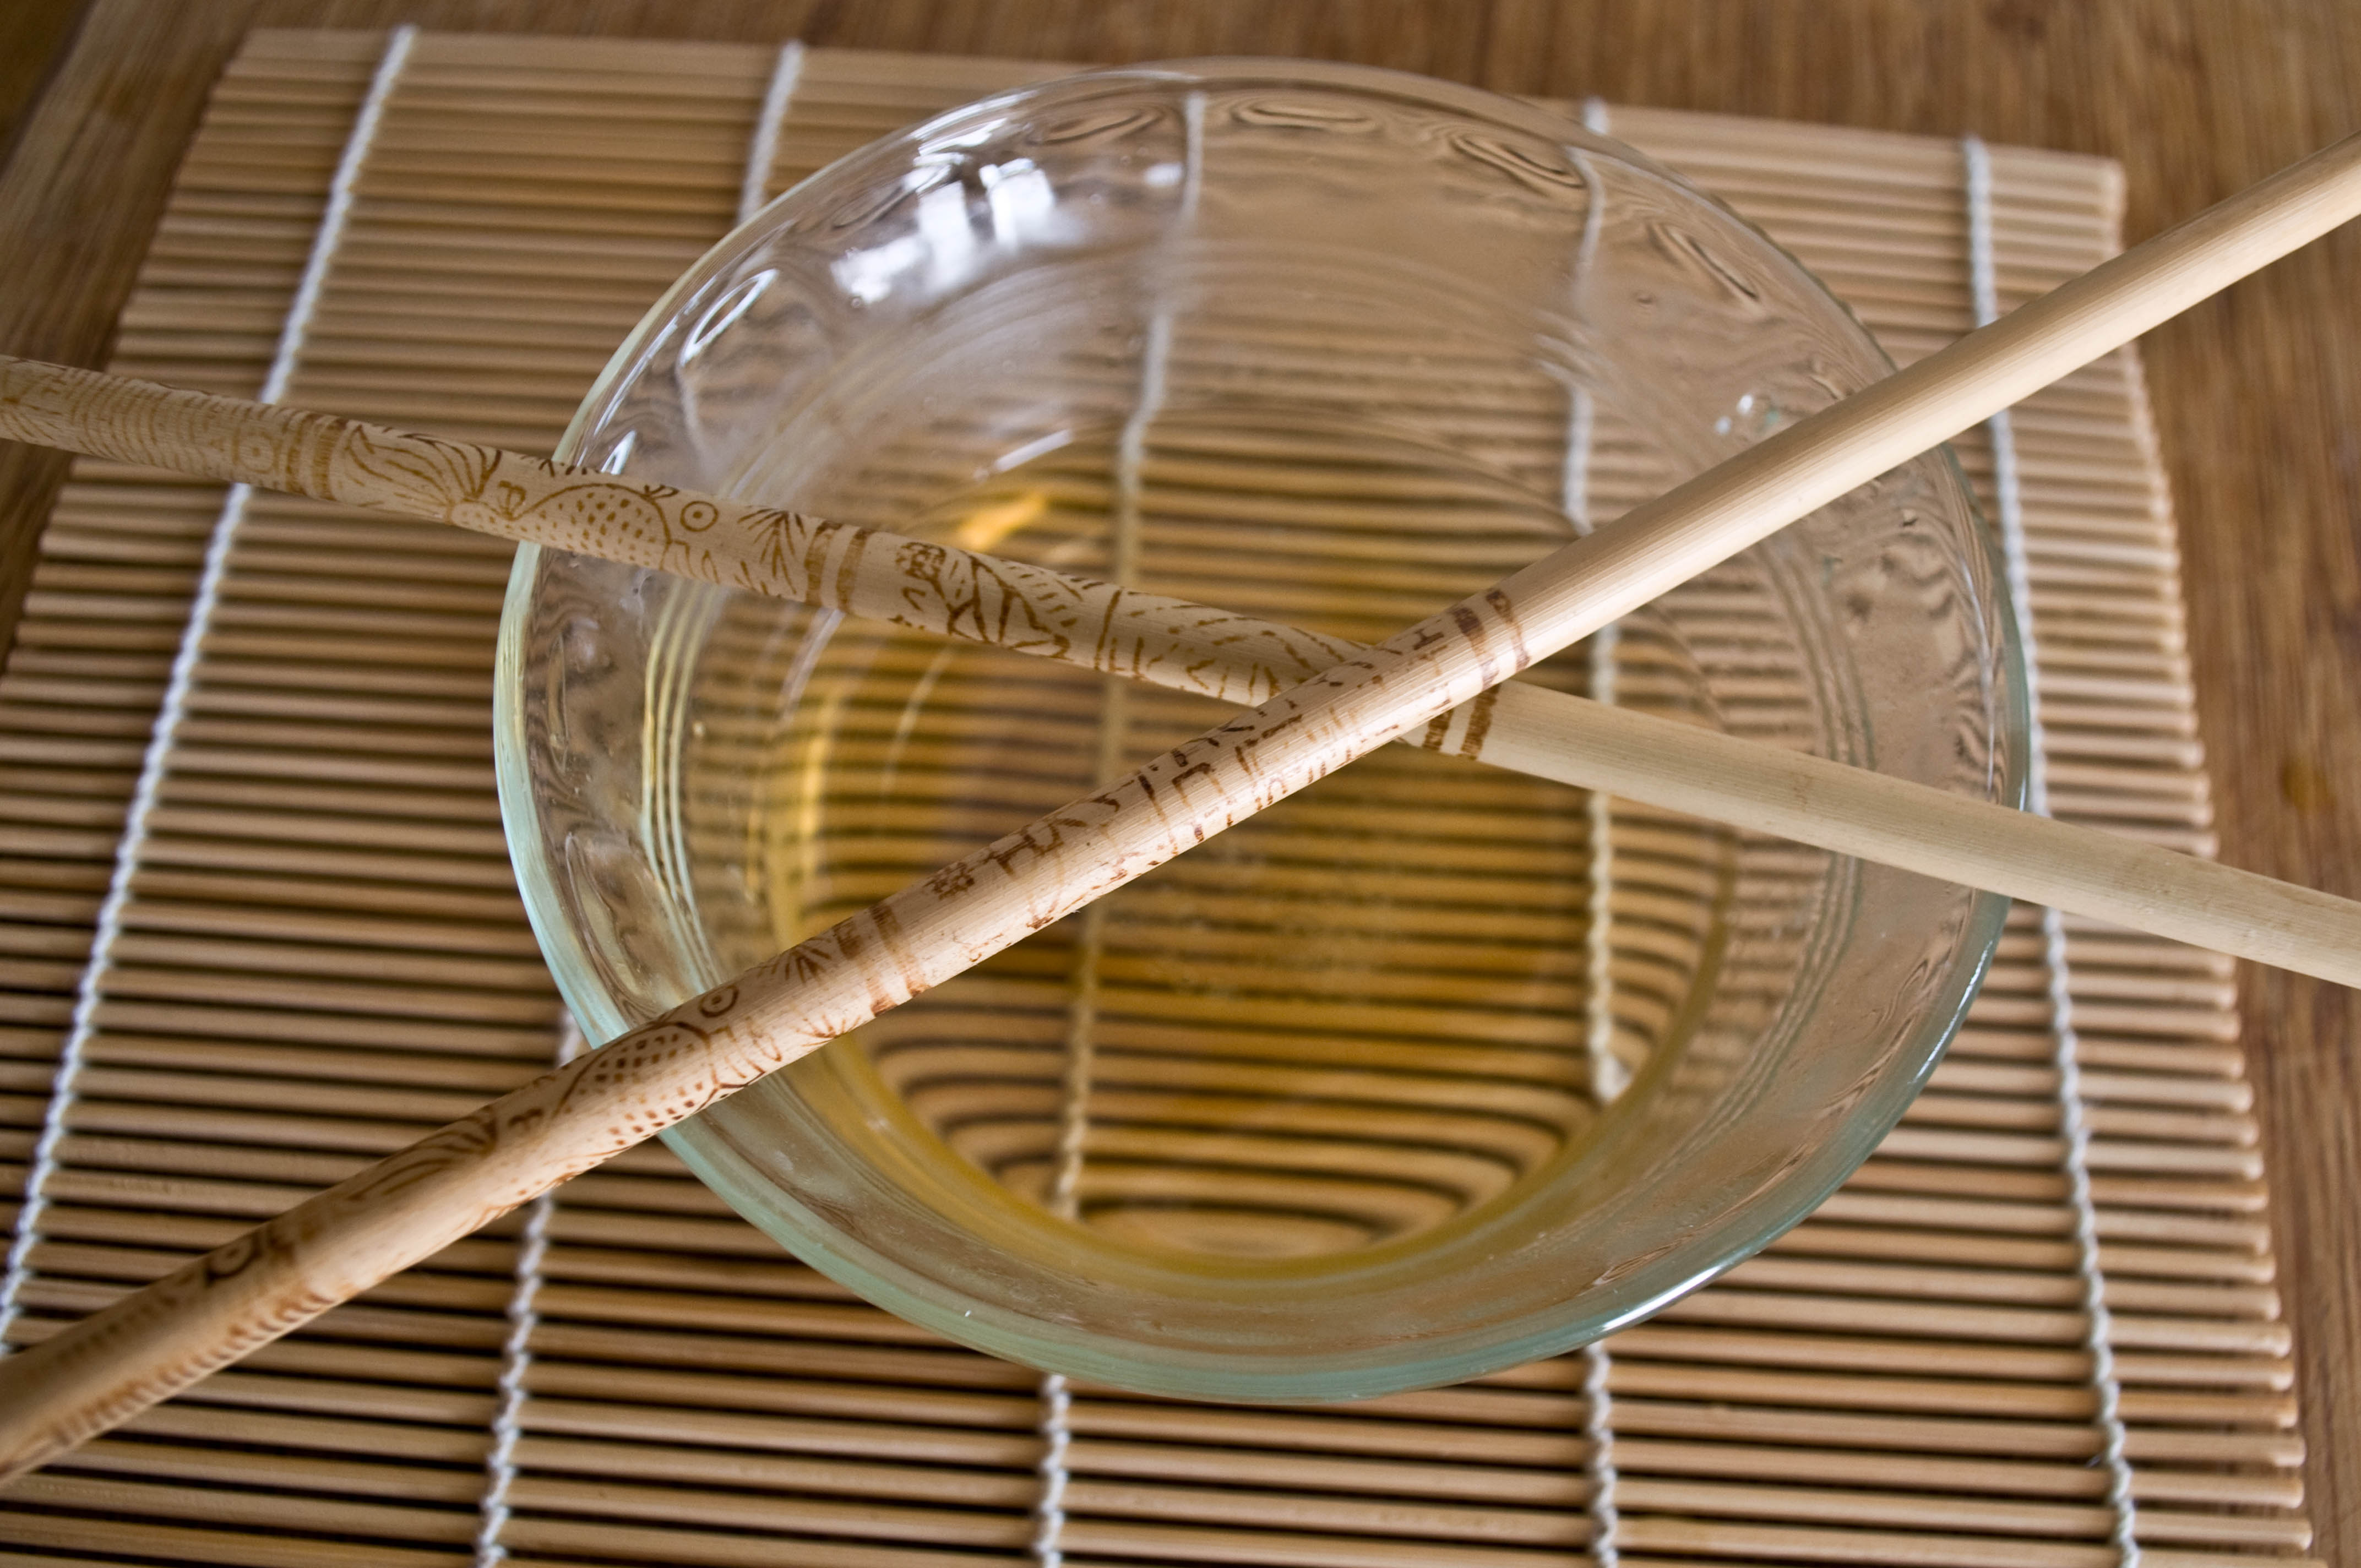
While your rice is cooking, make the dressing. Combine the vinegar, salt and sugar in a small bowl and microwave on high for 30 seconds. Stir until dissolved and allow to cool.
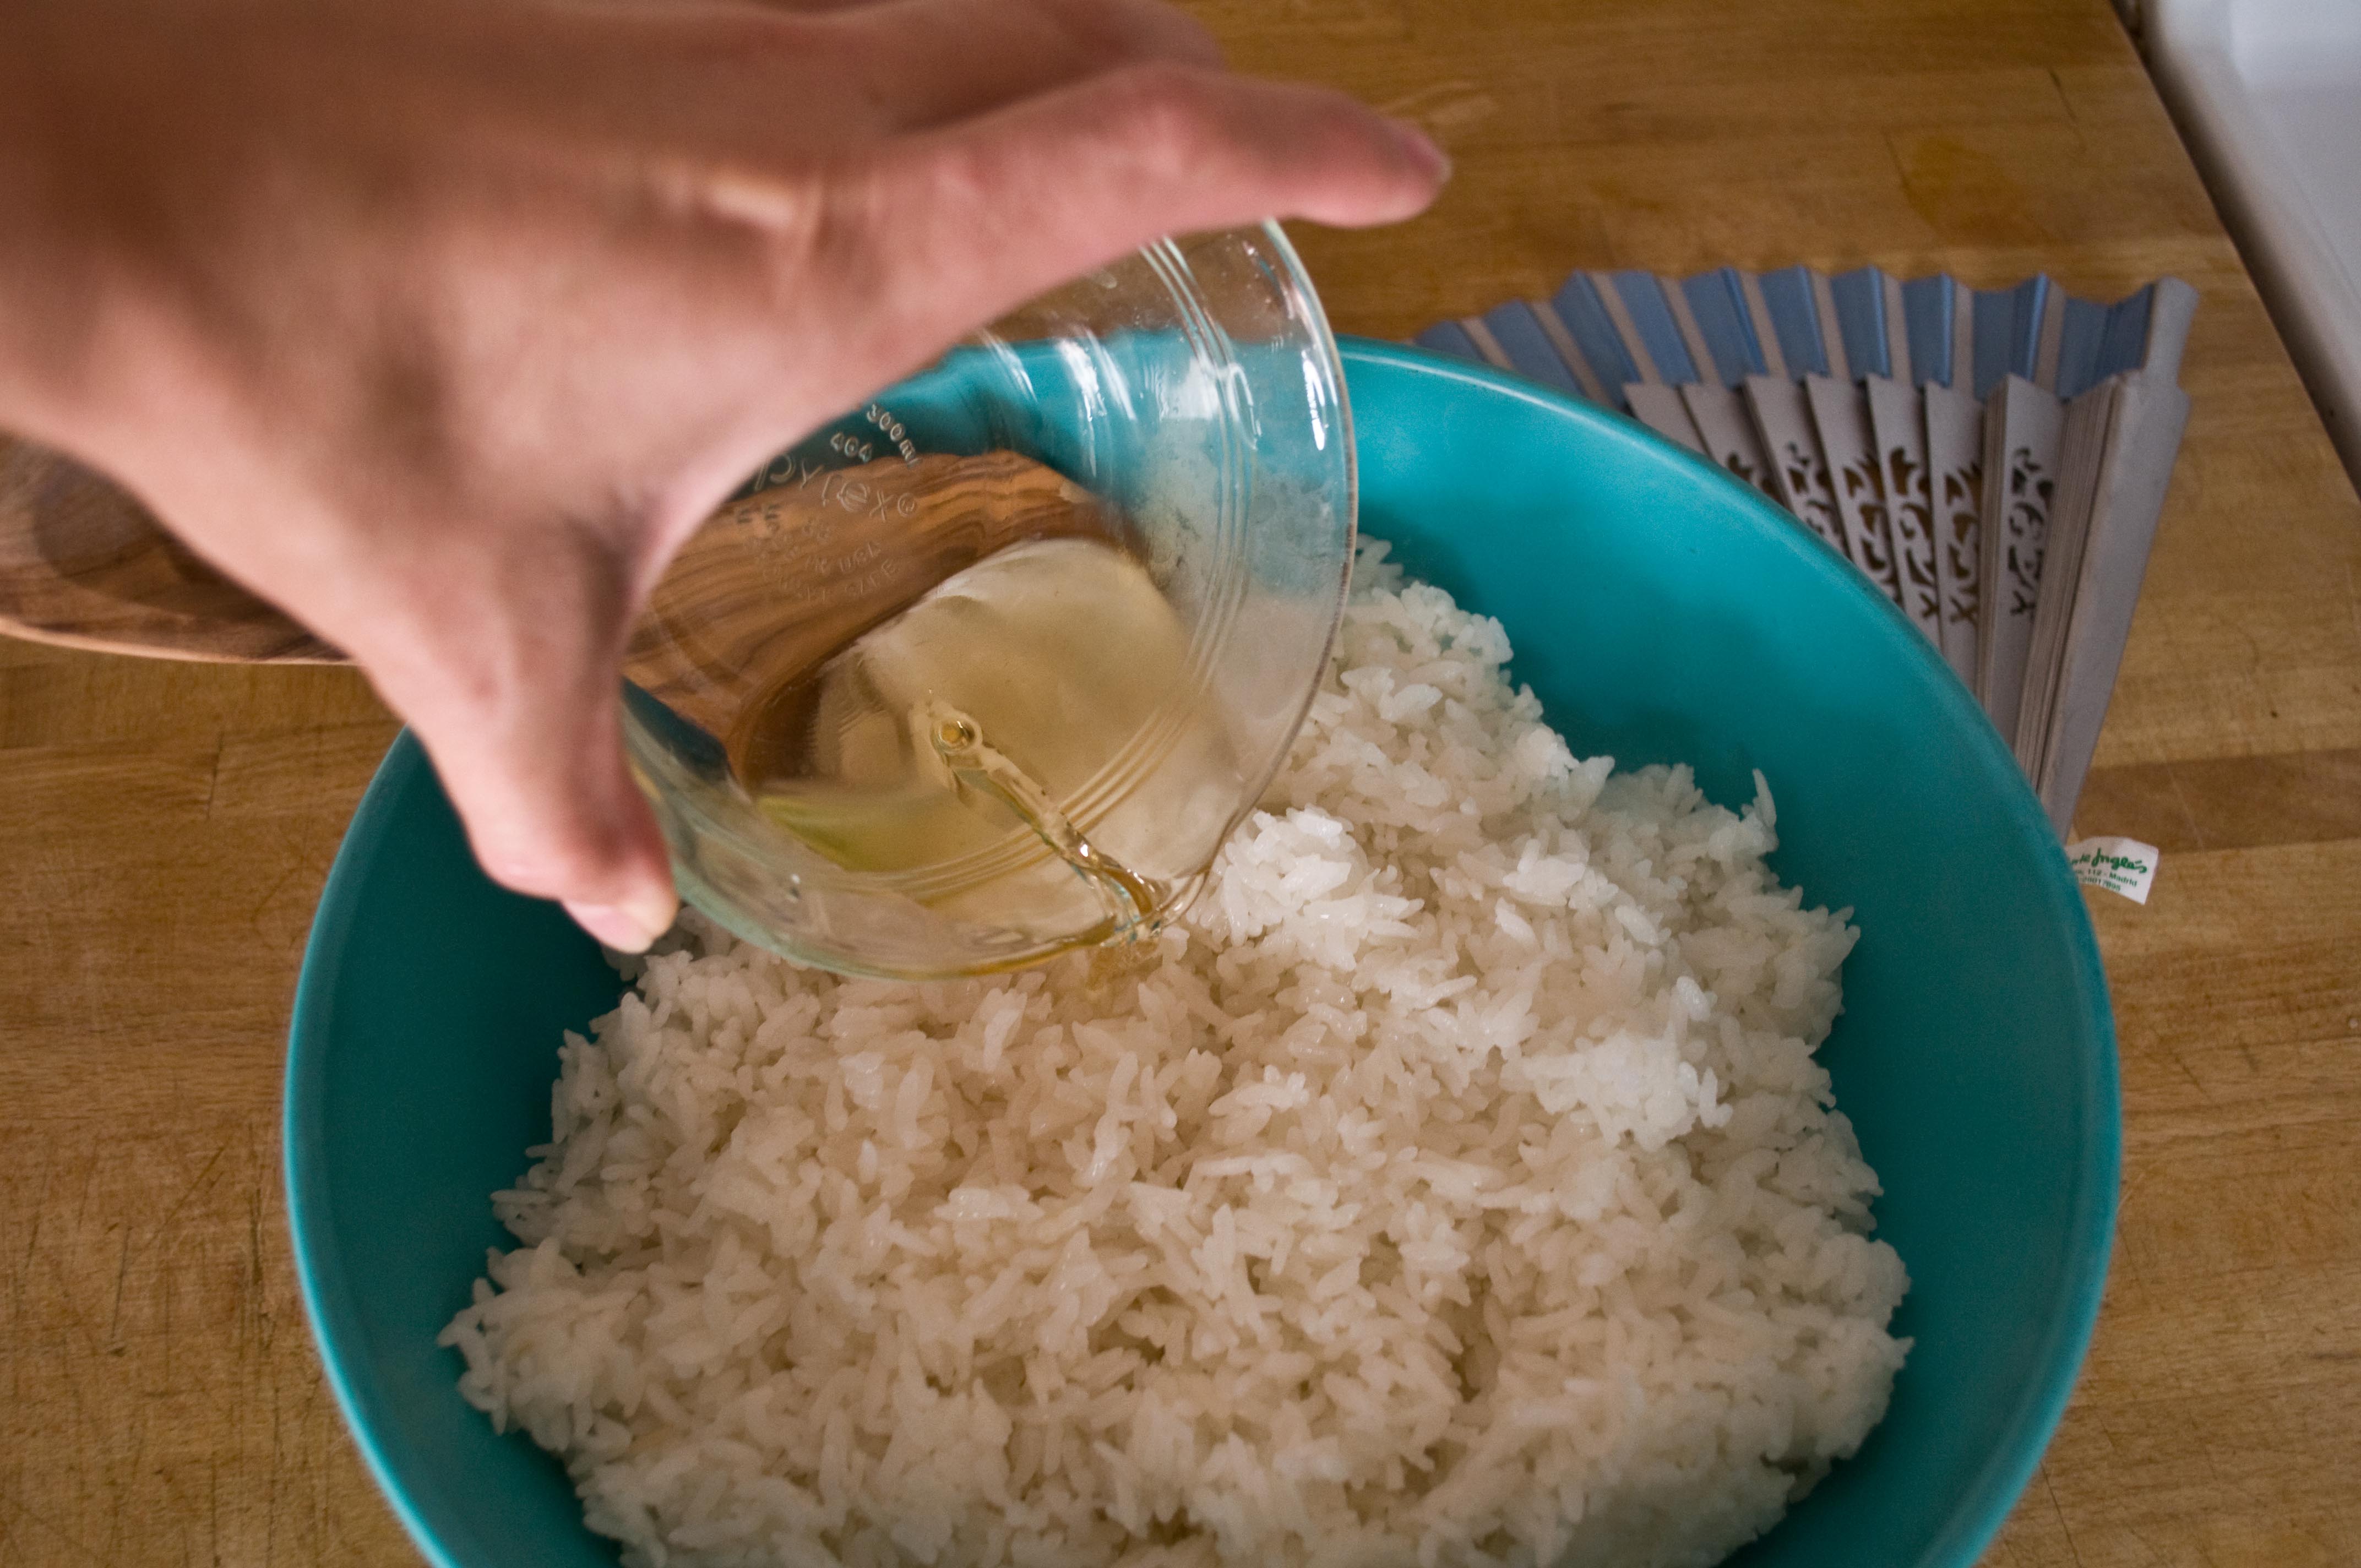
Once the rice has rested, transfer to a large, flat bottom bowl.
Pour the dressing over the rice.
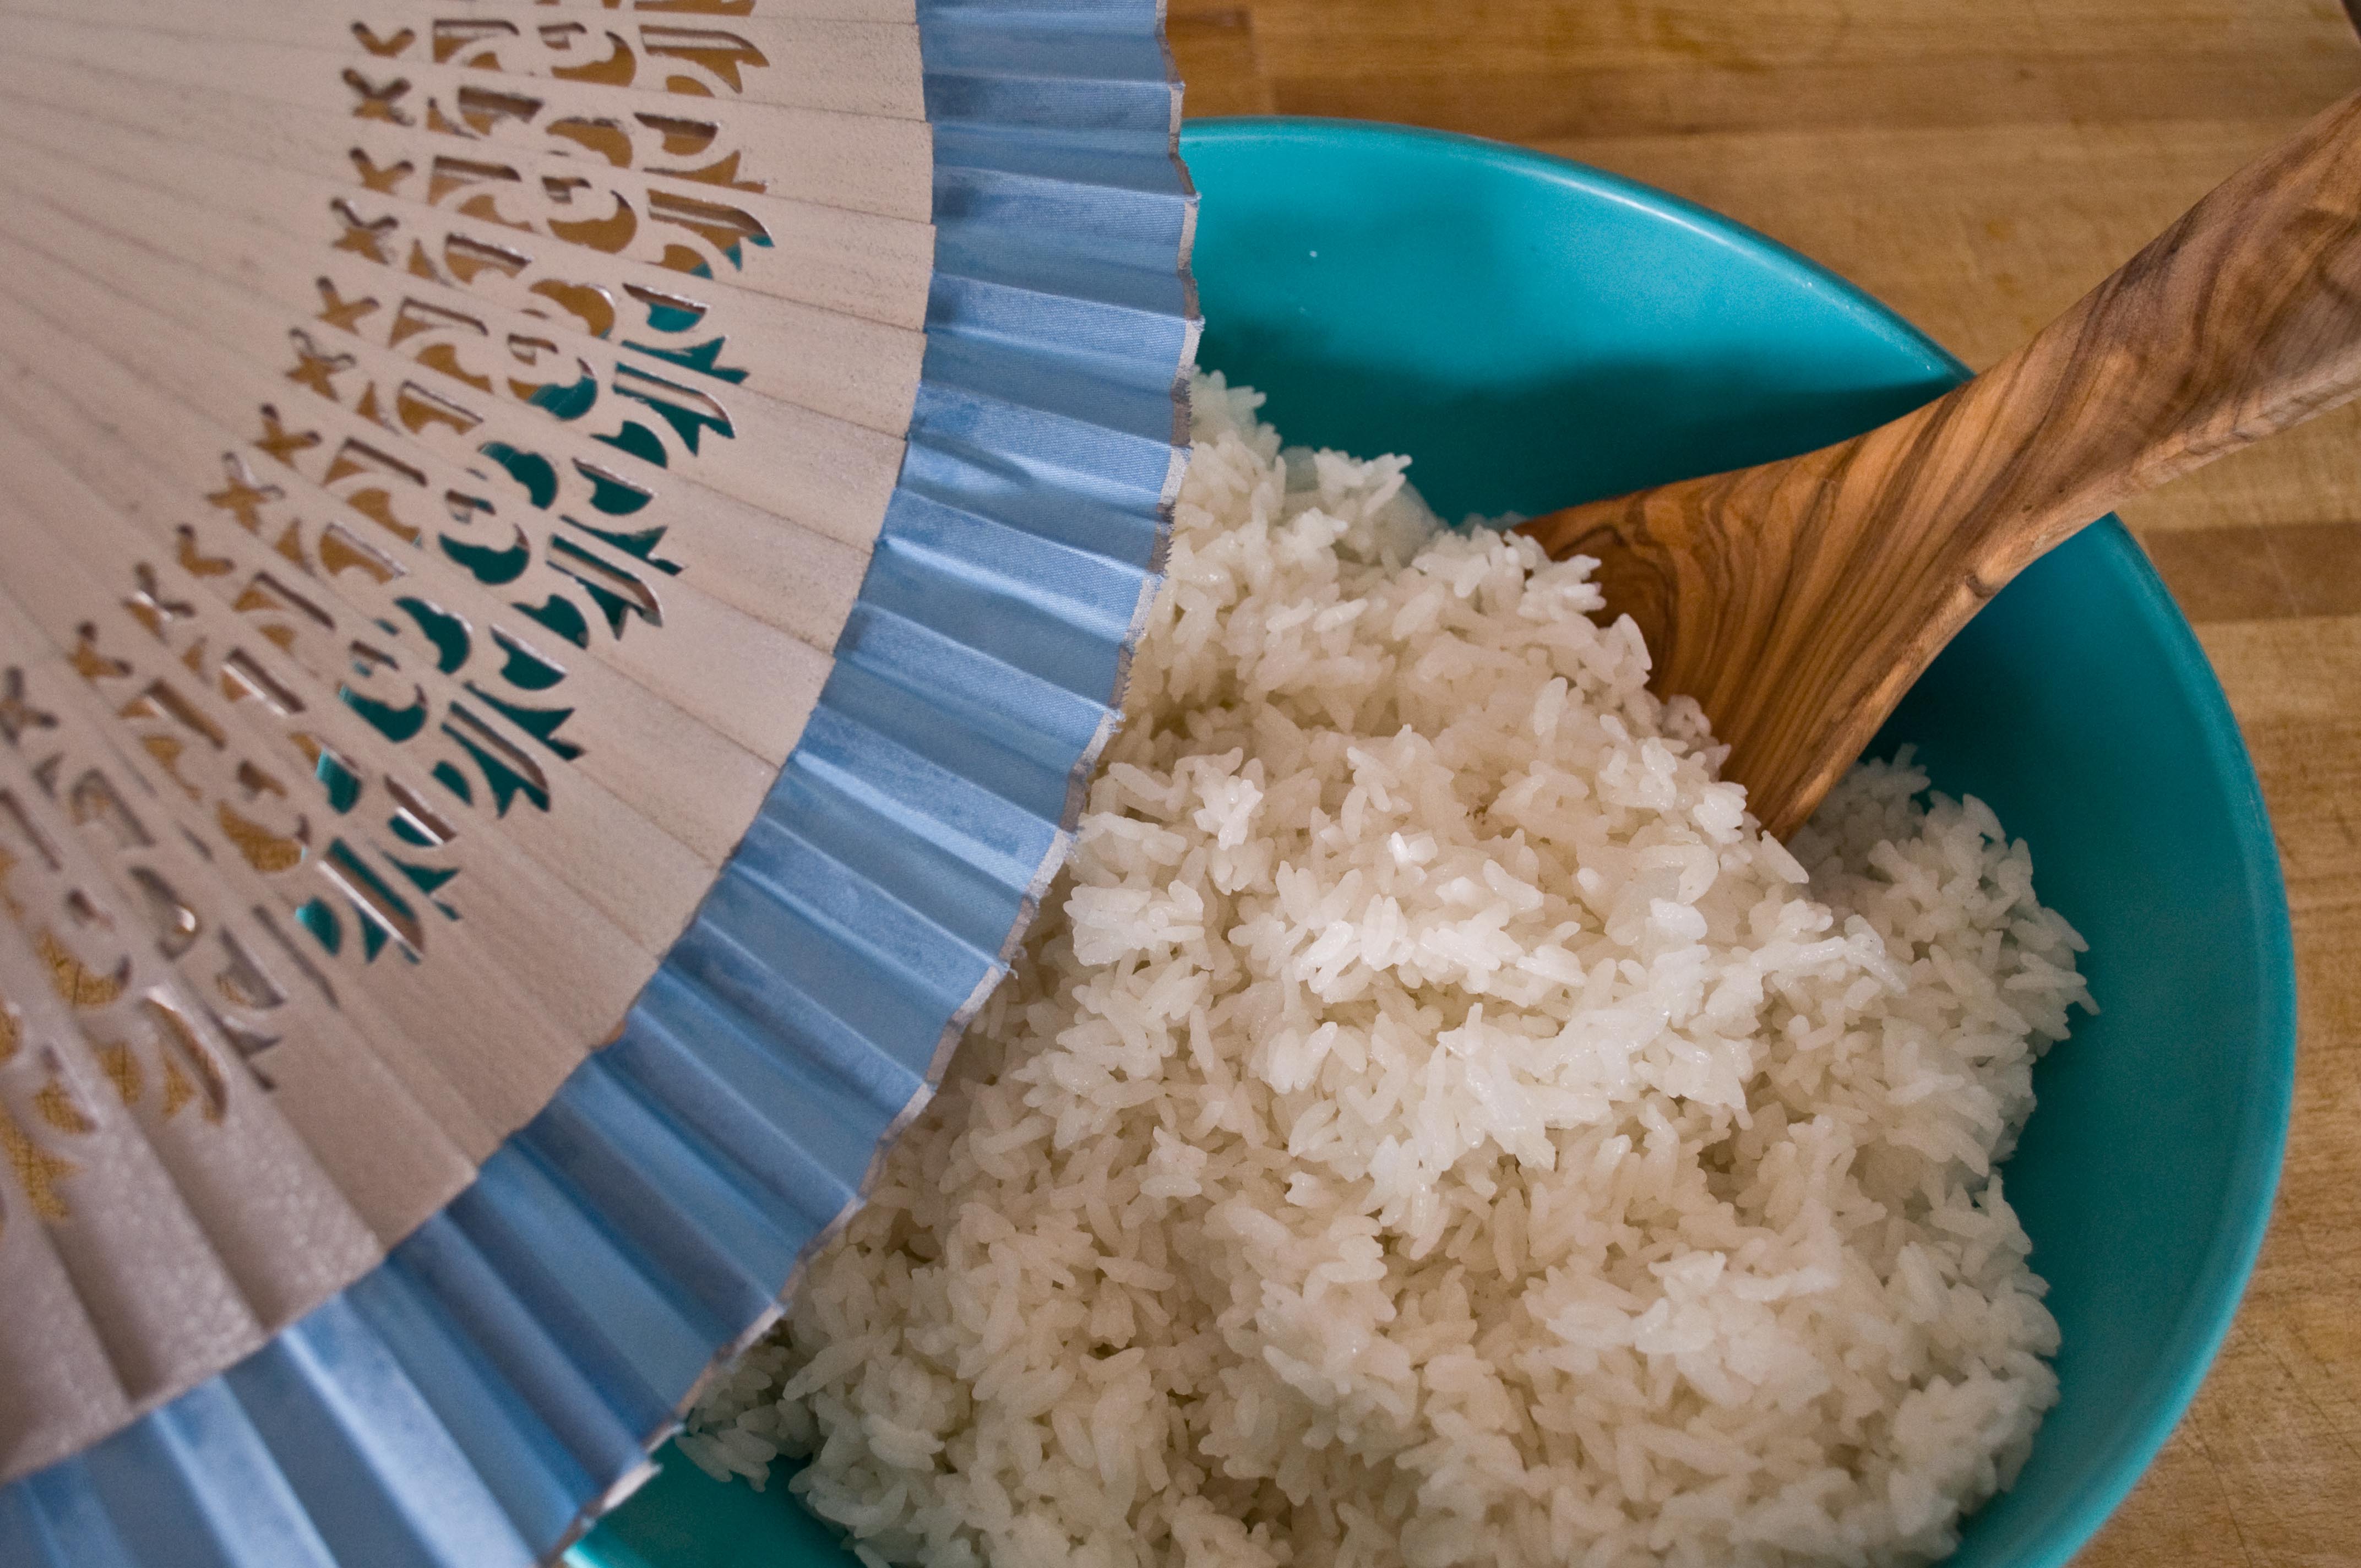
Stir the rice with a wooden spoon to distribute the dressing evenly, while fanning with a fan to cool. If you don’t have a fan a piece of cardboard will work just fine.
Repeat until rice is at body temperature.
Make The Roll
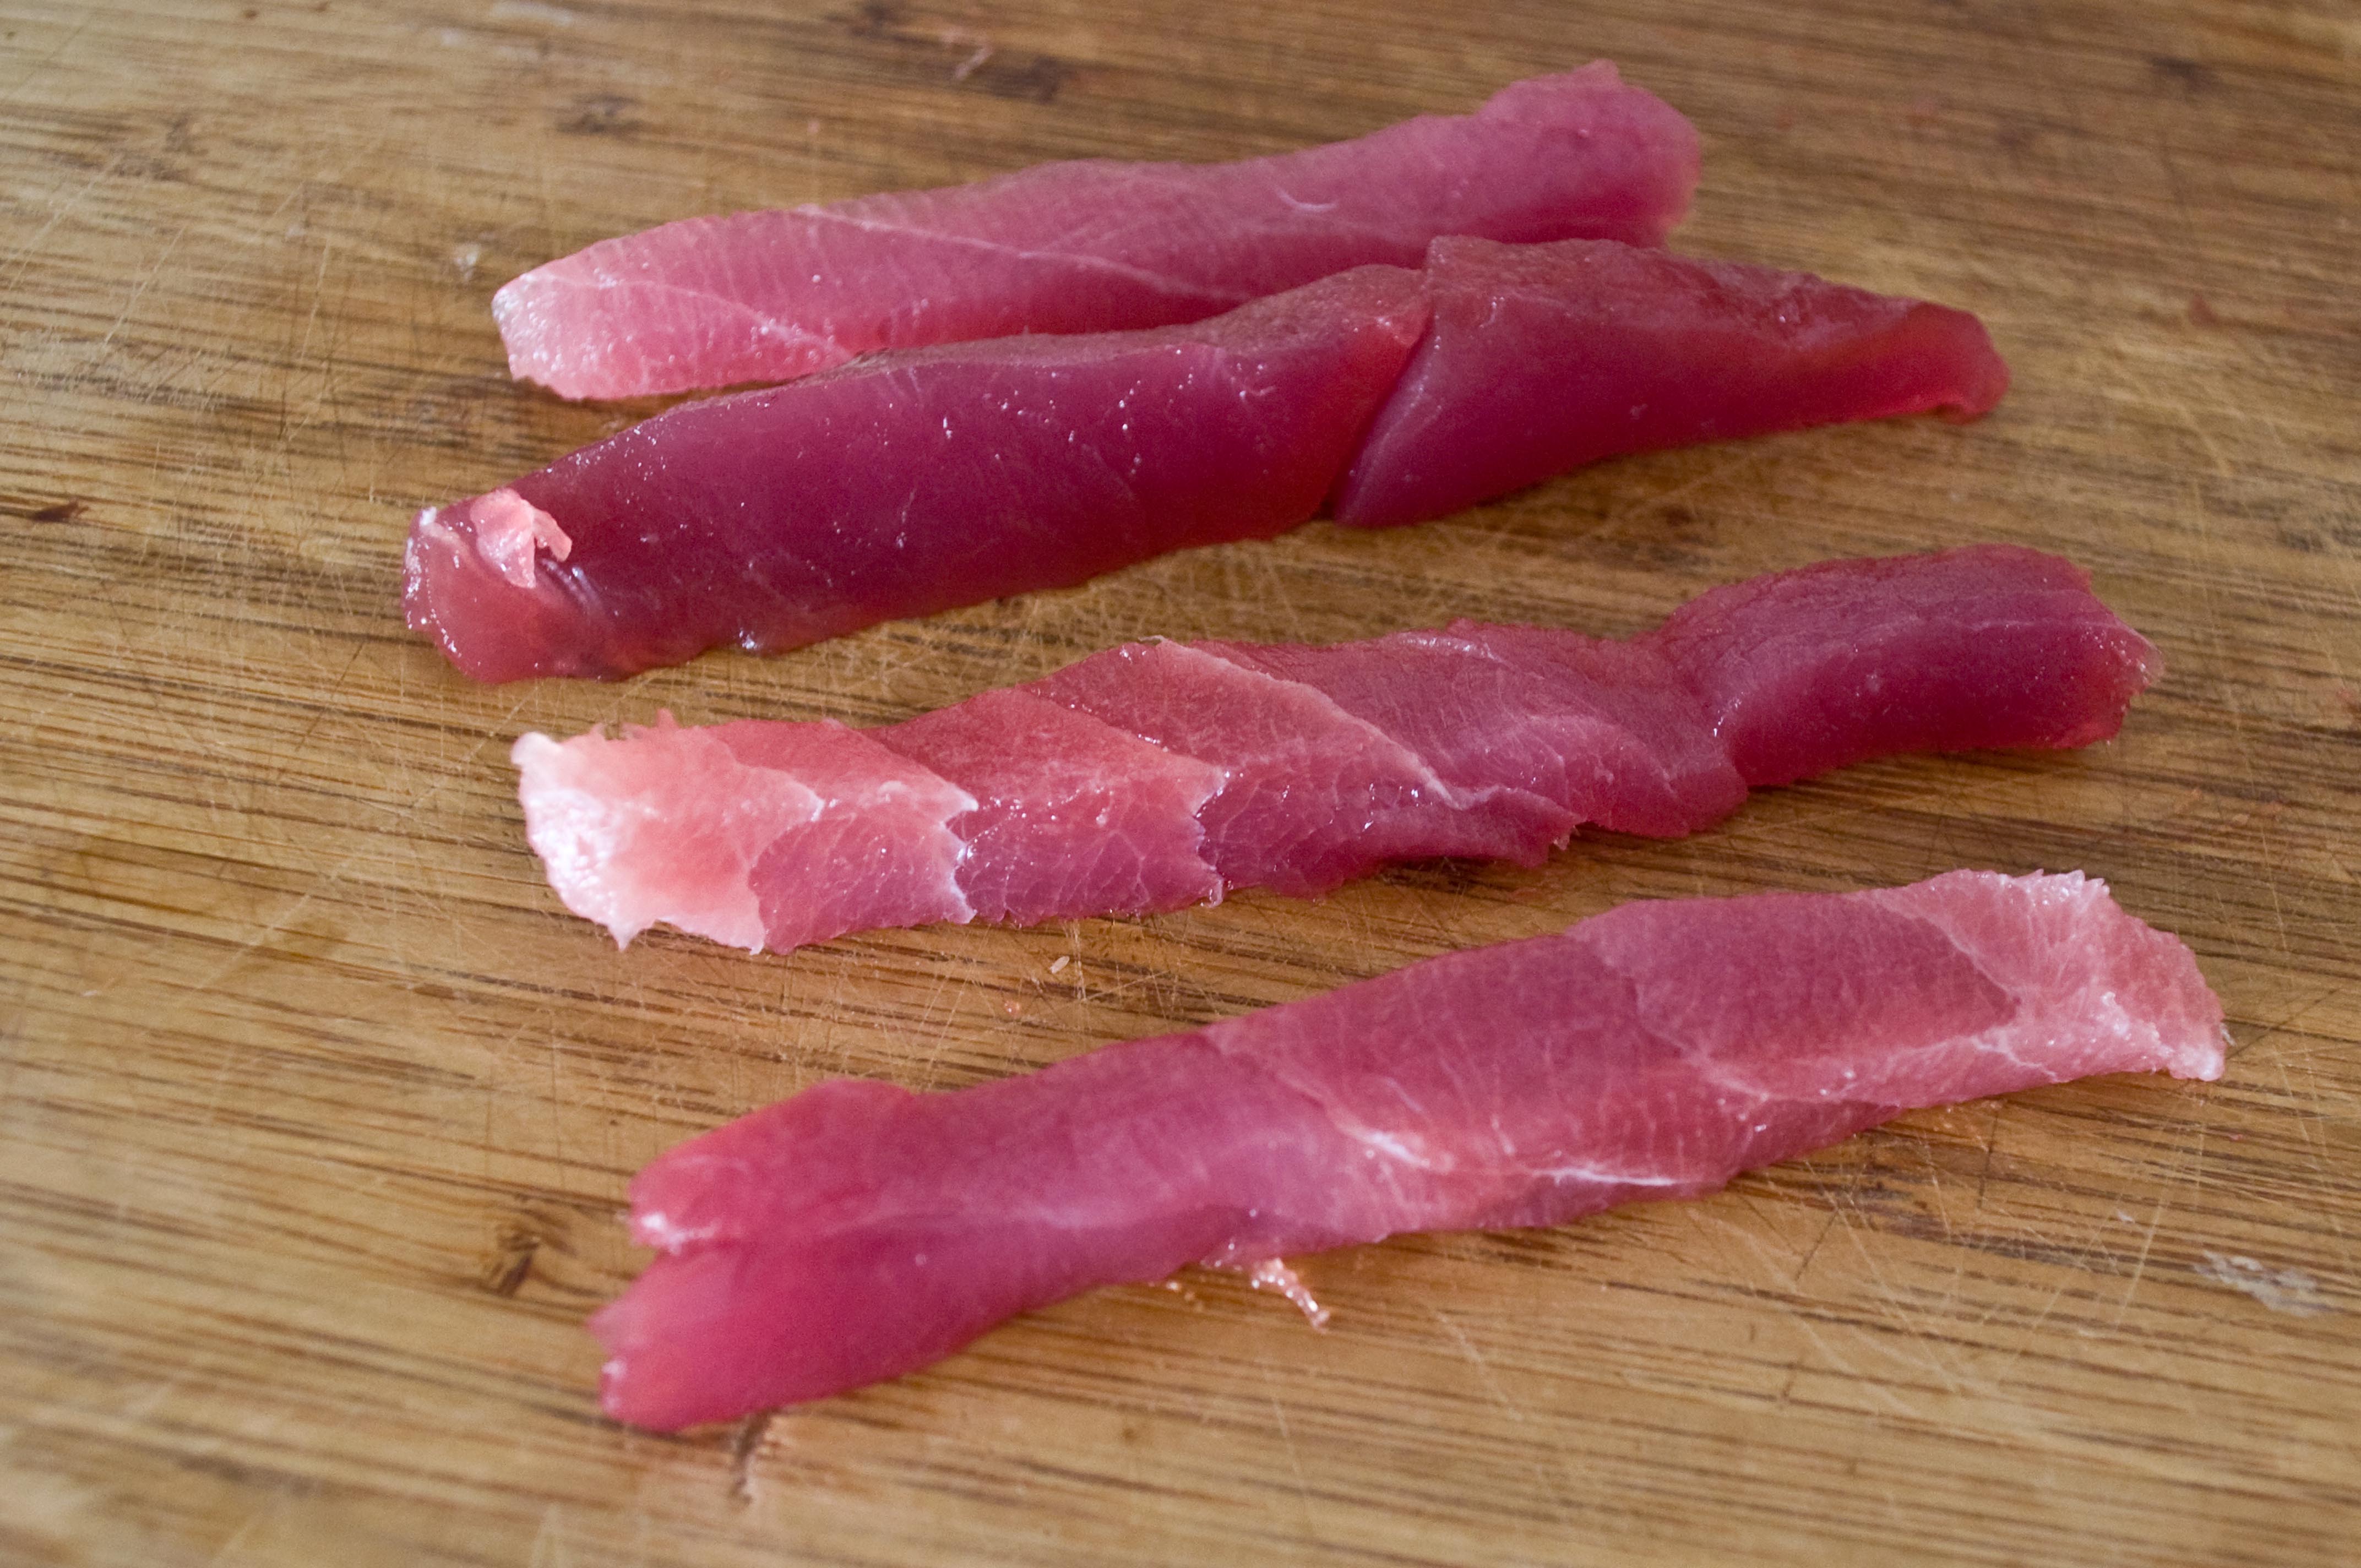
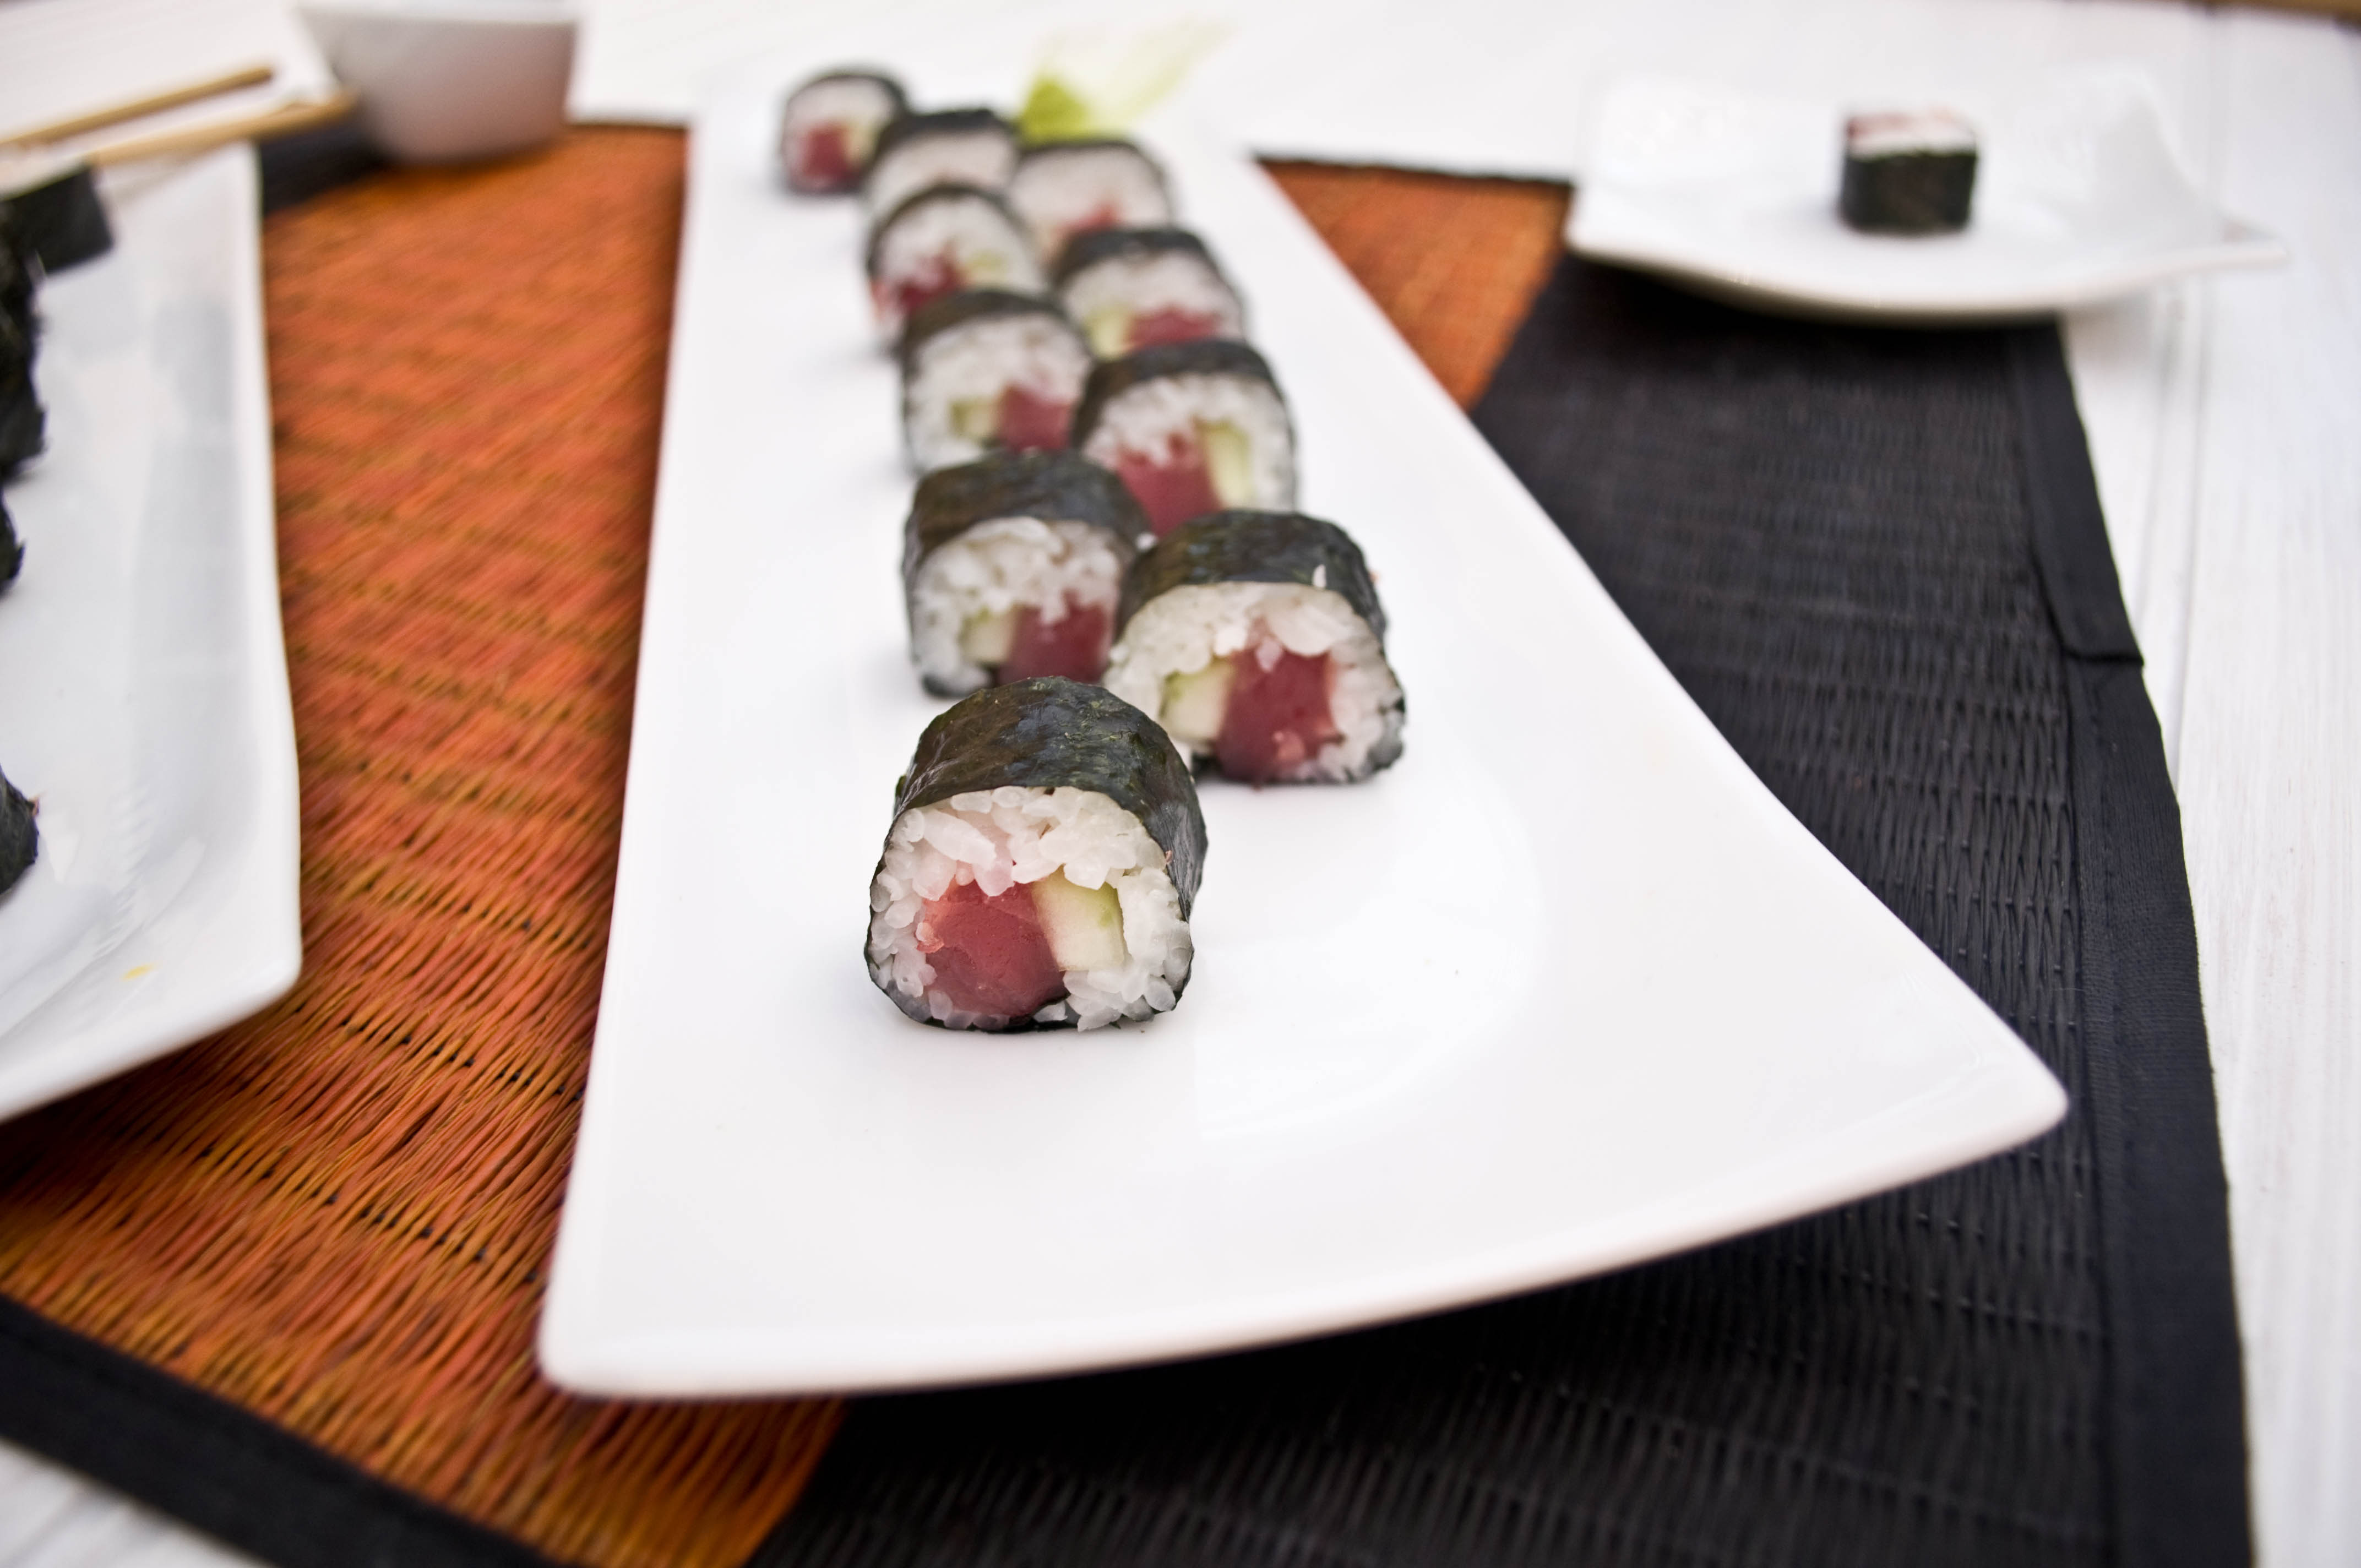
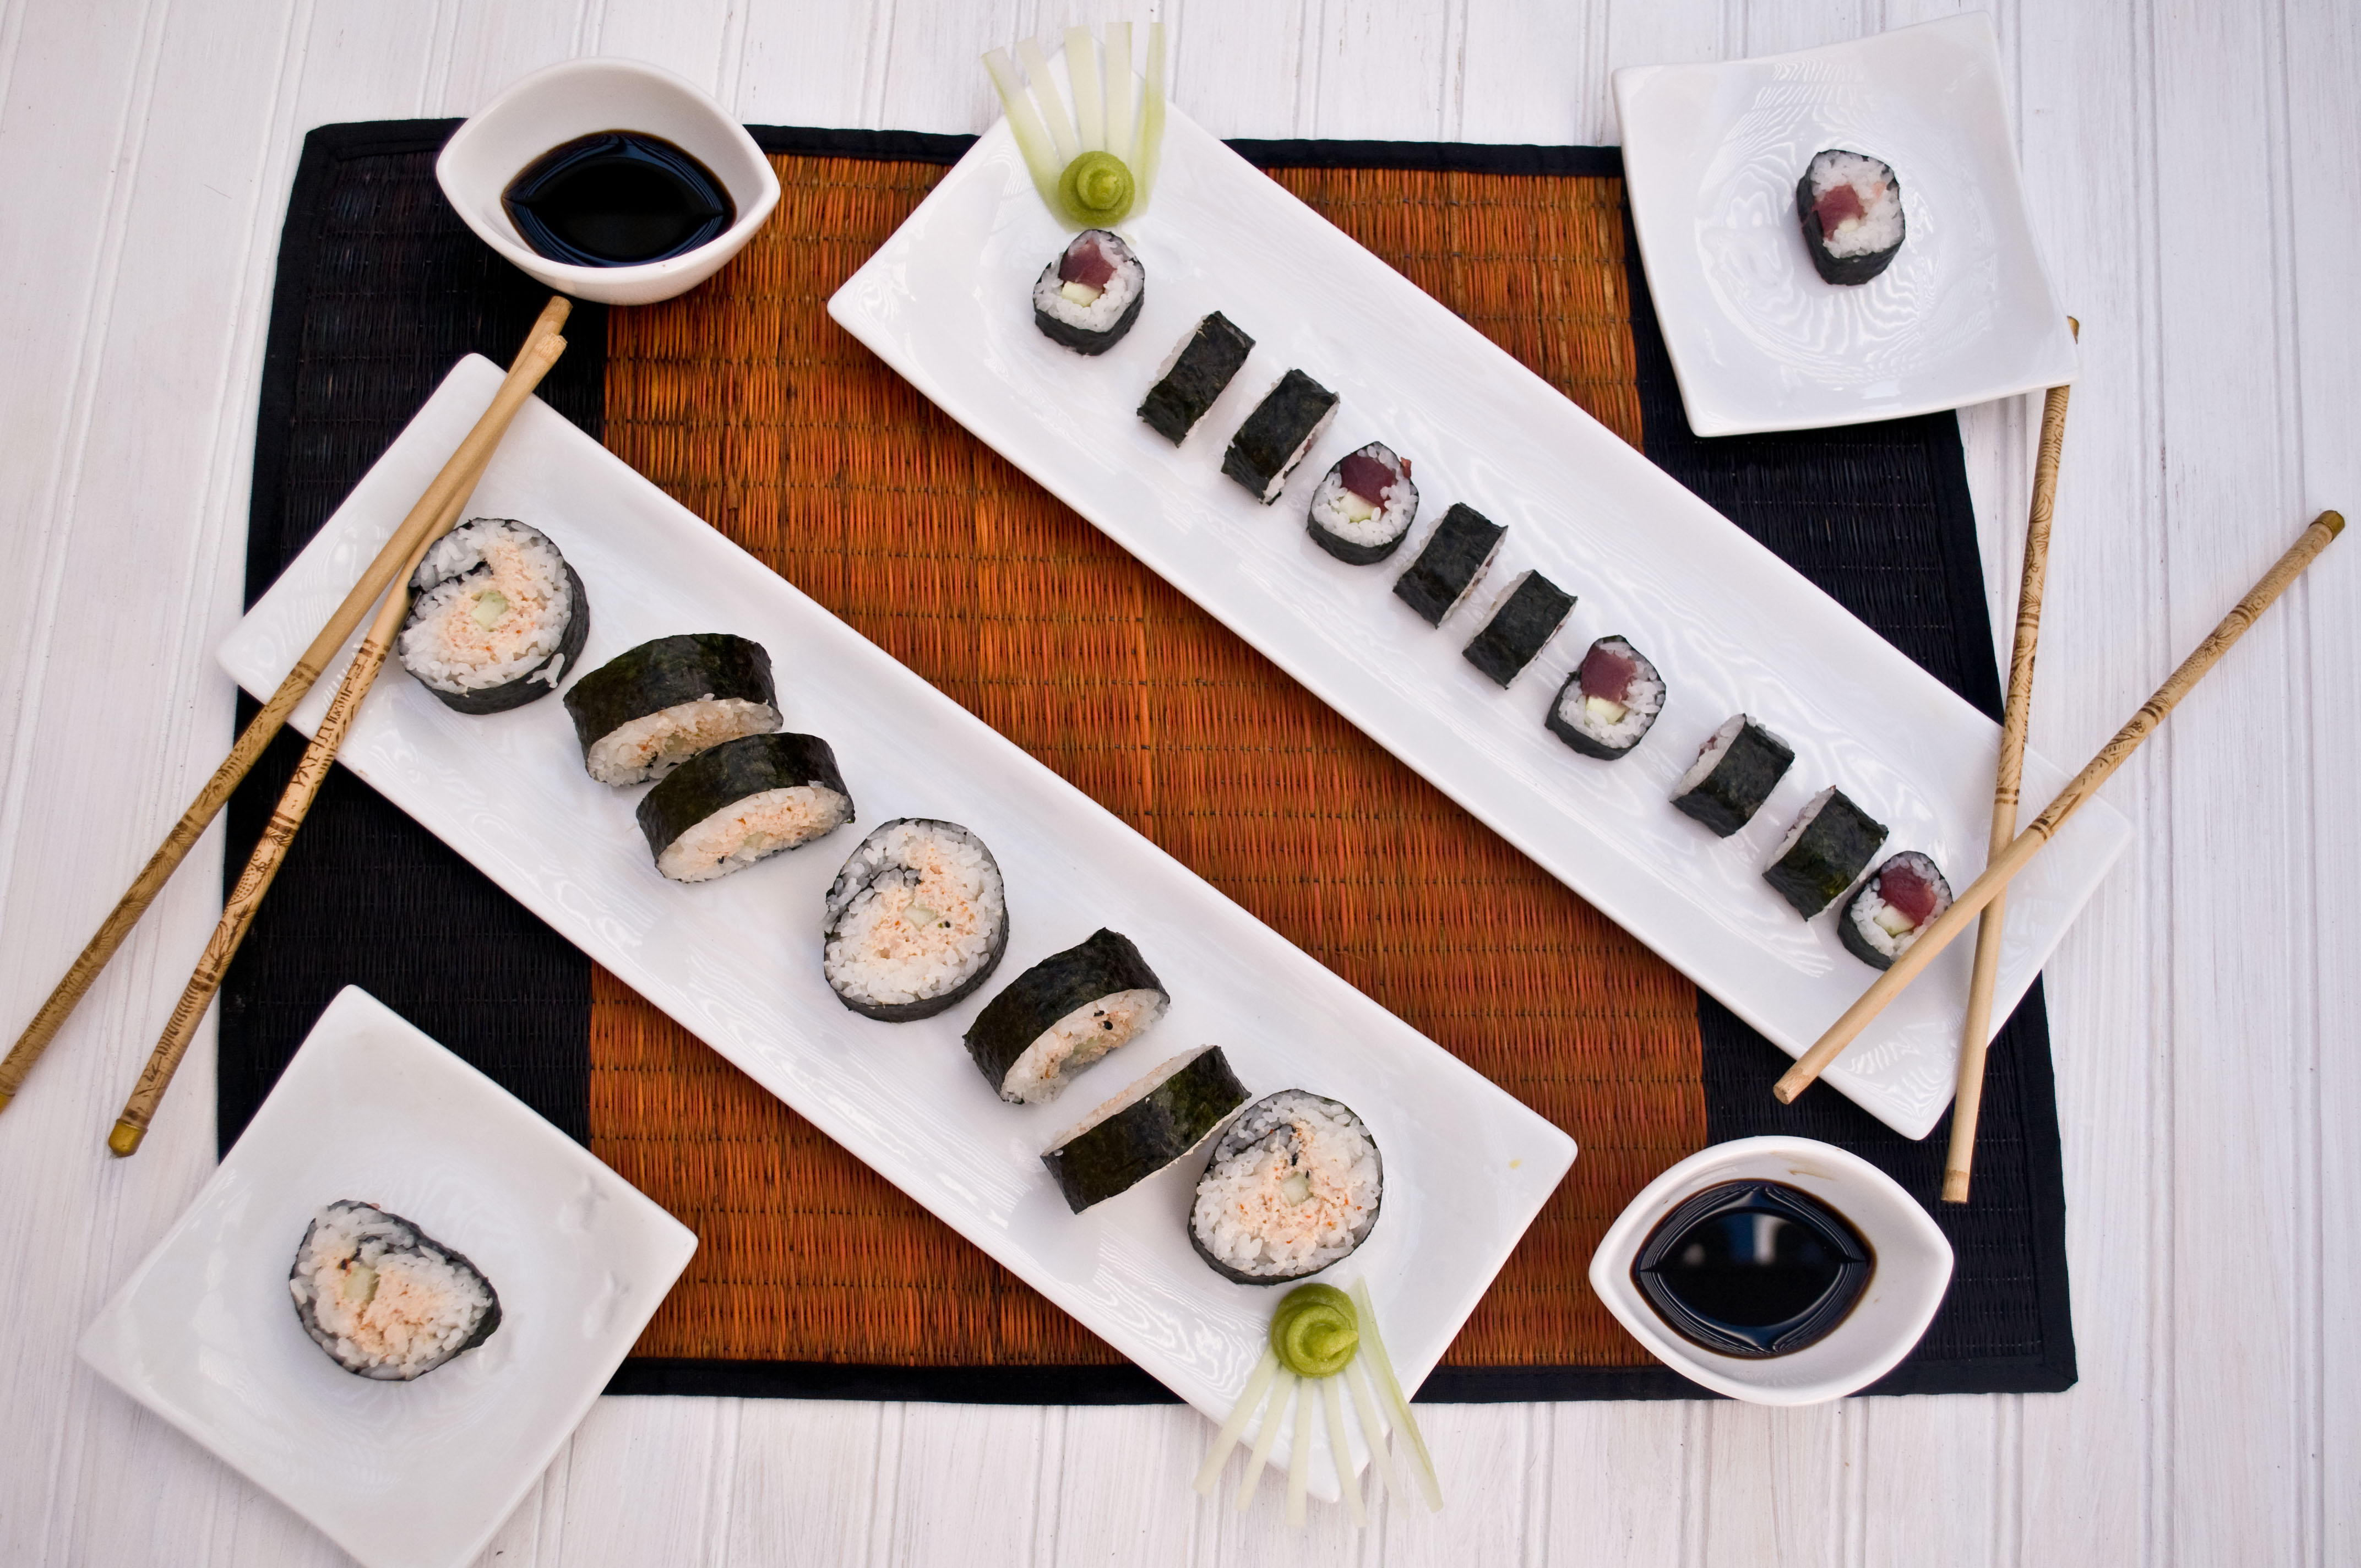
First, lets talk about fish. For this post I made two kinds of sushi, a basic Ahi Tuna Roll and a Spicy Crab roll. You can fill your sushi with just about anything you want, including other types of meat and vegetables. If you want to use raw fish, buy the best stuff you can find, really, this is no place to bargain shop. Go to the best fish market in your town and asked what they have that is Sashimi grade and of that, what is the freshest and highest quality. Don’t go in with your heart set on a certain kind of fish, you may not get the best quality. If you really want Ahi, but they just had a beautiful Yellow Tail come in, get that. You don’t need a lot, I was able to make 5 rolls from less than a half a pound of Ahi.
Cut your fish into long thin strips, the width of about your pinky. If you don’t have a long enough piece of fish to cover the entire length of the roll, you can use segments.
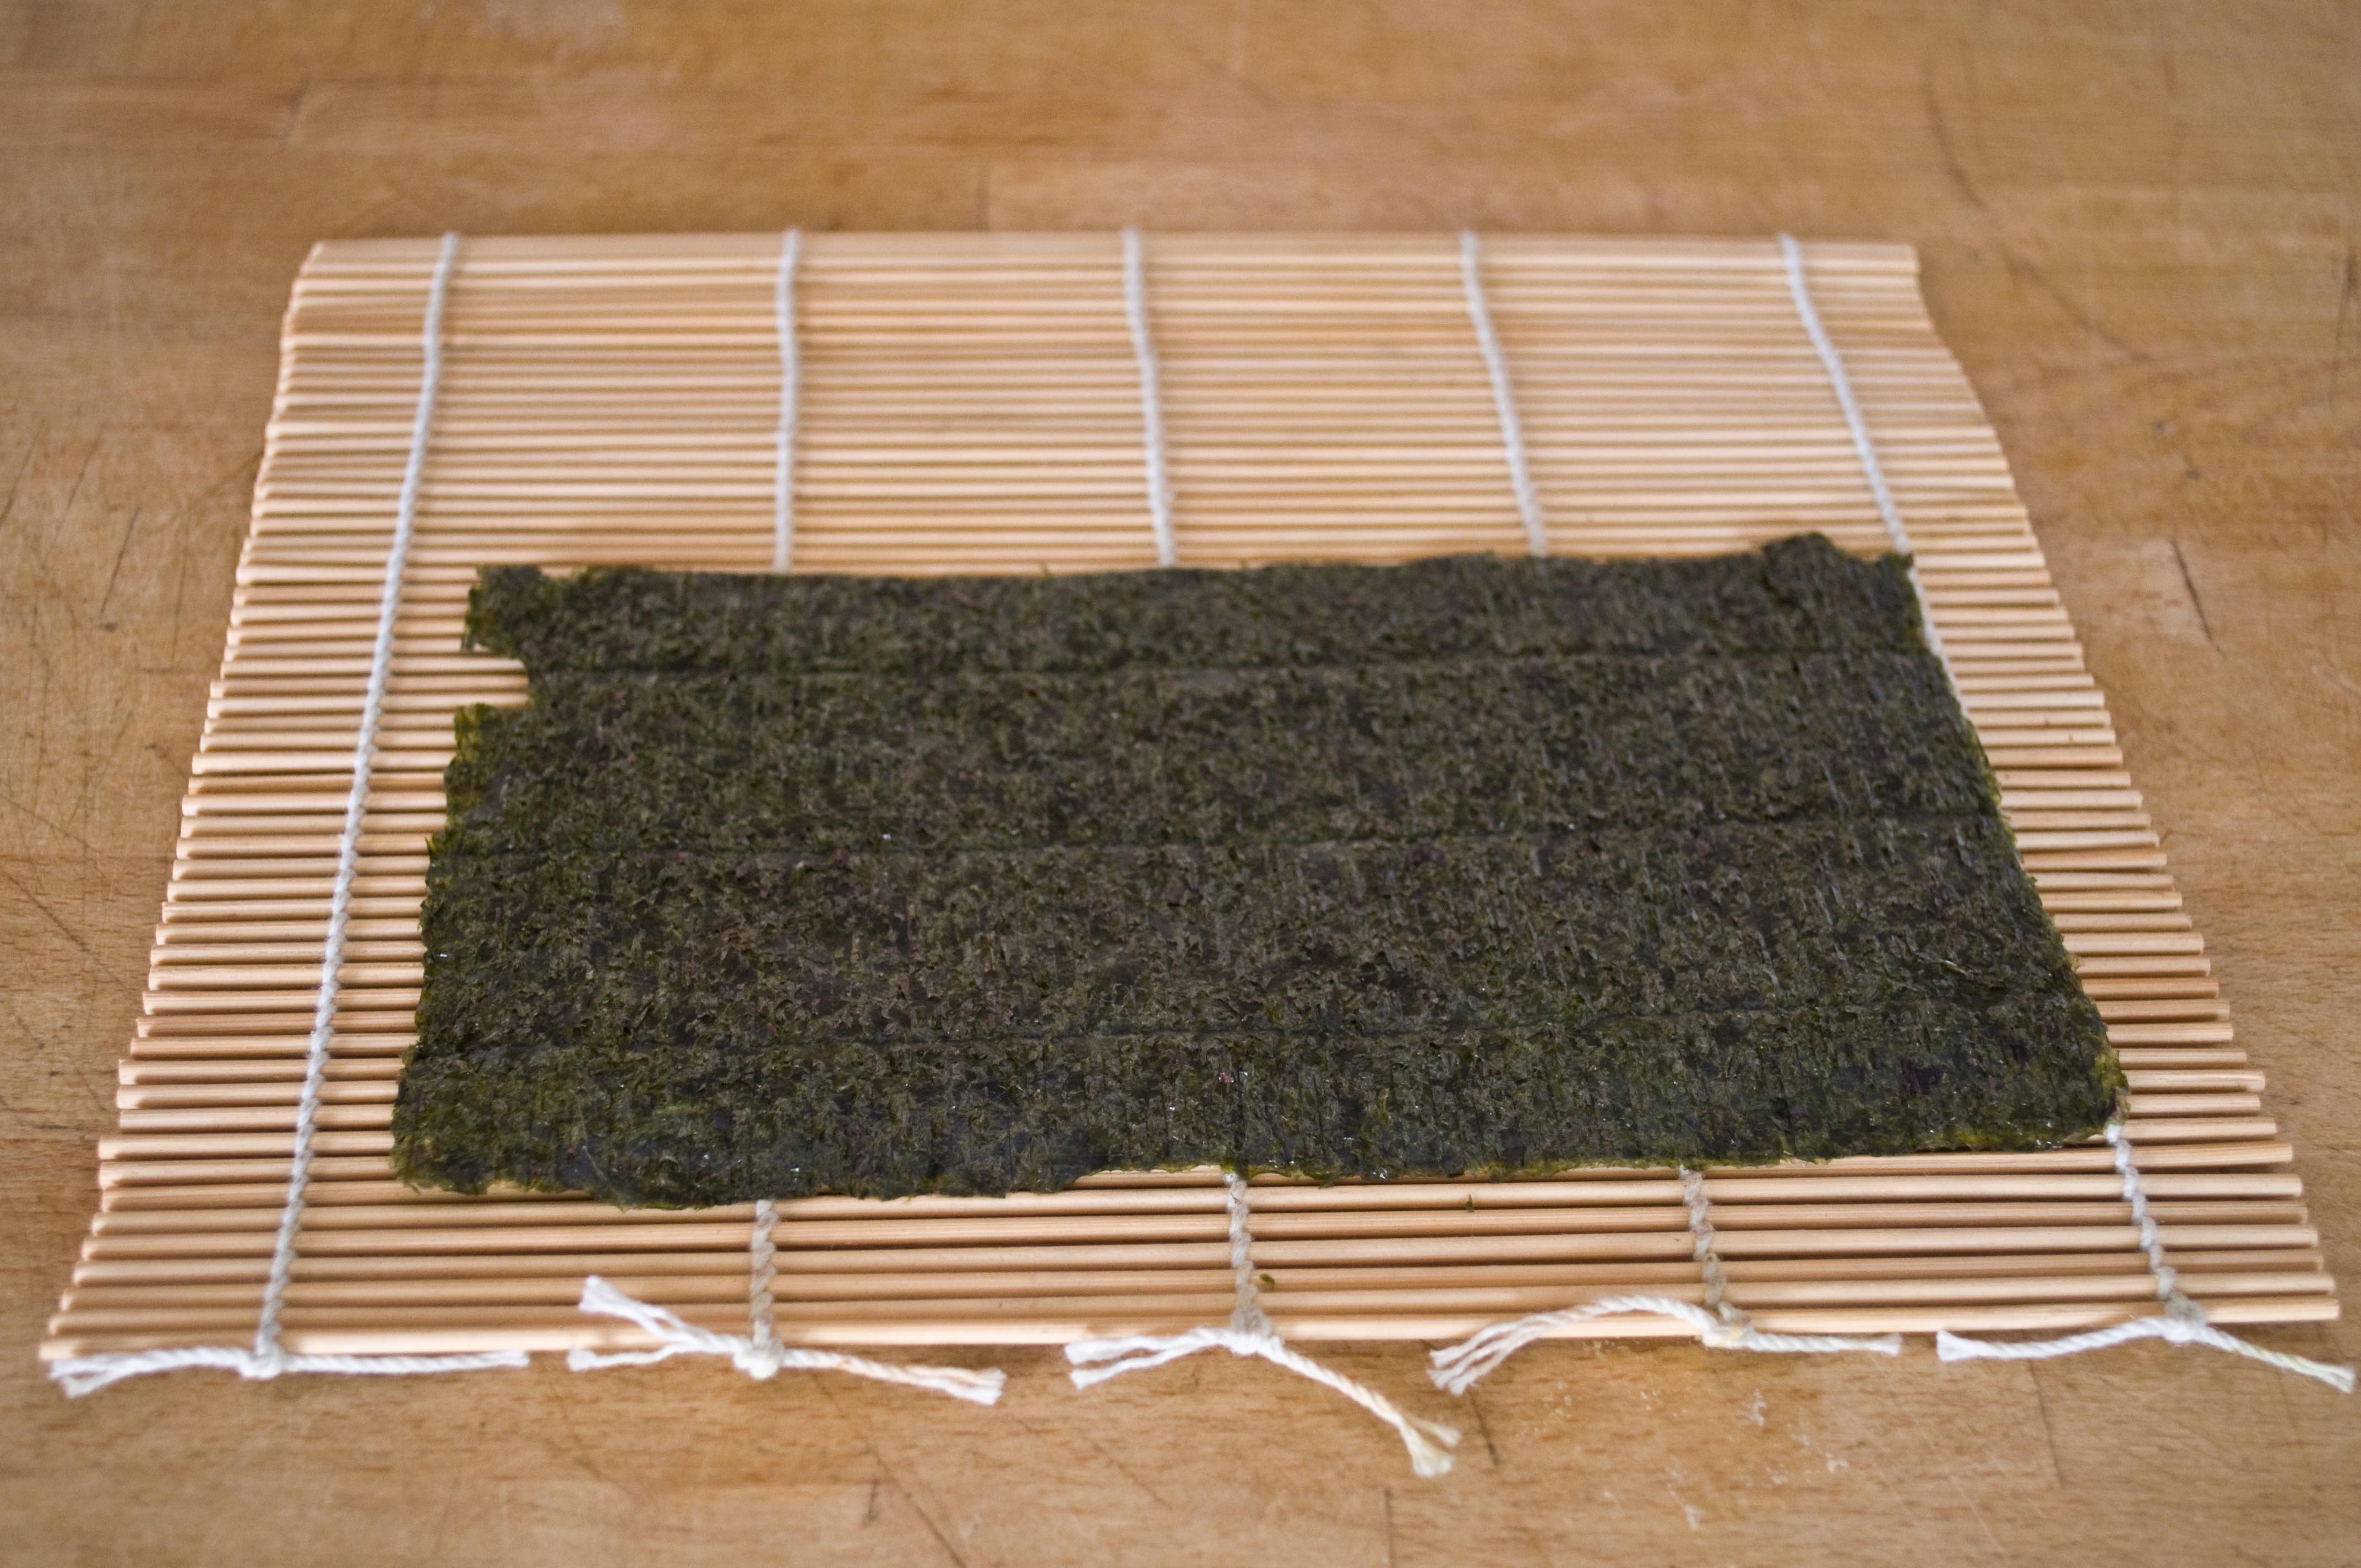
You’ll will need sheets of Nori and a bamboo rolling mat. Most large chain grocery stores carry both of those in their Asian sections. You can also try your local Japanese markets.
For the smaller, basic Ahi roll, use one sheet of Nori, cut in half width-wise.
Place this on your bamboo rolling mat.
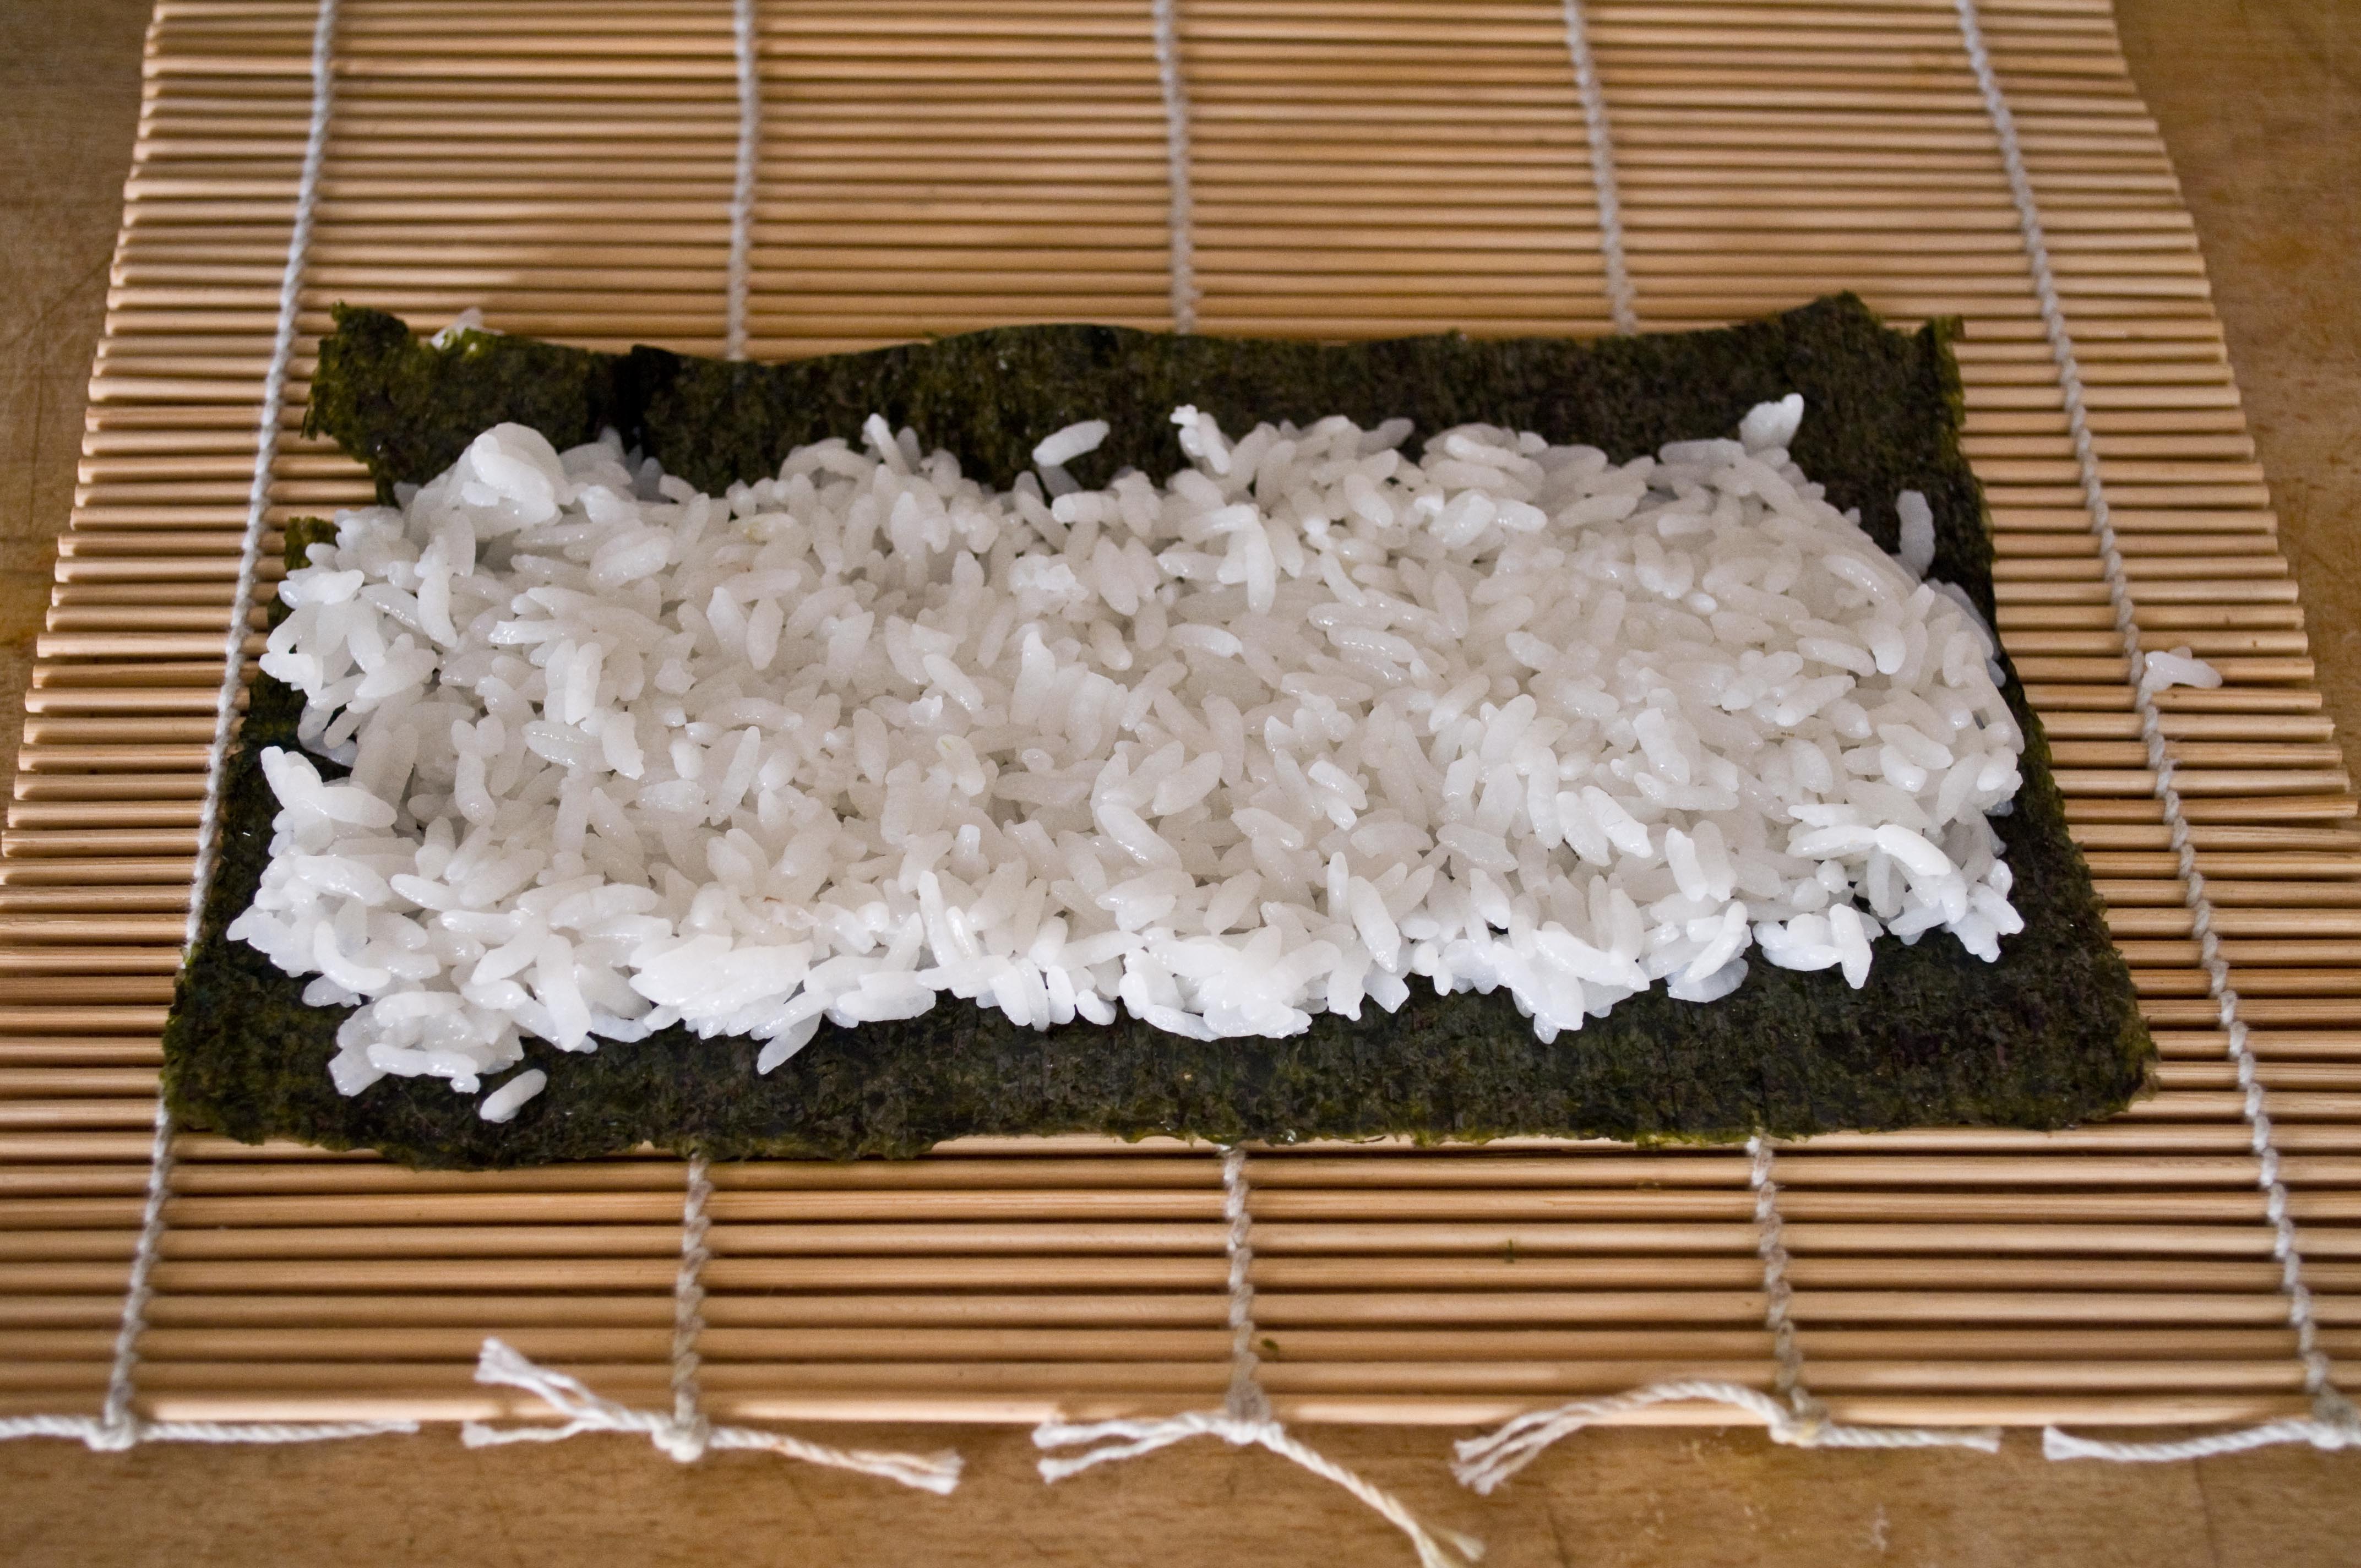
You will NEED a small bowl of cold water. This is so that the very sticky rice doesn’t stick to your fingers. Dip your fingers, as needed, into the water and transfer enough rice to make a thin layer of rice over the sheet of Nori while leaving a small blank margin along all sides.
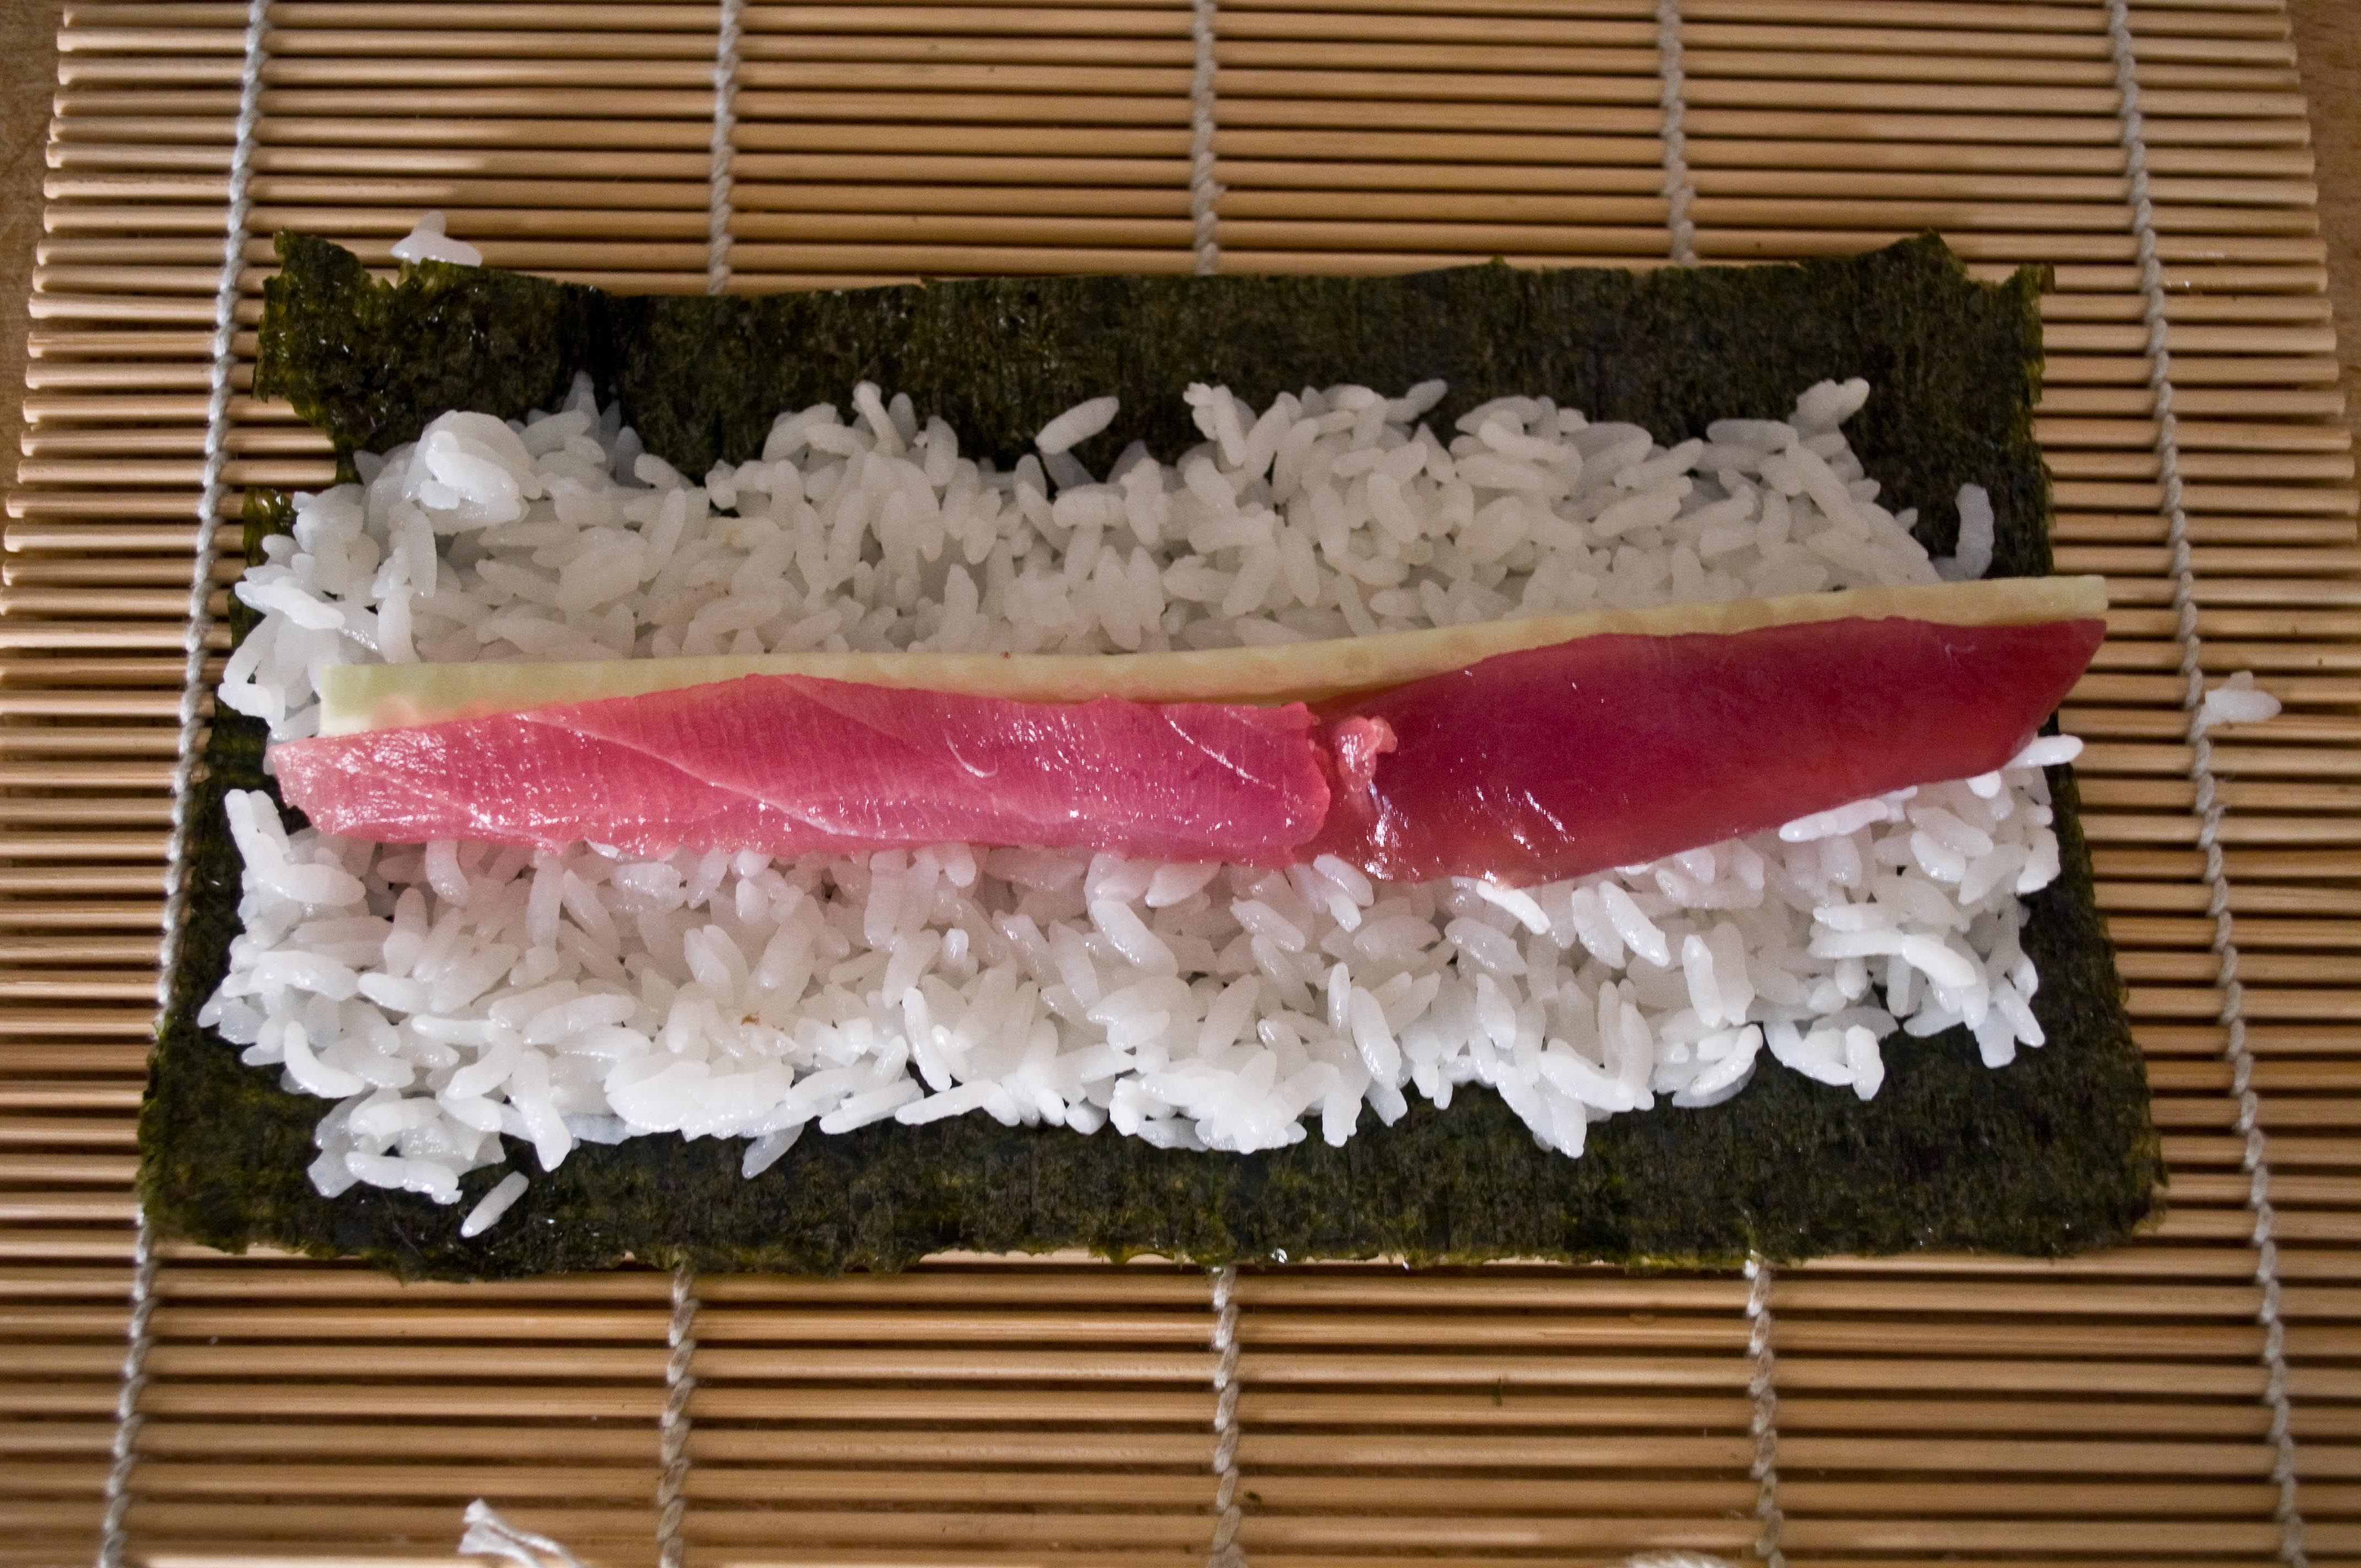
Place your thin strips of fish in the center. I also placed a long thin strip of cucumber for a little crunch.
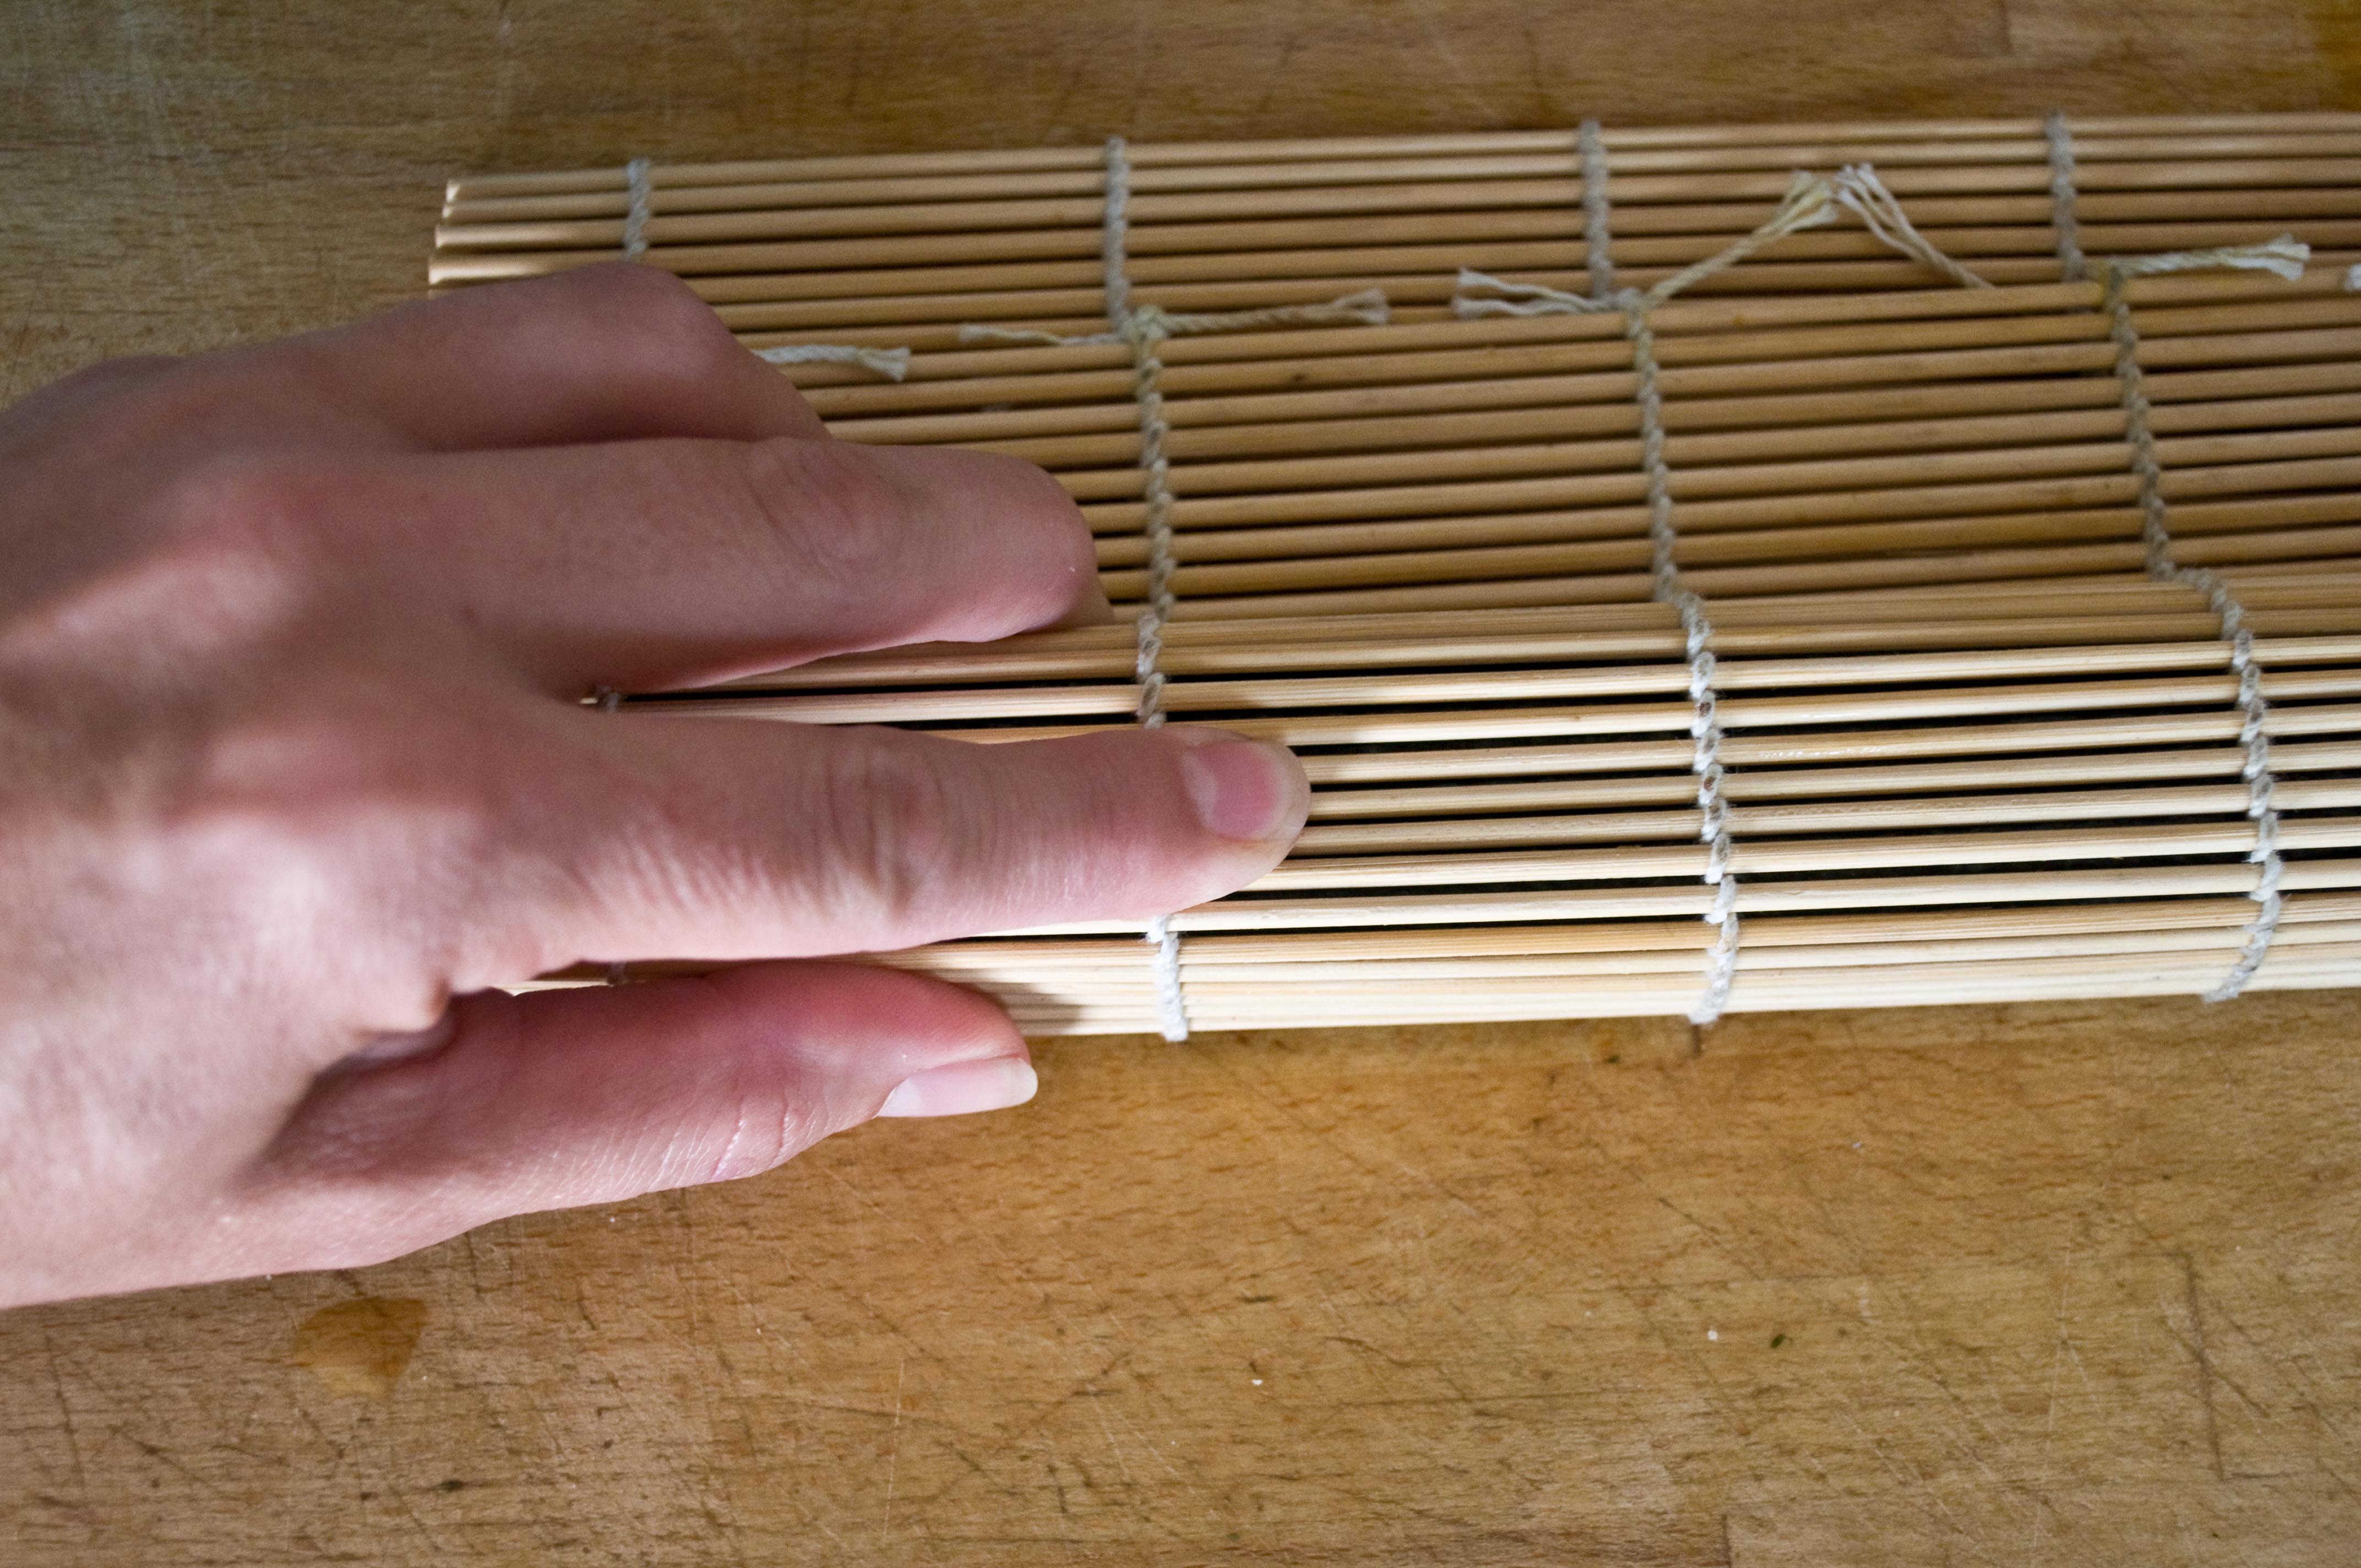
Roll away from you, using the mat as a guide. Apply firm pressure to shape the roll.
While the roll is still in the bamboo mat, form into a square with firm pressure.
For the Spicy Crab FIlling:
This is much more accessible and easier to find in most of the United States, regardless of how far you are from the ocean.
This is a basic spicy crab recipe, with sour cream as a substitute for the more commonly used mayonaise. If you want to use mayo, it will work just fine as well. I just have a very strong aversion to mayo in general, store bough being at the top of my hit list.
1 six ounce can of lump crab meat, or claw meat (please don’t use the fake stuff Krab just doesn’t taste the same)
2 tbs of sour cream
1 tsp Nanami Togarashi (Don’t be scared, most grocery stores have it in the Asian section)
Pinch of salt
Squeeze the crab meat to remove as much water as you can. This will help your filling to stay together and not become a soupy mess.
Add the sour cream, nanami and salt and stir to combine.
Use a full sheet of Nori for this roll, but use the same steps as with the Ahi roll.
I used a thin strip of cucumber for this roll as well. Just because I had it already cut and I wanted to add a little crunch.
Roll the same as before, but there is no need to make the larger rolls square.
Use a very sharp knife to cut the rolls, you may need to run the knife under hot water in between cuts.
Whats up with Wasabi?? There are two kinds that are pretty readily available at most grocery stores. The squeeze tube kind and the powder kind that you mix with water. I find the squeeze tube kind to have an odd, over powering taste. I very much prefer the powder kind.
You now know how to make sushi. Go impress your friends.
Do you have a How To that you want to see? Email it to [email protected] or leave it on my Facebook wall at:
The last time I had ceviche I was one week into my pregnancy with Tater. We were in New York. A trip that had been planned for months, even before all the fertility goalies were removed and we were officially “trying.” The first few weeks of pregnancy, when it is all just more of an idea, a theory, than an actual BABY, there is a thick fog of impending miscarriage. As if that is the inevitable outcome. You don’t tell anyone outside your very inner circle so that you don’t have to UNtell, “in case…well, you know.” We had gone to have dinner at the apartment of a newly married couple we know. He’s a musician we’ve known since we were kids and she is a doctor we feel grateful to know as adults. We arrive to a beautiful spread of homemade ceviche. I panic. I haven’t been able to do all research. Fish? Some is ok, right? What if this is the horrible, mercury laden trigger that will decimate the theoretical baby growing in my uterus? I gave a frantic look towards Mr. Fits. Casually, he searched Google on his phone without missing a conversation beat, as if just answering a text rather than shieling his unborn theory from poisonous, metal saturated fish. “It’s fine,” he leans over and whispers to me, showing me the phone, “Very low in mercury. They even encourage you to eat this kind because the omega 3’s are good for brain development.” Brain development? BRAIN? I’m growing a brain. It all hits me. I am growing a human. No one can even tell and my guts are making a brain. That was the moment that this theory, this idea, this pregnancy actually started to become a baby, a human Tater. Ceviche will always remind me of that night, and the realization that my pregnancy would end with my beautiful baby being born.
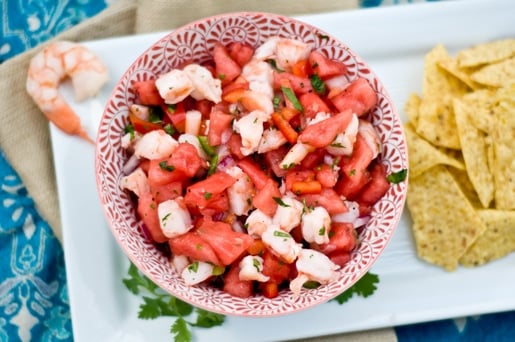
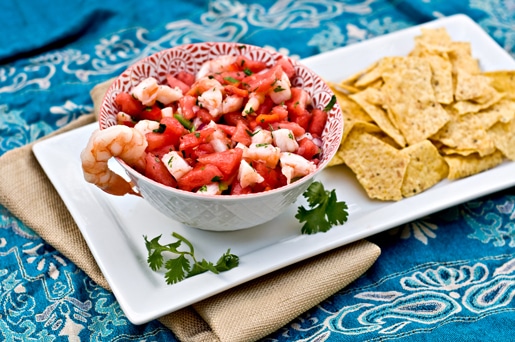
Watermelon Ceviche
3 cups of watermelon, chopped
½ cup diced red bell pepper
¼ cup diced red onion
¼ cup chopped cilantro
2 tbs diced fresh jalapenos, seeds removed
1 ½ cup cooked, chopped shrimp, tails removed
½ cup fresh squeezed lemon or lime juice (or a mixture of both)
1 ½ tsp kosher salt
1 tsp black pepper
1 tsp sriracha
Corn chips and Boston lettuce leaves for serving
Put all the ingredients (except the chips and lettuce) in a large bowl and mix until combined. Allow to chill for at least an hour before serving.
 I know that you can all tell how much I love party food, I’ve been making a lot of it these days. Food to serve to other people. Every country in the world will tell you how important food is to their culture, how community happens around a table, how love grows between mouthfuls of hand made food. It’s too bad that hasn’t become ingrained in Americans. We have "fast" food, as if we just need to get through the meal as quickly as possible to move on to better things like…reality TV? Whats the rush? Why don’t more people savor meal times, enjoy it as a journey and view food as too sacred to be "Fast"? Or take time to make food for as well as WITH their loved ones?


