Only three ingredients. Perfect for a party, and I do believe that Halloween kicks off the party season. The fall is filled with holidays, parties, my birthday…OK, so maybe there is a chance you’re not thinking about that last one. The number one food related question people ask me is about recipes for easy, yummy party food. First, party food generally has to travel well. Second, it has to survive at room temp for extended periods of time. Third, it has to be a crowd pleaser. I do believe, Figs in a Blanket meet all of those requirements.
Figs in a Blanket
12 figs
12 slices of bacon
3 oz goat cheese
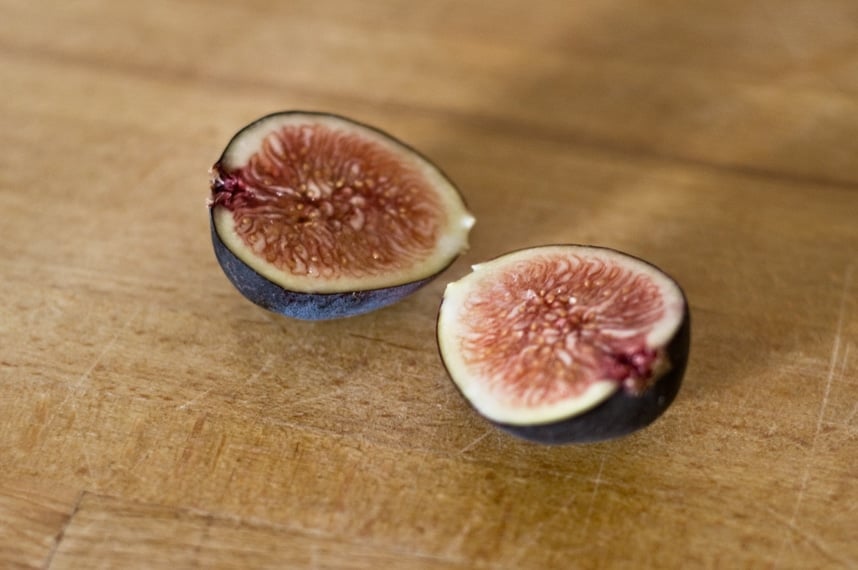
1. Preheat oven to 400. Cut the figs in half.
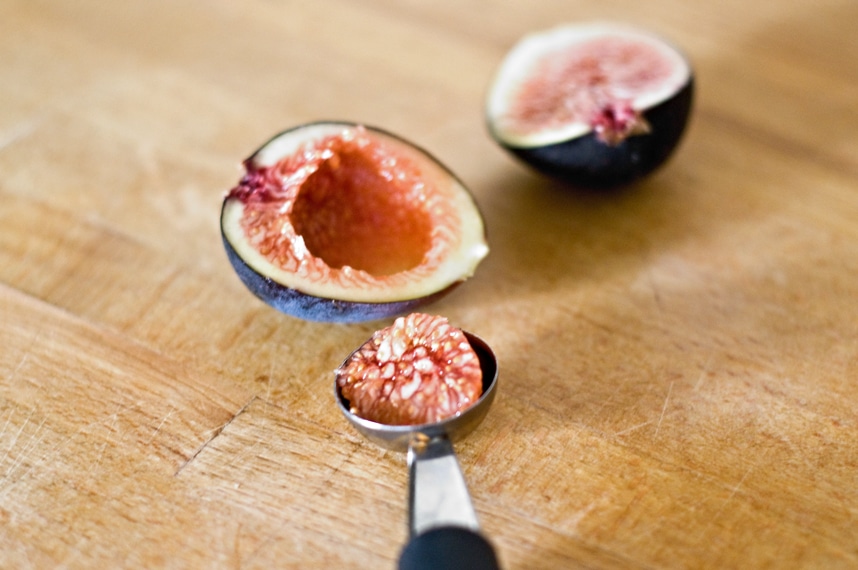
2. Scoop out a large portion of the insides with a melon baller (a small spoon should do fine as well).
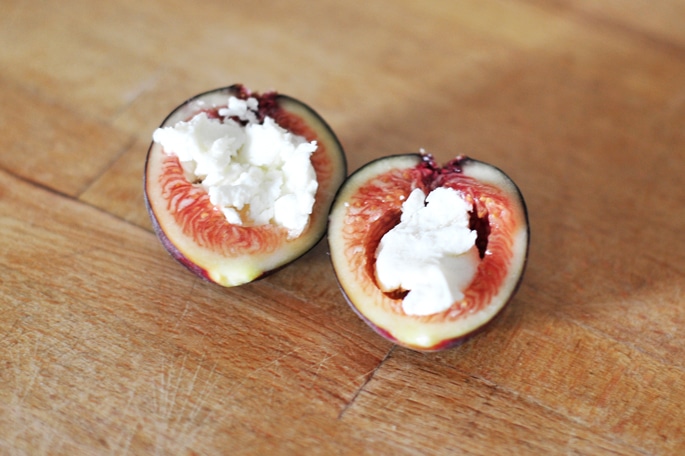
4. Fill the hole with yummy goat cheese.
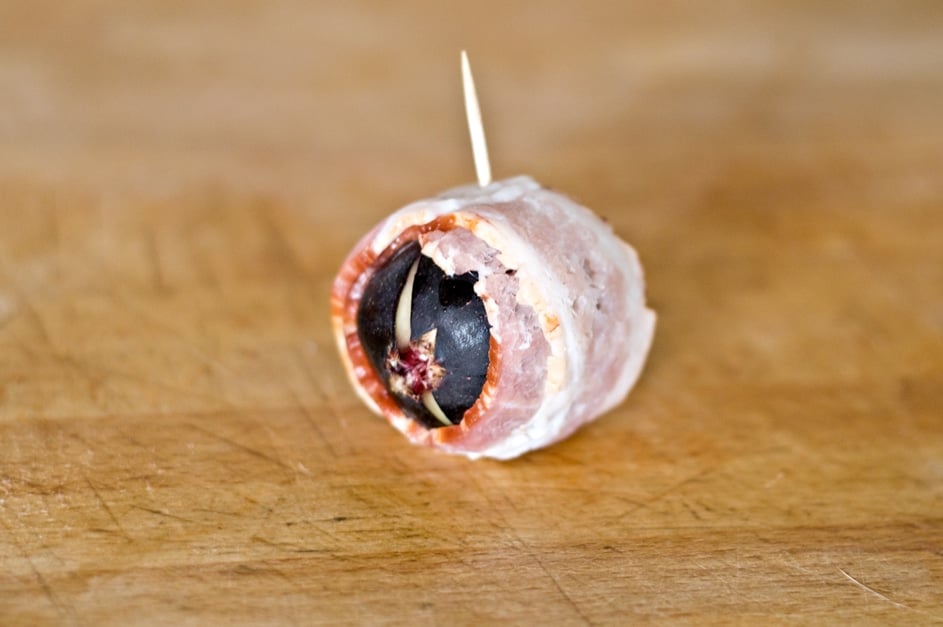
5. Re-assemble the fig and wrap it tightly with a strip of bacon. Secure with a toothpick.
6. Place figs on a baking sheet lined with aluminum foil. Bake in a 400 degree oven for 8 minutes, turn over and bake until the bacon is cooked through, about 8 more minutes.
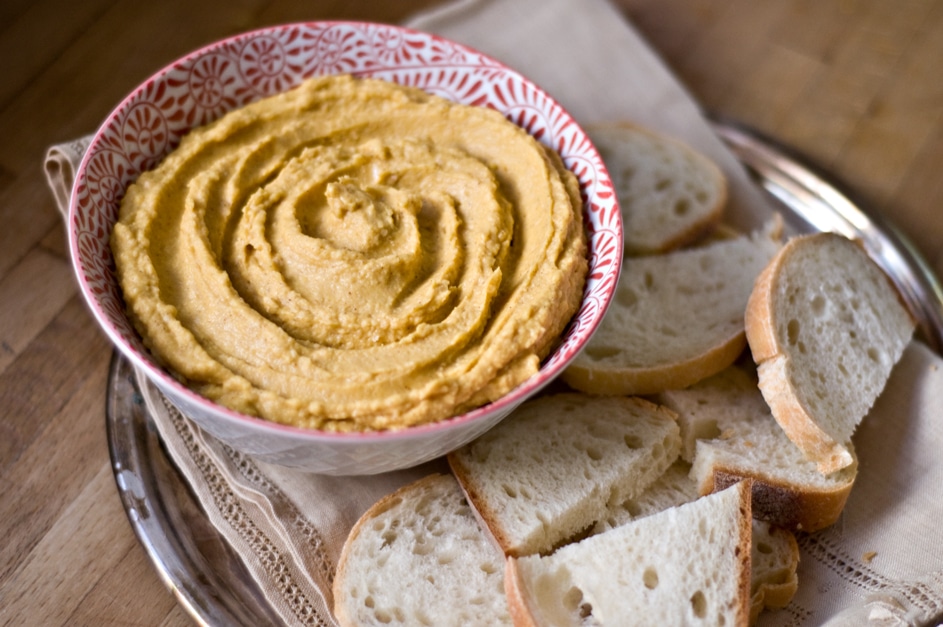
So, what do you do when you roast 4 pumpkins and end up with several containers FULL of homemade pumpkin puree? AND you have a husband that "Isn’t really crazy about that whole pumpkin flavor"? Besides the Pumpkin Pie With Bourbon Whipped Cream I made, and the Pumpkin Cranberry Cookies, I made hummus. Hummus, cookies and pie that I had the sole responsibility of consuming, which also turned into a few extra, much needed, workouts and spin classes. Totally worth it.
This hummus also became the "dressing" on my salad for lunch, and the schemer for my ham sandwich at lunch the next day. So many yummy uses.
There has always been a problem with caramel apples. The ratio is off, backwards even. There just isn’t enough caramel and you’re left with, well, a half eaten apple on a stick.
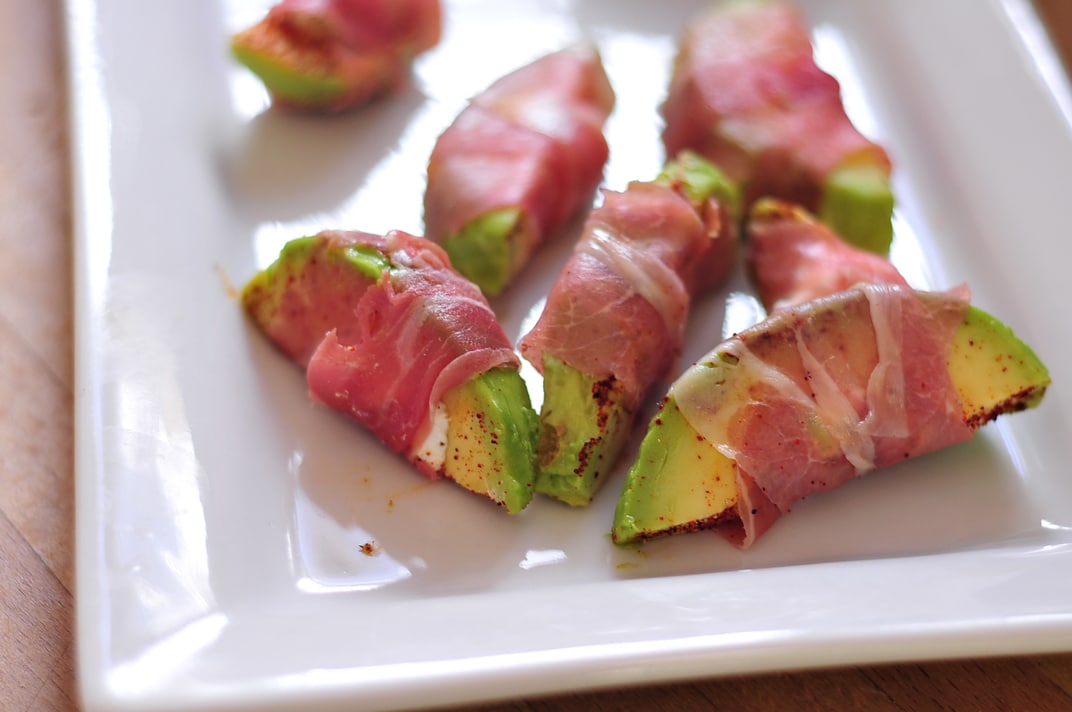
Spooky Halloween treat. Looks like slimy, severed fingers, makes you hungry, right? That’s the best part about Halloween, you get to make crazy, gross, appetizers that are inspired by dismembered body parts and people love it.
Spooky Avocado Witches Fingers
4 Avocados
peeled, pitted and halved
1 tbs lemon or lime juice
2 ounces goat cheese
1 teaspoon salt
1 teaspoon pepper
1 teaspoon chili powder
1 ounce prosciutto slices
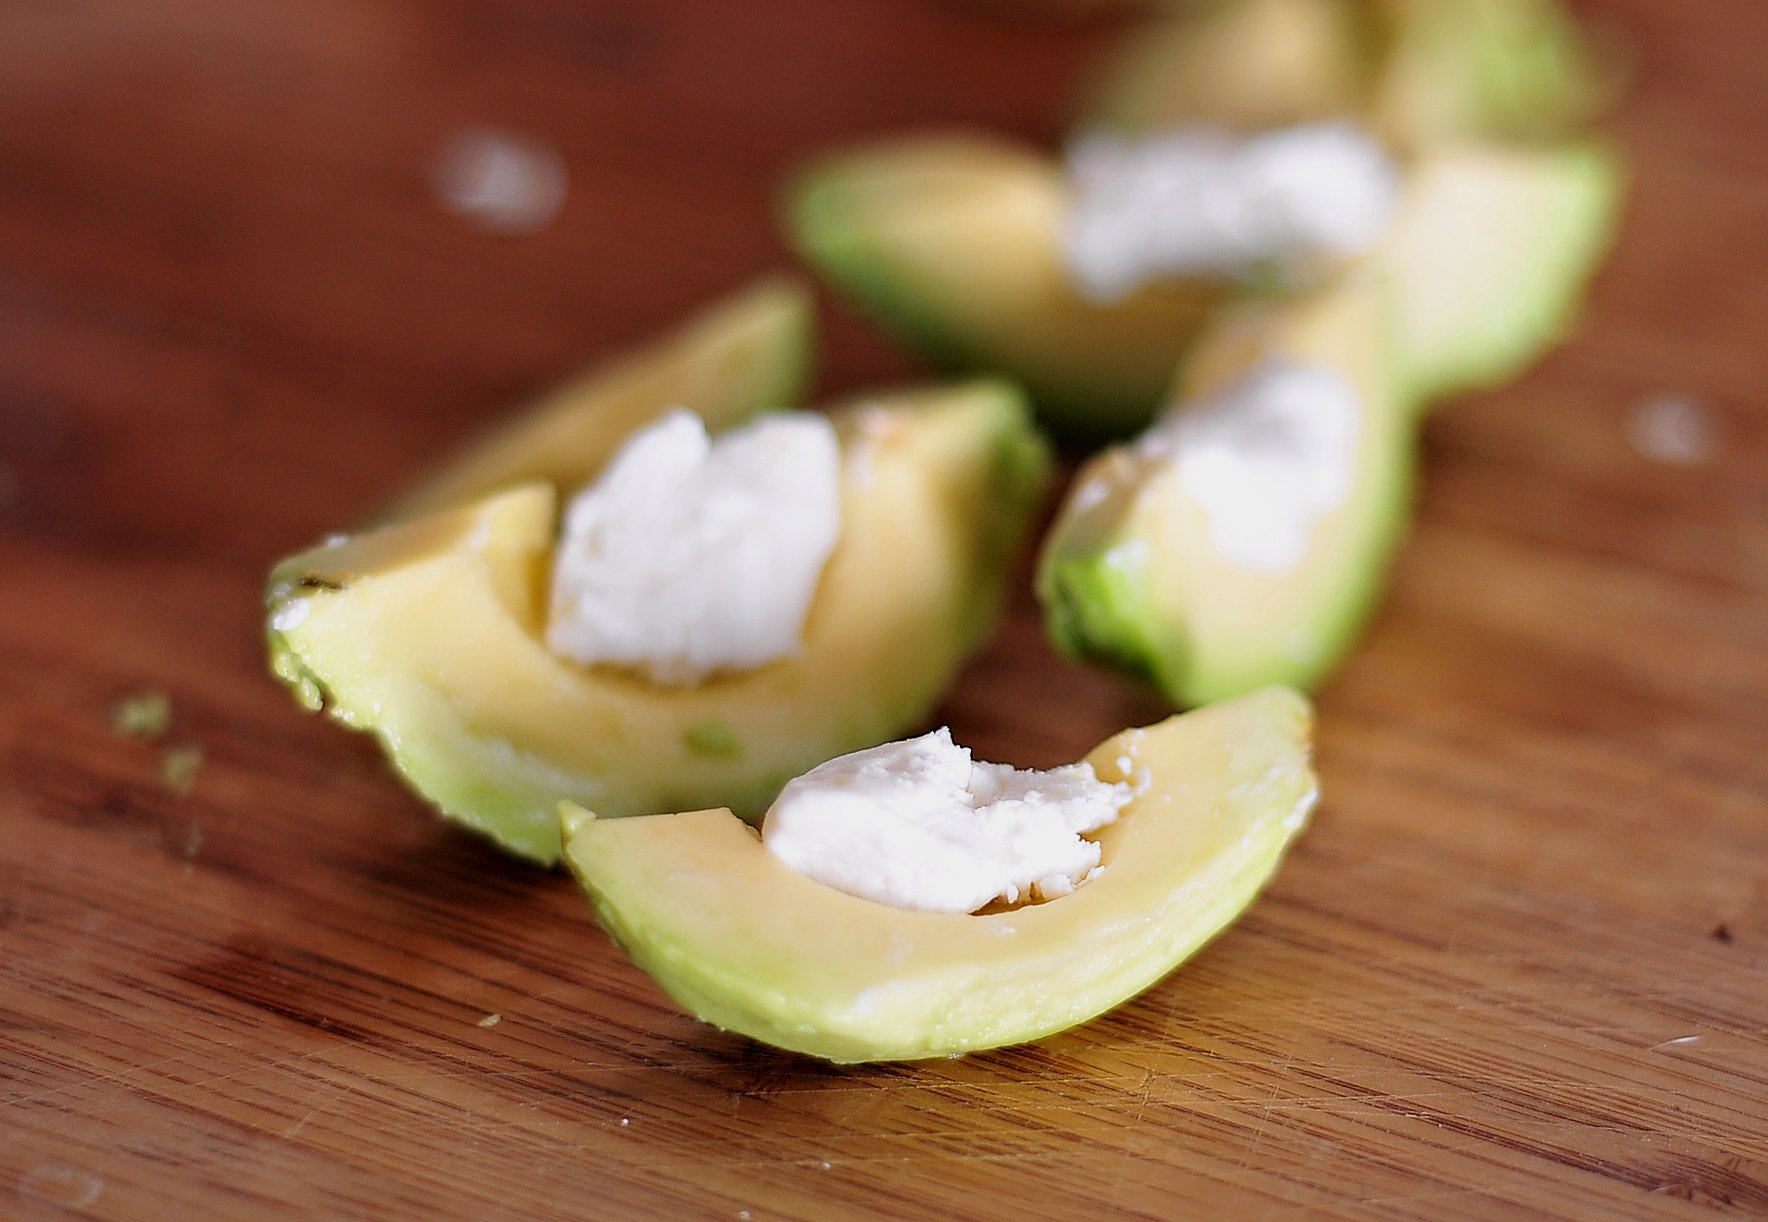
Cut each avocado half into 4-6 slices. Place in medium bowl and gently toss in lemon juice.
Fill the center of each avocado slice with 1/4 to 1/2 teaspoon goat cheese mixture.
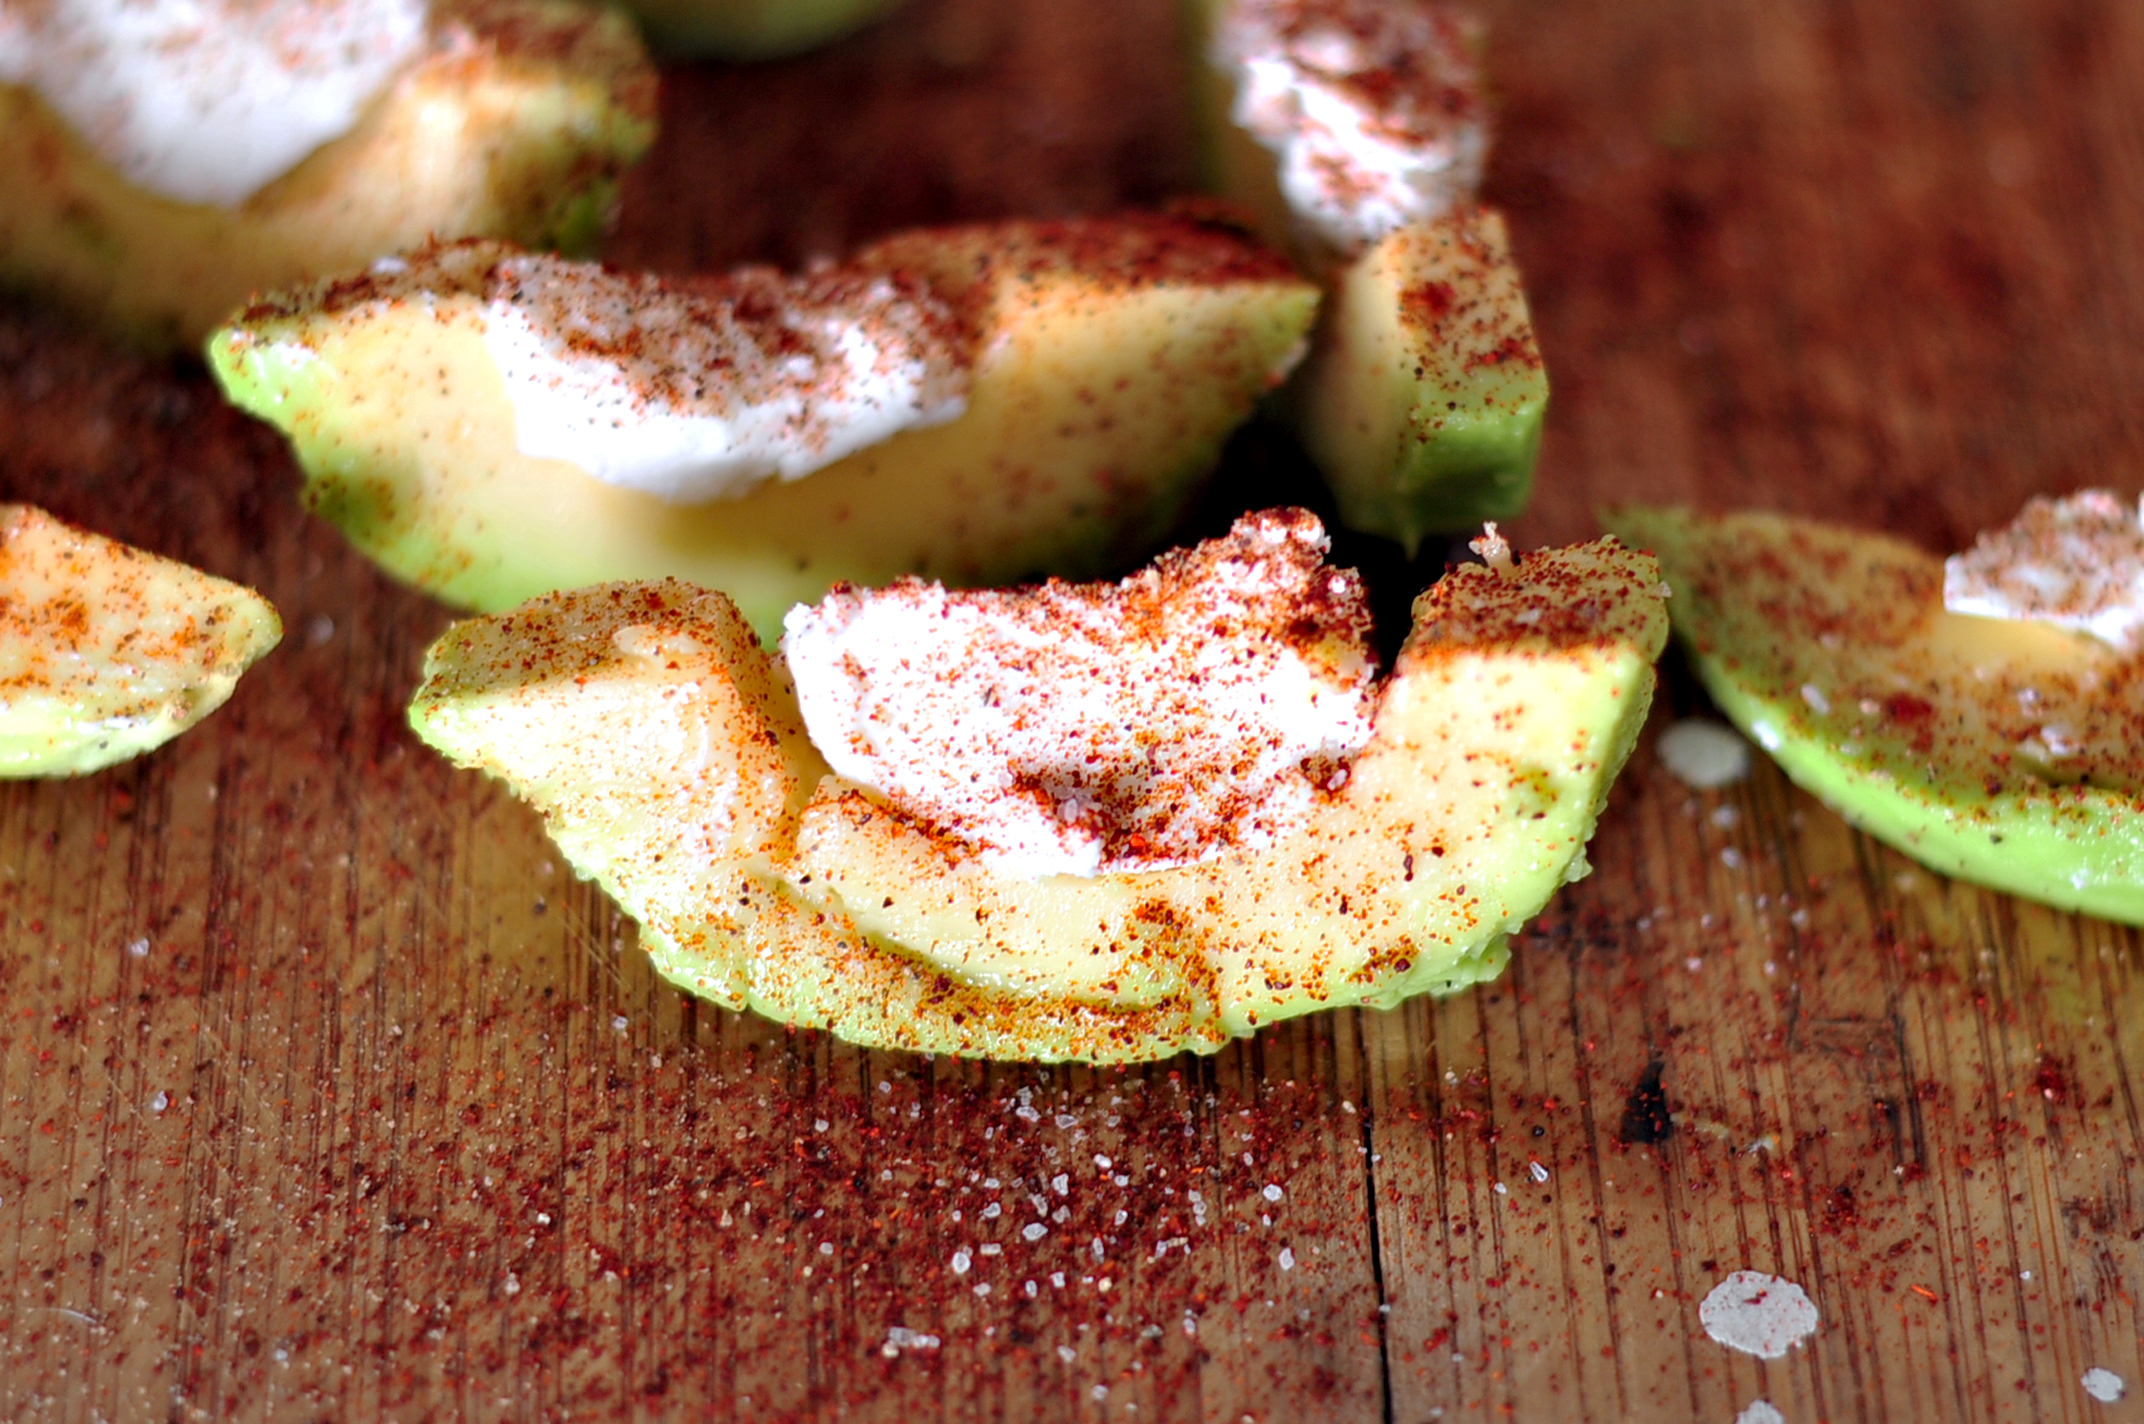
Sprinkle with salt, pepper and chili powder.
Wrap each avocado “finger” with 1/3 slice of prosciutto until the goat cheese is secured to the avocado. Make sure to leave the tip of the avocado exposed, to resemble a finger nail. Arrange the avocados in the shape of a hand on the plate to add extra spookiness. Serve and Enjoy!
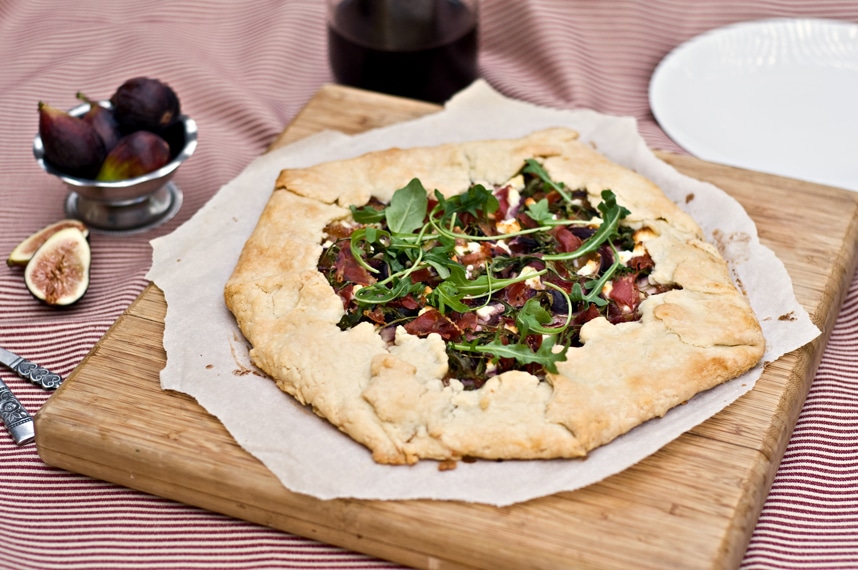
Galettes are such an amazing food. Like a tart or a pizza, only much more elegant and easier to make. This dough came out so beautifully, with a buttery flakiness that could be eaten all on its own. There is a very good chance that this Fall will be filled with galettes, sweet and savory.
Fig and Goat Cheese Galette
CRUST
2 cups flour
1 tsp salt
1 tsp sugar
1 1/2 sticks of butter
1/3 cup ice cold water
FILLING
1/2 cup ricotta cheese
1 tsp salt
1 tsp pepper
6 figs, sliced
1 tbs raw honey
2 tbs minced red onions
1/2 cup arugula
2 oz goat cheese, crumbled
1 oz prosciutto, chopped.
1 tbs melted butter
In a food processor, combine 1 1/3 cup flour, salt, sugar and butter, process until well combined. Add the remaining flour and process again until combined. Transfer to a bowl and add the water with a wooden spoon (don’t add the water while the dough is in the food processor or your dough will be brittle and cracker-like). If the dough isn’t moist enough, you can add more water, a tsp at a time until the consistency is right. Form dough into a disk, wrap with plastic wrap and chill in the refrigerator for 2 hours.
Preheat your oven to 375.
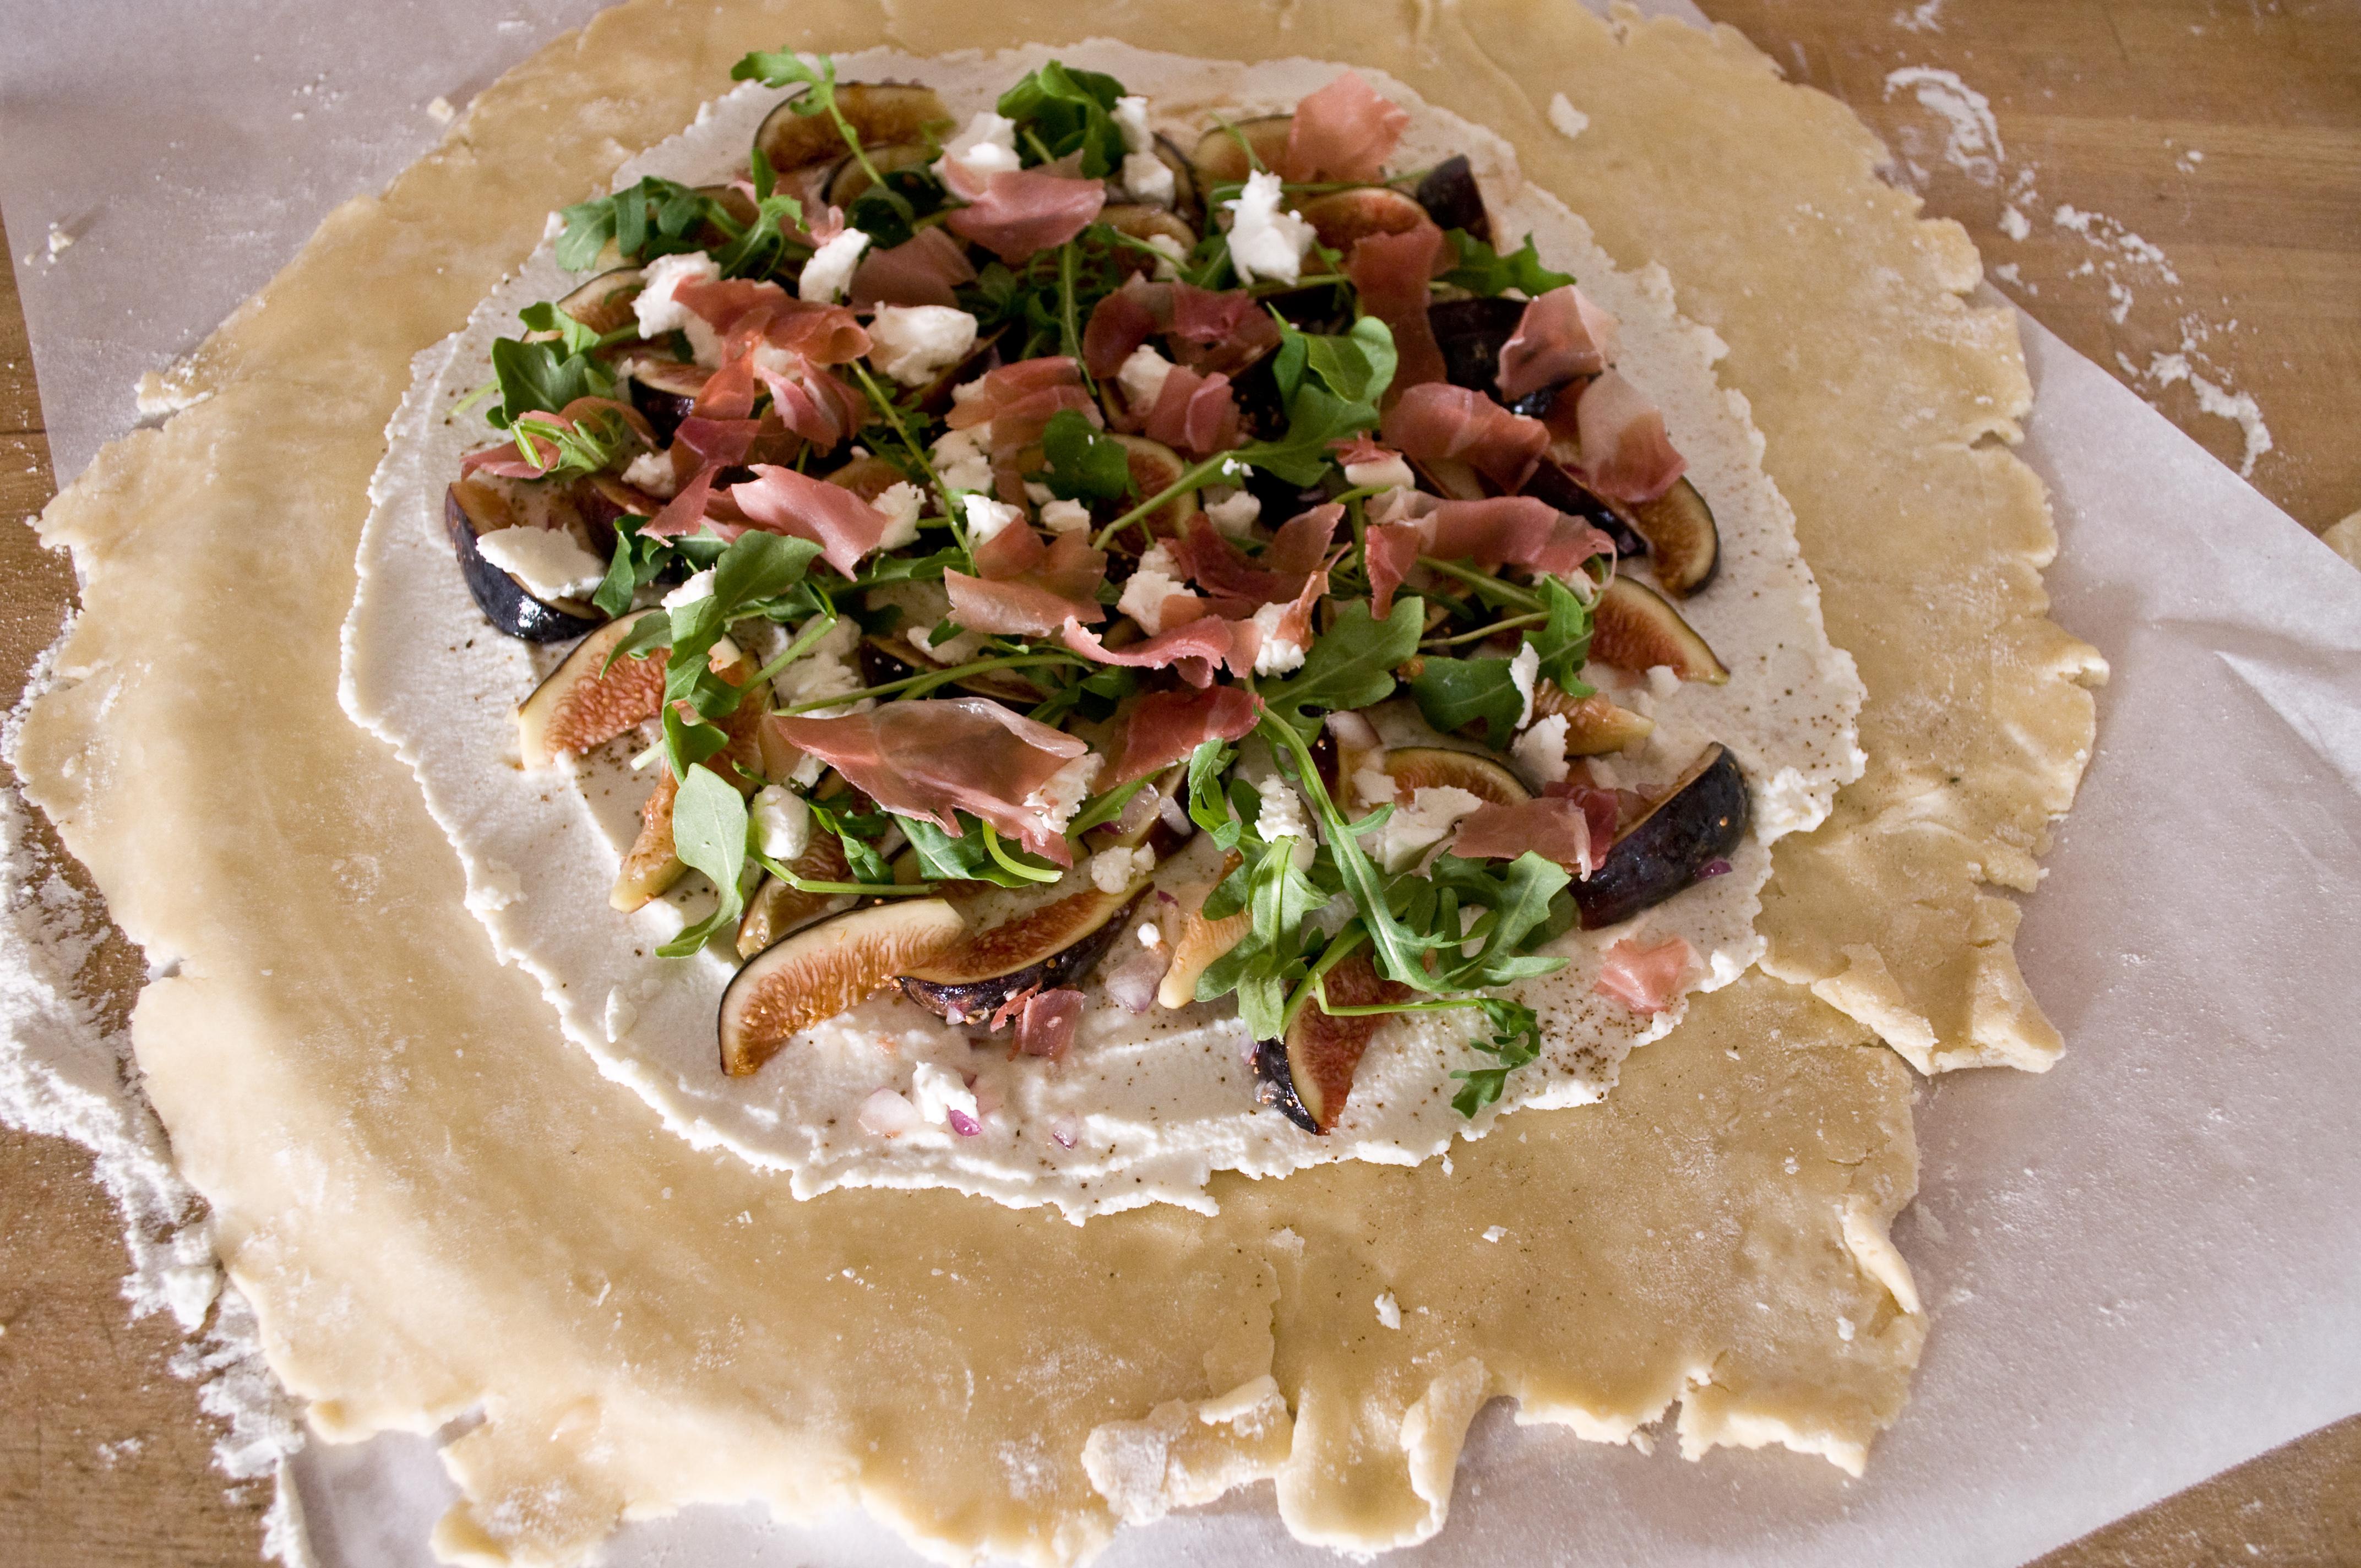
Once the dough is chilled, roll into a "rustic" circle. The great thing about a Galette is that an odd shape looks charming, don’t worry about making it too perfect. Transfer to a baking sheet or a pizza stone covered with parchment paper. Spread the ricotta in the middle, leaving about 2-3 inches on all sides bare. Top with salt and pepper. In a bowl, combine the figs, honey and onions, toss to coat. Add the figs to the top of the ricotta, then add the arugula, goat cheese and prosciutto.
Fold the edges into the middle
Brush the crust with melted butter and bake at 375 for 40-45 minutes or until golden brown. I added additional arugula and goat cheese to the top before serving, but this is completely optional.
I’ll end the suspense. I didn’t win. I had a great time and the competition was fierce. Well, they were actually really nice, lovely people, but people who had run themselves around this recipe circuit quite a bit. One woman, Roxanne, Has over 800 winning recipes to her name! Pascal owns a restaurant, Jennifer and Jamie have both made names for themselves winning dozens of recipe contests all over the country. Me? This was the 4th recipe contest I’ve ever entered. I was the rookie for sure. It was a fantastic experience for, I met some great people, had a wonderful trip to San Diego, I have such a better understating of what the judges are looking for and I am ready for the next contest, bring it on.
They even put me up in a fabulous hotel the night before the event. Here is Tater and I, enjoying the room:
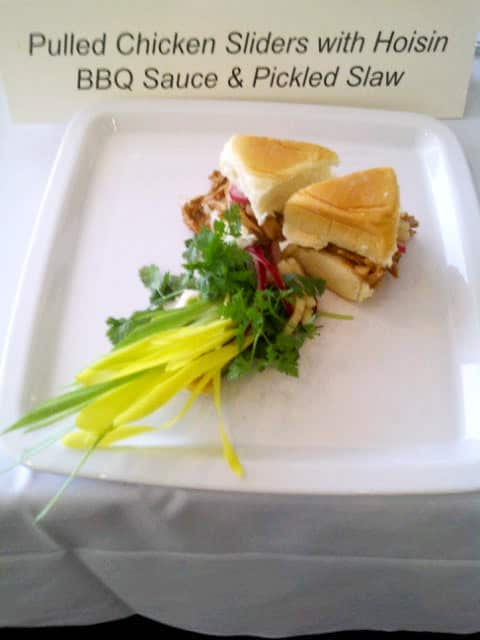
For those of you want to try out my Semi Finalist Chicken Sliders, I am now able to post the recipe:
Pulled Chicken Sliders with Hoisin BBQ Sauce & Pickled Slaw
Serves 4 – 6
4 Foster Farms chicken breast halves, boneless and skinless
1 ½ cups red onion, peeled and sliced into thin rings
2 cups cucumber, peeled and cut into matchstick sized pieces
¼ tsp salt
1/3 cup lemon juice
3/4 cup apple cider vinegar, plus ¼ cup, divided
2 tbsp sugar
8 whole dried allspice berries
1 tsp whole cloves
½ tsp black peppercorns
2 tbsp extra-virgin olive oil
1 tsp fresh garlic, minced
1 cup hoisin sauce
1 tsp chili powder
¼ cup low sodium soy sauce
1 tsp sesame oil
20 mini Hawaiian bread rolls
In medium bowl, combine onion, cucumbers, salt and lemon juice. Let stand and room temperature 30 minutes.
In small saucepan over medium high heat, combine ¾ cup apple cider vinegar, sugar, allspice, cloves and peppercorns. Bring mixture to a boil and cook for 30 seconds. Remove from heat and cool to room temperature. Strain the liquid to remove the cloves and allspice then pour over the onions and cucumbers and refrigerate mixture for 30 minutes.
Meanwhile, place chicken in large pot or Dutch oven. Fill with water to completely cover chicken. Place on stove over medium-high heat and bring to a slow boil. Cover and cook for 15 – 20 minutes or until chicken is completely cooked.
While chicken is cooking, prepare barbeque sauce by warming olive oil in large saucepan over medium-high heat. Add garlic and sauté for 30 seconds; add remaining vinegar, hoisin sauce, chili powder and soy sauce. Cook for 3 minutes or until thickened, remove from heat and add sesame oil and stir well to combine.
When chicken is cooked, remove from water and allow to cool. Using two forks, shred chicken to as thin slices as possible, then add to hoisin barbeque sauce pan, tossing well to coat.
Split rolls in half across the middle to resemble small sandwich buns. Fill each bun with about 2 tablespoons of the chicken and top with pickled slaw.
Cookin in the fancy kitchen:
*The slider pictures, as well as the above picture of me cooking were taken by a photographer for Foster Farms, Charlie. Here is his website for more information: http://www.charliegesellphotography.com/#
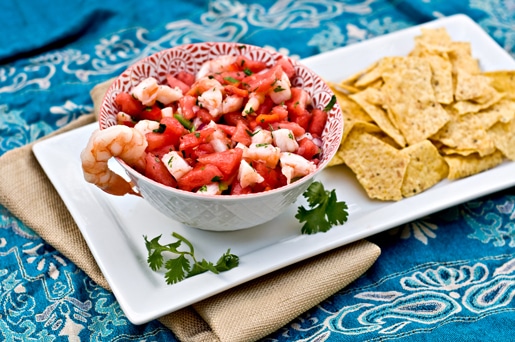
The last time I had ceviche I was one week into my pregnancy with Tater. We were in New York. A trip that had been planned for months, even before all the fertility goalies were removed and we were officially “trying.” The first few weeks of pregnancy, when it is all just more of an idea, a theory, than an actual BABY, there is a thick fog of impending miscarriage. As if that is the inevitable outcome. You don’t tell anyone outside your very inner circle so that you don’t have to UNtell, “in case…well, you know.” We had gone to have dinner at the apartment of a newly married couple we know. He’s a musician we’ve known since we were kids and she is a doctor we feel grateful to know as adults. We arrive to a beautiful spread of homemade ceviche. I panic. I haven’t been able to do all research. Fish? Some is ok, right? What if this is the horrible, mercury laden trigger that will decimate the theoretical baby growing in my uterus? I gave a frantic look towards Mr. Fits. Casually, he searched Google on his phone without missing a conversation beat, as if just answering a text rather than shieling his unborn theory from poisonous, metal saturated fish. “It’s fine,” he leans over and whispers to me, showing me the phone, “Very low in mercury. They even encourage you to eat this kind because the omega 3’s are good for brain development.” Brain development? BRAIN? I’m growing a brain. It all hits me. I am growing a human. No one can even tell and my guts are making a brain. That was the moment that this theory, this idea, this pregnancy actually started to become a baby, a human Tater. Ceviche will always remind me of that night, and the realization that my pregnancy would end with my beautiful baby being born.
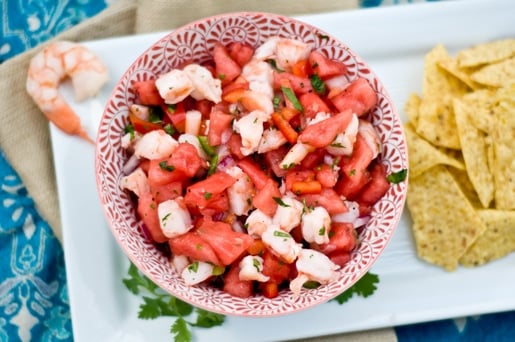
Watermelon Ceviche
3 cups of watermelon, chopped
½ cup diced red bell pepper
¼ cup diced red onion
¼ cup chopped cilantro
2 tbs diced fresh jalapenos, seeds removed
1 ½ cup cooked, chopped shrimp, tails removed
½ cup fresh squeezed lemon or lime juice (or a mixture of both)
1 ½ tsp kosher salt
1 tsp black pepper
1 tsp sriracha
Corn chips and Boston lettuce leaves for serving
Put all the ingredients (except the chips and lettuce) in a large bowl and mix until combined. Allow to chill for at least an hour before serving.
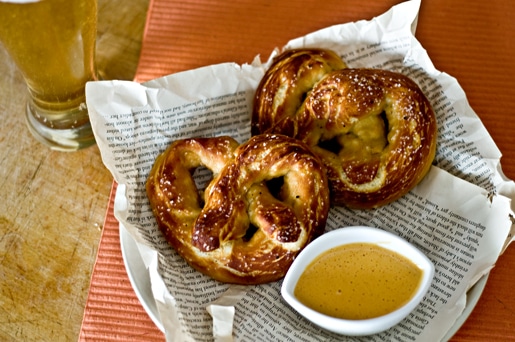
A few weeks ago I professed my love for Hepp’s Salt Barrel. They have this amazing Black Truffle salt that I have a huge culinary crush on. I’ve spent that last week inventing a recipe that would showcase this gorgeous spice. What better vehicle for salt consumption than a pretzel? Salt makes everything taste better, but in this case, it’s the star.
Truffled Soft Pretzels with a Smokey Garlic Aioli
1 cup water, warmed between 105-110 degrees fahrenheit
1 tbs sugar
1 tsp kosher salt
1 tsp active yeast
2 2/3 cups flour
1/4 cup truffle oil (can use olive oil instead) plus 2 tbs, divided
2 tbs veggtable oil
5 cups of water
1/2 cup baking soda
1 tbs black truffle salt
Aioli:
4 cloves of garlic
1 tbs olive oil, plus 1 tbs, divided
3 egg yolks
1 whole egg
1/2 tsp smoked paprika
1/8 tsp salt
In the bowl of a stand mixer, combine the water, sugar and then sprinkle the yeast on top. Give it five minutes to get foamy before proceeding. With a dough hook attachment, put the mixer on low and slowly add the flour and kosher salt. slowly add the 1/4 cup truffle oil, then increase the speed to medium and allow the mixer to knead the dough unit it’s smooth and gathers around the hook about 6-8 minutes. Coat the inside of a glass or metal bowl with the vegetable oil. Gather the dough into a ball and place inside your oily bowl, cover tightly with plastic wrap. Allow to sit in a warm place for about an hour or until it’s doubled in size (this may be a good time to start working on the aioli, instructions at the bottom).
Preheat your oven to 450 and line a baking sheet with parchment paper.
Bring the water and baking soda to boil in a pot on the stove.
Remove the dough and place on a sheet of parchment paper (if you don’t have parchment paper, use a clean oiled surface that will resist the dough sticking to it). Using a sharp knife, cut the dough into three equal sized pieces, then cut each of those pieces in half, giving you six equal sized pieces of dough.
grab one end of the dough and hold so that the other end hangs towards the ground. Using your other hand, gently squeeze the dough from top to bottom to form a long rope, using gravity to assist. You can also try rolling the dough on an oiled surface, to form a 12-18 inch rope of dough. Place on the parchment paper, forming a U shape, then brining each end in towards the bottom, crossing the ends in the middle to form a pretzel shape, pressing the ends in to secure them in place. Once the water has come to a boil, add one pretzel at a time. Allow the pretzel to boil on one side for 20 seconds and then flip it over and allow to boil on the other side for 20 seconds and remove and place on the baking sheet covered with parchment paper. once all of the pretzels have been shaped and boiled, brush with the remaining truffle oil and sprinkle with the truffle salt. Bake in the oven for 12-14 minutes or until a dark golden brown.
To make the aioli, you first need to roast the garlic. I prefer to roast whole cloves at a time, because it smells amazing, and you can always use roasted garlic in just about everything. But you only need 4 cloves for this recipe so that’s what we’ll do. Preheat your oven to 450. Take your four cloves from the bulb and leave the paper skin on. Place on a sheet of aluminum foil and drizzle with 1 tbs olive oil. Fold the aluminum into a tight package and place in a baking dish. Roast in the oven at 450 for 20 minutes, allow to cool. In a food processor, add the yolks, whole egg, smoked paprika and salt. Cut the root of you roasted garlic bulbs (where it was attached to the clove) and squeeze the garlic out and add to the food processor. Turn the food processor on and allow to process for about 3 minutes, or until thick and frothy. While your food processor is still on, slowly, slowly add the remaining 1 tbs oil, a tiny bit at a time. Allow to process for a few more minutes, until thick.
Serve your pretzeles right away. These just don’t keep very well, so if you have leftovers the next day, put them in your food processor because they make amazing bread crumbs. Keep the pretzel bread crumbs in an air-tight container in your refrigerator.
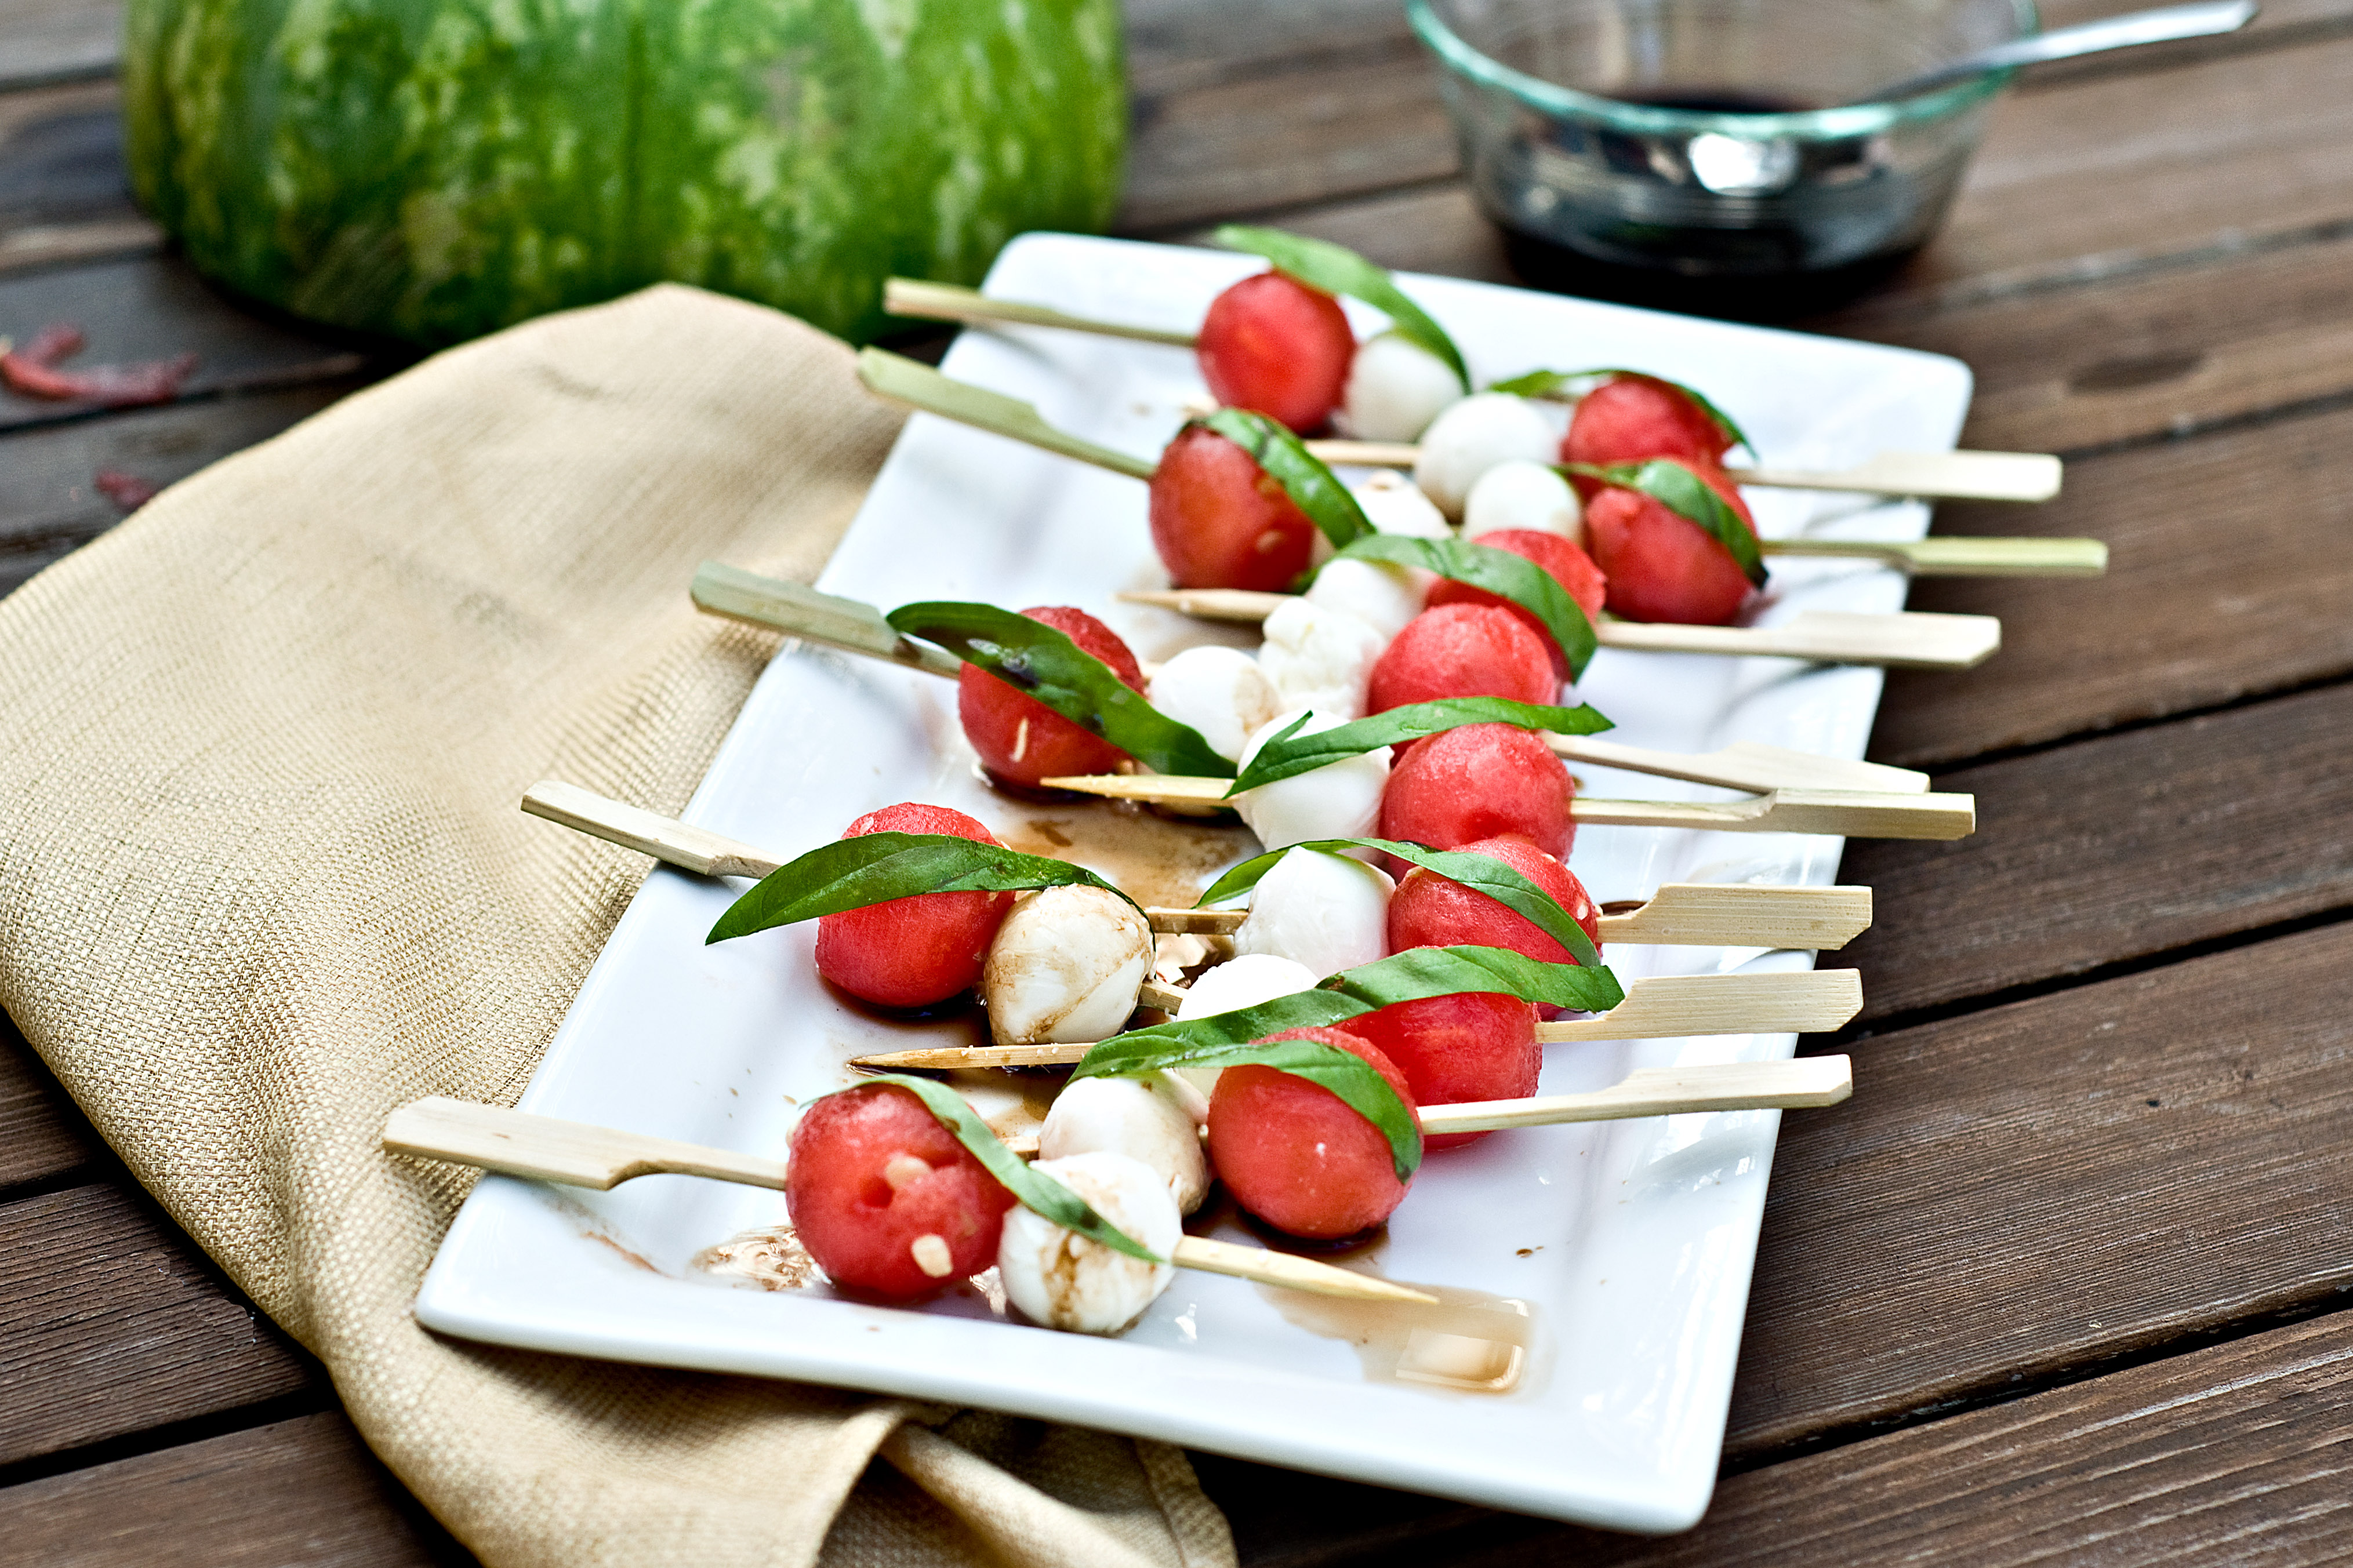
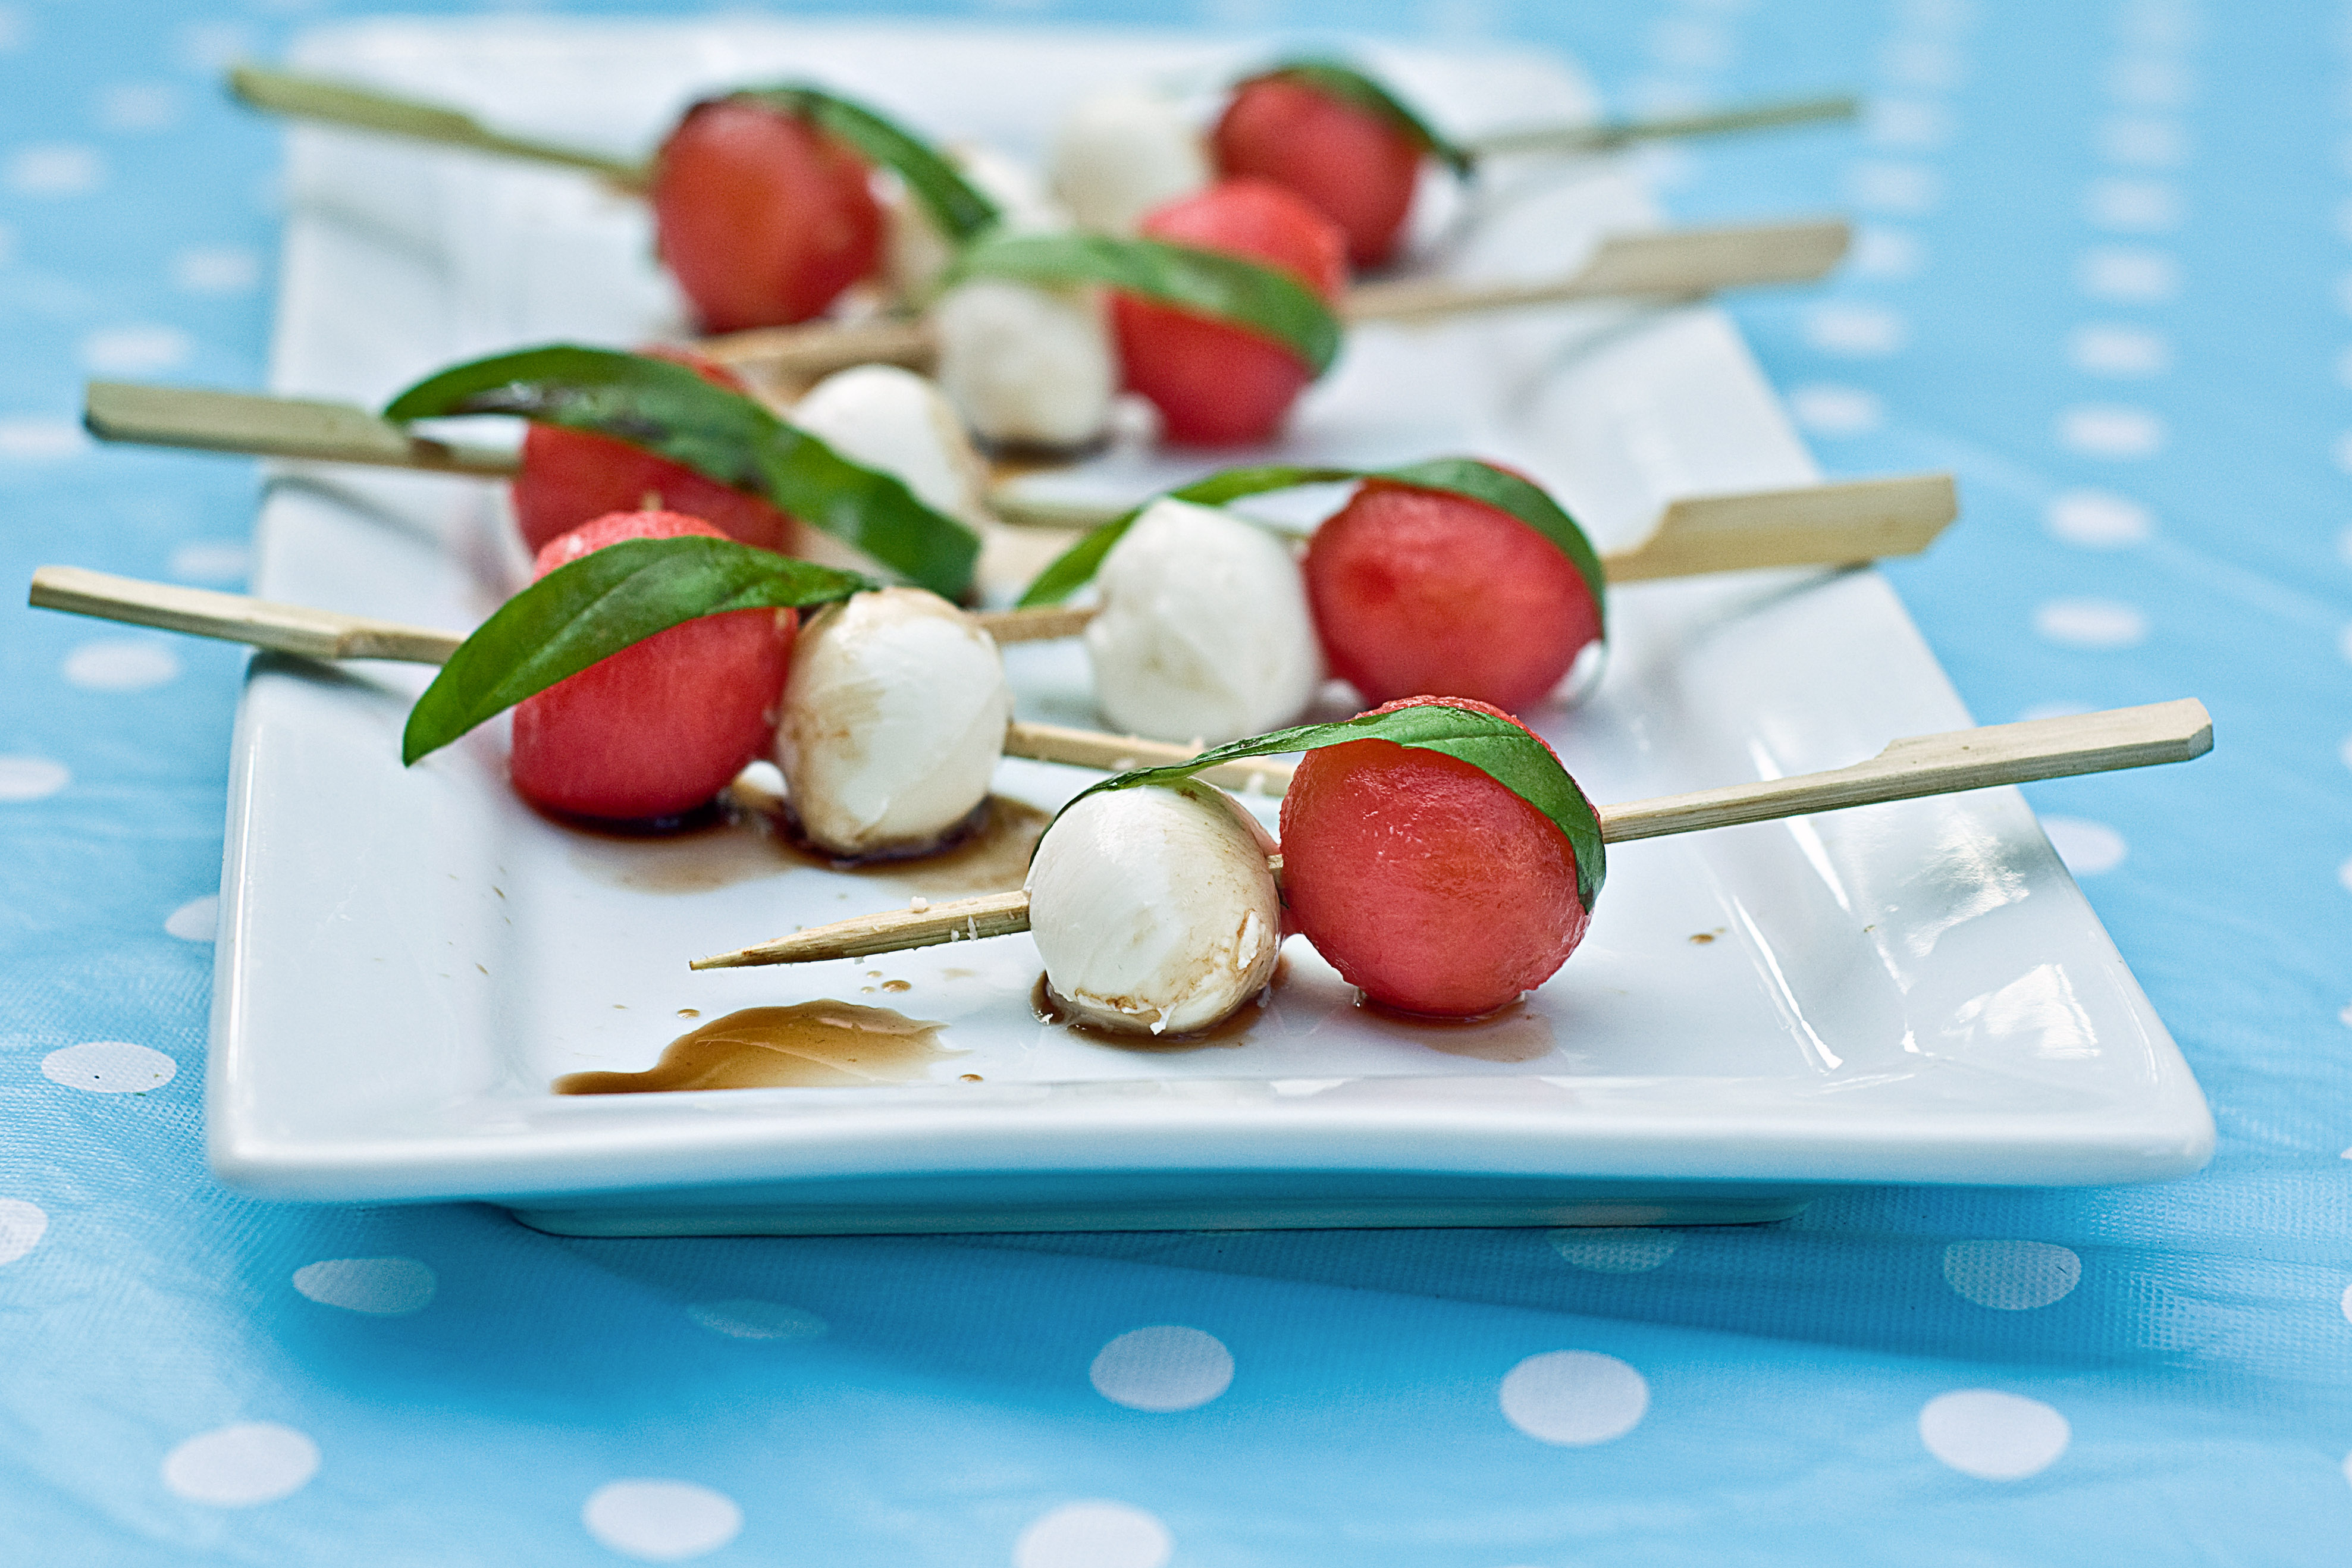
I’ve been making Caprese skewers for years. Great for parties. Anything that is in a smaller form is just inherently more adorable. I had the idea the other day to substitute a watermelon ball for the standard grape tomato that I use. Hmm…cheese and mellon? Is this OK? I waited a week for this to sink in. I tried it. Now it’s all I can think about and I want more. Right. Now.
Watermelon Caprese Skewers With Honeyed Balsamic Vinegar
1 large watermelon
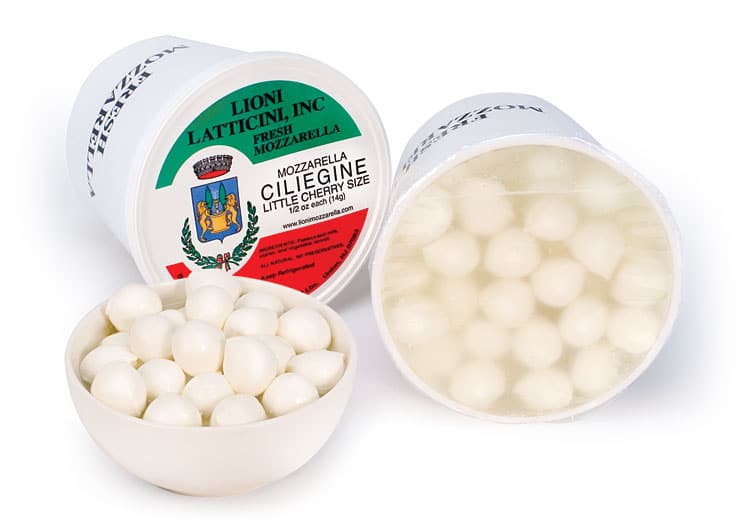
16 oz of Ciliegine or 'Cherry Size' Fresh Mozzarella
6 leaves of basil
1/4 cup balsamic vinegar
1 1/2 tsp raw honey
Cut the watermelon into 3 inch rings (slices? is that a better term?). This will make it easier to get as many balls out of it as you can with your melon baller. Make as many balls as you can out of your watermelon, because, if you have leftovers you also have a great snack! Store the extras in a container filled with water to keep them fresh. These ciliengine mozzarella balls are pretty fantastic. They sell them at just about any grocery store, in the fancy cheese section, and they come in a tub filled with water.
Slice the basil leaves into thin strips, discarding the thick vein that runs down the middle. Skewer one mozzarella ball and one watermelon ball on each skewer, drape with a basil slice. In a small bowl, mix the balsamic and the honey until well combined. Drizzle over the skewers or serve on the side.
Barbecue season is upon us. And as much as we need a great sundress and cute pair of wedge heels, we also need great party recipes. What makes a party food recipe great? Three qualities: 1. Tasty (obviously) 2. Travels well (in the event of off site parties) 3. Possible to sit at room temperature for a period of time without becoming a huge mess (sorry cheese dip and ice cream cake, we still love you)
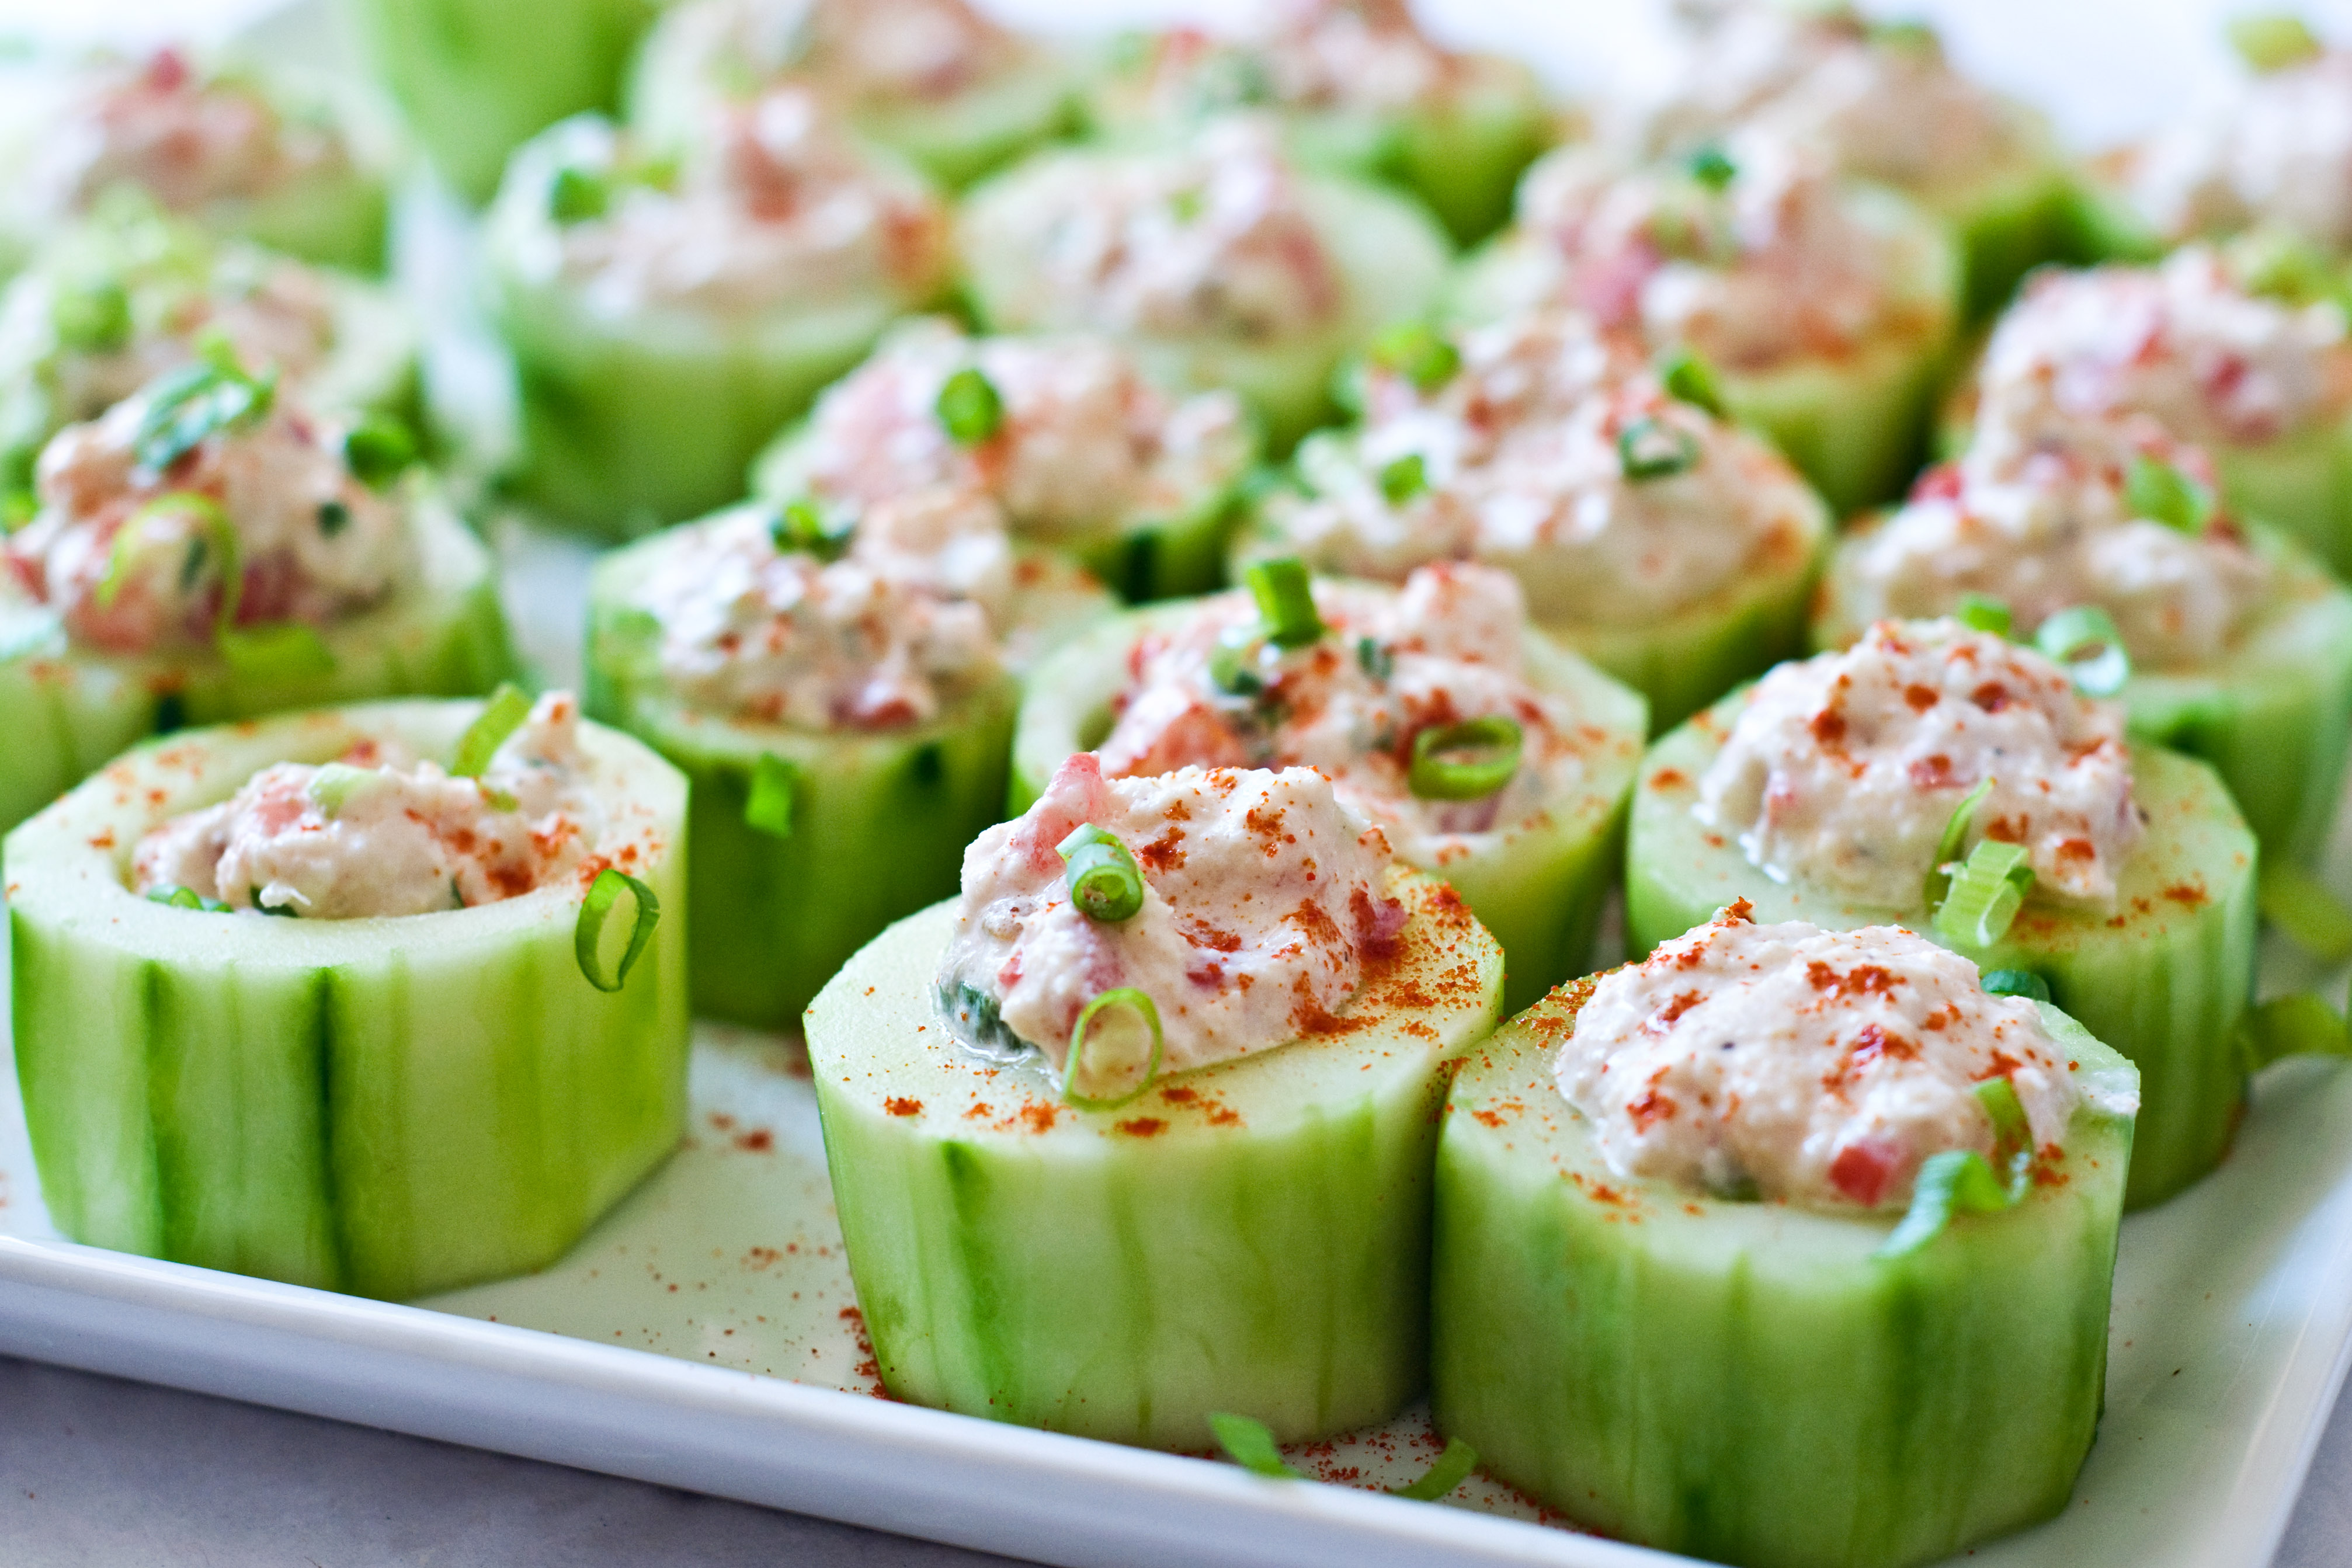
5. And the reason you are all here today: Cucumber Cups Stuffed With Spicy Crab
I saw these a few years ago on Iron chef. Cups made of cucumber. Brilliant. I am embarrassed to say that it took me nearly a year to figure out how it was done. Turns out, it’s so easy. All you need is a melon baller.
Remove the peel from the cucumbers using a vegetable peeler. Cut the cucumber into 2 inch slices. Using a small melon baller, scoop out most of the inside. You want to leave the walls and a thick portion of the bottom intact.
In a bowl, combine the sour cream and the cream cheese with a fork until well combined. add the remaining ingredients and stir until combined. Fill each of the cucumber cups with the crab dip. Refrigerate until ready to serve. Serve within 2 hours of making.
This was my breakfast this morning. Even if you aren’t a make-it-from-scratch kinda guy, biscuits should be the exception to that rule. A homemade biscuit tastes so wonderful, and it takes only about 10 minutes to throw these babies together. Plus, the leftovers are great for sandwiches.
Lemon Pepper Biscuits
2 cups of flour
1/2 tsp sea salt
1 1/2 tsp black pepper
1 1/2 tsp lemon zest
1/2 tsp baking powder
1/2 tsp baking soda
1 tsp sugar
1 stick (8 tbs) butter, cut into small cubes
1/4 cup whole milk
1/4 cup of carbonated water
1 tbs lemon juice
Preheat oven to 450.
I’ve mentioned this before, a time or 12, but overworking dough makes it tough. The less you work with dough the better the texture. BUT, when making biscuits it’s important to make sure that all the butter is distributed evenly or you’ll get pockets of butter that will cook differently. Your goal is to distribute the butter as quikly and evenly as possible. To do this, cut the butter into small cubes and have a food processor do the quick work for you.
Put the flour, salt pepper, zest, baking powder, baking soda and sugar in your food processor and pulse until combined. add your butter cubes and process until the butter is evenly distributed, about 1-2 minutes. Then add the milk, lemon juice and carbonated water and process until the liquid is well combined with the dry ingredients, about a minute.
Dump the dough onto a floured surface. Squish together with your hands to form a ball and then flatten into a rectangle about 6 -8 inches long and 2 inches high. Use a sharp knife to cut the biscuits into squares. You can make them as big or small as you want, but this recipe will make 4-6 average sized biscuits.
Place the biscuits on a baking sheet covered with parchment paper. Sprinkle the top with a bit of sea salt and pepper.
Bake for 12-15 minutes or until light golden brown.
A few years ago I found an article in Cooks Illustrated about why I wasn’t able to get a restaurant quality taste out of my grocery store scallops. I had always assumed it my because I just didn’t have the cookin’ chops to compete with a restaurant chef. And while that may be true, it wasn’t the main reason my scallops lacked taste. Here is my Scallops lesson of the day:
Wet vs. Dry
If you buy scallops at the grocery store, they will be wet 99% of the time. This is bad. It means that someone decided to saturate them in a solution of water and phosphates. Because of this, the scallops have a difficult time browning and they have a slightly soapy taste and rubbery texture. If you have a great seafood market, ask if they have dry scallops. If they aren’t sure, the scallops are probably wet. A dry scallop will be, well..dry. If it is sittin’ in a bowl of milk liquid, it’s a wet guy.
I’ll just assume that ya’ll have wet scallops, since that is what is most commonly available, but if you can find dry, buy them. The taste difference is huge (at least to me).
Ingredients
1 quart of water
1/4 cup of lemon juice
2 tbs Kosher or Sea salt
8 jumbo scallops (10-20 per lb size, the little guys just don’t hack it)
2 tbs butter
8 slices of prosciutto
1 tsp-ish of black pepper
1/2 cup fresh, diced mango
2 tsp olive oil
2 tsp honey
1/2 tsp siracha
pinch or salt
Combine the water, lemon juice and 2 tbs of salt in a bowl and soak the scallops for 30 minutes (if you are 100% bet your $20 worth of seafood on it sure that they are dry, skip this step). Remove the scallops and place them on a stack of about 4 absorbent paper towels, then top them with more paper towels and press down slightly. Allow the scallops to drain and dry for about 10 minutes. In a sauce pan, melt the butter on medium high until very hot. Fold a slice of prosciutto in half the long way and wrap around your scallop (you can also cut it in half to make two long strips if you’d like) securing with a tooth pick.
Season the top and bottom of your scallops with pepper. Once the pan is hot, add 4 scallops to the pan (you don’t want to crowd the pan or your scallops will never brown) and cook for about 4 minutes, then turn over and cook on the other side for an additional 4 minutes or until the top and bottom both have a nice brown sear.
in a food processor, combine the mango, olive oil, honey, siracha and a pinch of salt and puree until smooth.
I love to stuff food with other food. It’s so fun to try and figure out exactly how that can be done. These turned out beautifully, but if you would rather not eat stuffed muffins, you can always serve the goat cheese mixture as a spread.
Ingredients:
1 head of garlic
1-2 tbs olive oil
6 tbs of butter
1 cup of chopped fresh spinach
1/4 cup of onion, chopped
2 1/2 cups of flour
3 tbs baking powder
1/2 tsp salt
2 tbs rosemary, minced
1 1/3 cup whole milk
1/4 cup oil
2 eggs
5 oz goat cheese
1/4 cup chopped tomatoes
salt and pepper to taste
Makes 12 muffins
Preheat oven to 400. If you have never roasted garlic before, it’s time you start. I love roasted garlic so much, its great to add to so many recipes or just use as a spread on toast. Plus, it smells amazing. Start by chopping off the top of the garlic to expose the cloves inside. Put him on a sheet of aluminum foil and pour about 1-2 tbs of olive oil over him, salt and pepper.
Close the foil into a tight package, put in a baking dish and cook for about 30-40 minutes or until garlic is soft.
While the garlic is roasting, heat the butter in sauce pan over medium heat until melted and bubbly. Add the onions and the spinach and saute until onions are translucent and spinach is soft. Allow to cool
in a large bowl, add the flour, salt, rosemary and baking powder and whisk until well combined. make a well in the center. In another bowl, add the eggs, milk and oil. Once your garlic is done cooking and you have allowed him to cool a bit. Squeeze the garlic into the liquids bowl and break up the pieces as much as you can. Make sure that the papery skin doesn’t make it into the bowl. Stir the wet ingredients until well combined. Add the wet ingredients and the butter/spinach mixture to the well you made in the dry ingredients and still until combined, but don’t over mix. Add the batter to a greased muffin tin until each well is about 2/3 full.
In a small bowl, add the goat cheese, tomatoes, salt and pepper.
Mix until combined and then form balls with your hands using about 2 tsp of the cheese mixture.
Add the cheese balls to the middle of the batter filled muffin tin, press down slightly.
Put the muffin tin in the refrigerator and allow to chill for 15 minutes.
Savory cheesecake. Really, an invention of necessity. I want cheesecake, but it’s not dessert time. The solution? Pre-diner cheesecake. Brilliant. Then add the candy of the meat world: Bacon. Yum. E.
1 baguette, thinly sliced and toasted (optional, for serving)
Steps
Roast the garlic: (your kitchen is about to smell SOOO good) Preheat the oven to 400. Place the five cloves of garlic on a small sheet of aluminium foil. Drizzle with the olive oil and sprinkle with the 1/8 tsp salt. Fold up the aluminium foil into a tight pouch; you don’t want any of that goodness to seep out. Roast in the oven until garlic cloves are soft, about 20 minutes. Allow to cool (seriously, you really want to allow those suckers to cool) then remove the skins. Once garlic is done cooking, reduce oven temp to 350.
Bacon time: While the garlic is roasting, cook the bacon in a skillet over medium heat, turning frequently. Again, your kitchen probably smells so amazing that you may need to lock your doors. Remove bacon from the pan once it is dark pink and the fat is mostly rendered, allow to cool on paper towels.
Crust o’clock: In a food processor, add the crackers and pulse until reduced to crumbs and then add the butter, pulse until all that remains is a beautiful, buttery, crumbly pile that looks like wet sand. Press the cracker crumbs into the bottom of a 6 inch spring form pan.
Blend well: in a stand mixer, add the cream cheese, your yummy garlic, eggs, salt, pepper, smoked paprika, rosemary, sour cream and mix the crap out of it. Seriously, don’t be shy, show that cream cheese who’s boss.
Puttin’ it all together: Add the cream cheese mixture to the spring form pan. Chop the cooled bacon and sprinkle over the top of the cheese cake (it’s OK if you take a nibble or two of the yummy bacon).
Bake: In the oven for 35 minutes or until top is golden brown. Allow to cool completely and serve with bread, or eat alone. And by alone, I don’t mean "by yourself" because, really, if you have a Bacon Garlic Cheesecake, you will never be lonely again. Enjoy!!
Bacon and Jalapenos are the new peas and carrots, the new beets and goat cheese, tomatoes and basil. The sweet saltiness of the pork and the acidic spice of the jalapenos make these two a perfect pair. And with a textured backdrop of cornbread to highlight this union’s symbiosis, I am also in love. I wish the happy couple a long and prosperous relationship.
Although this past weekend gave us beautiful weather, this recipe is best eaten on a cool day, along side a steamy bowl of Chili.
1 1/3 cups coarse yellow cornmeal
1 cup buttermilk
6 strips of bacon, (make sure to reserve bacon grease)
1 cup unbleached all purpose flour
½ tsp smoked paprika
2 teaspoons baking powder
1/2 teaspoon coarse kosher salt
1/4 cup sugar
1 stick unsalted butter, melted
2 tbs olive oil
¼ cup picked Jalapenos, diced
1 large egg plus 1 large egg yolk
2 tbs honey
In a bowl, combine the cornmeal and the buttermilk; allow to soak at room temperature for one hour. Preheat oven to 375 degrees. Cook bacon in a skillet over medium heat, turning frequently. Remove from the pan when slightly underdone. Reserve grease. In a bowl, combine flower, paprika, baking powder, salt, and sugar, whisk until well combined. In a separate bowl combine the melted butter, olive oil, jalapenos, eggs, honey and ¼ a cup of the bacon grease. Staring and ending with the dry ingredients, add both the dry and the wet ingredients to the cornmeal mixture a bit at a time. Stirring after each addition until all three batters are combined. Line muffin tins with muffin papers. Add ¼ a cup of the batter to each muffin paper. Coarsely chop the bacon and evenly sprinkle on top of each muffin. Bake for 18-20 minutes or until toothpick in the center of the muffin come out clean.


