Appetizers

Coconut Cornmeal Shrimp With Jalapeno Peach Jam


I’ve had a busy week, and my body has decided to request that I slow down.

On Friday, I was asked to do a cooking segment on CBS news in Los Angeles. I’ve spent the week preparing. My husband helped me run through the segment in the evenings, and for an entire week my drive home consisted of me practicing my talking points, out loud, looking like a crazy person, on an LA freeway. It  all seemed to work, the segment went well:

The Beeroness Cooks on CBS

 As soon as I started my drive home from the studio, I started to crash. The next morning I lay in bed as my incredible husband got up with Tater, and I was able to sleep until the late, late hour of 8:45. In Mom Time, that’s pretty close to sleeping until noon. As I lay in bed, trying to pull myself together and trick myself into thinking I’m not actually sick, I watched this, this and this, and laughed so hard I think it worked. Maybe it’s true what they say about laughter and that whole "Best Medicine" thing.

And on Thursday I leave for the Foster Farms Cook-Off. I’ll be competing against 4 other cooks for $1,000 and a trip to Napa for the Cook Off Finals with a prize of $10,000.

Wish me luck! I’ll be posting on twitter and instagram as the contest goes along.

And now, the recipe. I bought a huge bag of Masa to make corn tortillas with, and if you have never made corn tortillas, you really, really need to . They’re so good, nothing like those cardboard disks they sell at the store, and they take about 5 minutes. The flavor is so good, I’ve been throwing the corn flour into everything, I’m totally in love with it. And the Jalapeno Peach Jam I also used on pork chops. So Good.

Coconut Cornmeal Shrimp With Jalapeno Peach Jam

Ingredients

For The Jam:

  • 3 cups peaches, skin removed, chopped
  • 2 tbs fresh lemon juice
  • 1/4 cup sugar
  • 1 jalapeno, stem and seeds removed, diced
  • 1 tsp cornstarch

For The Shrimp:

  • 1 can coconut milk
  • 2 lbs raw shrimp, shell and tail removed
  • 1 cup Masa Harina
  • 1/2 cup shredded coconut
  • 1/2 tsp salt
  • 1/2 tsp pepper
  • pinch cayenne pepper
  • 1/4 cup oil

Instructions

  1. Add the raw shrimp and coconut milk to a bowl. Chill in the fridge for about 45 minutes while you make the jam.
  2. In a pot over medium high heat, add all of the jam ingredients. Stirring occasionally, allow to simmer (not boil) until thick, and the peaches have broken down, about 45 minutes. Smash peached with a potato masher until a jam like consistency is reached. Remove from heat and set aside.
  3. In a bowl, combine the masa, coconut, salt, pepper and pinch cayenne. One at a time, remove the shrimp from the coconut milk and allow to drain a bit before adding to the cornmeal mixture. Coat the shrimp well in the corn meal mixture.
  4. Heat oil in a large skillet over medium high heat. Add the shrimp and cook until golden brown, about 3 minutes per side.
  5. Remove from heat. You can either top the shrimp with the jam or serve the jam as a dipping sauce.


Smoked Olive Oil Rosemary Shrimp & A Smoker Giveaway


This is by far my favorite giveaway I’ve ever been a part of.


I’ve secretly always wanted a smoker. Such unique flavors and no real way to get that without very specific culinary equipment. But the smokers I have always come across are so large, bulky and intimidating. Including those that my Step Dad seemed to fashion on a regular basis out of abandoned aluminum items such as non-working refrigerators and ancient gym lockers.


I didn’t really want one of those eyesore monstrosities just hanging around my back yard. Clearly there was some adolescent trauma involved in my hesitation to purchase a smoker.


And then I get an email from those wonderful people over at Big Kitchen, with tales of a stovetop smoker that I can store in my pantry.  They even wanted to give it to me, and give one to you. Of course, I said something along the lines of Hell Yes.


This is a fantastic option for those of you who want those great flavors of smoke without a gigantic metal object taking up residence in a remote corner of your yard.


And if you win, you can walk around your kitchen thinking, “I wonder if I can smoke that?” as you slowly realize what it must be like to live in Snoop Dogs head. Sort of.


As a girl who is constantly striving to fit into skinny jeans, I also feel compelled to point out that this little sucker crams an enormous amount of flavor into any food without adding a single calorie. And in most instances, it removes calories by rendering fat from meat. So much win.

It’s also simple to use.


Step 1: Place the base of the smoker on top of a stove burner, and add a few table spoons of woodchips in the middle of the base of the smoker


Step 2: add the drip try right on top of the pile of wood chips.


Step 3: Spray the wire rack with cooking spray and add to the top of the drip tray. Add the food to the wire rack.


Step 4: Slide the lid onto the smoker leaving a small vent. Turn the burner to medium heat (don’t turn it too high).


Step 5: once you start to see the first slight whips of smoke (about 2 minutes) use oven mitts to close the lid and start the cooking time.


A few things to remember while smoking food indoors:

  • Be realistic about the fact that you are using a smoker indoors, the smell will invade your house. But it seemed to dissipate in a few hours.  Run your hood fan on high while smoking.
  • This gets blazing hot. Keep the hands of tiny humans far far away from this thing.
  • Although this stovetop smoker was a bit smaller than I had expected, the instructions show you how to easily modify the unit to accommodate larger items, like a turkey. You can smoke a TURKEY in this thing! (Get ready for a very smoky Thanksgiving)
  • You can even use this on your regular grill alongside your burgers and hot dogs.

Smoked Olive Oil & Rosemary Shrimp


¼ cup olive oil

1 tsp chopped fresh rosemary

pinch of salt

½ tsp pepper

14 large raw shrimp, peeled

7, 6 inch wood skewers


2tbs Alder wood chips


In a bowl combine the olive oil, rosemary, salt and pepper. Add the shrimp and allow to marinate for 5 minutes Remove from marinade and add two shrimp to each skewer.

Smoke over alder wood chips using the above instructions for 15 minutes.


Giveaway details:


One Cameron Stovetop Smoker from Big Kitchen, shipped to USA addresses only.


5 ways to enter,

You do not have to do all five. Each one gets you a separate entry.


  1. Leave a comment of any sort.
  2. Follow me on twitter @domesticfits and leave a comment saying you did so
  3. Like Domestic Fits on Facebook and leave a comment saying you did so
  4. Follow Big Kitchen on twitter @BigKitchenStore and leave a comment saying you did so
  5. Like Big Kitchen on Facebook and leave a comment saying you did so


Contest closes Thursday, August 30th. Winner will be chosen using a random number generator.


We have a winner! Congrats to Meredith #59!

Mojito Chicken Wings With Wasabi Mint Cream Sauce & Free Tickets to the Cook-Off


If you are a regular reader of my blog, you might have taken one look at this title and wondered if I had flashbacks to the Moroccan Mint Experience. The answer, of course, is yes.

And I’m going to bet that my sister who accompanied me on the guided tour of Middle Atlas headed by a man who was surely a Moroccan drug dealer, had a similar flashback, and possibly a shudder,  just reading the title of this post.

But I still really want to like mint. It’s an amazingly fresh and bright flavor that I want to enjoy. I want to be able to drink a Mojito if I ever make it to Cuba, and when I someday go to The Kentucky Derby, I am most certainly going to order a mint Julip and enjoy it under my huge hat. And if I ever find myself in the "living room" of another hospitable cave dweller on the other side of the world, I want to be able to drink his tea with a smile.

So I’m subjecting myself to some Exposure Therapy. And I am enjoying it immensely. Other than the involuntary gagging when I chopped the mint (I know, that totally makes you want to run right out and make this chicken), I am completely in love with the end result of this dish. Even the Wasabi Mint Cream Sauce. It was a fantastic balance of flavors that I enjoyed much more that I had imagined. And I can now say that I am well on my way to recovery. I see more mint in my future.

Speaking of chicken, I have some great news. As I’m getting all the details for my participation in the 3rd Annual Foster Farms Fresh Cooking Contest all in order, the wonderful people over at Foster Farms have given me 5 pairs of tickets to the event to give away to my readers. I’m so excited about that. This is an invite only event, and tickets are very limited. I would love for some of you to go with me.

Mojito Chicken Wings With Wasabi Mint Cream Sauce

Ingredients

  • 12 Foster Farms Party Wings
  • 1 tsp salt
  • 1 tsp pepper
  • ¼ cup cornstarch
  • 2/3 cup ponzu sauce
  • 2 tbs honey
  • ¼ cup white rum
  • 1 tsp red chili sauce (such as sriracha)
  • 2 tsp garlic powder
  • 2 tbs sesame seeds
  • 6 oz Greek yogurt
  • 1/4 tsp wasabi powder
  • 1 tbs cilantro, minced
  • 2 fresh mint leaves, minced
  • 1 tbs lime juice

Instructions

  1. Preheat the oven to 425.
  2. Rinse the chicken wings in cold water and dry well.
  3. Sprinkle chicken on all sides with salt and pepper. Sprinkle with cornstarch and rub to coat.
  4. In a separate bowl, add the ponzu, honey, rum, chili sauce, garlic powder and sesame seeds, stirring well to combine. Add the chicken, toss to coat. Cover bowl with plastic wrap and place in the fridge for ten minutes.
  5. Line a baking sheet with aluminum foil.
  6. Arrange the chicken wings on the baking sheet and bake at 425 for ten minutes.
  7. While the chicken is baking, add the remaining marinade to a pot over medium high heat,stiring frequently, reduce until thickened and syrupy, about 8-10 minutes.
  8. Once the marinade has reduced, remove the chicken from the oven and brush with the thickened marinade, turn them over, brush with marinade on the other side.
  9. Return to the oven and allow to cook for an additional ten minutes, basting again.
  10. Allow chicken to bake until cooked through, an additional 10-15 minutes. Remove from the oven and sprinkle with sesame seeds.
  11. To make the sauce, add the Greek yogurt, wasabi, cilantro, mint, and lime juice to a bowl and mix to combine. Serve the sauce along side the wings as a dipping sauce.

(Note: the total cooking time for the chicken will be approximately 25-35 minutes, requiring basting every ten minutes)


Chicken Sliders With Zucchini Buns


At the end of the month I have this little cooking on TV gig that I’m incredibly excited about. And as much as I strive to be unique and impervious to social pressure, none of that has been able to penetrate my own vanity. After the initial shock of being asked to cook on CBS, Los Angeles wore off my first very female thoughts went something like this:

"What am I going to wear?"

"The camera adds ten pounds. Awesome."

So here I am, trying to stay as healthy as possible until I can school the Los Angeles metro area on the mid-day news with an introduction to cooking with beer all while still trying to run two food blogs that dazzle you with fun and delicious food. Not as easy for me as I’d like.

I did, however, discovered that if I give up dairy, which I already find skeevey in it’s unmanipulated state, the battle to lose those last few pounds becomes much easier. Butter and goat cheese have been the only real sacrifices, the rest has been easy to ignore or replace.

Don’t forget to come back on Wednesday when I give the best chocolate ice cream I have ever had that happens to be dairy free. It’s insane how creamy it is. You’ll want that recipe.

This recipe, which is dairy and gluten-free, gives you this delicious little mini burgers that are only about 90 calories each. And I am now one step closer to cooking on TV and not crying about it.

Chicken Sliders With Zucchini Buns

Ingredients

For The Patties

  • 1 lb ground lean chicken
  • 1 egg
  • 1/4 cup panko (for GF, use crushed potato chips)
  • 1/2 tsp salt
  • 1/2 tsp pepper
  • 1/2 tsp dry oregano
  • 1/2 tsp dry basil
  • 1 cup fat free chicken broth

Condiments & Toppings

  • 1 to 2 large zucchinis, cut into 1/4 inch rings (buns)
  • Avocado Slices
  • BBQ Sauce
  • Pickled Jalapenos
  • Tomato Slices

Instructions

In a bowl, combine all the the patti ingredients (except the chicken broth) with your hands until well combined.
Spray the inside of a skillet (with a lid) with cooking spray, allow to get hot but not smoking.
Form the chicken mixture into patties about the width of your zucchini slices and about 1/2 inch thick. Cook on one side until browned on the bottom, flip and allow to cook for about 1 minute. Add the chicken broth until about half way up the sides of the chicken patties. Cover with a lid and allow to steam for about 3 to 5 minutes or until chicken patties are cooked through. Because fat is responsible for moist patties, very lean meat becomes dry very easily. This is the method I use to make sure the chicken is cooked through but is not dry.
Remove from pan and allow to drain.
Add the patties to the zucchini slices, top with condiments and serve.

(Makes about 8)

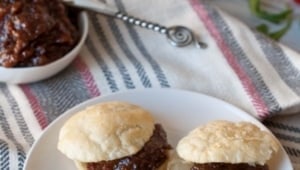
Pig Newton Jam (Bacon & Fig Jam) With Puff Pastry Biscuits

I love forming culinary obsessions. Foods that I can’t stop thinking about, that work their way into my kitchen via said obsession on a regular basis. Maybe you have tired of my bacon jam post, and if that is the case than I can pretty safely assume that you have never made it. It is completely worthy of prolonged obsessions. I promise.

This jam, this lovely spreadably pig and fig hybrid is so good that I beg you to make it. And then you’ll get it.

If I hadn’t already scoured my kitchen and spread this on everything from Trader Joe’s Crisp Chocolate Chip Cookies to stale graham crackers, these are the things that I would have made with this Pig Newton Jam:

Bake shortbread bar cookies + spread jam on top + chill for a few hours + cut into squares = Pig Newton Cookie Bars

Tortilla + Gouda + Bree + PN Jam = Pig Newton Quesadillas

Bake a tart crust in a tart pan (let cool)+ PN Jam + fresh arugula + goat cheese + Fresh tomatoes = Best tart ever

Above ingredients Tart crust + crusty bread = Pig Newton Crostini’s

PN Jam + Puff Pastry + Wheel of Bree cheese = Baked Pig Newton Bree

Crepes + PN Jam + Mascarpone = Breakfast Hog Heaven


I know that I have friends and readers who don’t dig the pig, so I’ve added a How To Veg It Up alterations to this post.


Pig Newton Jam (Bacon & Fig Jam)

Ingredients

  • 12 Black Mission figs
  • 5 strips of bacon
  • 3/4 cup brown sugar
  • 2 tbs honey
  • 2 tbs red wine vinegar
  • 1/4 cup cooking sherry
  • 1 tbs balsamic vinegar
  • 1/2 tsp cinnamon
  • 1 tsp salt

Instructions

  1. In a pot with a lid, like an enamel dutch oven, cook the bacon until browned. Remove bacon and set aside. Drain off all of the bacon fat except about 1 tbs. Return pot to the heat and add remaining ingredients, bring to a simmer. Chop bacon and add to the pot.
  2. Reduce heat to maintain a low simmer. Place the lid at an angle to vent and continue to cook, stirring occasionally, until thick and syrupy.
  3. Add to a food processor and process until smooth.

*To make vegan, replace the bacon with 1/2 tsp smoked paprika, 5 additional fig and 1 tsp olive oil.


Puff Pastry Biscuits

1 sheet puff pastry, thawed

2 tbs butter, melted

1 tsp salt

Roll the puff pastry on a lightly floured surface several times in each direction. Cut out 20 to 24 circles with a 3 inch biscuit cutter (note that circles will shrink as they cook). Place circles on a baking sheet sprayed with cooking spray. Brush the circles with melted butter and sprinkle with salt.

Bake at 350 for 15-18 minutes or until light golden brown. Split across the middle, fill with jam.


Bacon, Blue Cheese & Duck Fat Roasted Potato Salad

I’m torn. On one hand, I’ve never been the sort of person to trash a company in public, but on the other hand I want others to be aware of companies that form borderline abusive relationships with clients whose livelihoods they hold in their digital hands.

I will tell you this:

I am so glad to have broken free of blog.com and I am appalled by they way they treat their customers. I didn’t want to leave, but I didn’t have a choice if I wanted to protect my content and my ability to continue to do what I love. I would strongly recommend NOT using them as a host, and instead using wordpress.com or even better, using wordpress.org as a self hosted site. If none of that made sense to you, Julie at Burnt Carrots has a great How To Start A Blog post that can clear some of that up. If you need more evidence, other than my desperate pleas, that blog.com is horrific you can ask this guy or this girl.

I feel better. And I will be eternally grateful to my friend Andrew of Eating Rules who helped me switch both of my blogs to self hosted wordpress sites. He has a company called Blog Tutor who does that sort of thing. A tech guy who is also a food blogger, who else would I have used?

On a lighter note, I booked my first TV gig!

I was contacted through my other blog, The Beeroness to do a live Cooking With Beer demo on TV in Los Angeles on August 31t! I’ll update you will more information once that date gets closer.

I’m so glad you all let me get that off my chest and now we can truly appreciate the magic of roasted potato salad.

It is very possible that I am one of the only people in this world that has issues with boiled potatoes. Most of the time I seem to over boil them into a near mushy state with my lack of long term attention abilities. And the water washes away a lot of that great starch that we love so much about potates. Roasting helps me to fix both of those issues, it’s more forgiving with the time and it expands the flavors instead of removing them.

And I added duck fat. I bough it at Sur La Table and a little goes a long way.

I made this twice in one week, it’s really great. By far the best potato salad I have ever made.


Bacon, Blue Cheese & Duck Fat Roasted Potato Salad

Ingredients

  • 2 lbs red potatoes, diced
  • 3 tbs duck fat, warmed
  • 1/2 tsp salt
  • 1/2 cup pepper
  • 1/3 cup green onions
  • 6 strips of bacon, cooked and chopped
  • 2/3 cup blue cheese dressing (some dressings contain gluten, check package if needed)
  • 1/2 cup sour cream

Instructions

  1. Preheat oven to 425.
  2. Place the potatoes on a baking sheet, toss with duck fat. Roast in the oven at 425 for 10 minutes, toss/stir potatoes and roast for an additional 8-10 minutes or until potatoes are fork tender, remove from the oven.
  3. In a bowl add the remaining ingredients, add the potatoes and toss to coat. Serve warm.

Goat Cheese Stuffed Apricots With Honey

I have a message for that guy who decides what day holidays are on. It’s awesome when he picks a day of the week, rather than a date of the month. He did a great job deciding on Thanksgiving and Easter, but a spectacularly awful job for Halloween and the 4th of July.

So I have some changes to propose to…that guy. Whoever he is.

The 4th of July should be celebrated on the first Friday in July, so that the 5th of July never has me sitting in an office trying to participated in work related functions with the remnants of my "casual get together turned late night party" still hanging onto me like a overly tired toddler. I do realize that if you name a holiday after a date, then it really messes people up if it doesn’t occur on that date, as in, "Are you coming over for The 4th of July on the 6th of July?" But, Holiday Naming Guy is to blame for that.

So my suggestion is that Independence Friday is now to  replace (or rather move) Mid Week 4th of July celebrations. All the same patriotic fun with out the comprehensive country wide lack of productivity the following day. I might have to start lobbying for this as soon as I can beat the crap out of who ever invented Day Light Saving time, that Guy is a real A-Hole. 


Goat Cheese Stuffed Apricots

12 apricots

6 to 8 ounces goat cheese

3 tbs raw honey

1/4 cup chopped pecans

Cut the apricots in half and remove the pits. Grab a small piece of goat cheese, about the size of the pit you just removed and roll it into a ball. Place it in the center of the apricot. Drizzle with honey, sprinkle with pecans.

I also cut these in half again before serving, but that’s your call.

{Pin This Post!}

Follow me on twitter

Follow me on Pinterest

Like Domestic Fits on Facebook


BLT Mini Tarts With Bacon Jam

In my world, 4th of July is a lot like Thanksgiving. But with sunburns and pyrotechnics. An underlying feeling of patriotism and national gratitude, a day off work and an evening of food and celebration with friends and family. 

But unlike Thanksgiving, the food is all fair game. There are no requisite poultry centerpieces, or traditional casseroles, you are free to cook and eat whatever you like. Most people gravitate towards easy, low maintenance grill style food, or appetizers and dips that can just hang around the kitchen waiting patiently for attention. 

Here are some of my favorite foods for low key afternoon get together:

1. Brown Sugar Chili Chicken Wings

2. BLT Caprese Slider with Puff Pastry Buns


3. Jalapeno Popper Potato Bites 

4. Boozy (Or Not) Watermelon Stars  

And the Man of The Hour:

BLT Mini Tarts with Bacon Jam, Arugula & Grape Tomatoes

For the tart dough:

2 cups flour

1 tsp salt

1 tsp sugar

1 1/2 sticks of butter

1/3 cup ice cold water

For the topping:

A double batch of Bacon Jam

1 cup arugula leaves

1/2 cup grape tomatoes, cut in half

In a food processor, combine 1 1/3 cup flour, salt, sugar and butter, process until well combined. Add the remaining flour and process again until combined. Transfer to a bowl and add the water with a wooden spoon (don’t add the water while the dough is in the food processor or your dough will be brittle and cracker-like). If the dough isn’t moist enough, you can add more water, a tsp at a time until the consistency is right. Form dough into a disk, wrap with plastic wrap and chill in the refrigerator for 2 hours.

Preheat your oven to 375.

Roll your dough out on a floured surface. Using a 3 inch biscuit cutter, cut out 20-25 circles. 

Line a baking sheet with parchment paper and place the dough circles on the bakign sheet. Prick eat circle with a fork. Bake at 375 for 15-18 minutes or until golden brown. Remove from oven and allow to cool. 

Spread each mini tart circle with bacon jam, top with arugula and grape tomato halfs. 

{Pin This Post!}

Follow me on twitter

Follow me on Pinterest

Like Domestic Fits on Facebook


Crab Stuffed Baked Avocado

There is something about the raw exposure that blogging brings that forces you to face and deal with emotional handicaps that you didn’t even know that you have.

It may be the contrast between complete strangers showering you with compliments and adorations, and other complete strangers raining down harsh criticism. When in reality, neither is wholly accurate. You are, to one degree or another, somewhere in the middle.

And as harsh and those nasty comments can be, the overly positive ones have always been more difficult for me to deal with. Those readers who send compliment saturated emails about how much they love my recipes, or how great my life must be, are with no doubt a highlight of blogging. But I am always left with the fear that the pedestal will crumble and I will be exposed as the ordinary person that I truly am.

Self worth is supposed to be an isolated container, unaffected by the thoughts of others. But I’m not sure anyone has really figure out how to do that, and if he does, I’m not sure I want to meet that guy.

The truth is, sometimes we need a mirror of honesty to see how great we are, and place that value in our container of worth. And to really start to believe it.

Take a second to think back on your life and write down all the best compliments that you have ever received.

And then take the rest of your life to truly believe them.

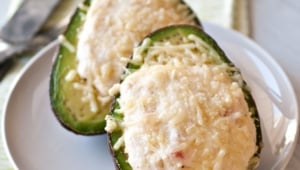
Crab Stuffed Baked Avocado

4 oz cream cheese, softened

6 oz crab meat (drain well if using canned meat)

1/4 cup tomatoes, chopped

1 tbs scallions

1/4 tsp salt

1/4 tsp pepper

pinch cayenne pepper

3 large ripe avocados,cut in half, pits removed

1/2 cup parmesan cheese

Preheat oven to 400.

In a bowl, combine all the ingredients except the avocados and the parmesan, mix until well combined.

Fit the hole in the avocado with crab mixture, top with generous amounts of cheese. Place avocados in the wells of a muffin tin, bake at 400 until the cheese has melted about 8-10 minutes.

{Pin This Post}

Follow me on twitter

Follow me on Pinterest

Like Domestic Fits on Facebook


Orzo Caprese In Tomato Cups

When I was a kid "Pasta Salad" was just a requisite side dish at family gatherings that was hastily bought at the grocery store and remained in it’s plastic tub beside other more appetizing offerings while slowly making it’s way to room temperature. I never really understood how macaroni noodles, eggs and mustard where always such an important part of every barbecue I went to. And while these little gatherings were being planned, there was always a mention of it, "Who is going to bring the pasta salad?"  Pasta salads have so much variety and take so little time, you don’t ever have to resort to grocery store tub again.

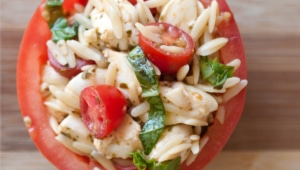
Instead of that I offer you this. Orzo pasta and a fairly traditional Caprese salad, mixed together and served in a hallowed out tomato (feel free to bypass the individual serving size vegetable dish for larger gatherings.)

Pin This Post!

Orzo Caprese Salad in Tomato Cups

1 cup dry Orzo pasta

2 cups (10 oz) grape tomatoes, halved

2 cups small mozzareall balls (ciliegine sized) cut in half or quarters

5 basil leaves, chopped

3 tbs pesto sauce

1 tsp balsamic

Salt & Pepper

4 beefsteak tomatoes

Cook Orzo according to package directions until al dente, put in a bowl with the grape tomatoes, mozzarella balls, basil leaves, pesto and balsamic. Toss to combine, salt and pepper to taste.

To serve in tomato cups, cut the beefsteak tomatoes in half widthwise and use a melon baller to scoop out the insides.

Fill with Orzo Caprese Salad and serve.

Follow me on twitter

Follow me on Pinterest

Like Domestic Fits on Facebook


Roasted Jalapenos with Bacon Jam & Goat Cheese

“In war, there are no unwounded soldiers.” – Jose Narosky

(Photo source unknown)

Thank you for all of the people who had fought, those who have died, the ones who will always nurse wounds and the mothers and fathers who had to stand back and watch it happen.

Thank you for the gift of peaceful days, Sundays with our families and the ignorance that allows us to enjoying without a full realization of the true sacrifice that was made.

To those who have died and those who were left behind, Thank You will never cover it.

Roasted Jalapenos with Bacon Jam & Goat Cheese

12 fresh jalapenos

3 oz cream cheese

1/4 cup Bacon Jam (posted last week on The Beeroness)

3 oz goat cheese

1 tbs butter

1/2 cup Panko

Preheat oven to 400. Cut the jalapenos lengthwise, removing the seeds and the inner membranes.

Place on a baking sheet and roast until soft, about 10 minutes.

Using a butter knife, smear the inside of the jalapenos with cream cheese.

Top the cream cheese with bacon jam.

Using your fingers, top the bacon jam with goat cheese.

In a microwave safe bowl, melt the butter. Add the panko and stir until coated.

Top the jalapenos with the buttered panko and roast at 450 until the panko has browned, about 5-8 minutes.

Pin This Post!

Follow me on twitter

Follow me on Pinterest

Like Domestic Fits on Facebook


Bacon & Panko Crusted Scallops

Bacon wrapped scallops sound like such a great idea, don’t they? Two fabulously delicious meats teaming up for one incredible bite. There’s an issue. A  huge, unavoidable, technical glitch: the cooking times. Like most great loves lost, the deal breaking fundamental flaw is timing. Bacon takes somewhere around 3 times as long to cook as scallops, giving you two options: Hideously dry, overcooked scallops or semi-raw undercooked bacon. Yum, appetizing.

If you really want to fly in the face of Kosher and wrap your shellfish with pork, you have two really great options:

Wrap your scallops in prosciutto, like I do here, only needing attention on the scallops cooking time since proscuitto can be served any where from raw to cripsy,

or

Bread your scallops with crushed bacon and Panko, which I do below.

Either way, pork and scallops are harmoniously reunited. I knew those two crazy kids would work things out.

Bacon & Panko Crusted Scallops

4 strips of bacon, cooked

1/3 cup panko

8 large scallops

1/4 cup flour

1/4 cup milk

2 eggs

1/2 tsp salt

3 tbs canola oil

Roughly chop the bacon and add to a food processor along with the Panko, pulse until well combined and the bacon is reduced to crumbs, remove from food processor and add to a bowl. 

Add the flour to a plate.

Add the milk, eggs and salt to a bowl and beat to combine. 

Dry the scallops very well and dredge in the flour, knocking off any excess, dip in the milk/egg mixture and then into the Panko/bacon bowl, coating well. Place in the refridgerator for ten minutes to allow the coating to stick. 

Heat oil in a skillet over medium-high heat. Cook scallops on both sides until golden brown, about 2 minutes per side, taking care not to over crowd the pan. 

Pin This Post!

This is what happens when you try to photograph food while hanging out with a 2 year old:

Follow me on twitter

Follow me on Pinterest

Like Domestic Fits on Facebook


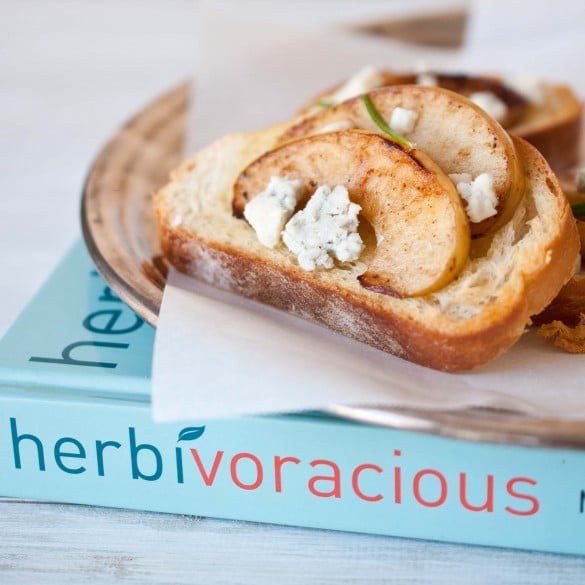
Herbivoracious Cookbook Review & Caramelized Apple and Blue Cheese Crostini

At a book release party for Michael Natikin’s Herbivoracious I fill my plate past capacity with the gorgeous spread laid out at a Culver City restaurant, his cookbook’s recipes incarnate. It isn’t until I’m halfway though the incredible tasty bites that I realize that it’s vegetarian. Of course it is, its Herbivoracious. This is how I like my vegetarian food, as a celebration of produce rather than and explanation for missing meat. This is what Michael has managed to do, turn out an entire book of recipes so full and beautiful that the addition of animal protein would be an imposition. Recipes that range from perfectly simple to complex and inspirational.  This isn’t a book for vegetarians, or for accepting meat eaters, it’s a book for everyone who loves food.

Cookbooks, in a real life paper and page form, are even more important to me that ever. As I pull out my Grandmothers copy of The Joy of Cooking, with her notes scrawled in the margins with a soft pencil I can feel a connection with her that would have been lost if eReaders had been invented 50 years ago. I feel her in the pages, and she is still able to teach me what I was never able to learn when she was alive. I want this for my daughter, for my future Grandkids, another piece of me to be found in an old box, when they are ready to receive it. Cookbooks should be the last thing to be digitized, you won’t pass down a kindle, make notes in the blank spaces with a number 2 pencil.

But the main reason to buy cookbooks is simple: recipe testing. Cookbook recipes are tested, over and over, to insure that the unchangeable print is perfect. Bloggers make a recipe once, giving online recipes a much higher rate of flaws, my own included. You are our testers and your feedback gives us insight in how we write the recipes and if we later make changes to what we have already posted. With bloggers cranking out up to 10 recipes a week, you can hardly blame us. But cookbook authors take much more time and care, agonizing over measurements, yields, terms and times, getting hundreds of hours of opinions and feedback because once it prints, that’s it. No updating posts, or responding to comments, the recipe has to be perfect.

That is why you should buy cookbooks.

Even if you aren’t a vegetarian, ESPECIALLY if you aren’t a vegetarian, Michael Natikns book is a must own celebration of produce. Buy it, make notes in the margins, and pass it down to endless generation of food loving humans. 

Caramelized Apple and Blue Cheese Crostini

Recipe from: Michael Natkin, Herbvoracious 
Makes 16 crostini
20 minutes

  • ½ cup loosely packed fresh tarragon leaves
  • 2 tablespoons extra-virgin olive oil
  • Kosher salt
  • 16 thin slices of crusty baguette
  • 1 tablespoon unsalted butter
  • 2 small apples such as Pink Lady, cut into 16 wedges
  • Tiny pinch of cayenne pepper (Don’t be afraid of this, it put this dish over the top!)
  • Freshly ground black pepper
  • ¼ cup blue cheese (such as Blue de Causses or Gorgonzola dolce), at room temperature
  • Flaky sea salt (such as Maldon) or large crystal sea salt (such as red Hawaiian salt)
  • (I added a drizzle of raw honey)

1.Preheat oven or toaster oven to 400 degrees.

2. Set aside 32 nice looking tarragon leaves. In a mortar and pestle or mini food processor, roughly puree the remaining tarragon with the olive oil.

3. Brush the baguette slices with the tarragon oil, reserving the crushed tarragon. Toast in the oven (on a baking sheet) or toaster oven until golden brown and crispy, about 5 minutes.

4. Melt the butter in a large skillet over medium heat. Cook the apples on in a single layer, working in batches if needed, until both sides are golden brown and somewhat tender, about 5 minutes. Season with a pinch of cayenne pepper and several grinds of black pepper.

5. To serve, arrange two slices of cooked apple on each crostini. Top with ½ teaspoon of the blue cheese, a speck of the crushed tarragon, two whole tarragon leaves, and a few grains of sea salt. (Drizzle with raw honey, if desired)


Baked Brown Sugar Chicken Wings With Roasted Red Pepper Cream Sauce

People always ask what I prefer: sweet or savory. The truth is I have a strong pull to mix them together, blur the lines. I add savory ingredients to my baked good and sweet ingredients to my savory dinners.

The best fried or baked chicken recipes there are have a touch of sugar. It’s this magic secret ingredient that just seems way to simple to make such a huge impact. If you already have a baked or fried or even grilled chicken recipe that you are perfecting, add a tsp of brown sugar and see how it gives an entirely new dimension to the flavor. 

And the sauce combines two of my favorite kitchen staples: roasted red peppers and goat cheese. Both are savory ingredients with a touch of sweetness. 

I baked these, more or less because it was easier. But they would also lend themselves well to frying, if you are brave enough. 

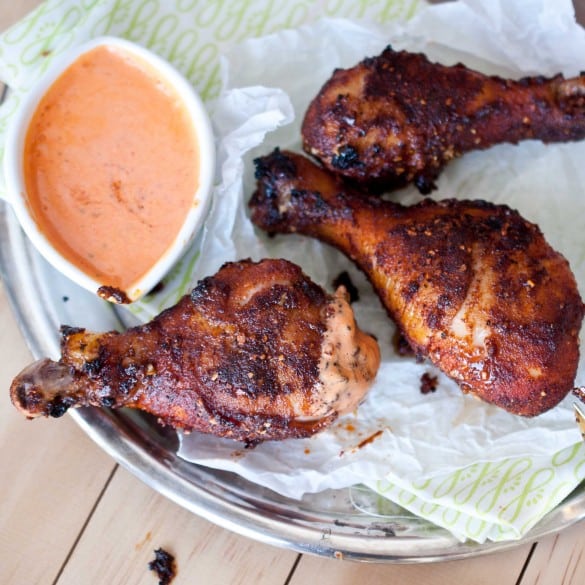
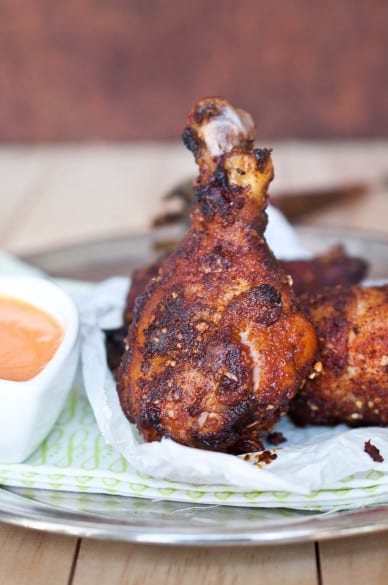
Brown Sugar Chili Chicken

2 tsp brown sugar

1 tsp salt

1 tsp onion powder

2 tsp dried minced garlic

2 tsp smoked paprika

2 tsp chili powder

1 tsp black pepper

2 tbs olive oil

8 chicken legs or wings

1/3 cup roasted red pepper, chopped

2 oz goat cheese

1/4 tsp salt

2 tbs sour cream

Preheat oven to 425.

In a plastic bag, or a bowl,  combine the first 7 ingredients. Drizzle the chicken with olive oil and rub to coat. Add the chicken to the bag (or bowl) and toss or shake bag until well coated.

Place on a baking sheet and bake for 12 minutes, turn the chicken over, and continue to bake until cooked through, about 10-15 additional minutes (depending on the thickness of your chicken).

In a food processor, add the roasted red pepper, goat cheese salt and sour cream, process until well combined.


Pin This Post!

Follow me on twitter

Follow me on Pinterest

Like Domestic Fits on Facebook


Mango Wrapped Mozzarella


I’m back. Sort of. When I say that I’m move into my new place, all that means is that my stuff is physically there. 

In boxes. Lots and lots of boxes. But the gas isn’t on yet, so I can’t cook, and showers have been very cold. 

Like this mango.

So the theme for this week is about food you can cook without a stove.

Which can be tricky. But when you are so sick of take out and pizza and all you want to do is cook a meal for your family and the stove is gas which hasn’t been turned on yet and the new place doesn’t have a microwave and your old place had a built in one that had to stay and you can’t figure out which of the billion boxes holds the cord to the electric griddle, you have to make do.  

So this is what I made for breakfast for my first morning in the new house:

Scrambled eggs in the waffle maker. Totally works. 

Bacon cooked on an electric crepes maker. 

Toast. 

It may have been my most creative use of heating elements, but it wasn’t the most delicious breakfast ever to be made by my hands. 

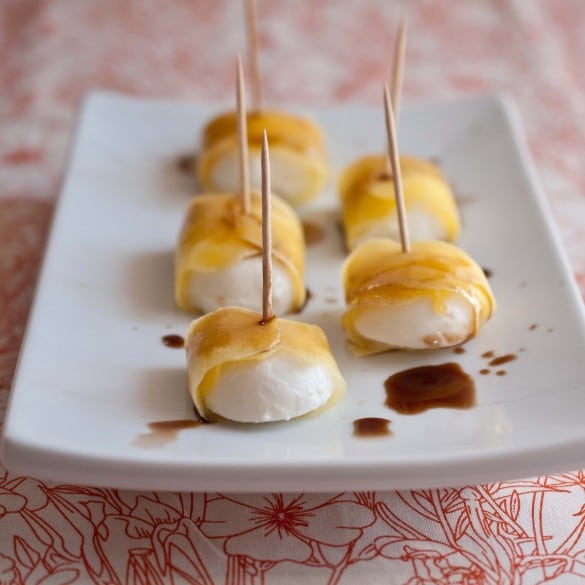
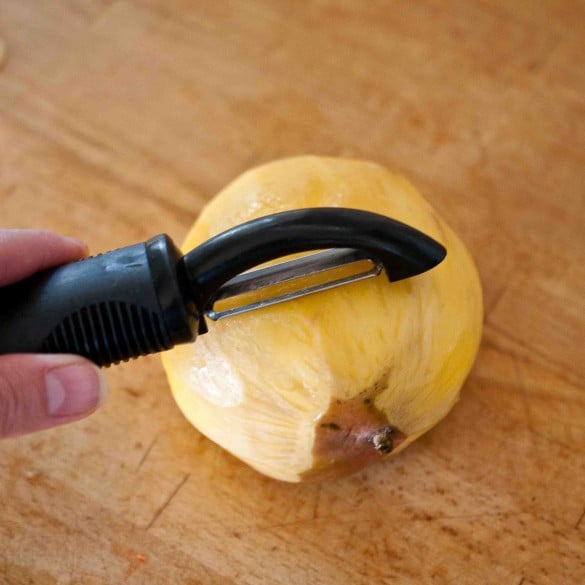
In keeping with the motto of my life: Figure out what is great about the situation that you are in and enjoy the crap out of it, I decided to give you a tasty treat that requires no cooking. It only has three ingredients and the only tricky part is shaving the mango with the vegetable peeler. But even if you need two of three strips of mango to go around the mozzarella ball, who cares. Its easy and tasty and looks fancy. Don’t sweat it. 

I hope to bring you pictures of my new place soon, right now the mess isn’t nearly charming enough to be photogrpahed. Except Taters room, it’s her perfect little sanctuary in the midst of the chaos, even the pictures are hung and every box has been unpacked. Other than that, the rest can wait. 

Mango Wrapped Mozzarella

1 large mango

12 Bocconcini or Ciliegine sized mozzarella balls

2 tbs balsamic vinegar 

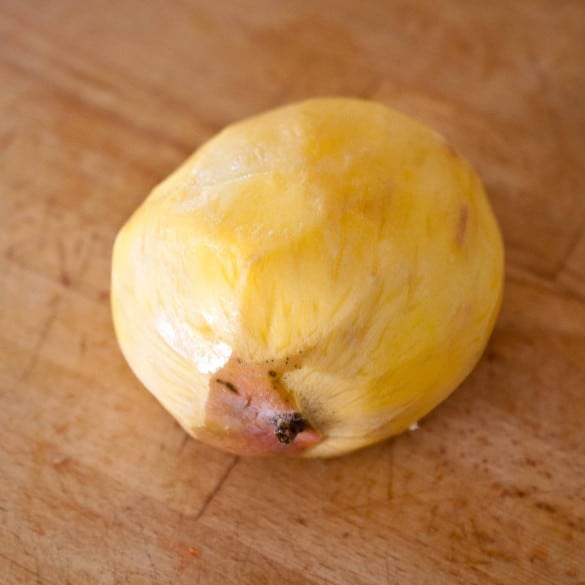
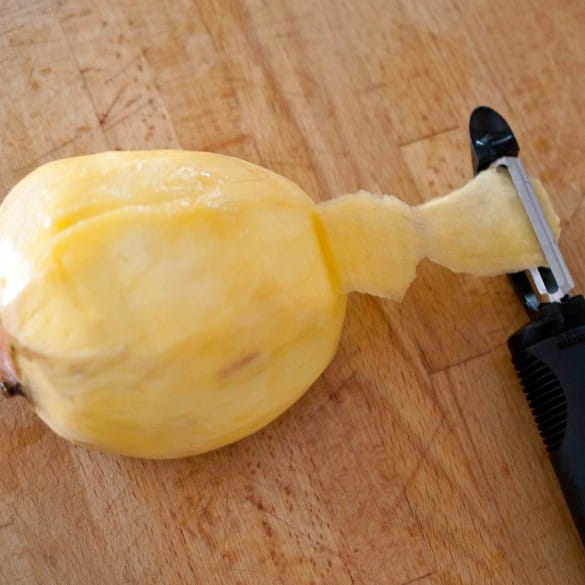
Peel the mango with a vegetable peeler. once the peel has been removed, shave thin slices of the mango with the vegetable peeler until you have enough to cover the mozzarella balls. 

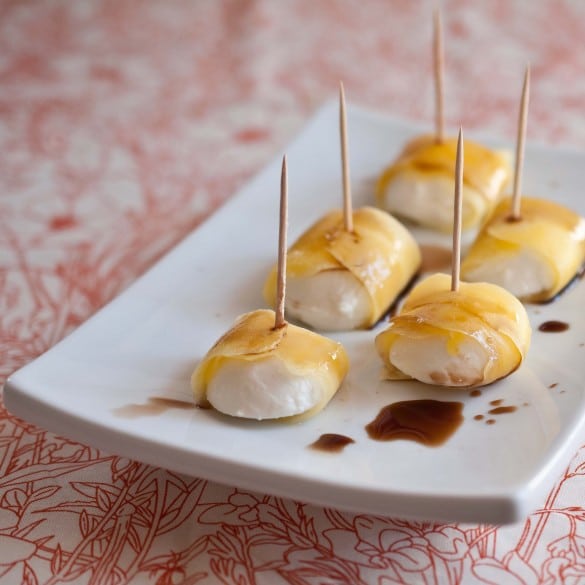
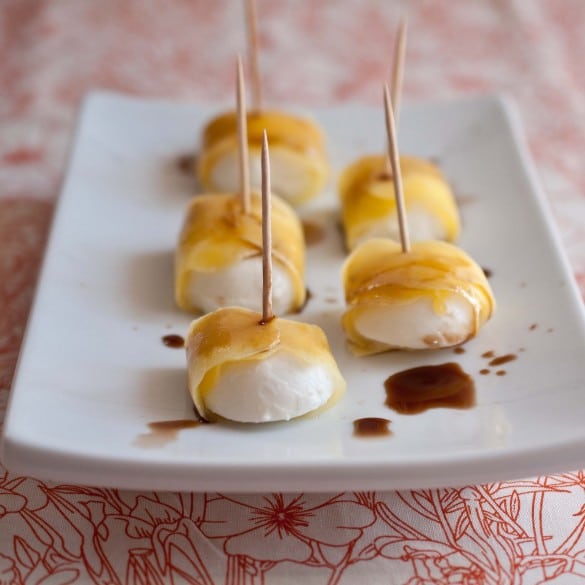
Wrap the mozzarella balls with the mango slices and secure with a toothpick. Drizzle with balsamic vinegar. 

Pin this Post!

Follow me on twitter

Follow me on Pinterest

Like Domestic Fits on Facebook


Crab Guacamole

I try to eat a healthy balanced diet. Most days, my daily meal planner looks like this:

Breakfast: 2 slices of high fiber wheat toast with 1 tbs of peanut butter each and coffee. Lots of coffee.

Lunch: Quinoa salad or leftover dinner from the night before.

Dinner: Some arrangement of lean protien (mostly chicken or fish), vegetables, and either rice or quinoa

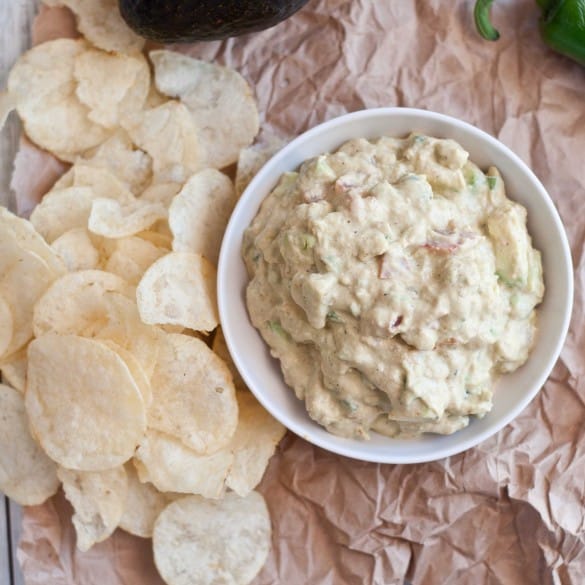
But sometimes I just want to use the gorgeous avocados that were delivered to my door from a local produce delivery service. I want to mix it up with crab and sour cream and eat it over the sink while Tater plays in the back yard. So that’s what I did.

I added fresh jalapenos, and removing the seeds removes most of the heat so you get the flavor, a little crunch and just a bit of heat.

Crab Guacamole

 3 large ripe avocados

1 tbs chopped shallots

2 tbs chopped fresh jalapeno, stem and seeds removed

1/2 cup full fat sour cream

3 ounces crab meat

2 tbs lemon juice

2 tbs chopped cilantro

1/2 tsp sea salt

1/4 tsp black pepper

1/2 tsp chili powder

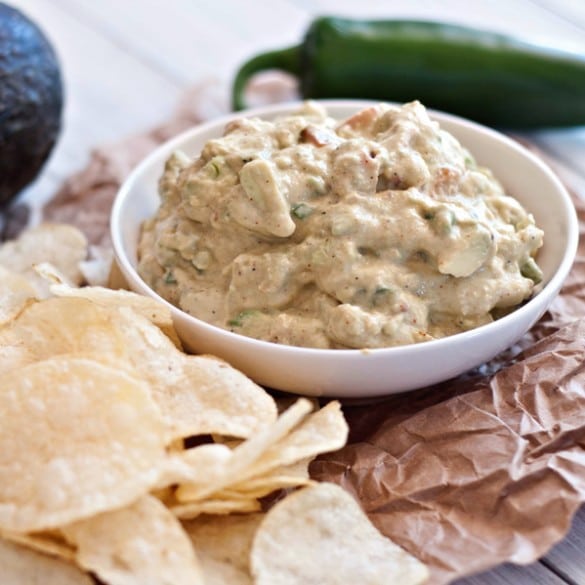
cut the avocados in half, remove the pit and scoop the flesh into a large bowl. Add the remaining ingredients and smash it all together until well combined, but some chunks of avocado still remain.

Pin This Post!

Follow me on twitter

Follow me on Pinterest

Like Domestic Fits on Facebook


Let’s Have A Ball Themed Kids Party & Apple Slice Party Balls

I am now the mother of a two year old. 

Of course I’ve been warned about the Terrible Two’s and the nightmare that I am now  a party to. 

And no offense to those who have gone before me, but I rather enjoy this age. Every age, every situation and every person is not without drawbacks. There is no such thing as a perfect situation. Quality of life is built on figuring out what is great about the situation that you are in and enjoying the crap out of it. 

So, what is great about 2 year old?

You get to have all the answers. You are able to solve all of their problems. These tiny little humans see you, their moms, as the Fair Princess Goddess of The Universe. You have control over everywhere they go and who they play with. And all of that will end way too soon. As much as I long to have more freedom and independence, sleep past 6:30am, set my schedule on a whim, travel to exotic places and be able to pee in private again, I know without a single tiny doubt that I will miss the hell out of my 2 year old once she is all grown up. 

For Tater’s second birthday, my little tomboy wanted to run around the back yard and play with balls, her favorite thing in the entire world. So that’s what we did. 


I had huge gigantic balloons from Sweet Lulu


I made Yarn Ball Party Favors, You can see the DIY here:

Dozens of red and white beach balls covering the lawn, that I bought from Oriental Trading

Tater was in love with this. 


I filled a red baby pool up with a bag of ball pit balls. 

And as I shared with you a few weeks ago, I’m tring to rid my life of food dye. Quite a challenge for someone who is used to spending hours concocting the perfect frosting color for cakes. I let go and accepted the fact that the frosting I made with beet powder was just going to be purple and that was OK. More on that in a later post. 


A least I was able to sneak some antioxidants and vegetables into her cupcakes, at fine compromise in my opinion. 

And the food went largely unphotographed. A pretty shocking thing in my world, given the frequency with which I snap food pictures. 

We did, however, reserect the Tater Tot Bar from last year.

I used white cone cups and made the cone holder out of a cardboard box and wrapping paper. 

I also made the Hanging Paper Lanterns, one of my very first post was how to make them.

And I remade the paper Happy Birthday banner. 

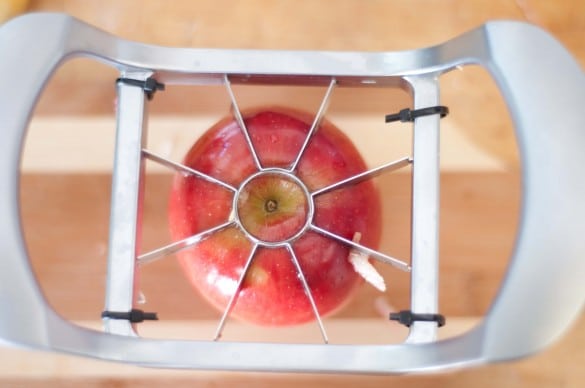
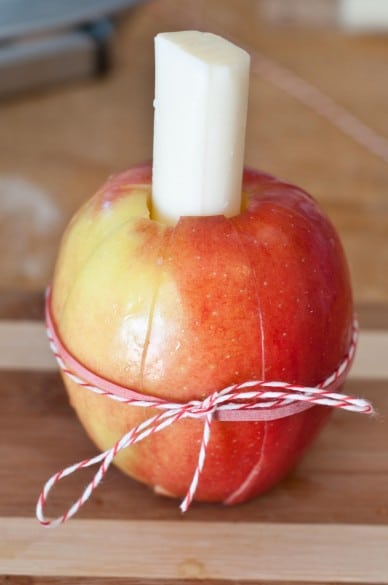
I did get a few shots of my Apple Balls, cored and sliced apples held together with rubber band and bakers twine. I replaced the core with string cheese. This will keep them fresh, un-browned and party ready for hours. 

First, core and slice the apples using an apple slicer. 

Remove the core and replace it with string cheese. Reassemble the apple and secure with a rubber band, then tie a ribbon or bakers twine around the rubberband. This will help your apple slices to stay fresh longer, without turning brown. 

If you can, try to find string cheese that is the same size, or just a bit larger than your apple corer. 

Pin This Post! 

Follow me on twitter

Follow me on Pinterest

Like Domestic Fits on Facebook


Skinny Potato Skins: 62 Calories

I’m not going to sit here and pretend that these are as good as the real thing. Those potato skins loaded up with bacon, sour cream and cheese that are somewhere around 62 calories per bite. But these make a great lunch durring my "I am GOING to lose those final 3 pounds" week. And they reheat really well, so you can make a batch on Sunday, and reheat them through out the week for lunch. With a side of this salad.

I’ve run the numbers and have come up with 62 calories each potato half, but that completely depends on the size of your potato and the amount of flesh you scoop out of it.  

My Husband added fat free sour cream and shredded cheese. If you add a tbs of fat free sour cream and a tsp of shredded part skim mozzarella cheese, it will about double the calories in the potato. But, if you like it more and that will make you eat less, it may be worth it. 

Also, this dish is:

Gluten Free

Vegan

Kosher for Passover

Skinny jeans friendly 

Skinny Potato Skins

4 large red potatoes

1 large red bell pepper, thinly sliced, stem removed

1 large yellow bell pepper, thinly sliced, stem removed 

2 cups sliced crimini mushrooms

2 cloves of garlic, chopped

olive oil cooking spray

2 tbs Smart Balance Light, melted

1 1/2 tbs or Fajita Seasonings

(Or: 1 tsp salt, 1/2 tsp cumin, 1/2 tsp smoked paprika, 1 tsp garlic powder, 1/2 tsp chili powder)

1/2 cup Pico De Gallo (or you fav salsa)

Preheat oven to 400. 

Pierce the potatoes a few times with a fork and microwave on high for 5-7 minutes or until cooked through. Remove and allow to cool until enough to handle. Cut in half and scoop out most of the insides, leaving about 1/4 inch of the walls in tact. You can save the potato middles for mashed potatoes or potato cakes.

Place thinly sliced bell peppers, mushrooms, and garlic on a baking sheet. Spray lightly with olive oil cooking spray and sprinkle with fajita seasoning (or the homemade blend) and toss to coat. 

Roast the vegetables in the oven for 15 minutes or until soft and the mushrooms have browned, tossing every 5-8 minutes with a heat safe spatula. 

Place the skins on a baking sheet and brush the insides with melted smart balance light, sprinkle with salt. Bake at 400 for 10 minutes, allow to cool slightly. 

Fill each potato skin with fajita veggies and top with Pico De Gallo. 

Pin This Post!

Follow me on twitter

Follow me on Pinterest

Like Domestic Fits on Facebook