
Jackie Dodd-Mallory
Senior Editor

Jackie Dodd-Mallory

How To: Make Candied Bacon

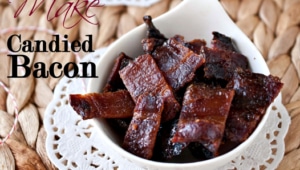
Before we get started on the essential skill of making your very own batch of candied bacon, I need to pause to tell you some amazing news:

I signed a cookbook deal last week.

And so begins the frantic, not enough time, spending to much money on groceries, stress, lack of sleep that has nothing to do with my toddler, phase of my life. The book is focused on cooking with craft beer, the subject of my other blog, The Beeroness, from which the book truly sprang.

Even with all the warnings from those who have gone before me, all the friends I have who have written cookbooks, novels, non-fiction research books, I am thrilled. Even though I realize that writing a book is light years more work and far less money than anyone ever thinks, I’ll never stop being grateful for being given this opportunity.

Now all I have to do is write it.

So for now, lets make some candied bacon.

First, what do you DO with candied bacon? The better questions is, what wouldn’t you do with candied bacon?

For starters, here are some fabulous ideas:

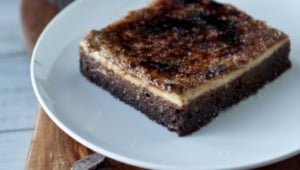
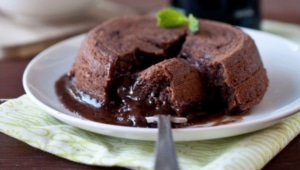
Candied bacon topped brownies (just sprinkle on top of your favorite brownies before baking)

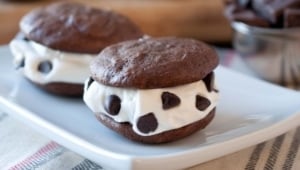
Candied bacon & Vanilla ice cream

Candied bacon sprinkled on maple doughnuts

Candied bacon mixed into your favorite pancake batter

Candied bacon waffles

Candied bacon on salad (for real)

Candied bacon chocolate chip cookies

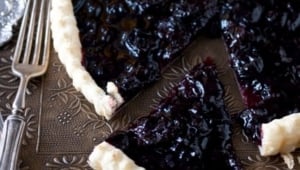
Candied Bacon sprinkled on a chocolate tart

It’s endless.


Ingredients:

12 strips of bacon

1/4 to 1/2 cup brown sugar

Preheat oven to 350.

Sprinkle one side of the strips of bacon with brown sugar.

Press it into the bacon well.

Place the bacon, sugar side down, on a wire rack on top of a baking sheet. You are going to want to cover the baking sheet with a Silpat or aluminum foil, the drippings will burn and be difficult to clean.

Top the other side of the bacon (the side facing up) with more brown sugar and press into the bacon.

Bake at 350 for 15 minutes.

Using a pair of tongs, turn each slice and continue to bake until a dark brown and cooked through.

Bacon will not crisp in the oven. Bacon will not get crispy until it cools and the sugar has hardened.

Allow bacon to cool, chop and use in all sorts of amazing ways.


Creme Brulee Topped Chocolate Stout Brownies & Some Big News

I have some news.

If you Follow me on Twitter, you probably already know the Big News.

I signed a book deal on Thursday. A publisher has actually decided to pay me to write a cookbook.

How amazing is that?

Writing a cookbook has long been on my list of goals, and as I somewhat naively and idealistically jump into this process, I am reminded that it is you I have to thank for this milestone. The ones who share my posts, tell their friends about my little blog, believe in what I’m doing here,  the ones who read every silly word I write, and yes, even those of you who write creepy comments about wanting to wake up in my bed and email me about how you google stalk me on a weekly basis. I am grateful for all of you.

This isn’t just my book, it’s yours too. The ideas you give me, the way I’m inspire by your questions and humbled by being seen as a source of knowledge and beer-cooking wisdom.

I wish I could properly thank you all, over a beer and some possibly inappropriate conversation.  But for now, we’ll have to settle for some Creme Brulee Brownies made with two different types of beer. Which seems to be fitting, since chocolate stout was the first beer I ever cooked with and creme brulee was the subject of my first post. It’s an homage to my beer cooking beginnings, hope you like it.

If you are at all interested in helping me with this book, as an un-paid but thoroughly appreciated, recipe tester, for which you will receive my undying love and affection, a mention in the book, a sneak peek at never-before-seen-recipes, and possibly more, stay tuned. Once we get to that place, I’ll let you know how you can be my beer cooking partner in crime.

Creme Brulee Topped Chocolate Stout Brownies

Ingredients
  

For the Brownie Layer:

  • 3 eggs
  • 1 cup white sugar
  • 1/2 cup brown sugar
  • 1 tsp vanilla
  • 1/2 cup flour
  • 1/2 cup cocoa powder
  • 1 tsp espresso powder
  • 1/4 tsp salt
  • 1 stick butter
  • 7 oz dark chocolate 60%
  • 2/3 cup chocolate stout

For The Creme Brulee Layer

  • 1 cup heavy cream
  • 3/4 cup low-hop pale ale beer
  • 1 vanilla bean split and scraped or 1/4 tsp vanilla bean paste
  • 3 eggs plus 2 yolks
  • 1/2 cup sugar
  • 2 tbs corn starch
  • Plus 1/4 cup sugar for the brulee topping

Instructions
 

  • Preheat oven to 350.
  • In the bowl of a stand mixer, beat the 3 eggs, white sugar, brown sugar and vanilla on high for at least ten minutes. You need a meringue type consistency in order to create a crust on top of the brownies to insure the layers stay separate. In a separate bowl, add the flour, cocoa powder, espresso powder and salt, stir to combine.
  • In a microwave safe bowl, add the butter and the chocolate. Microwave on high for 30 seconds, stir and repeat until melted.
  • While the stand mixer is on medium speed, slowly add the chocolate until mostly combined. Add the beer and stir. Add the flour mixture and stir until just combined.
  • Grease and flour a 9x13 inch baking dish. Pour batter into dish and smooth out the top. Bake at 350 for 25 minutes or until the top is matte and a bit cracked. Don't over bake.
  • Allow to cool to room temperature.
  • For the creme brulee layer:
  • In a sauce pan over medium heat, bring the cream, beer and vanilla to a slight simmer, removing from heat when bubbles start to form around the edges. Remove from heat and allow to cool to room temperature.
  • In a separate bowl, whisk the 1/2 cup sugar, eggs and yolk, and cornstarch until well combined and slightly frothy.
  • While continuing to whisk the egg mixture, slowly add the cream and whisk until well combined. Make sure the cream has cool or you will just have created vanilla scrambled eggs.
  • Return the cream to the stove and stir over medium heat until it comes to a low simmer. Continue to whisk until thickened, between 5 and 10 minutes. The cream should leave a track when you drag the whisk through it. Allow to cool to about room temperature.
  • Pour over the brownies, cover tightly with plastic wrap and chill until set, about 1 hour.
  • Just prior to serving, cut into squares, cover with a light layer of white sugar and brulee the top with a kitchen torch until the sugar has melted and turned a dark amber color.


Potato Artichoke Bisque & Support for Sandy Victims

As we leave the most divisive election in modern history, we need to remember that we are still a Nation. One Nation, Under God, Indivisible by politics, that comes together to help others.

(Photo, AP:  Frank Franklin)

Red state or blue, that is what we are. We are also a Nation that loves to help, feels an obligation to lend a hand, lift up others when we have the opportunity. We are a Nation in which everyone of  us have had the "do you give your spare change to the homeless"  debate, because regardless of the answer we all have felt the a conflict in walking away without handing something over to someone in need.

We are a society of people who have even felt selfish in giving because it makes us feel good. Because we want to help others.

(Photo: AP Spencer Platt)

We are not a nation that spends our precious moments on this earth angry because of which of the  good-hearted, great men was chosen to lead this amazing Nation. At least that is what I need to believe. I see so much good in you,  America.

I see that huge heart that breaks when you see others in need. And no matter where your bed is tonight, remember those who are without one.

This post is dedicated to all of the victims of hurricane Sandy, from Jamaica, to Cuba, to Haiti, to New Jersey to New York.

To all of the more than 110 lives that were lost in the USA, and the 71 lost in the Caribbean.

For the more than 55 billion dollars of damage the storm did.

This post is so little, in the face of that. But like you, America, I want to help. And if I could, I would make every person affected by the storm a big bowl of soup, and listen to their story and hope that I did someone some good.

 Click on the picture to give to Red Cross to assist in their efforts to help:

This post was part of a blog event put on my Creative Culinary.

Other ways to give:


Potato Artichoke Bisque

Ingredients

  • 2 tbs butter
  • 1 leek, chopped (white and very light green parts only)
  • 1 shallot, minced
  • 1/4 tsp salt
  • 2 cloves garlic, minced
  • 2 tbs white wine
  • 4 cups broth (either chicken or vegetable)
  • 4 cups red potatoes, peeled and chopped
  • 2 cups artichoke hearts, divided
  • 1/2 tsp pepper
  • 1/4 tsp chili powder
  • 1/4 cup cream

Instructions

  1. In a large pot over medium heat, melt the butter. Add the leeks and shallots, sautee until soft and slightly caramelized, about 6 minutes. Add the garlic and stir. Add the wine, scraping to deglaze the pot.
  2. Add the broth, potatoes, and only 1 cup of the artichoke hearts. Cover and allow to simmer (adjust heat if necessary) until potatoes are fork tender, about 20-30 minutes. Remove from heat. Using an immersion blender, belnd until smooth.
  3. Add pepper chili powder and cream, stir until combined. Salt to taste.
  4. Chop remaining artichoke hearts.
  5. Pour into 4 bowls, garnish with chopped artichoke hearts.

(Yields 4 servings)


Beer Battered Mini Corn Dogs with Chipotle Ketchup


This my friends, is how you do Football Food.

It meets all of the requirements to earn a spot on the Football Food Table.

These vague and unenforceable requirements include qualities like: fun, as high calorie as possible, no utensils or plates needed, ability to sit at room temperature for hours, AND there are always bonus points for including beer.

 I also want to tell you a little bit about Chipotle Ketchup. Corn dogs need to be dipped, and if we are all willing to adhere to the good 'ole American tradition of dunking fried stuff in ketchup, I want to doctor it up a bit. Although you can make ketchup from scratch, and don’t think I haven’t filed that idea away in my mental recipe stockpile, I just used store bought. Chipotle is a lovely flavor, one of my favorites.

The smokiness is beautiful. If you just want smoke and no heat, just add 1 tsp of smoked paprika to 1 cup of ketchup and stir to make yourself a little smokey ketchup to go along with your fancied up deep-fried treats.

Beer Battered Mini Corn Dogs with Chipotle Ketchup

Servings 24 mini corndogs

Ingredients
  

  • canola or peanut oil for frying
  • 1 cup flour plus 1/4 cup, divided
  • 2/3 cup corn meal
  • 1 tbs brown sugar
  • 1 tsp baking powder
  • 1 tsp baking soda
  • 1 egg
  • 3/4 cup plus 2 tbs beer I used an IPA
  • 24 mini hot dogs
  • 24, 4 inch wooden skewers or toothpicks

For the Ketchup

  • 1 cup ketchup
  • 1 chipotle peper in adobo sauce
  • 1 tsp adobo sauce

Instructions
 

  • Pour oil into a pot, about 3-4 inches deep. Clip a cooking thermometer onto the side. Heat over medium high heat until the oil reaches between 350 and 375, adjust heat to stay in this temperature range.
  • In a bowl, combine 1 cup flour, corn meal, sugar, baking powder, baking soda, stir to combine. Add the egg and the beer, stir until combined.
  • Pour the batter into a tall coffee mug, this will make dipping the corn dogs easier.
  • Skewer all of the mini corn dogs with wooden skewers. Put remaining 1/4 cup flour in a bowl. Roll the hot dogs in the flour, then brush off any excess flour.
  • Holding the skewer, dip the hot dog into the batter until submerged and coated. Slowly place the battered hot dog into the oil. Allow to fry in the oil until a dark brown, about 4 minutes. Remove with a slotted spoon and place on a stack of paper towels to drain.
  • To make the ketchup, place all ketchup ingredients in a small food processor or blender and process until smooth.

I used these bamboo skewers.

Chocolate Fudge Bourbon and Whipped Cream Sandwich Cookies

I had this really Idealistic feeling that once the election was over, and the Binders had spoken, we would all go back to love and cookie baking. Seems like this morning, waking up and reading Facebook, the world is more divided than it was yesterday.

Anger, hate, social media mud slinging, has never given anyone a better quality of life or made them happier. But it has destroyed friendships and divided families.

I understand the urge to express feelings of disappointment, and more than that, a feeling that you are "forced" into a decision that you didn’t make. It’s important to feel like your voice is heard, whether it be a victory cry or sobs of distain. But, please, bear in mind that expressing those feelings on social media will inevitably cause division between you and, statistically speaking, half of your friends. Is it worth it?

We need to take a step back, appreciate that no matter what outcome you expected, we had two great men fight to lead this Nation. We had a higher than expected voter turnout of engaged and passionate voters. We are lucky to live in a country that approved marriage equality in four states last night. We live in a place where we are free to post ignorant and hateful rants online, and the government protects that freedom. No matter who is president, we live in a great nation, run by leaders we get to vote for.

No one ever changes an opinion because of an angry Facebook status. But nearly every time someone posts a rant fueled update, someone loses respect for the poster, especially when half of the country dissagrees with you.

My suggestions on how to cope is find a space where like minded people dwell. Because, for the most part, what you really want is camaraderie, and people who agree with you and understand the feelings you have. Most people (in general) aren’t looking for a fight.

Instead of posting that angry status to Facebook, text it to a friend to get it out of your system, find a message board or Facebook group of people who feel like you do, or just take a cyber hiatus.

If you do need to post something controversial, take a moment before you hit send. Walk away from the computer, think about a person you love who will disagree with what you are about to post and speak in a way that is respectful to that persons feelings. Take at least one pass at it, to make it more diplomatic. The more you seek to understand the other side, the more likely they are to listen to you.

Anyone have any thoughts on how to tame the impulsive cyber rants we all seem to be close to from time to time?

Any perspective you can offer?

Or, just make some cookies. Because no matter what, we are headed into the Holiday Season and cookie swaps are almost here!

And those always have bipartisan support.

Chocolate Fudge Bourbon and Whipped Cream Sandwich Cookies

Ingredients

For the Cookies

  • 2 eggs
  • 1 tsp vanilla
  • 1/3 cup brown sugar
  • 1/3 cup white sugar
  • 1/4 cup flour
  • 1/4 cup unsweetened cocoa powder
  • 1 tsp espresso powder (this intensifies chocolate, it does not make it taste like coffee)
  • 1/8 tsp salt
  • 4 tbs unsalted butter
  • 3.5 oz chocolate, broken into chunks
  • 2tbs bourbon

For the whipped cream filling

  • 2 cups heavy cream
  • 2/3 cup powdered sugar
  • 1 tsp vanilla
  • 1/2 cup mini chocolate chips

Instructions

  1. In the bowl of a stand mixer, add the eggs, vanilla and both kinds of sugar. Whip on high for ten minutes to create a frothy meringue like texture.
  2. In a separate bowl, add the flour, cocoa powder, espresso powder and salt. Stir until combined.
    In a microwave safe bowl, add the chocolate and the butter. Microwave on high for 30 seconds, stir and repeat until melted.
  3. Gently fold the chocolate and the bourbon into the eggs until mostly combined (some streaks are fine).
  4. Sprinkle the dry ingredients over the chocolate/egg mixture, stir until just combined. Place in the fridge and allow to chill until set up enough to scoop, about 30 minutes. Preheat oven to 375
    Line baking sheets with parchment paper. Using a cookie scoop, drop equal amounts of dough evenly space on the cookie sheet.
  5. Bake for 9-11 minutes, don’t over bake. Allow to cool.
  6. In the bowl of a stand mixer add the whipped cream, powdered sugar and vanilla. Beat on high set up, about 3-5 minutes. Gently fold in the chocolate chips.
  7. Assemble sandwich cookies. Makes 12-16

Chicken in Creamy Mushroom Beer Sauce


Today is November 6th, Election Day.

As Americans spend the day thinking of little else, wedged firmly between Barack and a hard place, I wanted to give you a little motivation to get through this day.

We will soon find ourselves at the end of this exhausting Election Season, our feelings of separatism from those who disagree with us will fade. We will find Facebook to be a friendlier place, and those Someecards of a political nature will ebb.

Regardless of the outcome, you have a reason to grab your favorite beer. Either in celebration of your guy winning the mad race to 1600 Pennsylvania Avenue, or as a way to console yourself over the fact that the other guy came out ahead.

Given that you may be too distracted to spend all that much time in the kitchen tonight, this meal only takes about 20 minutes.

And, I’m pretty certain it has bipartisan support.

For this recipes, I like a brown ale, a blonde, a pale or a wheat beer. Be aware that using an IPA will kick up the beer flavor considerably and may be too bitter in the end.

Chicken in Creamy Mushroom Beer Sauce

Ingredients
  

  • 4 boneless skinless chicken thigh fillets
  • 1 tsp salt
  • 1 tsp pepper
  • 3 tbs butter
  • 1/4 cup onions chopped
  • 3 cloves garlic minced
  • 5 oz wild mushrooms such as Shiitake (not dried)
  • 1/2 cup beer
  • 1/2 cup heavy cream
  • 1/3 cup shredded parmesan
  • salt and pepper to taste

Instructions
 

  • In a pan over medium high heat, melt the butter. Sprinkle chicken thighs on all sides with salt and pepper. Add chicken to the pan and cook on both sides until browned, about 4 minutes per side. Remove chicken from pan.
  • Add onions and saute until soft and translucent, about 3 minutes.
  • Add garlic and mushrooms, cook until mushrooms are soft and have darkened, about 5 minutes.
  • Add the beer, scraping the bottom to deglaze the pan.
  • Reduce heat to medium, add the cream and stir.
  • Add half of the cheese, stir until melted. Add the remaining half, stir until combined.
  • Add the chicken and allow to cook until sauce has thickened, about 5 minutes. Salt and pepper to taste, serve over rice or pasta.


Potato Artichoke and Goat Cheese Gratin

I think I need to buy a goat. And some chickens.

Although I grew up on a farm, and at the time I found very little of our remote, sequestered-from-civilization-and-my-friends, life very appealing, I now want a little bit of that back. Not all of it. I want to live in the city, a big, huge, full of energy, and excitement, city but with a goat and a couple chickens.

I hope that can someday be possible.

Maybe I’ll move from food blogging to creating lofts in downtown LA with rooftop chicken/goat farms. I think people would be into it.

Until then, I have to settle for putting goat cheese in everything.

I did just find out about Redwood Hill. A goat cheese farm in Sebastopol, CA that is 100% solar powdered and nearly landfil-free, reusing and recycling as much as they can. As well as giving all employees & their families members great health benefits, this is a company I can give my full support. Along with being a pioneer in the humane treatment of animals (they love the crap out of their goats, even the old ones who are past the milk giving prime) they were eco-friendly and free range before it was hipster chic. I love places like this. I love being able to tell you about them.

I hope they will let me visit, feed me cheese and let me pet their goats.


Potato Artichoke and Goat Cheese Gratin

Ingredients

  • 2 tbs butter
  • 1 large leek, chopped (white and very light green parts only)
  • 2 cups Sunchokes, also called Jerusalem Artichokes, peeled and sliced into 1/8 inch slices (can sub peeled red potatoes)
  • 4 cups red potatoes, peeled and sliced into 1/8 inch slices
  • 1/2 tsp salt
  • 1/2 tsp pepper
  • 14 ounces artichoke heats, quartered
  • 1 cup heavy cream
  • 6oz parmesan cheese
  • 6 oz goat cheese, crumbled
  • 2/3 cup panko bread crumbs

Instructions

  1. Preheat oven to 400.
  2. In a large skillet with a lid, melt the butter. Add leeks and sauté until softened, about 3 minutes. Add the Sunchokes and the potatoes and toss to coat. Reduce heat to medium, cover and allow to cook, stirring occasionally, until potatoes are fork tender, about 12-15 minutes.
  3. Remove from heat. Add the cream, artichoke hearts and the parmesan, stir until combined.
  4. Transfer to a 2 litter baking dish.
  5. Sprinkle the goat cheese on top, cover evenly with panko.
  6. Cover with aluminum foil and bake at 400 for 20 minutes. (To make ahead, you can stop here. Return to the oven the following day and cook uncovered for 20 minutes or until warmed through and browned.)
  7. Remove foil and bake until panko has browned, about 15-20 additional minutes.


Salted Chocolate Stout Truffles


This is totally easy. I promise.

At a beer event a few weeks ago, I had a guy call my recipes, "Foodie but accessible. They sounds hard and impressive, but once you read the recipe it’s actually really easy."

I like that.

This recipe is the same way. It sounds really hard, making truffles from scratch. And really, that’s the best part. It sounds hard, and impressive, and it has beer in it, which makes you a Christmas Party Superhero, but it’s really easy. And since so few people have ever made truffles from scratch, they won’t even know how easy it was.

I made these for the first time a few years ago to bring to a Thanksgiving party. A friend of mine, an artist from France, ate one. Without even knowing that I was the one who had brought them, he looked at me and said, "It’s like Paris at Christmas time."

That pretty much made my year.


There are a few things to keep in mind when making these. Although your active time is pretty minimal, it takes about 2 1/2 hours start to finish because of the chilling time.

Also, this is no place to skimp when it comes to chocolate. Use the good stuff. Don’t use chocolate chips, they contain additives that prevent them from melting together in the package and that could be problematic.

For the coating, you can go crazy. Roll them in anything that goes with chocolate, and make a bunch of different flavors and figure out which ones you like the best.

Some ideas:

Cocoa powder (the old standard)

Crushed Pretzels

Coconut shavings

Chopped nuts

Chopped bacon (yep, you should totally do that)

Crushed candy cane

Sprinkles

Crushed graham crackers

Crushed toffee

Seriously, anything that you think might taste good on chocolate, give it a try.


You can also try tempering chocolate to give them a nice, smooth, shinny chocolate shell with a satisfying snap when you bite into them. I would strongly encourage you to do this. It isn’t difficult and it gives you a really professional tasting final product.


For the filling:

1 cup stout beer

8 weight ounces (225 g) good quality chocolate (60% cocoa content)

For the coating:

8oz (225 g) good quality chocolate (from a shiny bar, this means it has previously been tempered) can be milk, dark or white chocolate

and/or

Cocoa powder, coconut shavings, chopped nuts, chopped bacon, etc.

1 tsp good quality coarse sea salt (I used Himalayan Pink Salt)


Add the beer to a pot over high heat. Reduce by half (about 1/2 cup remaining), stirring frequently. Remove from heat, break the 8 wt ounce of chocolate into chunks, stir until smooth and melted.

Allow to cool to room temperature. Cover and refrigerate until set, about 2 hours.

Use a melon baller to scoop out a small amount of chocolate.

Roll into a ball with your hands, add to a plate and chill for 20 minutes to an hour.

To temper chocolate for the coating:

Chop the good quality chocolate into small pieces. Add about half of it to the top of a double boiler over medium heat (If you don’t have a double boiler, place a glass or metal bowl over a pot of water making sure the bottom of the bowl does not touch the water).

Stir until the chocolate reaches 115 for dark chocolate, 110 for milk or white chocolate.

Remove from heat. Stir continuously, adding a bit of the reserved chocolate at a time until the chocolate reaches 90 degrees (88 for milk or white chocolate). Stir, stir, stir like crazy.

Add the chocolate truffle balls, roll around with a fork until coated.

Remove from chocolate and place on parchment paper, sprinkle with a small amount of sea salt. Chill until ready to serve.

If you don’t want to temper chocolate, just place the coating in a small bowl, add the chocolate truffle and turn until coated.


Hefeweizen Honey Rolls

 I have wandered into a complete obsession with making bread. It started slowly, and really, rather timidly. When I first started, I was afraid of yeast, and a wee bit convinced that it hated me.

I threw several mounds of fail dough in the trash after it refused to rise. I learned a few things long the way that I am more than happy to share with you and save you from the "What the EFF is wrong with this damn bread!" frustrations that I suffered.

First, check the expiration date.  Yeast expires in a biblical sense, it actually dies. Yeast is a bit of a living beast, and once it reaches it’s expiration date, don’t even think about it. It’s not like that bottle of Ibuprofen in your  cabinet that expired last year but is probably still going to cure your headache. If the yeast has been in your cabinet a while, throw it out.

Salt kills yeast too. Don’t let inactive yeast come in contact with salt. I learned this the hard way when adding salt to the cream before microwaving it.

Yeast will rise between 40 and 120 degrees. Any higher than 120 and it will be killed by the heat (unless you use rapid-rise which will work until about 130), stay away from the high end of the scale in case your thermometer is a bit off. If the yeast is colder than around 90, it will take a long time to rise. At 40 degrees, it will still rise, but it will take days. 110 seems to be a bit of a sweet spot, but I live in LA, and even when the East Coast is being ravaged by Frankenstrom, it was still 85 degrees yesterday. Bread rises faster when it’s warm, slower when it’s cold. Yeast types are not interchangeable without major recipe modifications. Use the yeast the recipe calls for.

Dry milk powder is a bit of a secret weapon when it comes to bread making. I discovered this in the Secret Ingredient section of King Arthur Flour, it may be to blame for my bread making fixation.  Your bread will be softer, taller and more tender. Buy a bag just to keep on hand for Thanksgiving and Christmas rolls, because if you are going to all of the trouble to make homemade rolls, you should really pull out all the tricks in your bag.

Beer. Of course, the beer. Bread is my favorite thing to make with beer. Even if you aren’t a beer kind of girl, it gives your bread a lighter, slightly more leavened quality that makes it a perfect baking liquid. And because it’s bread, a wheat beer is a natural choice.


Hefeweizen Honey Rolls

Ingredients
  

  • 1/2 cup heavy cream
  • 1 envelope dry active yeast
  • 5 cups bread flour
  • 1/4 cup dry milk powder
  • 1/4 tsp salt
  • 2/3 cup wheat beer room temperature
  • 3 eggs
  • 1/4 cup honey
  • 4 tbs unsalted butter softened to room temp

To Brush On Top:

  • 4 tbs melted butter
  • 1 tsp honey
  • 1/2 tsp coarse salt

Makes 16 rolls

    Instructions
     

    • Add the cream to a microwave safe dish. Heat for 20 seconds, test temperature and repeat until cream is about 110 degrees. Add the yeast, set aside until foamy, about 5 minutes. If the yeast does not foam, it isn't good. Discard it and try again.
    • In the bowl of a stand mixer add the flour, salt and dry milk powder, mix until well combined.
    • Add the cream and the beer, mix until combined. It will look dry and shaggy.
    • Add the eggs, one at a time, mixing between additions.
    • Add the honey and butter and allow to mix until the dough forms a smooth and shiny ball that isn't sticky, about 8-10 minutes.
    • Coat the inside of large bowl with oil. Form the dough into a ball and add to prepared bowl. Cover the bowl tightly with plastic wrap and allow to rise in a warm room until doubled in size. This will take between 1 and 2 hours depending on the temperature of the room.
    • Punch the dough down, and knead lightly for about 1 minute.
    • Cut the dough in half, then cut each half in half. You will now have 4 equal size pieces. Cut each piece in half to create 8 equal sized pieces. Cut each of those in half to give you 16.
    • Roll each piece of dough into balls, place into a baking dish with a bit of space between each roll (you might need two baking pans to accommodate 16 rolls).
    • Cover and allow to rise until about doubled in size.
    • Heat oven to 400 degrees.
    • Combine the melted butter and honey. Brush the top of the rolls with honey butter mixture, sprinkle with salt.
    • Bake at 400 for 12-15 minutes until golden brown.


    Brown Butter Sage Hummus & And The Web’s Top Ten Hummus Recipes

    There seems to be something so paltry and vapid about trying to talk about hummus when half of the United States is bracing for an epic natural disaster.

    Because it seems to be only in those times when the brushes with disaster get top billing in our lives that we take the time to be thankful, today seems to be the prefect hour. Take a moment to relax the expectations you had for today, step back and be grateful and thankful for what you do have. And send thoughts, prayers and love to those on the East Coast who could possibly lose today what you forgot to be be thankful for yesterday.

    Brown Butter Sage Hummus

    Ingredients

    • 4 tbs butter
    • 3 sage leaves, minced
    • 3 tbs tahini
    • 1 clove garlic, smashed
    • 15 oz Chickpeas
    • 3 tbs olive oil (plus additional as needed)

    Instructions

    1. Add the butter to a pot over medium heat. Stir continuously until it has turned an amber brown color and has a nutty aroma. Remove from heat. Add the sage and stir.
    2. In a food processor, add the remaining ingredients along with the browned butter.
    3. Process until smooth. Add additional olive oil for a smoother texture.

    White Bean & Garlic Hummus – Bran Appetit

    Truffle Roasted Tomato Hummus – Bake Your Day


    beet Hummus – Heather Christo


    Zucchini Paleo Hummus – Amazing Paleo

    Edamame Hummus  – Oh My Veggies

    Jalapeno IPA Hummus – The Beeroness

    Pumpkin Hummus – Domestic Fits

    Bacon Hummus – Just A Taste


    Chipotle Hummus – Domestic Fits


    IPA Cherry Tart


     To be honest, I haven’t always loved IPA’s. It took me a while, although not as long as resolving my mint aversion, and now I can pretty firmly place myself in that Hop Heads category I used to shy away from. I discover that a dry hopped IPA gives me the delicate flavors of the hops that love, that are lost without the dry hopping process. I also found myself lurking on the Home Brew Talk website in a creepy way that usually lands someone in a face to face interview with Chris Hansen.

    If I was going to homebrew, jump feet first into the mash tun world, I’m not sure if an IPA would be first on my list. My love of stouts would probably pull me in that direction first. But once I made it around to an IPA, it would most definitely involve dry hopping. And possibly Sriracha.

    It’s probably a good thing I don’t homebrew, sounds like I’d waste a lot of money on crazy ideas.


    IPA Cherry Tart

    Ingredients
      

    • 1 sheet puff pastry thawed
    • 3 cups sweet dark cherries pitted (I used Bing Cherries)
    • 2 tbs corn starch
    • 1/2 cup IPA
    • 2/3 cup sugar
    • 1 egg lightly beaten

    Instructions
     

    • Preheat oven to 375.
    • Roll out the puff pastry on a lightly floured surface. Transfer to a tart pan with a removable bottom, press into shape, remove excess. If you don't have a tart pan, cover a baking sheet with parchment paper, place puff pastry in the middle, fold about 1 inch of the sides inward to form edges. Place puff pastry in the fridge until ready.
    • In a pot over medium high heat, add the cherries, cornstarch, IPA and sugar. Allow to boil until thickened, stirring occasionally, about 10 minutes.
    • Remove pastry from the fridge, prick all over with a fork, make sure the holes are small. Brush with lightly beaten egg.
    • Pour the cherries into the tart.
    • Bake until the pastry has turned golden brown, about 20 minutes.


    5 Boozy Whipped Cream Recipes

    Boozy whipped creams!

    Not just one, but 5 recipes for you. This is a great way to bring your holiday desserts to the next level. Because serving a Chocolate Tart is great, but people remember a Chocolate Tart with Orange Cointreau Whipped Cream. And you don’t even have to tell them that it only took you 3 minutes to throw that whipped cream together.

    And Homemade Hot Chocolate with Peppermint Schnapps Whipped Cream will give you the win at Girls Night In this December.

    Making homemade whipped cream is incredibly easy, but here are a few tips to make it completely fool proof:

    1. Cold, cold, cold. Seriously, cold ingredients or you will be churning butter.

    2. You can whip it by hand, with a whisk, of you can use  a stand mixer. Don’t over beat, stop when you have soft peaks.

    3. Make it right before you serve it, it tends to break down fairly quickly at room temperature and doesn’t last all that long in the fridge.

    4. Taste and adjust as you go. If you want it sweeter, add more sugar. More booze? Go nuts.

    Orange Cointreau Whipped Cream. I love this on a rich dark chocolate tart, cranberry apple crumble or a vanilla sponge cake with berries.

    Orange Cointreau Whipped Cream

    Ingredients

    • 1 cup heavy cream
    • 1/3 cup powdered sugar
    • 1 tsp orange juice
    • 1/2 tsp orange zest
    • 1 tbs cointreau

    Instructions

    1. Put all ingredients in a stand mixer, beat on high until soft peaks form, about 3 minutes.

    Vanilla Elderflower Whipped Cream. I love this on a lemon cake, peach pie, or strawberry tart.

    Vanilla Elderflower Whipped Cream Recipe

    Ingredients

    • 1 cup heavy cream
    • 1/3 cup powdered sugar
    • 1/2 tsp vanilla extract
    • 2 tsp elderflower liquor (like St. Germain)

    Instructions

    1. Put all ingredients in a stand mixer, beat on high until soft peaks form, about 3 minutes.


    Pumpkin Bourbon Whipped Cream. Of course, this is great on pumpkin pie. But also great on pancakes, waffles, caramel cupcakes and pecan pie.

    Pumpkin Bourbon Whipped Cream

    Ingredients

    • 1 cup heavy cream
    • 1/3 cup powdered sugar
    • 1/2 tsp cinnamon
    • 2 tbs pumpkin puree
    • 2 tbs bourbon

    Instructions

    1. Put all cream, sugar and cinnamon in a stand mixer, beat on high until soft peaks form, about 3 minutes. Gently stir in pumpkin and bourbon.

    Peppermint Schnapps Whipped Cream. This is perfect for your Christmas Hot Cocoa, garnish with a mini candy cane. Also great with chocolate fudge cake, or just chocolate mint cupcakes.

    Peppermint Schnapps Whipped Cream Recipe

    Ingredients

    • 1 cup heavy cream
    • 1/3 cup powdered sugar
    • 2 tsp peppermint schnapps

    Instructions

    1. Put all ingredients in a stand mixer, beat on high until soft peaks form, about 3 minutes.


    Tequila Lime Whipped Cream. Of course, this is awesome on key lime pie. But it’s also great on pineapple cake, and vanilla pound cake with strawberries.

    Tequila Lime Whipped Cream Recipe

    Ingredients

    • 1 cup heavy cream
    • 1/3 cup powdered sugar
    • 2 tsp lime juice
    • 1/4 tsp zest
    • 1 tbs tequila

    Instructions

    1. Put all ingredients in a stand mixer, beat on high until soft peaks form, about 3 minutes.

    Chocolate Stout and Bacon Skillet Brownies


    I hope you don’t mind my excessive use of stout over the past few weeks, but to be honest I’m really not sorry. I love stouts, I’m  unreasonably excited about stouts being back "in season," and we are only about 2 weeks away from International Stout Day.

    I’m geting you all stocked up on stout recipes, in case you want to celebrate via beer infused baked goods.

    Which, of course, I hope you do.

    You can use a chocolate stout for this, and that will be perfectly fine. You can also use a smoked porter or stout, or you can use a coffee or espresso stout.

    Whatever you choose, this is best served warm, in the middle of a table full of fun people, each with a spoon in one hand and a stout in the other.

    Chocolate Stout and Bacon Skillet Brownies

    Ingredients
      

    • 2 strips thick cut bacon
    • 1 stick unsalted butter
    • 3.5 oz 100g dark chocolate (60%), broken into pieces
    • 1/2 cup stout chocolate or coffee stouts work best
    • 2 eggs
    • 2/3 cup sugar
    • 1 tbs espresso powder
    • 1/2 cup flour
    • 1/3 cup cocoa powder
    • 1/4 tsp baking powder
    • Preheat oven to 350.

    Instructions
     

    • In a 8 or 9 inch cast iron skillet cook the bacon until done. Remove bacon from skillet. Swirl the bacon fat to coat the pan, discard the excess bacon fat.
    • Add the butter to the skillet, return to heat and cook until melted. Add the chocolate and stir until melted. Remove from heat. Add beer and stir.
    • In a separate bowl, whisk together the eggs and sugar until well combined. Sprinkle the flour, cocoa powder, baking powder and espresso powder over the eggs, whisk until just combined.
    • Add the egg mixture to the chocolate skillet and stir until just combined. Chop bacon and sprinkle over the top.
    • Bake until the top has set (don't over bake) about 25 to 30 minutes.
    • Remove from oven, top with vanilla ice cream if desired (and I'm pretty sure you should desire) set in the middle of a table full of hungry people. Add spoons.

    Pad Thai Soup

    Love veggie meals? Try my Vegan Mushroom Quinoa Beer Chili! or Beer Battered Avocado Tacos


    Living in LA during "fall" makes you feel like a bit of crazy person.

    I’ll pull on my tall boots and a chunky sweaters that I am rightfully entitled to wear in late October, later realizing that the weather will creep up into the 80’s by mid day. And I’m the crazy lady at Starbucks ordering a pumpkin latte, wearing vintage Frye boots, jeans and a thick wool sweater while I could be wearing a jersey knit sundress like the normal, non-crazy, girl behind me in line.

    And still, I persist. I even go home and make soup. Sweating the entire time I eat it. In my sweater, with the air conditioner running.

    I spent three years as a vegetarian. The best thing I ever did when it comes to cooking, it opened up a world of produce to me and reminded me of all the foods I would often overlook just because they didn’t contain meat. To this day there are still things I prefer in a vegetarian or vegan form.

    When it comes to thai cooking, fish and oyster sauce are frequently called for. Here is an article about how to make those, DIY style in your own kitchen using non-meat products.

    There is also a company that sell vegetarian fish sauce, vegetarian oyster sauce, and Golden Mountain Season Sauce is a great alternative when those are called for.

    And for Gluten Free, I hear this Kikkomon GF Soy Sauce is great.

    Pad Thai Soup

    Ingredients

    • 3 tbs oil
    • 2 cloves garlic, minced
    • 1 egg (omit for vegan)
    • 3 oz extra firm tofu, diced (or cubed chicken)
    • 4 cups broth (veggie or chicken)
    • 4 oz rice noodles (also called pad thai noodles)
    • 3 tbs soy sauce
    • 1/4 tsp sriracha
    • 1 tbs fish sauce (For vegan, use adaptation listed in above post)
    • 1/4 cup roasted peanuts, crushed
    • 1/4 cup green onions
    • 1 tsp crushed red peppers

    Instructions

    1. In a large pot or dutch oven, heat the oil. Add the garlic and stir. Add the egg and cook until softly scrabbled. Add the tofu (or chicken), cook until lightly fried about 3 minutes.
    2. Add the broth, then add the noodles, soy, sriracha, fish sauce, and peanuts. Cook until noodles have softened, about 5 minutes.
    3. Serve topped with peanuts, green onions and red chili flakes.


    Chocolate Mint Stout Lava Cake


    Let’s talk about mint for a second.

    If you know me well, you know I have an issue with mint. Although it would be hard to tell, given that I’ve made you Chocolate Porter Brownies with Mint Frosting, Chocolate Mint Stout Ice Cream, and our neighborhood beer float hussy, The Dirty Girl Scout. You could have even assumed that I LOVE mint by all of those recipes, but the truth is that this is my culinary equililant of Exposure Therapy.

    The devolution of mint in my life happened in Morocco. I was traveling though Middle Atlas a few year ago with my sister, being carted from one town to another in the back of what was surely the car of a Moroccan drug dealer (or at least drug dropper-offer-guy, *actual term). I can’t even really pinpoint which incident linked Mint with Morocco in my brain. Maybe it was the cave dweller in Middle Atlas who made me mint tea, or the three Moroccan rug makers who locked me in the back of the factory plying me with mint tea in an effort to convince me to spend $6000 on a rug, or maybe it was the mint vendors waving their wares at me in the walled maze that was the old City Medina.

    To be honest, the experience wasn’t entirely bad. Terrifying and life changing, but I’m grateful for the opportunity to have gone to the other side of the world, even if it did involved running for my life through the late night streets of Fez. The rumor is that your sense of taste is more strongly linked to memories than images. Which makes sense. Because even when I see my photos from that trip, it doesn’t even come close to evoking the memories that come screaming back when I smell or taste fresh mint.

    I want to like mint, it’s an incredible flavor. It’s fresh and bright, and makes me gag. But I’m working on it. Exposure therapy, one chocolate mint dessert at a time.

    Months ago, when I found out about the Ken Schmidt / Iron Fist / Stone Mint Chocolate Imperial Stout I was excited that my self imposed mint affliction could extend into my love of craft beer.

    This might do it. And with a bold and creamy taste, and a gentle, but not sweet, mint flavor, I have high hopes that I will someday be the cure to my mint aversion. I think I need to send Ken Schmidt a mint flavored thank you card.


    Chocolate Mint Stout Lava Cake

    Ingredients
      

    • 3.5 oz 100 g Dark Chocolate 70%
    • 1 1/2 sticks butter 10 tbs
    • 2/3 cup Chocolate Mint Stout or chocolate stout
    • 1/4 tsp peppermint extract
    • 3 eggs plus 3 additional yolks
    • 1 1/2 cups powdered sugar
    • 1/3 cup cocoa powder
    • 3/4 cup flour
    • 1 tsp espresso powder this will not make the dessert taste like coffee. Espresso intensifies chocolate
    • 2 tbs dark chocolate chips

    Instructions
     

    • Preheat oven to 425.
    • Butter six soufflé dishes very well. The best way to do this is to soften butter (or use vegetable shortening or margarine) and a wadded up paper towel, smear a large amount inside each dish, making sure to get into the edges.
    • In a saucepan over medium heat, add the chocolate and butter. Stir constantly until chocolate is melted, about 5 minutes. Remove from heat. Add beer, and peppermint extract, stir to combine.
    • In a separate bowl, whisk the eggs, yolks and powdered sugar.
    • Pour chocolate mixture over egg mixture, stir to combine.
    • Sprinkle cocoa powder, espresso powder and flour over chocolate mixture, stir until just combined.
    • Divide equally between souffle dishes, making sure not to fill more than 2/3 full. Press about 4 to 5 chocolate chips into the very center of each cake (can be made one day ahead, cover and chill).
    • Bake at 425 until the outside is set, but the center is still liquid, about 9 minute no more than 13. (Note: Glass baking dishes cook much faster then ceramic dishes. Take these out of the oven when it looks as if they "need a few more minutes," you want a very runny center.)
    • Run a butter knife around the edge of the cake. Place a plate on top of each ramekin, turn upside down, lift ramekin to reveal cake. Serve immediately.


    Chipotle Stout Sloppy Joe’s Sliders


    I spent a few days up in Napa last month. While I was hanging out at Bear Republic those guys were nice enough to show me around and even let me jump behind the bar. While I was behind the bar, most likely annoyingly in his way, the bar manager asked me what my favorite style of beer was. To be honest, I didn’t have an answer. I wanted to try his special release stuff, those beer that never make it into bottles. And the Peter Brown Tribute that I had heard about but hadn’t been able to taste yet, but I still am not sure if I could pick one all-time favorite.

    It depends on what I’m eating.

    I do tend to favor lower alcohol beers, because I live in LA and we like to drive here.

    I like a dry hopped IPA.

    Or a circusy White.

    And I will always stand in line for a spicy beer.

    But, if I had to choose only one style of beer to cook with, that would be easy. Stouts are by far my favorite beer to cook with. They work well with beef and fabulously with chocolate. Spicy stouts are always intriguing, and although the go-to recipes for those seems to be a meat product, I  also want to figure out a really great chili chocolate cake recipe made with a spiced stout.

    Lucky for us, more and more breweries are making beer with spices so check out your local beer store and ask around. Here are some of my favorites:

    Stone Smoked Porter W/ Chipotle Peppers

    Mikkeller Texas Ranger 

    Bootlegger Black Phoneix Chipotle Coffee Stout

    I really encourage you to find a great beer for a brewery close to home. Stop in some day and see what they suggest. Maybe there is even a brewery close to you that won at last weeks Great American Beer Festival. Take look, make  some notes on what you want to try, but don’t forget to drink what you love, because you love it, regardless of how many or how few prizes it has under it’s belt.


    Chipotle Stout Sloppy Joe’s Sliders

    Ingredients
      

    • 1 tbs oil
    • 1 lb 80%/20% premium ground beef
    • 1/2 white onion chopped
    • 3 cloves of garlic
    • 1 1/4 cup Chipotle Stout or Porter
    • 1 small chipotle pepper from can in adobo sauce
    • 1 tsp adobo sauce from can
    • 4 oz tomato paste
    • 1 tbs mollasas
    • 2 tbs Worcestershire sauce
    • 1/2 tsp dijon mustard
    • 1/4 tsp cumin
    • 1/4 tsp smoked paprika
    • 1/4 tsp salt
    • 14-16 slider buns warmed

    Instructions
     

    • In a pan over medium high heat, add the oil and ground beef, cook until browned, stirring and breaking up meat. Using a slotted spoon, remove meat from pan.
    • In pan with residual oils, cook the onions until soft, about 5 minutes. Add the garlic and stir.
    • Add the beer, stir to combine.
    • Remove a small chipotle pepper from the can. Using a sharp knife and fork, chop very well until nearly reduced to a paste like substance. Add chipotle to the pan along with tomato paste, adobo sauce, molasses, cumin, paprika, salt, Worcestershire sauce and mustard. Allow to cook until well combined and slightly thickened.
    • Add meat to the sauce pan, stir until well combined.
    • Fill slider buns with meat, serve warm.