
cookbook

DIY Chocolate Molds & SprinkleBakes Cookbook Review plus Giveaway

Cookbook is a bit of a misnomer with SprinkleBakes. It’s more like an education. Like your best friend who happens to be an incomprehensibly talented pastry chef standing in your kitchen teaching you everything she knows about baking. Of course there are recipes, they range from redefining the idea of a basic cake to fabulously well crafted mousses, but it’s more than that. As with most cookbooks these days, you get more than just a compilation of recipes, it’s a catalouge of all the tips and tricks you didn’t even know were missing from your repertoire. SprinkleBakes is filled with instruction that not only inspires you to create your own works of art, it gives you the tools you need to do so. From simple to extravagant, everything you learn is accessible, no matter what your skill level.

How To: turn anything into a chocolate mold using just brown sugar

(Photo, Heather Baird)

This is the perfect addition to the kitchen of anyone who wants to learn more about the art of baking, no matter how long or short your’ve been at it.

I was so impressed by the tips and tutorials in this book, they seemed endless, like every time I flip though it I am bound to learn something new. This is a book that I will be referencing for years.

Here is a fun trick that I feel in love with right away. She teaches you how to turn just about anything in your house into a chocolate mold using just brown sugar. This is a great tip for anyone who throws kids parties and doesn’t want to invest in a chocolate mold that you’ll use once.

How To: turn anything into a chocolate mold using just brown sugar

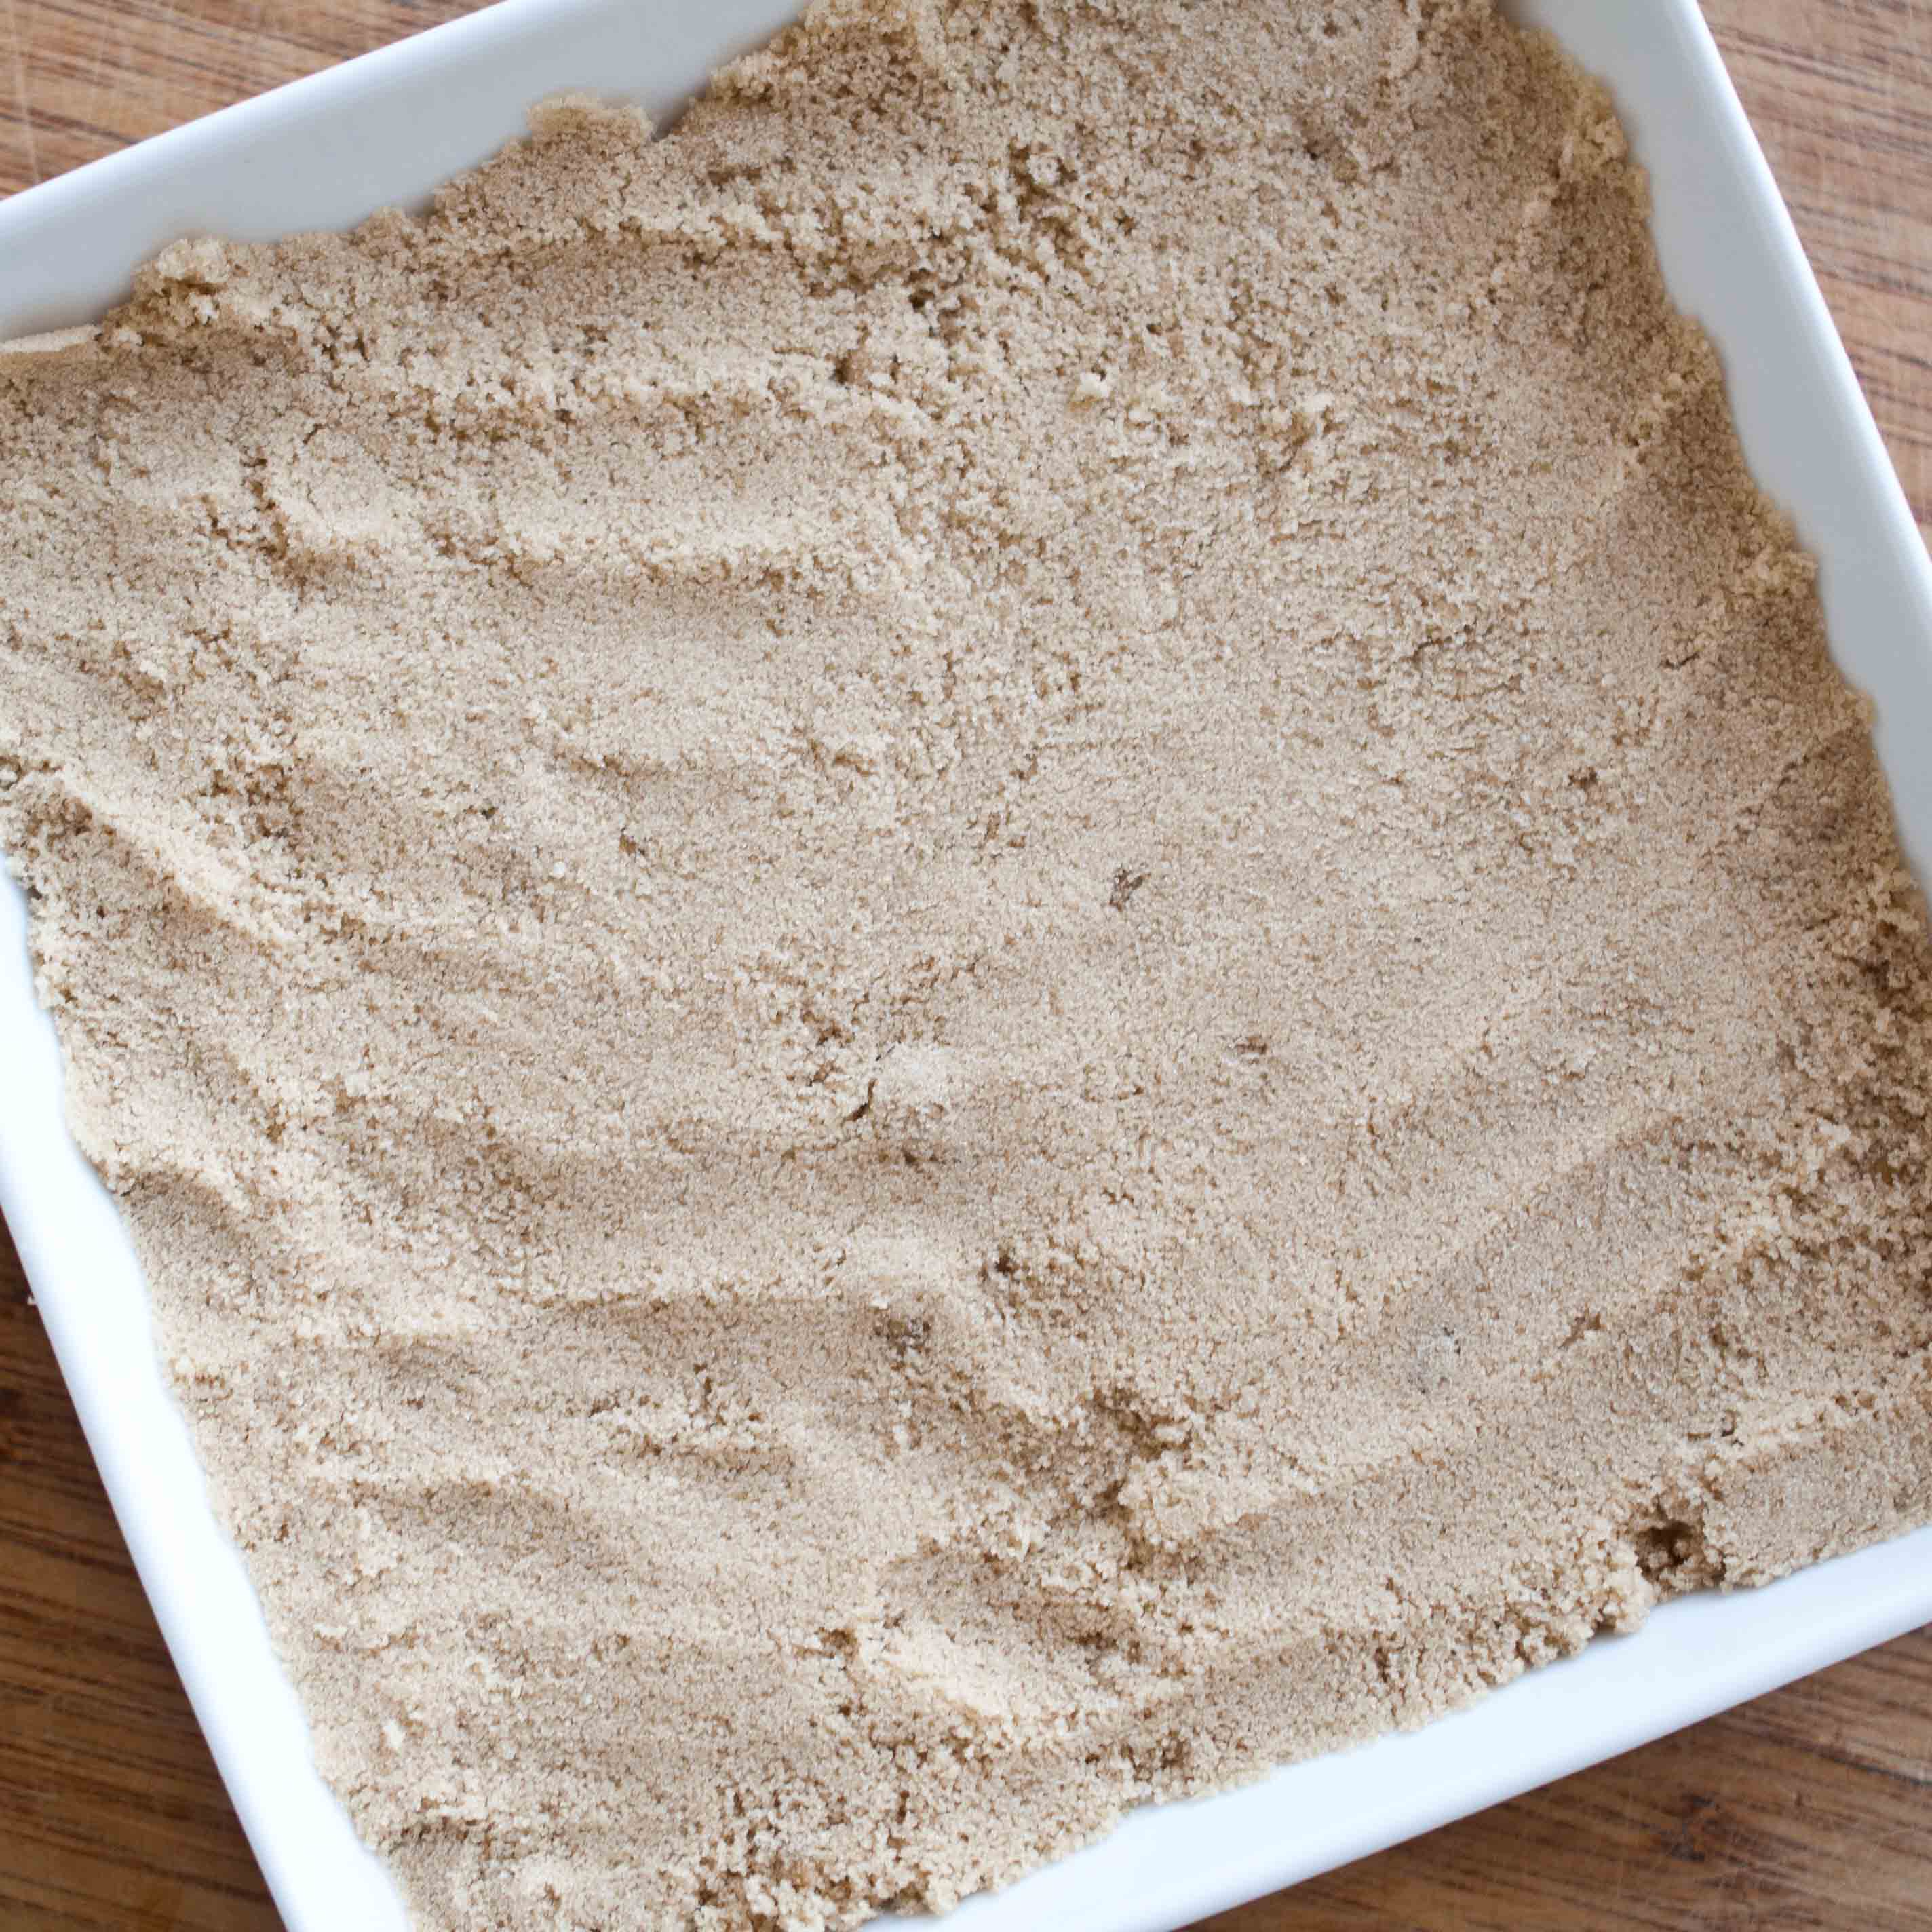
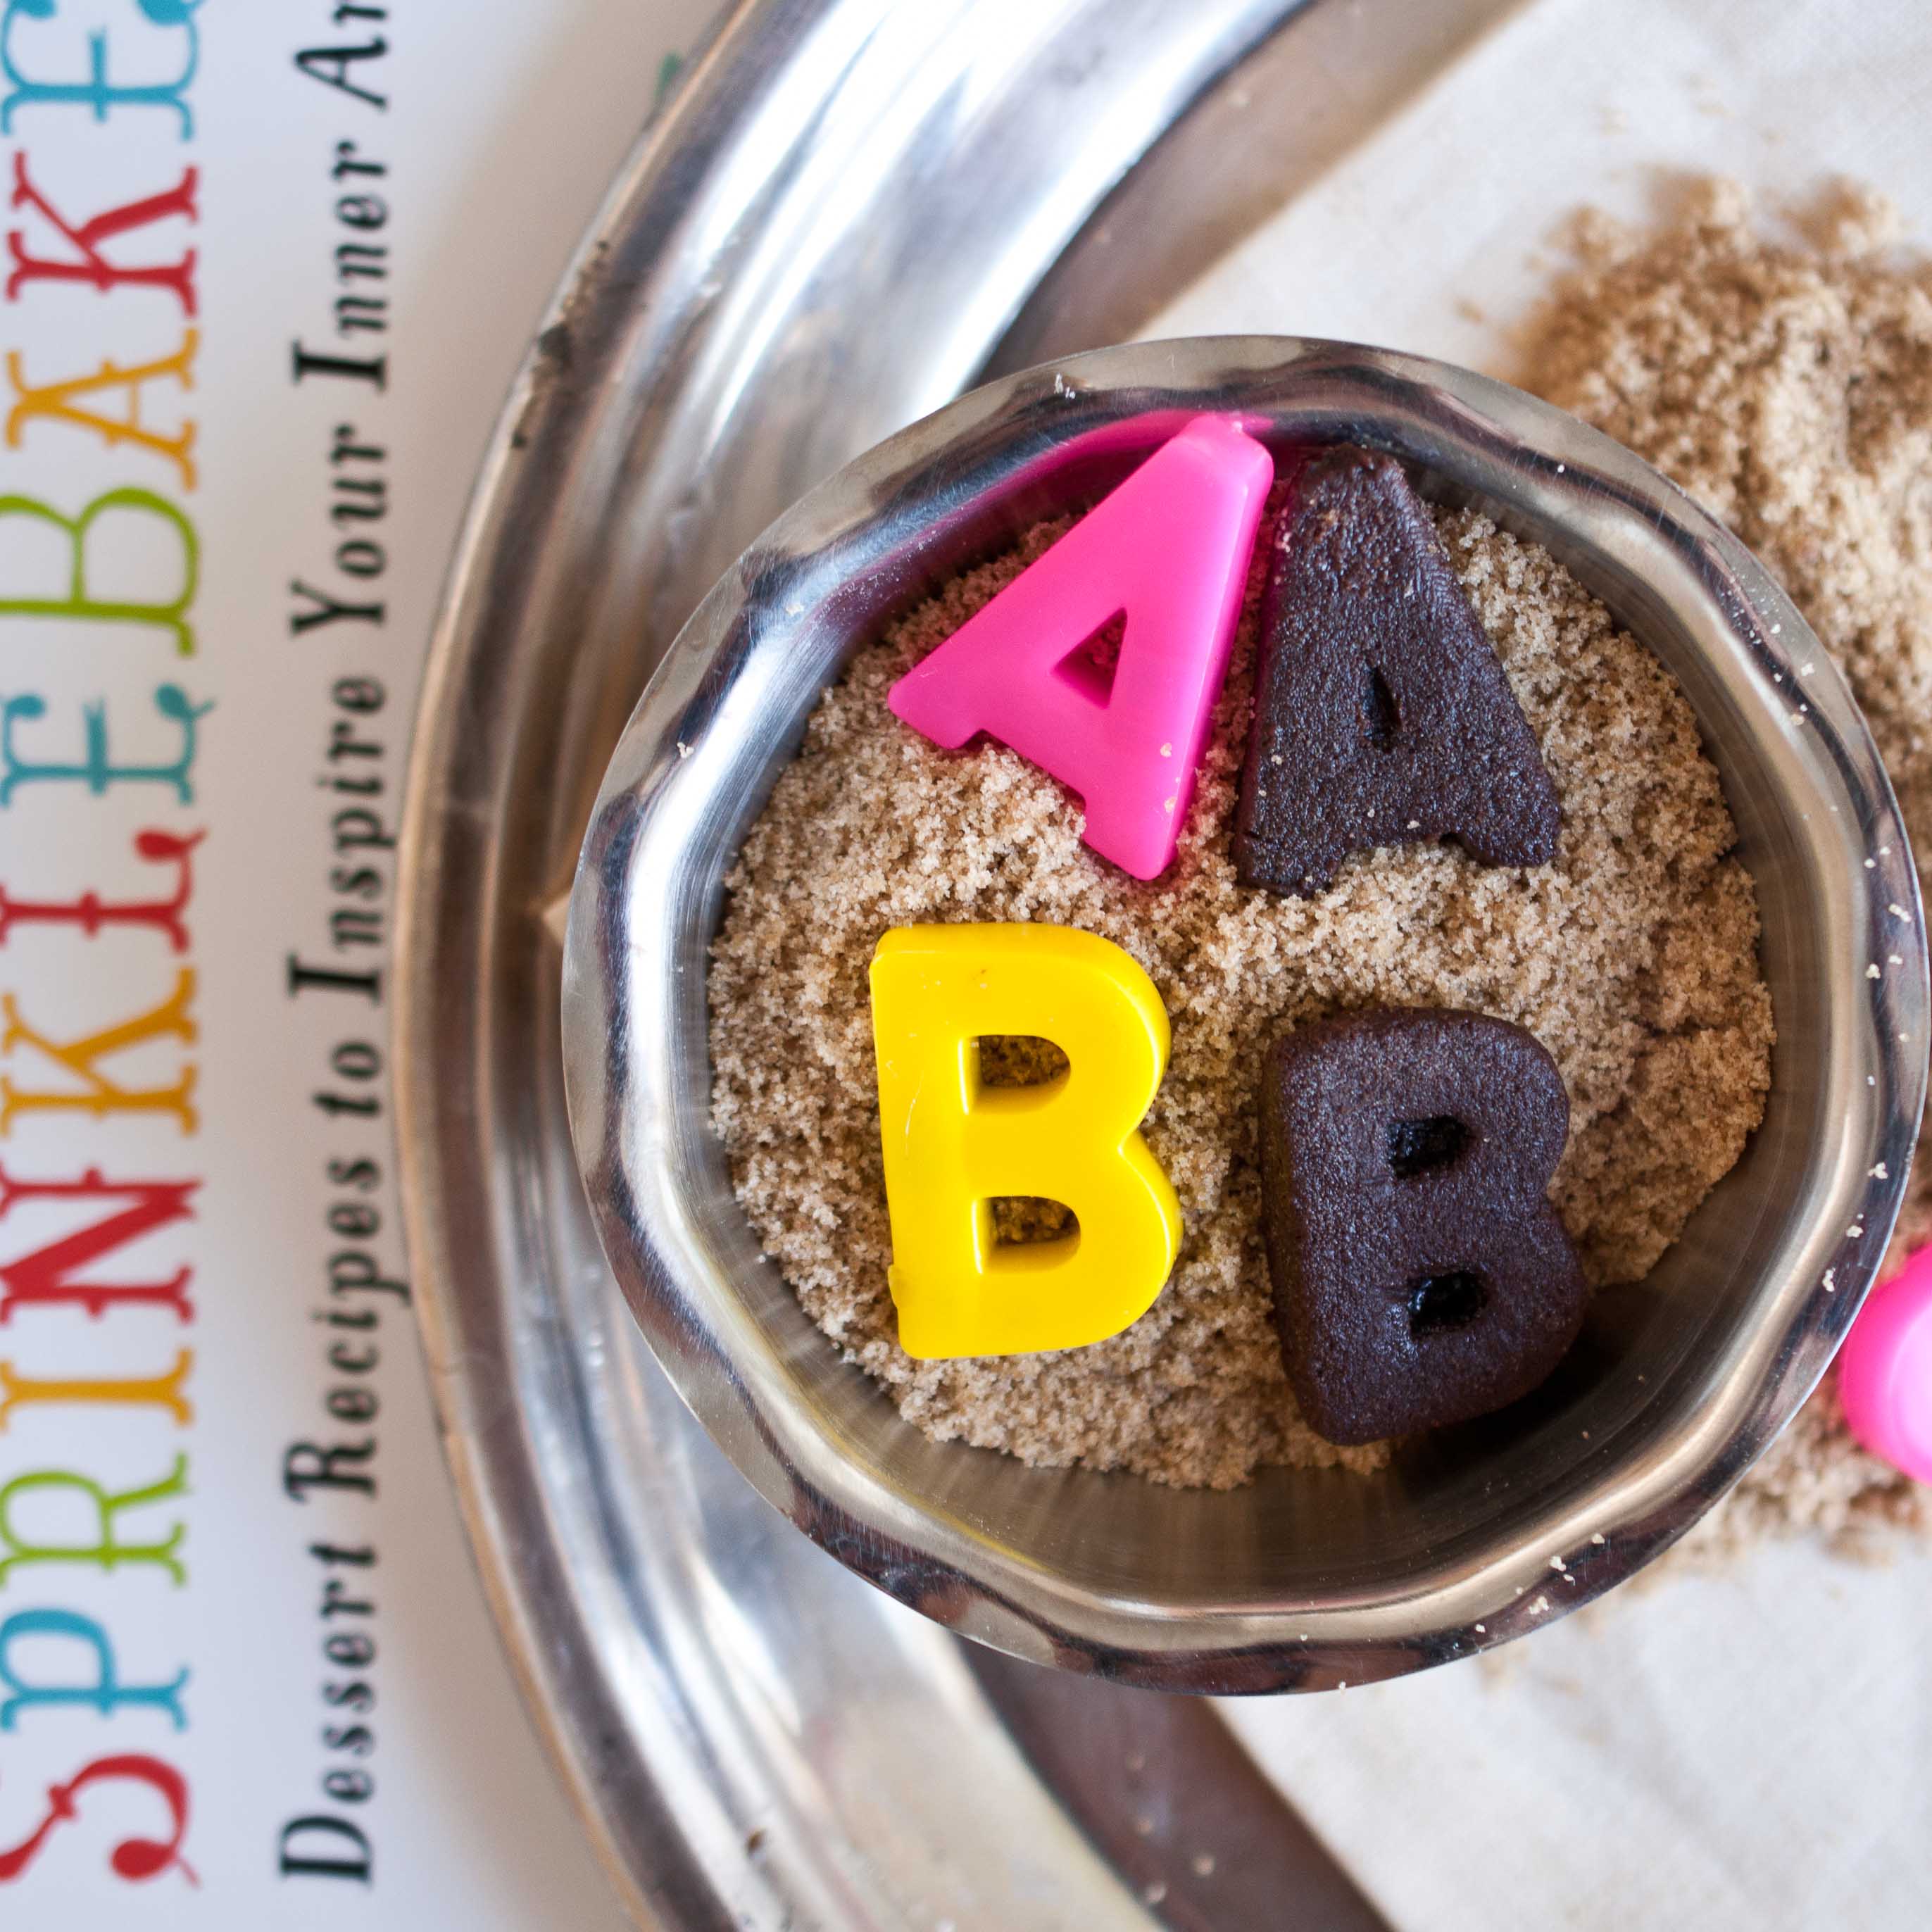
Brown Sugar Chocolate Mold

Step One:

Fill a small bowl with soft brown sugar and pack lightly.

Step Two:

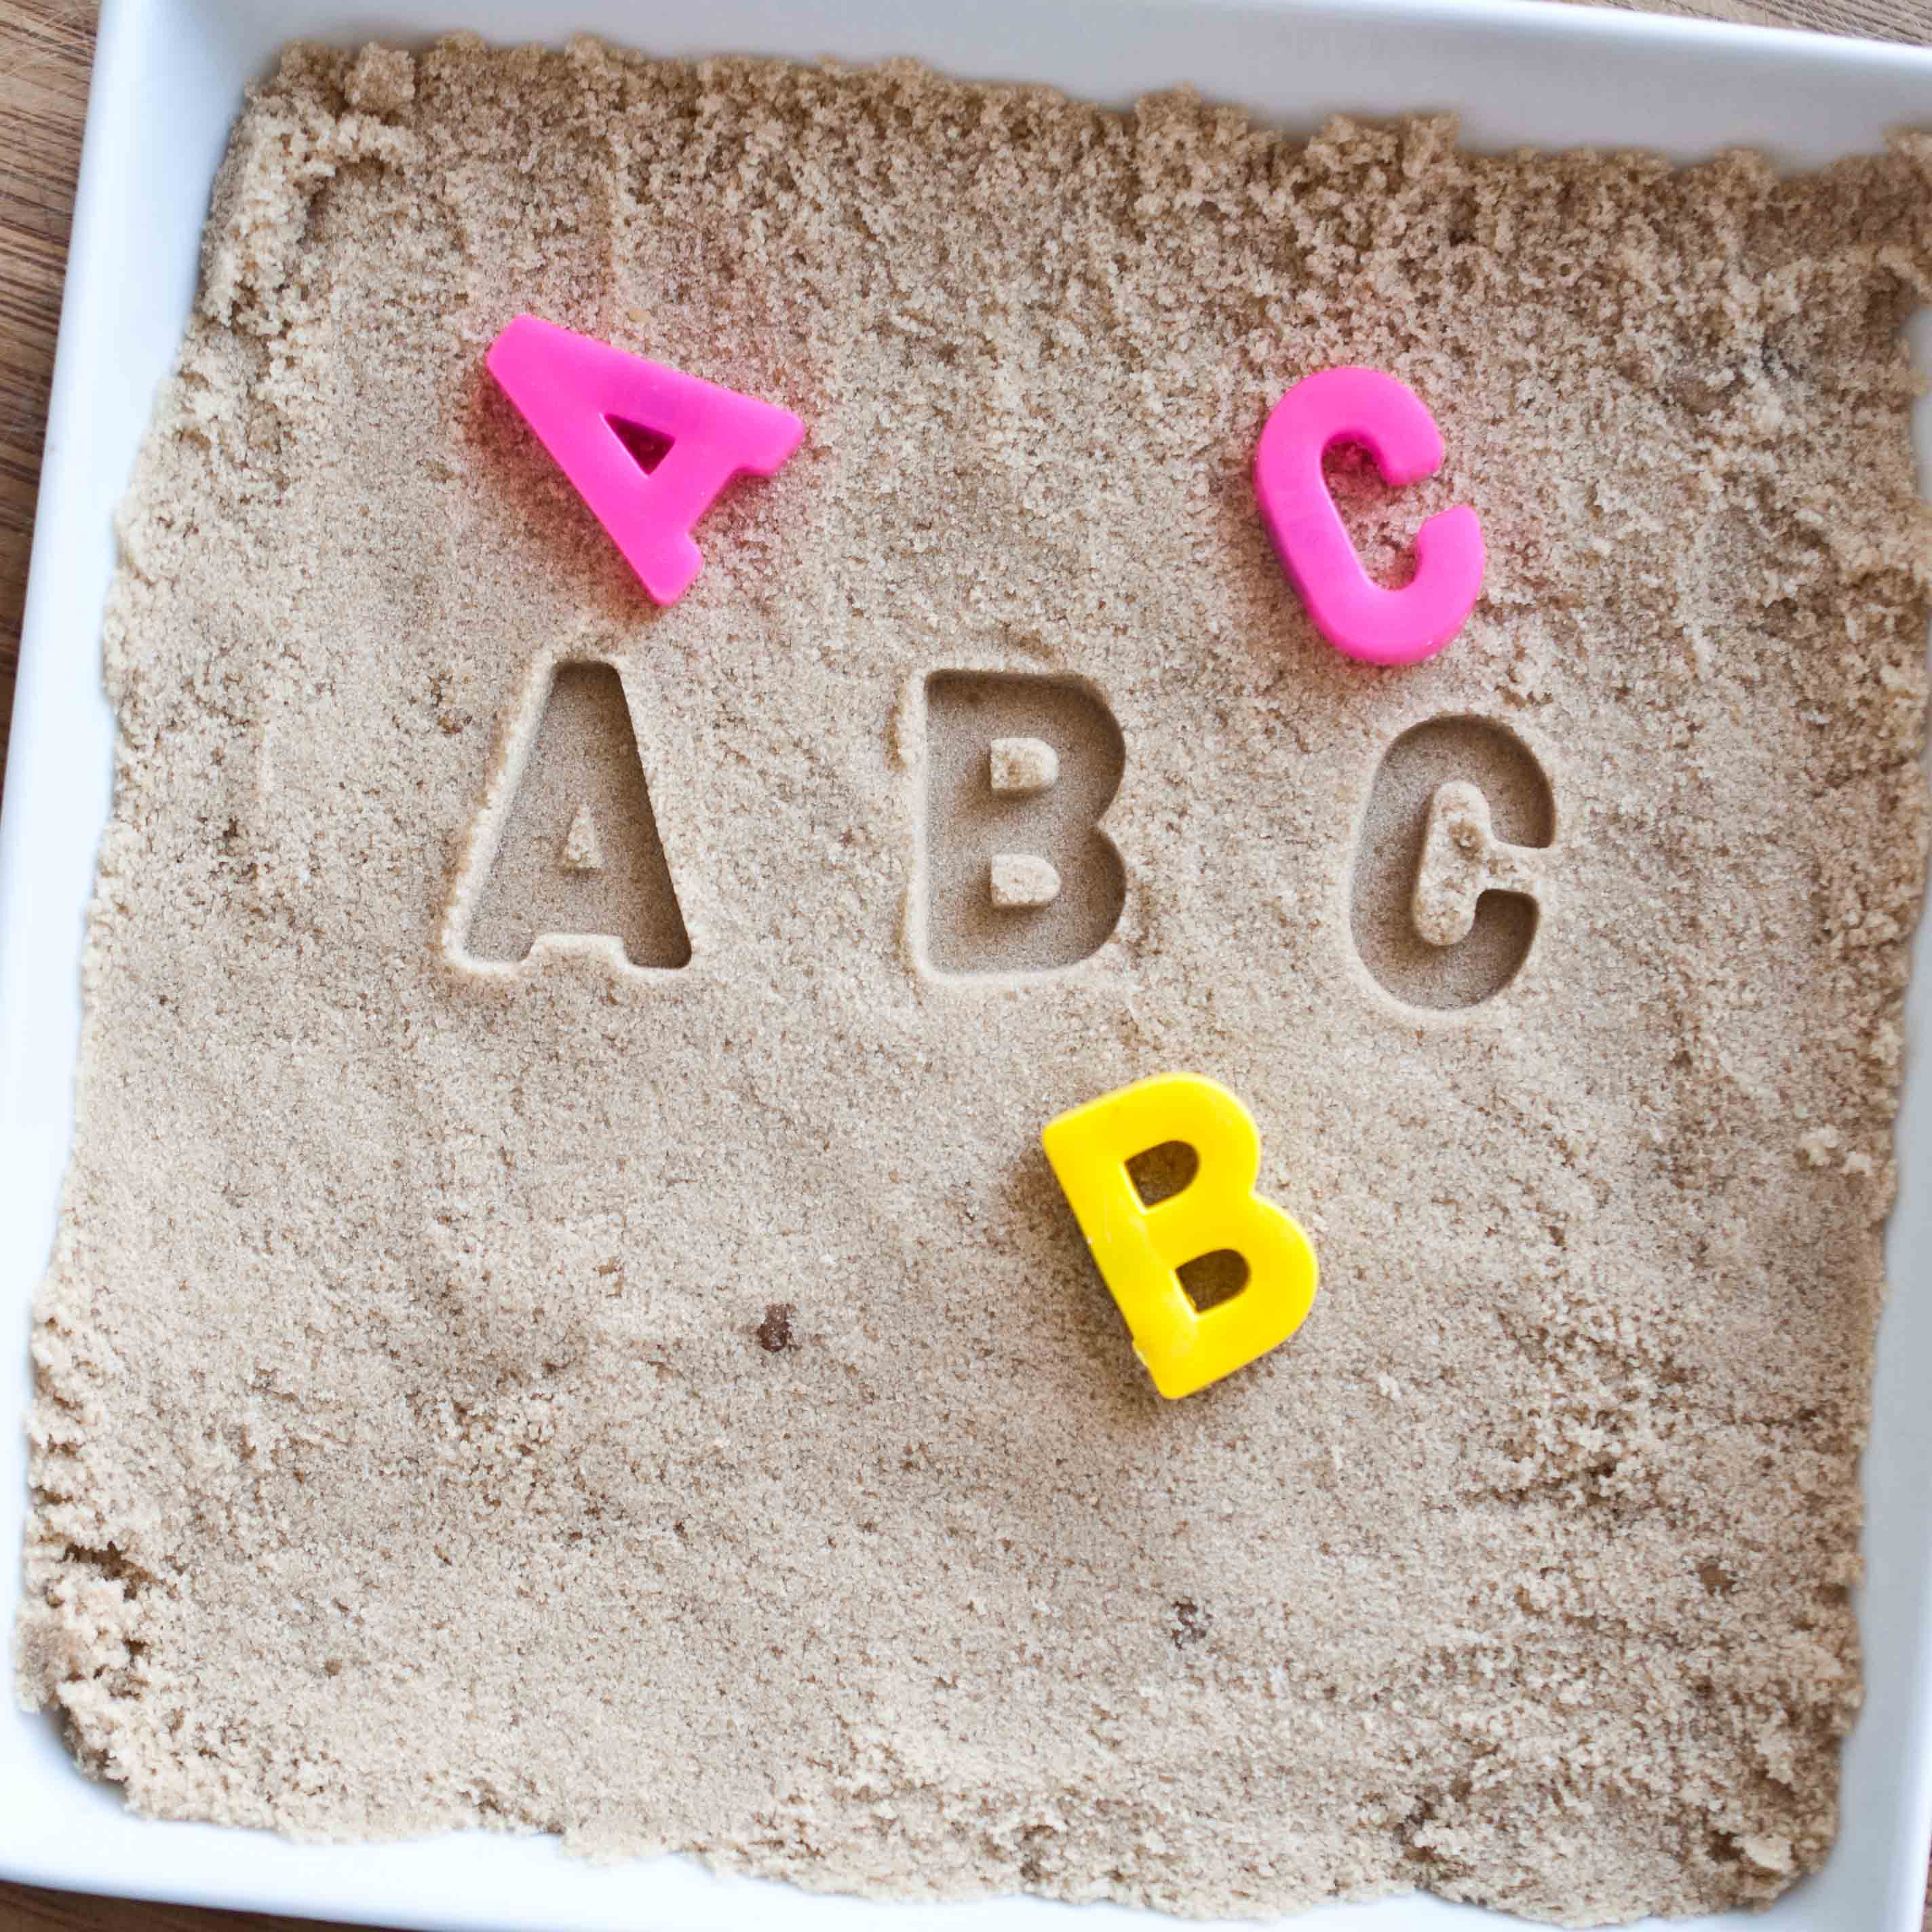
Place your object into the brown sugar and press down, compacting the sugar around the object. Objects that work best are fairly flat, with minimal detail. Heather uses a shell in her book and it turns out great. I used my daughters Alphabet magnets. If it doesn’t look right, remove the object, fluff the brown sugar and start again.
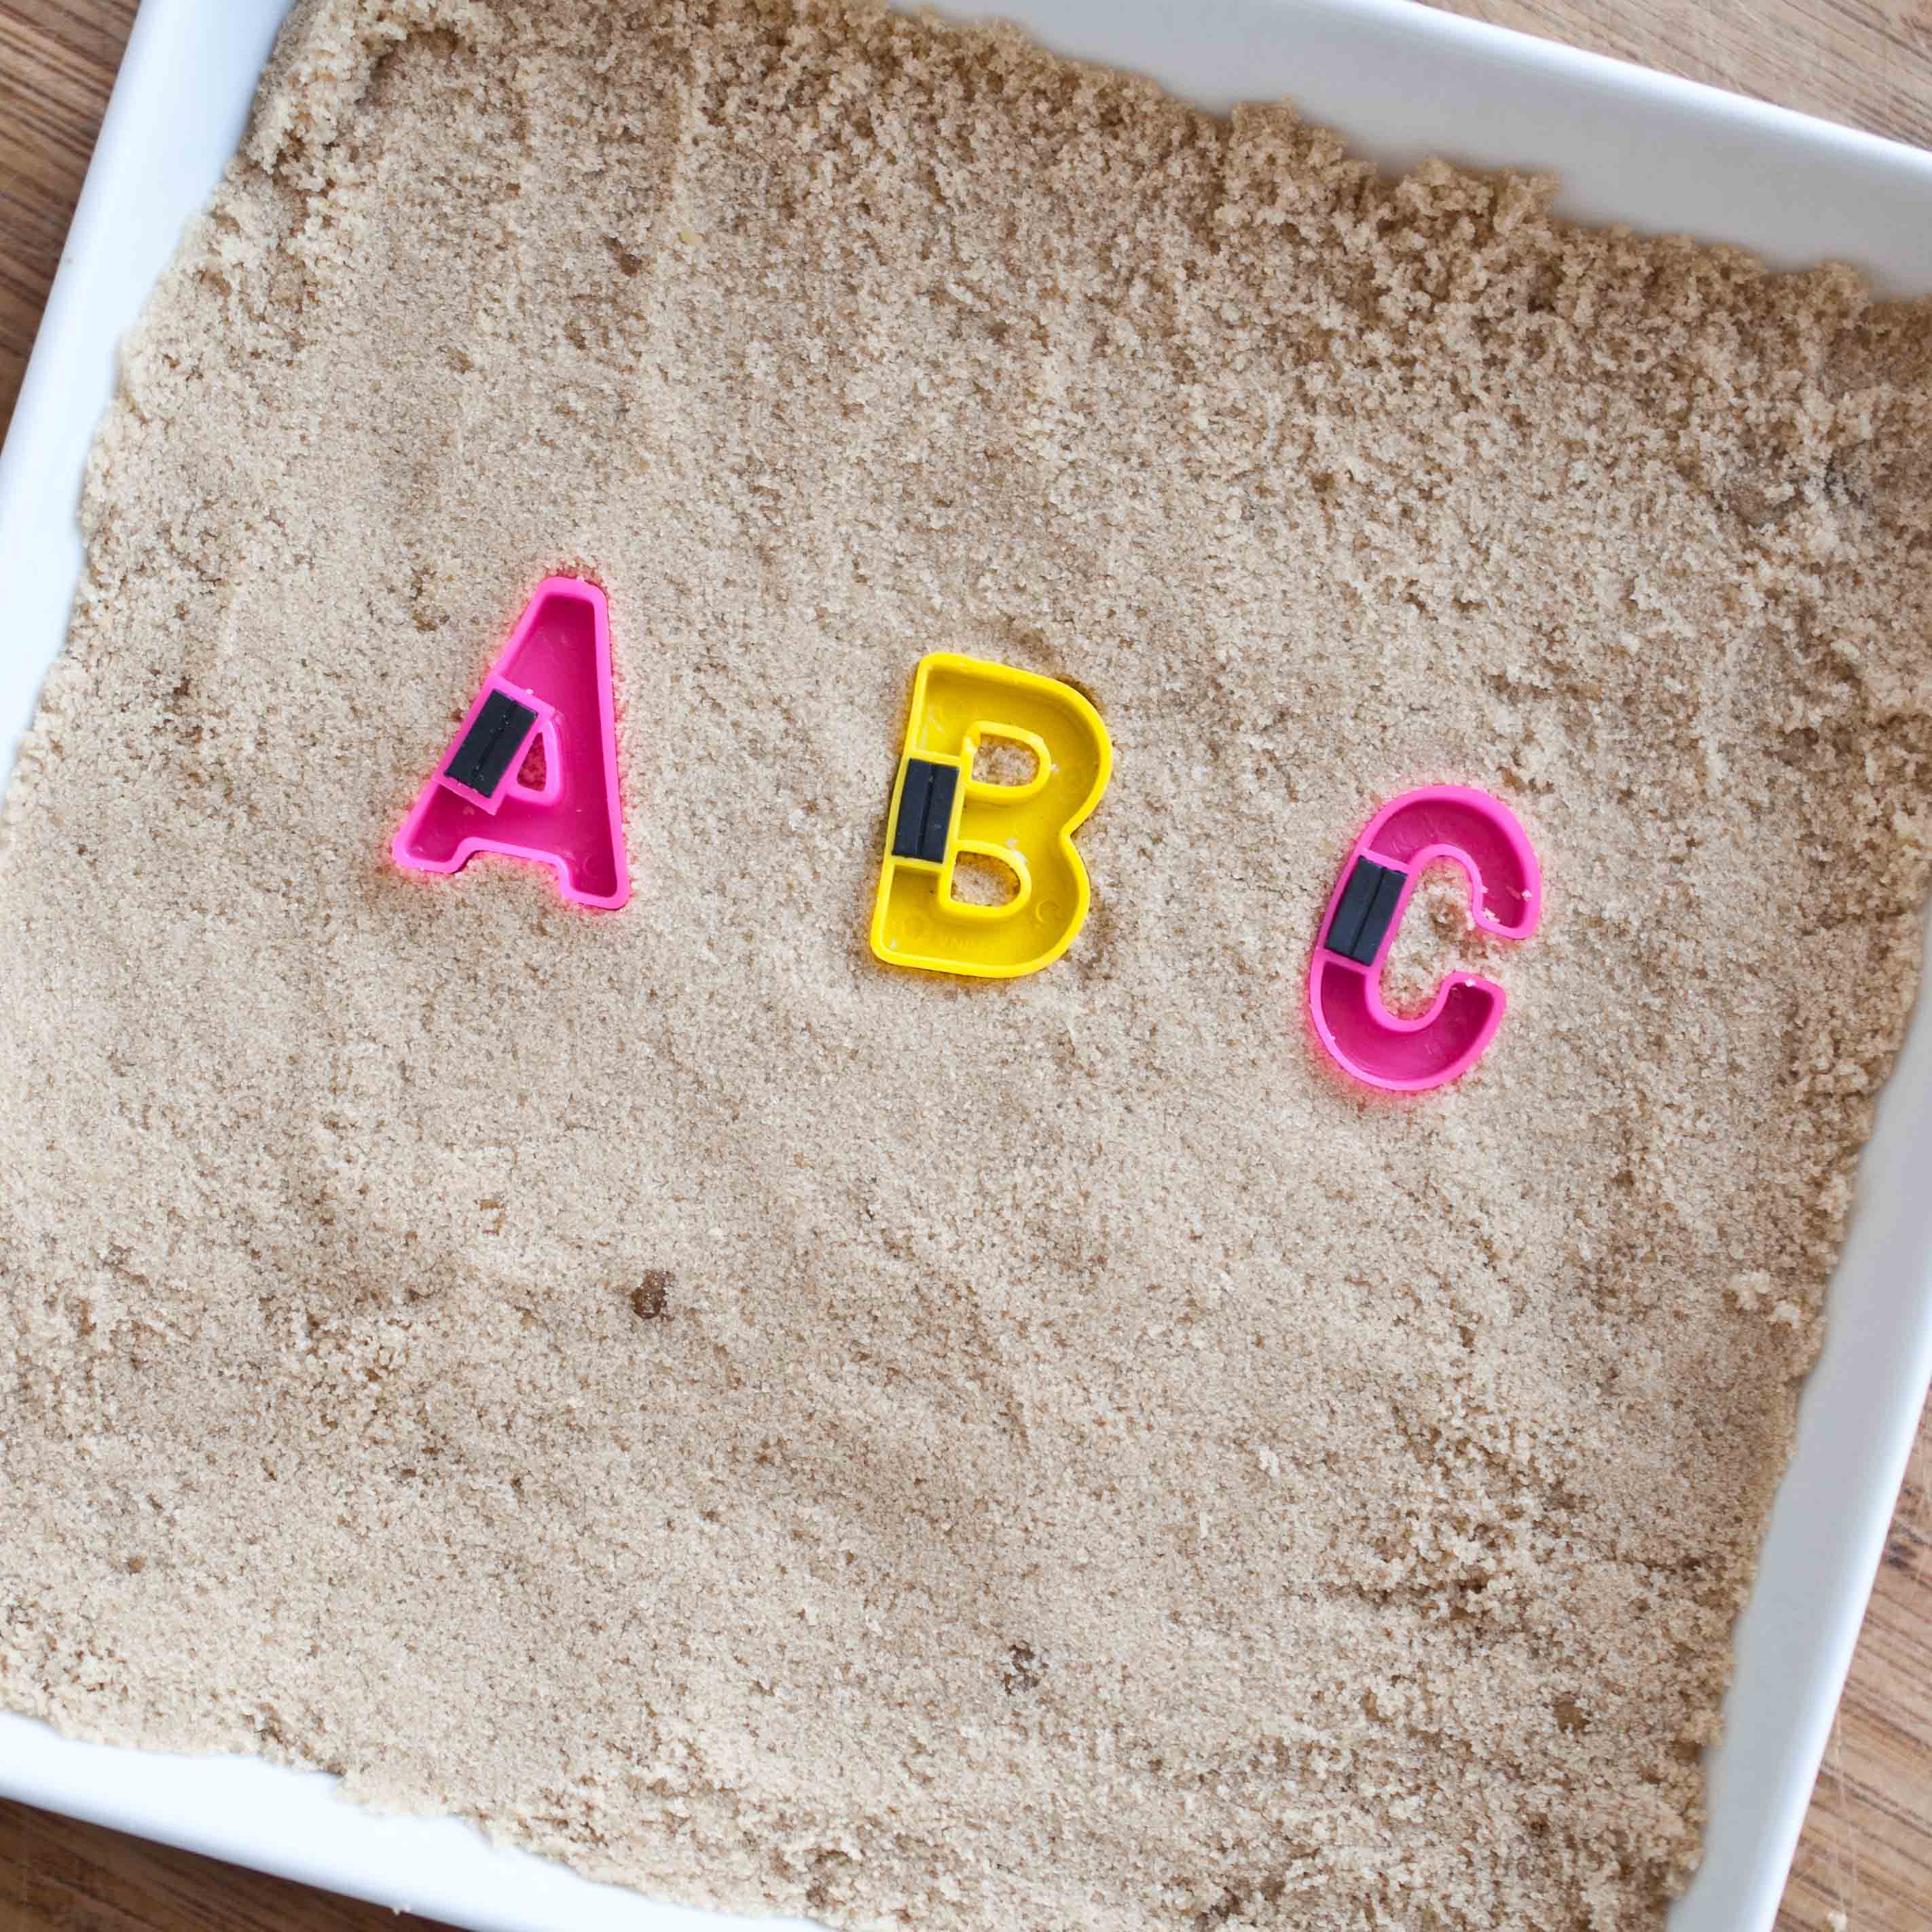
Step Three

Add chocolate chips (or candy melts) to a microwave safe bowl and microwave for thirty seconds, stir and repeat until chocolate is melted. Remove the objects from the brown sugar

Pour the chocolate gently into just the depression made by the object.

How To: turn anything into a chocolate mold using just brown sugar

Step Four:

Place in the refrigerator until set, about 10 minutes. Remove from the brown sugar and dust off as much sugar as you can. Run a very slow, very cold stream of water from your kitchen faucet. Gently run the chocolates under water until the excess sugar has been removed.

How To: turn anything into a chocolate mold using just brown sugar

Things to keep in mind:

These will not be shiny and smooth like those you get from a silicon mold, they will have a bit of a pocked texture. This might be what you want if you are going for a weathered look.

Pin This Post!

SprinkleBakes Cookbook Giveaway!

Win your very own copy of this fabulous cookbook!

All you have to do is leave a comment in the comment section to enter! This makes a great gift for anyone you know who loves to bake, no matter what the skill level.  

Contest ends Monday, June 4th at noon PST.

Contest Only open to residents of the USA.  
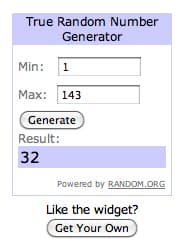
Update: 

Random Number Generator choose #32, Emily!

Congrats Emily!


Herbivoracious Cookbook Review & Caramelized Apple and Blue Cheese Crostini

At a book release party for Michael Natikin’s Herbivoracious I fill my plate past capacity with the gorgeous spread laid out at a Culver City restaurant, his cookbook’s recipes incarnate. It isn’t until I’m halfway though the incredible tasty bites that I realize that it’s vegetarian. Of course it is, its Herbivoracious. This is how I like my vegetarian food, as a celebration of produce rather than and explanation for missing meat. This is what Michael has managed to do, turn out an entire book of recipes so full and beautiful that the addition of animal protein would be an imposition. Recipes that range from perfectly simple to complex and inspirational.  This isn’t a book for vegetarians, or for accepting meat eaters, it’s a book for everyone who loves food.

Cookbooks, in a real life paper and page form, are even more important to me that ever. As I pull out my Grandmothers copy of The Joy of Cooking, with her notes scrawled in the margins with a soft pencil I can feel a connection with her that would have been lost if eReaders had been invented 50 years ago. I feel her in the pages, and she is still able to teach me what I was never able to learn when she was alive. I want this for my daughter, for my future Grandkids, another piece of me to be found in an old box, when they are ready to receive it. Cookbooks should be the last thing to be digitized, you won’t pass down a kindle, make notes in the blank spaces with a number 2 pencil.

But the main reason to buy cookbooks is simple: recipe testing. Cookbook recipes are tested, over and over, to insure that the unchangeable print is perfect. Bloggers make a recipe once, giving online recipes a much higher rate of flaws, my own included. You are our testers and your feedback gives us insight in how we write the recipes and if we later make changes to what we have already posted. With bloggers cranking out up to 10 recipes a week, you can hardly blame us. But cookbook authors take much more time and care, agonizing over measurements, yields, terms and times, getting hundreds of hours of opinions and feedback because once it prints, that’s it. No updating posts, or responding to comments, the recipe has to be perfect.

That is why you should buy cookbooks.

Even if you aren’t a vegetarian, ESPECIALLY if you aren’t a vegetarian, Michael Natikns book is a must own celebration of produce. Buy it, make notes in the margins, and pass it down to endless generation of food loving humans. 

Caramelized Apple and Blue Cheese Crostini

Recipe from: Michael Natkin, Herbvoracious 
Makes 16 crostini
20 minutes

  • ½ cup loosely packed fresh tarragon leaves
  • 2 tablespoons extra-virgin olive oil
  • Kosher salt
  • 16 thin slices of crusty baguette
  • 1 tablespoon unsalted butter
  • 2 small apples such as Pink Lady, cut into 16 wedges
  • Tiny pinch of cayenne pepper (Don’t be afraid of this, it put this dish over the top!)
  • Freshly ground black pepper
  • ¼ cup blue cheese (such as Blue de Causses or Gorgonzola dolce), at room temperature
  • Flaky sea salt (such as Maldon) or large crystal sea salt (such as red Hawaiian salt)
  • (I added a drizzle of raw honey)

1.Preheat oven or toaster oven to 400 degrees.

2. Set aside 32 nice looking tarragon leaves. In a mortar and pestle or mini food processor, roughly puree the remaining tarragon with the olive oil.

3. Brush the baguette slices with the tarragon oil, reserving the crushed tarragon. Toast in the oven (on a baking sheet) or toaster oven until golden brown and crispy, about 5 minutes.

4. Melt the butter in a large skillet over medium heat. Cook the apples on in a single layer, working in batches if needed, until both sides are golden brown and somewhat tender, about 5 minutes. Season with a pinch of cayenne pepper and several grinds of black pepper.

5. To serve, arrange two slices of cooked apple on each crostini. Top with ½ teaspoon of the blue cheese, a speck of the crushed tarragon, two whole tarragon leaves, and a few grains of sea salt. (Drizzle with raw honey, if desired)