
candy

Jelly Belly Makes Beer Jelly Bean

Draft Beer Bean

Beer Candy is a good sign. It’s a sign that these flavors we adore so much are so enjoyable to the mass market that they encourage large and successful companies to spend years developing those flavors into delicious non-alcoholic treats. It’s a win for the beer community.

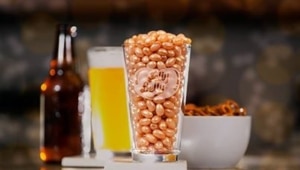
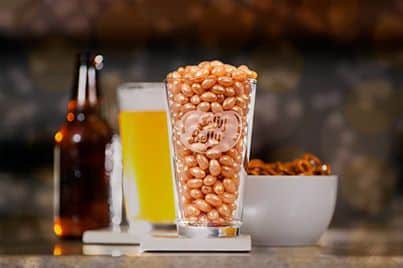
Recently Jelly Belly released a new flavor, Draft Beer, which took three years of tedious flavor development to get right, and they nailed it. It’s first and foremost a jelly bean, a candy that is meant to convey a flavor while pleasing the candy consuming public. But what does taste like?

Jelly Belly Beer Bean Launch Party

 Jelly Belly Draft Beer Bean launch party at 21st Amendment Brewing


It tastes like beer.

But what kind of beer? In the beer community, this is the question that is asked when anything is beer flavored, “what KIND of beer?”

Developing a candy that taste like beer in general is much more difficult than developing a specific beer flavor, the candy has to represent the spectrum as a whole and this is a candy that does that well.

But that’s not enough of an answer for you, you want to know what kind of beer it tastes like.

Sparing you from the Beer Advocate user review taste synopsis, and without using the cringe inducing beer term mouthfeel, here is what those jelly beans taste like:

The smell is more of a pilsner and you get that right away. The initial taste is a bit of a Hefeweizen you get those honey and bready notes, and there is a bit of a cream ale flavor in there as well, and it ends with the taste of a sweet honey like flavor that reminds you that it is, in fact, a jelly bean.

Given that the bean has a great beer flavor, it’s not hard to concoct your own beer styles using the Draft Beer Jelly Belly as a base.

 Jelly Belly Draft Beer Recipes


The worlds first beer flavored jelly beans is worth a try for any beer lover. You can order them at the Jelly Belly online store if you’re curious enough to want to taste them for yourself.

Chocolate Stout Covered Beer Caramels

You aren’t always aware of the nexus of a true obsession. It may only be in hind sight that the catalyst is revealed upon agonizing inspection of your past. For me, however, the spark was breathtaking, an obvious birth of a fixation that lead to this blog. That trigger was Bison Honey Basil Ale. A beer that begged to be turned into Beer Creme Brulee, my first post.

If you enjoy this little blog that I have, and are as fascinated as I am with turning beer into chewable treats, you don’t have me to thank, you owe the lovely folks at Bison Brewery a debt of gratitude. As do I, or course.

For this post, I used Bison Chocolate Stout, an excellent example of the genre.

Chocolate Stout Covered Beer Caramels

Ingredients
  

For The Caramels:

  • 12 oz bottle low hop Pale or Amber ale divided
  • 2 cups white sugar
  • 1 cup light brown sugar
  • 1 cup butter
  • 1 cup heavy cream
  • 1 cup corn syrup

For the Chocolate:

  • 1 1/2 cups 60% dark chocolate
  • 1/4 cup Chocolate Stout
  • 1 tsp flakey sea salt optional

Instructions
 

  • In a large sauce pan over medium high heat, add 1 cup beer (reserve the remaining beer). Allow beer to boil and reduce until thick and syrupy and only about 1 tsp remains, about 20 minutes. Set aside. (Note: if you want a lower level of beer taste, skip this step and substitute the "extract" you have just made with 1 tsp of vanilla extract in the later step that calls for the beer extract)
  • Line a loaf pan with parchment paper, making sure the paper goes up and over the sides of the pan, set aside.
  • In a large sauce pan over high heat add both sugars, butter, cream, corn syrup and remaining 1/2 cup beer. Stir until butter has melted and then stop stirring while the candy boils (you can occasionally swirl the pan), clip a candy thermometer to the side of the pot, taking care that the tip doesn't touch the bottom. Allow to boil untouched until the liquid reaches 244 degrees. The caramel will reach 200 degrees rather quickly,but will take 15-20 minutes to reach 244. The last few degrees climb quickly so stay close to your pot.
  • Once the caramel has reached 244, remove from heat. Add the reduced beer "extract" that you have set aside and stir until the bubbling has subsided. Pour it into prepared loaf pan, allow to sit at room temperature for 10 minutes, then refrigerate until set, about 2 hours. Cut into squares.
  • In the top of a double boiler add the chocolate and the stout, stir over low heat until melted and creamy, about 5 minutes. Don't over heat or your chocolate will seize.
  • One at a time, place the squares into the chocolate with a fork. Roll around until covered, remove and add to a piece of wax paper, sprinkle with sea salt if desired. Once the squares been covered in chocolate transfer the to the refrigerator, repeat with remaining caramel. Chill until set, about 10 minutes.
  • Keep refrigerated.


Join me: Facebook, Twitter

Food Craft: Spring Flower Pot Mini Muffins

I like to play with my food. For some reason, it makes me less hungry.

When I got these little suckers from a vendor at work, I had no interest in eating them. But I did want to play with them. Maybe it’s a commentary on how much food we waste in America, or maybe it’s just because candy is pretty, Food Crafts are huge source of entertainment in my world. Although there are many cupcake toppers featured on websites across the land, I’m not a fan of inedible garnishes. Even if I don’t plan to eat it, it seems like you just didn’t try hard enough.

Sure you can print out a pretty flower decal from your home computer, or make a rose out of paper, or a fancy embelishment with ribbons and buttons, but if you can’t eat it what the heck is it doing on my plate?

No one glues plastic googly eyes to a pot roast. Or puts a wizzard hat on a chicken sandwich. Why are completely random acts of craftiness allowed on baked goods?

And paper flag banners on a cake? weird. Why not put a pile of mail on there, or decorative globe? What’s next, filling my plate with bedazzled paper mache vegetables?

Here is my entry for completely edible cupcake garnish, other than the stick, of course.


Spring Flower Pot Mini Muffins

Supplies:

12 chocolate mini muffins

12 small suckers (dum dum sized)

18 standard size marshmallows

3 microwave save bowls

1/4 cup white chocolate

1 pair scissors

1/2 cup chocolate chops

1/2 cup chocolate graham crackers (or chocolate Teddy Grahams)

Cut the marshmallows into four to five slices. There are going to be a few that just don’t look right, so cut more than you need. They will curl up a bit, but just push them flat.

There will most likely be one end that is a bit more rounded and one that is a bit pointier.

Cut off a very small amount of the pointed end, about 1/8 of an inch.

Place the white chocolate in a microwave safe bowl. Heat in the microwave on high for 20 seconds, stir and repeat until melted. Don’t over heat or it will seize. Using a butter knife or a spoon, smear a small on the marshmallow petal where you just made the cut.

Press the chocolate side against the sucker, at the base, nearest the stick. 

Repeat for all pedals. You’ll want to put about 5 petals on each flower which will require a bit of overlapping of the pedals. 

Lay flat until the chocolate glue dries. 

Put the chocolate chips in a microwave safe bowl and heat on high for 30 seconds, stir and repeat until melted. 

In a food processor, process the graham crackers until nothing is left but crumbs. Transfer crumbs to a bowl. 

One at a time, take the mini muffin and submerge the top in the melted chocolate until completely coated. 

Before the chocolate cools and dries, roll the melted chocolate muffin top around in the graham cracker crumbs. 

Once all the chocolate has dried, plant your candy marshmallow flower in your little mini muffin pot. 

Pin This Post!

Follow me on twitter

Follow me on Pinterest

Like Domestic Fits on Facebook