
Jahresarchive: 2012

Beer Pizza Dough

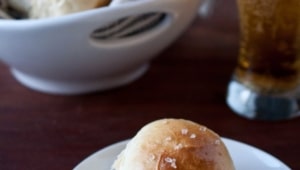
Before we continue with my Beer Pizza Dough post, you have to forgive me for the overly moody dough photos.

I was trying franticly to get them taken before I lost all of the light (damn daylight saving).

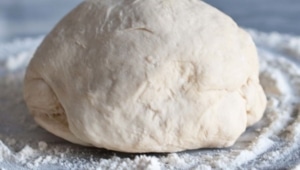
But it could be worse, see:

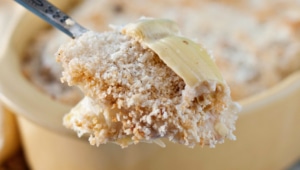
 That pizza dough looks like it should be listening to Radiohead and popping Xanax like Pez.


Anyway, that’s what happens when you try to cram way too much into one day, things tend to get away from you.

Back to the pizza dough.

I’ve been making pizza dough for years, and have yet to publicly put my name on a pizza dough recipe. This one is the best so far. I love crust, it’s the best part. If you make your way to my great little city, the best crusts can be found at Folliero’s, Mozza, Casa Bianca, and Milo & Olive.

I have also learned that if you come early in the day, when there is no rush, most pizza places will sell you some of their dough. Which is great to have on hand.

I also learned a few things in my quest to make kickass pizza at home:

The secrets of freezing pizza dough from The Kitchn

How essential it is to own and operate a pizza stone and a pizza peel (completely worth the money)

Milk, beer, and oil give the dough a depth and complexity that water doesn’t touch.

Bread flour is essential to getting a chewy crust.

Use good ingredients, grate your own cheese, add uncooked toppings (prosciutto, arugula, fresh tomatoes, herbs) after the pizza comes out of the oven to create depth and balance.


Beer Pizza Dough

Servings 1 lbs dough

Ingredients
  

  • 3 cups bread flour
  • 1/4 teaspoon salt
  • 2 teaspoons sugar
  • 1 cup wheat beer
  • 1 packet 2 1/4 teaspoons dry active yeast
  • 3 tablespoon whole milk
  • 1 tablespoon olive oil plus additional for bowl

Instructions
 

  • In the bowl of a stand mixer fitted with a dough hook, add the bread flour, salt and sugar, stir until well combined. In a microwave safe bowl, add the beer. Heat until 110 degrees. Add the yeast and wait 5 minutes or until the yeast foams.
  • Add the beer to the flour and stir until incorporated. Add the milk and 1 tablespoon oil, stir with the dough hook until it forms a sticky ball.
  • On a lightly floured surface, knead until smooth and no longer sticky.
  • Coat a large bowl with oil. Add the dough, cover and refrigerate for 12 hours or until doubles in size.
  • Punch down the dough and reform into a tight ball. Cover and refrigerate for another 8 to 12 hours and up to 3 days.
  • To bake, place a pizza stone in the oven and preheat to 425 for at least a half an hour prior to baking pizza.
  • Roll out the pizza dough to about the size of your pizza stone. Sprinkle a pizza peel with corn meal. Transfer the dough to the pizza peel. Top with your desired toppings, lots of them.
  • Open the oven and carefully transfer the pizza to the pizza stone. Bake for 8-12 minutes or until golden brown.

Deep Dish Apple Streusel Pie


This was the big winner at Thanksgiving.

It was the first to be devoured, even before the impromptu poker game ended. And, I’m not gonna lie, having every guest who ate it say, "Oh my GOD. This is so good" is really awesome.

When you are trying (fairly desperately) to wedge your way into the food world, there are certain expectations that people have when you make a dish.

The bar is pretty high.

And to be honest, I’m always nervous. Just like the feeling I get when a friend of mine says, "I’m going to make one of the recipes off your blog!"

I was so relieved when Thanksgiving turned out great. These rolls were so good they were second to be polished off, and this Beer Brined Turkey was the best I’ve ever made. Even though it was the same recipe I used last year, it was even better this year.

And the secret to the best potatoes ever is using an ungodly amount of butter. Like, several sticks. And some sour cream.

But this pie. THIS pie will now be the way I make apple pie. And making it in a spring form pan just makes it look incredibly impressive.


Deep Dish Apple Streusel Pie

Ingredients

For The Crust:

  • 1 ½ cups flour
  • ½ tsp salt
  • 1 tbs sugar
  • 1 stick of butter, cold, cut into cubes
  • 2 tbs shortening
  • 1/4 cup beer (or 2 tbs water and 2 tbs vodka)

For The Filling:

  • 7 large Fuji apples, peeled, cored and thinly sliced (about 9 cups)
  • 3 tbs lemon juice
  • 2 tbs flour
  • ½ cup brown sugar
  • ½ tsp salt
  • 1 tsp cinnamon
  • 1/2 tsp nutmeg
  • 1 tbs honey

For The Topping:

  • 1 ½ cup flour
  • ½ cup quick oats
  • ½ cup white sugar
  • ½ cup brown sugar
  • 1 tsp cinnamon
  • ½ tsp salt
  • 1 ½ stick chilled butter

Instructions

  1. In a food processor, add 1 cup of flour (reserving the other ½ cup) salt, sugar and pulse to combine. Add the butter cubes and the shortening, process until combined. Add the remaining ½ cup of flour, process until well incorporated.
  2. Transfer to a bowl, add the beer and mix until combined. Dough will be very soft. Form into a wide flat disk, wrap in plastic wrap and chill for at least 2 hours.
  3. Roll out dough on a lightly floured surface, transfer to a 9-inch spring form pan (This recipe makes way too much for a regular pie pan), press into shape. Remove the excess. Chill until ready to use.
  4. Preheat oven to 350
  5. In a large bowl combine all of the filling ingredients.
  6. Pour into the crust.
  7. In a food processor, add the topping ingredients, pulse until combined.
    Grab handfulls and press together into a ball. Grab pea sized pieces and spread over the top.
  8. Bake at 350 for 35-40 minutes or until golden brown.


Deep Dish Porter Pecan Pie

The best thing happened on Thanksgiving.

Just about 18 hours prior to Turkey Tip-Off, my small gathering of 4 people more than tripled into a 14 person party that ended in cocktails, poker, and eating pie right out of the pan. How great is that?

I was happy with the idea of a small gathering, sometimes those can be the best nights. But the fact that I have such an over abundance of food in my kitchen right now and dozens of recipes to be cooked and tested, I could not have been happier about the influx of last minute hungry visitors.

And a Thanksgiving that morphed into a Poker Night, complete with impromptu costuming and teaching my friends 8-year-old how to bluff, was one of the best Thanksgivings I have ever had. Although I was seriously caffeine deficient the next day, and zero percent productive.

I may, or may not, have consume an entire bottle of wine by myself.

 I used a chocolate porter for this recipe, and of course, a stout would work well also. BUT now that I sit here staring at these photos, I wish I’d have used something that had been aged in bourbon barrels. How great would that be?


Deep Dish Porter Pecan Pie

Ingredients
  

For the Crust:

  • 1 ½ cups flour
  • ½ tsp salt
  • 1 tbs sugar
  • 6 tbs of butter cold, cut into cubes
  • 2 tbs shortening
  • 2 tbs ice cold beer high ABV works best

For the filling:

  • 1 cup porter beer can sub stout
  • 2 cups brown sugar
  • 2/3 cup light corn syrup
  • 2 tbs flour
  • 3 cups chopped pecans
  • ½ cup heavy cream
  • 1 stick butter cold, cut into cubes
  • 4 eggs

Instructions
 

  • In a food processor, add 1 cup of flour (reserving the other ½ cup) salt, sugar and pulse to combine. Add the butter cubes and the shortening, process until combined. Add the remaining ½ cup of flour, process until well incorporated.
  • Transfer to a bowl, add the beer and mix until combined. Dough will be very soft. Form into a wide flat disk, wrap in plastic wrap and chill for at least 2 hours.
  • Roll out dough on a lightly floured surface, transfer to a 9-inch deep-dish pie pan, press into shape. Remove the excess. Freeze crust for 20 minutes.
  • Preheat oven to 350.
  • In a pot over medium high heat, add the beer, brown sugar and corn syrup. Allow to simmer until combined and the sugar has melted. Sprinkle with flour, whisk until well combined. Remove from heat, add pecans, heavy cream and butter. Stir until well combined and the butter has melted. Allow to cool to room temperature before adding the eggs. In a separate bowl, whisk together the eggs. Slowly add the pecan mixture to the eggs, whisking the eggs the entire time.
  • Pour filling into crust, bake at 350 for 50 minute to an hour or until the filling no longer jiggles when you shake the rack it sits on. Chill until the filling has set, about 2 hours.
  • *Note: This recipe is for a deep-dish pie pan. The filling is too much for a regular pie pan.

Oven Steamed Salmon with Blueberry Balsamic Reduction

Every once in a while this happens. I made a recipe I love, and then it sort of slips away and never gets posted. This is one of those recipes. I can’t even remember why it didn’t get posted, maybe because I don’t really like the photos (sorry my ego got in the way of sharing a great dish with you .)

But I DO remember really loving it. Not just because it had a ton of flavor, and was really delicious, but because it’s low calories, naturally dairy and gluten-free AND it is packed with an insane amount of antioxidants, heart healthy foods, and that good stuff we need to shove into our bodies after the collective gluttony we all gleefully participated in over the past few days.

It’s like detox, but really, really delicious.

To be honest, the only reason I remember that it was buried in the recesses of my Dropbox, is an email I got from a PR person at the Blueberry Councill about a recipe contest. And although I have been drawn to a recipe contest or two in my day, I really don’t have the time for that right now. SO, it seemed to be fate that I had one. A really fabulous, healthy and delicious blueberry recipe all ready to go. So thank you, Blueberry Council, for the fabulous berries and the timely reminder.


Oven Steamed Salmon with Blueberry Balsamic Reduction

Ingredients

For the Salmon:

  • 4, 3 oz Salmon Filets, skinless
  • 2-3 cups low sodium vegetable broth

For the Sauce:

  • 1 medium shallot, minced (about 1 tbs)
  • 1 tsp olive oil
  • 1 cup fresh blueberries
  • ¾ cup balsamic vinegar
  • ½ tsp black pepper

For the Salad:

  • 1 ½ cups cooked quinoa
  • 1 cup chopped arugula
  • ½ cup shelled Edamame beans
  • ½ cup dry roasted almond slivers
  • ½ tsp sea salt

(Makes 4 servings)

Instructions

  1. Place a wire rack over a rimmed baking sheet , place the salmon fillets on the rack. Pour the vegetable broth in the bottom of the baking sheet, making sure that the broth does not submerge the wire rack. You want at least 1/2 inch between the liquid and the top of the wire rack.
  2. Cover the baking sheet with aluminum foil, making sure to tent the foil over the salmon so that the foil does not touch the fish at all. Secure tightly, in order to trap the steam inside the foil.
  3. Bake for 15-18 minutes or until the salmon flakes easily with a fork.
  4. In a pan over medium high heat, add the oil and allow to get hot but not smoking. Add the shallots and sauté until opaque. Add the blueberries and balsamic, reducing heat to maintain a low simmer. Cook until reduce until about half, and thickened. Remove from heat and stir in the black pepper.
  5. Combine all of the salad ingredients in a bowl and toss to combine. Divide the salad among four plates. Top the salad with a salmon fillet and top each salmon fillet with the blueberry balsamic reduction.

Five Thanksgiving Leftovers Recipes


It’s the day before Thanksgiving and I am already thinking about the leftovers.

I will not be participating in Black Friday.  Unless it takes place in my refrigerator, I will be staying far, far away from any post-thanksgiving debauchery. Besides, I plan to make most of my Christmas gifts, but more on that later.

Here are my favorite uses for Thanksgiving leftovers:

1. Empanadas. A simple dough (or even store bough pie dough) can transform your leftover food into adorable and portable mini savory pies. Also handy to take along on those epic shopping ventures, for those of you who participate in that sort of thing.

My favorite combos: Turkey & Mashed Potatoes, Green Bean Casserole, Candied Yam, Stuffing & Cranberry

More directions on making Thanksgiving Leftover Empanadas Here.


2. Turkey Galette. Use a standard dough, or a store bought pie crust. Roll it out, add your leftovers, fold the edges in and bake at 400 until the dough is cooked, about 35 minutes. Top with some fresh greens and you are good to go.


3. Salad. Seriously, we all need some detox right about now.


Cook 1 cup quinoa (use these directions to cook the quinoa, the package directions make it soggy)

Add 2 cups chopped kale

1/2 cup chopped cooked turkey

2 tbs dried cranberries

2 tbs chopped black olives

1 chopped yam, cooked

3 tbs balsamic & 1 tbs honey, mixed together


Toss everything in a bowl. Makes about 4 servings.


4. Turkey Grilled Cheese.

Not a lot to explain here. Just load some bread up with turkey, lots of cheese and pan fry until gooey, melty and amazing.


5. Turkey Sliders

Split open on of those left over rolls (or maybe the biscuits from breakfast) load it up with left overs and you just made yourself a cute little sandwich.

Or toss some leftover turkey in some BBQ sauce, fill a dinner roll and it’s like a brand new food.


Beer Cheese Wontons


This recipe has nothing to do with Thanksgiving.

I love Thanksgiving, really. It’s my favorite holiday, due in no small part to the fact that it is a day devoted to a gluttonous love of food. And no presents are exchanged. I’m not sure what it is about those present exchanging holidays that makes me nervous. I’ve never been a girl who is comfortable with receiving gifts. I love to give them, completely love it. But having someone watch me open a gift, I can’t help but feel completely self conscious about my reaction which I assume to be sub-par.

I know. If you haven’t noticed, I tend to over think things.

Which makes my love for Thanksgiving FAR exceed any feelings I have for Christmas. I get to make significantly more food than will ever be consumed, and no one will be attempting to decipher my reaction as I peel away the wrapping of a hand selected present.

Starting sometime in the next 36 hours, I will start preparations for the following dishes: This turkey, These rolls, this Mac n Cheese, something similar to this pie, and this pie too. As well as about 6 other dishes that will create a disgusting surplus of food.


And then, we will all be back to making football food, like portable beer cheese dip.


Beer Cheese Wontons

Ingredients
  

  • 4 oz cream cheese
  • 1/4 cup sour cream
  • 1/4 cup parmesan cheese
  • 1 tbs corn starch
  • 1/2 tsp smoked paprika
  • 1/4 cup beer
  • 1/2 tsp sriracha
  • 1/4 tsp garlic powder
  • 1/2 tsp salt
  • 24 wonton wrappers
  • 2 tbs green onions chopped
  • 1/4 cup canola oil

Instructions
 

  • In a food processor combine the first 9 ingredients (everything except the wonton wrappers, green onions and the oil), process until well combined.
  • One at a time, place the wonton wrappers on a flat surface. Using your fingers or a pastry brush, wet the edges or the wrappers with water.
  • Place about 1 tbs of filling in the center of the wrapper. Sprinkle green onions on top (about 1/4 tsp).
  • Fold wrapper over to create a triangle, press the edges together until very well sealed. Brush the bottom of the triangle with water and fold the corners into the center and press into shape.
  • Heat oil in a pan over medium high heat until hot but not smoking. Adjust heat to make sure it does not get to the smoking point, or the wontons will burn.
  • Carefully add wontons to the hot oil, cooking until golden brown, about 2 minutes per side.
  • Serve immediately, wontons will get soggy if they sit.


Creamy Goat Cheese Dressing


"Do not regret growing older. It is a privilege denied to many." –-Unknown

It’s my birthday today.

Although I’m taking a few minutes to type this up, I get to spend the day with my Husband and daughter.

For me, birthdays are a bit like Thanksgiving, which is fairly fitting seeing as that my birthday often falls during the same week. Maybe it’s because my Dad died in his 20’s, or because I am by nature a grateful person, but birthdays make me feel lucky. Another years worth of experiences and knowledge under my belt.

Time to set some goals and remember the ones I’ve accomplished over the past year. This time last year I was contemplating writing a book proposal, and just two weeks ago I signed my first (yes, first, of what I hope to be many) book deal.

This year my goals are more personal:

1. Learn how to say no without feeling guilty.

2. Know my value and how to ask for it without apologizing (as in, stop doing so much work for free!)


So, seriously, help me out. I might need some accountability with those two.


Creamy Goat Cheese Dressing

Ingredients

  • 1/4 cup buttermilk
  • 1/4 cup sour cream
  • 2 tbs fresh lemon juice
  • 1 tsp fresh cracked black pepper
  • 1/2 tsp sea salt
  • 2 tbs chopped chives
  • 4 oz crumbled goat cheese
  • 2 tbs milk (if needed)

Instructions

  1. In a bowl, whisk together the buttermilk, sour cream, lemon juice, pepper, salt and chives until well combined. Add the goat cheese and stir, leaving some of the goat cheese lumps intact. Add remaining milk to thin if desired for a thinner consistency.


Oh, and don’t forget to enter to win $250 from California Strawberries. Details here!


Mini Drunken Pumpkin Coconut Pies


Have you ever served on a jury?

I have. A few years ago I was put on a federal case at the Los Angeles court house. The defendant was a smarmy little man who was, without a doubt, about a thousand percent guilty of smuggling 3 million dollars worth of Ecstasy into the country using teenage drug mules.

For two weeks I had to watch him represent himself, after firing his public defender, and very poorly and arrogantly cross examine those miserable teenage girls who had come to testify against him as well as anyone else who took the stand. At one point, the detective who had spent the better part of the previously year building a case against him took the stand to defend the piles and piles (quite literally) of evidence against him, most of which was collected in his home.

"well,do you have picture of me with these alleged drugs? or with the alleged thugs?"

The detective responded with, "First, the drugs are not alleged they are real and right on that table. Second, No, I did not take a picture of you with any drugs, or thugs, or in a box or with a fox. Doesn’t make you any less guilty."

I laughed so hard, and for so long it required a shushing for the judge. I was LOUDLY shushed by the oldest man I had ever seen still earning a living. A man who fell asleep twice the first day of trial.

Later that day, after I had composed myself, I looked over to see Old Man Judge flipping through a sketch book of artfully drawn pictures of naked women. I was probably the only one who could see the cartoon style smut, I was seated in the far top seat of the Jury Pit, closest the judge. Ok, I’m sure "Jury Pit" isn’t the right term, but it was either that or  "Judicial Dugout." Please, let me know if you know the real term.

The first thing I think is, "You MUST be old, your porn is hand drawn!" The second thought was, "I can’t believe he doesn’t have to pay attention to this, but I do."

At the end of a very long 2 weeks, we found Smarmy Drug Dealer very guilty, and I found later that he confessed to it all.

Why am I telling you ALL of this? Because, other than the pen and ink peep show, the most surprising thing about serving on a jury is how exhausting it was. I was SO tired at the end of the day, after doing nothing more than just sitting there forcing myself to listen to terms like bifurcate and per curiam.

And as I start to write this cookbook and I spend the entire day forcing creativity to get out of my brain and into my KitchenAid, I am exhausted at the end of the day. Really, not as surprising a 90-year-old man asleep on the job atop parchment inscribed with a nude Botticelli-esque drawing. But still, I wasn’t really expecting it.


Mini Drunken Pumpkin Coconut Pies

Ingredients
  

For the Dough

  • 1 1/3 cup flour
  • 1/4 tsp salt
  • 1 tbs sugar
  • 1 stick cold butter cut into cubes
  • 2 tbs ice cold beer high ABV works best

For the filling

  • 2 cups pumpkin puree if using canned, make sure it is not pumpkin pie filling
  • 2 eggs
  • 3 tbs flour
  • 1/2 cup coconut milk fat scraped off the top of a can of full fat coconut milk
  • 2/3 cup brown sugar
  • 1 tsp cinnamon
  • 1/2 tsp nutmeg
  • 1/4 cup pumpkin ale
  • 1 tsp coconut extract can sub vanilla extract

Instructions
 

  • In a bowl, add the flour, salt and sugar, mix to combine. Add the butter cubes and rub into the flour with your fingers, or a pasty cutter, until well combined. It will resemble coarse meal. Add the beer and mix until combined, adding more until all the flour is moistened and the dough is able to form a ball. Form into a disk, wrap tightly in plastic wrap. Refrigerate for at least an hour.
  • Preheat oven to 350. Roll out dough on a lightly floured surface. Cut dough into 4 inch circles, a large margarita glass works wonderfully for this.
  • Spray the wells of 12 to 14 muffin tins with butter flavored cooking spray. Place each circle into a well and gently press into shape, allowing for a bit of an overhang.
  • In a bowl, add all of the filling ingredients, whisk until well combined. Pour into mini pie crusts. Bake at 350 for 18-22 minutes or until the filling has set and no longer jiggles when the pan is shaken.


How To: Make Candied Bacon

Before we get started on the essential skill of making your very own batch of candied bacon, I need to pause to tell you some amazing news:

I signed a cookbook deal last week.

And so begins the frantic, not enough time, spending to much money on groceries, stress, lack of sleep that has nothing to do with my toddler, phase of my life. The book is focused on cooking with craft beer, the subject of my other blog, The Beeroness, from which the book truly sprang.

Even with all the warnings from those who have gone before me, all the friends I have who have written cookbooks, novels, non-fiction research books, I am thrilled. Even though I realize that writing a book is light years more work and far less money than anyone ever thinks, I’ll never stop being grateful for being given this opportunity.

Now all I have to do is write it.

So for now, lets make some candied bacon.

First, what do you DO with candied bacon? The better questions is, what wouldn’t you do with candied bacon?

For starters, here are some fabulous ideas:

Candied bacon topped brownies (just sprinkle on top of your favorite brownies before baking)

Candied bacon & Vanilla ice cream

Candied bacon sprinkled on maple doughnuts

Candied bacon mixed into your favorite pancake batter

Candied bacon waffles

Candied bacon on salad (for real)

Candied bacon chocolate chip cookies

Candied Bacon sprinkled on a chocolate tart

It’s endless.


Ingredients:

12 strips of bacon

1/4 to 1/2 cup brown sugar

Preheat oven to 350.

Sprinkle one side of the strips of bacon with brown sugar.

Press it into the bacon well.

Place the bacon, sugar side down, on a wire rack on top of a baking sheet. You are going to want to cover the baking sheet with a Silpat or aluminum foil, the drippings will burn and be difficult to clean.

Top the other side of the bacon (the side facing up) with more brown sugar and press into the bacon.

Bake at 350 for 15 minutes.

Using a pair of tongs, turn each slice and continue to bake until a dark brown and cooked through.

Bacon will not crisp in the oven. Bacon will not get crispy until it cools and the sugar has hardened.

Allow bacon to cool, chop and use in all sorts of amazing ways.


Creme Brulee Topped Chocolate Stout Brownies & Some Big News

I have some news.

If you Follow me on Twitter, you probably already know the Big News.

I signed a book deal on Thursday. A publisher has actually decided to pay me to write a cookbook.

How amazing is that?

Writing a cookbook has long been on my list of goals, and as I somewhat naively and idealistically jump into this process, I am reminded that it is you I have to thank for this milestone. The ones who share my posts, tell their friends about my little blog, believe in what I’m doing here,  the ones who read every silly word I write, and yes, even those of you who write creepy comments about wanting to wake up in my bed and email me about how you google stalk me on a weekly basis. I am grateful for all of you.

This isn’t just my book, it’s yours too. The ideas you give me, the way I’m inspire by your questions and humbled by being seen as a source of knowledge and beer-cooking wisdom.

I wish I could properly thank you all, over a beer and some possibly inappropriate conversation.  But for now, we’ll have to settle for some Creme Brulee Brownies made with two different types of beer. Which seems to be fitting, since chocolate stout was the first beer I ever cooked with and creme brulee was the subject of my first post. It’s an homage to my beer cooking beginnings, hope you like it.

If you are at all interested in helping me with this book, as an un-paid but thoroughly appreciated, recipe tester, for which you will receive my undying love and affection, a mention in the book, a sneak peek at never-before-seen-recipes, and possibly more, stay tuned. Once we get to that place, I’ll let you know how you can be my beer cooking partner in crime.

Creme Brulee Topped Chocolate Stout Brownies

Ingredients
  

For the Brownie Layer:

  • 3 eggs
  • 1 cup white sugar
  • 1/2 cup brown sugar
  • 1 tsp vanilla
  • 1/2 cup flour
  • 1/2 cup cocoa powder
  • 1 tsp espresso powder
  • 1/4 tsp salt
  • 1 stick butter
  • 7 oz dark chocolate 60%
  • 2/3 cup chocolate stout

For The Creme Brulee Layer

  • 1 cup heavy cream
  • 3/4 cup low-hop pale ale beer
  • 1 vanilla bean split and scraped or 1/4 tsp vanilla bean paste
  • 3 eggs plus 2 yolks
  • 1/2 cup sugar
  • 2 tbs corn starch
  • Plus 1/4 cup sugar for the brulee topping

Instructions
 

  • Preheat oven to 350.
  • In the bowl of a stand mixer, beat the 3 eggs, white sugar, brown sugar and vanilla on high for at least ten minutes. You need a meringue type consistency in order to create a crust on top of the brownies to insure the layers stay separate. In a separate bowl, add the flour, cocoa powder, espresso powder and salt, stir to combine.
  • In a microwave safe bowl, add the butter and the chocolate. Microwave on high for 30 seconds, stir and repeat until melted.
  • While the stand mixer is on medium speed, slowly add the chocolate until mostly combined. Add the beer and stir. Add the flour mixture and stir until just combined.
  • Grease and flour a 9x13 inch baking dish. Pour batter into dish and smooth out the top. Bake at 350 for 25 minutes or until the top is matte and a bit cracked. Don't over bake.
  • Allow to cool to room temperature.
  • For the creme brulee layer:
  • In a sauce pan over medium heat, bring the cream, beer and vanilla to a slight simmer, removing from heat when bubbles start to form around the edges. Remove from heat and allow to cool to room temperature.
  • In a separate bowl, whisk the 1/2 cup sugar, eggs and yolk, and cornstarch until well combined and slightly frothy.
  • While continuing to whisk the egg mixture, slowly add the cream and whisk until well combined. Make sure the cream has cool or you will just have created vanilla scrambled eggs.
  • Return the cream to the stove and stir over medium heat until it comes to a low simmer. Continue to whisk until thickened, between 5 and 10 minutes. The cream should leave a track when you drag the whisk through it. Allow to cool to about room temperature.
  • Pour over the brownies, cover tightly with plastic wrap and chill until set, about 1 hour.
  • Just prior to serving, cut into squares, cover with a light layer of white sugar and brulee the top with a kitchen torch until the sugar has melted and turned a dark amber color.


Potato Artichoke Bisque & Support for Sandy Victims

As we leave the most divisive election in modern history, we need to remember that we are still a Nation. One Nation, Under God, Indivisible by politics, that comes together to help others.

(Photo, AP:  Frank Franklin)

Red state or blue, that is what we are. We are also a Nation that loves to help, feels an obligation to lend a hand, lift up others when we have the opportunity. We are a Nation in which everyone of  us have had the "do you give your spare change to the homeless"  debate, because regardless of the answer we all have felt the a conflict in walking away without handing something over to someone in need.

We are a society of people who have even felt selfish in giving because it makes us feel good. Because we want to help others.

(Photo: AP Spencer Platt)

We are not a nation that spends our precious moments on this earth angry because of which of the  good-hearted, great men was chosen to lead this amazing Nation. At least that is what I need to believe. I see so much good in you,  America.

I see that huge heart that breaks when you see others in need. And no matter where your bed is tonight, remember those who are without one.

This post is dedicated to all of the victims of hurricane Sandy, from Jamaica, to Cuba, to Haiti, to New Jersey to New York.

To all of the more than 110 lives that were lost in the USA, and the 71 lost in the Caribbean.

For the more than 55 billion dollars of damage the storm did.

This post is so little, in the face of that. But like you, America, I want to help. And if I could, I would make every person affected by the storm a big bowl of soup, and listen to their story and hope that I did someone some good.

 Click on the picture to give to Red Cross to assist in their efforts to help:

This post was part of a blog event put on my Creative Culinary.

Other ways to give:


Potato Artichoke Bisque

Ingredients

  • 2 tbs butter
  • 1 leek, chopped (white and very light green parts only)
  • 1 shallot, minced
  • 1/4 tsp salt
  • 2 cloves garlic, minced
  • 2 tbs white wine
  • 4 cups broth (either chicken or vegetable)
  • 4 cups red potatoes, peeled and chopped
  • 2 cups artichoke hearts, divided
  • 1/2 tsp pepper
  • 1/4 tsp chili powder
  • 1/4 cup cream

Instructions

  1. In a large pot over medium heat, melt the butter. Add the leeks and shallots, sautee until soft and slightly caramelized, about 6 minutes. Add the garlic and stir. Add the wine, scraping to deglaze the pot.
  2. Add the broth, potatoes, and only 1 cup of the artichoke hearts. Cover and allow to simmer (adjust heat if necessary) until potatoes are fork tender, about 20-30 minutes. Remove from heat. Using an immersion blender, belnd until smooth.
  3. Add pepper chili powder and cream, stir until combined. Salt to taste.
  4. Chop remaining artichoke hearts.
  5. Pour into 4 bowls, garnish with chopped artichoke hearts.

(Yields 4 servings)


Beer Battered Mini Corn Dogs with Chipotle Ketchup


This my friends, is how you do Football Food.

It meets all of the requirements to earn a spot on the Football Food Table.

These vague and unenforceable requirements include qualities like: fun, as high calorie as possible, no utensils or plates needed, ability to sit at room temperature for hours, AND there are always bonus points for including beer.

 I also want to tell you a little bit about Chipotle Ketchup. Corn dogs need to be dipped, and if we are all willing to adhere to the good 'ole American tradition of dunking fried stuff in ketchup, I want to doctor it up a bit. Although you can make ketchup from scratch, and don’t think I haven’t filed that idea away in my mental recipe stockpile, I just used store bought. Chipotle is a lovely flavor, one of my favorites.

The smokiness is beautiful. If you just want smoke and no heat, just add 1 tsp of smoked paprika to 1 cup of ketchup and stir to make yourself a little smokey ketchup to go along with your fancied up deep-fried treats.

Beer Battered Mini Corn Dogs with Chipotle Ketchup

Servings 24 mini corndogs

Ingredients
  

  • canola or peanut oil for frying
  • 1 cup flour plus 1/4 cup, divided
  • 2/3 cup corn meal
  • 1 tbs brown sugar
  • 1 tsp baking powder
  • 1 tsp baking soda
  • 1 egg
  • 3/4 cup plus 2 tbs beer I used an IPA
  • 24 mini hot dogs
  • 24, 4 inch wooden skewers or toothpicks

For the Ketchup

  • 1 cup ketchup
  • 1 chipotle peper in adobo sauce
  • 1 tsp adobo sauce

Instructions
 

  • Pour oil into a pot, about 3-4 inches deep. Clip a cooking thermometer onto the side. Heat over medium high heat until the oil reaches between 350 and 375, adjust heat to stay in this temperature range.
  • In a bowl, combine 1 cup flour, corn meal, sugar, baking powder, baking soda, stir to combine. Add the egg and the beer, stir until combined.
  • Pour the batter into a tall coffee mug, this will make dipping the corn dogs easier.
  • Skewer all of the mini corn dogs with wooden skewers. Put remaining 1/4 cup flour in a bowl. Roll the hot dogs in the flour, then brush off any excess flour.
  • Holding the skewer, dip the hot dog into the batter until submerged and coated. Slowly place the battered hot dog into the oil. Allow to fry in the oil until a dark brown, about 4 minutes. Remove with a slotted spoon and place on a stack of paper towels to drain.
  • To make the ketchup, place all ketchup ingredients in a small food processor or blender and process until smooth.

I used these bamboo skewers.

Chocolate Fudge Bourbon and Whipped Cream Sandwich Cookies

I had this really Idealistic feeling that once the election was over, and the Binders had spoken, we would all go back to love and cookie baking. Seems like this morning, waking up and reading Facebook, the world is more divided than it was yesterday.

Anger, hate, social media mud slinging, has never given anyone a better quality of life or made them happier. But it has destroyed friendships and divided families.

I understand the urge to express feelings of disappointment, and more than that, a feeling that you are "forced" into a decision that you didn’t make. It’s important to feel like your voice is heard, whether it be a victory cry or sobs of distain. But, please, bear in mind that expressing those feelings on social media will inevitably cause division between you and, statistically speaking, half of your friends. Is it worth it?

We need to take a step back, appreciate that no matter what outcome you expected, we had two great men fight to lead this Nation. We had a higher than expected voter turnout of engaged and passionate voters. We are lucky to live in a country that approved marriage equality in four states last night. We live in a place where we are free to post ignorant and hateful rants online, and the government protects that freedom. No matter who is president, we live in a great nation, run by leaders we get to vote for.

No one ever changes an opinion because of an angry Facebook status. But nearly every time someone posts a rant fueled update, someone loses respect for the poster, especially when half of the country dissagrees with you.

My suggestions on how to cope is find a space where like minded people dwell. Because, for the most part, what you really want is camaraderie, and people who agree with you and understand the feelings you have. Most people (in general) aren’t looking for a fight.

Instead of posting that angry status to Facebook, text it to a friend to get it out of your system, find a message board or Facebook group of people who feel like you do, or just take a cyber hiatus.

If you do need to post something controversial, take a moment before you hit send. Walk away from the computer, think about a person you love who will disagree with what you are about to post and speak in a way that is respectful to that persons feelings. Take at least one pass at it, to make it more diplomatic. The more you seek to understand the other side, the more likely they are to listen to you.

Anyone have any thoughts on how to tame the impulsive cyber rants we all seem to be close to from time to time?

Any perspective you can offer?

Or, just make some cookies. Because no matter what, we are headed into the Holiday Season and cookie swaps are almost here!

And those always have bipartisan support.

Chocolate Fudge Bourbon and Whipped Cream Sandwich Cookies

Ingredients

For the Cookies

  • 2 eggs
  • 1 tsp vanilla
  • 1/3 cup brown sugar
  • 1/3 cup white sugar
  • 1/4 cup flour
  • 1/4 cup unsweetened cocoa powder
  • 1 tsp espresso powder (this intensifies chocolate, it does not make it taste like coffee)
  • 1/8 tsp salt
  • 4 tbs unsalted butter
  • 3.5 oz chocolate, broken into chunks
  • 2tbs bourbon

For the whipped cream filling

  • 2 cups heavy cream
  • 2/3 cup powdered sugar
  • 1 tsp vanilla
  • 1/2 cup mini chocolate chips

Instructions

  1. In the bowl of a stand mixer, add the eggs, vanilla and both kinds of sugar. Whip on high for ten minutes to create a frothy meringue like texture.
  2. In a separate bowl, add the flour, cocoa powder, espresso powder and salt. Stir until combined.
    In a microwave safe bowl, add the chocolate and the butter. Microwave on high for 30 seconds, stir and repeat until melted.
  3. Gently fold the chocolate and the bourbon into the eggs until mostly combined (some streaks are fine).
  4. Sprinkle the dry ingredients over the chocolate/egg mixture, stir until just combined. Place in the fridge and allow to chill until set up enough to scoop, about 30 minutes. Preheat oven to 375
    Line baking sheets with parchment paper. Using a cookie scoop, drop equal amounts of dough evenly space on the cookie sheet.
  5. Bake for 9-11 minutes, don’t over bake. Allow to cool.
  6. In the bowl of a stand mixer add the whipped cream, powdered sugar and vanilla. Beat on high set up, about 3-5 minutes. Gently fold in the chocolate chips.
  7. Assemble sandwich cookies. Makes 12-16

Chicken in Creamy Mushroom Beer Sauce


Today is November 6th, Election Day.

As Americans spend the day thinking of little else, wedged firmly between Barack and a hard place, I wanted to give you a little motivation to get through this day.

We will soon find ourselves at the end of this exhausting Election Season, our feelings of separatism from those who disagree with us will fade. We will find Facebook to be a friendlier place, and those Someecards of a political nature will ebb.

Regardless of the outcome, you have a reason to grab your favorite beer. Either in celebration of your guy winning the mad race to 1600 Pennsylvania Avenue, or as a way to console yourself over the fact that the other guy came out ahead.

Given that you may be too distracted to spend all that much time in the kitchen tonight, this meal only takes about 20 minutes.

And, I’m pretty certain it has bipartisan support.

For this recipes, I like a brown ale, a blonde, a pale or a wheat beer. Be aware that using an IPA will kick up the beer flavor considerably and may be too bitter in the end.

Chicken in Creamy Mushroom Beer Sauce

Ingredients
  

  • 4 boneless skinless chicken thigh fillets
  • 1 tsp salt
  • 1 tsp pepper
  • 3 tbs butter
  • 1/4 cup onions chopped
  • 3 cloves garlic minced
  • 5 oz wild mushrooms such as Shiitake (not dried)
  • 1/2 cup beer
  • 1/2 cup heavy cream
  • 1/3 cup shredded parmesan
  • salt and pepper to taste

Instructions
 

  • In a pan over medium high heat, melt the butter. Sprinkle chicken thighs on all sides with salt and pepper. Add chicken to the pan and cook on both sides until browned, about 4 minutes per side. Remove chicken from pan.
  • Add onions and saute until soft and translucent, about 3 minutes.
  • Add garlic and mushrooms, cook until mushrooms are soft and have darkened, about 5 minutes.
  • Add the beer, scraping the bottom to deglaze the pan.
  • Reduce heat to medium, add the cream and stir.
  • Add half of the cheese, stir until melted. Add the remaining half, stir until combined.
  • Add the chicken and allow to cook until sauce has thickened, about 5 minutes. Salt and pepper to taste, serve over rice or pasta.


Potato Artichoke and Goat Cheese Gratin

I think I need to buy a goat. And some chickens.

Although I grew up on a farm, and at the time I found very little of our remote, sequestered-from-civilization-and-my-friends, life very appealing, I now want a little bit of that back. Not all of it. I want to live in the city, a big, huge, full of energy, and excitement, city but with a goat and a couple chickens.

I hope that can someday be possible.

Maybe I’ll move from food blogging to creating lofts in downtown LA with rooftop chicken/goat farms. I think people would be into it.

Until then, I have to settle for putting goat cheese in everything.

I did just find out about Redwood Hill. A goat cheese farm in Sebastopol, CA that is 100% solar powdered and nearly landfil-free, reusing and recycling as much as they can. As well as giving all employees & their families members great health benefits, this is a company I can give my full support. Along with being a pioneer in the humane treatment of animals (they love the crap out of their goats, even the old ones who are past the milk giving prime) they were eco-friendly and free range before it was hipster chic. I love places like this. I love being able to tell you about them.

I hope they will let me visit, feed me cheese and let me pet their goats.


Potato Artichoke and Goat Cheese Gratin

Ingredients

  • 2 tbs butter
  • 1 large leek, chopped (white and very light green parts only)
  • 2 cups Sunchokes, also called Jerusalem Artichokes, peeled and sliced into 1/8 inch slices (can sub peeled red potatoes)
  • 4 cups red potatoes, peeled and sliced into 1/8 inch slices
  • 1/2 tsp salt
  • 1/2 tsp pepper
  • 14 ounces artichoke heats, quartered
  • 1 cup heavy cream
  • 6oz parmesan cheese
  • 6 oz goat cheese, crumbled
  • 2/3 cup panko bread crumbs

Instructions

  1. Preheat oven to 400.
  2. In a large skillet with a lid, melt the butter. Add leeks and sauté until softened, about 3 minutes. Add the Sunchokes and the potatoes and toss to coat. Reduce heat to medium, cover and allow to cook, stirring occasionally, until potatoes are fork tender, about 12-15 minutes.
  3. Remove from heat. Add the cream, artichoke hearts and the parmesan, stir until combined.
  4. Transfer to a 2 litter baking dish.
  5. Sprinkle the goat cheese on top, cover evenly with panko.
  6. Cover with aluminum foil and bake at 400 for 20 minutes. (To make ahead, you can stop here. Return to the oven the following day and cook uncovered for 20 minutes or until warmed through and browned.)
  7. Remove foil and bake until panko has browned, about 15-20 additional minutes.


Salted Chocolate Stout Truffles


This is totally easy. I promise.

At a beer event a few weeks ago, I had a guy call my recipes, "Foodie but accessible. They sounds hard and impressive, but once you read the recipe it’s actually really easy."

I like that.

This recipe is the same way. It sounds really hard, making truffles from scratch. And really, that’s the best part. It sounds hard, and impressive, and it has beer in it, which makes you a Christmas Party Superhero, but it’s really easy. And since so few people have ever made truffles from scratch, they won’t even know how easy it was.

I made these for the first time a few years ago to bring to a Thanksgiving party. A friend of mine, an artist from France, ate one. Without even knowing that I was the one who had brought them, he looked at me and said, "It’s like Paris at Christmas time."

That pretty much made my year.


There are a few things to keep in mind when making these. Although your active time is pretty minimal, it takes about 2 1/2 hours start to finish because of the chilling time.

Also, this is no place to skimp when it comes to chocolate. Use the good stuff. Don’t use chocolate chips, they contain additives that prevent them from melting together in the package and that could be problematic.

For the coating, you can go crazy. Roll them in anything that goes with chocolate, and make a bunch of different flavors and figure out which ones you like the best.

Some ideas:

Cocoa powder (the old standard)

Crushed Pretzels

Coconut shavings

Chopped nuts

Chopped bacon (yep, you should totally do that)

Crushed candy cane

Sprinkles

Crushed graham crackers

Crushed toffee

Seriously, anything that you think might taste good on chocolate, give it a try.


You can also try tempering chocolate to give them a nice, smooth, shinny chocolate shell with a satisfying snap when you bite into them. I would strongly encourage you to do this. It isn’t difficult and it gives you a really professional tasting final product.


For the filling:

1 cup stout beer

8 weight ounces (225 g) good quality chocolate (60% cocoa content)

For the coating:

8oz (225 g) good quality chocolate (from a shiny bar, this means it has previously been tempered) can be milk, dark or white chocolate

and/or

Cocoa powder, coconut shavings, chopped nuts, chopped bacon, etc.

1 tsp good quality coarse sea salt (I used Himalayan Pink Salt)


Add the beer to a pot over high heat. Reduce by half (about 1/2 cup remaining), stirring frequently. Remove from heat, break the 8 wt ounce of chocolate into chunks, stir until smooth and melted.

Allow to cool to room temperature. Cover and refrigerate until set, about 2 hours.

Use a melon baller to scoop out a small amount of chocolate.

Roll into a ball with your hands, add to a plate and chill for 20 minutes to an hour.

To temper chocolate for the coating:

Chop the good quality chocolate into small pieces. Add about half of it to the top of a double boiler over medium heat (If you don’t have a double boiler, place a glass or metal bowl over a pot of water making sure the bottom of the bowl does not touch the water).

Stir until the chocolate reaches 115 for dark chocolate, 110 for milk or white chocolate.

Remove from heat. Stir continuously, adding a bit of the reserved chocolate at a time until the chocolate reaches 90 degrees (88 for milk or white chocolate). Stir, stir, stir like crazy.

Add the chocolate truffle balls, roll around with a fork until coated.

Remove from chocolate and place on parchment paper, sprinkle with a small amount of sea salt. Chill until ready to serve.

If you don’t want to temper chocolate, just place the coating in a small bowl, add the chocolate truffle and turn until coated.


Hefeweizen Honey Rolls

 I have wandered into a complete obsession with making bread. It started slowly, and really, rather timidly. When I first started, I was afraid of yeast, and a wee bit convinced that it hated me.

I threw several mounds of fail dough in the trash after it refused to rise. I learned a few things long the way that I am more than happy to share with you and save you from the "What the EFF is wrong with this damn bread!" frustrations that I suffered.

First, check the expiration date.  Yeast expires in a biblical sense, it actually dies. Yeast is a bit of a living beast, and once it reaches it’s expiration date, don’t even think about it. It’s not like that bottle of Ibuprofen in your  cabinet that expired last year but is probably still going to cure your headache. If the yeast has been in your cabinet a while, throw it out.

Salt kills yeast too. Don’t let inactive yeast come in contact with salt. I learned this the hard way when adding salt to the cream before microwaving it.

Yeast will rise between 40 and 120 degrees. Any higher than 120 and it will be killed by the heat (unless you use rapid-rise which will work until about 130), stay away from the high end of the scale in case your thermometer is a bit off. If the yeast is colder than around 90, it will take a long time to rise. At 40 degrees, it will still rise, but it will take days. 110 seems to be a bit of a sweet spot, but I live in LA, and even when the East Coast is being ravaged by Frankenstrom, it was still 85 degrees yesterday. Bread rises faster when it’s warm, slower when it’s cold. Yeast types are not interchangeable without major recipe modifications. Use the yeast the recipe calls for.

Dry milk powder is a bit of a secret weapon when it comes to bread making. I discovered this in the Secret Ingredient section of King Arthur Flour, it may be to blame for my bread making fixation.  Your bread will be softer, taller and more tender. Buy a bag just to keep on hand for Thanksgiving and Christmas rolls, because if you are going to all of the trouble to make homemade rolls, you should really pull out all the tricks in your bag.

Beer. Of course, the beer. Bread is my favorite thing to make with beer. Even if you aren’t a beer kind of girl, it gives your bread a lighter, slightly more leavened quality that makes it a perfect baking liquid. And because it’s bread, a wheat beer is a natural choice.


Hefeweizen Honey Rolls

Ingredients
  

  • 1/2 cup heavy cream
  • 1 envelope dry active yeast
  • 5 cups bread flour
  • 1/4 cup dry milk powder
  • 1/4 tsp salt
  • 2/3 cup wheat beer room temperature
  • 3 eggs
  • 1/4 cup honey
  • 4 tbs unsalted butter softened to room temp

To Brush On Top:

  • 4 tbs melted butter
  • 1 tsp honey
  • 1/2 tsp coarse salt

Makes 16 rolls

    Instructions
     

    • Add the cream to a microwave safe dish. Heat for 20 seconds, test temperature and repeat until cream is about 110 degrees. Add the yeast, set aside until foamy, about 5 minutes. If the yeast does not foam, it isn't good. Discard it and try again.
    • In the bowl of a stand mixer add the flour, salt and dry milk powder, mix until well combined.
    • Add the cream and the beer, mix until combined. It will look dry and shaggy.
    • Add the eggs, one at a time, mixing between additions.
    • Add the honey and butter and allow to mix until the dough forms a smooth and shiny ball that isn't sticky, about 8-10 minutes.
    • Coat the inside of large bowl with oil. Form the dough into a ball and add to prepared bowl. Cover the bowl tightly with plastic wrap and allow to rise in a warm room until doubled in size. This will take between 1 and 2 hours depending on the temperature of the room.
    • Punch the dough down, and knead lightly for about 1 minute.
    • Cut the dough in half, then cut each half in half. You will now have 4 equal size pieces. Cut each piece in half to create 8 equal sized pieces. Cut each of those in half to give you 16.
    • Roll each piece of dough into balls, place into a baking dish with a bit of space between each roll (you might need two baking pans to accommodate 16 rolls).
    • Cover and allow to rise until about doubled in size.
    • Heat oven to 400 degrees.
    • Combine the melted butter and honey. Brush the top of the rolls with honey butter mixture, sprinkle with salt.
    • Bake at 400 for 12-15 minutes until golden brown.